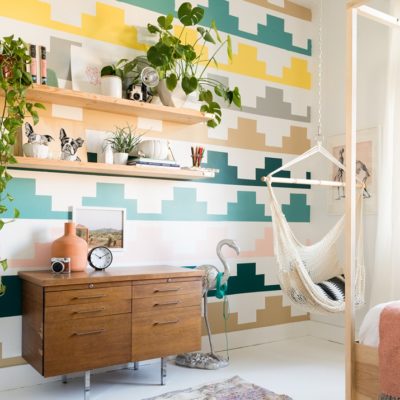
We are in the throws of Ivie’s room makeover and the FrogTape Paintover Challenge and I wanted to pop in with some tips that will SERIOUSLY take your pattern painting to the next level.

Painting wall patterns is sort of something that I do frequently, and have I learned a slew of lessons along the way. All of them the hard way. Trial and error is my middle name…actually my middle name is Lyn, but I feel strongly about looking into getting it legally changed.
Anywho. Lets get started!
Lesson #1 You probably have to take into account the width of the tape. This is especially true when you are doing a pattern and not marking the walls first. To get evenly spaced sections (if your pattern is that type of pattern) you’ll have to put the tape on the outside of the section that you are painting.
Let me show you what I mean.
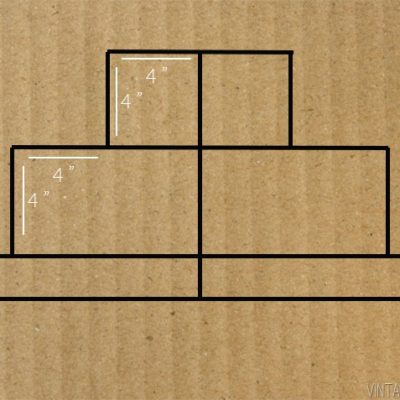
For my wall, I want the finished pattern to be consistent in size. To do this I have to line up the edge of my tape where I want the actual painted edge to be. See how in the below shot, it looks like there are big sections and small sections it looks totally weird and not symmetrical at all?
The spaces are actually the exact same size. Freaky right!

That is because the width of the tape is on the outside of the space that I am painting with color. It is 100% on the inside of the section that I’m leaving white. When the tape comes off it will be exactly the same on both sections.
Lesson #2 Mark the sections that you are NOT painting! When you are in the middle of a project and you’ve been taping off all day and your face is by the wall, and all you can see are lines and lines and lines, it can be really easy to start painting the wrong section by mistake (been there, done that. Twice.) One simple solution is to put a small piece of tape inside that section so that you know not to paint there.
Lesson #3 Start measuring your pattern from the center of your wall. There is nothing worse than taping off a pattern (or worse, finishing up painting a pattern) only to realize that it’s off centered because you started on one side of the wall. You don’t need to take into account the wall width (unless you want to ensure that you don’t have any partial pieces on the edges) you just need to start your pattern in the center.

It might make it a little awkward at first, but after the first row or 2 you’ll be fine, and get such a better result!
Lesson #4 Use a Putty Knife to get a straight outside corner. Making perfect outside corners has been a beast in my life. I’ve tried everything. Cutting the tape with scissors, trimming it with a razor blade, swearing at it profusely. You know, standard things that make sense in the given situation. Until I realized that I just needed to tear a straight line.
To maximize my efficiency because naptime doesn’t last forever, I taped off all of the sections in a row without worrying about the outside corners.
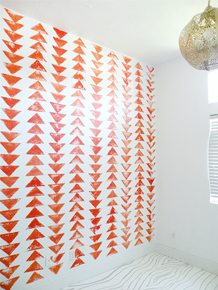
It doesn’t look so great at this point.

You get the general shape and pattern, but its not awesome.
Theeeen you go back with your putty knife and tear the extra off.
Line your knife up along the edge, matching it with the tape. Channel your inner esthetician and rip that sucker off like you’re waxing someone’s eyebrows. This part goes so fast and is massively satisfying. Speaking of estheticians, have you seen Dr. Pimple Popper? How can you hate and love something so deeply at the same time?!


Lesson #5 Preserve your pattern! For a pattern like this I made a cardboard template. I lined it up and traced it before I taped it off. But if you’ll notice in the above picture, along the edges of the wall. the shapes aren’t taped off yet. This is because the pattern wasn’t a complete shape and so I would have to fold or cut the template to finish the design. I didn’t want to have to remake my template 1/2 way through because it was falling apart or getting wonky because it had been folded. So I waited until the end and finished up the edges then.

Lesson #6 Seal your tape edges. Ok so this is the most critical lesson in this whole lesson giving post. I don’t care who you are, how perfect and precise and pretty your pattern looks in tape, you can jack the whole thing up in an instant if you get paint bleed. The reality of the situation is that if you have texture on your walls, you need to pre-bleed your pattern with your base wall color. All this means is that you take a little bit of the wall color (in my case white) and paint along the edge of the tape. This ensures that any groove in the wall texture, or section that maybe you forgot to seal down super well, will bleed the same color as the wall (meaning you wont see it at all) before you paint it a contrasting color (that you will see if it bleeds).

I hope that these lessons help you avoid the mistakes that I’ve made along the way! Cant wait to show you how this wall is turning out!! We’re pretty in love with it!


yay!!!! go Mandi!
I was just yelling at my tape today bc I couldn’t get a straight edge! Haha! And I love Dr pimple popper, it is so disgusting but so amazing at the same time. My husband thinks I’m a weirdo for watching it 🙂
Whaaaaaaaa….how could you leave us hanging!? Dying to see the end result!
Throes, not throws. Sorry! Love you!
Thanks! 😉