When I saw the big storefront windows for the first time at the Merc I loved them. When I started planning the layout and dove into exactly what I wanted them to be, I fell in love even deeper. There were some serious quirks that we had to work around with the renovation, Merc Perks if you will (see some of our favorites and how we coined the term in this video!) One of the biggest Merc Perks being that the walls aren’t strain or plum. In an effort to compensate as much as we could for the wonkieness, we made the walls around the windows nice and thick. That of course snowballed into making window seat benches. And the most surprising thing at the end of the day, is that these window benches are our favorite place to congregate (which also might have something to do with the fact that we don’t really have seating right now. Its fine.)
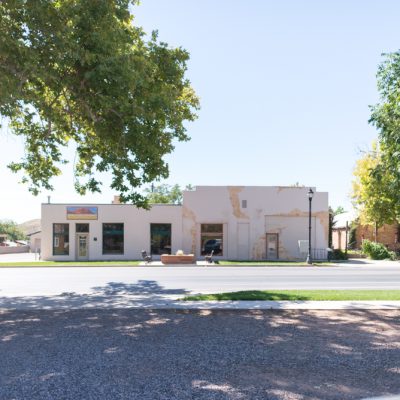
This is what we started with, before phase 1 had walls and was just a giant open space.

That boarded up door is our front door now. (Man its weird looking at these pictures!)
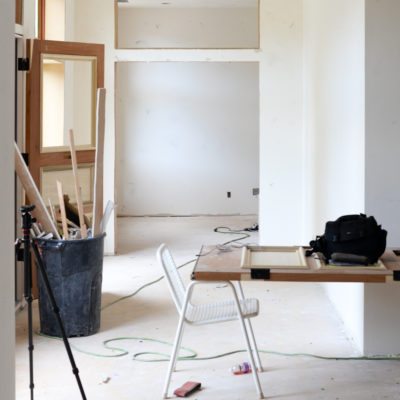
Like I mentioned earlier, we have loads of Merc Perks one of which is the fact that not much is straight. The walls, the windows in the walls, the floors, I mean really all of it. The first step in compensating as much as we could for this crazy situation was to frame new walls inside the existing walls.
 This helped immensely with the crooked wall situation, but there were still some quirks, especially with the windows. Even with our newly straightish interior walls, we had to do some creative finish work to hide the crookedness of the windows. Look at the picture below and notice the gap difference between the top of the wall and the bottom! ? Literal inches folks.
 We also decided to make the transom windows separate from the large window, which I LOVE! This is what it looked like after all of the insulation was in and we were ready to go.


Once we fit the drywall around the edges we knew a little bit better what we were working with. Each piece had to be custom cut to account for the wonk-factor. We also learned that 3/4″ drywall is significantly more frustrating to cut than 1/2″ drywall.
 Once the drywall was in and flush with the windows we put 1/2″ MDF over the whole thing, all the way to the glass on the windows. We also wrapped the cross piece on 3 sides with MDF to finish it off a bit and beef it up.
Just for fun, can you spot the crazy drop in the window below? Look at the level ceiling and the left side of the window, then look at the right side… #mercperk
 This droop is visible from the outside of the Merc too. We love this character so much! (It’s the window with the wood piece above it!) We’ve nicknamed this the Merc’s Dope Eye.

On the bottom of the windows we used 1″ poplar that we cut to have a 3″ overhang to widen the seat area. We used poplar because I was originally planning on painting it black with the rest of the windows. But as things usually go the plans changed. Once it was up I just loved it so much I knew it needed to stay raw wood. Ideally we would have used maple but I’m not hating the poplar, I’m just glad we randomly used some that wasn’t green. I put a quick coat of Danish Oil on it and called it a day.
 I’ve got a whole post about the trim moulding coming up, so I’m not going to dive into those details in this post, but I will say we found a pretty great casing solution…after we had already done these. (If you haven’t noticed yet, we change things a lot.) Good news is that you’ll see 2 options for inspiration!
 If you walk past the Merc, you’ll probably see Gertie and Gilly sprawled out in one of the windows and Brem watching the trucks drive by in the other. I snapped this picture while Dylan was telling me about her day at school. It actually makes me a little emotional, as I’m sure most of you with old houses understand. To think that for 100 years, people have gazed out these windows, and now we get to be part of that.
Man we’re so blessed.

Really nice! Functional and pretty—the perfect combo! Mary Wilding
Looks fantastic, especially that last snap where you really get a sense of how HUGE those windows are!
Good content, as usual. Suggestion – have someone read before you post, there are 2 typos in first paragraph.
Love the photo of Brem and the pups. 🙂
Such innovative solutions. And yes…love the raw wood against the black.