So this tutorial is something that I wasn’t planning on posting until April (i know, its so far away.) It is a project that I did for my nieces bedroom and because the makeover is for National Painting Week, it has to stay under wraps until then. But this project is just so good, I had to share it with you guys right away. Court was super stoked about hauling it back to my house (for the 4th time since it’s conception) so that I could shoot it.
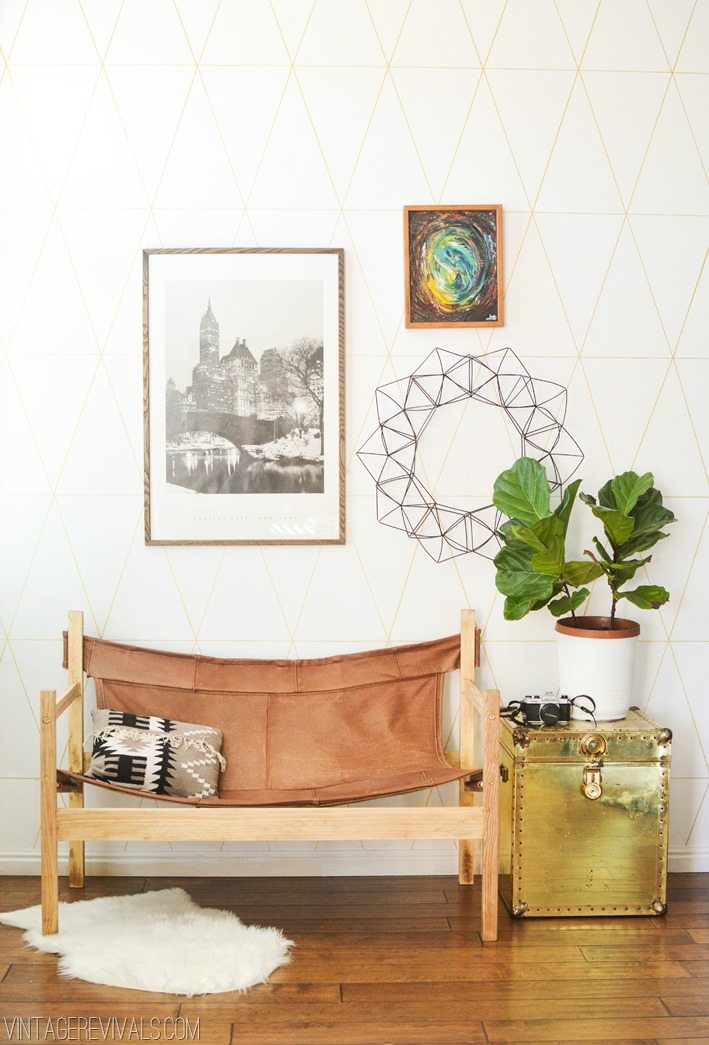
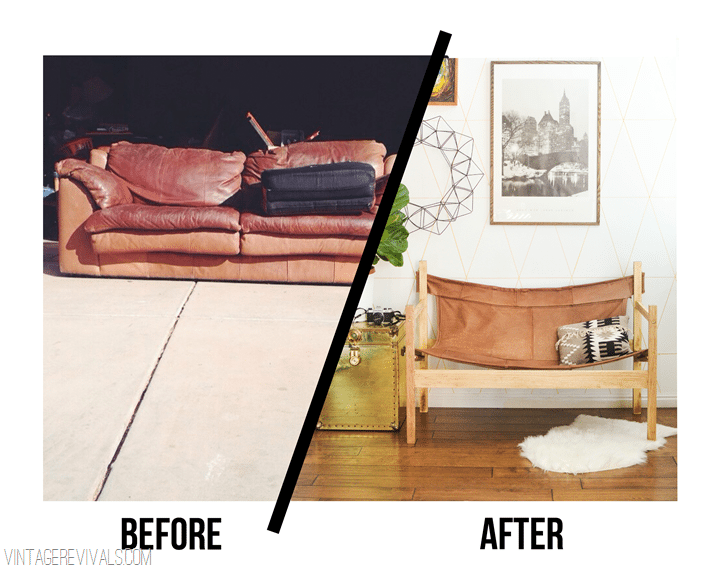
The world is full of horrifyingly puffy leather couches. You know that you agree with me. I mean, there is no saving grace for them, they are just offensively unaware. Poor things. Until now. I promise after seeing this project that you will never look at an ugly sofa the same again.
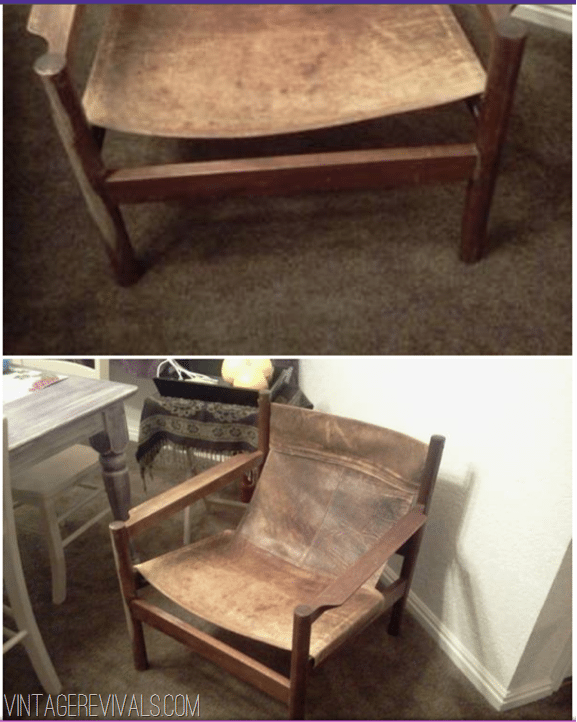
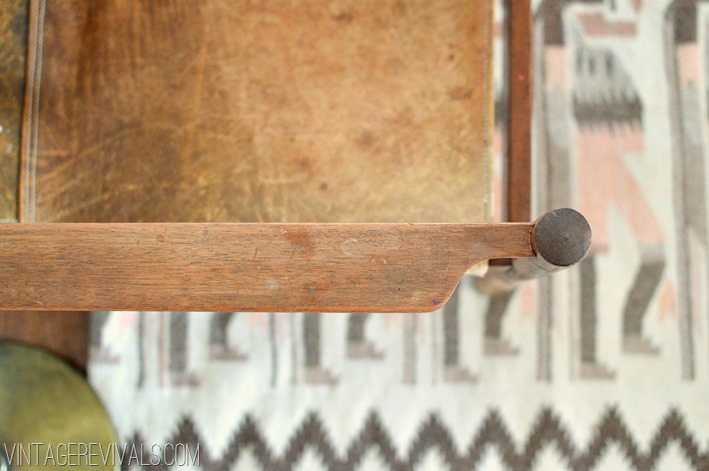
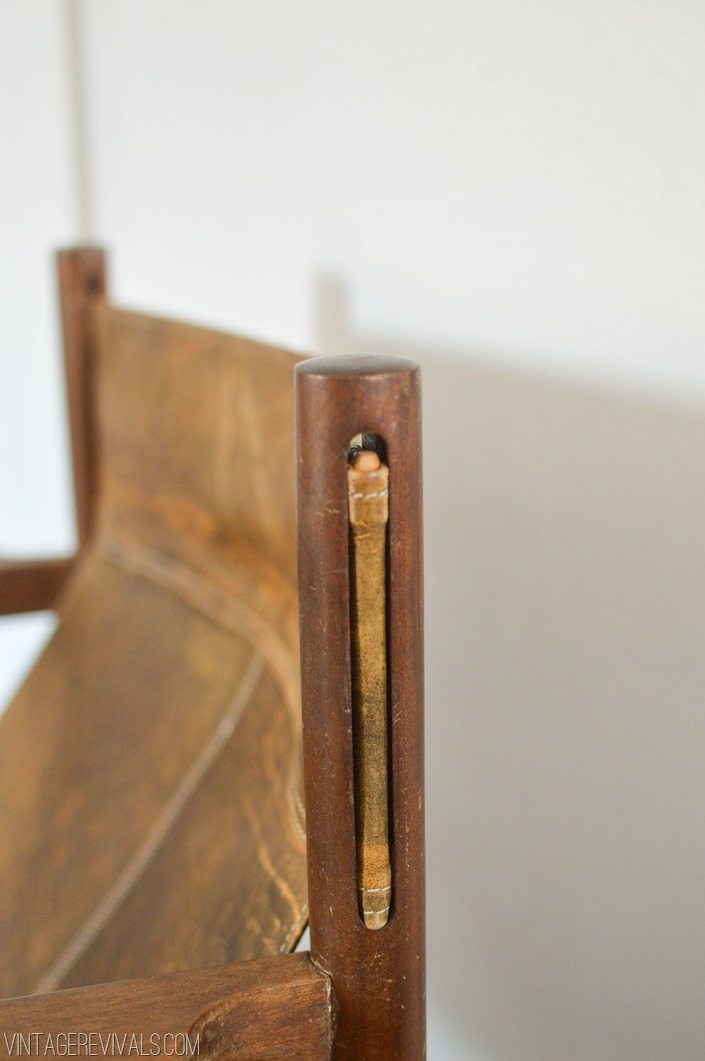
Last week I showed you an amazing Michael Arnoult chair that I scored on Craigslist. Studying the structure was completely awe inspiring. It was held together with a few screws and wooden dowels. That is it. The design was so basic, I knew that it could be a doable project. Luckily for you guys, I made all of the mistakes and now you get to benefit from my failures. What can I say, it’s what I do best.
Skinning a couch for a project is nothing new to me, remember when I made Leather Pillows? This is like that, but on steroids.
First things first you need a leather couch. The one that I used for this project was a sofa that I found at ReStore for $75. $75 may seem a bit steep for a couch that you only want for it’s skin, but have you ever priced leather? Hot dang that stuff is expensive. Make sure that the leather is in good condition, the thicker the better. This stuff was fantastic.

Start by skinning your couch. Keep the pieces in as large of chunks as possible. (i.e. the entire back section, the arms and sides etc.) Put them aside.
Now is the fun building part.
For this project you will need:
(2) 2×2’s @ 34” long
(2) 2×2’s @ 28” long
(2) 1×4’s @ 46” long
(2) 1×2’s @ 24” long
(2) 1×3’s @ 25” long
(2) 1/2” Wooden Dowels @ 16” long
(2) 1/2” Wooden Dowels @ 5” long
(16) Screws. I used bolts like these (because I love the way they look!)
7 Yards of Upholstery Webbing (this can be found at Joann’s for $.75/yd)
The tools that you will need are:
Miter Saw
Jig Saw
Drill
1/2” Drill Bit
1/4” Drill bit (depending on the size of the screws that you use you may need to adjust the size of this bit, it is used to drill pilot holes into the wood)
Stapler
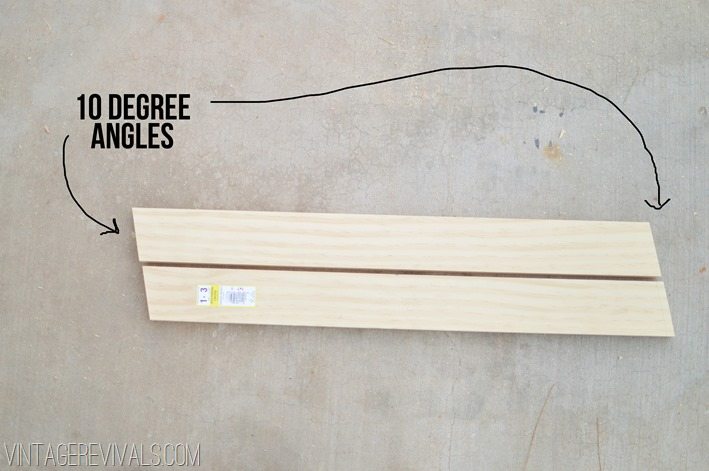
Start by cutting your 1×3’s down to 24” with a 10 degree angle cut at each end. (see picture below)
The next step is cutting out the grooves that will hold the leather and the dowel. Probably the easiest way to do this would be to use a router, but I don’t have one and I am sure the majority of you lovely folks don’t have one either, so we figured out a way that you can cut this channel with a drill and a jig saw. If you have a router, feel free to use it’s guts out.
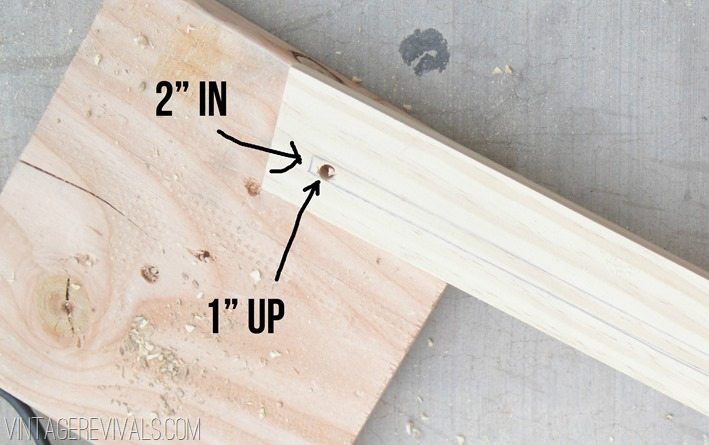
Measure 2” in from the end and 1” from the bottom and drill a hole with your 1/2” bit.
Using a straight edge measure 16” and drill another hole. Then mark 2 lines on the outsides of each hole.
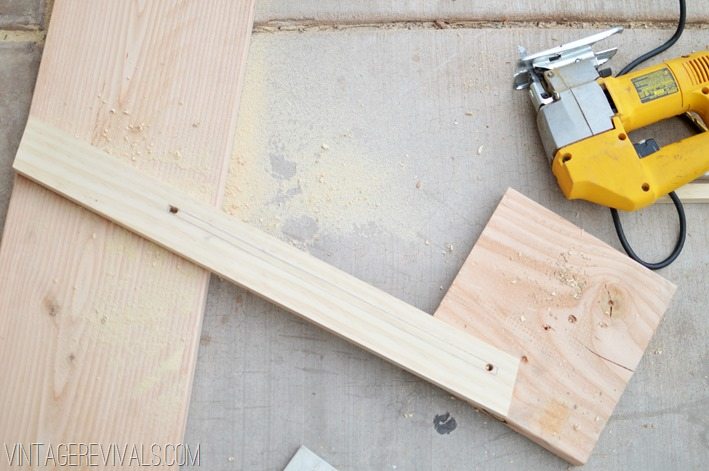
Now you are going to take your jig saw and cut along the lines that you just drew.
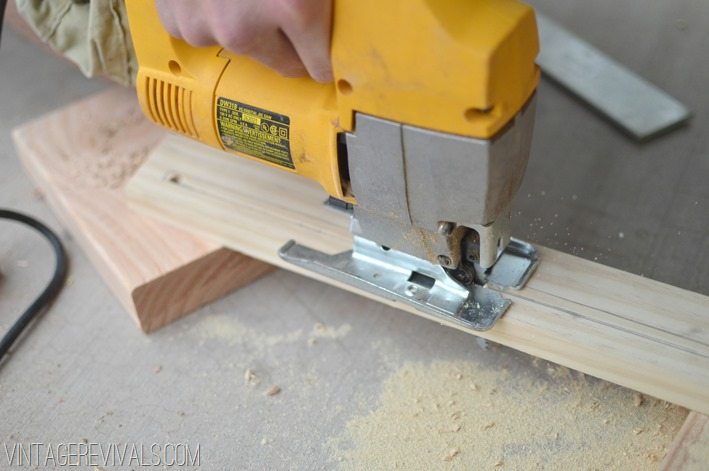
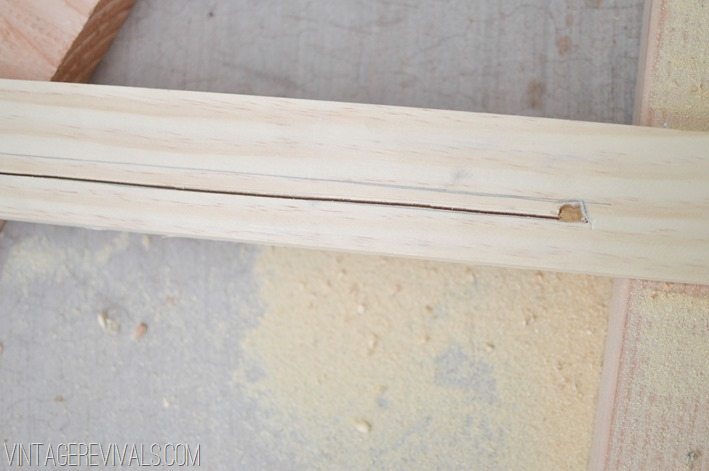
After you have cut up one side, you are going to cut down the other. And you will have the perfect sized gap for your leather.
You are also going to repeat this on the 2x2x34’s for the back of your sling. They will need to be thicker, because the leather you are passing through is 2x thicker than the leather that you are passing through the seat and 6” long.
Now it is time to assemble.
We are going to start by attaching the front cross piece (1) 1x4x46 to the front legs (2) 2x2x2. Measure 12” from the ground and mark it. This is where the bottom of your 1×4 is going to sit.
Drill a pilot hole through the side of the legs into the 1×4. (Notice that we used some scrap wood to prop it up so that it was centered on the legs. Your scraps need to be 1/2” thick for this.
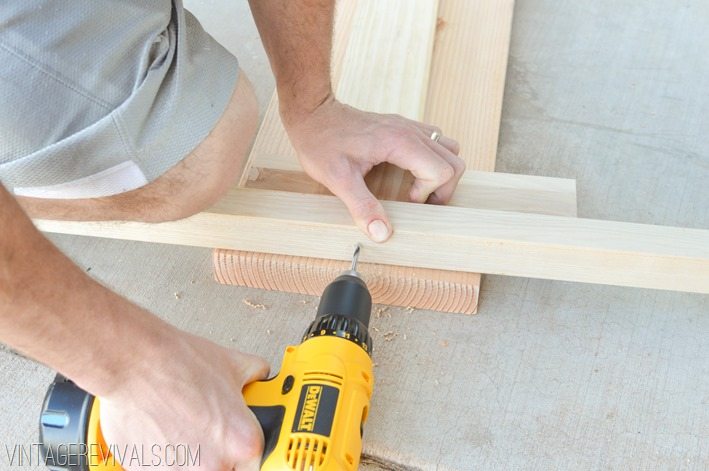
Then using a paddle bit, clear a spot for your screw to sit on the outside of the leg.
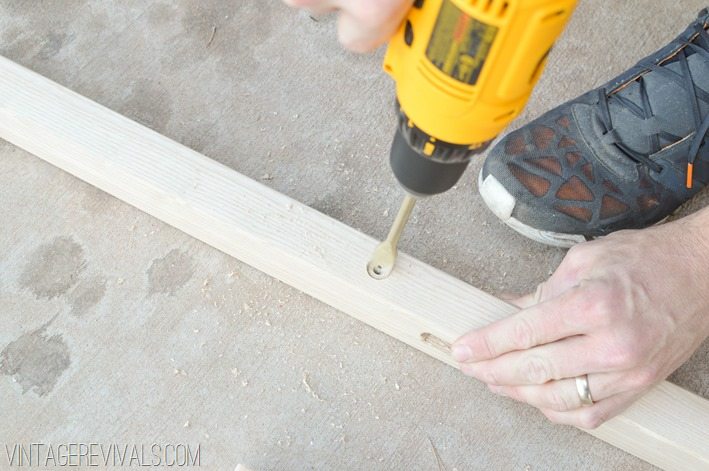
Then drive your screw into place.
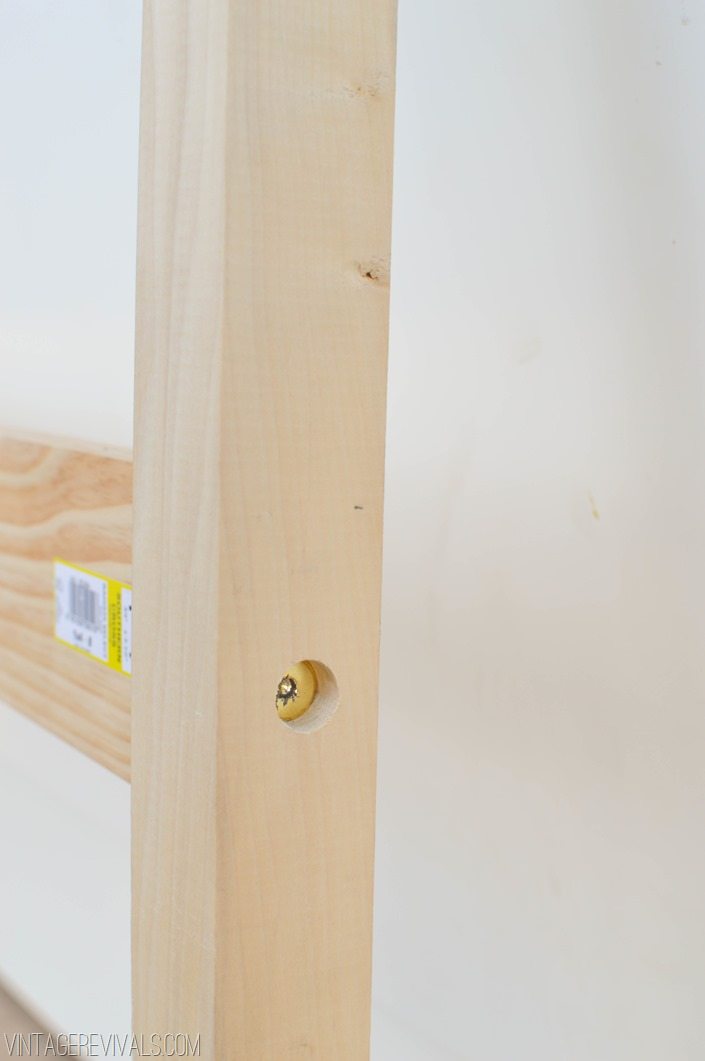
Do this for both sides. Make sure that your board is level before screwing it in place.
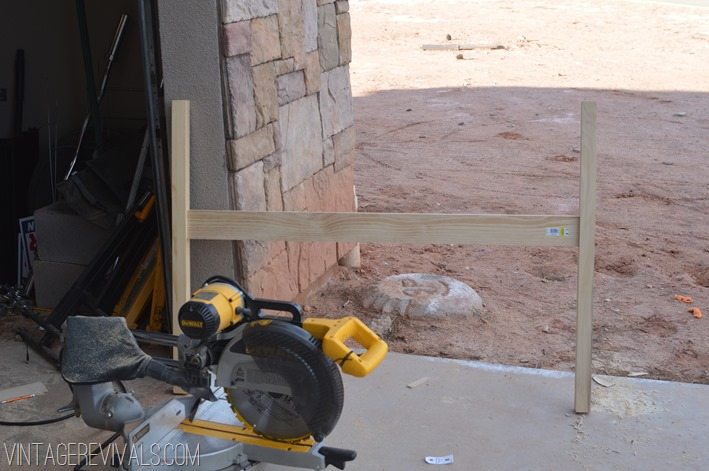
Now you are going to repeat it for the backside with the legs that are 2x2x34. Measure 13” from the ground and mark. This is where the bottom of your 1×4 is going to be. Because of the slouchy style of this chair, you don’t want to put the back piece too high because it would be super painful if you rammed your spine into it. So keep the bottom at 13” and you wont have that problem! Here is a picture of the back piece, if it looks a little wonk it is because it is upside down.
Next you are going to attach the seat cross pieces. These are the ones that you cut the channels into. Measure 16 1/2” up from the ground. The bottom of your 1×3 will stop there. The angle of the seat goes back and connects to the back piece lower than the front.
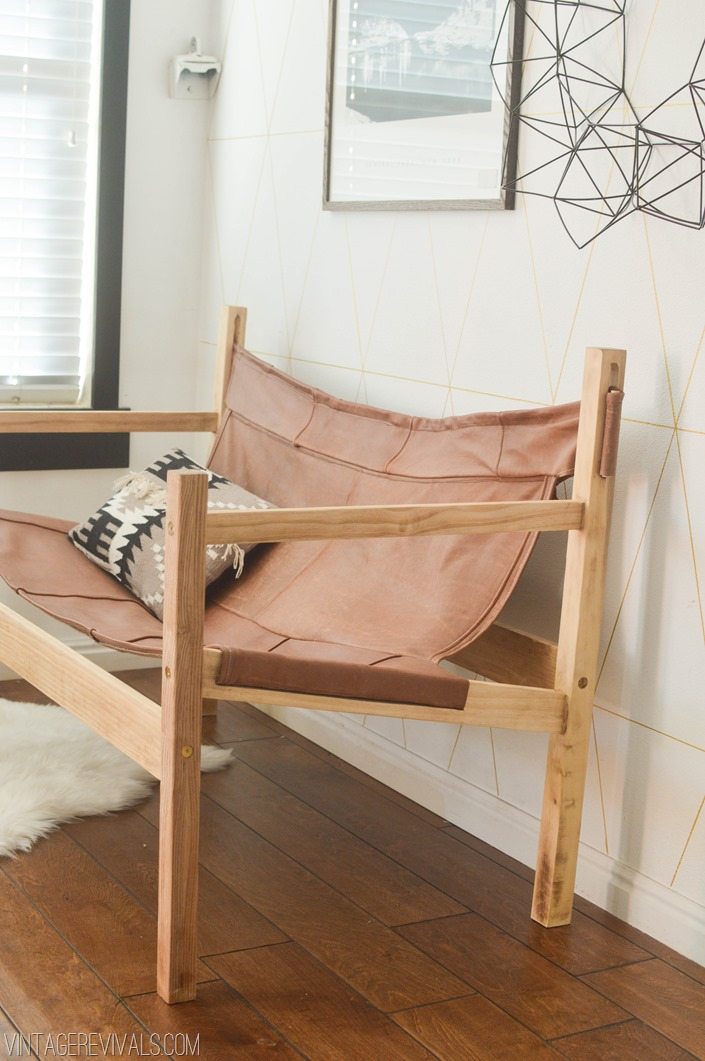
Drill your screw into the wood in the same manner that you did above.
Repeat for the other side.
Because of the nature of this chair, you want to make sure that these cross pieces are completely secured or else they will turn under your weight when you sit on the bench. I wanted the front of the chair to look as clean as possible so we attached another screw on the back leg and put a few finishing nails in the front.
The arms attach 3” below the top of the leg. Make sure that you are using a level!
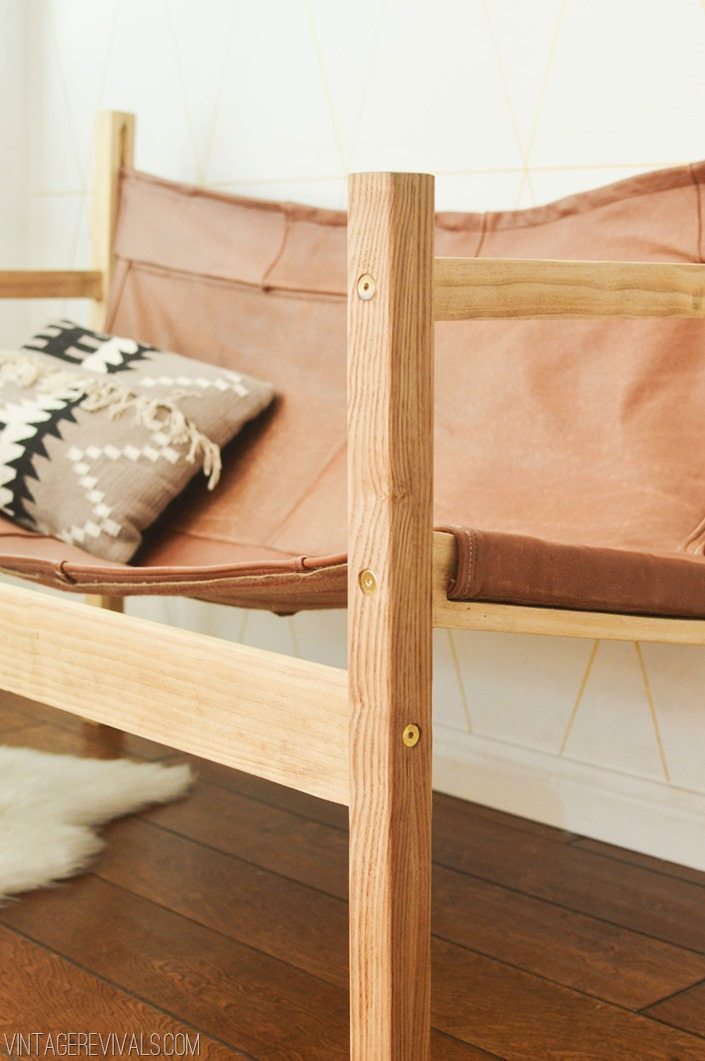
Give the whole thing a nice little rub down with 220 grit sand paper to soften the hard corners. I conditioned my wood with Danish Oil, to make it look nice and finished.
Now for the seat. Are you still with me?
Sewing the leather was admittedly the most frustrating thing of this entire project. My sewing machine is not fantastic, but it worked okay (there are a few spots that are not my finest workmanship but it’s fine.) It did wonderfully well sewing 2 thicknesses’ of the leather, the part that I had trouble with was where the seams from the original couch were. Especially when it was doubled over (like the hem in the front) So just keep in mind that you have to go really slow over those parts.
To sew leather you NEED leather needles. Like don’t even try this without them. Stock up, I went through 3 packages. You also need upholstery thread that matches your leather (as close as you can find)
Here is the basic cut guide and pattern. 3 large rectangles, sewn together just like they are pictured below.
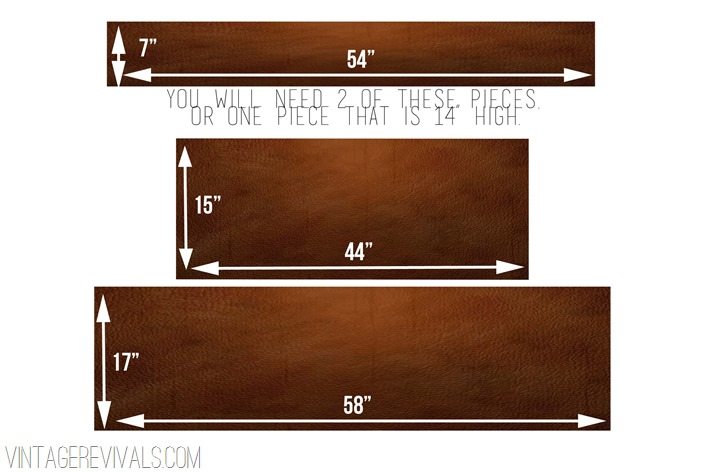
The base of your seat needs to be 58”x17”
Start by sewing a hem on the front. You have just over 1/2” seam allowance in the cuts.
The leather from this part of my seat came from the back of the couch, in case you were wondering!
The measurement for the back of your seat is 44”x15”. I had to piece 2 different sections together to get something big enough for the back (notice the seam running down the center)
Center the back piece on your seat base with the right sides together and sew it together. You will want to go over it a few times to make sure that it is reinforced, this seam is holding it all together.
Your top section will measure 54”x7” I was running low on thick pieces so I used a second piece that was also 54”x7” along the back to strengthen it. If you have a piece that is wide enough (like 14”) you can just fold it over and you wont need a second piece.
To sew this one in place, put the right sides of the top and middle piece together (make sure it is centered!) and stitch it in place.
Then take your back piece and put right sides together with the top section. After it is sewn together fold it down and stitch along the very top of the middle piece to hold it in place.
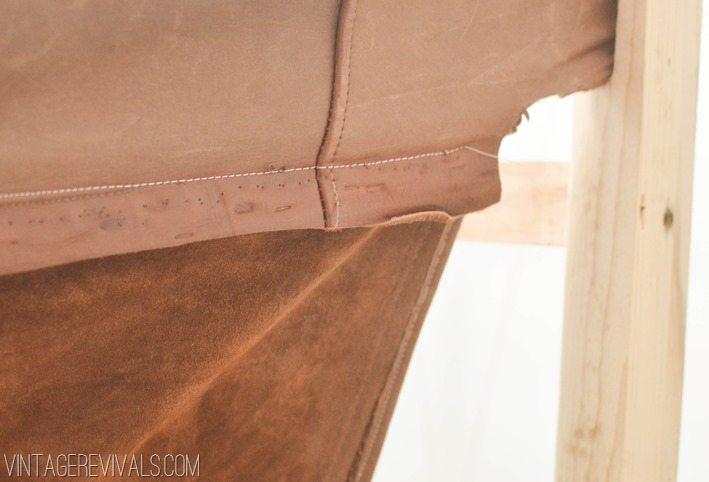
To make pockets for your dowels, just fold over the edge and sew it down.
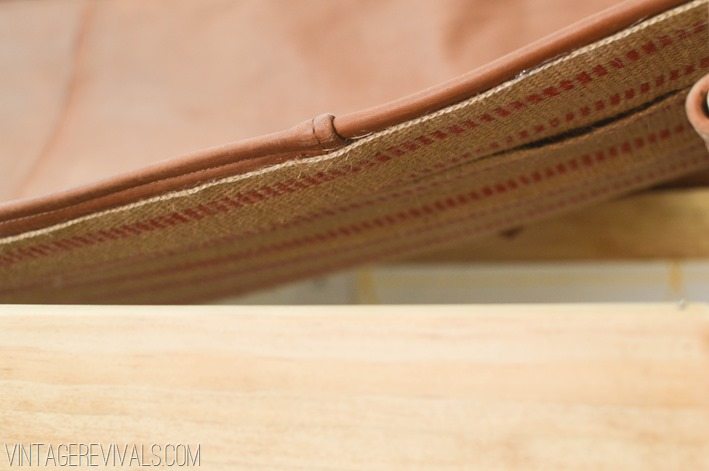
When we attached the leather I had a little bit of a complex about it over stretching. In order to sleep soundly at night and not have nightmares of teenagers ripping my amazing new bench, I stapled a few rows of Upholstery Webbing between the wood and the leather.
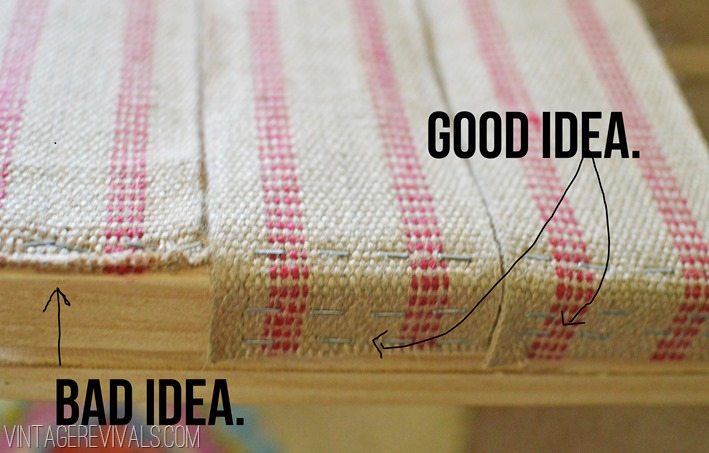
Make sure to staple it on the sides and on the top. (Learned the hard way that it can pull through the staples if you just staple it along the top.) I also doubled up the back row, because that is where most of the weight is.
Feed your leather through the grooves and slide the dowels into place. You my need help doing this if your leather is really tight.
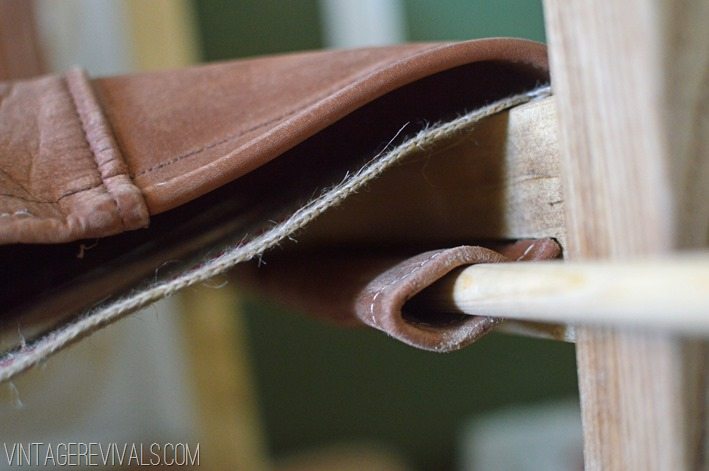
You might want to run a line of hot glue along the edge of the webbing and attach it to the underside of the leather just to make sure it doesn’t poke out of the front.
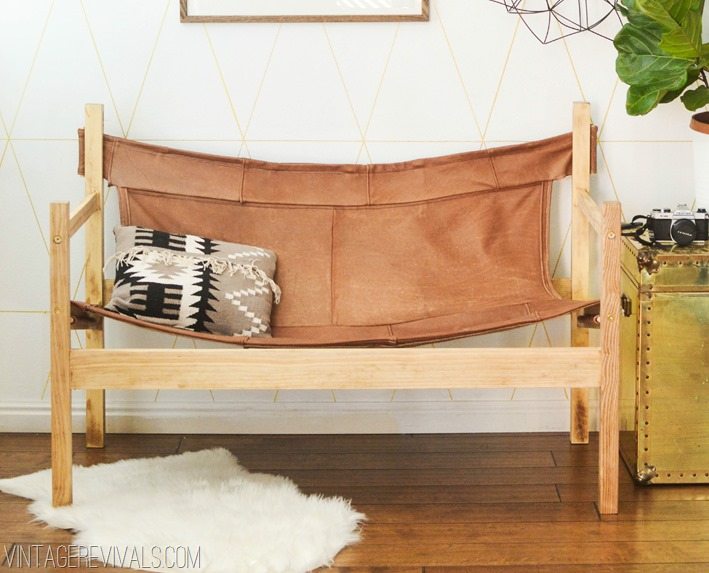
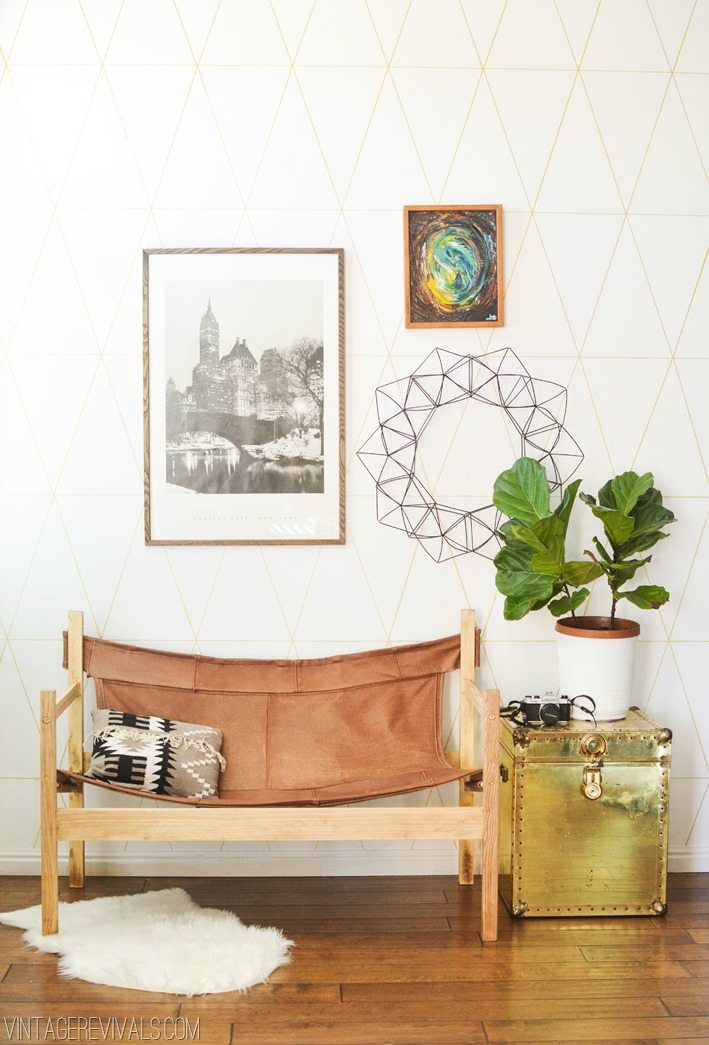
Now all that is left is to sit back and enjoy the fact that you just made, literally, the coolest bench known to man.
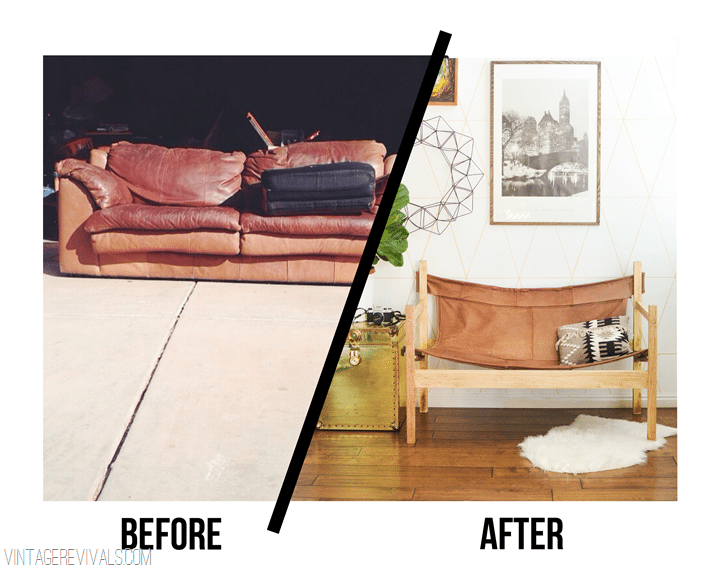
And just because the before and after is SO good…
I cant wait for you guys to see it in Macie’s room!
If you have any questions, leave them below!!
Also. If you loved this tutorial, I would be ever so grateful if you would please please pleeeeeeeeease hop over to the Homies Finals on Apartment Therapy and vote for Vintage Revivals for the Best DIY Blog. We are about 300 votes behind as of this morning and could use a boost!

 Now it’s time to show off your #rockwhatyagotparty projects. Please follow the rules below!


