So as I was checking out some of my favorite bloggitys today one of my favs Brooke @ all things thrifty was talking about making your own wall stencils. I have been meaning to post this so today is as good as any right? Basically I followed Brookies tutorial {found here} and this is how I did it. I found the image that I wanted on my favorite photo editing website Picnik (look under create- stickers- Floralia) Then I took a pic of the wall and uploaded it to picnik so that I could easily edit the picture to change the size, color, etc. and get a general idea of what I wanted. {Seriously please don’t judge my messy house mmmmkay?}

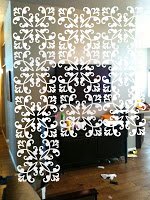
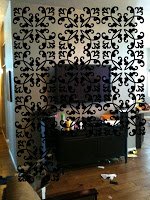
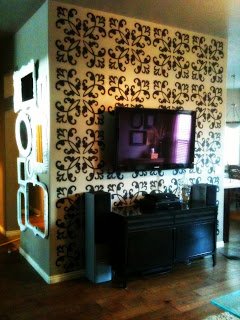
I originally was going to do white (the color of our baseboards, doors etc.) but after seeing the black I knew that had to be it. I measured my wall (which was about 8 feet across) and decide that 4 stencils across would be a great size. I printed off a single square of the pattern, and drove my happy butt to steamroller copies (local in St. George but I’m sure anywhere would do it.)
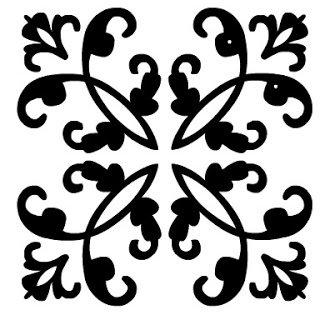
I had the cute girl working there print 2 sizes off. 1 1/2 feet squared and 2 feet squared. It cost me all of $2.00. When I got home I taped both sizes up on my wall to see which one I loved the most.
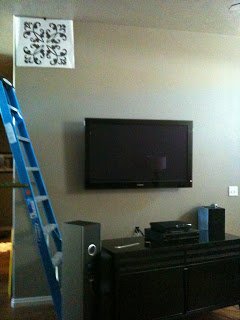
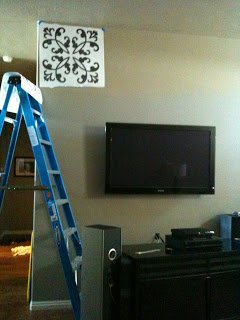
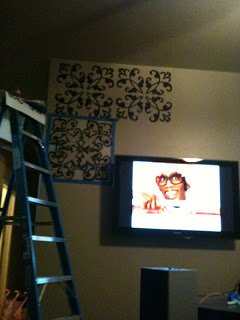
I loved the big one (I was totally grateful for that decision when I realized how much time was involved!) I took 4 sturdy plastic folders that I got at Target and taped them together and then laid it over my design and traced it with a sharpie. (make sure you tape them both down- you don’t want it to slide! On Brooke’s blog she used an Exacto knife to cut out her design. But she recommended getting a stencil cutting tool, I am all about doing things the easy way so that’s what I did. I completely recommend getting one too. (I think it was about $15.00 at Roberts) It was a tedious process even with that tool I cant imagine what it would be like without it. Basically its like a soldering tool but smaller and it has a small point on the end that gets flamin’ hot and just slides thorough the plastic. Then comes the fun part. Spray it with spray adhesive to make it stick to the wall so that the paint doesn’t bleed. I used 2 kinds because I ran out in the middle. I used Krylon brand and Elmers brand. I would take the Elmers over Krylon any day. The Krylon left stickiness on the wall and its just another step to clean it off. Because my walls were dusty stencil was “flippin’ huge” (according to Ivie) I had to spray it after every other stencil so that it stuck really well on the edges. I used just regular old black tole paint and it worked great, just make sure you don’t get to much on the brush (because my stencil was so big I didn’t really have a detail issue but I can see that happening)
Linking up to:
Mandi that is the cutest wall stencil ever!!! So cute you are so crafty!! P.S. no one cares if your house is messy with kids and a dog. 🙂
Wow it turned out soooo great! you make it sounds easy but I’m sure it takes a lot of patience and precision.
I’ve always wanted to get wallpaper but I think this is a definitely cheaper and less permanent alternative.
Thanks for the great tips!!!
I just featured you over at All Things Thrifty. 🙂 Your comment made my day yesterday! Feel free to grab a “featured” button and wear it proud.
That looks great. I don’t think I would ever have the patience, but it makes for an awesome effect.
I saw you over at AllThingsThirfty, this looks so great! You did such a fantastic job!
PS: You are hilarious, I’m a new follower!
I saw you on all things thrifty and I LOVE YOUR WALL! I also LOVE your wall that slightly shows a bunch of mirrors on it I think? All I know is it looks absolutely AWESOME. Great job!
I lurve it! Great job 🙂
you wall is AB FAB!!! can you come do my wall now?
Mandi! I love it! Now I really need to come see your room!
It’s awesome! My husband would say that it hurts his eyes. Men…
Cool beans! This would be fun to translate into moveable wall art too- just make a stencil of whatever and paint it on cardstock and frame it.
bec@theiheartblog
I tried to make a stencil for my daughters room to do a border, by cutting it out with an exacto knife…I just about lost my religion. I threw it in the trash. Now that I know they make a special tool for cutting out stencils I am back in business. Thanks a million.
I love, love, love how this turned out! Fantastic! Thanks for stopping by and visiting my blog.
I just saw this linked on Tater Tots and Jello and had to come over and tell you how beautiful I think this is! What a great focal point for your room!
I linked from All Things Thrifty and I LOVE it so much. I love your idea of using picnick to sample out the size and color – BRILLIANT. I also love the idea of getting it printed in two sizes – you are my new best friend because I am one of those that would never think to do all this pre work to make sure it was exactly what I wanted!!!
Oh my gosh!!! What a wall!!!! I love it! It looks like it was seriously hard and time consuming to do. It’s really lovely and just creates so much interest… I wish my hubby would go for some “POP” ideas like this…
So I asked my Boyfriend what he “thought of the wall” (hates it = we can do it, egh its alright or love it = we’re soooo doing that!)
his response: “Uh, I like the TV”
Thanks babe… ha!
LOVE your wall!
I love it!! That is one of my favourite images from Floralia!!!
Wow, that is amazing. Thanks for the step-by-step instructions. It’s smart you started on one manageable wall. Nice job.
Totally going to try this!
Thanks for the instructions and idea to use Picnik, it’s nice to see what things might look like before going to all the work!
This was really fun to read, not to mention how neat to know! Great accent wall!!!
Gorg! Love it. I plan on stenciling my den but i have no guts so for now I will just enjoy looking at yours
We love this party link and I wanted to let you know that we are planning on featuring it. We hope that you get a bunch of new visitors.
http://www.remodelaholic.com
That looks so cool! I love it!
This wall looks awesome! Welcome to the “No, it’s not wallpaper” accent wall club!
I know this is off topic, but how did you hide all the cables for the TV? We’ve been dying to mount our TV, but don’t know what to do with all the cables.
Oh my gosh, I LOVE that! I wish I could paint my apartment walls, I would go right ahead and try it!
So appreciate the tips (Picnik & Elmers) and really love how it turned out. I think it really grounds your tv. Beautiful!
@Gaby – we had a contracter install a tub in the wall that went from behind the tv to behind the cable box, dvd player, etc…, worked for us and looks great!
I LOVE this! too bad we live in an apt right now, but someday my wall will be as awesome as yours, I hope!
I posted your button on my blog just fyi, because I love yours so much =)
This is the perfect pattern for some throw pillows for my couch! Thanks for sharing:) And God bless you for being able to watch/hear Yo Gabba Gabba!
Wow – your ideas and energy!
Was intrigued by the “seizure wall” thing and here’s why. I am an American living in Germany (20 years) and so I’m thinking to myself “hmm, seizure wall? what the heck is that? guess I’ve been gone too long. no home build in the US; must be a vocabulary deficit.” So imagine my LOL- really loud – when I get to the end of your post and become enlightened… And, and this is probably why I’m still laughing, I can just imagine that quote coming from my husband’s mouth! Just wanted to share. Thanks for exercising my smile muscles. You have a new follower.
OMG I just found your blog from a link on Dream Book Design and I have to say that I have read like everything already on here! You are freakin awesome and you have so much talent!! Can’t wait to try this on my wall!!
Splendid job. I think I’m going to try this on curtains. However, I want two-tone and I’m not sure how easy that may be.
I’m basically crying at your “cool tricks cool tricks” comment! BAHAHAHA gotta love gabba for sure! I’m attempting this with some girl friends tomorrow!
Thanks for the killer tips!
xoxo Mallory @ Classy Clutter
i swear this was the first post I ever read on your blog and the second was the mirror wall! Flashback!