UPDATE: You can see the entire room reveal here!
I love custom lighting, don’t you? Like love love love it. When I was finishing up my Master Bedroom (that will be unveiled later this week) I needed lights for my nightstands. I knew that I wanted them to be symmetrical but the dilemma that I ran into is that I already had 2 symmetrical lamps on my dresser. It was just too matchy. Blech.
So I did what I always do. I thought about what the PERFECT light would look like if I could have exactly what I wanted. You do this don’t you? When you decorate you need to dream and feel the space. Then let your DIYing get to work.
I decided that I wanted to jump outside the lamp box after all I wanted LIGHTING, not a lamp.
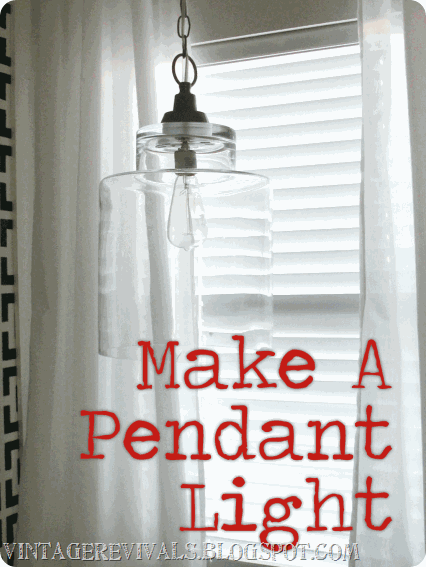
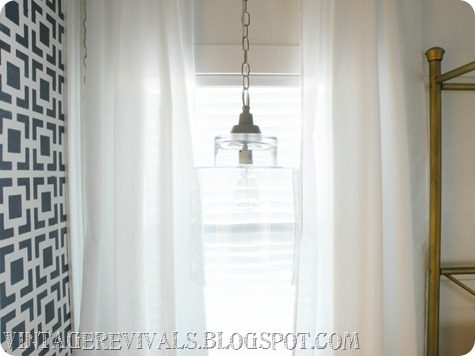
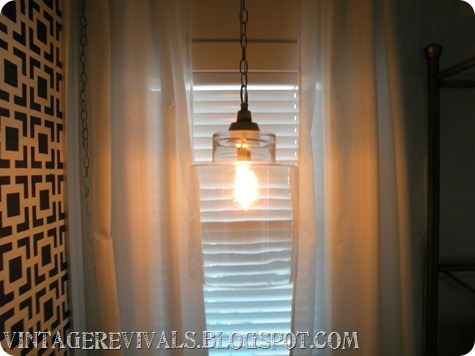
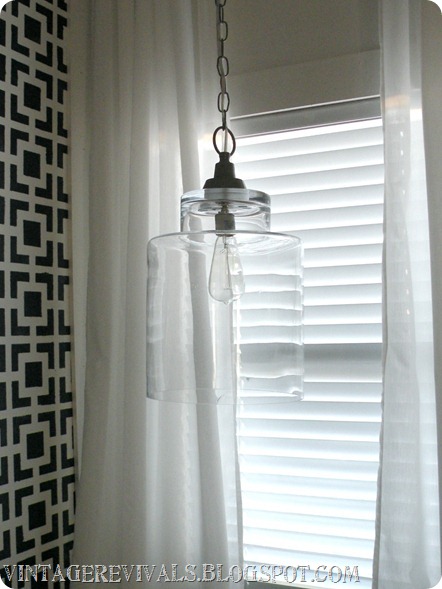
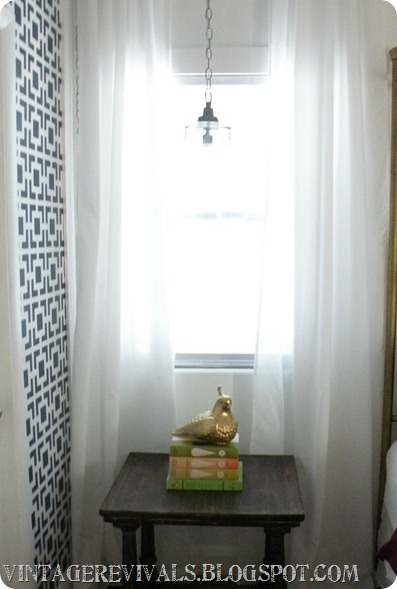
I knew that if I was going to hang something in front of the window it needed to still let natural light in. So I went to my favorite store in the world Homegoods and bought 2 identical glass urns. Its sort of hard to understand how big they are. My head could easily fit inside on. And I have a big head…
If you wanted to do this with ones that didn’t match that would be totally awesome too, just make sure you have more than 2. So, it would be great above the counter in your kitchen where you have pendant lights….just saying.
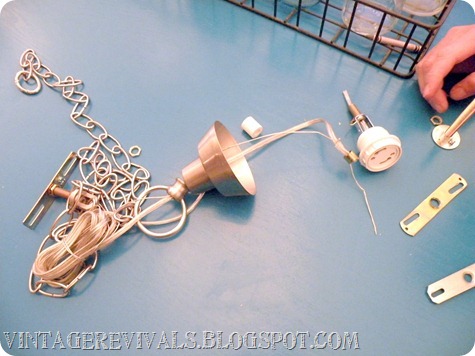
I found 2 matching lights at Home Depot that were on MAD clearance (less than $10.00 each) that I used the hanging hardware from. I could have used the entire thing (Hardware, electrical etc.) but I wanted to use an Edison bulb and these lights had a FUNKY socket that only takes special bulbs with prongs…. So that was added cost and labor that most of you probably wont have to deal with.
If you need to rewire it, here is how you do it. If you don’t, hang tight through these next few steps!
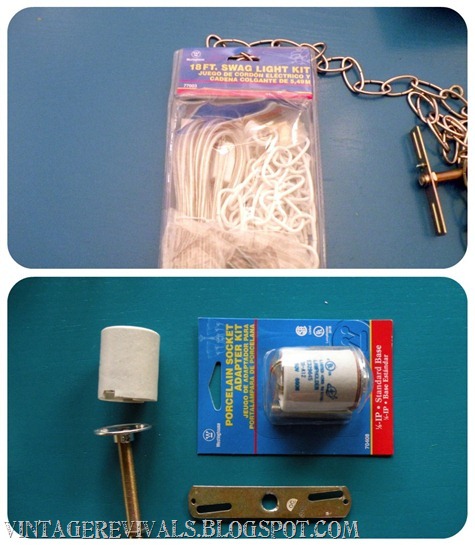
You will need a hanging light kit and a socket.
I had 2” holes drilled in the bottom of the glass because I am an idiot. YOU DO NOT NEED HOLES THIS BIG!!!!!!! You only need a 1/2” hole to fit the small rod. This is how to drill through glass.
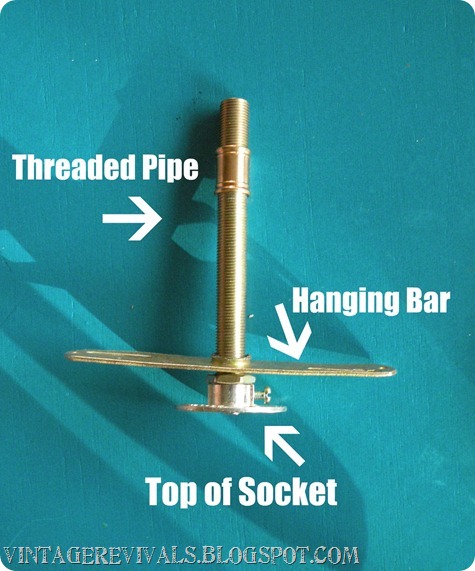
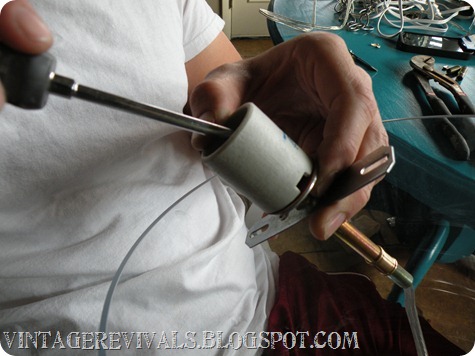
Take your socket and screw it onto the threaded rod then attach the hanging bar. (Normally this bar is used when you are attaching it to the ceiling but I needed something to keep the socket on since my hole was so dang big). BUT even if you have a small hole I would recommend doing this or something like it. The glass jars are really heavy and it helps distribute the weight a little better.
Then you are going to wire your socket. The instructions are very simple and included in the packaging. If you are concerned you can always hire an electrician. But you should be totally fine!
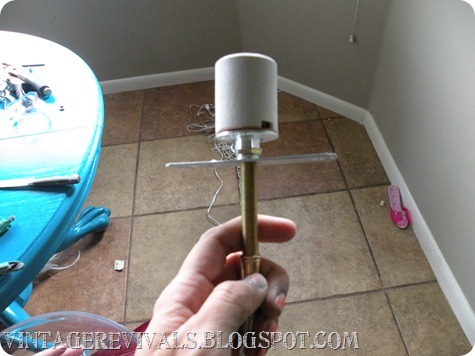
Once your socket is wired you have this:
With the cord coming out of the bottom, sorry I missed that in the shot!
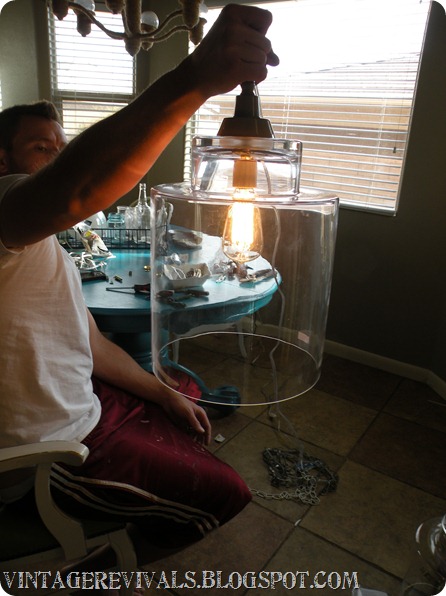
Next you are simply going to put all of the components together. Super easy!
And make sure that it works before you hang it!
Don’t I have the best husband in the world?
I sort of wanted the vintage bulb to be the star of the show. You can buy bulbs like this at Home Depot or Lowes for around $10. Pretty pricy but SO worth it!!
And make sure to check out all of my other unique tutorials if you need more lighting ideas in the Project Graveyard!


I love the bulb.
This is the best tutorial I’ve found so far! I found an old fixture in my attic that I wanted to do this with but the hole on the top is about 4 inches . How can I make the light kit fit inside. Most are pretty small..
I love the bulb.
LOVE it!!! It looks very chic. We just made a pendant light over the weekend too and I have to share…I think you’d approve:) https://imperfectlypolished.com/2012/01/02/diy-pendant-light/
I must protest. I do not think you have a big head. That is all.
Oh and I love your lighting too.
xoxo
This is great! Way to go. Love it.
Love it! Also love the walls, I just did our room navy in November and am stenciling a wall this week. We have an antique brass headboard and footboard as well. Looking forward to seeing your room!
Wow this is great! You are so into making your own lighting now, I love it. Can’t wait to see the whole room though!
I love clever people. What a great project. It doesn’t look like urns and much cheaper then buying pendant lights anywhere else. I also like that your shared your thought process about it all.
These lights are seriously the bomb.com!!! LOVE them! You just gave me an idea for a new kitchen light!
I LOVE this pendant. Enough that I pinned it away for the future sometime. Thanks!!
Very pretty. It really let’s the sunshine in and looks dreamy in the evening. Good job! Now the punk shoe. LOL cute.
That is too awesome; I love it!!! So so pretty, and I love that the light can still come in the windows. Amazing as always, Mandi!
What an awesome idea! I love them! I think I need to make some right away.
thanks for the tutorial. you are so talented!!!
I absolutely LOOOOVE this!
xo
I love it…can’t believe how easy you make this look!!
fantabulous!
Kelly
It’s perfect! I love making lamps, what did you use to drill a whole in the vase, did I miss that part?
I have done many lamps and chandeliers. This one is amazing.
Fabulous light! But am curious about the part you don’t show. Is this wired into the ceiling or does it run down to an outlet? I’ve got a situation where I need to use an outlet and would be love to see how you did it. Thanks!
Brilliant! I have ugly lighting in my house that cast weird shadowy and very dim light. The original owners put the exact same light fixture in every single room! 😀 I have been been wanting to replace them but it is cost prohibitive…unless you pull a Mandi and make your own!!!!! Woo hoo! I’m gonna make me some lighting! Uh huh, oh yeah!
Thanks (once again) for such amazing inspiration.
Girl – get outta my head! I’m so in pendant mode right now and I’ve been thinking of large glass vases as a possibility. As usual, your project is f’in’ awesome. You said you had the holes drilled – by whom and how much? Thanks!
Heidi 🙂
These are amazing! So clever, clean and beautiful I can’t wait to see the whole room.
Hi, Mandi
Great idea and love how they turned out.
Love your guts back,
Vanessa
this is awesome. thanks for the link for the drilling through glass tutorial… xo, laura
Love it and Pinning it!!! I just saw similar lights like these in a decorating mag and thought they would be perfect for my kitchen but not my budget. Once again, thank you for reminding everybody in the power of DIY.
PS. I also totally love the pink princess shoe. I have a toddler and feel like her stuff is overtaking the house. It makes me feel better that even you, a Bloggy Supastar, has random kiddy goodness in your house too.
Jamie R
So lovely!!! this came at the perfect time, because our ceiling fan/light literally FELL out of the ceiling last night. I may just do a post about that. My husbant *tapped* it and out it flew! Soo…needless to say, we need something there again. Maybe not a fan, I’m not sure, but this would look lovely above our bed! Unfortunately now there are some sort of wires sticking out of the ceiling and I have *no* clue how to solve that. Off to probably find an electrician friend. 🙂
https://munchtalk.blogspot.com/2011/12/mediterranean-snacks-review-and.html
These are completely and totally amazing! I’ll have to check out the link about drilling glass, because I’ve had ideas of using glass things before but always stopped thinking it wasn’t easily possible. Thanks for the inspiration!
I love it!!!
I thanks for sharing. I love this. It seems very thourough. I just might have to get into this and make a new light for my bedroom.
Greetings from Germany
Catrin
P.S. Found you trough the Pity Party Link party.
Wow. I’ve been looking for a clear chandelier/pendant type light fixture for my dining room – it is hard to come by. I never thought of making one!!! Yours is fantastic.
-Katie
Hi Mandi –
I love this light! I was just wondering if you can get these kits at the big box stores or are they at a specialty store or online? I know I have a couple of things that would be great to do this with!
Thanks,
Jan
Very chic, Mandi- and yeah, I think the extra $$ spent on the right bulb for a project is that is WELL worth it! Nice job 😀
Visiting from TT&J linky party tonight and thanks for sharing 😀
~Suzanne in NW Illinois at WHYCUZICAN
Oh my goodness Miss Mandi! I am in love with these light fixtures. I would have never known that you could drill through glass either. Such a sheltered life I lead… 🙂
You never cease to amaze me with you ingenuity! Awesome lights, girl.
I wanted to try this but the electrical part seemed a little scary. The step by step instructions with pictures makes the task look a little less daunting. Thanks!
This is new look
Gorgeous. I love making my own lighting too. It can make such a big difference in a room for so little money.
Very cool light. That would look perfect in my nook
You know it really isn’t nice of you to post something this incredible when I can’t find containers like that ANYWHERE in the town I live in! I have looked everywhere and nothing. So someday when I find them I will have them over my dinning room table.
HOW DID YOU DRILL INTO THE GLASS???? DYING TO GET MY HUBBY ON THIS PROJECT!
I just found your blog when searching for teacup lamps. I am so inspired by your DIY skills and how creative you are! I’m going through chemo right now and am so looking forward to doing projects again and your tutorials are exactly what I needed! Thanks for cheering me up today! Keep up the innovative design and never lose your enthusiasm! God bless you! Maryjane
I love it! I am making one of these but it is going to be a lamp that is plugged into the outlet. Instead of a shade I am using glass so I can display a vintage edison bulb. Here is the plans link. https://ana-white.com/2011/09/nature-inspired-floor-lamp
I’m a little confused because you used a pre-existing fixture. I have to buy the hardware to build the light; threaded rod, bar, socket, cord, etc. I looked at my options at Lowe’s and I can’t figure it out. Please help me with constucting the light hardware.
Thank you so much!
I’m trying to get my husband to do this for our new kitchen…roughly how lond did it take to make one?
Sweet!!!
I want to make a hanging pendant for over my sink for light but I do not want to hardwire it. I want to do a plug in. I found what you did at Home Depot but that is for a hard wire. Know where I can get a plug in kit? Thanks
The glass lamp is a delight for the eyes ! Thank you.
When you drilled the holes for fixture, did you you also make an extra one for the heat to escape? Maybe it’s not necessary?
Greetings from Denmark.
This is cool. I love seeing people making pendant lights. It is very easy and brings so much into a room. That is why I started doing it for a living!