Happy Monday you guys!!!
Too perky? Should we go with just one ! ?
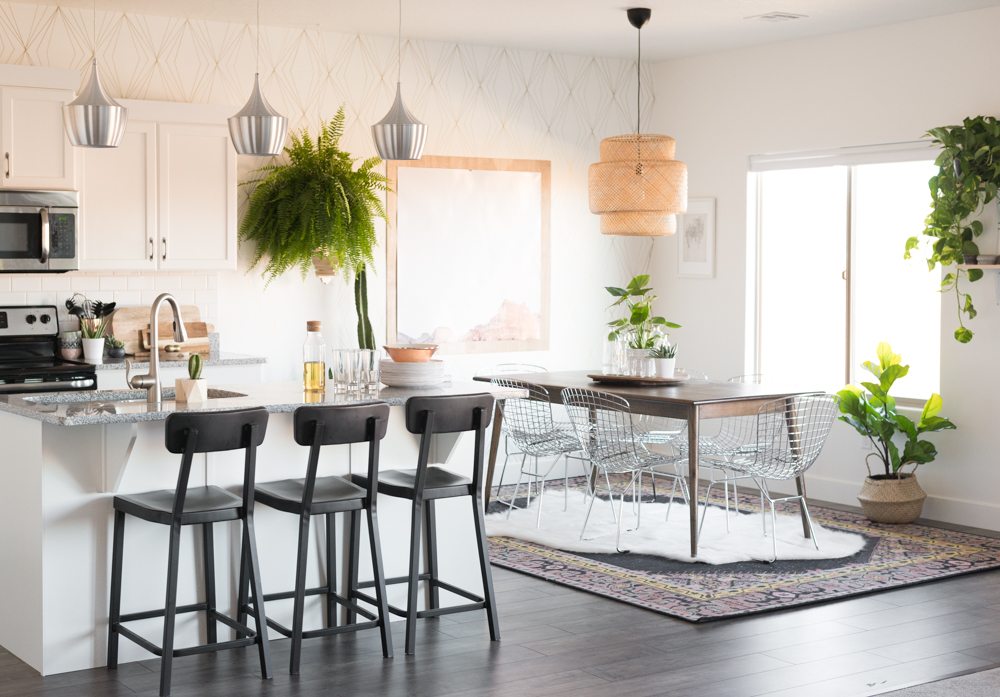
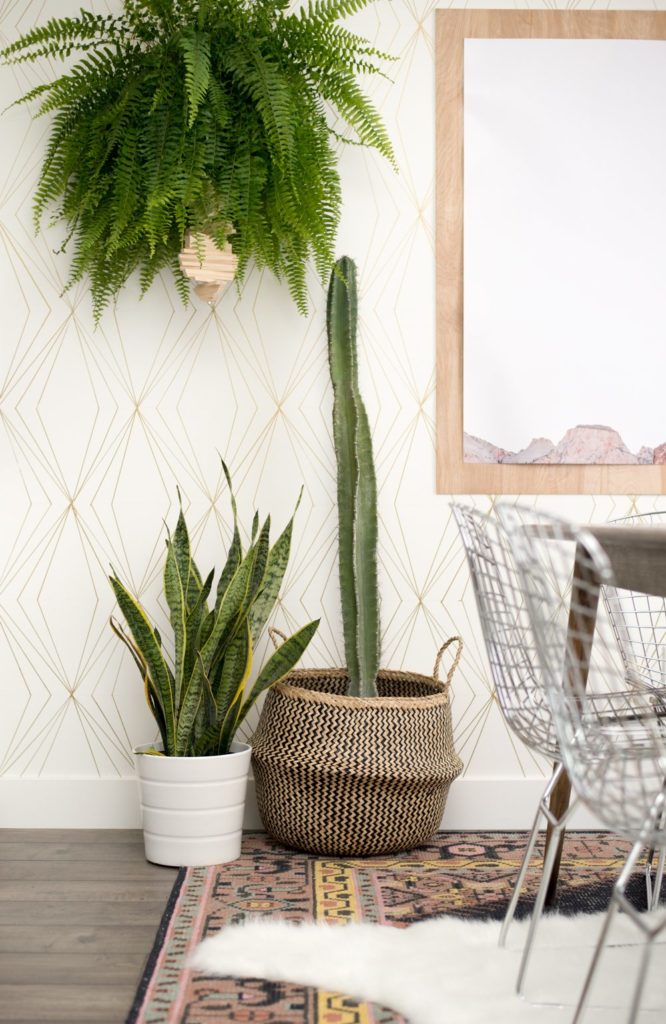
I’ve been traveling for a solid week and I am THRILLED to be back home and in the swing of things! If you’ve hung around Vintage Revivals for a little bit you know that waaaaayyyy back in 2012 I got the idea to draw on my walls with a Sharpie paint pen. It has since spurred a whole new DIY revolution, the Sharpie wall. I’ve done a few since then and love each one more than the last. Its such an easy inexpensive way to get the look of high end detailed metallic wallpaper without the cost. And by without the cost, I mean this project will cost you $8. Booyah!
Ready to get started? He’res what you you need:
Oil Based Sharpie Paint Pen
(for a wall this size I used 2 but I recommend if you can to overbuy and take back the ones that you don’t use.) Please note that’s is NOT a regular Sharpie marker. If you use a Sharpie marker you will have a heck of a time repainting your walls because it will keep bleeding through.
Straight edge
I LOVE clear fabric rulers for this project because you can see exactly where everything lines up.
Level
Tape Measure
Pencil
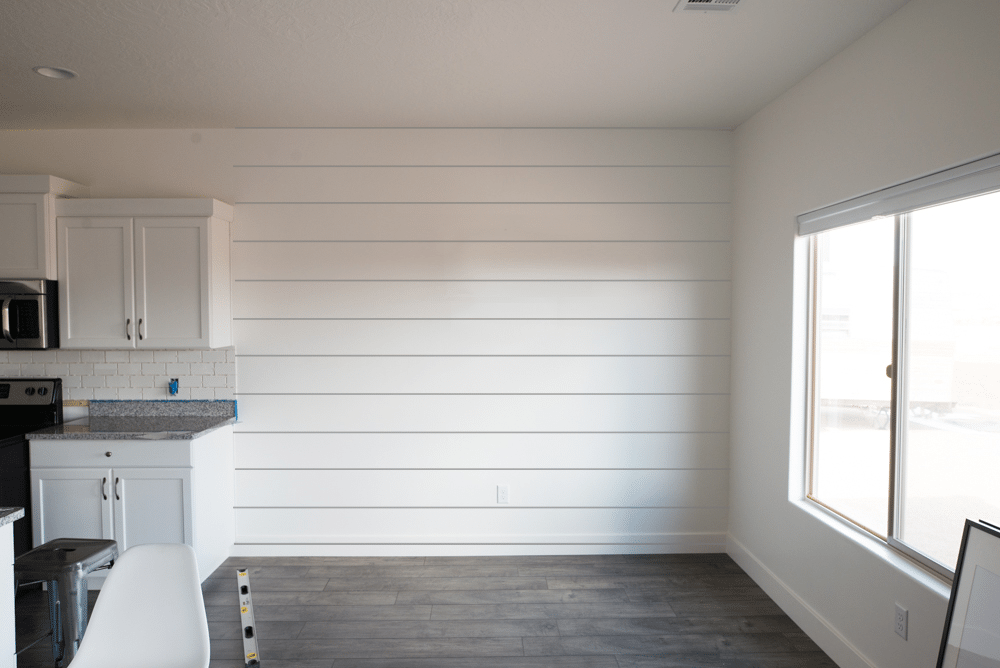
Start by lightly drawing level lines on your wall with a pencil. They should be 10″ apart. (the horizontal lines in this tutorial are photoshopped, they aren’t actually that dark! ;))
Easy enough?
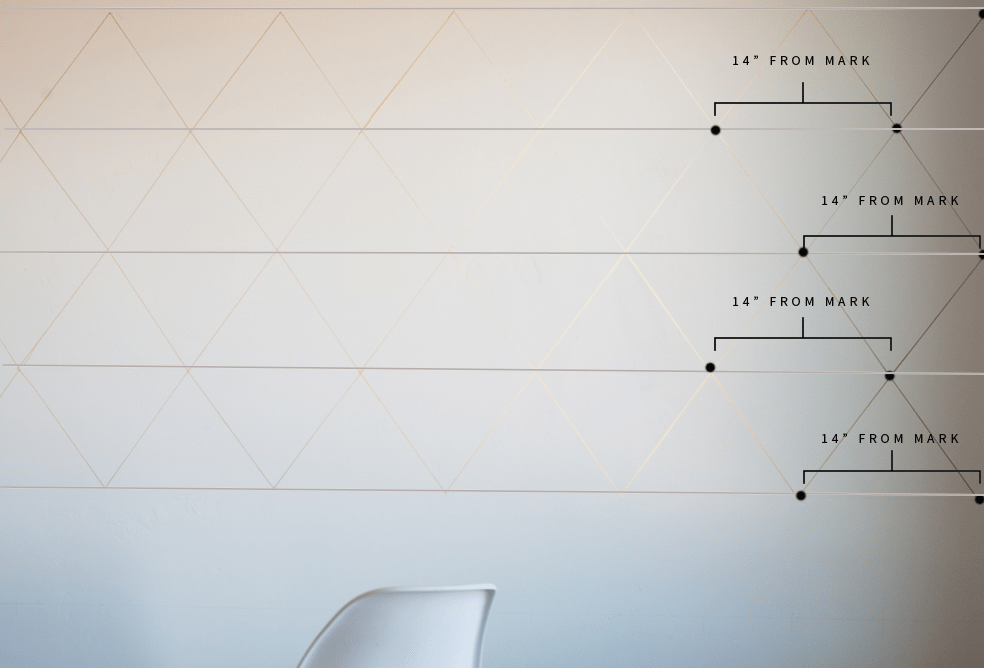
The next step is to mark where your diamonds are going to be. My diamonds are 14″ wide so to get the pattern spaced right I started against the wall.
(I did the following step on pictures with the diamonds already drawn so you could actually see why you’re doing what you’re doing! You won’t have diamonds drawn at this point!) On every other line you are going to mark the corner, then 7″, the corner, then 7″, etc.
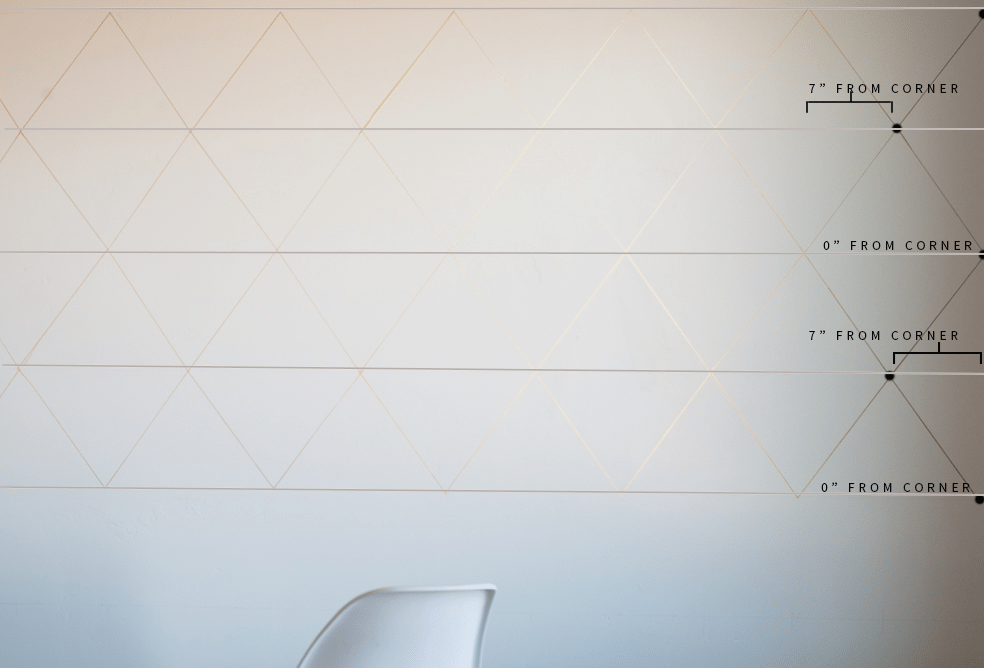
Then from that point forward you are going to measure and mark 14″ on all of the marks.
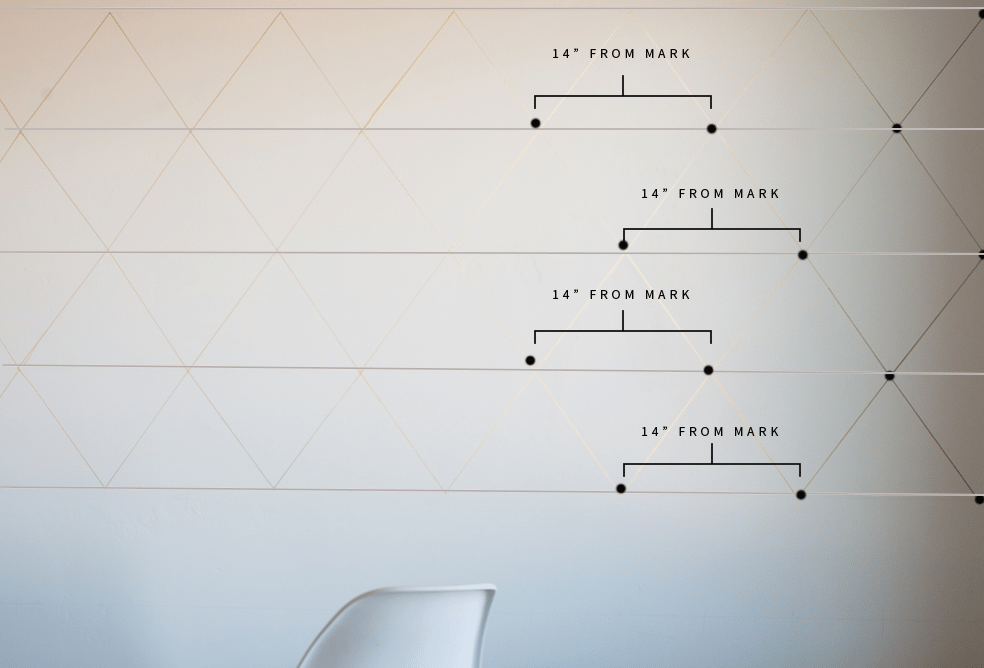
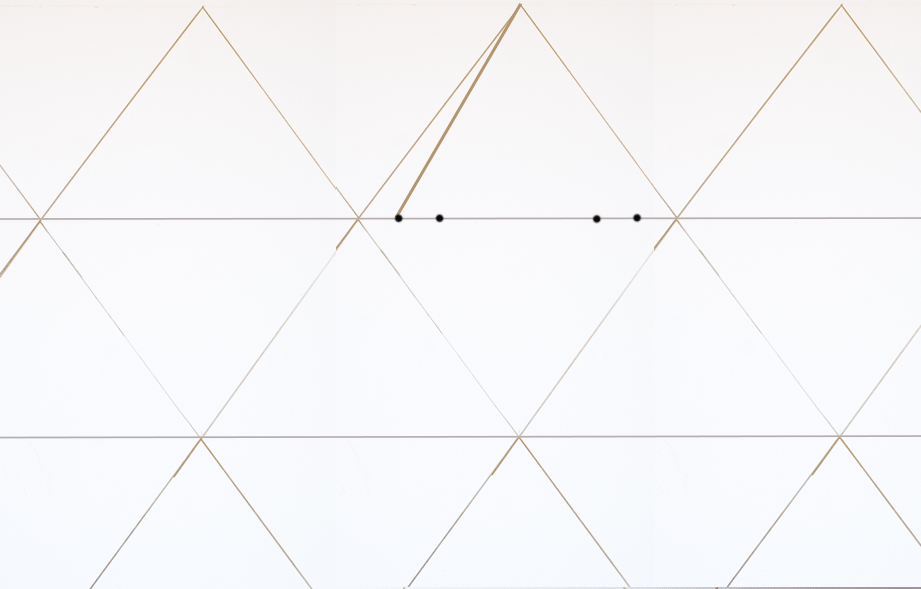
When you’re done you should have a very light version of this:
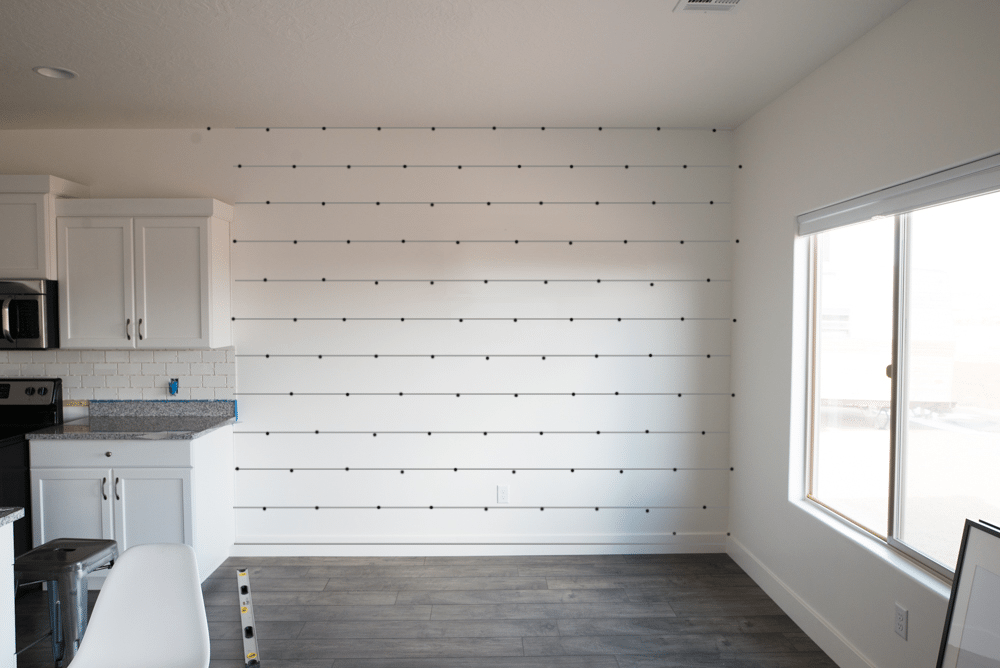
The next step is to use you’re straight edge to connect the dots (lalalala)
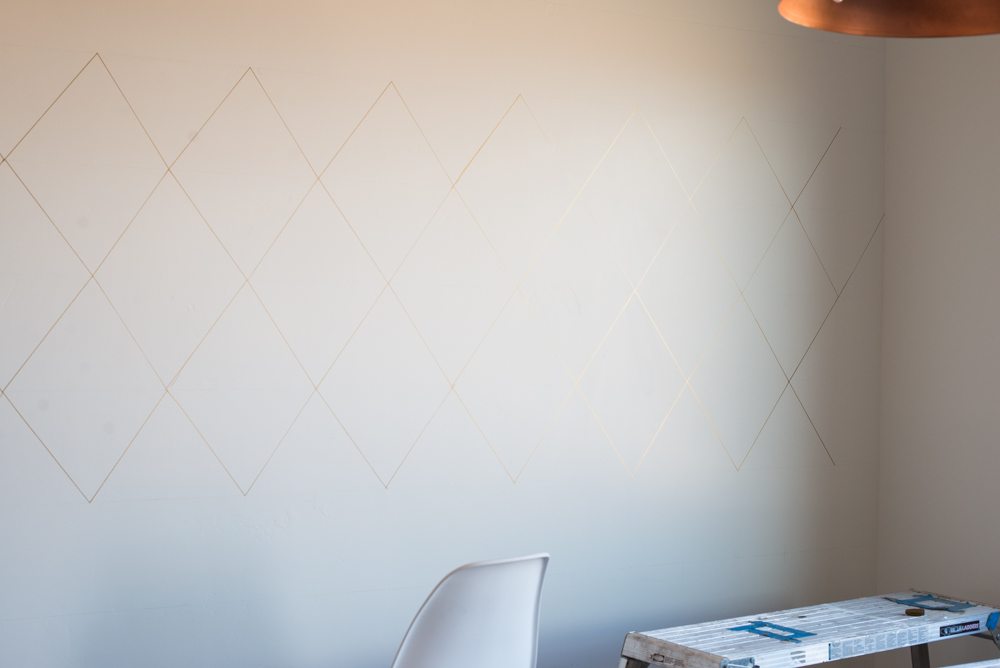
Last its time to add the detail inside the diamonds.
Measure and mark 2″ and 4″ from either side of your diamond. (the gray lines running across the diamonds are where you’re pencil line is!)
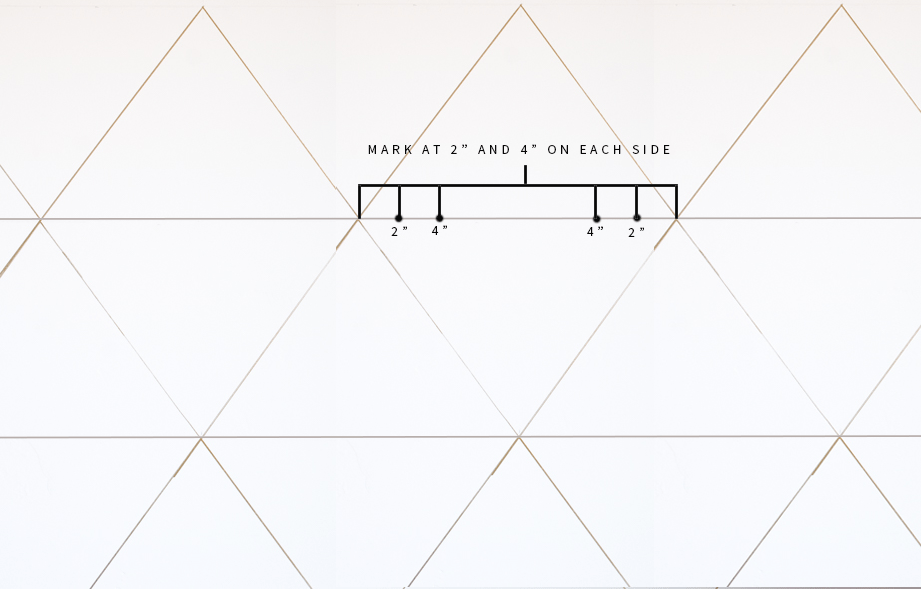
Draw a line by connecting that mark to the top and bottom of your diamond.
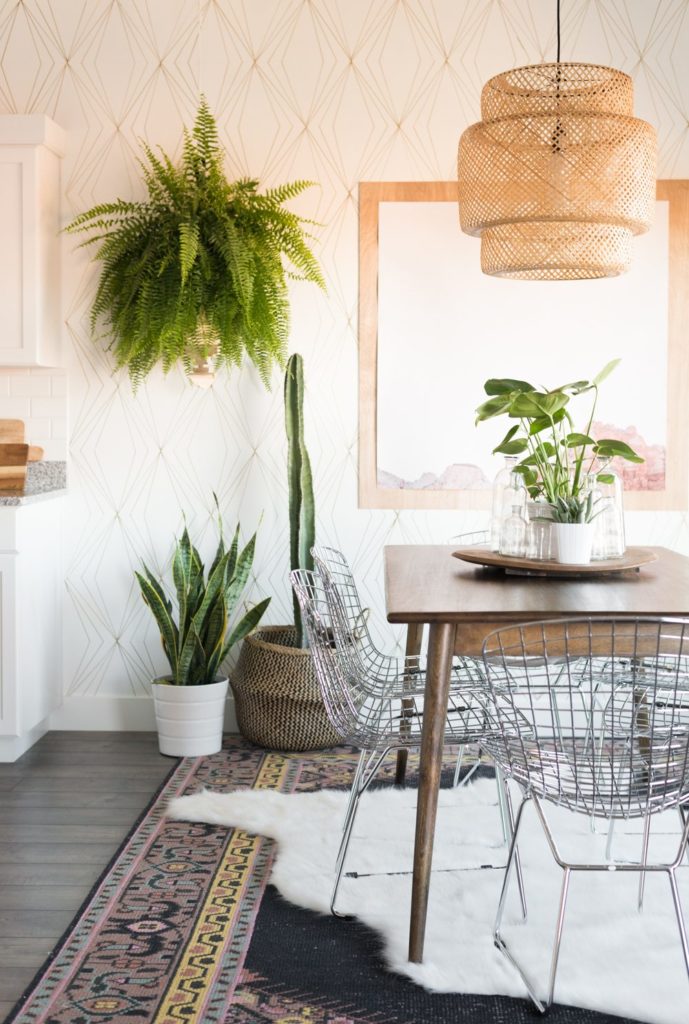
So good, so cheap, so fooling everyone.
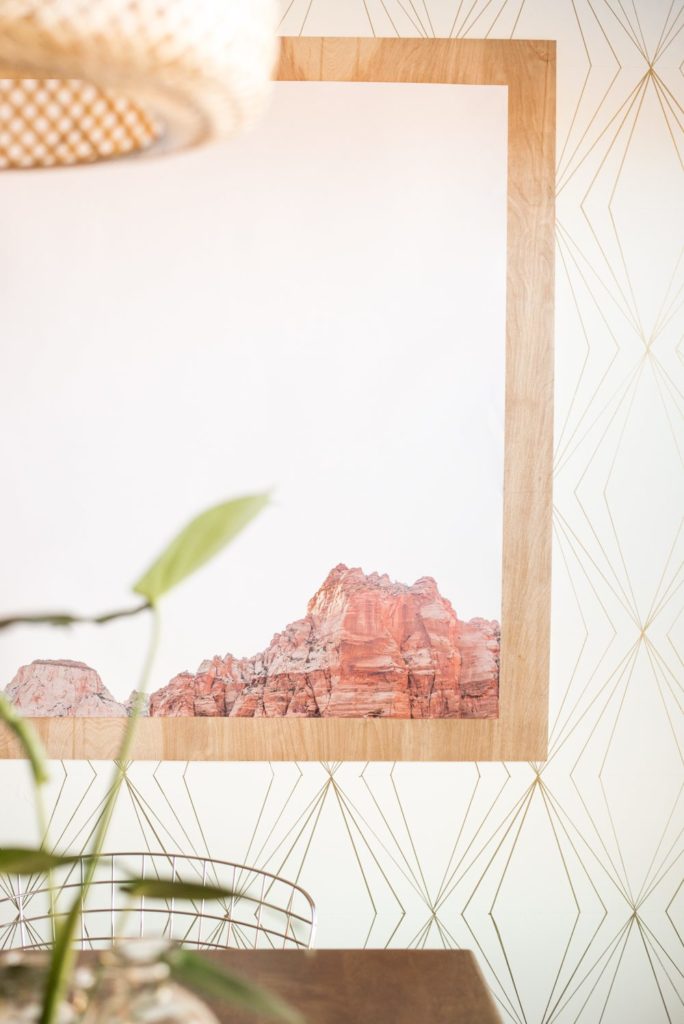
PSSSST!! Love that print? You can snag the download at its introductory price (and save $20!) here!!
Check out the rest of the projects from Aspyn’s room here!
You are amazing. Can you estimate how long this took you?
About 6 hours
Now I have that Pee Wee Herman song stuck in my head!
Seriously, this is like, I can’t even. LOVE it
question: do you use an OIL paint marker? or a water based marker?
Reason I asked is that I’ve read it is hard to cover oil paint with regular latex paint later on.
It’s in her instructions with a hyperlink if you want to find it:
Oil Based Sharpie Paint Pen
(for a wall this size I used 2 but I recommend if you can to overbuy and take back the ones that you don’t use.) Please note that’s is NOT a regular Sharpie marker. If you use a Sharpie marker you will have a heck of a time repainting your walls because it will keep bleeding through.
I used a gold Sharpie paint pen (oil based) in my last apartment to add some much needed drama to my entryway. When I moved out, I did need to use three coats of paint to cover the gold, but that could be because I had colored in the rather large triangles in my design rather than keeping it white.
Yes, I want to know this too.
Ive used both and I recommend Oil. Its not a problem to paint over it and the waterbased ones sort of wash off if you scrub the walls.
Thank you. Thank you. Thank you! I have been waiting (and dying) to see this tutorial. I think I may be able to tackle this project despite being awful with math!
Love! Question – do you erase the pencil marks when you’ve finished drawing the lines? Or do you have any tips on how best to get rid of the pencil? Thanks!
I used a magic eraser!
I am doing this!
One question, and it might seem like a dumb one, but did you go back after you were done and erase all the pencil lines? How did you get them all off so well?
She said magic eraser ?
Hi Mandi, Love this wall treatment you make everything seem so simple.I do have a question did you move from the house with the brick wall decor? Just wondering because I feel I miss something.
I freaking love this wall! Okay, so question: how long did this take you to finish? Like how many hours? I know it speeds up as you get the rhythm of it.
I’m thinking of doing it on my wall! On navy paint 🙂 just want a heads up if I’m going to be doing this for weeks….
Total time is about 6 hours!
Hi Mandi, I was wondering if this wall has texture or if it is flat? Just wondering if you think the lines would look wobbly if drawn on a textured wall and if you would recommend skim coating the wall first. Thanks!
Walls with a little texture are totally fine! The first time I did it was at my house and I have orange peel texture there, you can see how it turned out here:https://vintagerevivals.com/2013/01/diy-sharpie-wallpaper-tutorial-this-is
Stunning!! I cannot believe it’s only sharpie. I love it!!
This is just the thing for my daughters closet. We wanted a pop when you open the door but all the papers I like are so expensive. We’ll do a dusty plum with gold. Thanks for the how to!
My walls are quite textured–thoughts on whether this would still work? My husband thinks no (although that could just be his desire to not have ANOTHER project) but I think YES (although that could be my extreme love of this).
I guess it depends on the kind of texture and design, too. Jmo, but for this super geometric design, the little uneven bumps and squiggles that a textured wall would cause would make it look kind of… sloppy. =/ A more freehanded design might be ok, but I’m not sure – if it doesn’t work out, at least you can paint over it!
The walls in my old house were pretty textured and it worked great, you can see the details here! https://vintagerevivals.com/2013/01/diy-sharpie-wallpaper-tutorial-this-is
I’ve tried before using paint pens to trace a stencil on my very textured walls and unfortunately it looked awful :(. I really want to try something like this but I have such a hard time getting the lines to be straight and even thickness. Chelsea, you might as well try it in a hidden spot like a closet before committing to the larger wall just in case it does work for you. Maybe you can develop a technique with practice. This is so inspiring I’m willing to give it another shot!
Oh wow, this looked so complicated but now… definitely a future project!! Bookmarking. =D Thanks so much for sharing this with us!
How did you get rid of the pencil marks when all was said and done?
A magic eraser!
very nice!!! your dining room looks lovely! And the wall ist so beautiful! Great work!
Absolutely love the gold marker accent wall I did in my bedroom, this will be a staple accent wall trick in my arsenal from now on!
Love the design you used on this one 🙂
I’m going to try this in a small bathroom. It has Harvest Gold tiles from the’ 70’s. I’m not ready to reno yet so this may be my interim solution. Thanks for the inspiration.
I did the large triangles in gold sharpie…very one loves it! I think I might have to go back and do the smaller triangles inside; it looks so amazing. Thanks Mandy!
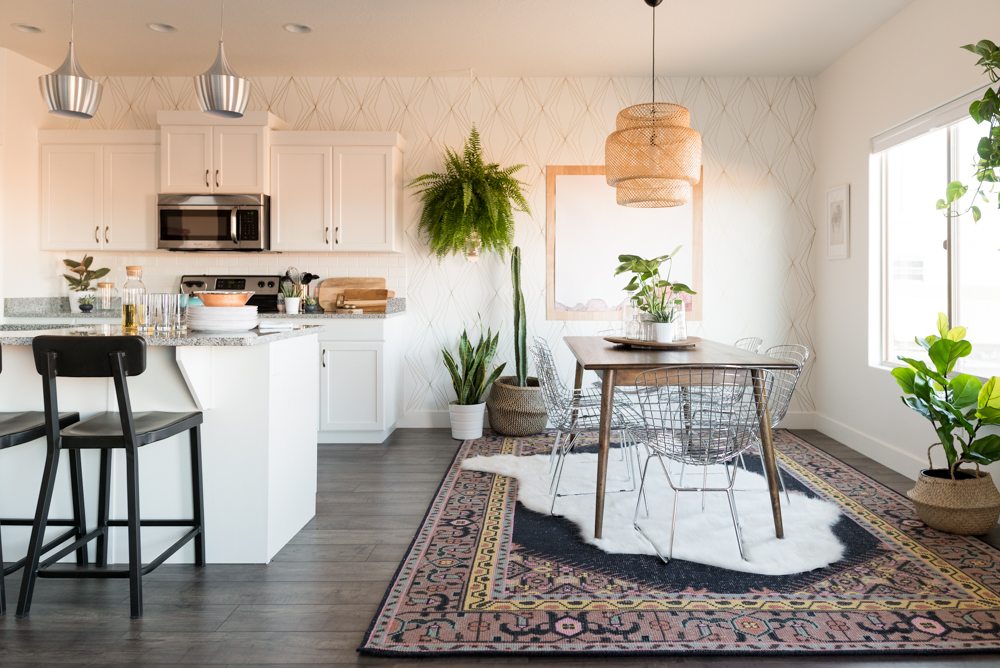
Where can I find that basket like lamp shade hanging over the table?
This one is from Ikea!