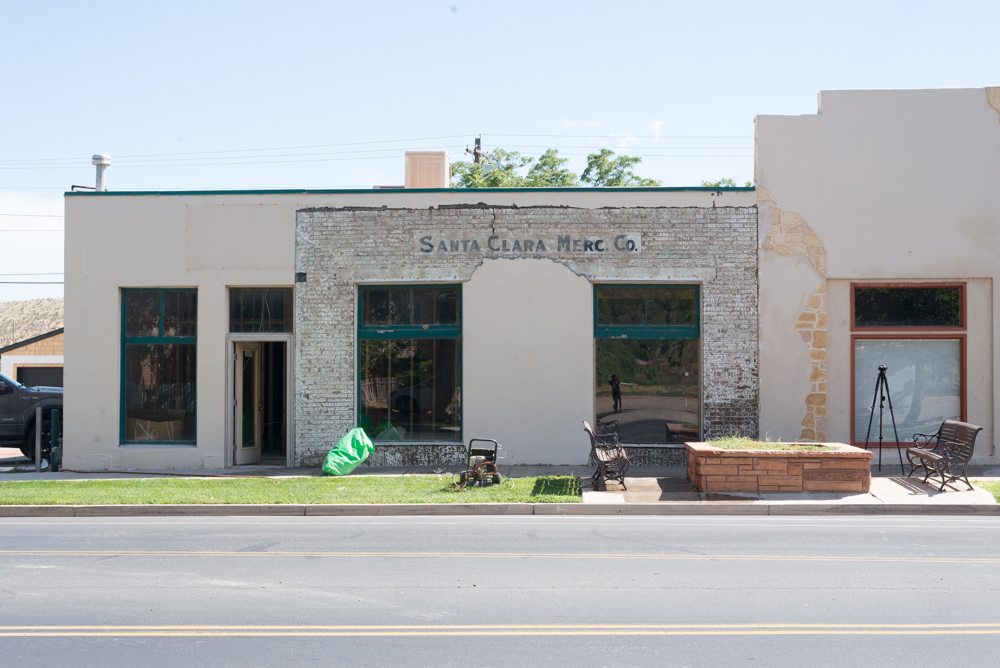
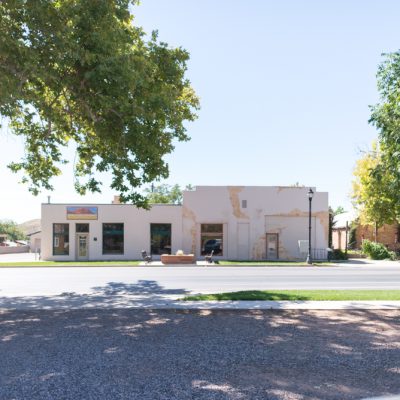
Dudes! We’re renovating an 1928 mercantile store and turning it into our dream home! Start from the beginning here!
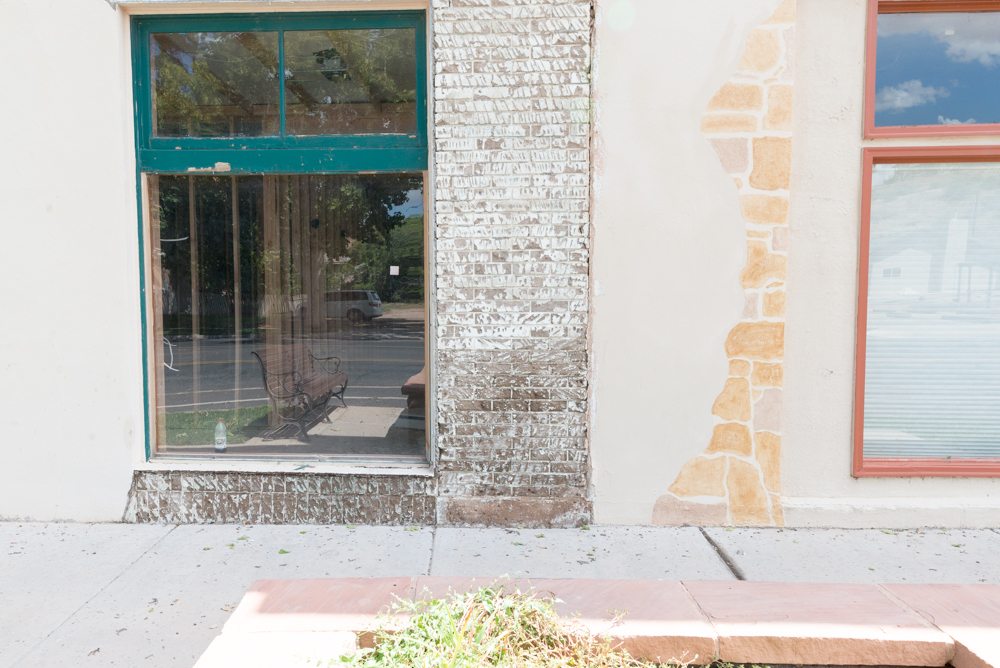
Uncovering the brick on the front of the Merc has been a huge undertaking. In the 1940’s when the original store was added on to, the brick was covered up and has been buried under 2″ plaster ever since.
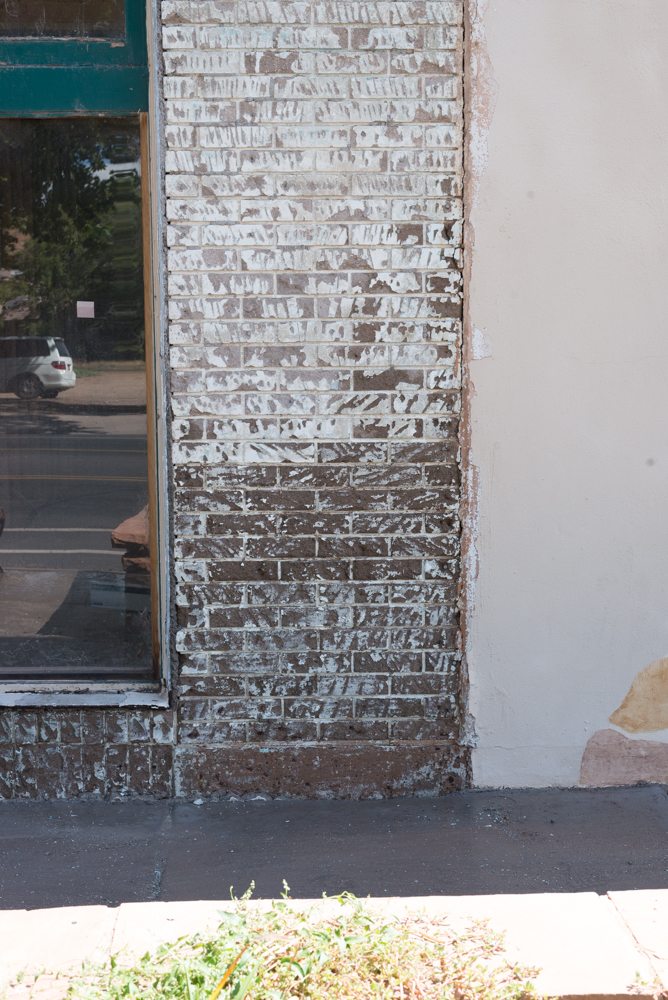
When I was planning the exterior reno I knew that I wanted to uncover it, but the problem with that is that you have no idea what you’re going to find. The brick had 3 layers of paint on it and had been HEAVILY scarred so that the plaster would stick to it. It wasn’t the pristine and perfect brick of my dreams, thats for sure.
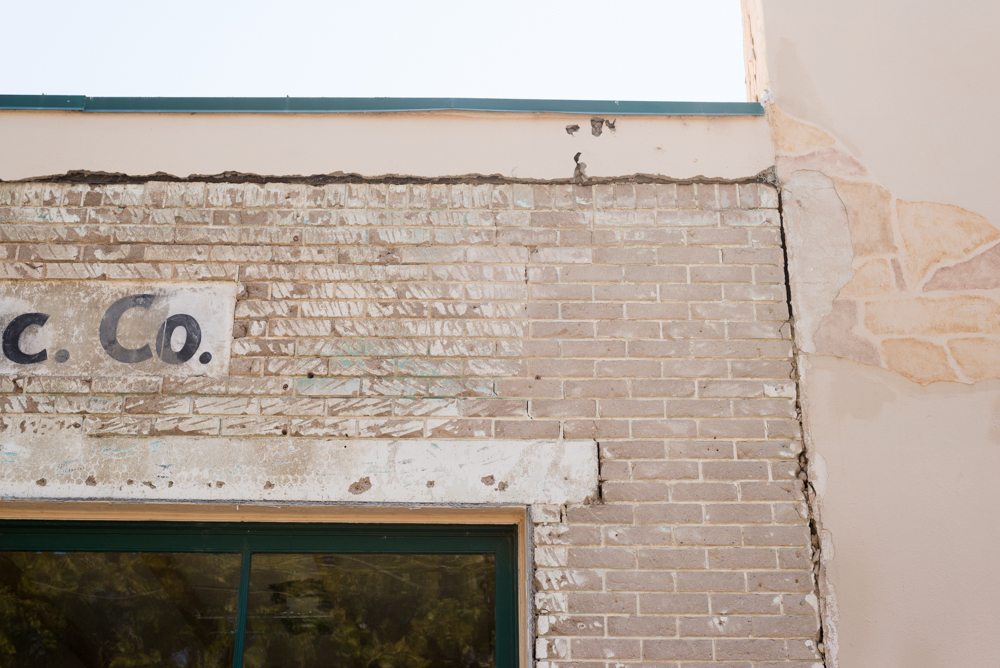
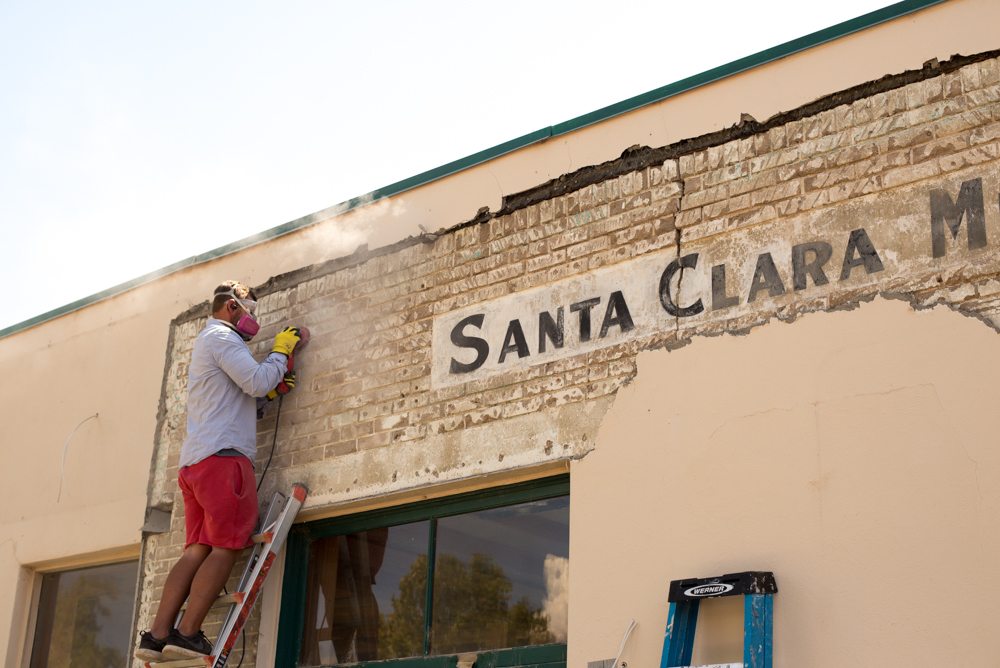
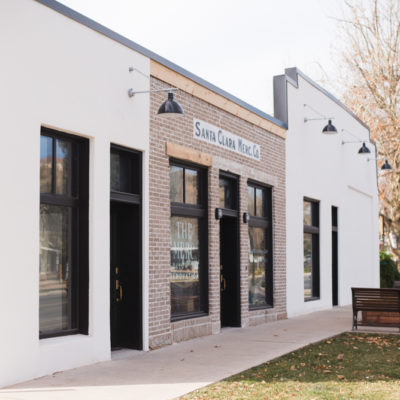
One good thing that came out of the plaster removal was uncovering the original Santa Clara Merc Sign. Oh my gosh, guys it was the BEST!!
Even with the brick in as rough of shape as it was, we weren’t coving it back up so we had some work to do. We tried a few different techniques for taking the paint off and some worked better than others. Loads of you thought we should just leave it, but because the building on either side will have white stucco I was worried that there wouldn’t be enough contrast and really wanted the brick to be its original color.
The first thing we tried was power washing it.
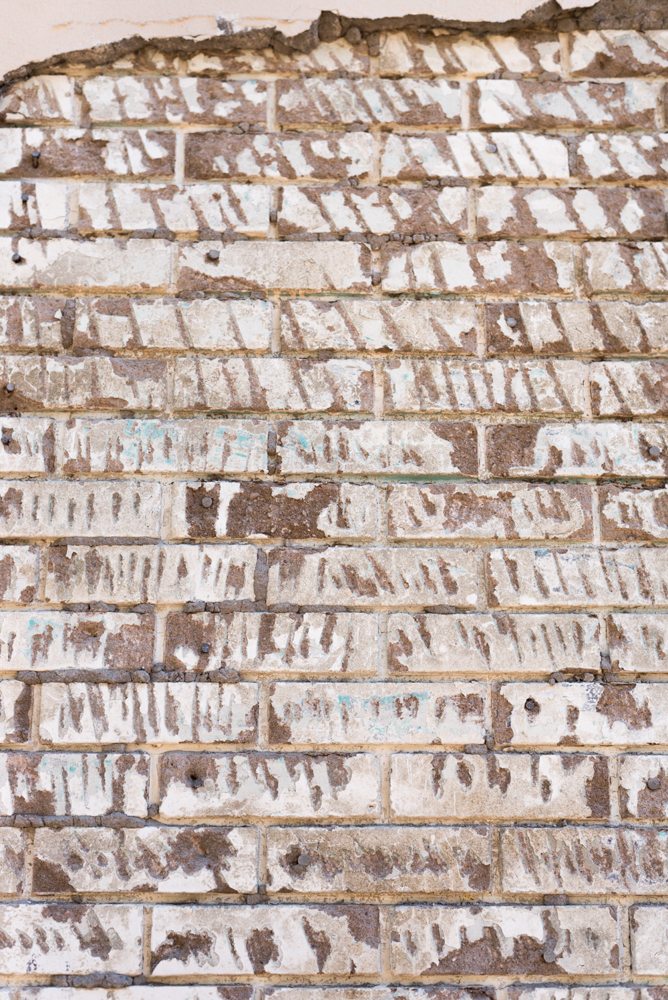
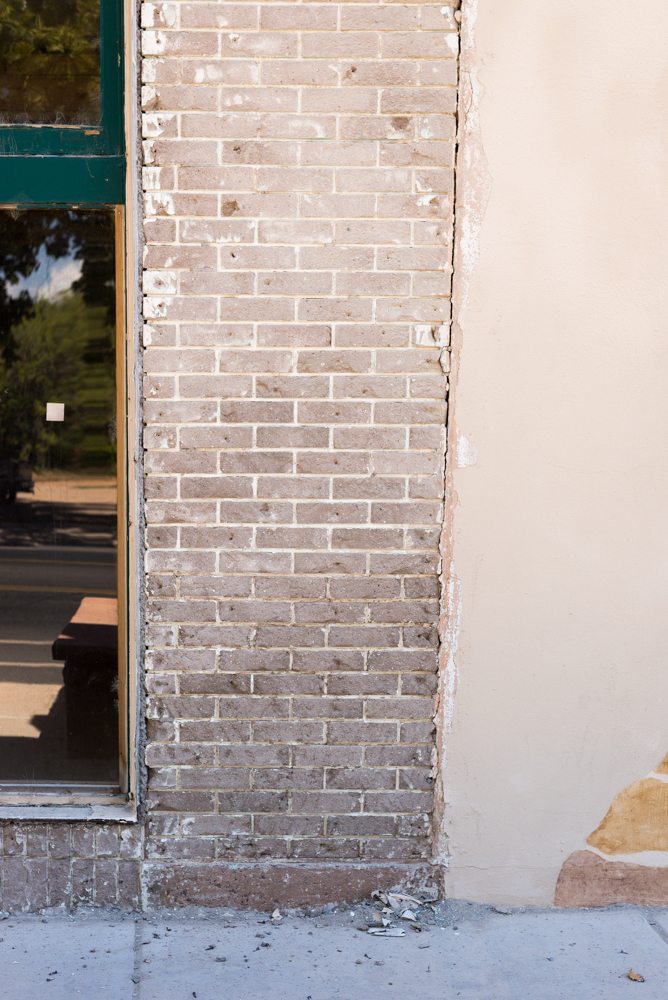
We tried 2 different pressures with it. The first one took off 2 of the layers, but the bottom layer stuck. (This is the lowest section of the wall in the picture above)
The second one was a higher pressure, and while it took the layers off, it also ate away at the brittle brick and left it looking worse than before. (The middle section in the picture above)
The next thing we tried was using a paint stripper and it did absolutely nothing.
We also tried a wire brush on a grinder and while it took the paint off, it destroyed the brick.
After so many failed attempts we finally found one that worked! We used flap disc sanding pads that you put on a grinder and they work SO WELL. We got ours at Home Depot (they’re these ones!)
Look at that!!!
They do take off part of the brick, but just enough to remove the gouges and smooth it all flat. The little indents that you can still see are from where they nailed the chicken wire to the walls.
The lower section where we power washed it is still a little rough but waaaayyy better than it was. I think we’re going to go over it with a belt sander just to smooth it out a little bit more!
Its definitely labor intensive but SO worth it! Can the husband of the year get a round of applause?!
Up next is getting the grout lines prepped and ready for new grout! Its a good thing I’m a pro at this already ?. We will definitely need to seal it to protect the brick because its so old, do you have any suggestions on a good brick sealer? Something that doesn’t leave a sheen is what we’re looking for!
Did you test the paint for lead?!
Yes! It came back negative but we were careful just to be safe!
Can’t believe how well that worked!!! It looks INCREDIBLE!
Make sure you use the right grout for that old brick! I see so many old brick houses destroyed by re pointing with mortar that is too hard, and it makes me sad.
Cool. Looks great.
Speaking of repointing, have you ever read the The Danville Experience restoration blog? Everything I know about old bricks and mortar, I know from them. If you scroll down past the bit about the carpet moths, there’s a great primer on old kinds of brick & mortar and the challenges of repointing: https://danvilleexperience.blogspot.com/2016/06/masonwork.html
Loving all your updates, even though I rarely comment!
Oh wow I just spent the last few hours over there!! Such an amazing thing they’re doing!!
xo
m
Hi Mandi –
Love your blog. I work in historic preservation in Texas and I love seeing how people reuse their old buildings.
I have to admit, when I started reading this post, the grinder scared me. Old brick is soft to begin with and grinding or sandblasting can destroy it quickly. Seems like the sanding pads were a good solution though.
My two recommendations would be for moving forward would be (and I realize you might have moved on already):
1. Talk to the brick professionals at Prosoco. They have many products for old brick that can protect it without completely sealing it, which can damage it further. Old brick is meant to breath, which means it can absorb water and then expel it again. Old wall don’t have weep holes and vapor barriers like new frame construction, so this breathing process is important. Prosoco’s products help to keep this natural process while protecting it.
https://www.prosoco.com/
2. Make sure when you repoint the mortar joints that you don’t 100% Portland. This will also damage the brick as Portland cement is way stronger than old brick. This guide from the National Park Service elaborates https://www.nps.gov/tps/how-to-preserve/briefs/2-repoint-mortar-joints.htm and this guide has a good mortar ratio for historic brick – https://www.gsa.gov/real-estate/historic-preservation/historic-preservation-policy-tools/preservation-tools-resources/technical-documents?Form_Load=88337