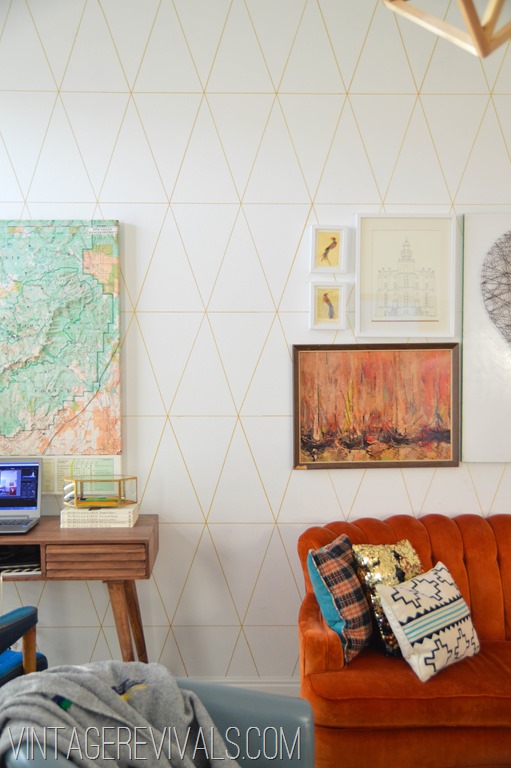
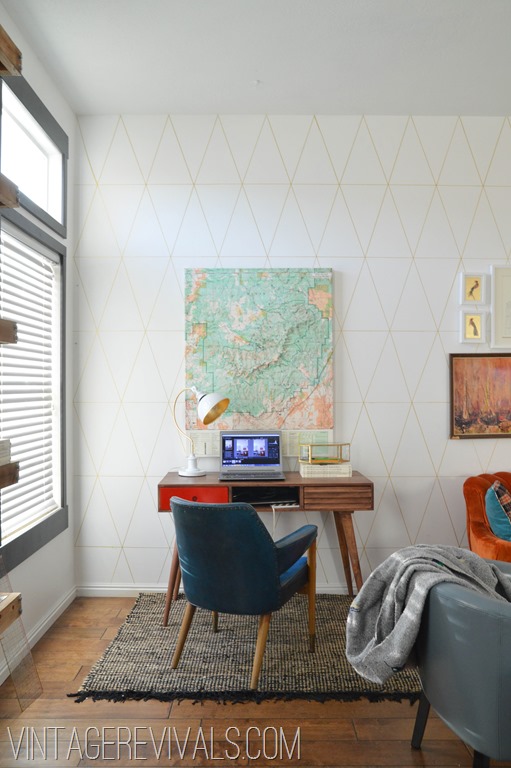
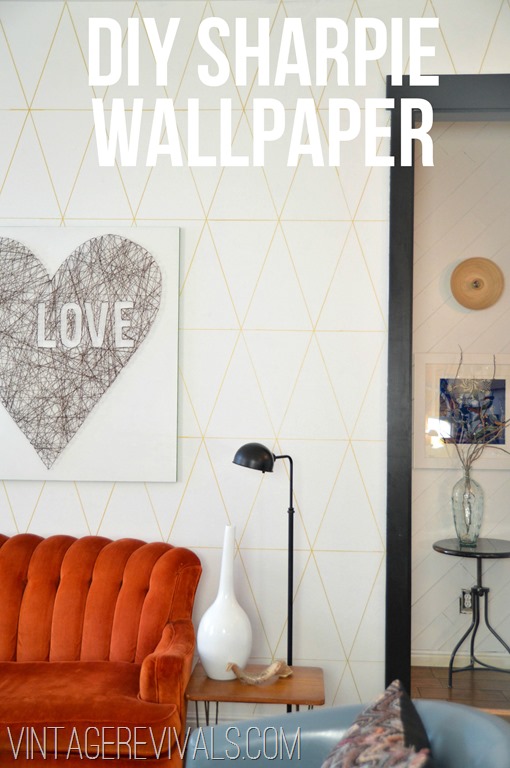
I am so IN LOVE with today’s project I want to lick my wall. Remember last week when we chatted about overcoming a major project/idea fail? This post is what I like to call redemption. Or DIY Custom Wallpaper…without the paper, or the cost, or the mess for that matter.
For those that are new here is a quick recap. In my living room I was itching for Southwest/Tribal inspiration. The original plan didnt work out the way I wanted so I left the walls white. There is nothing better to brighten a room than white walls. I had fallen in love with the white, I didnt want to give it up. Now I have the best of both worlds (sing that in your best Miley Cyrus voice for full effect…)
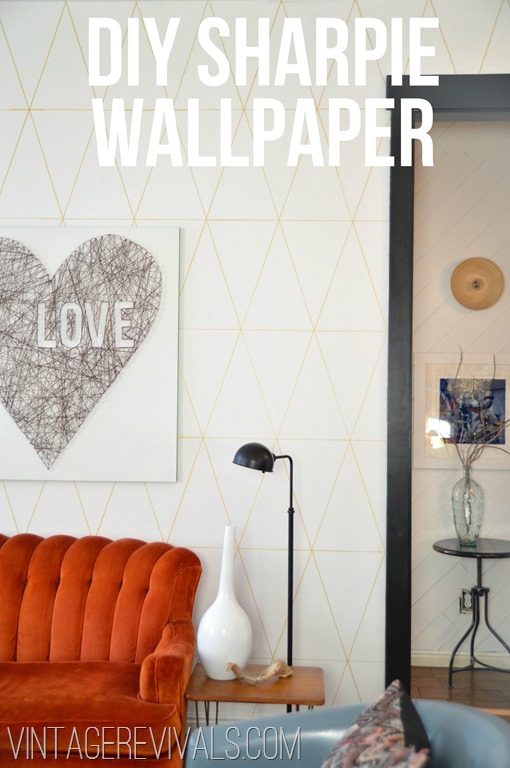
So great right?!! Here is the best part. The entire project cost $8.00! I mean that is like 2 happy meals!! If you are overwhelmed by stenciling, wallpaper is too expensive or want thinner lines that you can get with taping off stripes this project is PERFECT!
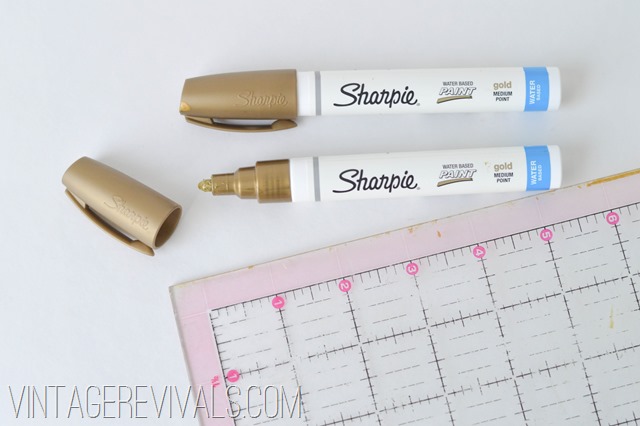
Here is what you need:
Yep, that’s it. A Sharpie paint pen and a straight edge. Make sure that you are getting a PAINT pen and not just a regular sharpie, and make sure that they are water based. Did you know that you can paint oil paint over latex but you cant paint latex over oil? We are using a water based pen for that very reason, in the future if you want to paint over it you will be able to without re-priming your walls.
You can find water based paint pens at any craft store (I got mine at Michaels on sale for $2.50) I used 3 for my wall.
I was inspired by this amazing wall I saw on Apartment Therapy:
I love how this wallpaper looks hand drawn and I love the huge scale of it. So I took what I loved and gave it my own twist with triangles.
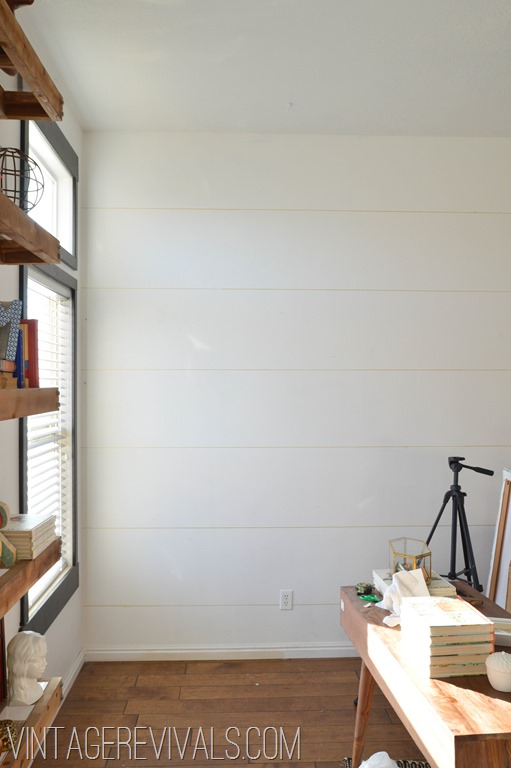
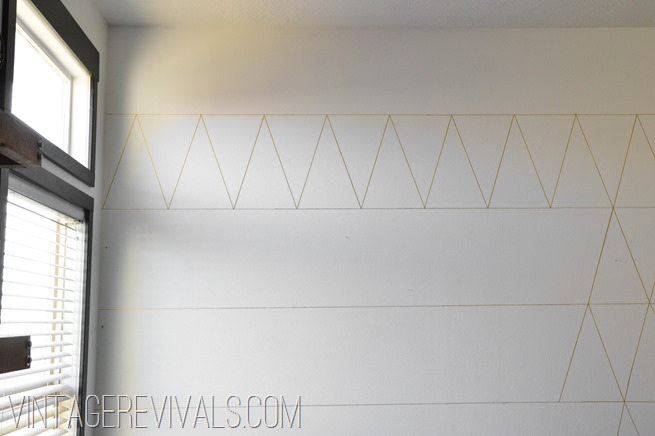
Start by drawing your horizontal lines. Dont forget to use a level folks. My lines are 18” apart. When you are doing a project like this start at the ceiling and work your way down, that way you will end up with a full design at the top and the broken design at the bottom.
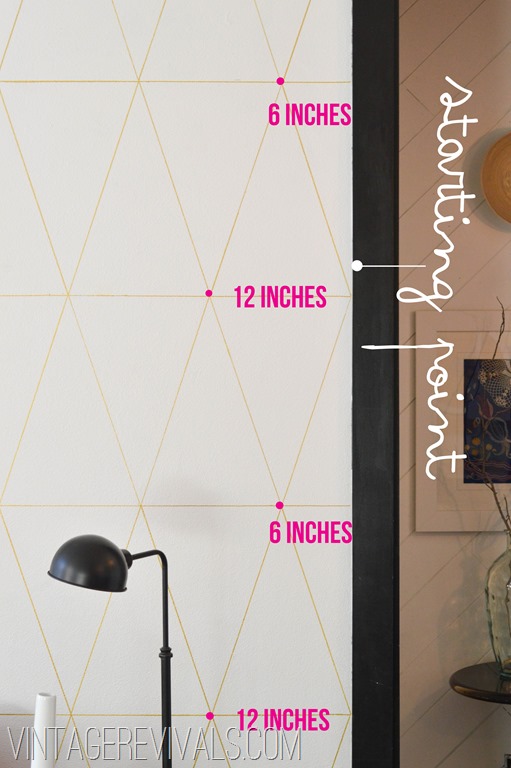
Now comes the fun part, the actual design. First you need to decide how large you want the base of your triangle to be. I wanted mine taller than wider so I decided on a 12” base. Find where your starting end is (against a wall or door frame) and alternate marking the full width of your base and 1/2 the width of your base on your horizontal lines.
There are 2 reasons you are doing this. It is setting the pattern and the spacing (so that the point of the triangle is in the center of the base).
Once you have your starting marks just measure the width of your base from then on (12”) Lets say you want your triangles to be 8” at the base, you would mark (going down your horizontal lines) at 4”, 8”, 4”, 8”. And then mark every 8” from those starting points. Got it?
Now channel your inner 1st grader and using your straight edge connect the dots!
Here are a few tips for working with metallic paint pens.
1. You have to shake them constantly, what ever it is that makes it metallic looking seems to settle on the bottom.
2. If it seems like the pen is drying out depress it onto a piece of paper and that will fill the felt tip again.
3. The paint dries very quickly, but make sure that the line is dry before you cover it with your straight edge because if its not it can smear.
4. If you flub a line you will have to repaint it and then go again, you cant wipe the paint pen off without getting a big yellowish smear.
The best part is that you can do a million combinations of patterns and colors . What about a charcoal wall (like the one I did in the $150 room makeover) with white lines? Amazing.
To do the entire wall in my living room I spend 3 hours drawing, which is WAY less time than it takes to stencil, wallpaper, tape, or paint. This project is perfect if you just need a little spruce up in your house!
Some of the other tutorials I spy in this picture are Love String Art, How To Make A Light From A Bowl, and the always incredible Thrift Store Crewel Art. If you are wanting more hand drawn inspiration check out Wendy’s traditional wall and Elsie’s off the beaten path wall posts.
So what do you think? Is this a project you could handle?



Do you know how fabulous this is?!?!
Well, evidently you do, since you want to link them….I want to scarf them, how fabulous is this???
Very, very well done
Good job! Great idea. Looks awesome in your space.
What a great idea Mandi! Looks fabulous!
***drool***
i am in love..
dreaming about what room to do this to!
thanks mandi!
Amazing! Can’t believe it only cost you $8 and 3 hours of your time!
LOVE THIS. I have a gray wall in my living room…. there may be some white sharpie in its future….
DO IT DO IT!
xo
m
ok I couldn’t take it anymore and I HAVE ORDERED THE MARKERS. they’ll be here Thursday night…. which is perfect, because my fiance just so happens to be out of the house Thursday night, haha 🙂 woo hoo!
wooooooow. It is so amazing. It is a subtle and stunning. I love your creative mind!
LOVE it! Great job Mandi! I am really digging the combination of gold and white lately, probably because of you. I learned it by watching YOU! 😉
Linds I love you more than life. We would have DIED without you at Kelsey’s!!
wonderful!
This looks great!! Just wanted to say though that Sharpie marker is terrible to cover up even with KIllZ and such. It bleeds through. I hope that does not happen to you if you need or want to cover this at a later date.
Hey Eric!
A sharpie paint pen is different than a sharpie marker, it doesnt bleed through (I know cause I had a few mistakes I had to paint over!) Thanks for your thought, I am sure there were others that were thinking it!
xo
m
Oh. My. Gosh. This is amazingness!!! I am so in love (and still jealous of that map find every time I see it)!
OMFG YOU JUST BLEW MY MIND!!!
pretty cool my friend… and easy to do (just takes a lot of time)!
Holy freaking CRAP Mandi! That turned out SO dang good. I am glad you ballsed up (is that even a term? haha) and did it! It looks fab!
Thanks for the shout out cute Mandi! Love how your wall turned out!!! xoxo
Beware! My daughter did a stained glass cross in her bedroom that she outlined with sharpie and many layers of “kills” primer and several layers of paint later, the sharpie is still bleeding through:(
Talk about going weak in the knees! gold and triangles are 2 of my latest obsessions. 🙂
LOVE it! Such a great idea and great pattern you designed. Do they have lots of sharpie paint pen colors?
This is crazy good. I’m totally sitting here in amazement right now because the possibilities are endless.
Angela
Love it! Totally doable, doesn’t break the bank, perfect for a small accent wall, and easy to cover up when your over it…awesome!
Pretty cool Mandi!
I was going to comment how it looked like my inspiration photo for my office walls, but it’s the same pic that inspired you! Too funny. I will be doing it without the triangle effect, though I think you’re a genius to do it like that! Hmm, I may have to look for a sharpie in the color I want instead of painting it now, bc $8?! Awesome. GRRRRRRREAT job as always Mandi!!!
Amazing! I love it.
do you think this would work on textured walls?
That’s what I want to know too! I been thinking about stenciling my pantry walls but nothing about the idea was exciting me…until now!
too awesome.
WOW I love it!!!!
Oh my! You are my hero! I am totally doing this!!! LOVE it!
I thought about not commenting but then I realized that no one can ever hear how talented they are too much. Your blog is one of my favorite on my reader. Everything you have done lately I love! You are super duper talented, seriously!
I agree with all of the above. I have nothing new to add except WOW ZOWIE and I don’t really have a good place for this effect but it looks so fun I just want to do it anyway.
Love, love, love, love, love! We are getting ready to move at the end of March and I am so stinkin’ excited to have a fresh new “canvas” to decorate! I’m definitely going to try something like this in one of my rooms. Amazing. You blow my mind.
This is awesome! Love that it takes much less time than stenciling, especially if one is into geometric shapes. Though from reading these posts some people still seem to think you used a regular Sharpie, which would bleed. So again, this was made using a Sharpie metallic PAINT pen.
One word. AWESOME! I feel like I can do this!! What do you think about stripes? In my master?? 🙂 thanks for sharing!
flippin adorable
Love this! And love that map? Where did you find that gem??
This is so genius, I cannot wait to try it! Thanks for sharing.
I love this…and can’t believe I never thought to do it.
Amazeballz Mandi. So simple yet original. You have saved me time & my wallet from buying a $40+ stencil (in a crazy easy pattern) to make my laundry room understated, yet fabulous. Well Michael’s here I come!! Maybe I’ll send you a picture when I get it done:)
Amazing Mandi!!
This is ridiculously amazing! I can’t believe how amazing it looks! Well done!
Love, love, love this idea! Will be proposing to my client that we do this in here hallway! Perfect for those on a budget : )
Sharpie paint pens…..genius! Looks awesome!
Love it! Such a huge impact for so little time and money. Amazing!!
That is so cool – your ‘fail’ turned out pretty good 🙂 Simple but artsy.
Shut UP! This is crazy awesome… pinning!
Stop being so awesome!! Wait. Don’t stop, you are so inspiring 🙂 xo love you!
i love all your work!! sorry i don’t comment more, but i did want you to know i check in on your blog often, your amazing and so full of talent! and i do have something for your what would you do series, i just gotta get my crap together and e-mail pictures… then i can have a touch of your awesome-ness in my house!
and one of these days we need to coordinate so we are visiting slc at the same time and do a big girls plus grandpa lunch or something, wouldn’t that be fun! it’s sad, i feel like i don’t see anyone anymore! but just know i love you and your cute family from afar!
FABUUULOOUUUSSSS!!!
Love it!! Can’t wait to try this one day!!
LOVE LOVE LOVE! I’ve been wanting to do a pattern on one wall instead of wallpaper. I would think you could do the same thing using the sharpie paint pen? Right? I love the paint pen idea so it can cover later! You continue to be awesome! HUGS!
I have never seen those pens! Great idea, might have to use in my son’s bedroom to save on the cost of a stencil. I originally wanted to do an allover birch tree stencil – but this could be modified. Thanks for the tips.
Look at all these comments…I’d say you’re past the puberty stage, wouldn’t you? This is a fabulous idea, but I wouldn’t expect anything less from you. You rock!
What an awesome idea…love it!
Love it!! I would have never thought of that. Thanks for the idea!
Love this idea. Your walls look amazing!
between this idea and your love art piece…..i’ve got a hefty to-do list ahead of me!
Super idea, saw this with tape but the sharpie would be easier…very smart!
You are a really good tutorialist. The wall is fabulous and I’m already planning which wall is getting this treatment, but I have to tell you how impressed I am by your explanation. You really have a gift, not just of creative ideas, but of how to explain the execution. So many bloggers can carry out their own ideas, but can’t explain in enough detail, clarity, and pictures how to duplicate it. I write for a living (and see plenty of poor writing in the process), so I can truly appreciate the talent you have. I hope you realize that is one of your greatest strengths.
answers! so fab!
Yet another awesome DIY courtesy of Sharpie paint pens! Looks like I just found another use for mine. I swear those things are addicting!
This is so amazing, I am pinning for when I actually do it and I soooo want to! Thanks again Mandi, you inspire me!
Holy cow, this is like perfectly done! How on earth did you get your lines so straight and perfect looking?!
Chloe
https://rainbowsandhoneysuckle.blogspot.com/
I love your wallpaper! I am featuring this at somedaycrafts.blogspot.com
Love it!
This post makes me want to eat paste for some reason. 🙂 Super cute – wish my walls weren’t textured. Now, I’ll be wondering all day what I can take my paint pens to…I’m thinking the blah curtain on the back door could use a good kindergarten treatment. Thanks for the idea! ~ Dee
oh my word this is fantastic. i love that it is done with a freakin sharpie pen! amazing.
I just discovered your blog, after seeing your sharpie marker wall on thenester.com. How did I not know about this before?! Loving it! Can’t wait to see more! – Christine (www.saltandtwine.wordpress.com)
Amazing idea … love it!!!
LURVE!!!!!!!!!! Now that I have popped over here, I realize there are so many projects that I love of yours. So fun to meet you at Alt. Will be following you along your journey for sure.
so good…totally love it.
I love your sharpie wallpaper!! I tackled a sharpie+paint wallpaper in my bathroom. Well, it’s actually a {schumacher}wallpaper knockoff. It took a loooong time, but I love the results and the $ in my pocket 🙂 Always love your projects!If you want to check out my sharpie walls:
https://shannonberrey.com/_blog/Shannon_Berrey_Design_Blog/post/Bathrooms_done!_schumacher_birds_DIY_
shannon berrey design
http://www.shannonberrey.com
Love this! I think I finally found a solution for my stairway to the basement!
Totally love this project!!!!
WOW, this looks amaaaaazing! And such an original look and idea!!
Okay, this may be obviously silly, but my walls are textured. Will this work for my walls too? or is it too risky? How would I try it out?
Not a silly question at all!! My walls are textured and it worked great! You might have to go a little slower drawing the lines, but it will work.
xo
m
LOVE your wall! I tried this too with a Sharpie but my lines didn’t turn out even, I think it’s because I used a thick marker… hmm. Anyways, I have this linked to my wallpapers post too today – for inspiration!
Mandi, I’m a believer & a faithful follower. Now, I am a believer & faithful follower of your blog, as well! Good job- You’re very inspiring! (this is coming from a person who only subscribes to two blogs- the other one is a good friend of mine) so I mean this a big compliment! Truly, Julie PS. I’m Doing Sharpies on the wall of my bathroom in country club pink and green:~) Thanks Doll!
I just found this and wanted to say thank you times a million! Doing this in the powder room this weekend!
You are so talented it’s ridiculous! You know that right?!?
Wow, talk about being creative. You basically created your own wallpaper using a $3 Sharpie. Great advice for folks who are trying to decorate on a budget or want to get creative with what they already have.
Love this idea! So simple yet with just enough impact and gold too, well done.
Hello! I featured this tutorial on my blog (:
https://thisblackbirdsnest.blogspot.nl/2013/10/home-decoration-diy-roundup-1-walls.html
In a moment of inspired insanity, I repainted my dining room walls and used this genius idea of yours. Then I blogged about it, linking to this post. Thank you for being AMAZING!!
awesome work! you forgot to ad a line on the bottom left of the second to the last photo. haha i am a bit observant
Hey everyone! I’m actually in the process of doing this project right now and wanted to share a happy coincidence – well, sort of. I was drawing my horizontal lines when the paint pen caught on a spot on my wall and stuck and gushed paint all over and down my wall. Well, I quickly grabbed paper towels to try and wipe up the excess. When it made an enormous yellow smear on my very light gray walls, I decided to try what I always whip out when my two year old has a little too much artsy-fartsy fun in my house – a Mr. Clean Magic Eraser. Luckily for me, it came right off. I even had a couple of spots in the lines that weren’t perfect and I used the corner of a small Magic Eraser to correct the lines and they now look great. So get a Magic Eraser if you want to do this project – or if you’re like me and nothing turns out quite perfect. Thanks for the AWESOME project Mandy! I can’t wait to finish!
Hi–I clicked over from Apt Therapy. What a great blog you have! I spent way too much time clicking all around with your irresistible links. I’ll be back. Love your wall, too.
Too bad I can’t post a photo, but I just did this this weekend (found it through Apartment Therapy) and I am so excited about it! It gave the blank wall some real pizzaz and changed the whole room, which I’d been struggling to have come together. Try it!! Isn’t it funny that NBC is using this same geometric for the background of their Olympics coverage? Did you notice?
Jennifer you can upload it to instagram and hashtag it #myvintagerevivals and then everyone can see it!!
xo
m
I found my way to your blog via Pinterest and coaxed my hubby into doing the Sharpie accent on our big blank boring tan family room wall. It was just what the wall needed! The tan wall with the gold accent is a fabulous combo and I LOVE how the light picks up the design. I still need some artwork to finish the wall, but at least I have a more interesting wall to enjoy in the meantime. Thanks for sharing this inexpensive and AWESOME project!
Genius! This is amazing Mandi!
You might be a fan of my Sharpie “wallpaper”! https://kellygenelife.wordpress.com/2013/03/15/faux-wallpaper/
It’s my most favorite part of my entire house! I’m loving that gold Sharpie paint pen, though, so I may be tackling another room so I can try it out. You used two pens for just one wall, right?
Hi Mandi, I have just done this on my study wall! It looks AMAZING! Just wondering if you would be happy for me to link back to your blog to show people where I got the idea! thanks, Allie
Sure!! Thanks Allie, I cant wait to see it!!
Thanks Mandi! The post is up. We did the wall in silver and looks so beautful, thanks so much for sharing the idea!!
This looks amazing! So simple, yet so elegant!
I am in love!!! I am about to do an office/craft room makeover and incorporate gold….hmmmm 😉
Stacy
http://www.anygirlcandoit.com
Hey!!! Loved this post the moment I saw it and just got around to do it in our bedroom today and it looks FREAKING AMAZING!!! The whole time I was doing it I was whispering to myself “Oh my gosh this looks so cool” … for reals, like 50 times haha I did gold paint on a tan wall and I love it!! The design shows beautifully but is still subtle and it was sooo easy 😀 Thank you so much for sharing this beautiful post!! 😀
Thank you for so much inspiration for me and my boyfriends new apartment. I’ve been raving about you on my blog and I did my entire dining room with gold sharpie paint pens and it turned out fantastic! I gave all credit to you and linked back to here. If you ever get the chance to check it out you can see the before and after here:
https://www.openheartbeats.com/2014/06/home-sweet-home-diy-gold-sharpie-wall.html
LOVE YOU TO PIECES
Jess Feavel
What do you think if I tried this on a turquoise/teal accent wall. Do you think the gold would show up??
I think it would! Do you have the paint? Maybe do a test on a painted piece of paper?
Thank you!! Good idea☺️
I absolutely LOVE this idea! I’m a designer and I’ve been brainstorming ways to tackle white apartment walls without leaving tons of nail holes or having to do some serious repainting during move-out time (as if moving out wasn’t bad enough). I browsed Sharpie’s website and reviewed the water and oil-based paint pens and their lists of suggested uses, but none of them included walls or cleaning methods. I know for regular Sharpies, although permanent, are not so permanent with some elbow grease. So this leaves me with a few questions for you…
How easy is it to clean the surface with the Sharpie marker applied to it? Do you have to treat the walls with water-based paint pens and oil-based paint pens differently when cleaning? Have you noticed any smearing or fading caused from rubbing or wiping? What cleansers do you use (or stay away from) on the walls with the paint pens? Do you feel as if this wall application would be tolerable for a bathroom setting with a humid environment?
Sorry for all the questions! As a fellow designer, I’m sure you understand how there are tons of things to consider before starting a project;)
I really want to do a wall like this in my office! I understand that you used a level to keep the lines straight but I don’t understand how you managed to create the initial horizontal lines. Did you use something to trace? Would it make since if I used one of those level/laser beam things?
Definitely a great alternative to more expensive painting options!
Do you know if the sharpie will smudge or run if used in a bathroom because of heat or steam? Thanks!
Did it in my entryway! Looks so great! Wish I could post a picture! (Sorry for my english, Im french speaker)
Hey- that looks great and its right up my alley! Question: when you got to the end of your straight edge (on the long horizontal lines) and had to start again, how did you keep from making that ‘new starting point’ so noticeable?
I am guessing you have non-textured walls. I am trying to do this in our kitchen and the walls have the standard texture and it isn’t looking clean. Any suggestions? I really want to re create this!! Thanks 🙂