Building lights is sort of my thing. It is honestly my DIY spirit animal. That being said this light pushed me to the brink. Not because it is hard, but because I was trying to figure out the best way to do it in the most uncomplicated way possible (which complicates things). So after trying out 3 different types of wires and few hardware swaps I am SO excited to share with you the most simplified version of this brass bent arm chandelier!
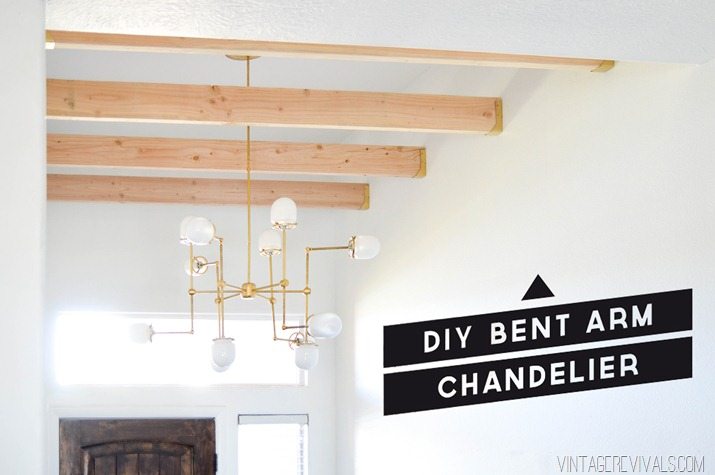
A few weeks ago I was thumbing through a magazine and came across this gorgeous light from Circa lighting. I loved all of the different angles and the whole feel of it. I also love Lindsay Adelman and her branch lights so hard. I knew that I could use both of them as a jumping off point for an amazing light in the entryway.
After spending a few hours on Grand Brass looking at all of the parts that they had, and a lot of sketching I came up with a plan (and ended up with a lot of parts.) All of the serial numbers for the parts are listed after their description.
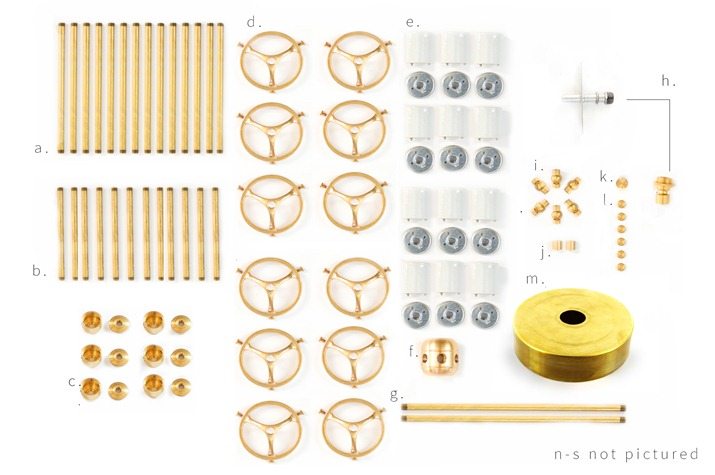
a. (12) 8in. X 1/8 IPS HOLLOW BRASS PIPE STEM (PIBR08-0X8)
b. (12) 6in. X 1/8 IPS HOLLOW BRASS PIPE STEM (PIBR06-0X8)
c. (6) 1/8F sides X 1/8F bottom X 1/8F top SMALL CLUSTER BODY (BOS2X8)
d.(12) 3-1/4in. SPOKED HOLDER CAST BRASS with 1/8F TAPPED HOLE (HO3-1/4S)
e.(12) PORCELAIN SOCKET (SO10045C)
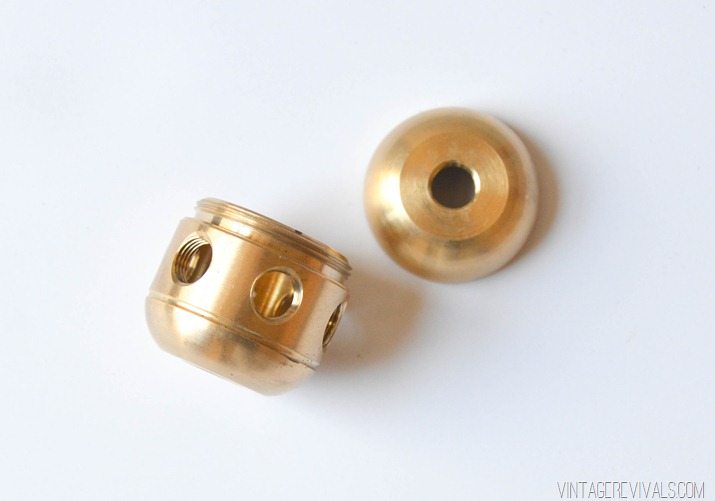
f. (1)1/8F sides X 1/4F bottom X 1/8F top JUMBO CLUSTER BODY (BOJ6)
g. (3)* 12in. X 1/8 IPS HOLLOW BRASS PIPE STEM (PIBR12-0X8)
h. (1) 1/4IPS PIPE PENDANT HANGING CROSS BAR SET (CB208)
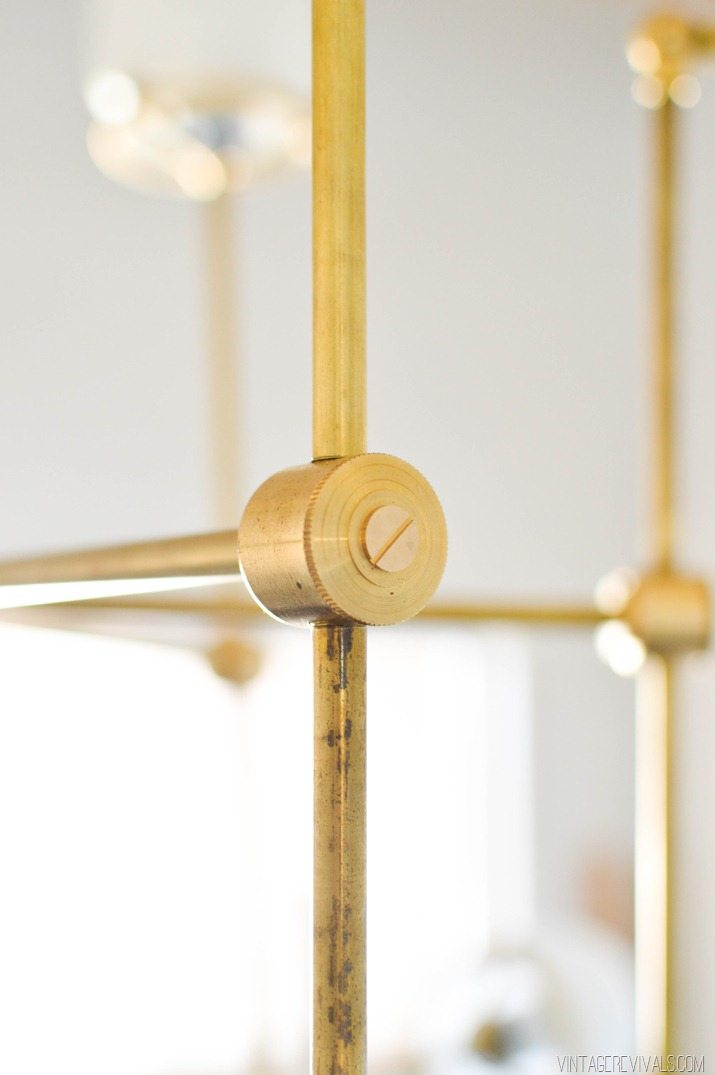
i. (6) 1/8F X 1/8F ips. ADJUSTABLE FRICTION SWIVEL (SV140)
j. (2)* 1/8F THRU 5/8H X 5/8W STRAIGHT COUPLING (NE438)
k. (1) 1/4 PLUG WITH SCREW DRIVER SLOT (FI1/4PLUG)
l. (6) 1/8 PLUG WITH SCREW DRIVER SLOT (FI1/8PLUG)
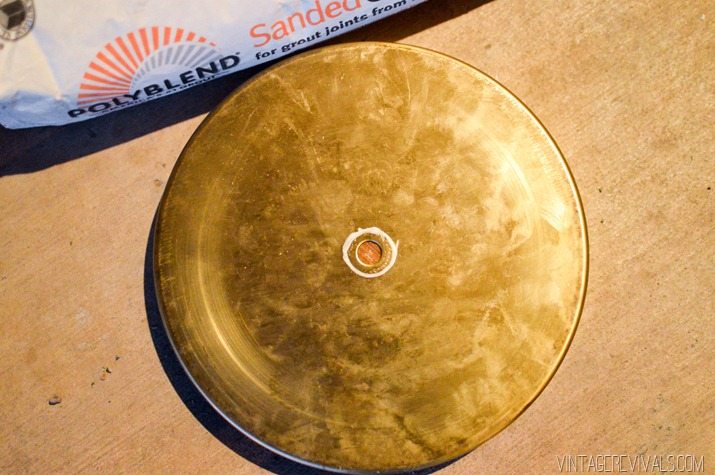
m. (1) 8in. BRASS FLAT BASE W/RETURN (BAFL08NW) (We had to drill our hole larger, so if you dont have a tool to do this they have some that are smaller in diameter with a bigger hole.)
n. (12) OPAL 3-3/4″ DIAMETER X 4-1/8″ HEIGHT WITH 3″ FITTER ROUND BOTTOM CYLINDER TUBE (GLC304)
o. (12) 22-10 Crimp Sleeve
p. (2) large wire nuts
q. (2) Medium wire nuts
r. (1) Wire stripper/cutter
s. Lamp wire
*dependant on the height of your ceiling
While this project isn’t horribly hard (now that we know the right way to do it) it’s definitely not on a beginner DIY level.
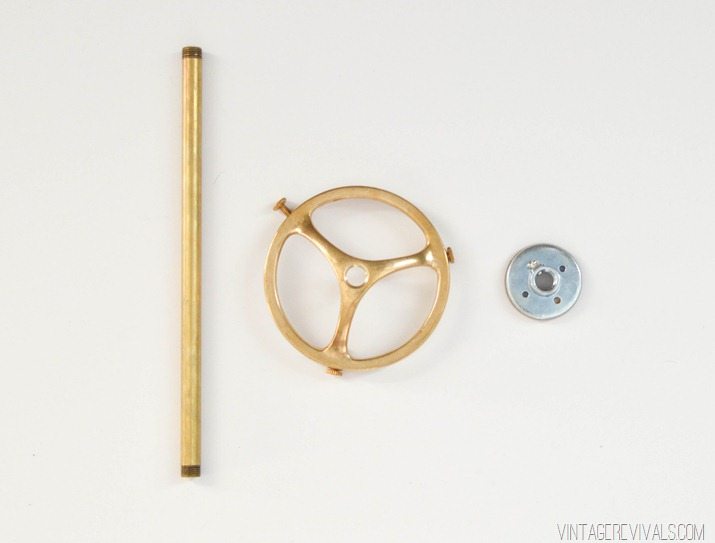
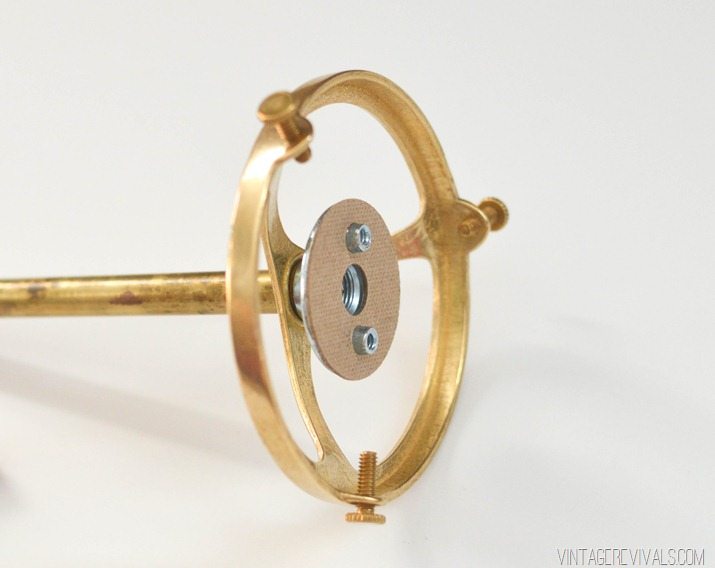
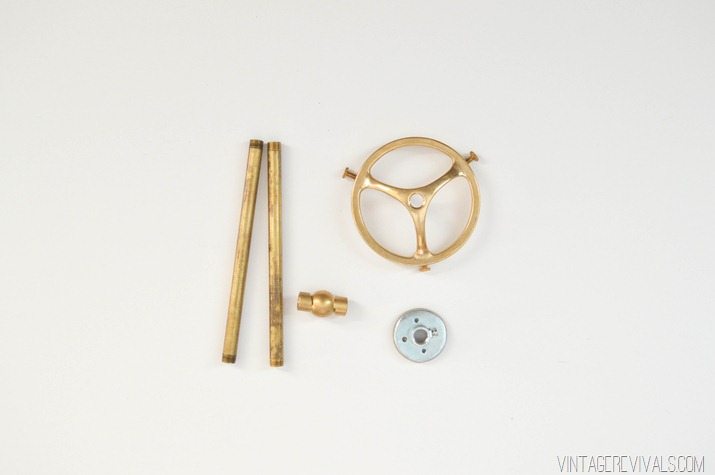
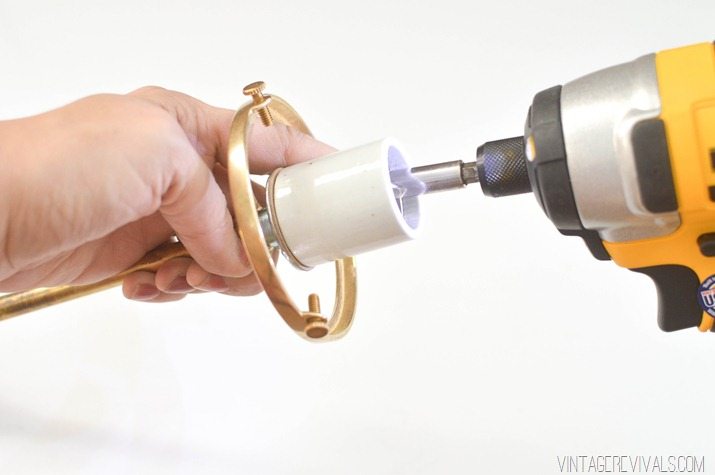
You are going to start by assembling your short arms (these are the arms without the bend) using the 8” brass pipe (a.), the spoked holder (d.), and the metal base for the socket. (Make sure that once everything is assembled you tighten the small screw on the socket base.) This will keep your entire socket from unscrewing when you are changing the light bulb.
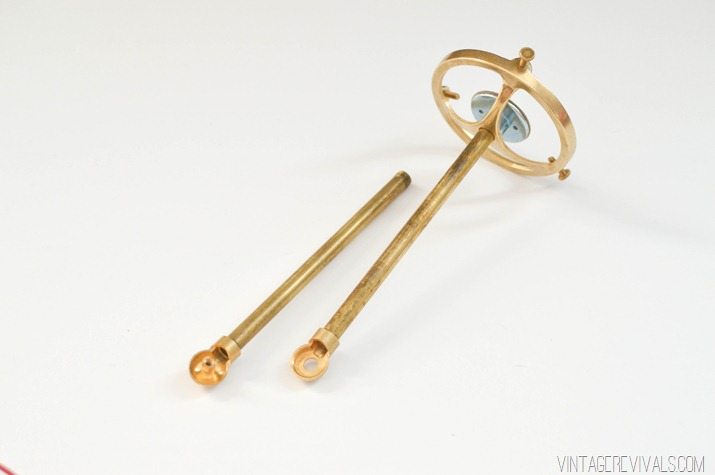
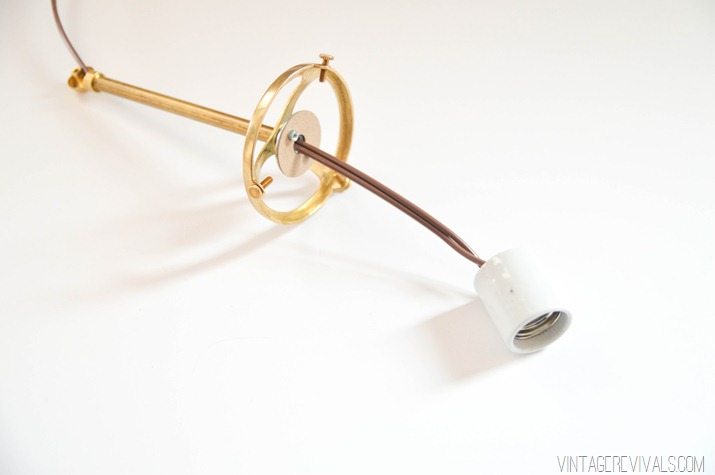
Next you are going to assemble the longer arms using 2 of the 6” pipe (b.), the spoked holder (d.), the metal base for the socket (e.) and the friction swivel (i.)
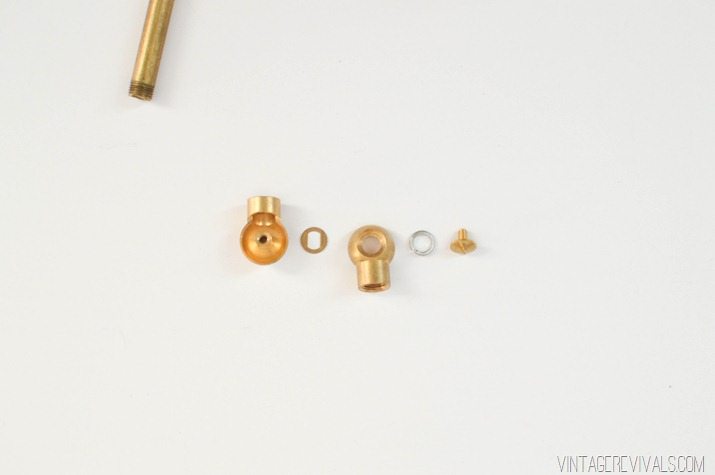
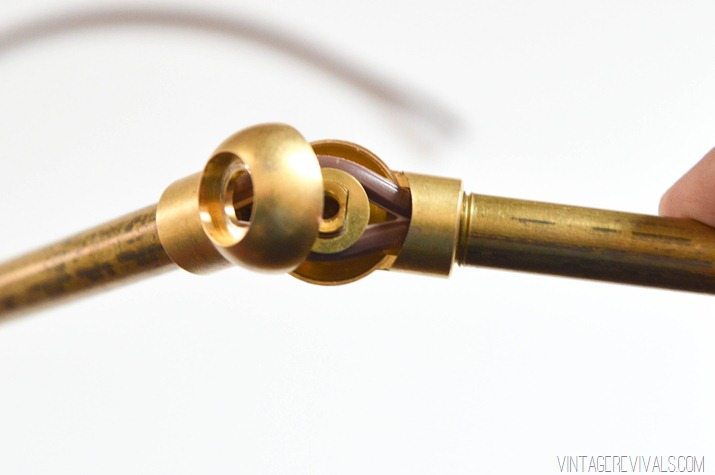
Take apart the friction swivel (dont lose the little bits!) and attach each side to the brass pipe.
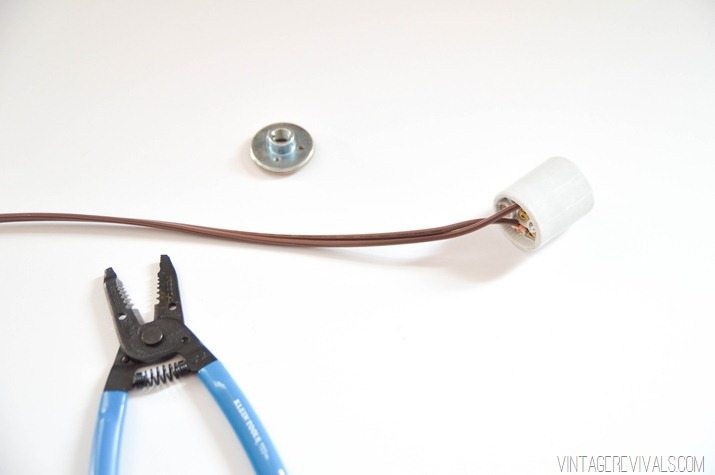
Wire your socket by checking for the textured edge on your lamp wire. The smooth one is hot and will be connected to the gold screw inside your socket. The textured edge is going to be connected to the silver screw.
Then feed the other end of the wire through your socket base and brass tube.
Attach the socket to the base.
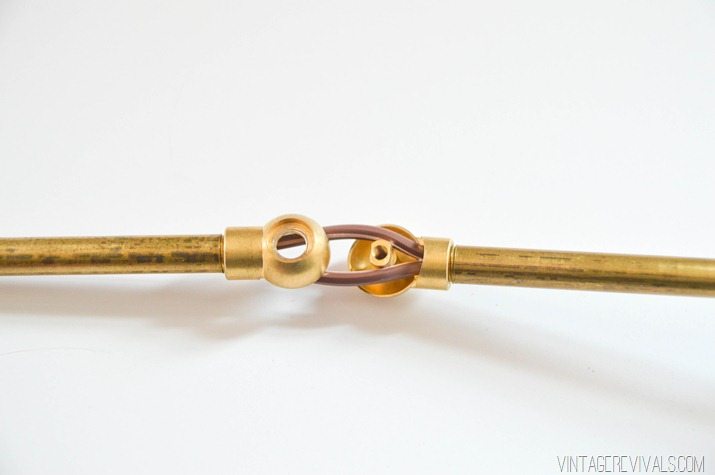
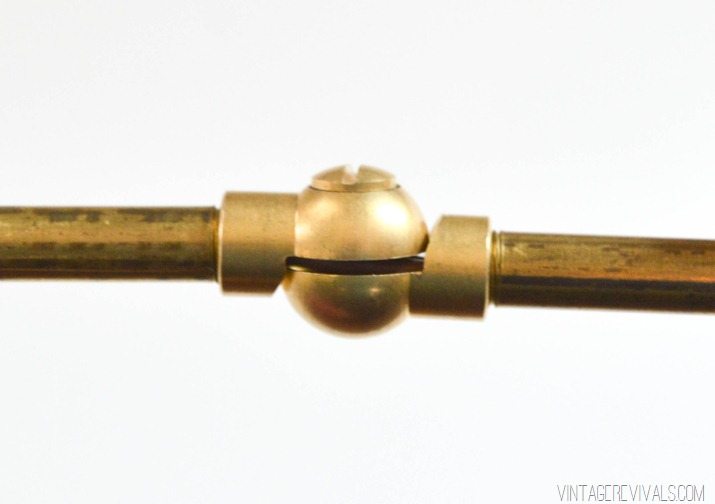
When you get to the friction swivel you will have to split your wire to go around the post in the middle (I just split mine from the bottom, up to this point).
Reassemble the swivel using all the little parts that you didn’t lose (because you are AWESOME!!)
I didn’t tighten the screw down all the way until I was completely done with the light (it made things a little floppy) but it gave me a little more play with the wire.
The next step is connecting your short arm and long arm to the hub and adding a 3rd wire that will connect everything to the main body of the chandelier. This was hands down the most complicated part of the entire light.
So here is what I learned.
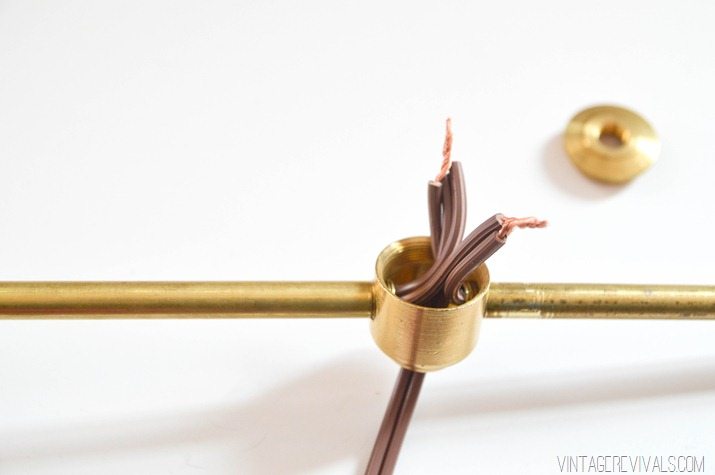
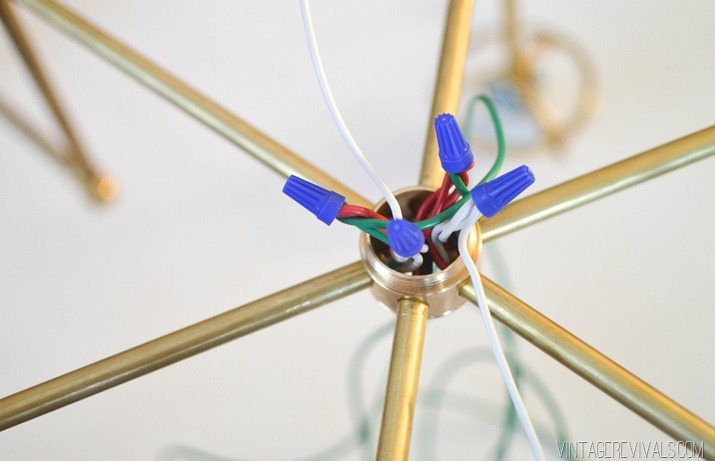
Starting with the fact that the wires in this picture are WAY too long. But it is all I had to show you so sorry about that ;).
Make sure that the wires that are coming into the hub are on the same sides (hot, hot, and hot, neutral, neutral, and neutral) this will give you a little more room because they aren’t crossing over each other and adding more bulk to the situation.
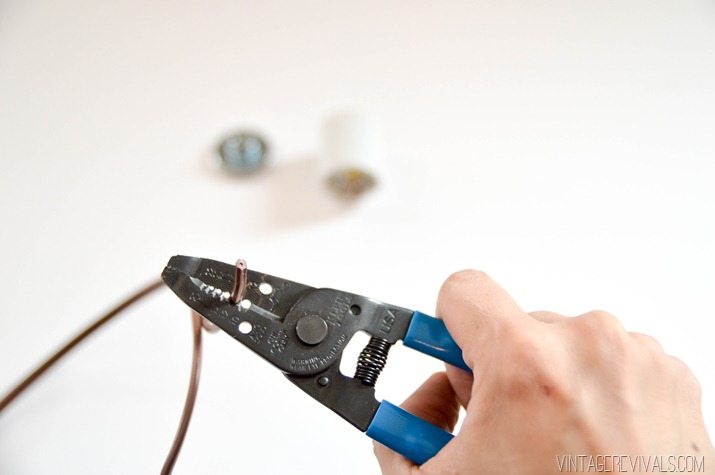
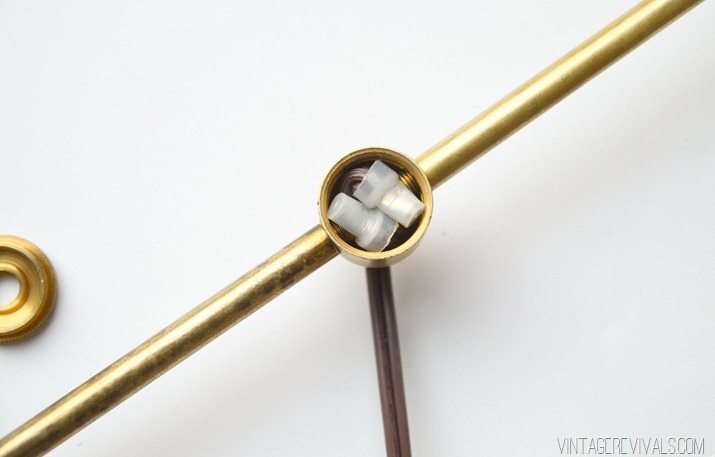
Cut and strip the wires as short as you can while still being able to mange them (I think ours ended up about 1/2”-3/4” long) Twist the wire together and clamp it with a wire clamp (we had to trim a small amount of the plastic off of the edge of the wire clamp)
Lay it in as flat as possible. Once you have both of your wires clamped and sort of inside, gently pull on the 3rd wire (it is still exposed at this point, it hasn’t been covered up by the brass tube) and suck everything inside the little chamber.
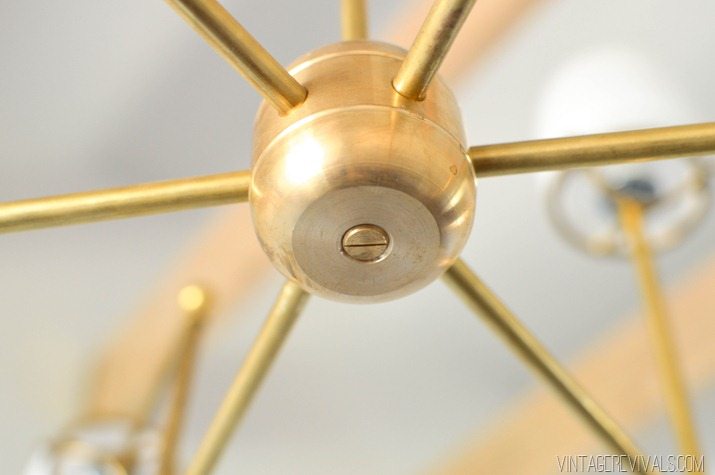
Then add the cap and the screw plug.
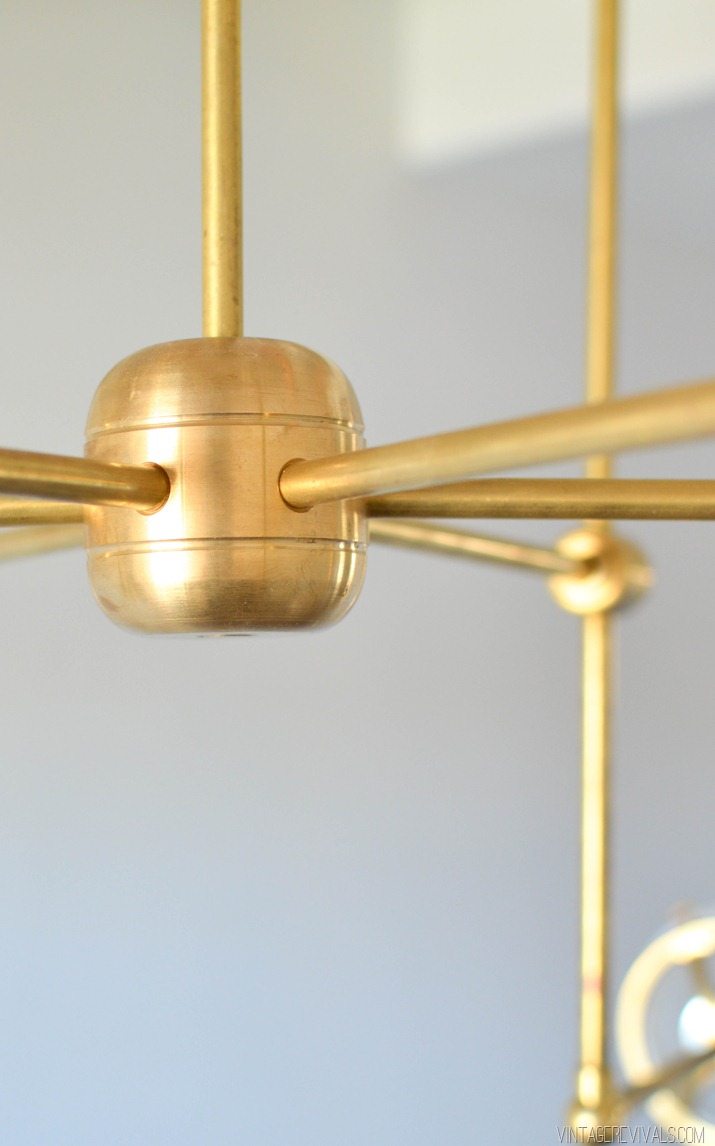
Thread your 3rd wire through an 8” piece of pipe (a.) and connect it to the main body of the chandelier (f.) The body of the chandelier is an egg shaped brass piece that screws apart. When it unscrews, the piece with all of the holes is the bottom section. (This is a mini version)
Repeat for all 6 arms. When you are attaching them make sure that they alternate which arm (long or short) is on the top.
Once you have all of your wires in the main center hub take all of the hot and twist them together, adding one more long length of wire. This will be the main wire that runs up the stem to the ceiling. We found that it worked best to twist one group and then after the wire nut was on to tuck it down inside so that it was out of the way before twisting the second group.
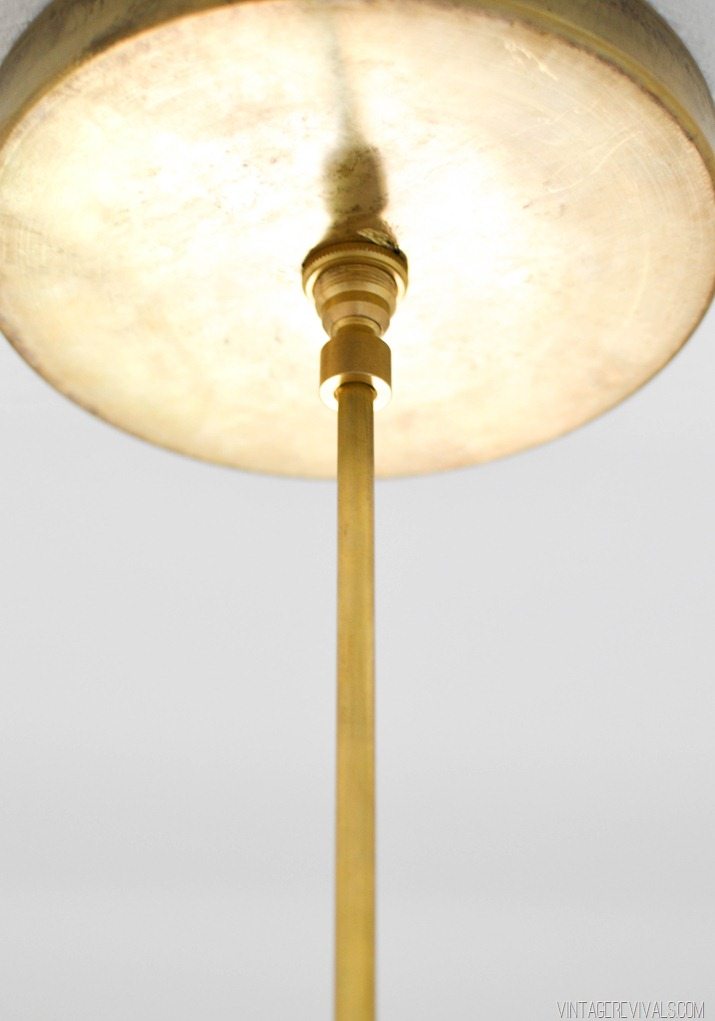
To assemble the stem that comes out of the ceiling you are going to use the 12” pieces of pipe with the straight couplings. The amount that you need is based entirely on how high your ceilings are and how low you want your light to hang. This will attach to the hole in the top of the upper body section. The bottom section has a larger (1/4”) hole that you will cover up with the screw plug.
Add the large screw ring for the canopy (it comes attached to the hang straight coupling), the canopy, then the hang straight coupling and the cross piece in that order. Tighten everything up. I mentioned above that the canopy that we ordered had a hole that was too small. We used a hole saw that we had left over from this project to make it bigger.
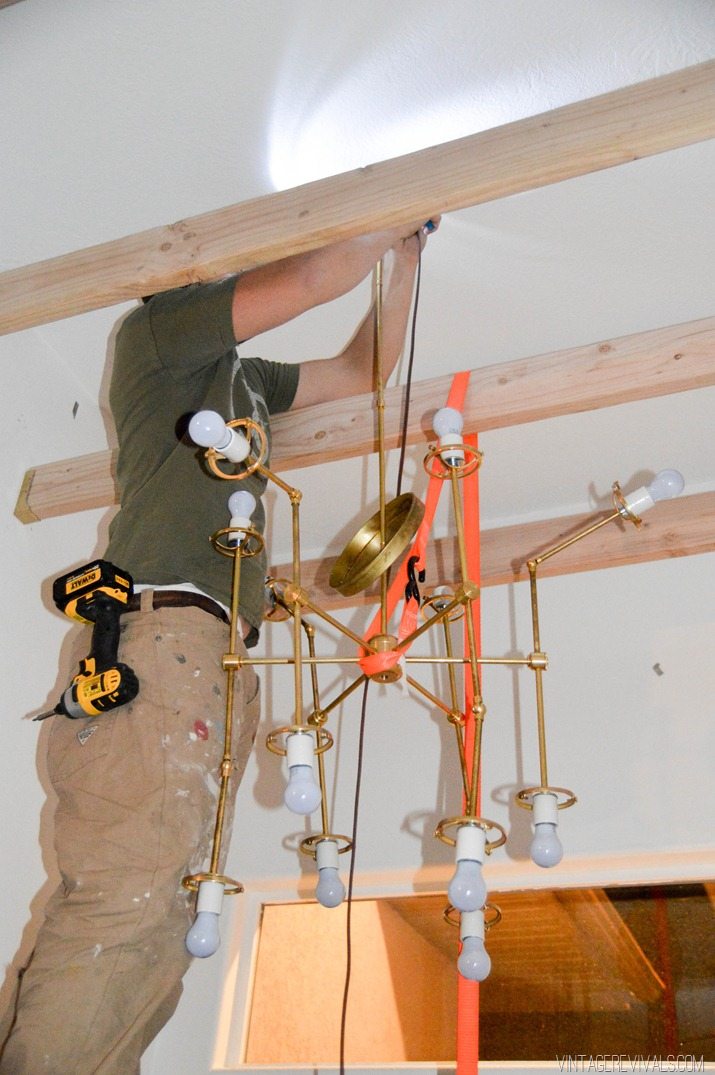
Now comes the fun part. MAKE SURE THAT YOU TURN YOUR BREAKER OFF BEFORE YOU WIRE YOUR LIGHT! (yes that was me yelling, it is critical.) Attach it to the ceiling with the cross bar, wire it to the house wires and bring the canopy to the ceiling and tighten the screw ring. Dont attach the cross bar first, and then try to screw the light into that, it will just twist your wire up. Get the hang straight attached to the cross bar first.
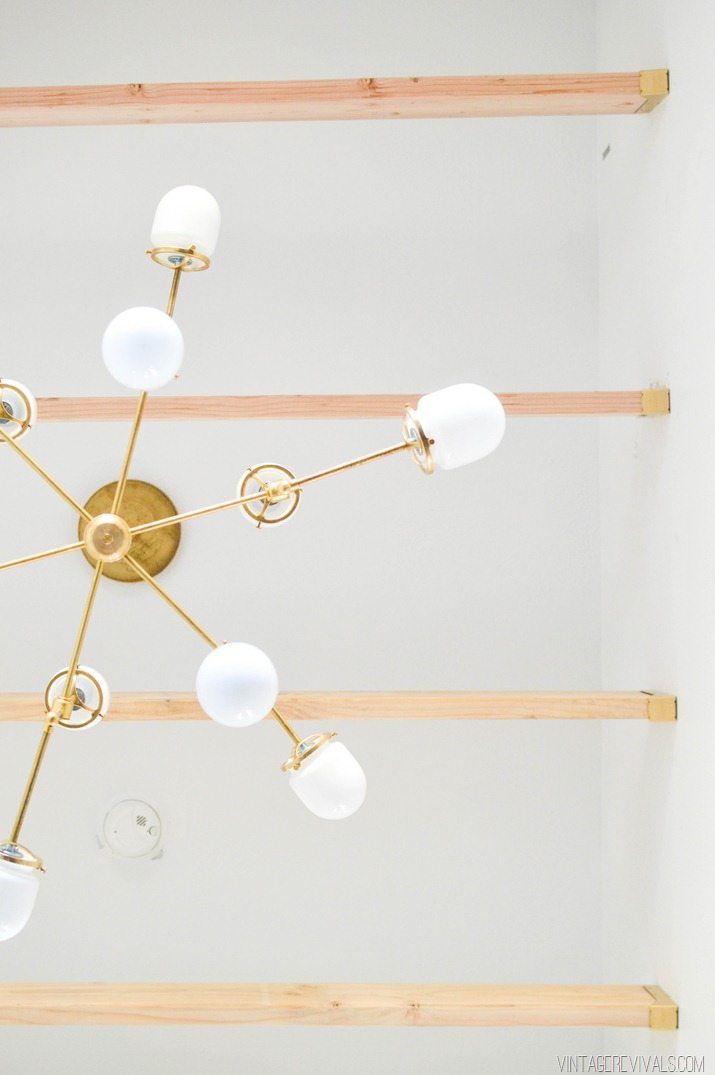
Apparently the ceiling beams are good for more than just looking awesome. How’s that for MacGyver?
When everything is wired, tightened and light bulbs are in, flip your breaker back on and cross your fingers that everything went smoothly!
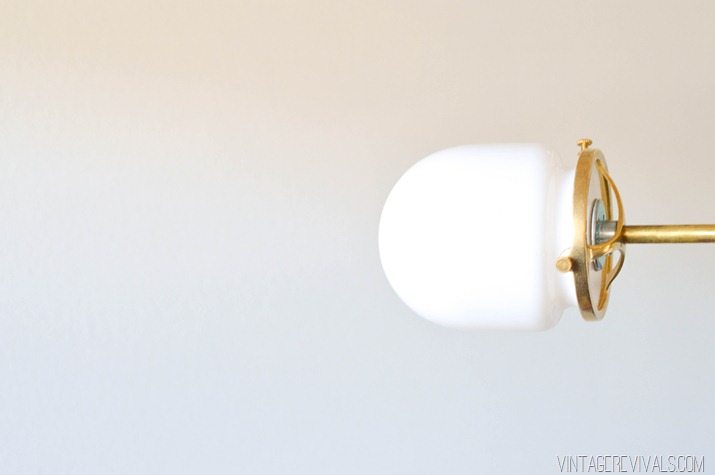
The last thing is to tighten the screws on your swivel elbows, and finish it off with the glass shades.
If you make it through this entire tutorial, you are a rockstar!
So what did I learn rewiring the same light 15 times?
The first thing that I did was try a different type of wire because lamp wire was super thick. Even though it had a good amount of insulation on it, it was no match for the sharp edges of the pipe. Lamp wire was the only kind (I tried 3 different varieties) that didn’t have the coating stripped off of it. Go with lamp wire.
When something seems too small, that is because it is. The original main body of the chandelier was teeny. Too teeny to fit 6 wires into. Trust me I tried.
The bigger one that the final light ended up with was SO MUCH BETTER.
The last thing that I learned? The projects that push you to your breaking point and you hang in there and dont give up, usually end up being your favorite.
We’re thinking of adding them to the shop, so stay tuned!
Dont miss the Shop My House sale that is happening over at Joss and Main!!



You’ve done a lot of cool projects, but this one seriously takes the cake! Best project ever! You should sell them for lots of $!!! 🙂
Design within Reach has got nothing on YOU. Exquisite piece. Amazed by your dedication to teaching and a fan of your spirit! A heavenly light…..please bring them to the shop!!!
Shoot dang girl! So, how much did it cost for all the parts?
So I am assuming this cost you over 100 clams. The homemade chandeliers I have made usually go over $100.
Out of curiosity, I entered all of the items and quantities in at Grand Brass…total, without o. (12) 22-10 Crimp Sleeve, p. (2) large wire nuts, q. (2) Medium wire nuts, r. (1) Wire stripper/cutter, s. Lamp wire, is $352.05 (excluding shipping).
I got $393.25, and that’s assuming none of the items you mentioned above, and only 1 12-in pipe stem.
Freaking stunning light! So glad you shared this tutorial. I fell hard for a DIY similar in style but not as complicated. I’ll have to file this one away to contemplate when I move into my dream house with tall ceilings one day.
Thank you for this!!!! I LOVE it and hope I can convince my husband to help me with this.
Lighting design is our spirit animal, too! This light is ALMOST as good as the one we designed for our office 😛
As always, amazing.
Please say you’ll show us how to do a variation and make sconces!!! Love this!
This is stunning. ABSOLUTELY you should sell this.
This is amazing! I have clients who have a similar one that cost them 5000 dollars! Good for you for coming up with a much cheaper yet beautiful alternative!
I agree, BEST DIY ever. This is absolutely stunning! And I will be making this one day!
oh my this would look so bad ass in my hall way….. or living room. I cant decide. I am overwhelmed and stressed with my decor lol
I am absolutely amazed that you made that! It is so beautiful, which I am not surprised you made something beautiful, because you create so many pretty things. But I am amazed that you handmade a light fixture. All that wiring – my hat is off to you woman!
The whole time I was reading this I was saying to myself ” I wonder if I just email Mandi and BEG her to make me one and I’ll pay her handsomely for it if she would do it for me?!?!” Please sell these! I’m obsessed, but this is beyond my DIY skill set. LOVE LOVE LOVE!
Where’d you find the glass shades?
Super cool idea… love it! So I know this is random and I promise it’s not spam, but I found this website for hairpin legs the other day and immediately thought of your blog and your style. They have these really cool colored legs, including some neon-like colors. Maybe attach neon green legs to a piece of live-edge wood for a funky mid-century modern table? I promise I have no affiliation with this company! It really did just make me think of your blog! 🙂 https://hairpinlegsforless.com/shop/hairpin-legs/
Thanks for the great tutorial! I’m planing on a simply 3 arm light for the hallway and this really helps keep the project from being daunting! The chandelier looks amazing!
You are amazing!!! I love this lamp! I am going to give it a shot, but on a smaller scale. Wish me luck!!!
This chandelier is everything! Thank you for the great tutorial. Would love to know where the shades came from so I can add this to my dining room.
Scratch that. Figured out that the shades are letter ‘N’
New reader here. I am blown away by your style. It is 100% fabulousness! And this light is the bomb!!!! I’m dying to make a light fixture and this is some serious inspiration. Congrats on its awesomeness!
Holy cow it’s so awesome!
I wish I had some higher ceilings!!!!! FYI to those wondering about cost, all in would be just under $400.
Oh!!! Is the glass shade “N” in your parts list? round cylinder tube?….where can we find these? What do u think your total cost came to? Surely more than $100! ??? Loves it
I added up all of the parts, and it will be at least $400.
Thank you for sharing that!
Thank you for doing all the work of figuring out what parts it would take!! Very laborious and generous of you to do all the groundwork for your projects Mandi…. I love the involved ideas that take so much more to figure out than the average simplistic, l’il crafter sites, this is what makes you stand out in DIY Mandilicious! The quality projects like this and the Nugget etc. etc. loves it!
You have some serious diy skills! Wow! Saving and pinning 😉
Looks great! – Can you tell us how you wired, what I’m assuming to be the ground wires (green), into the whole fixture itself? Are they wired into the sockets? That would be helpful to know 🙂 Thanks!!
per chance, where did you get the glass globes. I was not able to find it anywhere on the sites.
What gauge lamp wire did you use?
Thanks so much!
I want to know more about the boards running across the ceiling and secured with brass fasteners.
Hey Kristen!
You can find the tutorial here! https://vintagerevivals.com/2015/03/adding-industrial-ceiling-beams-in-the-entryway.html
xo
m