Oh heyy! Ivie’s bedroom makeover and the Frogtape Paintover Challenge is in full swing and I’m super jazzed to share with you the how to for DIYing this awesome geometric pattern. Make sure that you read this post for all the tips and tricks before getting started. You can thank me later ;).
I don’t usually use templates when I do wall patterns (just a ruler and a lot of measuring) but this would have been a little too complicated without one. So in an effort to simplify life for all of us we are rockin’ the template.

Start with a piece of cardboard.
Measure your total width (mine is 24”. Mark the center. Then mark 4” on either side of the center mark and draw a line connecting them. This is your top edge.
Measure down 4” and mark on either side. Connect the top edge to this mark on either side. Measure out 4” and mark, connecting those points.
Last measure down 4”” and mark. connect those points as well as a horizontal line to the edge. Then measure down 2” and draw a line. This is your bottom edge.
Cut out your pattern with a box cutter or rotary blade (its hard to cut straight lines in thick cardboard with scissors…at least it is for me.)

Put some Frogtape on the edges of your template. This helps keep your edges strong and straight.

Find the center of your wall. This is where you want to start the pattern. Line it up with the center mark on your template and lightly trace it with a pencil. Line your template up end to end and trace the entire row.
Once everything is traced, take your roll of Frogtape and put the tape on the outside of your pencil line, starting with the long horizontal piece that will run across the top. Then go back through and fill in the steps.

Repeat for the next row.

Check to make sure that your horizontal line is level before you get going on a row. Then just go to town!

Once everything is taped off its time to seal your edges.

The reality of the situation is that if you have texture on your walls, you need to pre-bleed your pattern with your base wall color. All this means is that you take a little bit of the wall color (in my case white) and paint along the edge of the tape. This ensures that any groove in the wall texture, or section that maybe you forgot to seal down super well will bleed the same color as the wall (meaning you wont see it at all) before you paint it a contrasting color (that you will see if it bleeds)

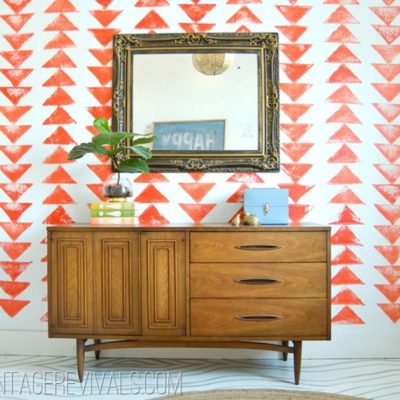
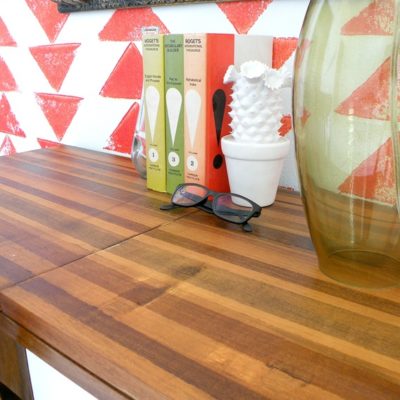
Then its time to start painting!!. My original color palette was based on the painting that my grandma did.


Once I got going I sort of…hated it. It was too 90’s Southwest. The only thing missing was a painting of a cowgirl dressed in one of those long flowy denim skirts and fringe jacket.
In my mind, when everything goes sideways its time to experiment. Because you’ve already screwed it up so its ok! Remember my Watercolor Wonderwall? I’ve been itching to try that technique again. So I did.

And I didn’t love it. Womp womp.
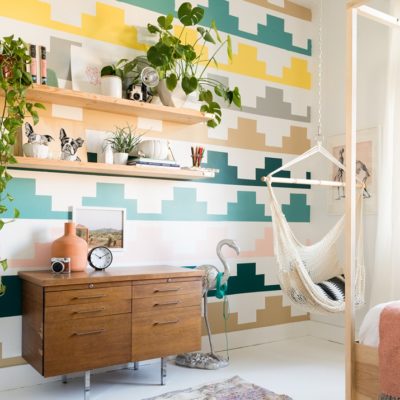
Trying to fit it in such a defined space didn’t really work, and rows upon rows in different colors was just too much. It would have been awesome if I was just doing one color. So I hopped on pinterest in search of a cool color palette. This one was the crowd favorite.

Loving this so much more!

Stay tuned for the reveal next Monday and get your voting fingers ready!

.

Girl! That is SO.MUCH.WORK. It’s going to be amazing! Loooove the new colors!
YESSSSS!!!!!!! The color choice is sooooo good!!! I can’t wait to see it all done!
Sometimes it’s nice to make geometric wall art that isn’t totally perfectly geometric. I’m always saying how frustrating it is to pick a wall color, because when you make a painting you get to mix and play to find the colors before you ever put your brush to your canvas. Picking a wall color is so much more final. I love that you gave yourself the freedom to go back in and work with this until you reached a color balance that felt right. Can’t wait to see the finished product!
Likely By Sea
“Womp womp” lol. You crack me up!
I can’t wait to see the reveal!! Love the colors you chose. Had to laugh at the Southwest comment. My mom used to have a painting of an indian woman on a horse that reminded me of your palette..
Love the new colour palette. We did our guest bedroom in a similar colour combo and I’m so pleased with it.
It is so awesome you show your readers the mistakes. Even someone as awesome as you may not get it right the first time. I have had so many ideas that didn’t work like I thought and it is very discouraging. Thanks for the real life.