Here is a tutorial on how to perfectly stripe your walls….Vintage Revivals Style.
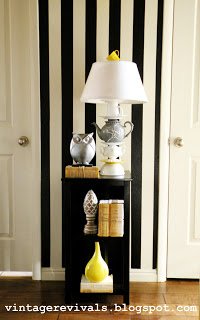
I have been wanting to do this post FOREVER. Like before “Crafting With The Stars” but I couldn’t because um….the voting was anonymous. So here you go friends!
Remember the motto here at Vintage Revivals….Don’t You Judge My Messy House.
Step 1:
Paint your base color!
Before
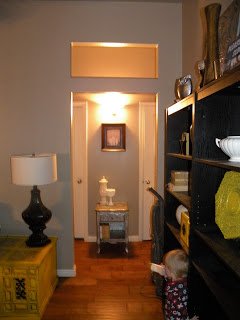
Step 2:
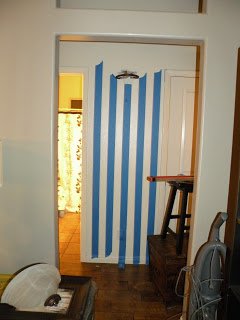
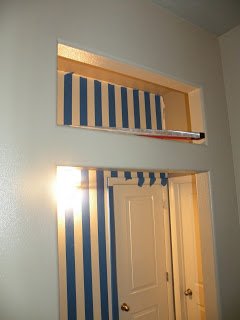
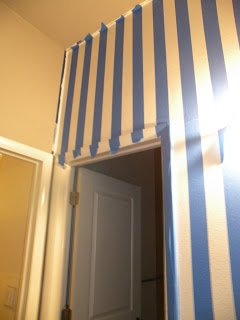
Add your tape.
I used Scotch Blue Painters tape. The roll was 3″ wide…..HUGE. It was kind of expensive (for my thrifty blood) at $12.00. The only place that I could find this thick of a roll is Home Depot. It was COMPLETELY worth it. If you are wanting 3″ stripes (which in my not so humble opinion are the perfect size) just fork out the mulah cause you wont regret it! I measured 3″ out from the door jam on the bathroom and the set my tape. Make sure you are measuring the whole length of the wall and use your level….otherwise your stripes will get wonky. Keep taping until its all done
Step 3:
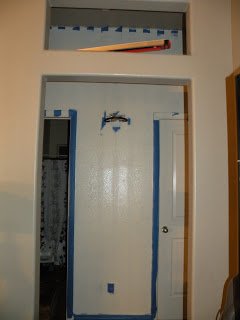
Re-apply your base color.
This will almost completely eliminate bleeding! When you are doing this many stripes its so worth it, you DO NOT want to have to touch up 87,612 lines.
Step 4:
Apply your other color.
I did 2 coats because the black and white are so contrasting.
*WARNING MESSY HOUSE PICS AHEAD!
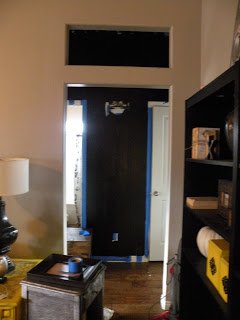
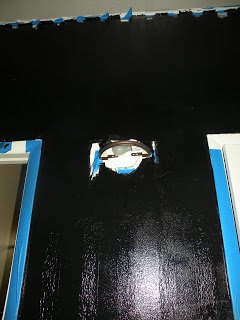
There are a lot of experts that say to peel off your tape while your paint is still wet . I didn’t do this because the whole length of the tape was painted black and um….I didn’t want to ruin my floors. Good idea though.
And this is what you have!

Tomorrow I am going to post about alternative lighting…..its SOOOOO Thrift Shop Glam and completely awesome! It just might involve this $5.00 light.




Oh too cool! I love it! The wall looks great!
I’m thinking I need a tour of your entire house. Dang, girl. That is awesome.
genius – paint the base color again!! I would have NEVER done that!
So you paint the base color, tape, and paint over the tape with the base color again? THEN, paint the contrast color on the same tape lines you just painted? I want to be sure…it looks great! I totally could do this in my entry cause the ceilings are so short in there! That would certainly help!
Becky B.
http://www.organizingmadefun.blogspot.com
That is correct Miss Becky! Base, Tape, Base, Contrast.
Wonderful!!! I can’t imagine how difficult it was to do black & white!
We just did tan on white stripes too…and base+tape+base+contrast is the only way to go!
https://sidebysideblog.blogspot.com/2010/11/striped-hallway-finished.html
Love love love how this turned out. So Ive been wanting to do horizontal stripes in my daughters room and then saw you did the same in your little girls room, did you use the same concept or no. I just have horrible luck with painting walls. Its always bleeding threw or my paint literally peels off. Crappy paint though. Anyways you are awesome and I’m so glad you and the fam are all ok 🙂
This looks straight out of a magazine!
Oh my gosh, this is absolutely gorgeous! You should submit the pictures to some major design blogs or something! I love, love, love it.
Just saw your Studio 5 clip! That was so awesome, congrats!
OOOOOO…PUUUUURRRRRRTY! Totally lovin’ it! I SO want to see the wall to the right in your picture. It’s like I want to turn my computer so I can be a total stalker to see your whole house!
Jen
Love love love it! I have so wanted to do striped walls somewhere in my house. Still looking for that perfect spot!
Megan
Now you must think I’m your blog stalker!
Thank you for this post! It helped me successfully paint stripes this weekend! I am so happy with how they look! Kelly