Hey guys!! Did you have a chance to catch Studio 5 last week? In case you missed it, here is the link to the video…the good (the room reveal), the bad (the process it took to get there x3), and the ugly (where I talk about a stripper.)
If you’ve watched it then you know just how easy this project is.

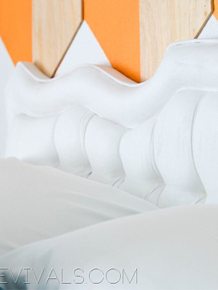
We started with our antique Mantle. First things first we gave it a good scrub (because paint doesn’t stick very well to dust…)

One thing that you MUST remember when you are working with old old pieces is that there is pretty much a 100% chance that at least 1 of the 67 layers of paint on it is lead based. You need to lock that into the piece by painting or sealing it. Now I know what you are thinking…but even if you love the chippy worn out finish you need to protect yourself and your family by putting a polycrylic sealer over the top of it (if you use polycrylic it wont yellow, if you use polyurethane it can!!) In the case of Sierra’s mantle we primed and repainted. (a few times…but that’s another post for another day.)
Once the final design was hatched it was simple.
Head to your fave local hardware store and buy a piece of 1/8” underlayment. It is a type of plywood that is thin and lightweight but has a good wood grain on it. (it will cost you $12.00 for a 4×8 sheet.) And while you are there have them cut it down to size (its free!!) I put a quick coat of Golden Oak Restore a Finish on it to bring the wood to life. (Its my go to sort of stain!!)
Because of the shape of Sierra’s mantle I had to build up a few spots so that the sheet of ply was flat on its surface. See in the picture below how surrounding the hole for the fireplace the trim is about an inch lower than the spot that has the cubes? That is where it needed to be built up.

Luckily for me the difference was EXACTLY 1” so I just used scrap wood from my garage, LOVE it when that happens! If the bed wasn’t so high on the mantle I would have used a sheet of 1” wood to cover the entire space. (also don’t mind the awful picture quality, I had to screenshot a video to get it!)

Then attach your ply with finishing nails. There are really about a million awesome things you could to do this, I mean, how cool would it look if you used upholstery nail heads all along the edges?!

As you can see in the pic above I used painters tape to mark where the support piece that I nailed on ended. That way I didn’t get to nail gun happy, which is something that TOTALLY happens. Don’t act like you haven’t shot a few extra nails off for effect. I nailed all along the edges every 4” or so (just push on the wood, if it moves then nail it down.)
Now comes the fun part. The arrows!!
When I free hand things I tend to start pretty straight and then everything takes a giant curve to the north. A handwriting analysis told me its because I am optimistic. And as fun as that is, I wanted these arrows to be straight and evenly spaced.
I used painters tape to mark each home so that I had a clear guide to not screw it up.

I loved this image that I found on Pinterest from Pocket Tiger (she has an AMAZING etsy shop!!) I used it as inspiration for my arrows. I love how they are all different, and hand drawn and imperfect.
Fun Fact: Did you know that I am a southpaw? Well now you do! Drawing with markers always ends up with giant smears unless I do it strategically. I know you other lefties TOTALLY know what I am going through!
I used my favorite new tool Sharpie Paint Pens (remember I did an entire wall in my living room with them?!) And I just started drawing.

Are they perfect? Heck no. Do they look awesome anyway? Absolutely. Channel your inner doodler and go to town.

And that’s it!!


Mandi! I love it! Just sat here grinning through your whole segment…you are a doll! 🙂 Thanks for sharing the awesomeness!
Loved the video and that you shared the honest side of d.i.y., that sometimes it takes three tries (or more) to get to a finished product you’re proud of. Great job with the sharpie design. I’m lovin’ it!
You are SO my hero… what a fabulously funky headboard/room. And you rocked the screen!
I love love love this!
What an incredible piece of furniture.
Lisa
Creative Raisins
I LOVE it! Any funny thing … I was just sitting here watching your studio five clip with my little three year old my lap and she said, “Mommy! That girl looks just like you!” (It was when you had your hair up in a bun with your glasses on … which is how I look 5 out of 7 days a week 😉 Anyway, I couln’t ask for a better compliment!
love—adore! and you’re so cute!
i love seeing unique headboards! we currently are using my great gram’s table we accidentally broke…as our headboard. the options are endless!
Love it Mandi!! All of the pieces together with that amazng green wall are just happy perfection. Great job guuurrrrllll! 😉
What’s the paint color on that wall?
And here I thought *I* was your favorite stripper. HA! Good job on the segment, Mandi! xo
This is wonderful! Please excuse my ignorance but can you please tell me if the mantle/headboard is actually mailed to the wall and if so, how? I’ve never done anything like this but I’d like to give it a try….
Thanks!
Love this! I’m looking for ways to spruce up the bedroom. I live in an apartment so I have the same question as Kianna about mounting this headboard.