Would You Buy or DIY?

By Mandi | 09/02/2015 | 40 Comments

Guys. I found THE CUTEST cradle for the baby.  I’ve been on the fence about doing a nursery or not, but when I saw this? It was all over.
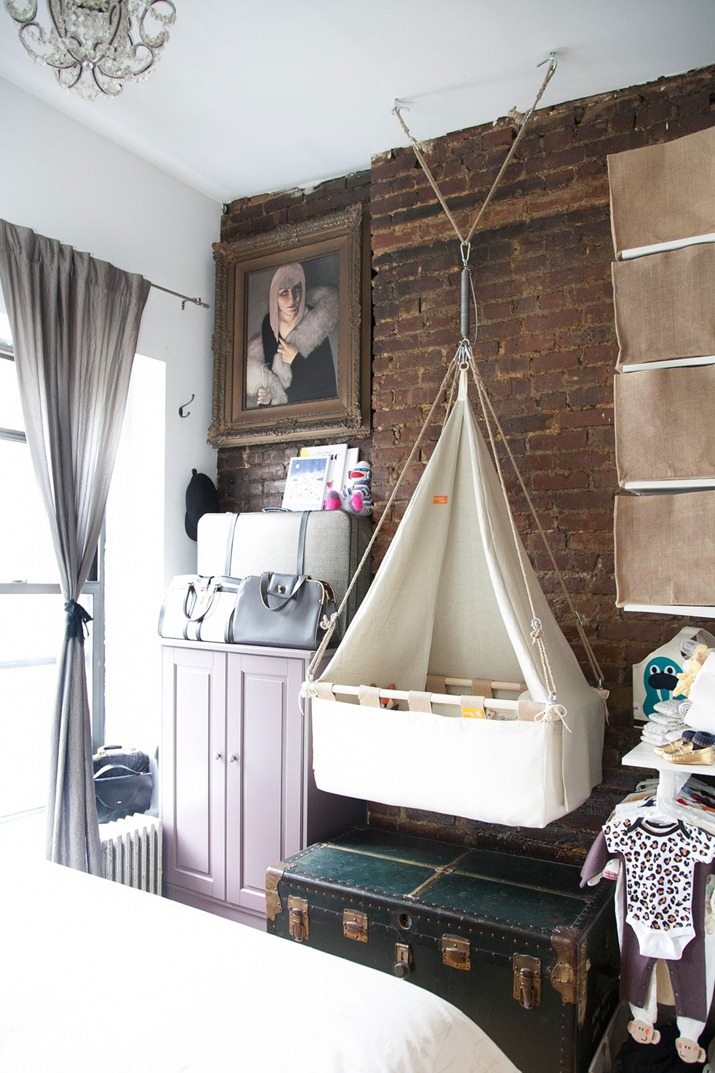
Baby Cradle

(Check out the full tour on Refinery29)

Doesn’t the sight of it just make you want to have a baby?!  Just so they can be so cute and squishy in this little cradle?

When you look at the design it looks extremely simple.  Canvas, dowels, some hardware and rope.  I mean. Really simple. Like make it in an afternoon simple.  But hello, its for a brand new baby.  This is where the DIY line gets a little terrifying. 

So lets go over it. The cons? There’s totally a learning curve. Do I want to remake this thing a few times to make sure that its right?  Here’s the other thing, even if I did make it, there is no way I would ever post a tutorial.  Because hello, other people’s brand new babies.  That post would keep me up at night, and I don’t think that I’m going to need help in that area.

The Pros.  It would be a fun project.  I’d save a ton of money and I could make it exactly how I wanted it.
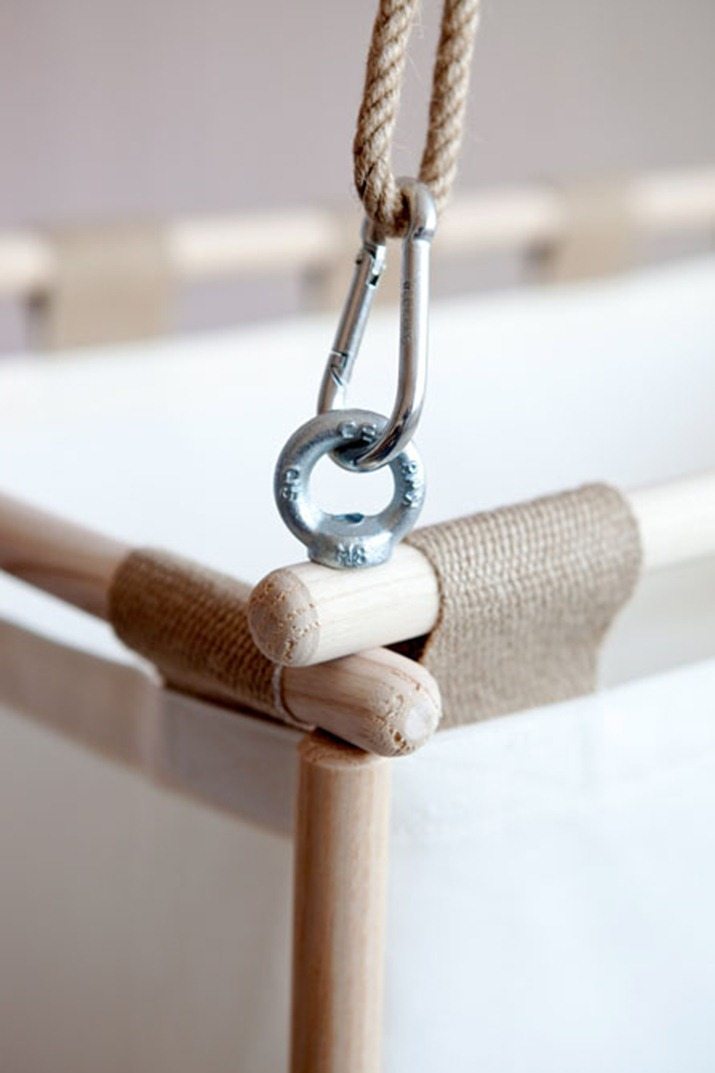
cradle


Ok so luckily it wasn’t too hard to track the maker down, its made by a company called Kindekeklein in Holland (don’t worry, they ship to the US).  The longer I was on their site, the more I knew it was exactly what I wanted for this little nugget.
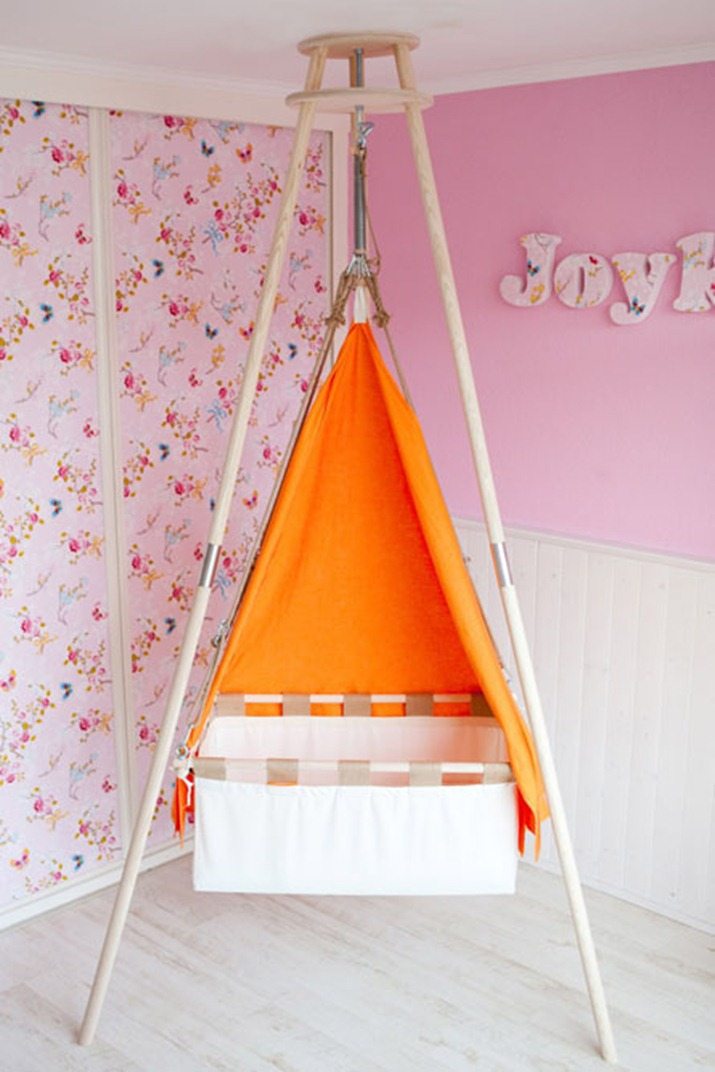
cradle3


I fretted about it all weekend. Its not the cheapest option (especially because with both of the girls we co-slept so Court thinks we might not even use it) but after still fighting to get Dyl out of our bed I have made a resolve to not let the past repeat itself.  I wanted something, I needed something! 

I love how it gently bounces and rocks because of the giant spring at the top.  Its like being in a hammock (which is the best place to be ever!!), Now granted, it could get wild if you had a small child that wanted to “push” the baby, but with Ivie and Dyl being older that isn’t a concern in our house. You know what is a concern? The fact that I have cactus everywhere and my house has to be made child-proof again.
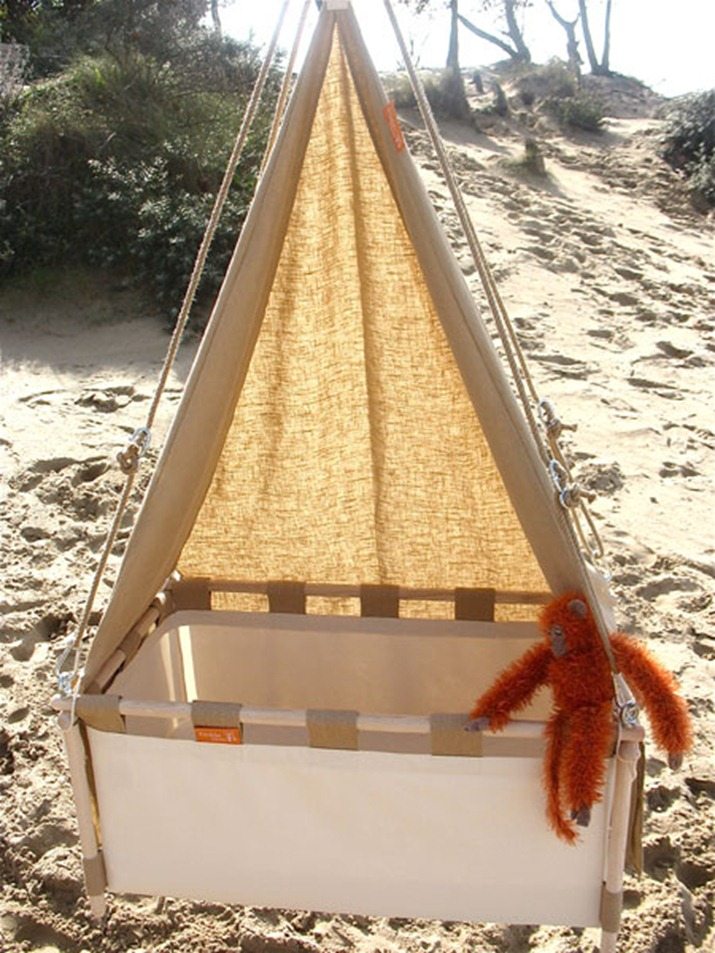
hanging-cradle-kindekeklein


Ultimately I decided to fork out $300 for the cradle and extra hardware (so we could hang it in the nursery and in the master by my bed).  I’ve never actually seen anything like it in real life as a point of reference to learn from and also because I don’t know how to DIY a baby friendly mattress (freaky!!). But I did decide to pass on the removable canopy because that thing can TOTALLY be an easy project.

So what do you think?  Would you have bought it too or attempted a DIY?  Did you use anything similar for your babies?  I’d love some experiences!

 

LoveYourGuts14

12 Steps to Change

By Mandi | 09/01/2015 | 18 Comments

Addiction recovery, and service in the LDS 12 Step Addiction Recovery Program (ARP) is the single most important thing in my life. I’ve shared our story of addiction and recovery over the last 5 years with you guys, and while I don’t talk about it a ton in the day to day content on the blog, it is a HUGE part of who I am.

I started the blog right before Court got sober (in July 2010) after 8 years of active addiction had destroyed everything. Usually behind every good addict you’ll find at least one co-dependant trying to keep things together. That was me. I had completely lost who I was as a person over that time. There was nothing left in either of us. We were completely lost and hopeless. A hopelessness that is so deep you cant even begin to describe the darkness. It was the only constant thing in my life, that feeling of pain.

Long story short (you can read the whole long story here) we found ourselves in an LDS Addiction Recovery Program meeting. The feeling of love and understanding that was in that room was tangible. We weren’t the only people who dealt with horrible things. We weren’t judged. We were not alone.

So twice a week for the last 5 years, Court and I have been at these meetings. We started out as attendees, scared and hopeless and it has grown into a service mission where we get to be the ones to share hope that comes through our Savior and give the unconditional love that we felt. The love that saved us.

Screen Shot 2015-09-01 at 7.33.23 AM

The LDS Church launched a video series yesterday that breaks the 12 steps wide open. They are gritty and true stories of self inflicted pain and isolation. 12 stories of individuals at the brink of destruction. 12 stories out of the tens of thousands that could be told of the rescue that came through Jesus Christ. The series mainly focuses on drug addiction (there are a few videos that talk about sex addiction and eating disorders) For those that may not have this as part of their lives it might be a little intense, but its true.

This is the reality. Its horrible and dark and terrifying.

But there is a way back.

However late you think you are, however many chances you think you have missed, however many mistakes you feel you have made or talents you think you don’t have, or however far from home and family and God you feel you have traveled, I testify that you have not traveled beyond the reach of divine love. It is not possible for you to sink lower than the infinite light of Christ’s Atonement shines.

-Jeffery R. Holland

The thing is that everyone can benefit from this program. You don’t have to be living in your car to need help. Your addiction doesn’t have to be to Heroin. The Atonement is real. Whatever you struggle with, there is healing in our Savior and in the unconditional love that is in these rooms. Whether you yourself is the addict, or if it is someone that you love, or you feel like you need to work through some stuff, please come you are welcome!

There is a line is Step 4 that sums up this program perfectly. It says “Because of the love and grace of the Savior, you do not have to be what you have been.” That line makes my heart just leap with hope.

Here is the preview video for the entire series, and you can watch each of the 12 steps here.


For those that feel like they are alone, you’re not. There is hope. There is healing. I know because it has happened to me and my family!! I have witnessed the most miraculous changes in people that you never would have thought could make it. I have seen this program teach people about recovery and about the Savior and it has made all the difference. It is so easy to feel like we are too lost or too far gone. That there is no way that we have a Heavenly Father that still loves us and a Savior that can redeem us. But the thing is, He is the only way back. He is our only hope, and He knows that. He’ll never give up on us because of that simple fact. Court’s addiction is the biggest blessing of my life. It’s the price that we had to pay to know our Savior and it is infinitely  worth it.

If you are looking for a meeting in your city, just put your zip code into the site below and it will pull up all of the meetings in your area! addictionrecovery.lds.org

LoveYourGuts14

Cold Dead Fingers // The $15 Card Catalog Edition

By Mandi | 08/31/2015 | 7 Comments

Hello my darlings!!  How was your weekend?  Last week I had a major #colddeadfingers score.  Major.  If your unfamiliar with the term Cold Dead Fingers its all about AMAZING secondhand finds. Thrift store, Craigslist, side of the road…you get the idea. Its a find so good that it can only be pried from your cold dead fingers (super clever name, horrible SEO)

Ok so back to my score.  Its been a while since the thrifting itch has turned into a full blown scratching obsession. But I had a few minutes before I had to pick up Dyl from school and decided to stop in for the 4 minute run through. (Laser focus, in and out in 4 minutes flat, no time for chit chat) 

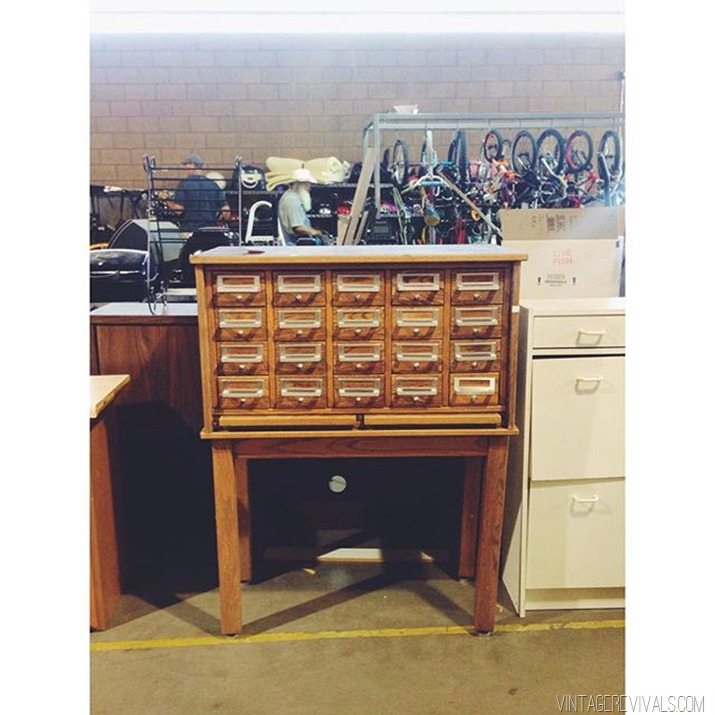
When I walked into the yard (the large open area where they keep a lot of large items) I looked up and saw this guy. 

11371039_883320888381873_140105663_n


I was completely convinced that it had been sold. Because HELLLLLOOOOO card catalog. So I did a super slick walk/run move over and guess what?!  Not sold.  But even better than that? It was priced at $15. FIFTEEN FREAKING DOLLARS!!  I mean, one handle would cost you more than that.

Condition-wise its pretty good.  The wood drawer fronts need to be sanded because the varnish is old and flakey, but everything is intact and just needs a little DIY love!  I ended up selling it to one of the besties, so make sure that you are following along with Amy to see what she does with it!

Ok, now on to the real goods.  Your cold dead fingers finds! Thanks for sharing!!


Found this vintage baby for $30 and I am super excited. Now to get it home…. #colddeadfingers

A photo posted by hellomeggo (@hellomeggo) on


Found this vintage baby for $30 and I am super excited. Now to get it home…. #colddeadfingers

A photo posted by hellomeggo (@hellomeggo) on


LoveYourGuts14

Black and White Statement Wall

By Mandi | 08/26/2015 | 10 Comments

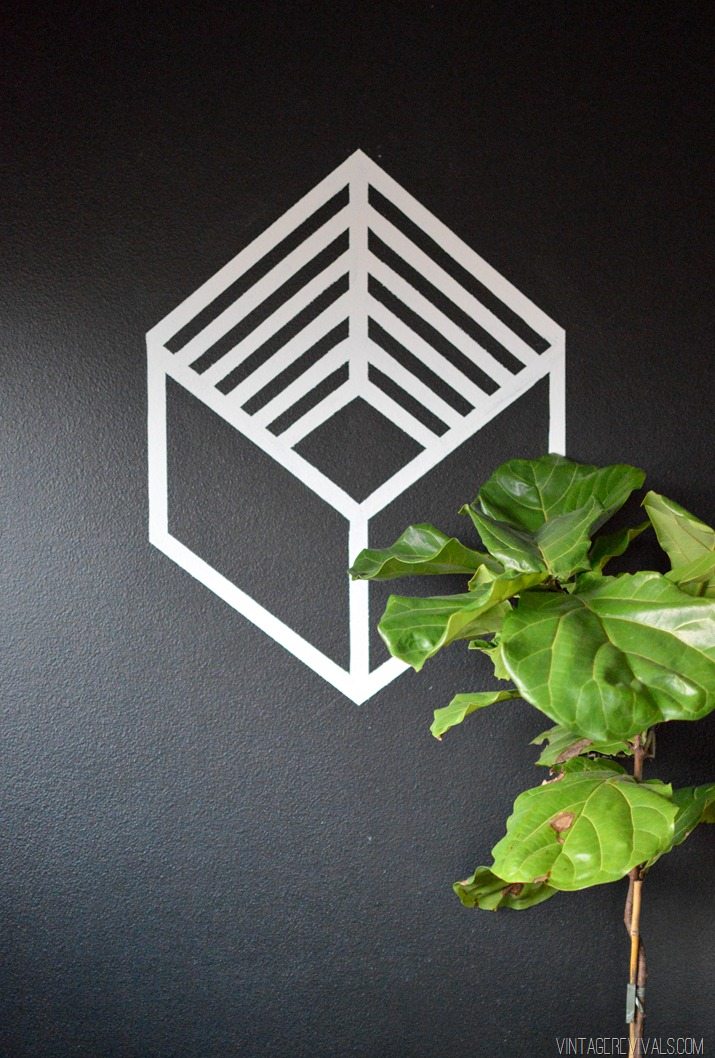
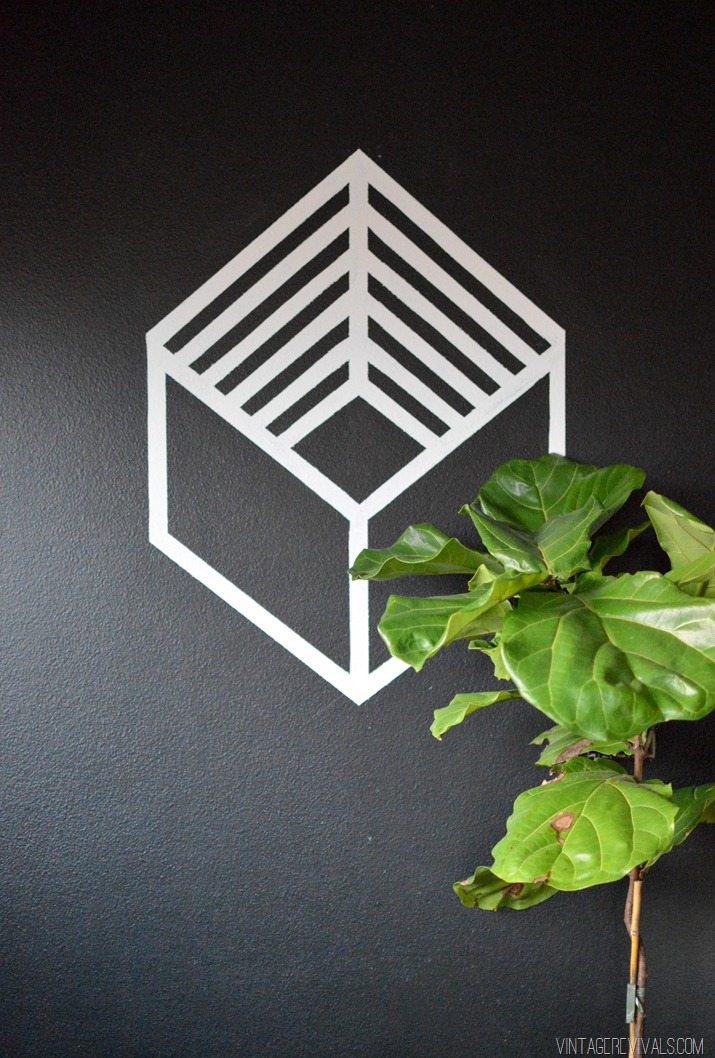
You guys!! I am so excited about today’s project!! Forever ago I fell down the inspiration hole called the internet and came across the coolest street artist. Aakash Nihalani uses tape and cardboard to make these amazing geo openwork structures. I have been itching to recreate one on a wall and finally got around to it (of course with the help of my partners at ScotchBlue™.)

Black and White Geo Wall

The supplies are as simple as could be:

ScotchBlue™ Painter’s Tape Multi-Surface with Advanced Edge-Lock™ Paint Line Protector (for use on walls with light texture)
Paint in the color of your wall (in my case Tricorn Black by SW)
Paint in the color that you are painting your shape (White)
Paint Brush
Level and/or straight edge
Razor Blade

Do you ever wonder what type of ScotchBlue™ tape you need? My rule of thumb is to use the Delicate (orange) on surfaces that are freshly painted (within the last 48 hours) or surfaces that are extremely smooth (where the paint didn’t have a rough surface to adhere to) the Advanced tape (green) is my go to because it works on almost any surface walls, wood, furniture, glass, you name it.

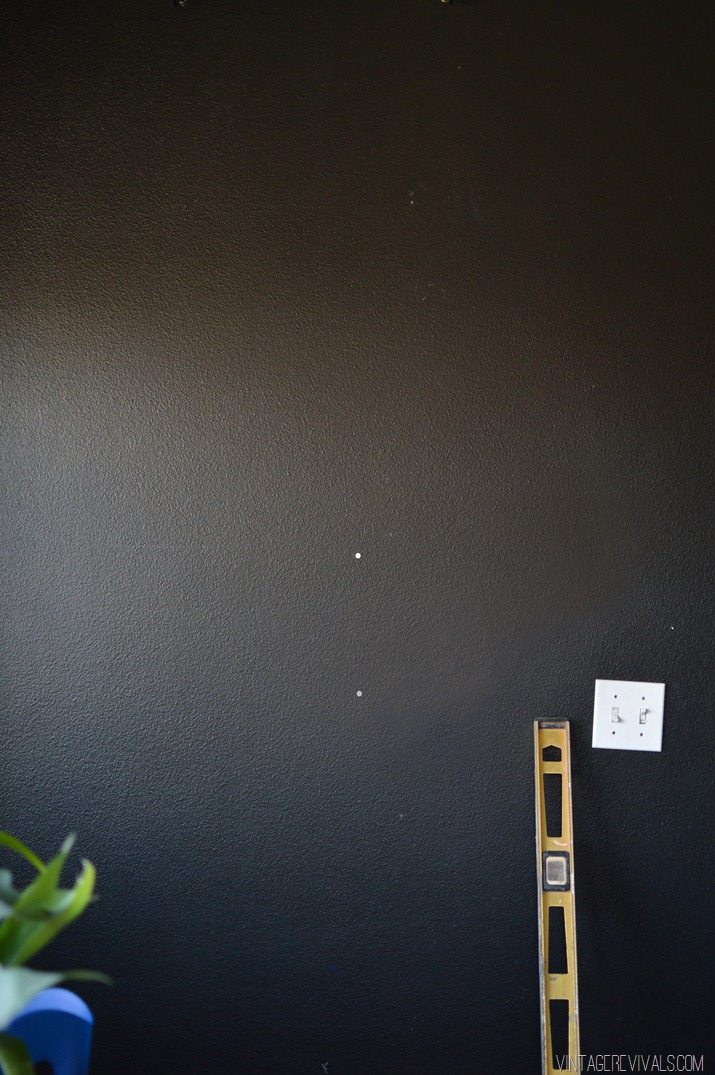
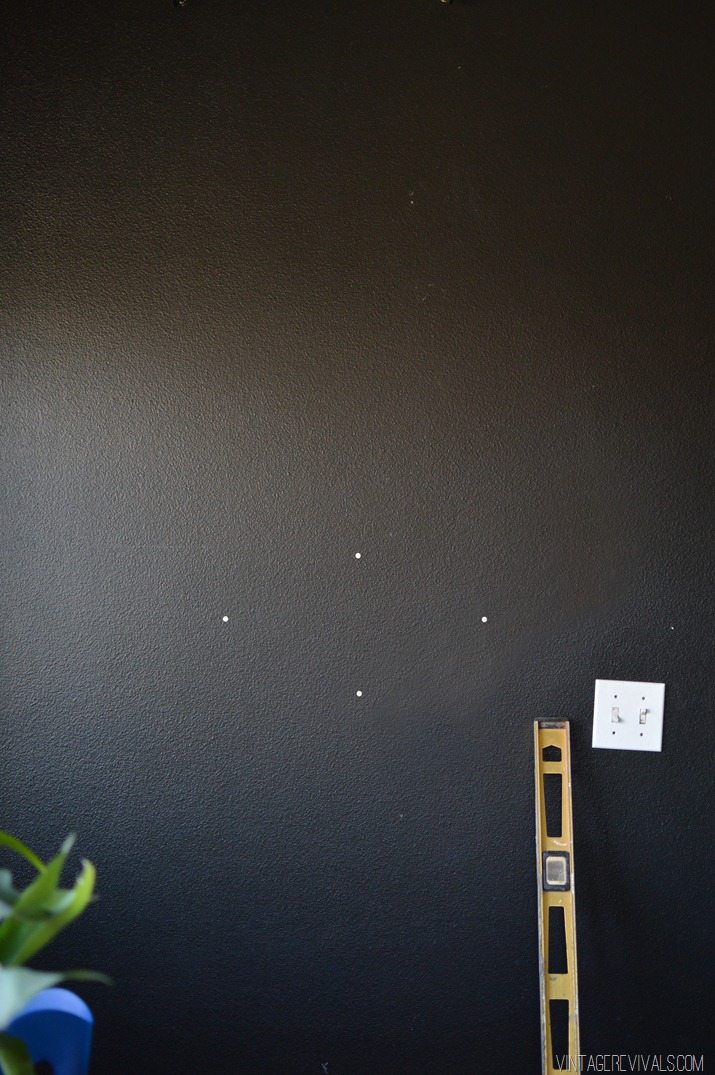
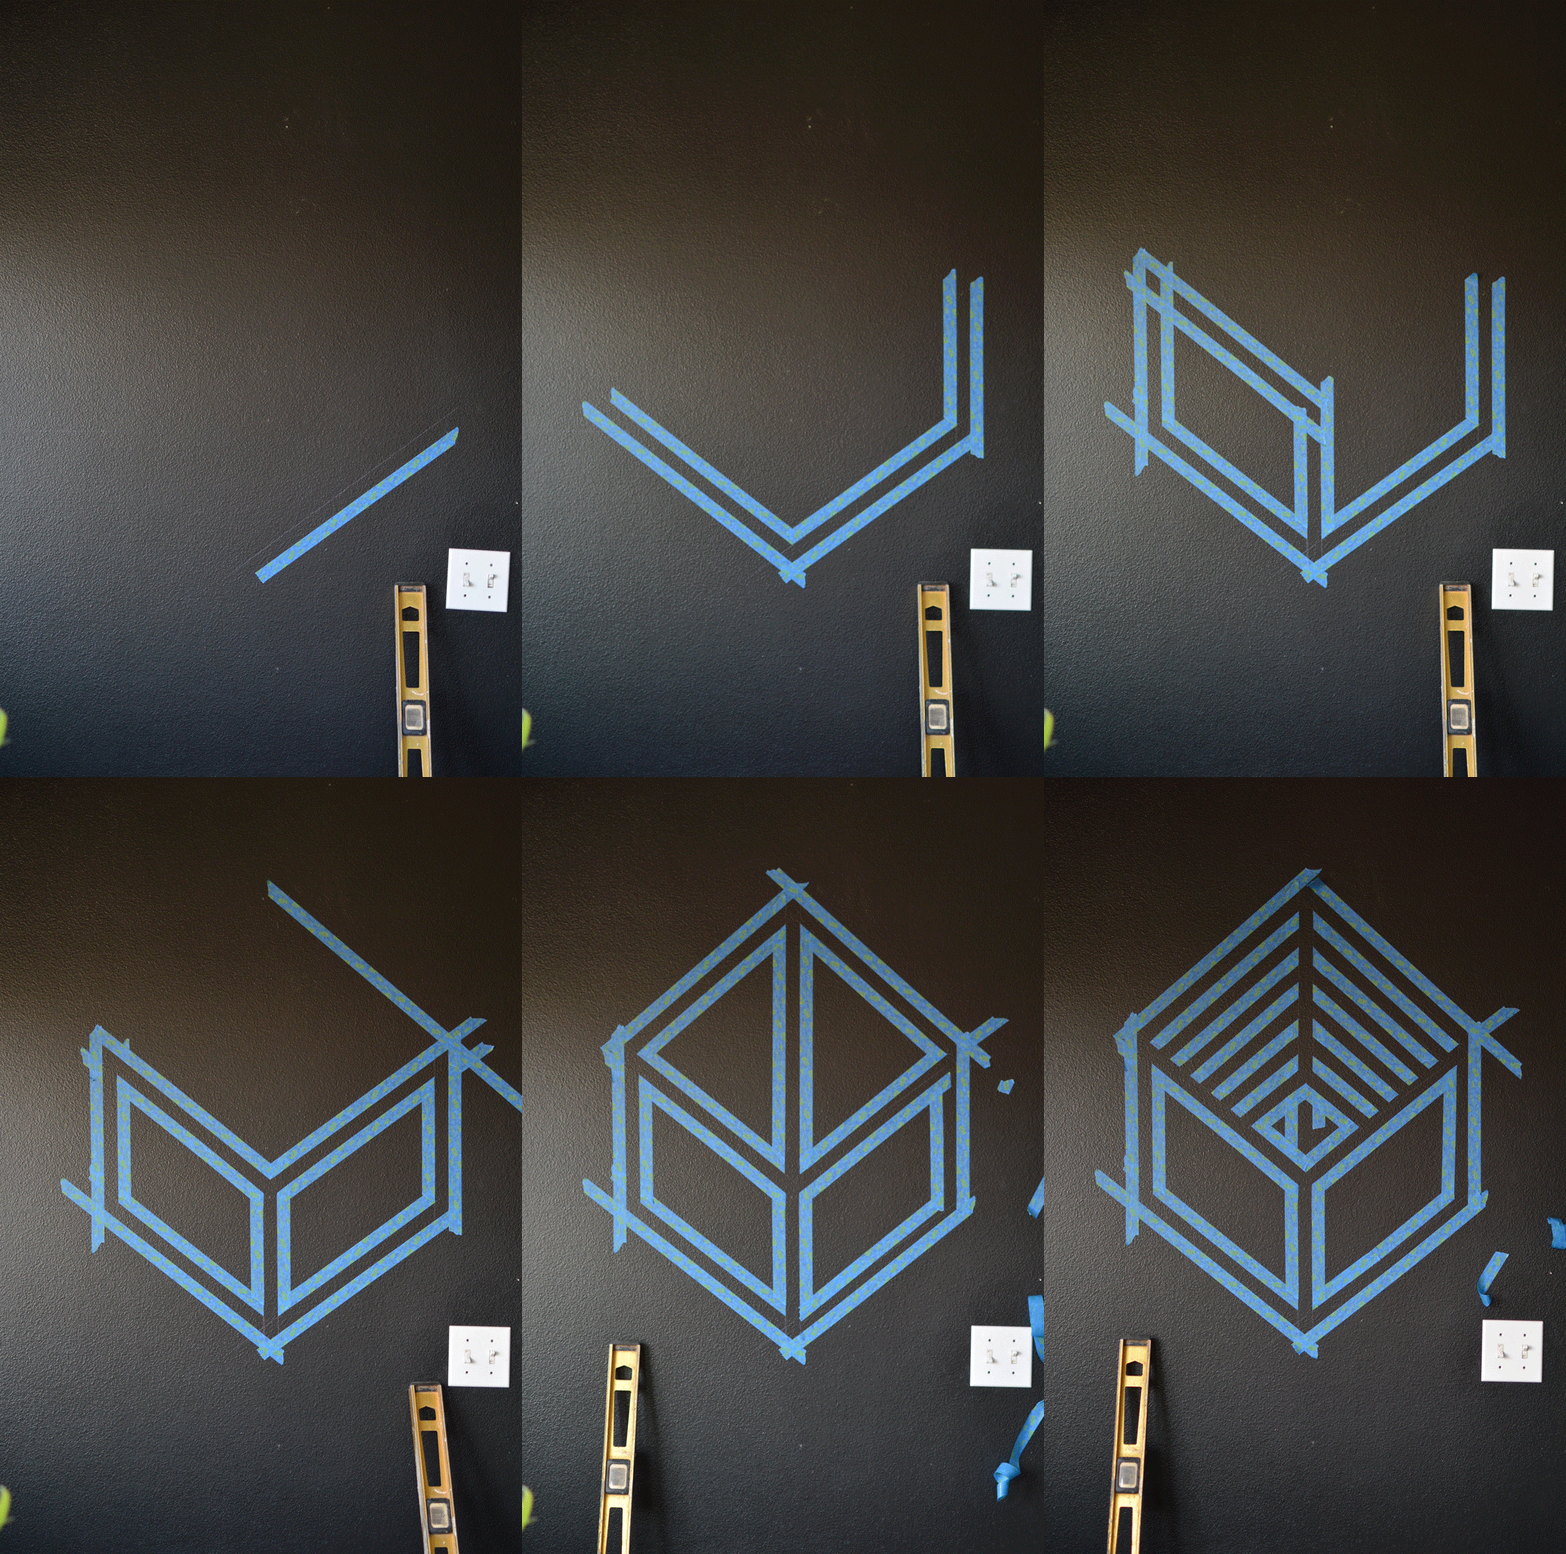
So to get started with this project you need to mark 2 spots on your wall. One directly on top of the other.

Mark 1


This is where the center vertical line will be. Remember the distance between the 2 marks, because you will be using it again!

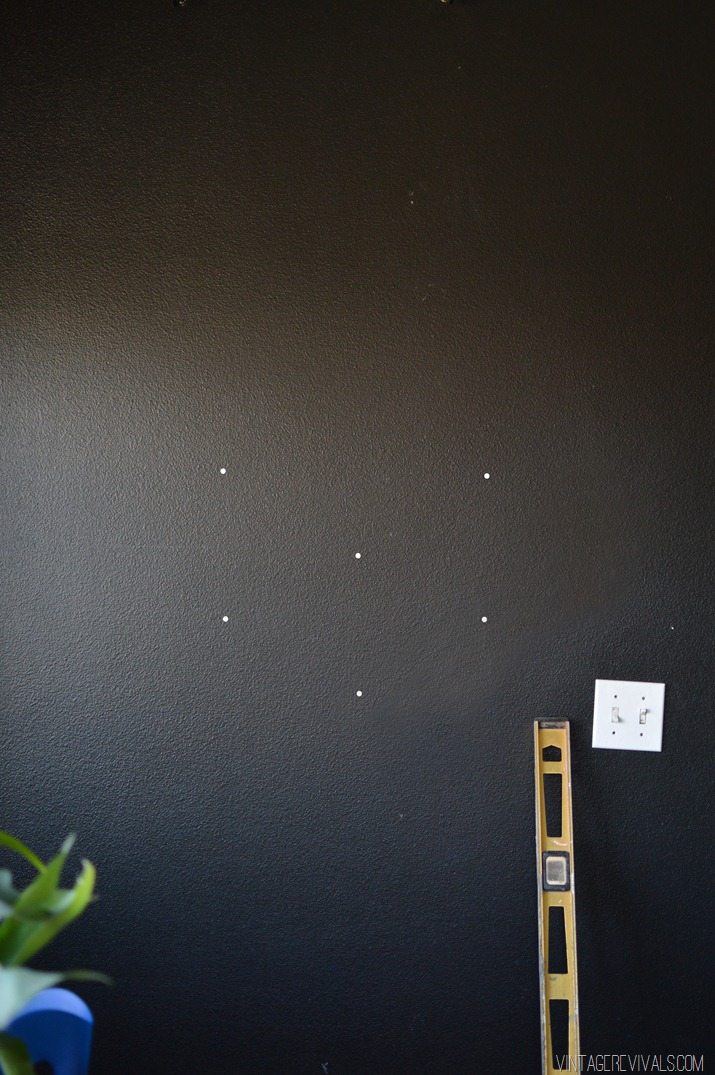
Then measure out and mark where your corner will be. You don’t have to worry about exact angles here, just what looks pleasing to your eye.

Then using your level, measure and mark the exact same distance for the other side.

Mark 2


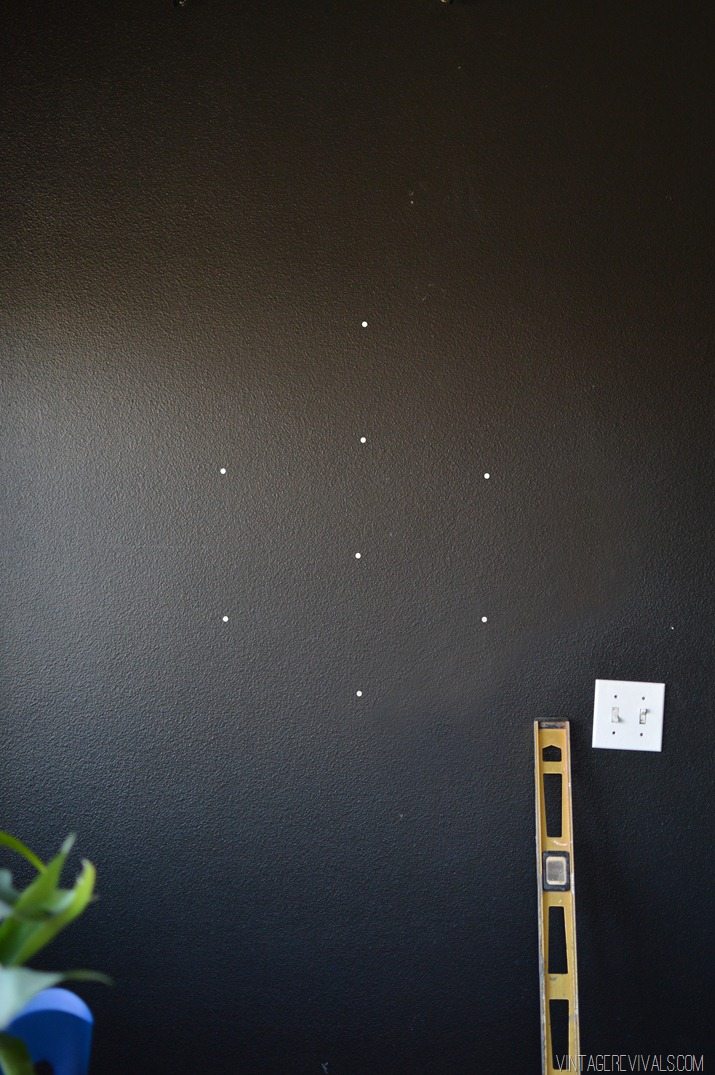
Now, using the same distance that was between your first 2 marks, measure up and mark above marks 3 and 4.

Mark 3


Lastly, you are going to measure and mark 1 more vertical line in the center of your cube.

Mark 4


Now the fun can begin!

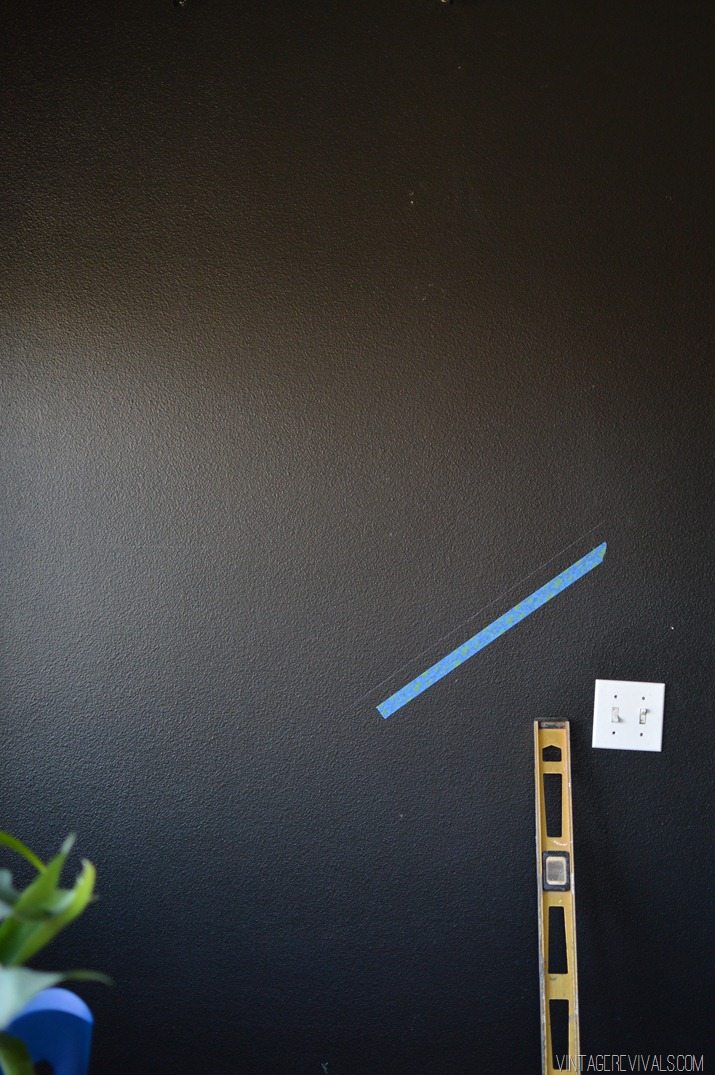
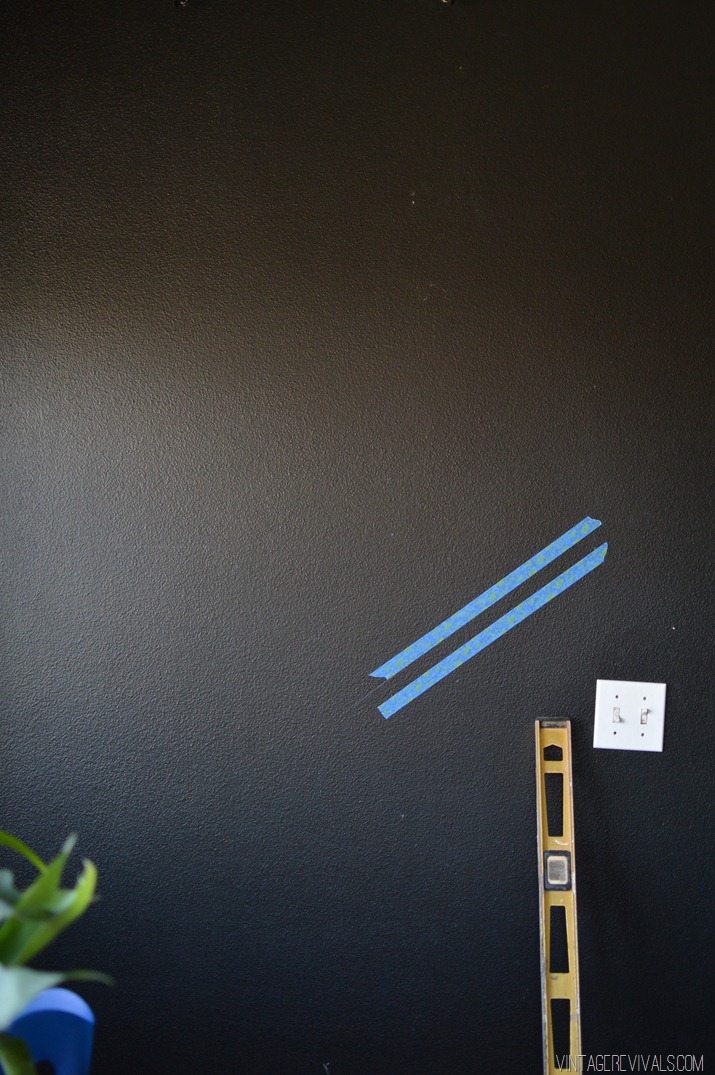
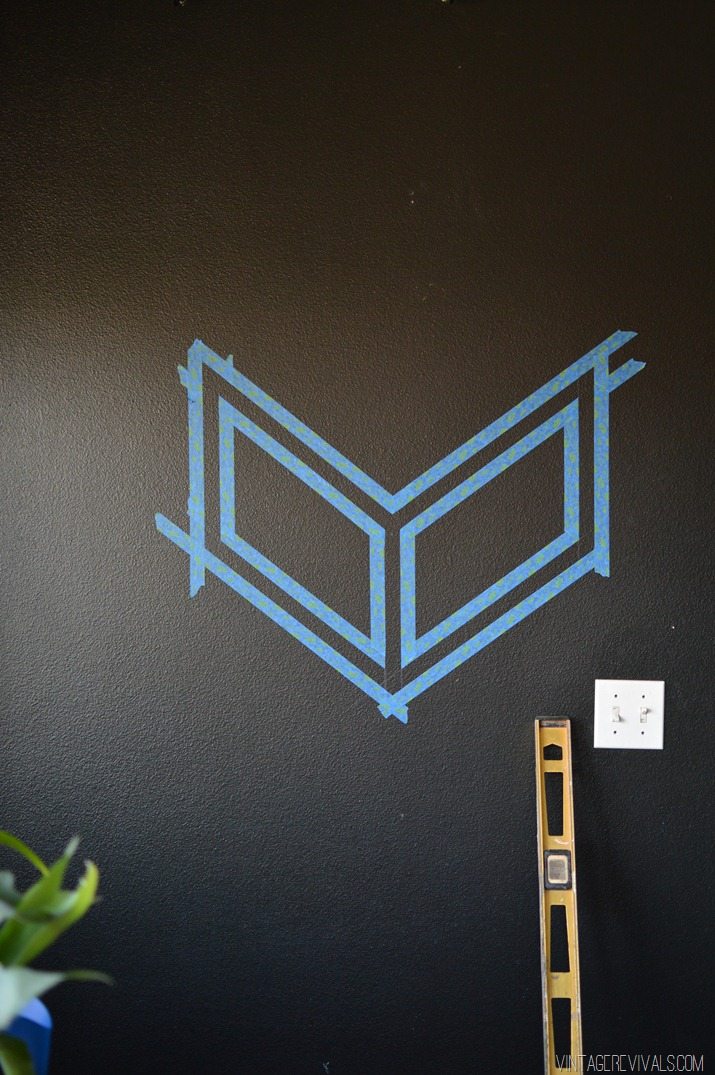
Using a pencil (in my case a colored one so you can see the marks against the wall in pictures) draw a straight line connecting the bottom right edge. Then measure an inch up and draw a second line. Place your tape on the outside of both of these lines. This will leave the gap that we need to paint our cube. To keep my brain straight, on the angled lines I connected the original marks and this made the outside edge, then I measured in 1”. On the vertical lines you’ll need to center your original mark on the inside of the 1” space or it will be wonky.

Black and White Geo Wall-2

Black and White Geo Wall-3


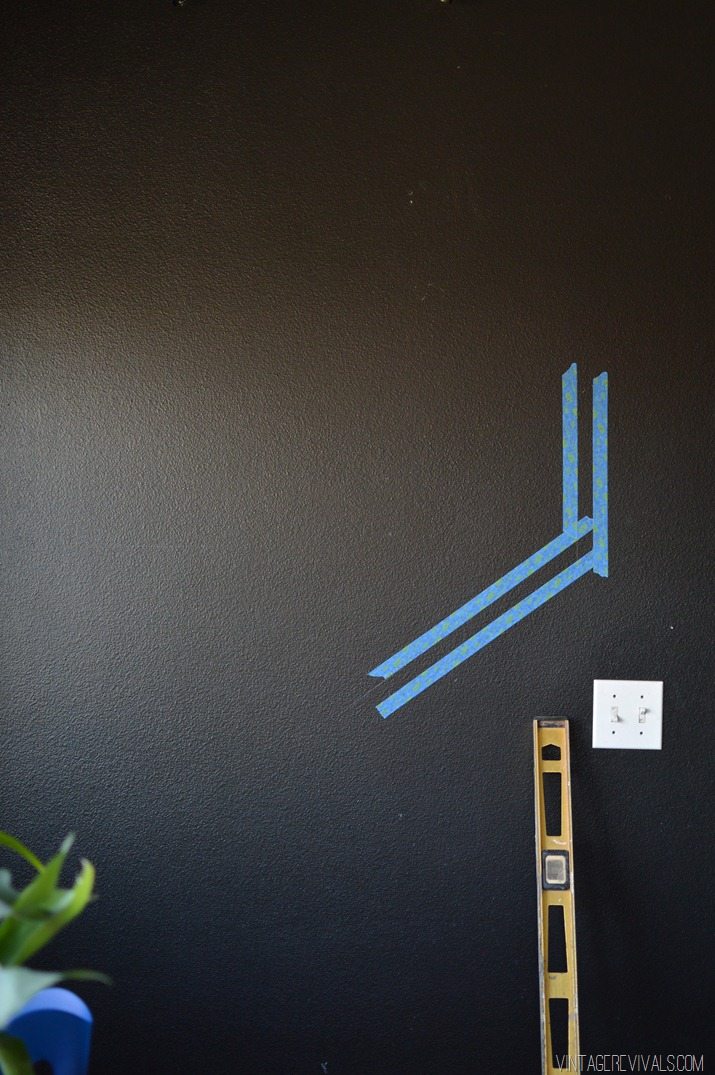
Draw two vertical lines starting at the tape line that you just created and extending up to the next set of marks.

Black and White Geo Wall-5


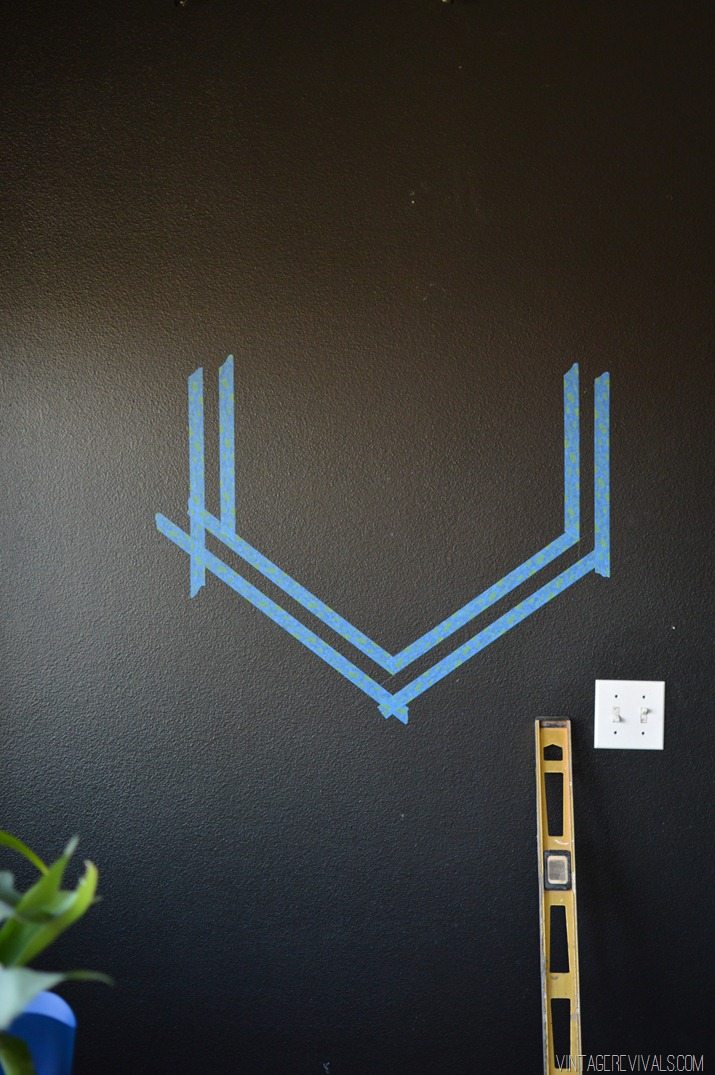
Repeat Step 1-3 to form the left side of the cube, mirroring the strips on the right side.

Black and White Geo Wall-8


(You’ll need to go back through with a razor blade and clean up the inside angles.)

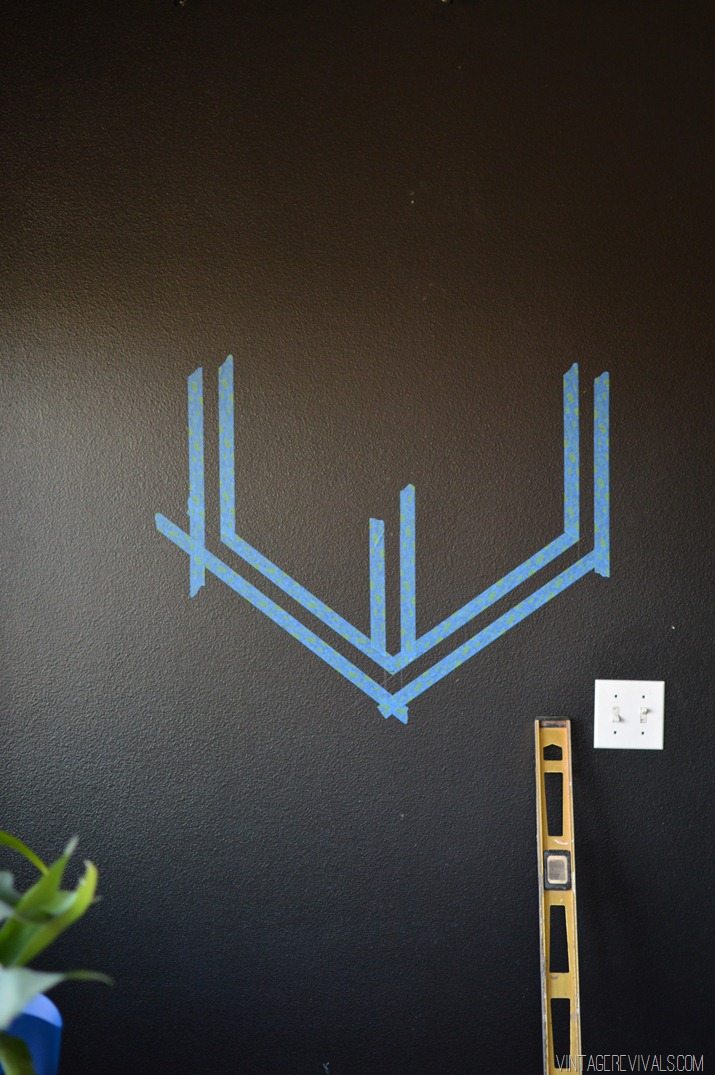
The next step is to create the center line. (Remember to center the point or it will be a wonkfest!)

Black and White Geo Wall-10


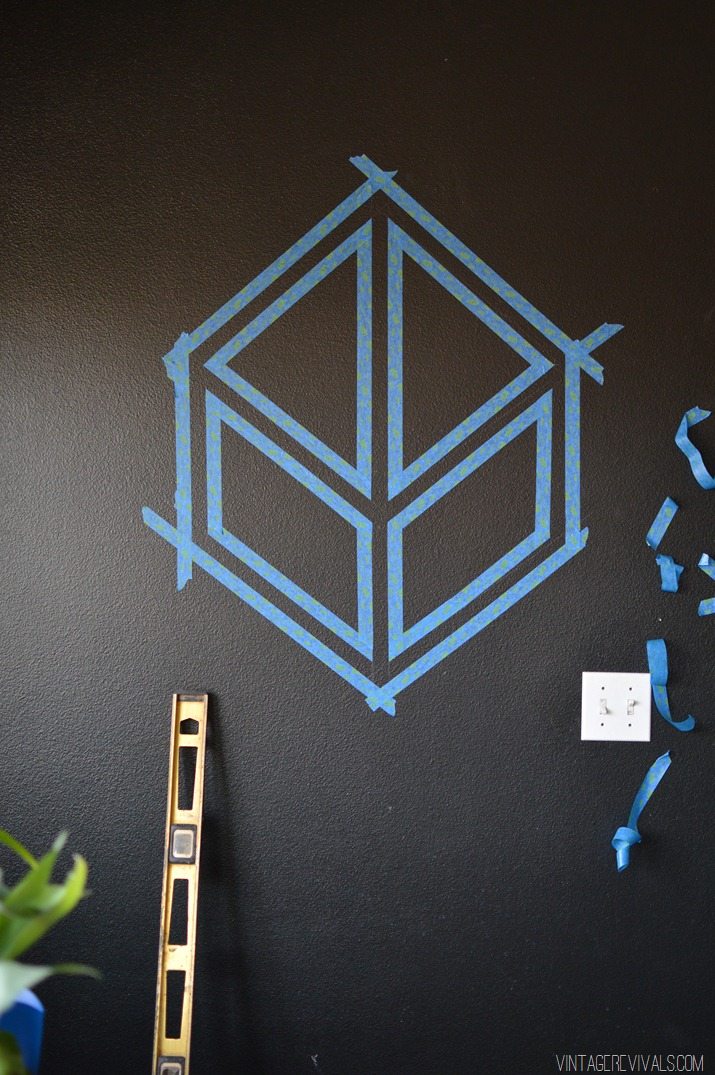
Then you’ll connect the outer edges to the center line and clean up the overlap.

Black and White Geo Wall-16


To finish off your cube shape,  connect the outside lines to your last remaining mark. Then connect the horizontal sides to that. Can you see the cube? Magical!

Black and White Geo Wall-23


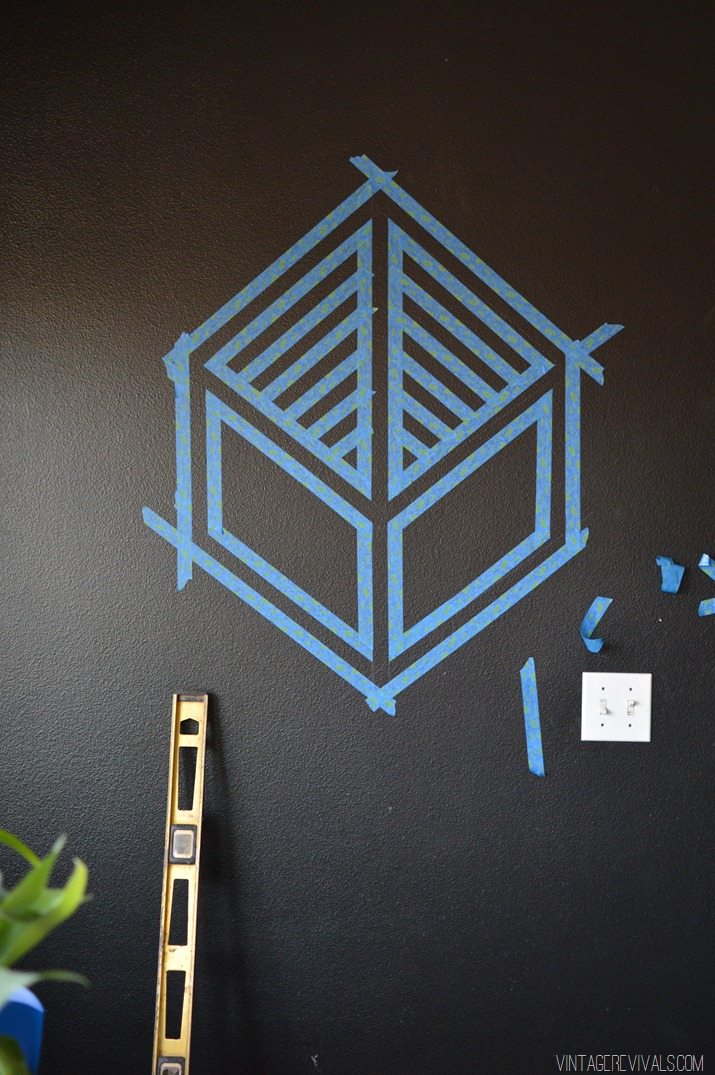
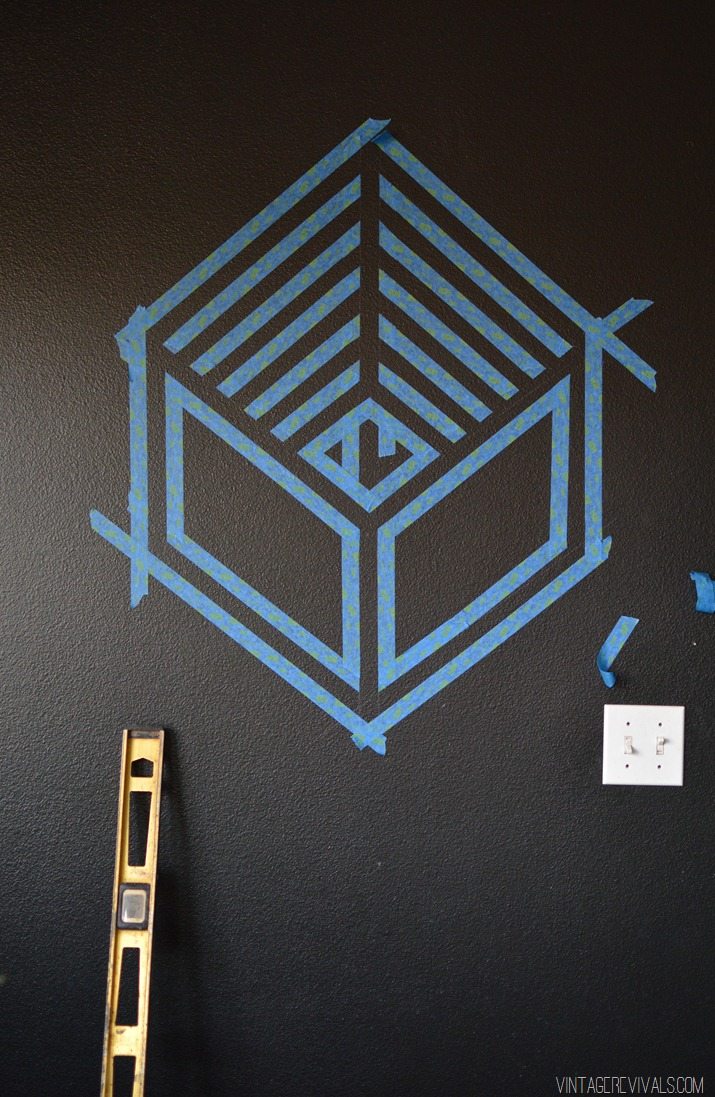
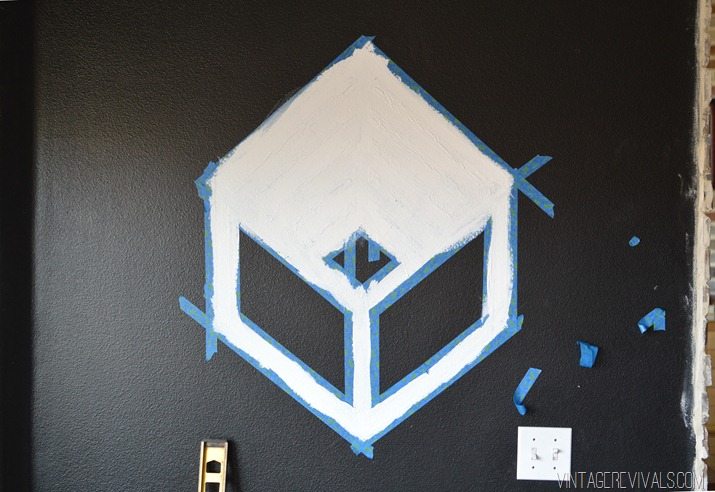
Fill the backside of your cube with parallel pieces of tape (make sure that they match up on both sides!
Black and White Geo Wall-26


The last step before painting is to trim the tape between the stripes (otherwise they would just be floating in the middle of your cube, and that’s just not the look we are going for.)

Black and White Geo Wall-28


Black-and-White-Geo-Wall


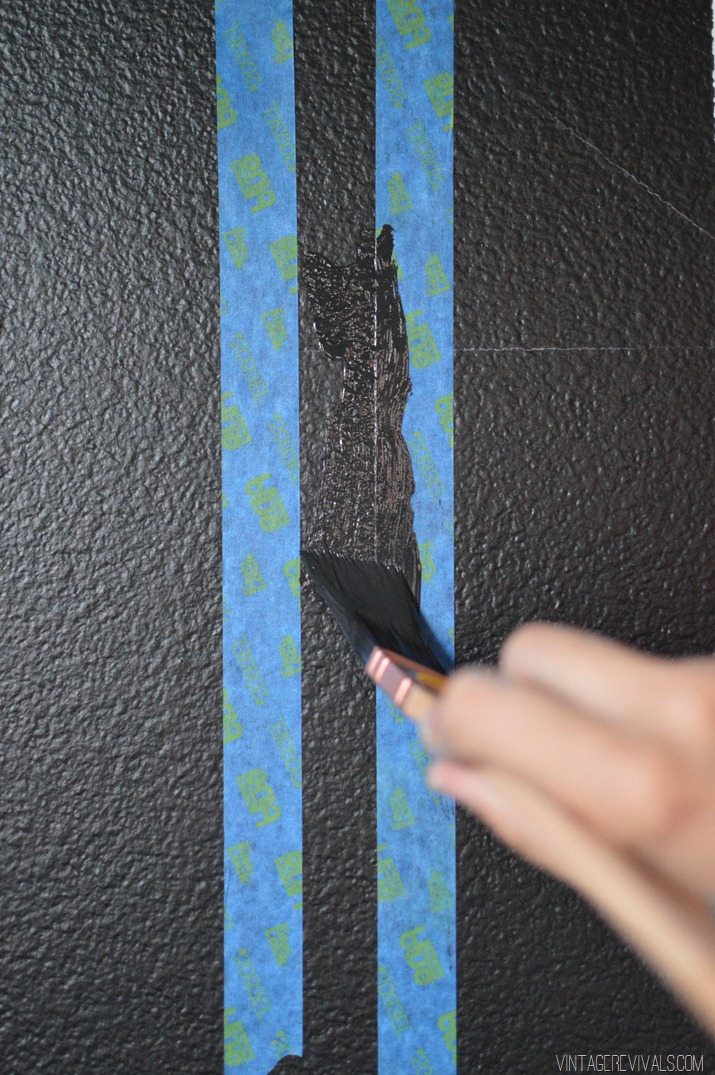
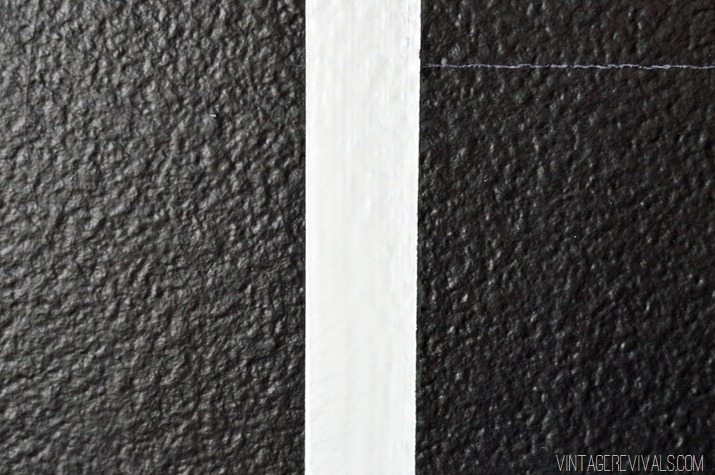
If you hear nothing else that I say today, hear this. The secret to getting perfect paint lines is to put a small amount of your wall color along the tape BEFORE you put on the accent color. Especially if you have textured walls.

Black and White Geo Wall-31


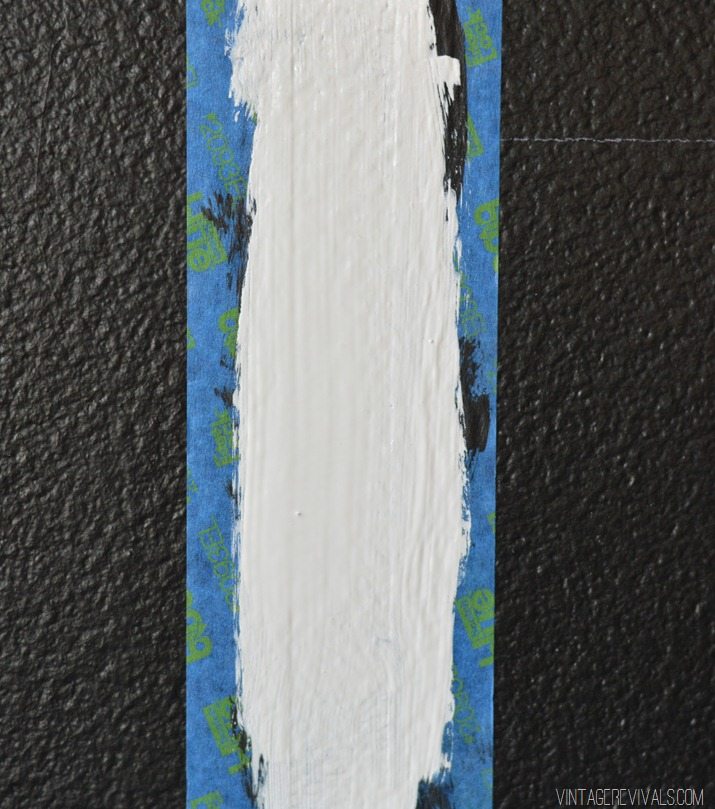
When that coat is dry then you can go back through with your accent color.

Black and White Geo Wall-32


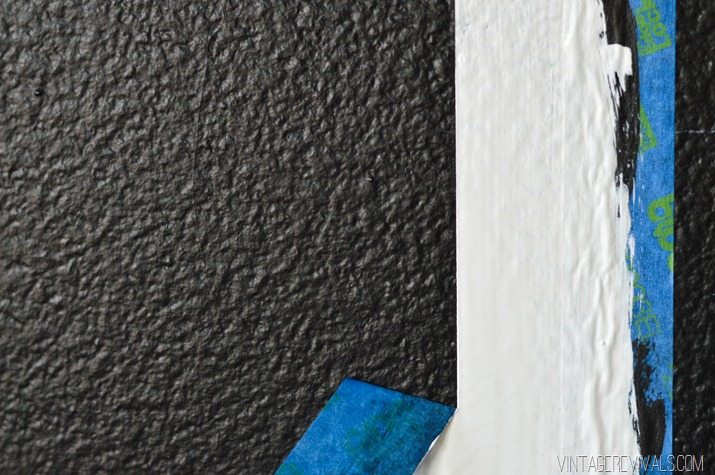
Peel off your tape at a 45 degree angle while the top coat is still slightly wet.

Black and White Geo Wall-33

Black and White Geo Wall-34

Seriously. Can that line be any more perfect?!


Black and White Geo Wall-29

Black and White Geo Wall

Can you imagine this as a repeating pattern on an entire wall? Amazing.

Huge thanks to ScotchBlue™ for teaming up with me on this project!!

LoveYourGuts14

The Overconfident Dream List of Pre-Baby Projects

By Mandi | 08/20/2015 | 31 Comments

Man, there is nothing that lights a fire under me like telling me that I cant do something.  And in roughly 20 weeks, we will have a new little nugget that will undoubtedly make it hard to tear myself away to go and paint a wall.  (I was trying to explain to Court that its practically September, which means its October, which means Christmas is over, which means we have like 2 weeks until the baby is here.) 

I thought it would be fun to share with you guys the list of all I’d like to get accomplished. Court thinks I am insane, but you guys are really good enablers so lets get the guy motivated together!!

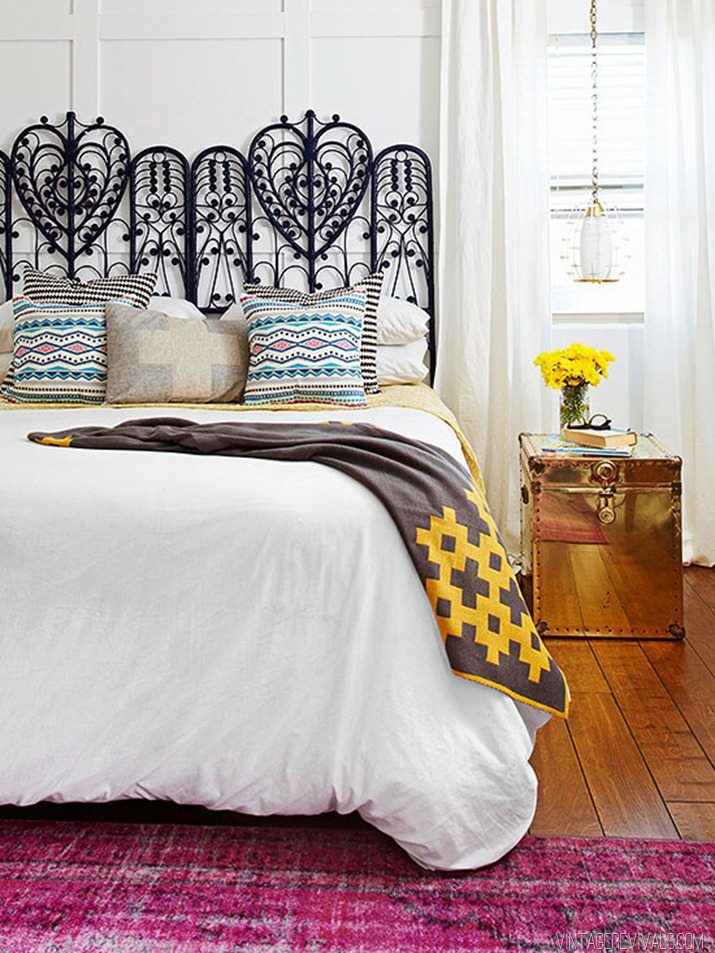
The Master Bedroom.  Sighhhhhhhhh.  The freaking master bedroom.  You may remember a while ago (um. 2013)I had major plans to do a real time master makeover.  I got a few projects deep and at this point just didnt love where it was going.  So I stopped to re-evaluate.

ColorBlockedVintageWickerHeadboardPr


When BHG came to shoot I whipped it into shape a little so that it was ready for pictures, but in my mind it just wasnt ever done (you know that feeling rihgt?)

 102161313.jpg.rendition.largest

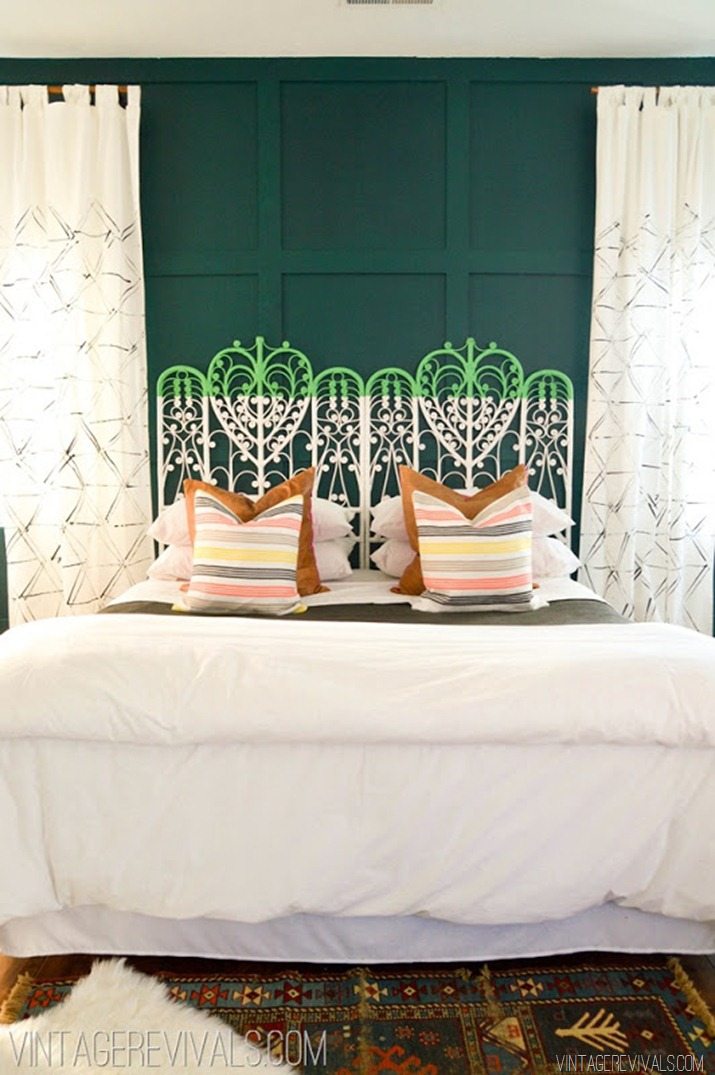
Then I had some big plans to turn it into an office (lots of walls for pictures) so we moved the bed into the teeny 4th bedroom and have been camping out in there for a few months.  Long story short, I’m ready for it to be a bedroom again.  Right now all I’ve got figured out is the headboard (its going to be so goooood!!) but once everything gets rolling I’m hoping it’ll all fall into place.

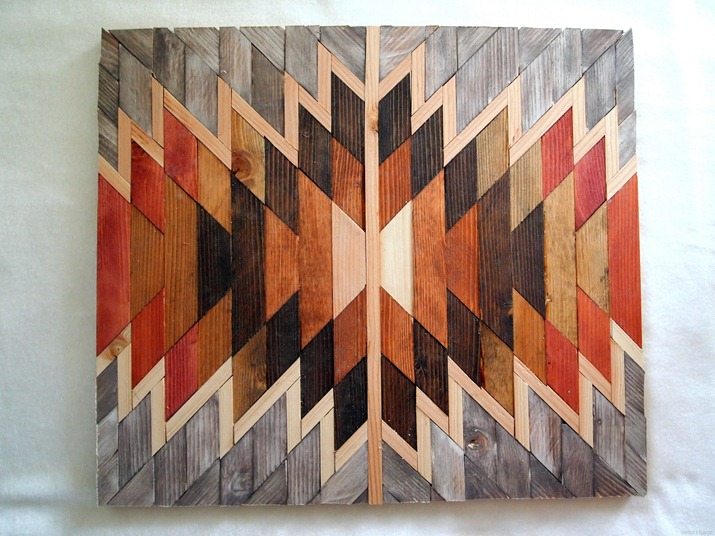
The Kitchen.  Sighhhhhhhhhhhh x2.  The kitchen makeover started with the tile (hellooooo 2 years ago!) and came to a dead standstill once that was done.  The thing is, I dont want to completely renovate it.  I dont have 20k to pour into it, I want it to be actually doable for most people that hate their kitchen and have a teeny budget.  That being said, I dont want it to look like I spent nothing.  And have you guys seen this piece of art the Nick and Beth did?  Can you imagine something similar only 10x bigger?  Maybe as big as a kitchen table?!

DIY-Native-American-Artwork-using-scraps-of-wood-and-different-stains-Sawdust-and-Embryos


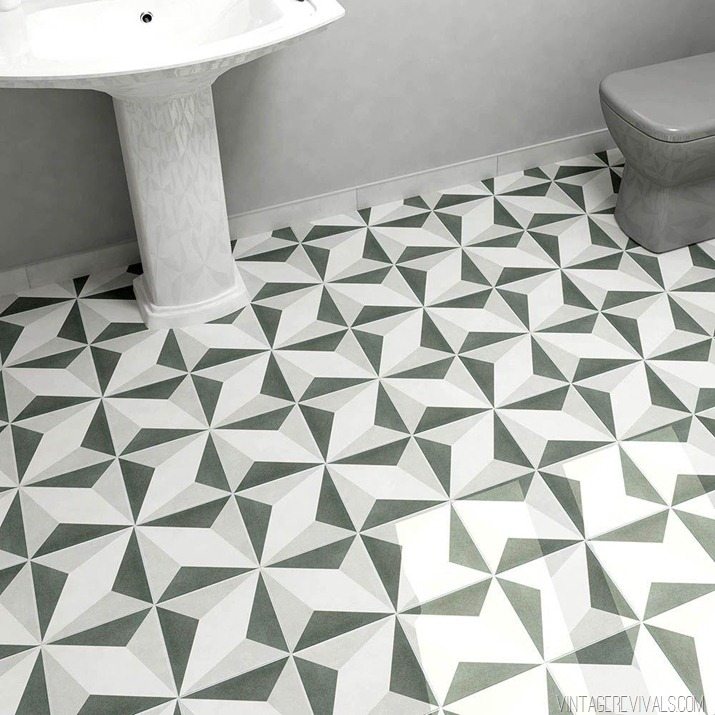
The Laundry Room.  Our laundry room hasnt been touched since the day we moved into this house.  Beige paint and horrible linoleum greet me every time I walk in the door.  No wonder I hate laundry (jk, I would hate laundry even if I had to do it in the most gorgeous laundry room ever.) but its such a teeny space that with a little bit of effort we could have it looking and functioning a million times better than it does right now.  I’m a little torn between using the same tile that we used in the kitchen, or doing something really exciting like this tile from Home Depot (HELLLOOOOOO. Way to step up your tile game HD!)

7ba3c060-5003-46c0-b847-056b5dbd3231_1000


The Nursery.  The teeny 4th bedroom will be the baby’s room (once we get moved back into the master.)  The problem that I’m having is that I’m not sure I’m ready to dedicate an entire room to a baby that will most likely sleep in our bedroom.  Thoughts on this one? 

Ok so who wants to come over and help?

LoveYourGuts14

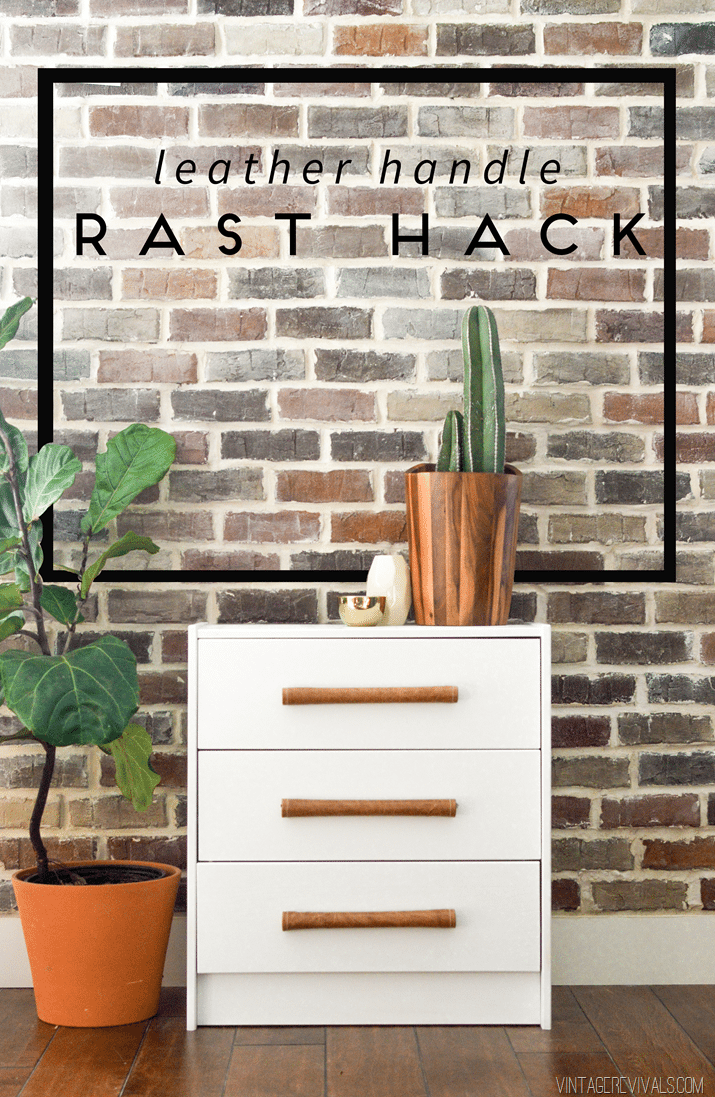
DIY Leather Handle IKEA Rast Hack

By Mandi | 08/18/2015 | 17 Comments

Well hello there! As you can imagine after our last post, things have been a little lax on the DIY front these days. That coupled with squeezing the last drops out of summer have made for a much needed breather. But, the girls are back in school and sawdust is in the air once again!!

There are about 5 million ways to rock a Rast hack. I mean, how can you go wrong with the most basic $35 dresser that has ever existed?! It screams at you to do something exciting with it! While I was at IKEA last month I bought one just for its blank canvas properties and knew that a fun project was just around the corner.

If you know anything about me you know that I am addicted to plants, I say “you guys” waaaaay too much, and I love leather. Specifically the scrap leather that I have laying around my house from doing things like skinning thrift store couches.

DIY Leather Handle IKEA Rast Hack Tutorial


This hack is cake. The only tool that you’ll need is a router.

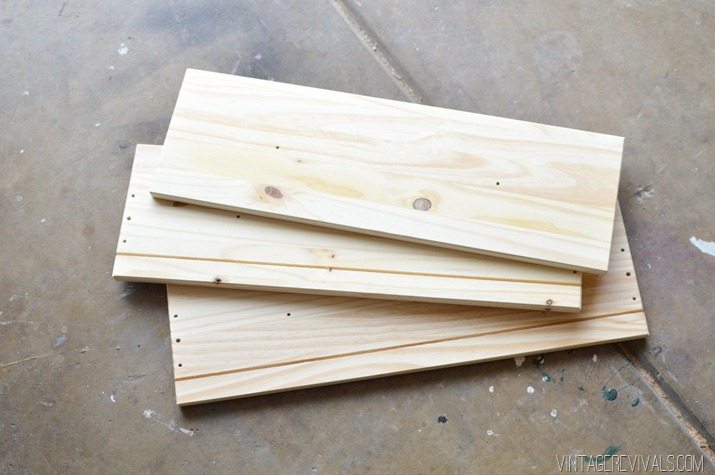
Start by assembling everything on your dresser except the drawer fronts.

DIY Leather Handle Rast Hack


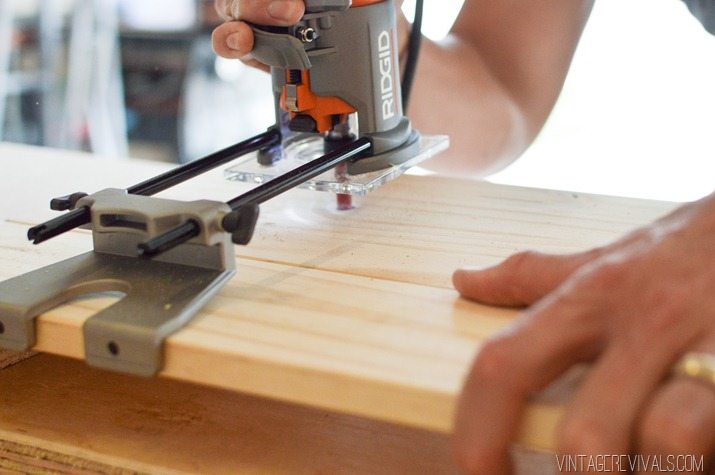
The drawer fronts are pre-drilled for handles so we used it to our advantage and that is how we determinted the width of our leather pulls. All you have to do is route a (semi) straight line between the holes.

Use the guide on your tool and it is so easy!

DIY Leather Handle Rast Hack-2


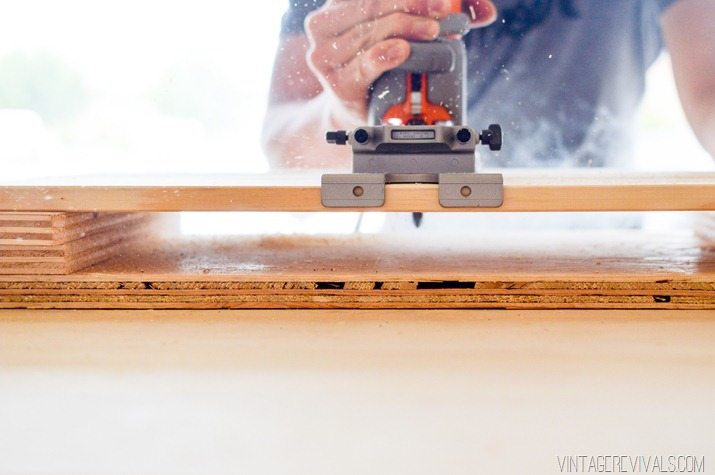
Because we wanted the routing tool to go all the way through the wood, the piece needed to float above the table to create a little pocket for the bit to exit.

DIY Leather Handle Rast Hack-3


One thing that we learned is to move the router smoothly and consistently the entire time it is on, if you pause you’ll create a larger opening in that spot.

DIY Leather Handle Rast Hack-4


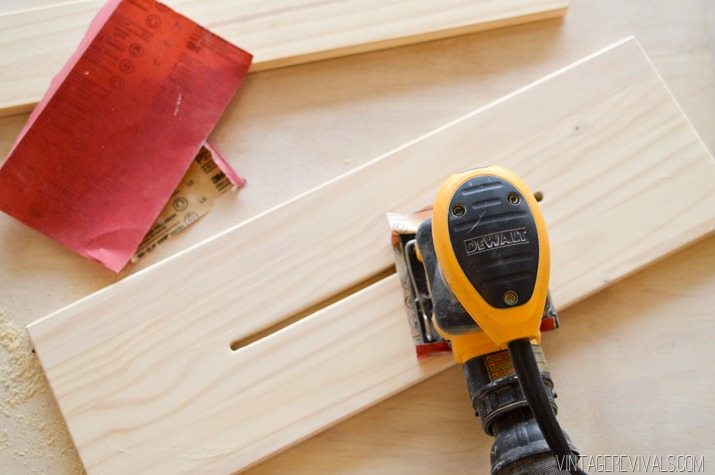
When your drawers are routed, give the entire dresser a quick sanding with 220 grit sand paper

DIY Leather Handle Rast Hack-6


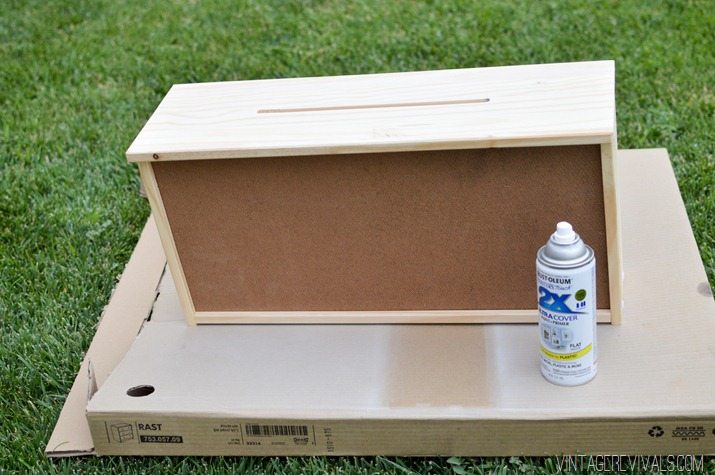
I painted my dresser white with RustOleum 2x White in Flat. If you cant find the color that you are looking for in spray paint, I have a great tutorial for using roll on paint that will give you a flawless finish.

DIY Leather Handle Rast Hack-8


When everything is nice and dry, its time to attach your handles!
 

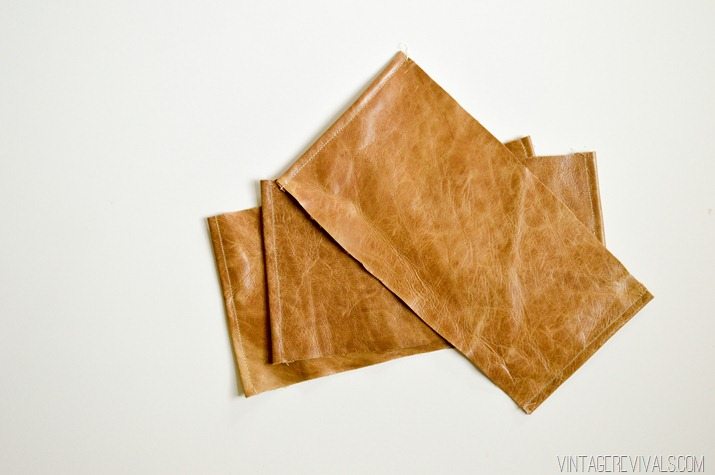
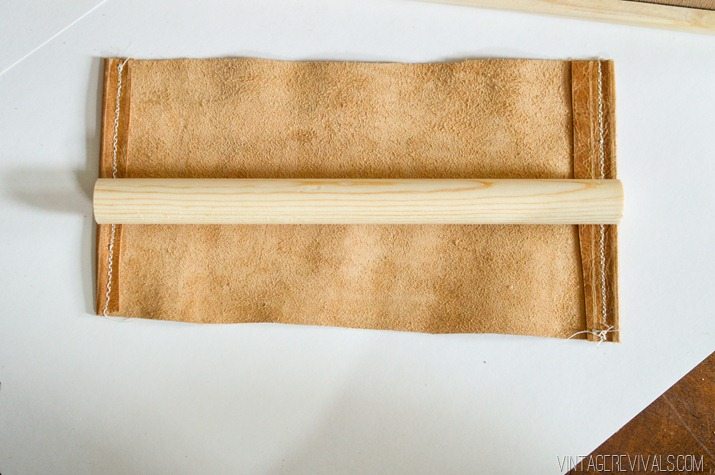
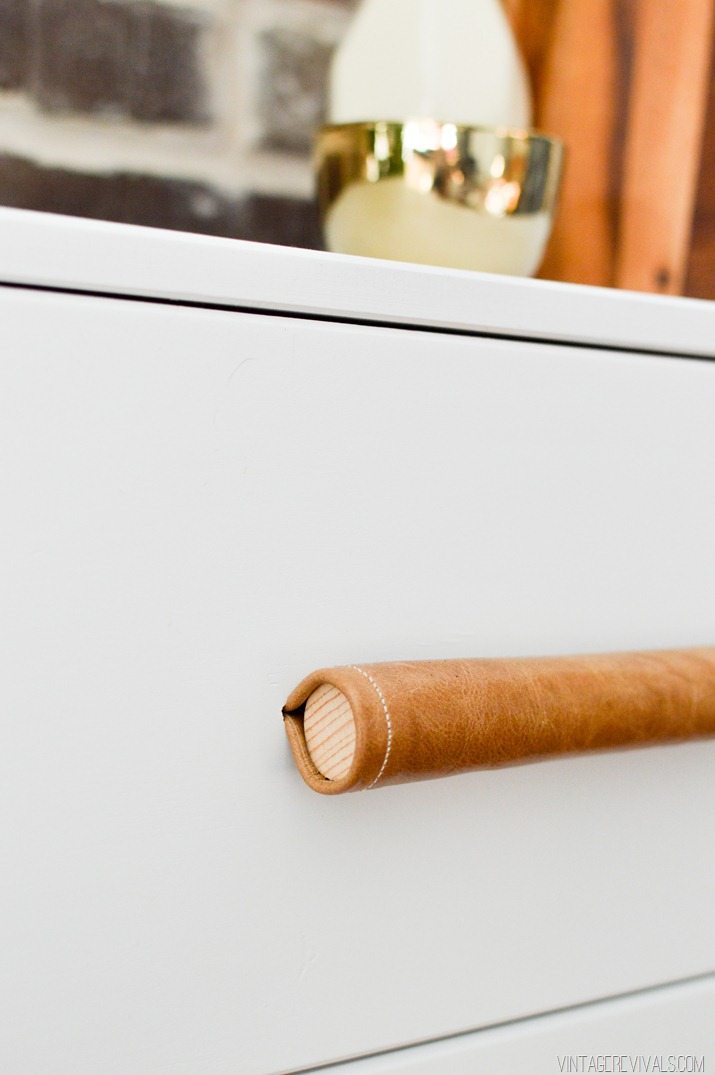
I had some scrap 3/4” dowels that I put inside the leather because it was so soft and floppy. If you use really stiff leather you probably wouldnt need to use them.

I folded over and stitched the edges of the leather just to finish them off a little, this part is totally optional but I love the way that the stitching gives it a little contrast!
DIY Leather Handle Rast Hack-11

DIY Leather Handle Rast Hack-14


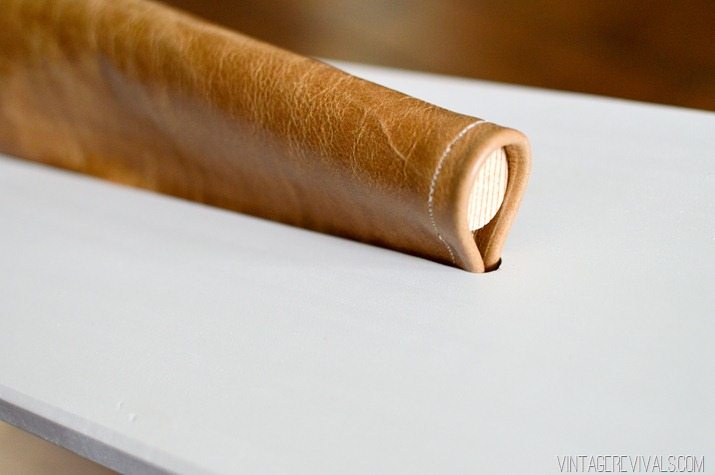
Fold the leather around the dowel and stick it into the hole that you created.

DIY Leather Handle Rast Hack-15


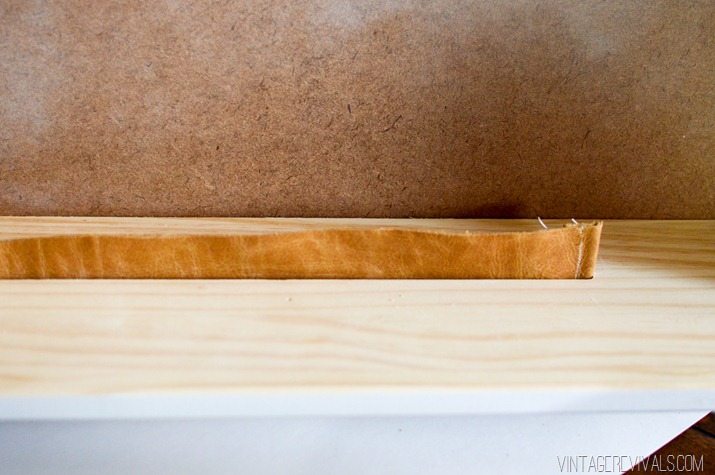
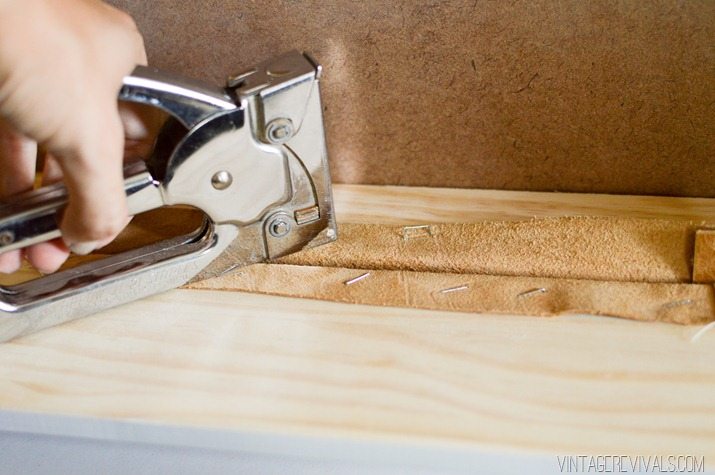
Pull it through the other side, split it open and staple both sides down the inside of the drawer.

DIY Leather Handle Rast Hack-16

DIY Leather Handle Rast Hack-17


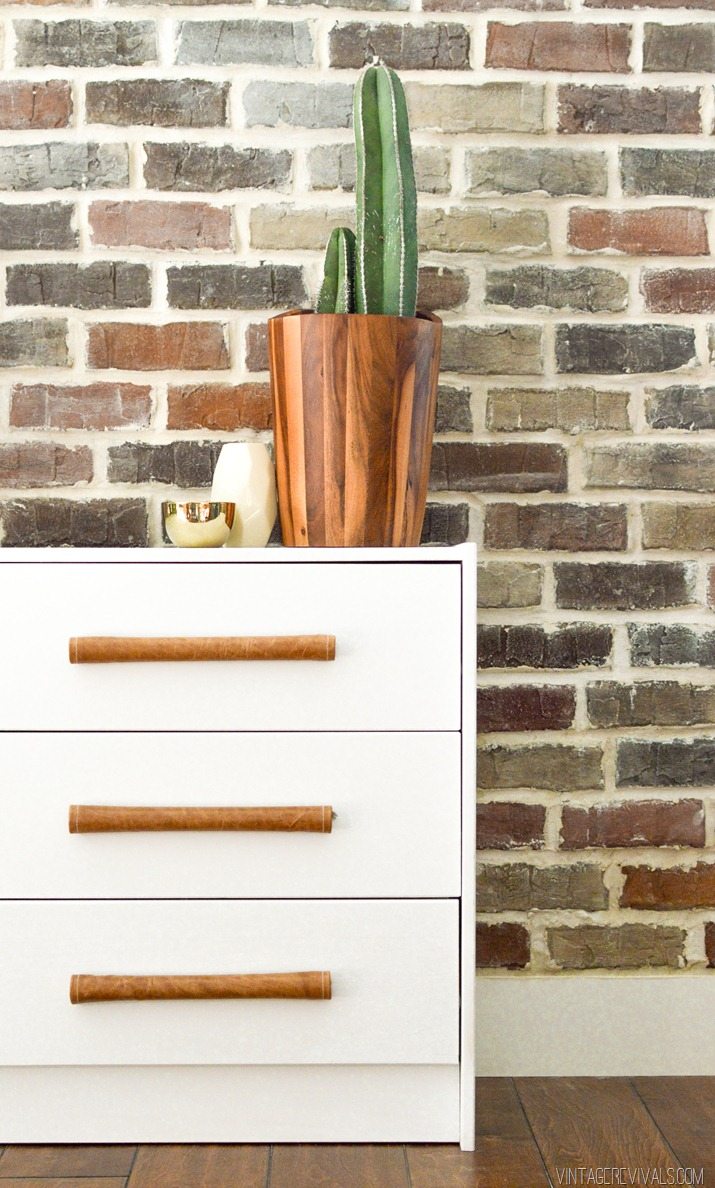
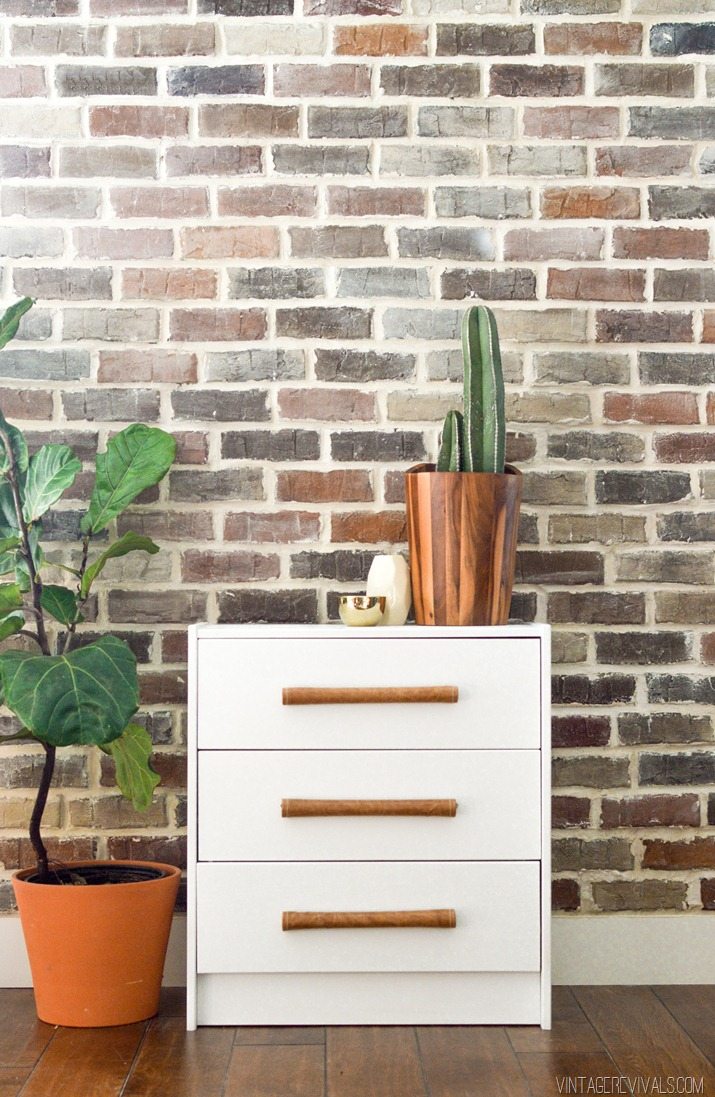
And you’re done!!

DIY Leather Handle IKEA Rast Hack-4

DIY Leather Handle IKEA Rast Hack-2

DIY Leather Handle IKEA Rast Hack


Can you think of all of the places you can use this!? I think this guy might be going in Ivie’s room as a nightstand.

LoveYourGuts14

Our Funnest Announcement Ever!

By Mandi | 08/07/2015 | 89 Comments

You may or may not have noticed that I’ve been a little sporadic with the posting happening around these parts.

Wellllllll, I’m so happy to announce that we’ve had a pretty great reason.


And lest you think that our family is actually sort of well behaved, here is the blooper reel.


Have an awesome weekend!

LoveYourGuts14