Real-Time Bedroom Makeover

By Mandi | 06/25/2013 | 53 Comments

I asked, you answered, and now we are embarking on a journey of sorts. Well, a journey for me because this is the opposite of the way that I usually do room reveals. I am going to attempt to show you in real time just what happens when I overhaul a space. Hold on to your hats, friends, because this is as close to TV magic as it gets.

Let me start off by saying that the beautiful precious souls that make up the other half of our loving family of 4 (that would be my daughters) are staying at their Grandma’s for a couple of weeks. Which means, I can project my ever lovin heart out and not need to stop unless I want to (yes, I just used project as a verb.)  This fact alone is cause for a celebration of epic proportions.

Some of the posts will be tutorials, some will be shopping and craigslisting sneak peeks,  some will be moments of frustration, but one thing is guaranteed. You will be along for the entire ride. The plan is to get the room done over the course of the next few weeks (I do have a few other posts to mix in with it).

But here is what I need from you.

I need your cheers, I need your feedback,  I need you to make me feel like this is THE BEST THING EVER. Otherwise I might die. Posting in real time means no back up,  its sort of like I am doing SkyWire, but in blog makeover form.

1372043315618395_largeSkyWire

Ok lets pause that thought for a small heart to heart. When I started Vintage Revivals 3 years ago it was a COMPLETELY different world. There was no Pinterest. Which meant every shot did not need to be a money shot. You could post a picture of your dresser in your driveway and it was FINE. Now? Notsomuch. Everything needs to be staged and shot and vingetted till the cows come home. Its just the way it is.

SO. I am totally going outside my comfort zone posting JUST a painted wall. And nothing else.

Hives people. Hives.

I need your ooohs and ahhhs over a painted wall job. Mmmkay? Otherwise I just might go AWOL and pop up a few weeks later with an entire room full of projects and money shots.

Now comes the really fun part.

The Plans.

Do you remember 2 years ago when I announced that my living room was going Southwest and everyone thought I had inhaled too much spray paint?

For some reason you guys pictured this:

091107g

Also please enjoy the master bedroom:

091107i

When it actually turned out like this (and it admittedly a little less southwesty than planned because of the stencil fail, but was totally not going to turn out like the above.):

Living Room Makeover @ Vintage Revivals

So here are the plans for my Master Bedroom.

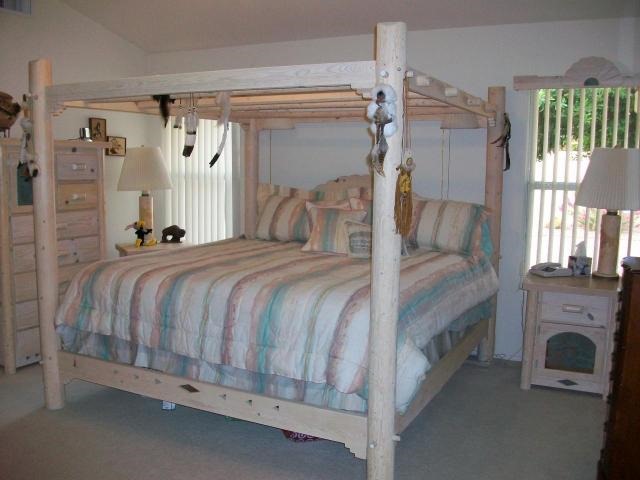
This is what it looks like now…(on a good day)

Master Bedroom Makeover Ideas 003

The makeover plans include:

An uber dark green wall somewhere along the lines of Hunter Green. Did you cringe?

A swirly wicker headboard from 1978.

And roses.

All I have to say is…

tumblr_ln8fwu1t831qzk299o1_500

And just like Mr. Nik Wallenda I am working without a safety net people. Hopefully I make it to the other side and not fall to my design death. But even if I do, its bound to be entertaining.

Also?

If I did fall to my design death, it would look a little something like this:

Mandi_29

And yes, that picture was intentional,  I just didnt think it would be THAT bad. 19 cycles of America’s Next Top Model did nothing for me.

The whole point of this? I hope that you are inspired by these daily doses of DIY and start tacking the projects in your home that are giving you the itch.

Love Your Guts

How To Paint Concrete UPDATED!! (Plus My Secret Cleaning Tip!)

By Mandi | 06/24/2013 | 124 Comments

Happy Monday my friends! You may or may not know that about a year and 1/2 ago I posted a really through tutorial for painting concrete/cement. Ivie’s floor was my first experience and its held up really well, so well in fact, that I decided to rip the carpet out of Dylan’s room and paint her floor too.

How To Paint Concrete Floors Tutorial @ Vintage Revivals

So why another tutorial? Well, I’ve learned a few things along the way that I would love for you to know to (in case you are planning on tackling your own concrete painting project!)

Carpet Removal

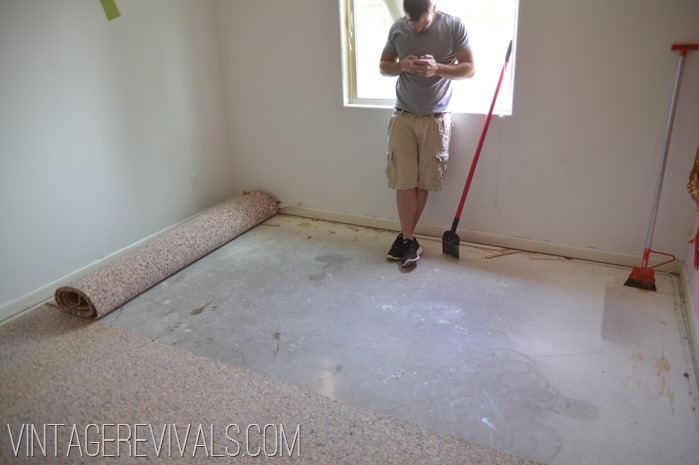
First up is carpet removal. Not the funnest job in the world, that is for sure. Dyl’s room is preeeeetty small so it wasn’t a horribly hard job (but if you need a few more tips on that, pop over and check out this post on YHL.)

DSC_0190

Once your carpet and pad are out its time to remove the tack strips. (Those are the pieces of wood along the edge of your carpet that hold it in place.)  You can use a myriad of tools for this from a chisel, to a hammer, to a screw driver. We used floor scrapers to remove them (you can see both of them in the picture above)  The one on the left is a little finer and you have a little more control, and the one on the right is sort of like the bulldozer of floor scrapers and destroys everything in its path. Basically you are using them to pry up the tack strips. Make sure when you pick them up you are wearing gloves, those suckers are sharp.

Remove Adhesive

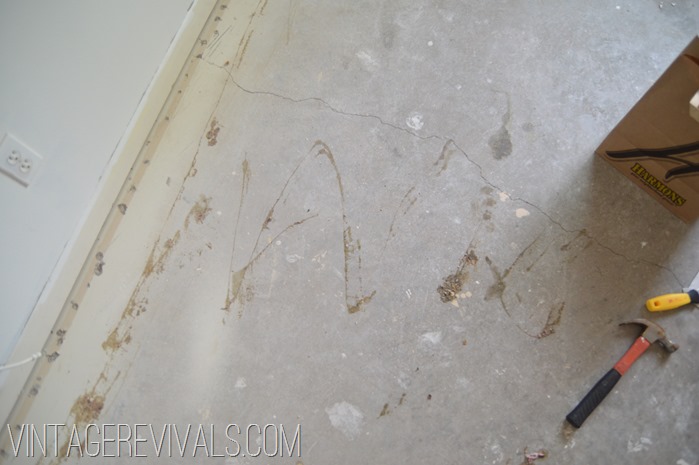
Now you have the fun job of getting off all of the carpet glue. And actually the proper spelling of that would be Carpet Human Fly Trap GAAA-LOOOOOOE. Our carpet was laid when we moved into our house 4 years ago and the glue was still VERY sticky. I don’t know at what point it looses its tack and becomes concrete like but I have heard that does happen….

DSC_0192

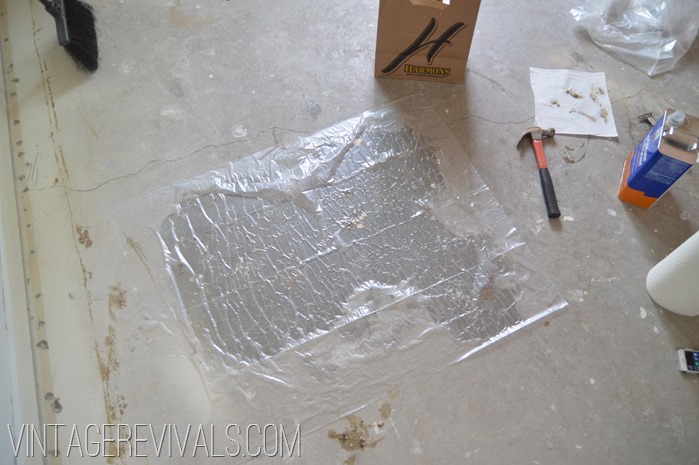
In my first post I talked about dousing it with  Lacquer Thinner and letting it sit and then dousing it again and scraping it off with a plastic scraper. This is what I have learned since then,  if you pour a fair amount of Lacquer Thinner on and then cover it with a plastic garbage bag for 10 minutes the glue comes RIGHT off. Very little scraping involved. I took a few garbage bags and cut them down one side and the bottom so that they could cover a larger area.

DSC_0194

Fill Holes

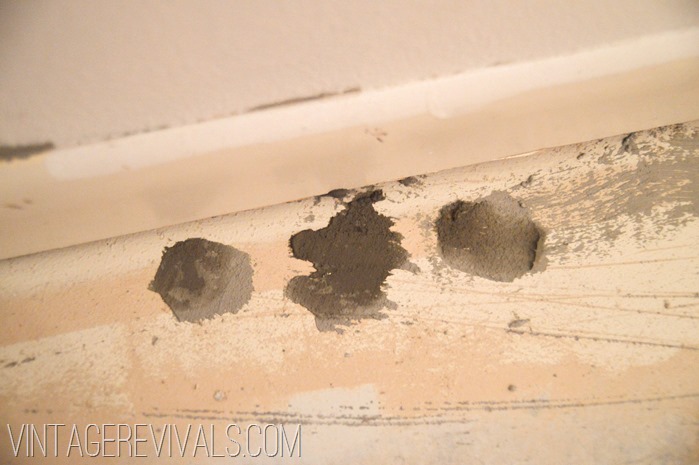
If you previously had carpet, then you are going to have lots of cute little holes along your baseboard that will need to be filled before you can paint. Mix up a batch of Quickcrete and fill your holes (its ok if you overfill them a little) and let it cure overnight.

How To Fill Holes in Concrete

Sand Baby Sand

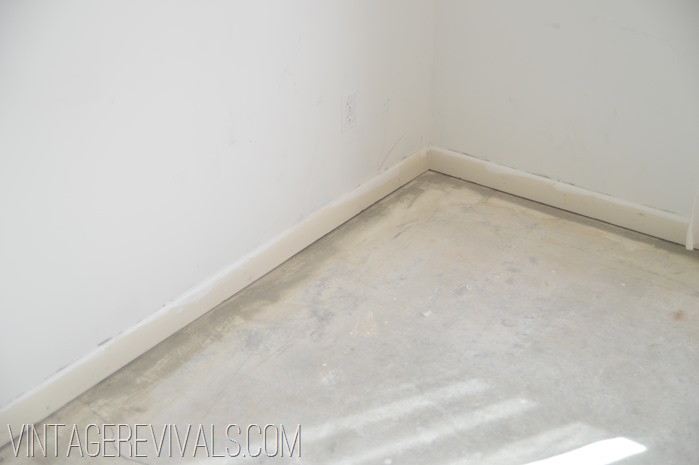
The last prep step is to sand your heart out. Use a pole sander (you can buy them for around $6.00 at Sherwin Williams) and 80 Grit Sand Paper to rough up the entire surface of the floor. Sand the entire floor one direction, then sweep it up. Then sand it in the opposite direction, then sweep it up. Then sand one MORE time and this time when you sweep you want to sweep, vacuum, sweep, vacuum. Until you are SURE there is no dust left. (If you get it wet at this point you will have to wait 24 hours for it to fully dry, so don’t do that)  Just sweep and vacuum like your floor’s life depends on it…because it does. Take special care to sand along the edges where you filled the tack strip holes and they should blend right in.

DSC_0198

Now comes the fun part.

Paint

Painting a floor is hands down the easiest thing on the planet. In fact I would rather paint 5000 floors than 1 ceiling. You don’t even need a paint tray!

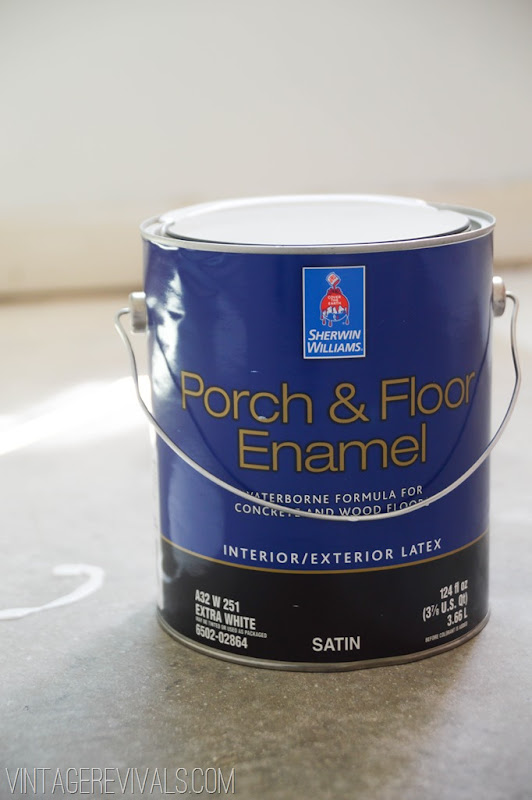
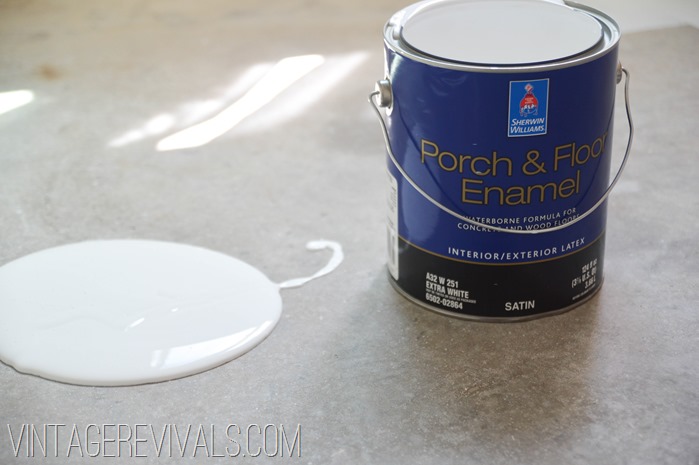
But you do need good paint. Regular latex paint is NOT for this project. You need something specially designed to withstand the beatings that a floor takes. The paint that I recommend is Sherwin Williams Porch and Floor Enamel. It is AMAZING and has held up SO well in Ivie’s room. It is a water based paint (so no crazy fumes) that is self priming and goes on so smooth. You do not want to get the wrong product when you are doing a project like this (can you imagine?!). You can have it tinted to any color of the rainbow, but personally I love the Extra White Base.

Best Paint For Concrete Floors

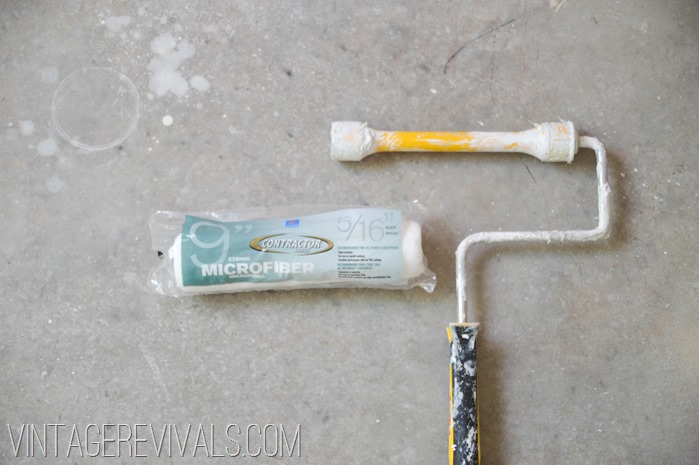
Make sure that you are using a microfiber roller cover that has a 5/16” nap for a really smooth finish. (If you are doing a top coat you will need to buy 2 of them.)

How To Paint Concrete Floors-7

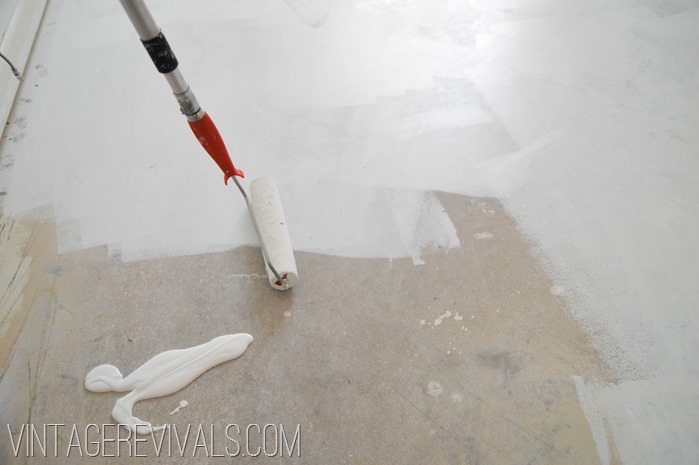
Pour your paint onto the corner furthest away from your door. I usually pour an amount that is the size of a dinner plate. If you have closets in the space you will want to start there.

Best Paint For Concrete Floors-2

Roll it the same way that you would roll a wall, in a “W” pattern. Make sure that you are not leaving any gobs behind (yes, gobs is the technical term.)

How To Paint Concrete Floors

Also, notice in the picture above that the holes that were filled absorb the paint more than the regular floor. So go over those extra well.

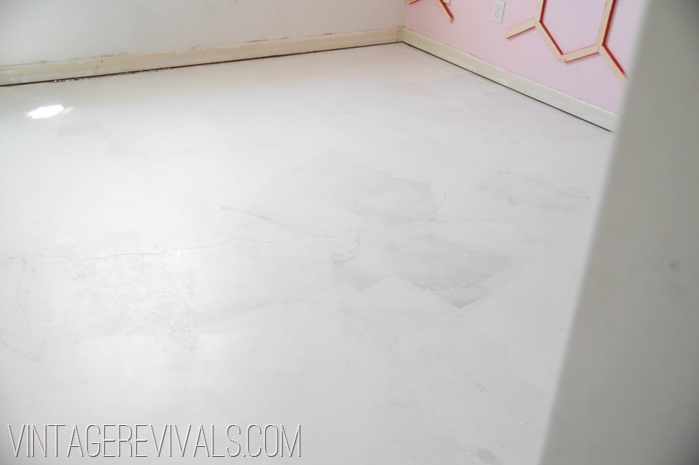
This picture is after 1 coat.

How To Paint Concrete Floors-6

Let coat 1 cure for a few hours. Once it is dry recoat following the same pattern. I didn’t need more than 2 coats on Dylan’s floor, but if you do, wait the appropriate amount of time before you recoat.

Sherwin Williams Porch and Floor Enamel does not require a top coat to seal it. You can leave it just how it is with a Satin finish and be golden as the geese on Willy Wonka.

But.

I LOVE LOVE LOVE having a top coat on because it makes cleaning the floors easier. It makes them shinier (this picture from Ivie’s room is the perfect example!)

How To Paint and Clean Concrete Floors Full Tutorial @ Vintage Revivals-16

If you are putting on a top coat, wait 24 hours before you do it to let your paint cure.

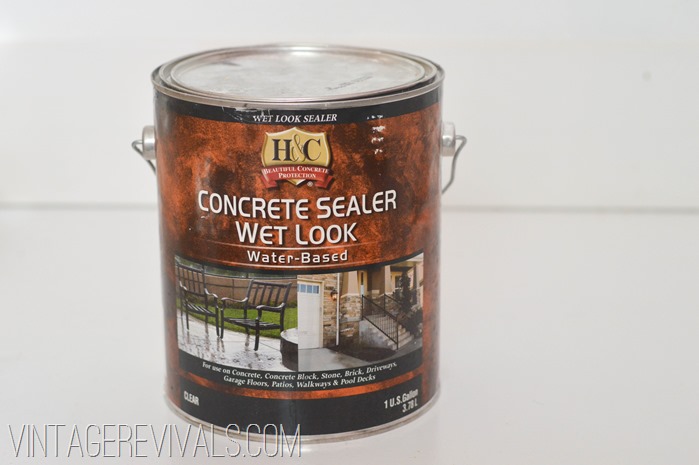
The top coat I recommend is H&C Wet Look Concrete Sealer (you can also buy this at Sherwin Williams). DO NOT use a polyurethane on top of your floor, especially if you have used white paint. You will hate your life when it yellows.

How To Paint and Clean Concrete Floors Full Tutorial @ Vintage Revivals-13

*When I did Ivie’s room I did 2 coats of Sealer and there are a few places where the concrete was not level and it puddled there and has yellowed a little bit. So I would just say to one coat it and avoid that possible problem.

Once your top coat is finished wait at least 24 hours to walk on it and72 hours before you put furniture on it. Deal?

Dylan's Dream Room Makeover @ Vintage Revivals


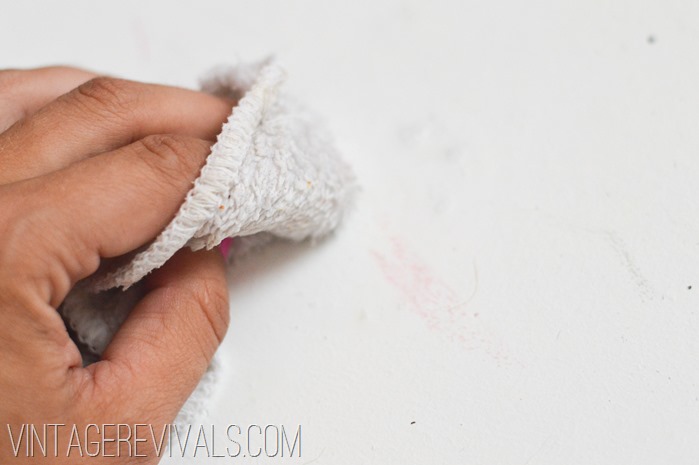
One question I get over and over again about painted concrete is how to clean it. Surprisingly the best method that I have come up with (after trying lots and lots) is dish soap and a washcloth. Yep,  regular old dish soap.

How To Paint and Clean Concrete Floors Full Tutorial @ Vintage Revivals-15

Put a small amount on the tough spot. (Dylan is going through a phase where she writes her name on EVERYTHING.)


How To Paint and Clean Concrete Floors Full Tutorial @ Vintage Revivals-7 Rub it in small circles with a damp washcloth.

Wipe it up with a clean non soapy one.

How To Paint and Clean Concrete Floors Full Tutorial @ Vintage Revivals-11

Do you have any questions about this project? Leave them in the comments and I will answer them there!

Love Your Guts


This post was written in partnership with Sherwin Williams. All project ideas, opinions and hard work are 100% mine.

Furniture Buying Fool

By Mandi | 06/20/2013 | 30 Comments

An intervention is in order. I have been buying furniture again.

The problem that I am seeing is, once I clear everything out of my house after the Hoard Sale I feel like new ideas have room to breathe. And so they start…and then they grow…and next thing you know I am calling everyone I know asking if they can help me track down a swirly wicker headboard from the late 70’s. Oh yes, I am SO going there. The good news? I found one. The bad news? Only 133 people COMBINED on FB and Instagram liked it. Which I think means that you are scared. Which I LOVE. Also you should be aware that when I am done with this, you are going to be wanting one too. Consider yourself warned.

1012123_541641582559292_622773696_n

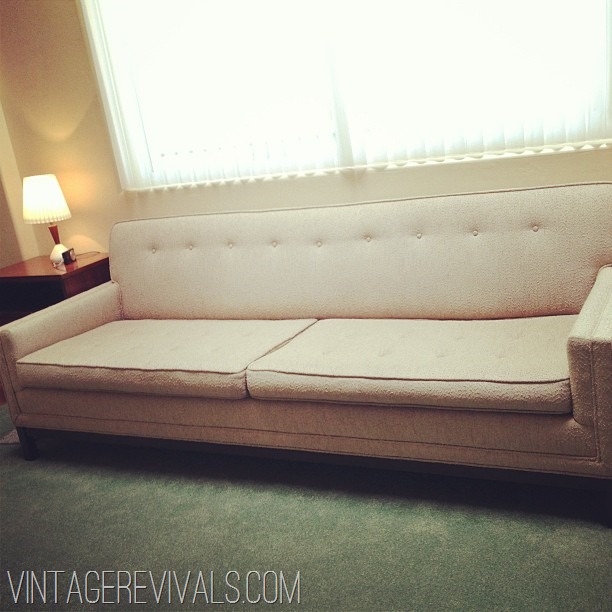
I have also bought a couch (the cushions look more deflated in this pic than they are in real life) and a few of you asked about buying used upholstery.

936915_536356219754495_1257314753_n

Typically I don’t buy used upholstery unless it is being reupholstered. But with a few cases like my orange couch and with this one, I bought them to use as is. In both cases I felt like I had a really good grasp on who the previous owners are (the previous orange couch owner is my friend,  and the woman who owned this couch is a neat freak. Her house was spotless and we had to take our shoes off every time we came in the front door during the transport.)  That being said, I don’t know if I would buy a couch without any indication who the previous owner with no intention of reupholstering. Make sense? And of course you want to CSI clean and get every piece of anything that could be evidence that it was owned by someone else off of it.

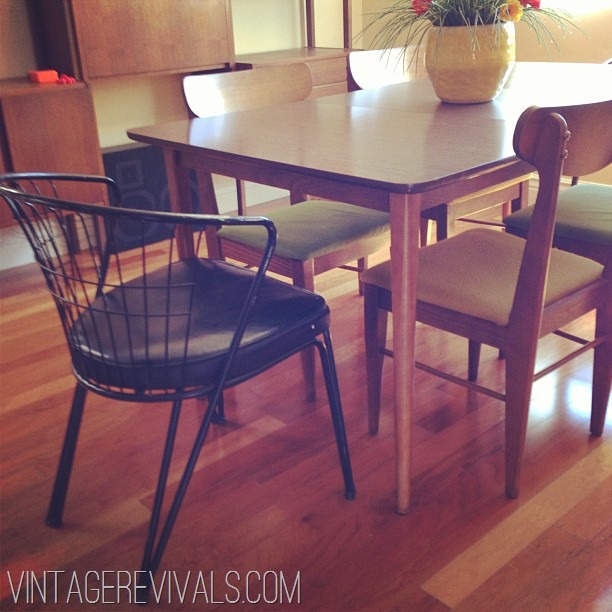
These dining room chairs (because I LOVE the black ones more than life) I got them from the couch lady.

971414_536363629753754_703571652_n


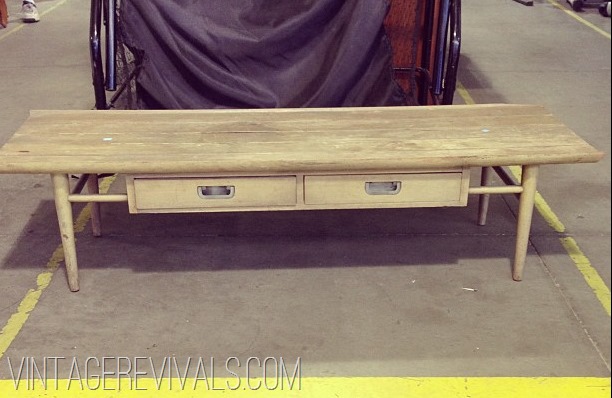
This bench for my 15 year old niece’s bedroom that is getting an overhaul in the next few weeks. So if you have a teenage girl in your life, hang tight because this room is going to be filled with stuff that she can do herself!

996180_541198975936886_1042815778_n

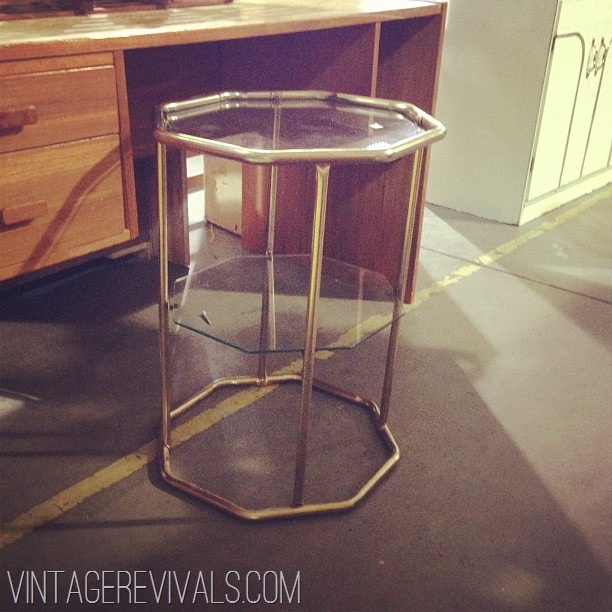
And this little side table because it was pretty cute and $5.00.

390079_541200585936725_498682493_n


Do you have any amazing scores lately? I want to see them! Leave a link in the comments so we can all be jealous!

Love Your Guts

Outdoor Summer Reading Nook Challenge with Pottery Barn Kids

By Mandi | 06/17/2013 | 86 Comments

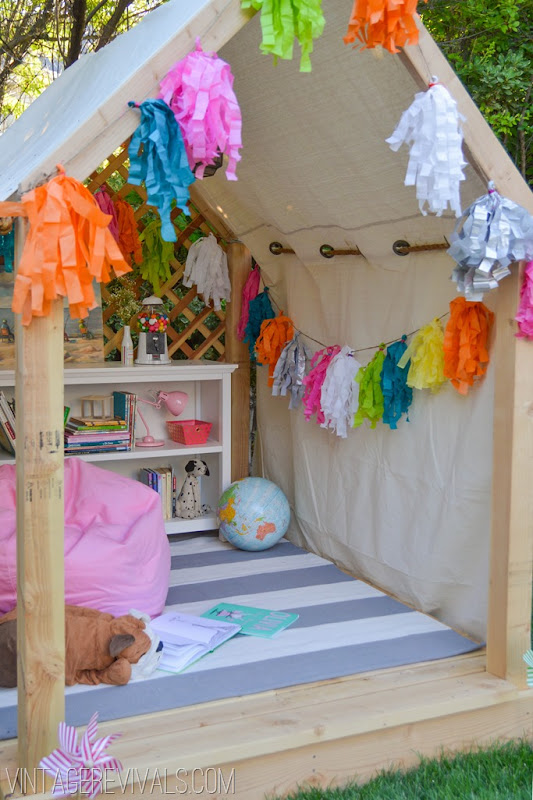
Fun project alert! A few weeks ago the folks at Pottery Barn Kids emailed me about creating a Summer Reading Nook for my girls and for their PBK and PBS Kids Summer Reading Nook Challenge. 5 other bloggers were included and we were given access to specific PBK staples for us to use in our nook,  the rest was up to us.

I don’t know what doing Dylan’s room did to my brain,  I think it unlocked my inner daydreaming child, because right now everything I am doing sort of has the perspective of someone roughly 3.5 feet tall. (what do you know, maybe I am a good mom…if you ignore all of the cereal/toast/ramen that happens in this house.)

So here is the thought process for this fun project. I don’t so much have a spot in my little house right now for a reading nook, so the obvious choice was to make something that was well,  not in my house. When I told Court the plans he was like…”Dude. This thing is going to be so heavy, and cost a million bucks,  can’t you just repaint a wall?” To which I replied “I mean, I understand, but if you saw what I see in my head you wouldn’t be able to shut it off either. Plus its freaking Pottery Barn.”

He then saw the light.

Aaaaahhhhhhhhhhhhhhhhh!

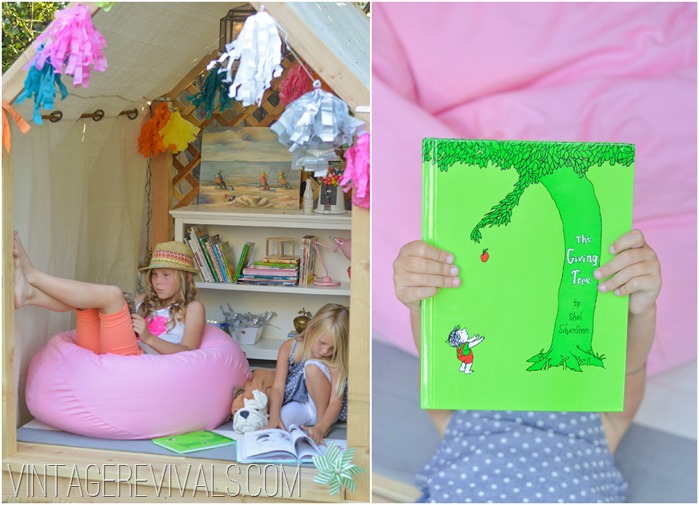
Summer Reading Nook Project @vintage revivals

Doesn’t it look like childhood in a jar? I am SO in love with it, and more importantly my girls are too.

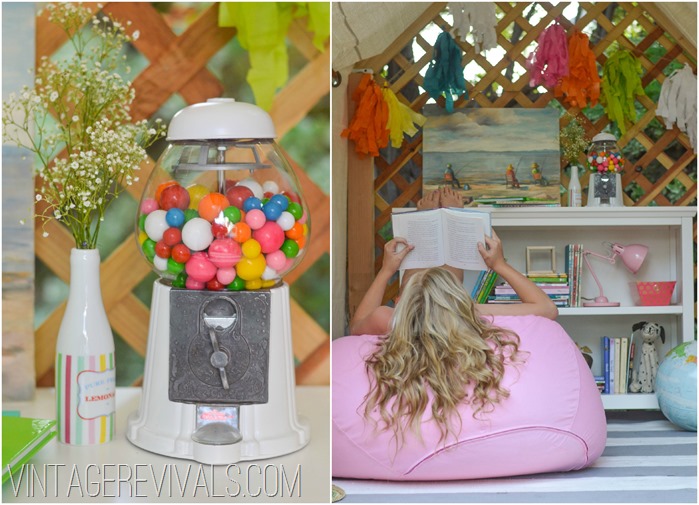
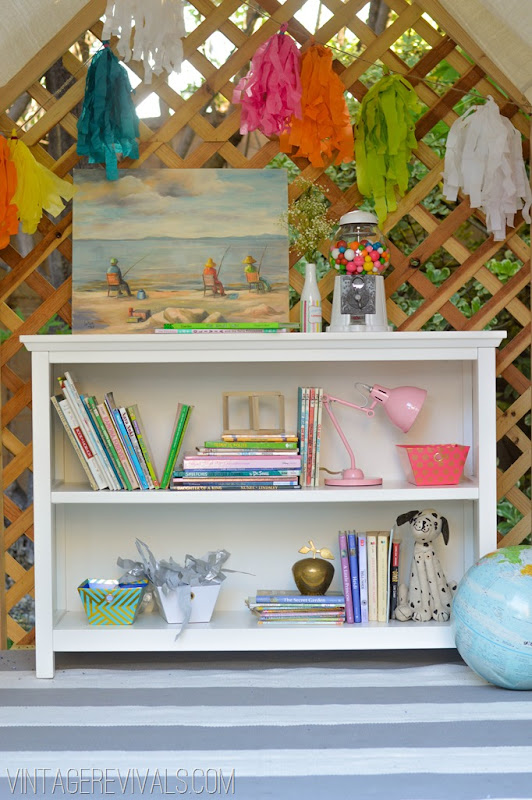
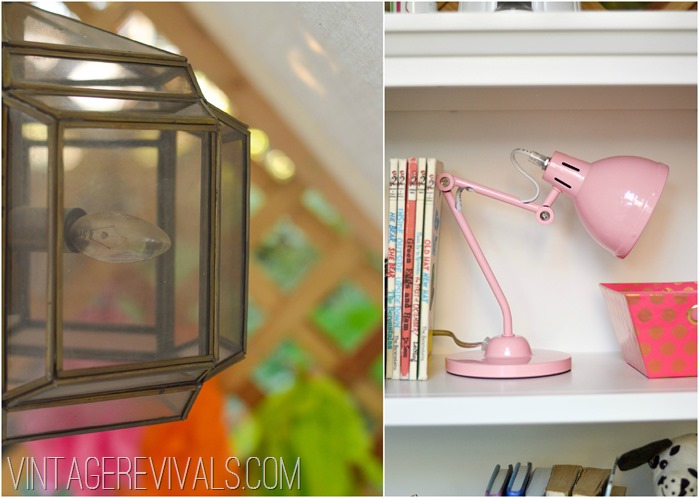
The design is a mix of thrifted treasures (the light and accessories),  family heirlooms (the amazing oil painting by my Great Grandma),  handmade flair (obviously the pom pom tassels),  and Pottery Barn Kids Furniture.

Summer Reading Nook @vintage revivals-12

(Bookcase / Rug / Beanbag / Dalmatian Bookend / Pink Task Light)

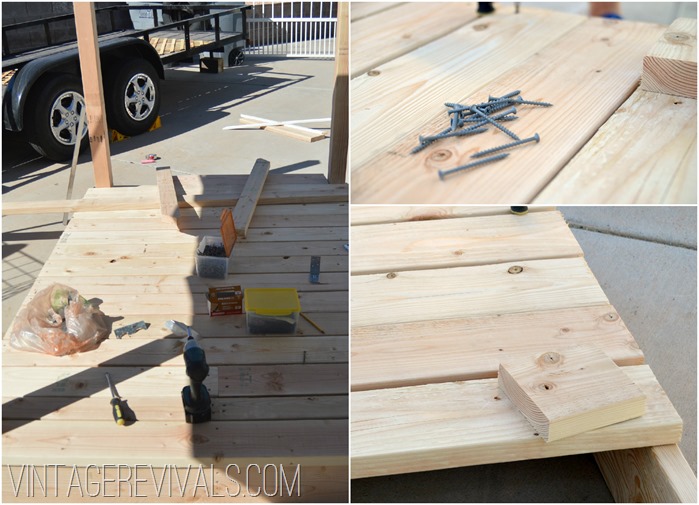
The build went really smoothly and I will have a quick tutorial with guidelines and info about the structure up this week.

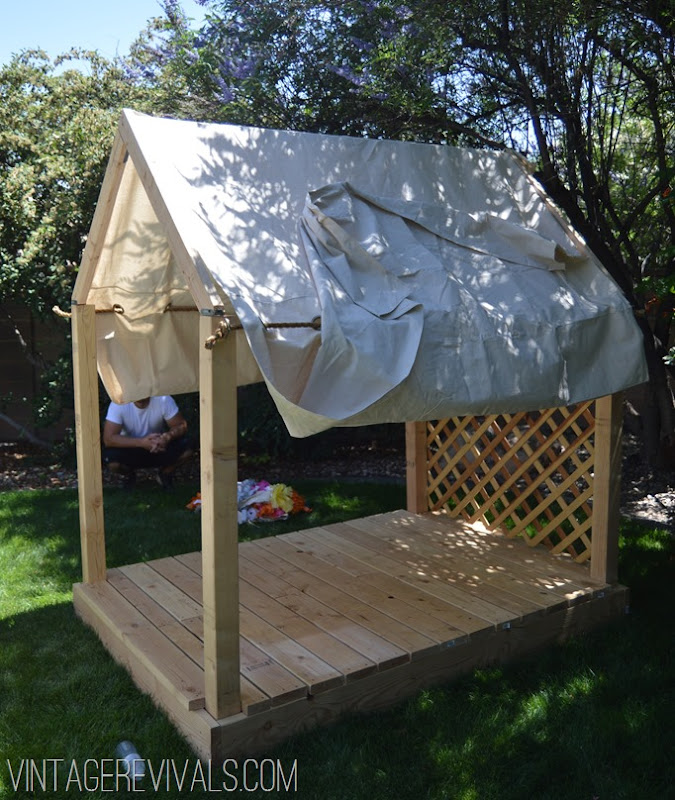
Playhouse Build

The canvas tent is made from a drop cloth, sisal rope, and grommets, and was SERIOUSLY simple. And because you guys love to know the behind the scenes nuggets…the original plan was to use wooden dowels instead of the rope. But then the whole, running, screaming, tag playing scenario ran through my mind and I knew we needed something that was a little more forgiving (as in forehead forgiving). So rope it was! If you are a hardcore Vintage Revival-er you will remember the curtains I made for Hailee’s Living Room with this same idea!

Summer Reading Nook @vintage revivals-9


My favorite piece is the gray and white striped Rugby rug.

Summer Reading Ideas


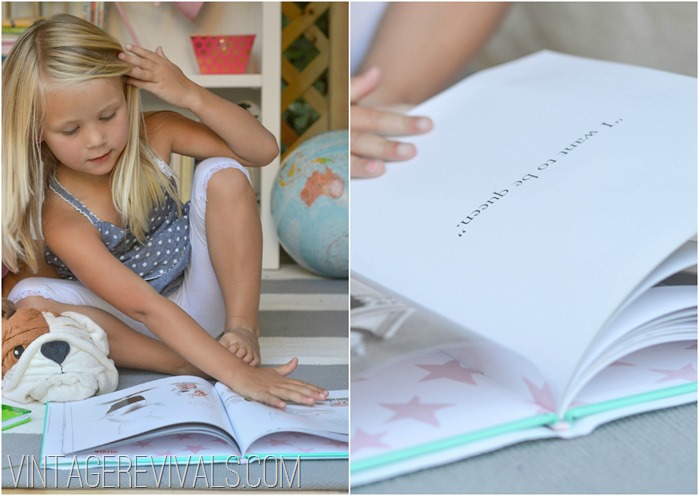
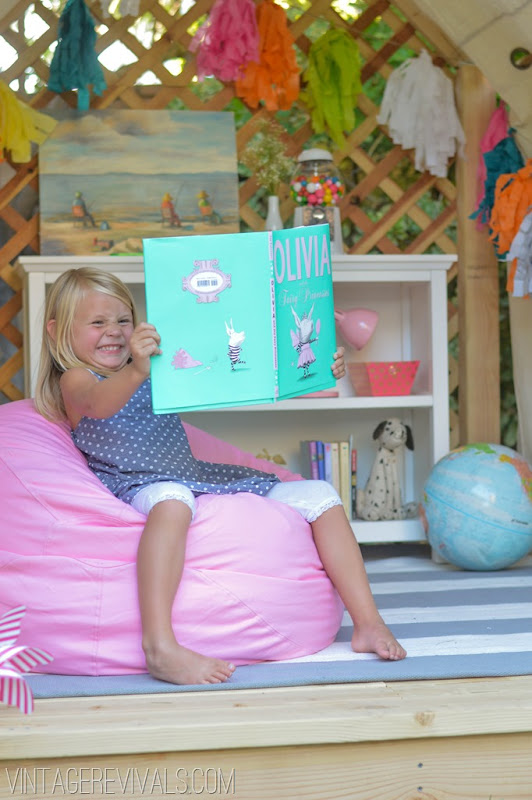
Of course my girls love the beanbag. Also, Ivie’s hair? Super jealous.

Colorful Summer Playhouse

Summer Reading Nook @vintage revivals-39

Summer Reading Nook @vintage revivals-43

Summer Reading Nook @vintage revivals-52

Pottery Barn Kids Lighting

Pottery Barn Kids Summer Reading Nook

And what would be a photo shoot without a few Dylan Outtakes?

Summer Reading Nook @vintage revivals-2

Oh Dylan

Summer Reading Nook @vintage revivals-29

That girl will be the death of me.

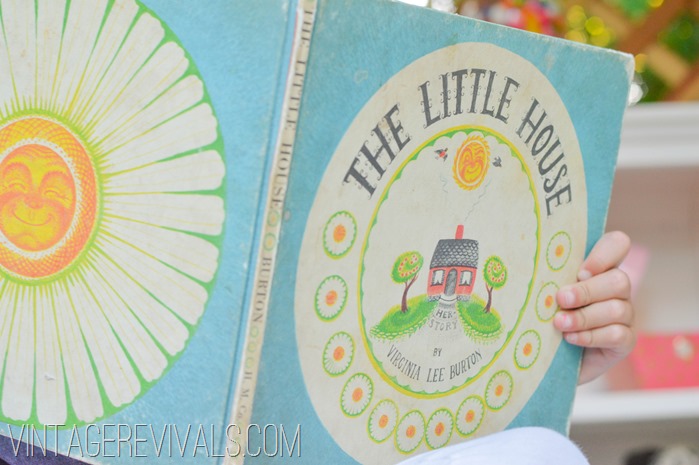
Reading with my daughters is something that I cherish. I love reading books that have a great lesson in them, like The Giving Tree. My favorite series of all time though is Skippy Jon Jones. I can do a MEAN Spanish accent Skippito.


Summer Reading Nook Project @vintage revivals

GET THE BUILDING PLANS HERE!


If you are itching for more kiddie inspiration, check out Dylan’s Bedroom.

Little Girl Bedroom Ideas

Or if you are in the market for something a little more grown up (I use the tern grown up loosely around these parts) check out my living room.

Orange Tufted Couch Living Room Makeover @ Vintage Revivals

Love Your Guts


I partnered with Pottery Barn Kids and PBS to create this project. Pottery Barn Kids sent me specific items to use in this challenge. The project ideas, cost, and opinions are 100% mine.

Lets Talk Truncation

By Mandi | 06/14/2013 | 41 Comments

I know, I know that this isn’t a post about a DIY project (next week is PACKED with them, so hang tight!) But I really wanted to have an open convo with you guys about the truncation question that so many of you took the time to answer. HUGE FAT THANK YOU by the way.

And since there are no pretty pictures to go along with this subject, here is a very awkward one from my photo shoot for the summer reading nook that is going up on Monday…leave it to Dylan.

DSC_0375

Ok so back to the subject of truncation. Roughly 95.5% of you hate it. The other 4.5% are bloggers. (not an actual statistic, but totally what it felt like when I was reading through the comments.)

I loved The Ballard Family’s comment.

According to what many bloggers have admitted on their site, most of them do not spend the amount of time reading other blogs like the rest of us non-bloggers do, because they are busy working on projects or preparing their post for the day. That is probably why many of them that are going to the truncated posts (which I hate)for organization purposes or whatever reason do not find it as annoying because they aren’t on the different sites as much as the rest of us.

I will admit that I don’t have time to actively read blogs the way that I used to,  if I have a few extra minutes a day I am more apt to  respond to some comments (or play a few rounds of Candy Crush). I also understand that while there are A LOT of bloggers that read my site, the vast majority of you are not bloggers. You are who I try and write for. I know that a lot of you come daily or every few days specifically to see the latest post, and your opinion takes precedence over any other type of reader. So thank you for sticking around while I try and get this figured out!

There were comments about truncating the posts on a homepage and comments about truncating a feed. I didn’t realize that my feed was truncated when I shortened a post (SO FREAKING SORRY ABOUT THIS!!)  I am still trying to figure out how to fix it, so hang in there with me.

Ok so that being said and while I don’t speak for anyone but myself, this is what I think is happening. It came up more than once about extra pageviews and money. That absolutely may be somebody’s reason for truncating (other reasons may include,  page load time, site organization and overall appearance, etc.)  but it is not mine. In fact if you notice, the only posts that I truncate currently are my big projects, usually a room reveal or a long tutorial,  you know, something really great. The reason I truncate those posts is so that when they are pinned, they are pinned to the direct URL, not just to vintagerevivals.com. (This is also why I asked how you pin from blogs). The reason that I do it is purely selfish,  I would rather take the time to respond to one of your design dilemmas, than to send links to complete strangers that stumbled over here from Pinterest and cant find a specific post.

I totally get the extra time it takes to click over,  I am beyond grateful that you choose to spend a few minutes of your day with me (really, it makes me grin like an idiot).

So how do you think we can come up with a solution? If I post the full post on my homepage, do you want me to throw up a reminder at the end of it to click the link for those that decide to pin it? Would you be more willing to use the pin it button or the hover button to pin it because those pin to the permalink? Am I way to worried about this because you guys are responsible pinners?

A few of you mentioned having the latest post in full context and then posting excerpts from a few of the other ones,  do you have a yay or a nay about this?

As far as the pin it hover button goes, I know mine has issues…but I have NO CLUE how to fix it. Its one of those things about being self taught on Blogger that gets a little hairy. I am not an HTML ninja unfortunately. But once everything is migrated over that will be fixed too! (for now you can usually click on the left side of an image and it will pull up the correct link.)

Thoughts? Comments? Critiques? Lay ‘em on me. For reals, I don’t write just to hear er…read myself talk. I write for YOU, and I want your feedback to help make this one of your favorite spot on the interwebs. If you feel like something has gone awry I want to know, feel free to email me any time. Do you have a great idea for a series? Send it over!

In other news, as most of you know Google Reader is being laid to rest on 7/1. If that is your preferred reader you may want to get your feeds transferred elsewhere before they are gone forevs. Everyone has different plans, I am switching over to Bloglovin. You can follow Vintage Revivals here if you so choose.

I think you guys are fab. That is all.

Love Your Guts

Fab Finds For EVERYONE!

By Mandi | 06/12/2013 | 12 Comments

You know when you see something AMAZING on your favorite blog ahem, Vintage Revivals and then you find out that it was a thrift store score, and you are like, “But I want that too.” (insert puppy pouty face)

Well turn that pouty face from me to your husband, because I have a fantastic round up of my latest obsessions on Fab. Sometimes I look at things and think, can I pull this off? And I know that I am not the only one that feels like that, I get your emails! These are a few of my favorite finds that I PINKY PROMISE you can pull off. Trust. They are only available for a short time so you are going to want to act fast.

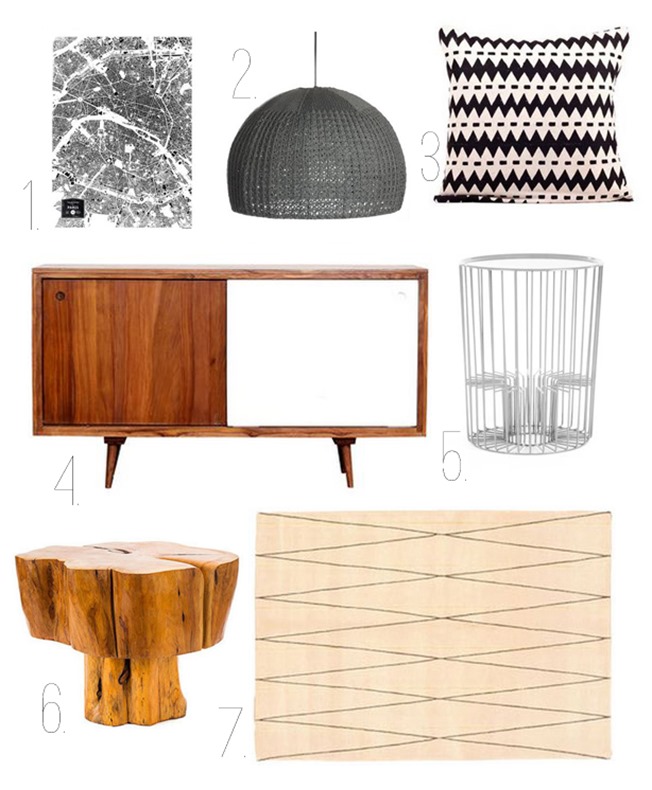
Fab Black and White Ideas @ Vintage Revivals

1. Paris print

2. Crocheted Dome Pendant Light

3. Pillow of my dreams

4. Mid Century Buffet (it totally reminds me of the desk in my living room!)

5. White Wire End Table. I am picturing 2 in my Master, what do you think?!

6. Raw Wood Mushroom Table. LOVE the unique shape.

7. Tufted Rug


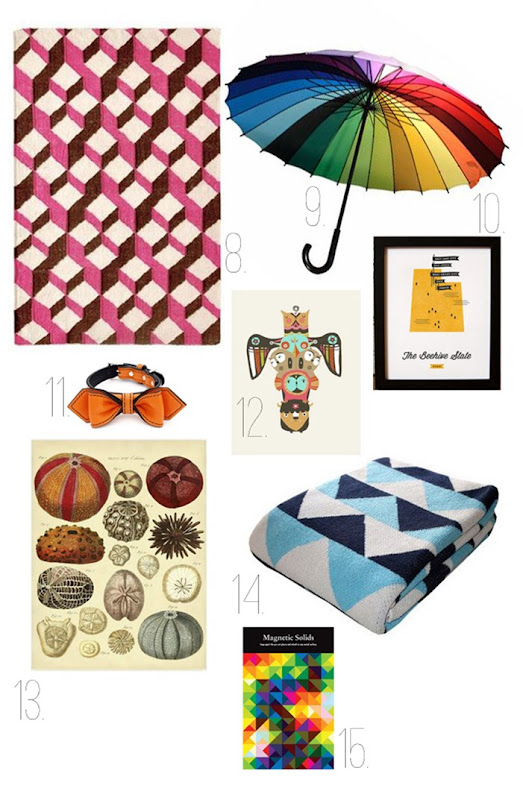
Color Me Happy Fab Sale @ Vintage Revivals_edited-1

8. Pink Tumbling Block Rug

9. Spectrum Umbrella. This umbrella makes me want to plan our family pictures around one of the 3 rainy days a year in St. George.

10. State Prints

11. Don’t you thing Wallace the Boston Terrier would look like such a dapper dude in this Bow Tie Collar?

12. Totem Pole Print

13. Sea Urchin Specimen Print. Just like the one I used here and the one I used here!

14. Triangle Throw. 2 words. Marry Me?

15. Op Art Magnets.

So guess what?! Now we can be twinners! Pop on over to Fab to register for a free account and access to deals that make your mind explode! What item is your favorite? Or do you have a Fab score you want to show off? Leave your link in the comments!

Love Your Guts

I Need Your Thoughts and a Project Sneak Peek

By Mandi | 06/11/2013 | 117 Comments

Friends friends! Hope you are having a day that is fantastic as you are!! I have a few quick questions for you today.

Vintage Revivals is in the middle of a massive overhaul (it is all VERY exciting) and as we are working through the site design a few things keep coming up (and since they effect you more than anyone) I want to know what you think!

How do you feel about truncated blog posts? If you are unfamiliar it looks like this with each post shortened to a thumbnail image and a blurb. Ps. I stole this screen shot from my BFF Brooke. She is awesome.

image

Do you love them? Hate them? Are feeling a little like Switzerland?

What are some of your favorite features on other sites? (Functionality, etc.)

How do you normally pin from your favorite blog?

And now for the really fun part… I mentioned on Instagram last week that I was working on a project for Pottery Barn Kids and I wanted to give you a sneak peek! Mind you, this is before it was glamorized and shot, but isnt it so fun?! Its our new summer reading nook! I cant wait to share the tutorial and final shots with you guys!!

DSC_0246

If you have any other site feedback I would LOVE to hear it,  as long as its not that you hate my guts,  cause that might make me cry.

Love Your Guts