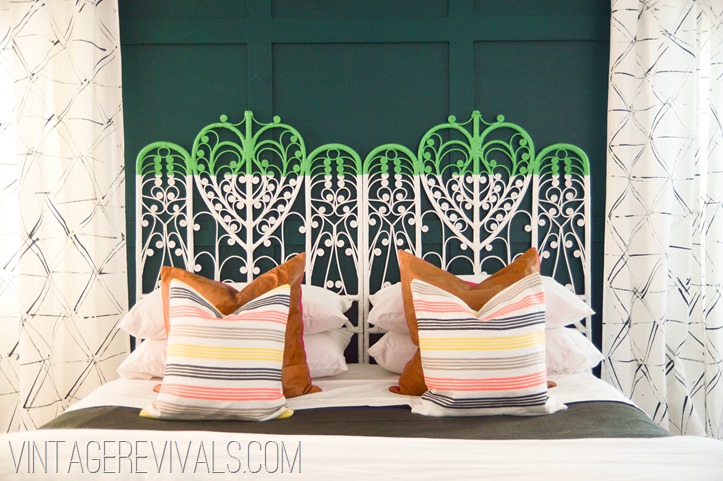
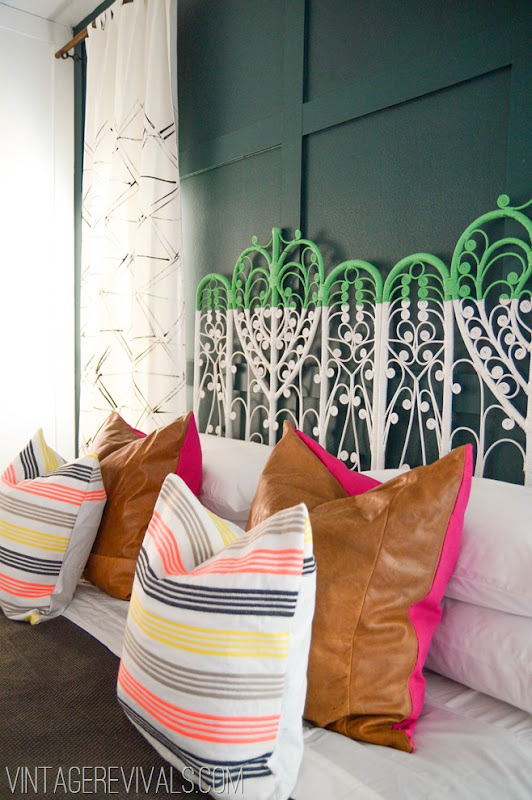
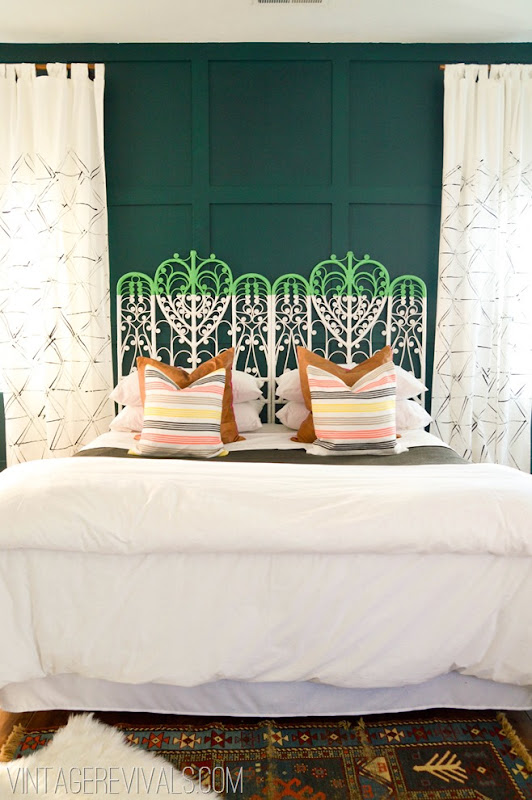
Remember when I told you guys that this Wicker Headboard was the starting inspiration for my entire master bedroom makeover and most of you were a little scared? Its ok, you weren’t the only one.
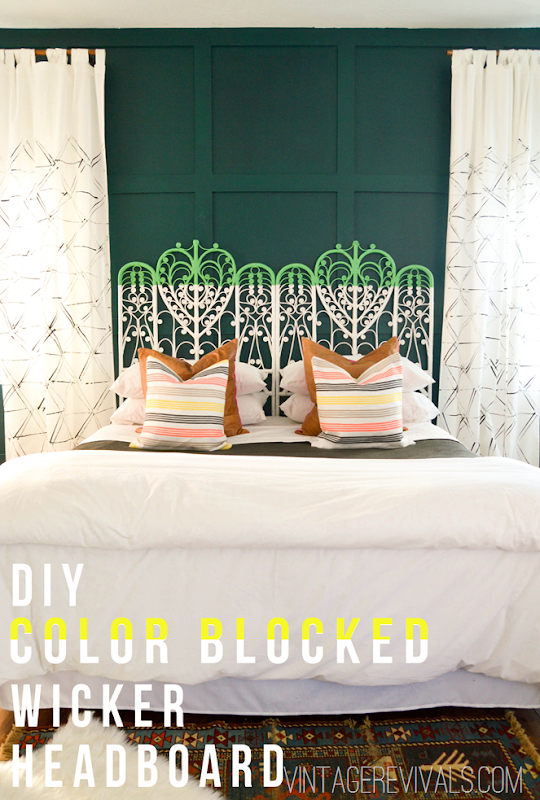
Today I am putting your wondering mind at ease with the reveal. Oh and totally setting a new trend. NBD. Jump on board now my friends, because these puppies are hard enough to get when everyone still thinks they are ug.
I feel like this post should start out with 2 things.
1. DUN DUN DUN DUN DUN DUN DUUUUUUUUN!
And 2. Finally.
I loved using colors from the same family so much in Dylan’s room that I had to give it a shot in my bedroom too. Luckily my boyfriend Sherwin Williams has direct access to my brain waves and tracking down the perfect Spearmint green was simple. (It is Eco Green BTW, and make sure you buy a sample pot because you wont need much!)
I love when you can take something that people give a sideways glance at and make it a show stopper. This is why I will forever be a thrift store addict. Its just so gratifying.
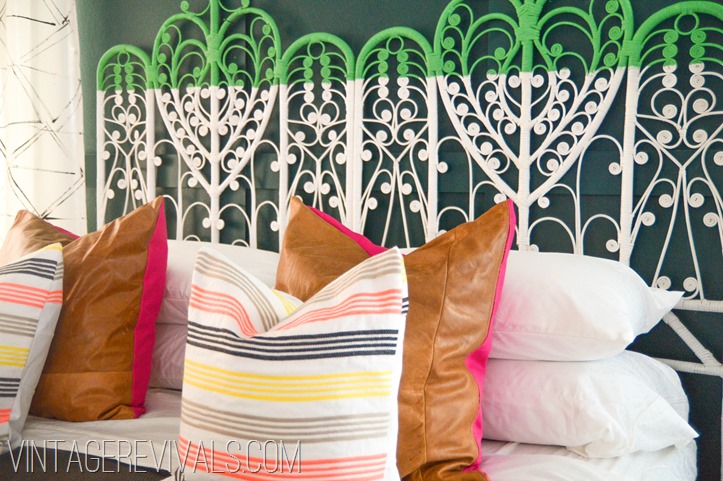
Paint dipping or color blocking (however you choose to phrase it) is a VERY simple technique with a ton of impact. If you are on the fence about painting a piece of furniture, maybe start here, it will give you a pop of color without having to commit to the entire thing.
If the piece is small enough you can actually pick it up and dip it in paint. If it is HUGE like my headboard?
Probably not the best idea.
So here is the cheater way to get the look without spending $5000 on a zillion gallons of paint to fill your bathtub.
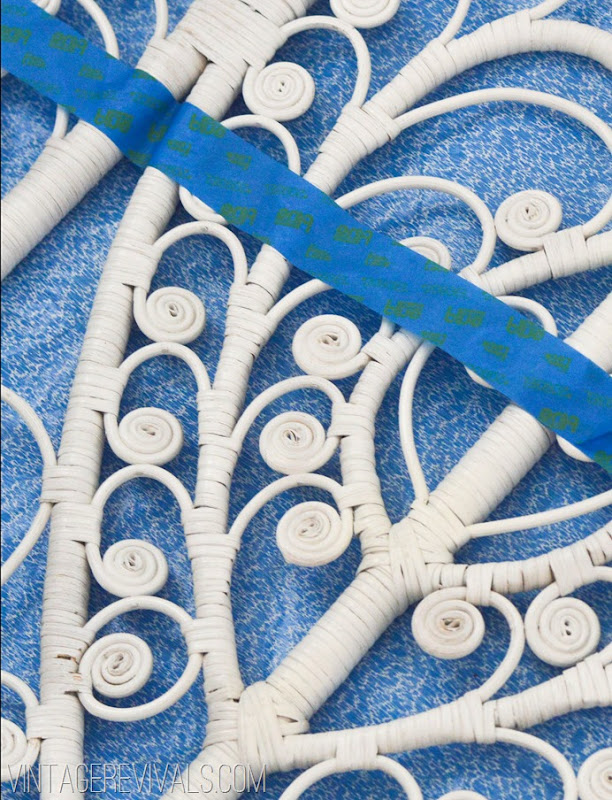
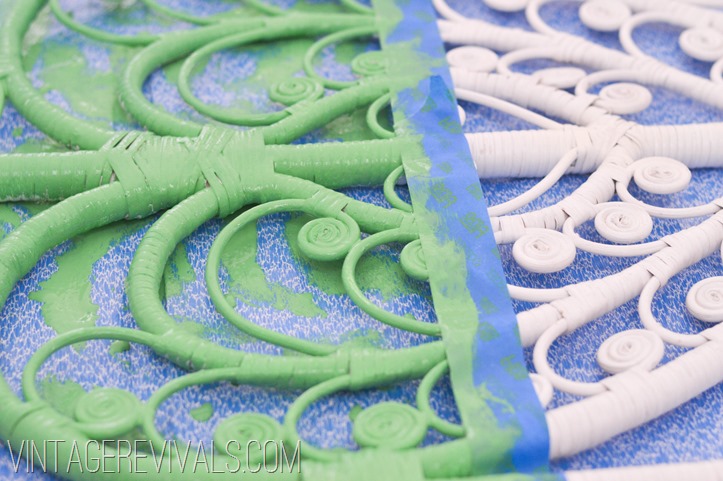
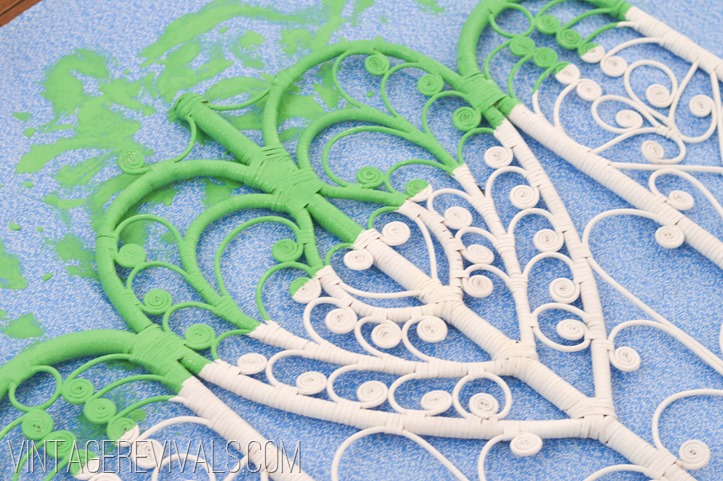
Start by taping off where your paint line will end. I 100% recommend ScotchBlue™ Painter’s Tape for any taping needs, its my favie.
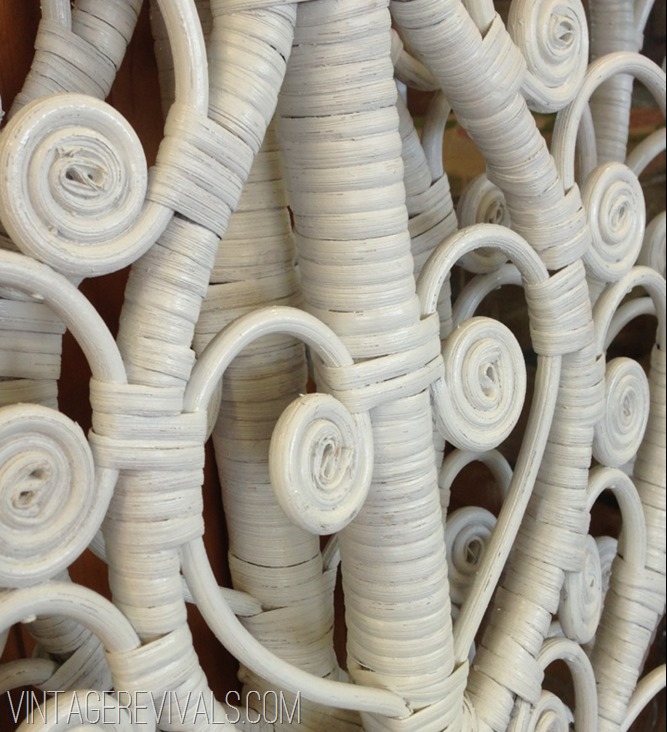
When you are painting something like Wicker, with all of its dips and grooves, you are not going to get a perfect paint line, your just not. But it is ok, because all of those dips and grooves are going to hide it. Press your ScotchBlue into all of the spots that you can reach. If you are taping off a flat surface, check out this post for my secret for PERFECT paint lines (its sort of life changing.)
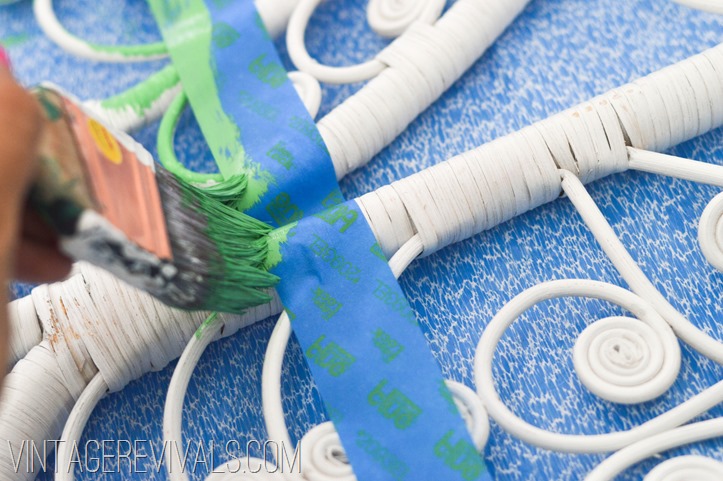
As you are painting (especially on the paint line) start with your brush on the tape and brush away from it. If you are brushing toward the tape then you are likely shoving paint into all of the grooves that we are trying to avoid.
Once my paint was dry enough, I flipped the headboard over and painted the backside.
Remove your tape and grin at the fact that you are amazing.
To joint the 2 headboards together I used clear fishing line. A few readers gave the suggestion of binding them together with wicker strips. If I was planning on repainting the whole headboard, I TOTALLY would have done that, but because I was not planning on repainting the white, I McGyvered it a little.
So now that it is starting to come together a little bit more are you a believer? Or are you still on the fence (don’t worry, by the end of it the fence will be a distant memory…)
Did you notice the DIY Leather Pillows and Wood Shim Stamped Curtains?
If you are in dire need of other inspiring projects there is a HUGE Ready, Set, Paint Blog Hop going on with all of your favorite DIYers, so make sure you check their goods out…you know what I mean.
Centsational Girl – Textured Panel Dresser Makeover
Thrifty and Chic Framed Stencil Wall
The Design Confidential DIY Concrete Color Block Painted Tables
Sand & Sisal Faux Etched Glass
The Girl Creative Summer Chalkboard
PB & J Stories Dipped Effect Outdoor Bench and Front Patio Makeover
In My Own Style How to Paint Outdoor Furniture
Making this Home Embellish with a Paint Border
Rustic Bench Gets Modern Moroccan-Inspired Makeover
Charles & Hudson – Wood Block Planter
Love of Family and Home – DIY Striped Curtain
Nesting Place – Painting with Chalk
Thistlewood Farms: How to Paint Stripes
Live Laugh Rowe: DIY Drop Cloth Table Runner
SawdustGirl – Spray-Painted-Striped Lemonade Stand Canopy
This post was brought to you in partnership with The Home Depot and ScotchBlue™ Painter’s Tape.








Mandi, I recently did something like this for my daughters room… How did you end up attaching your headboard to the bed frame? Did you have to reinforce it with wood etc? Any help is appreciated! I wish I had read this post before doing my daughters… I painted the whole thing but am now thinking a dip dye effect would have been really cool! Thanks, Jen
So simple, but makes a statement 🙂 xo Kristin
How bright and cheery. Just lovely!
https://www.newlymynted.blogspot.com
It looks fantastic! Very unique, I love that you keep coming up with stuff I've never seen before. It's so refreshing.
In one word, Fabulous!!!
Mandi, when I saw the preview image in my Feedly reader, my jaw literally fell open. No joke. It looks spectacular!
It looks darling. Absolutely darling. My grandparents still have those headboards up in their guest room where they were first put over 40 years ago. I'll just warn you about sitting up in bed reading and leaning against them. They grab your hair. I've had hair yanked out of my head many times until I could just throw those things across the room. Maybe painting them will help close up some of those nooks and crannies that are so evil?
Love it! You are so creative!
The headboard looks really awesome! Love it!
this is cool. I JUST bought a wicker folding screen with swirly hearts very similar to this. It is not in the best shape – a few of the curls are missing and some of the wicker is loose but dude, I got it for 10 bucks! It is still a natural color. I am wondering how to re-attach some on the loose wicker wrapping and then I am going to spray paint the whole thing. I have been trying to decide how to add something unexpected also and this post is super inspirational! As always, you freaking rock!!
the headboard looks great against that dark, dark wall! Props to you for once again doing something that pretty much NONE of us would have thought to do. 😉
That is AWESOME.
so fun!
That looks awesome and unique! I love it!
I'm on the fence – I'm not a fan of the color block/paint dip trend (I love the headboard otherwise). I can't wait to see how the whole room comes together – you are definitely creative!
I can't believe people have been nay-saying your wicker – I feel like that's such a hot trend!
Looks awesome, never would have thought to colour block it like that.
I'm still not entirely sold on the dark wall behind (to me it feels a bit oppressive for a bedroom) but I LOVE how the wicker pops against it. So, I'm doing my best to withhold a verdict until we see the complete room reveal. I have no doubt that you'll somehow convince me that you made the right choice all along!
Holy moly, I don't think I could love this any more. It's GORGEOUS! Going to look on craigslist for one right now… Who knew wicker could be so pretty?
-Becca
Ladyface Blog
Super Cute!
Holy crap, this is AWESOME! Now where am I going to find one of those headboards??
The headboard definitely pops against the dark wall.
I was definitely a doubting Thomasina, and while I'm still not sure I like it better than what you had before, I have to admit – the headboard looks good. And your skinned-couch pillows are awesome, and I want some, like, right now.
Love this! I have two of those wicker headboards in my stash from years ago. I feel a project coming on
How did you repair the broken little swirly on top?
I'm just curious, but at the beginning of your blog you put the abbreviation "NBD." I may sound completely stupid for asking this, but WHAT THE HECK does that stand for?? Thanks in advance! 🙂
Freaking amazing! The whole bed looks awesome. So bold, yet soft. Love, love it!
What is the color on your walls???! I LOVE it.
Awesome Post! That spearmint color makes me want gum 🙂 It is so refreshing!
Love the wicker headboard, and even love the green (although I do hope something else in the room relates to it?). However… the colour-blocking… I do love colour blocking on solid pieces but something about the swirly-ness of the wicker makes me say no. Would love to see the whole headboard in that colour, or possibly on parts you want to highlight (say the heart shapes and their inner bits, or the vertical arches), but the dipped effect doesn't work for me on this piece.
Just call me crazy, right?
The spearmint against the darker green looks AMAZING! Plus I think it really pulls the green side out of that dark paint.
Super cute headboard! How does everyone in the house like it?
I kind of agree with you…
Cool! Great job!
I am having such Déjà vu! The second I saw your post, I knew, somewhere, way back in my 1970's, avocado colored appliance memory, was this headboard in our home! Seriously! I think I was 4 or 5 yrs. (1975) old and we lived in southern California and this was my parents' headboard! I'm freakin' out (just a bit) for this trip down memory lane. So cool that you found these "vintage" (yikes! am I vintage already????) headboards! Love that you preserved them yet added the Mandi touch to it! Love my ScotchBlue! 😉
Kim @ Sand & Sisal
No big deal 🙂
OMG I'm obsessed!!!!!
such a good mix, mandi! i really love it all! the color on the wall is so rich and beautiful, but the wicker keeps it from being too stuffy. you're so talented!
I just loved your old room so much that……I don't know how I feel about this one. :/ I think I just have a thing against change. Don't get me wrong though, your creativity is through the roof!
I love this, Mandi! Colour-blocking is such an awesome technique!
Normally I gush over your projects. I am ALWAYS amazed at how creative you are and how you see things is fun, whimsical and exciting. But I gotta say I'm not loving this. I NEVER criticize on blogs because it isn't nice but 1. I know you are tough enough and 2. you don't need validation from your audience. You love what you love and you make no apologies. It might just be the green walls I don't like and that is something that is 100% personal preference. It might be the curtains. I get that you are going for a graphic look but I"m not feeling them. Your daughter's room on the other hand….I loved every. single. element. And some of those elements are down right crazy. So I am perfectly prepared to change my tune when the final reveal occurs. Your scarf pillows are pretty but I just as obsessed with a scarves…but I love them around my neck. Can't wait to see more.
Good golly! That is incredible looking! Wow!
Haha-don't even BOTHER clicking my link, y'all! Ain't nothing there! 🙂
I really like the light green against the dark green but I am not a huge fan of the color blocking. I think the whole thing painted speriment would be perfect. Your rooms always look amazing though so I can't wait to see the whole thing!
LOVE LOVE LOVE! Great color scheme!
So crisp and clean. Seriously the effect is so striking it looks like you photoshopped it 🙂 Love it.
I would have never thought to do that, but it looks awesome! Love the colors you used.
I'm dying. That looks awesome. You=genius.
You've done it again Mandi! Pure genius. You should be gettign your own show on HGTV!
Vidya @ Whats Ur Home Story
http://www.whatsurhomestory.com
What a fun look–and I love projects with "forgiving" paint edges 🙂
LOVE the color blocked wicker! And mint – beautiful! I can’t seem to wrap myself around the dark green or the other elements though. I just want a tiny bit of mint in the striped pillows…..or something so that the mint isn’t lonely with all the bold and the dark. I can tend to be too match-y though. I’m certainly willing to be proven wrong as I haven’t seen anything else that you’ve done that isn’t stunning : )
Okay…I’m DONE! You are the baddest “B” on the internet…and I don’t say that lightly…I have been blogging since 08…and have meet lots of thrifty, diy, decor chicks…your the baddest…by far. I’m new here…how do I not know about your blog? Sigh. Inspired.
…and just to let you know, I will be copying this DIY headboard tricky thing…immediately…or as soon as I thrift a wicker headboard…which could be immediately…sigh.
wall color behind the awesome headboard?! pretty, pretty please?!?!!?
thanks!!
-stacey