Dudes! We are overhauling a 1972 Bell Travel Trailer! Follow the entire series from the beginning here!
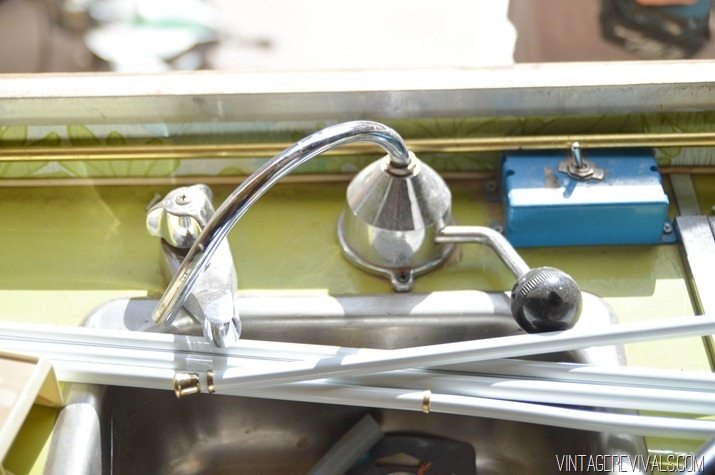
When we bought our little vintage trailer, we were lucky enough to have not one, but two glorious faucets. The original faucet was a hand pump that had stopped working and had been connected to a small electrical pump that pumped the water from the small water tank that lives under the sink. The other faucet was connected to a copper pipe that ran to the outside water hook up. I am pretty sure that changing out the faucets was the first thing I touched on when we were talking about fixing up the Nugs.
My original thought was to just have one faucet (the sink is SO teensy) that connected to the water tank and not have one for the outside water hook up. There was just no way that I was going to put 2 faucets back in.
In the middle of the night I woke up to (what is most likely) a very obvious solution, that I just didn’t see. A faucet with 2 handles can utilize BOTH water pipes. But instead of being hot + cold, it would be outside + inside. So the hunt for a great faucet began. I had one requirement. Brass.
Have you ever shopped for a small brass faucet that isn’t hundreds and hundreds of dollars? It kind of doesn’t exist. After looking for a few days, I narrowed down my search to a bridge faucet which unfortunately increased the price. Whyyyyyyy?!!
There was no way that I was going to spend more on this faucet than I spend buying the entire trailer. That just doesn’t seem like the smartest move.
So I did what I do in every situation where I want something that just doesn’t seem to exist. I went to Home Depot.
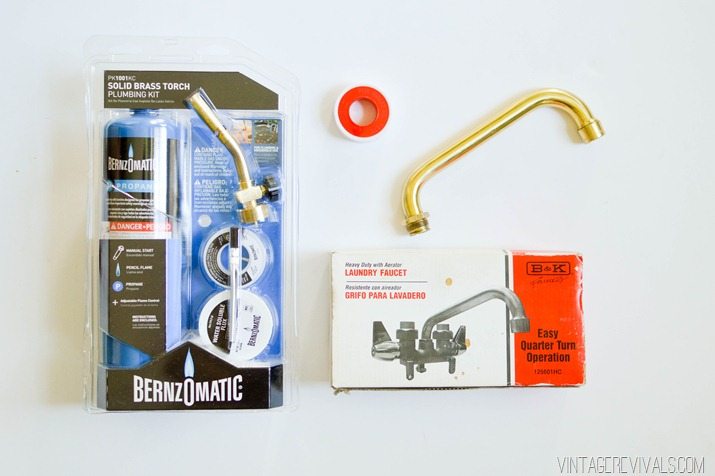
There I found a few things, a laundry faucet that had a brass neck, and John, the master plumber that worked there. I explained to him that I wanted to build a faucet and he was AMAZING and spent the next little bit coming up with solutions for the problem.
So here is the ingredient list.
(1) Laundry Faucet
(1) Soldering Kit
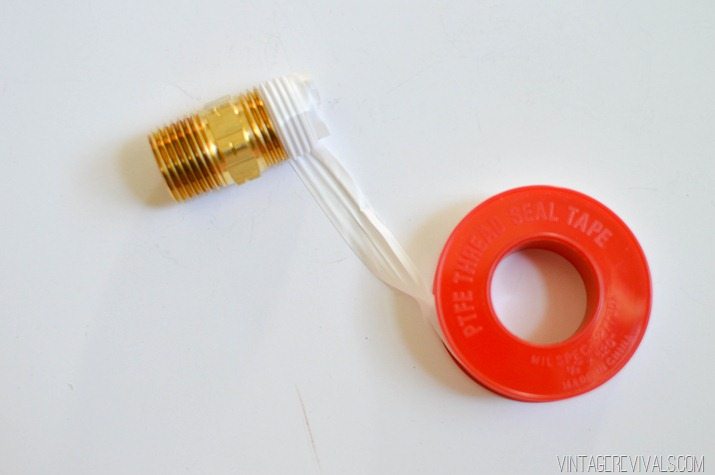
(1) Roll of Thread Seal Tape aka Teflon Tape
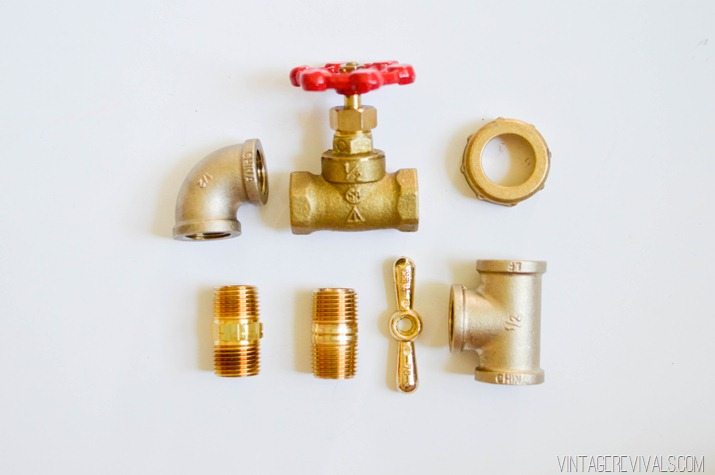
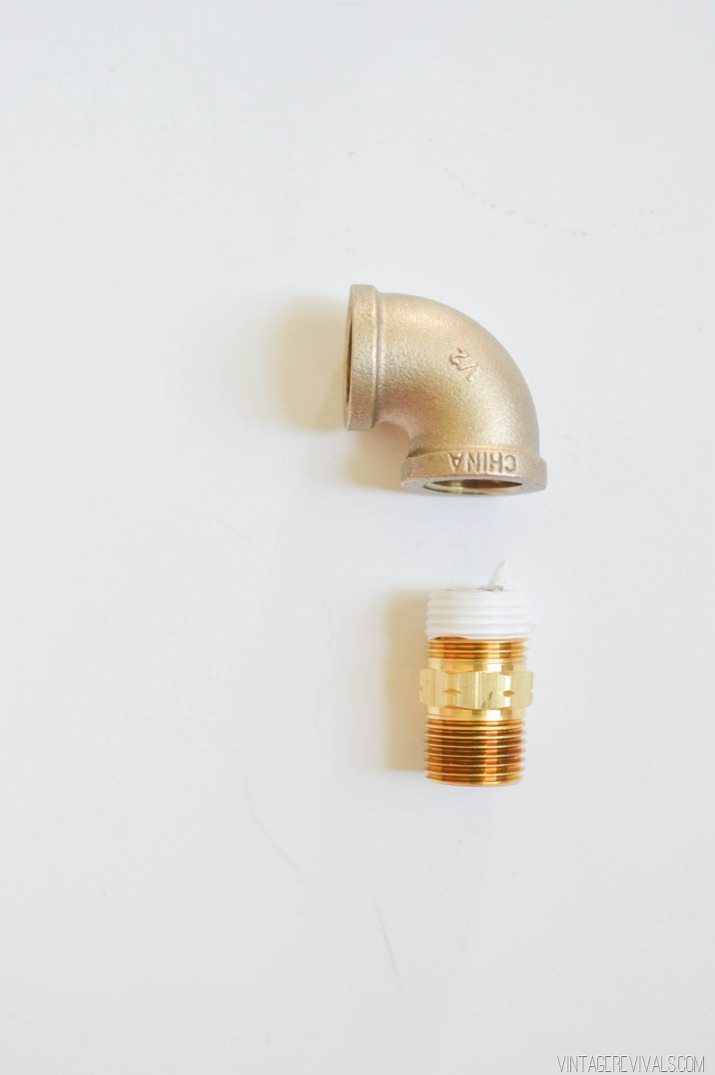
(2) 1/2” 90 degree elbows
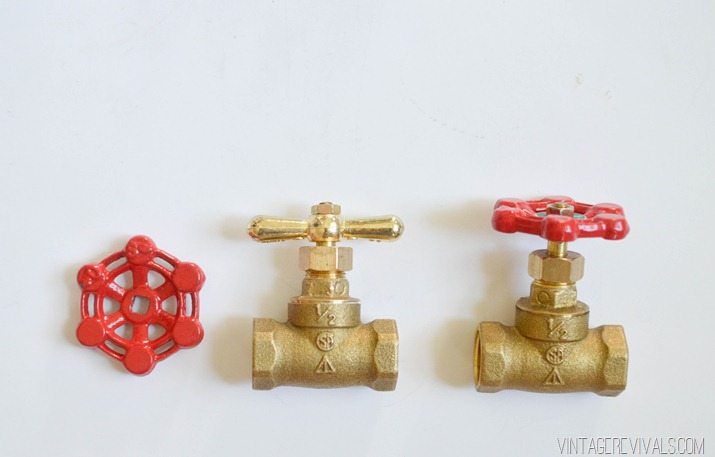
(2) 1/2” stop valve
(2) Washer Caps
(2) 1/2” brass pipe hex nipple
(2) 1/2”x1-1/2” brass pipe nipple
(2) handles
(2) 1/2” T’s
Not Pictured (1) 1/2” copper male adaptor
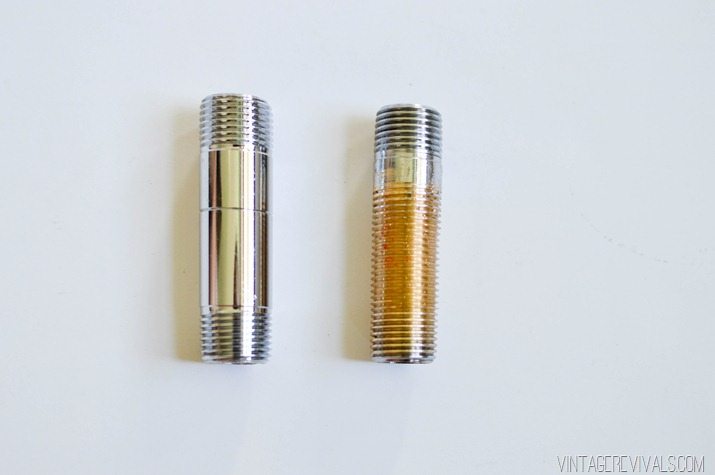
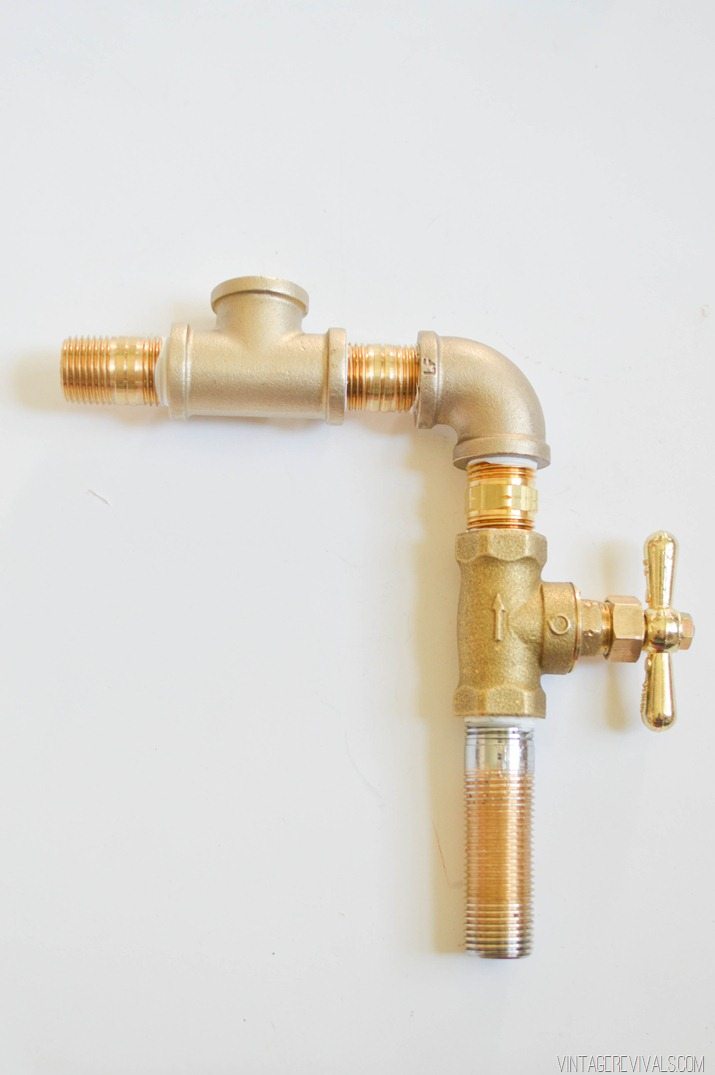
(2) 1/2”x3” Chrome Brass Pipe Nipple **Have the employee at Home Depot thread these pieces as pictured above, that way, whatever the thickness of your countertop, you will be able to tighten the faucet down.
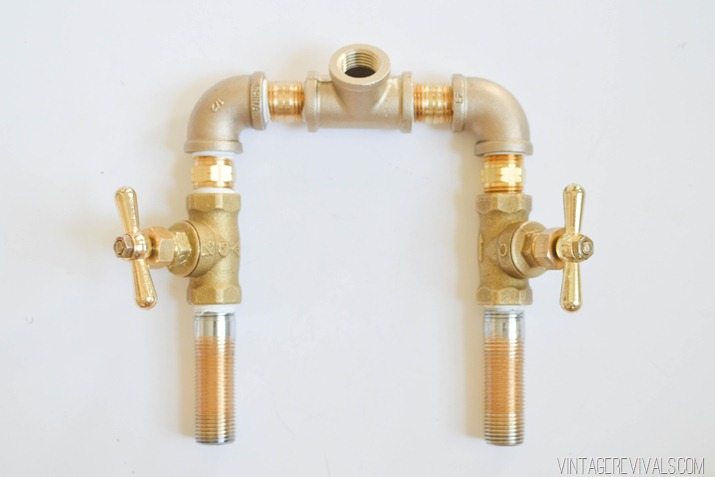
Assembly is really simple.
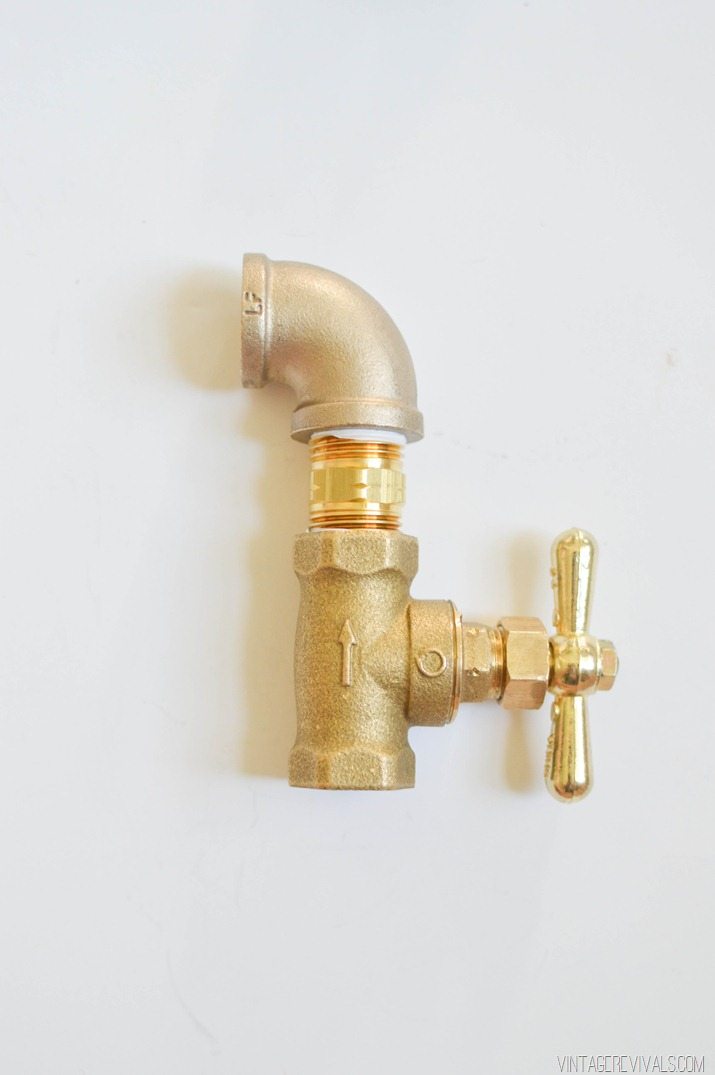
Start by replacing the handles on your Stop Valves. I used a little bit of 5 minute epoxy to make sure they stayed on really well.
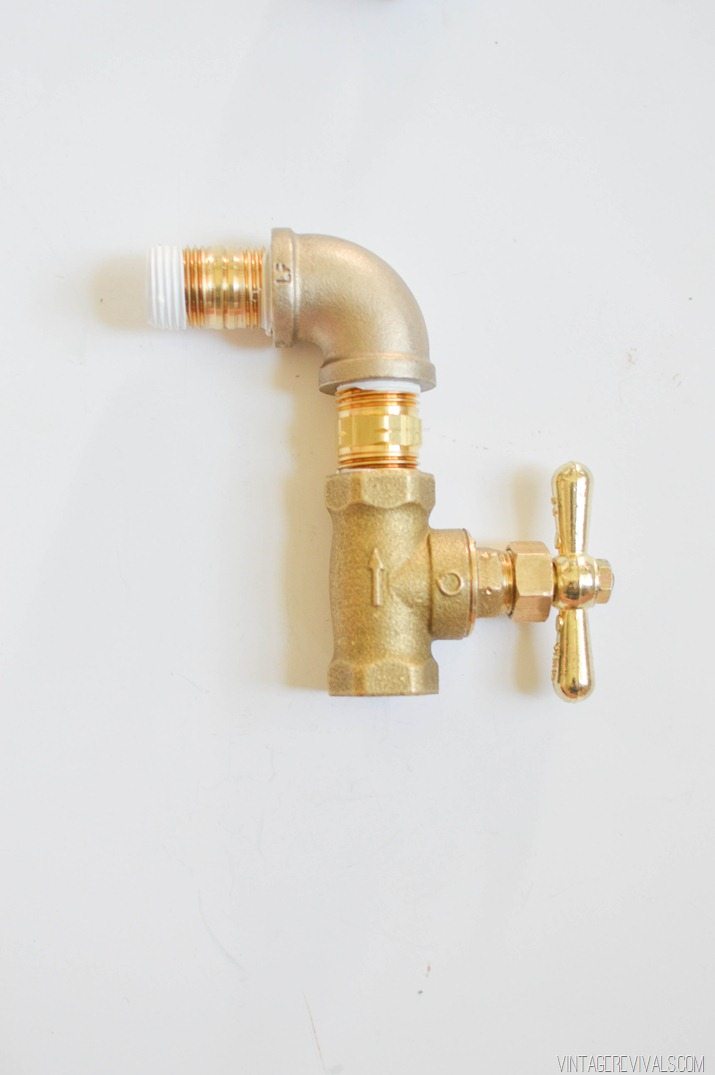
Each of the nipples need to be wrapped with teflon tape before attaching them to their components.
The Hex nipple will attach to the bottom of the elbow.
Then the Stop Valve attaches to the other end of the Hex Nipple.
The brass nipple goes into the other side of the elbow.
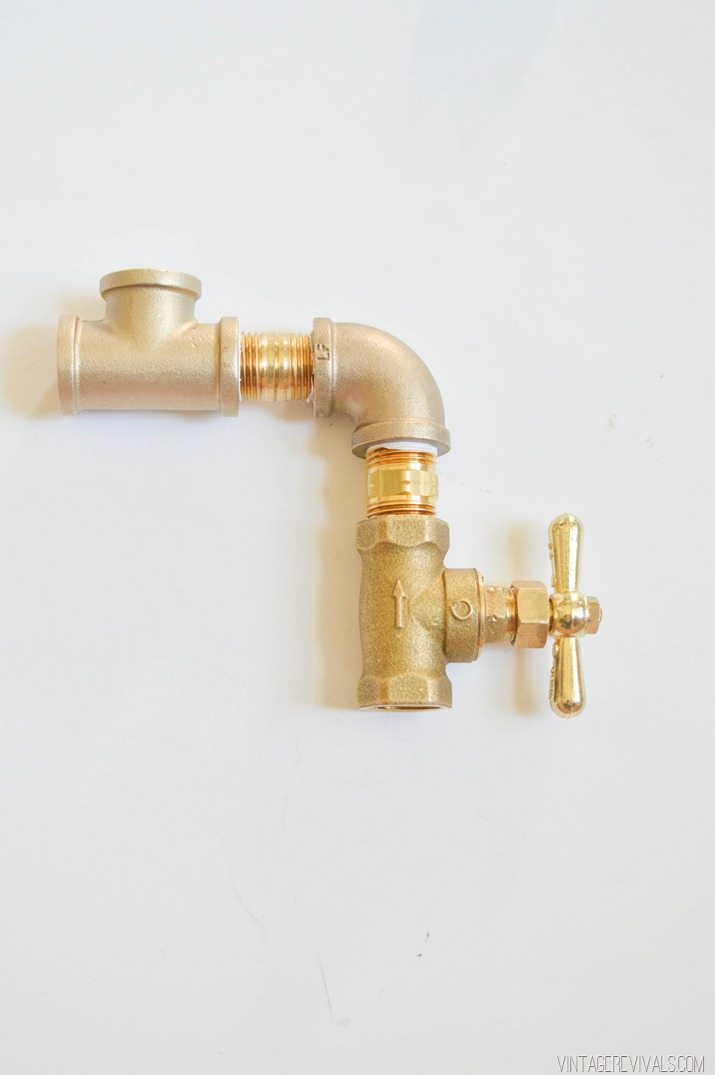
Then the T is attached to that.
Lastly, the 3” pipe nipple that you had threaded attaches to the bottom of your Stop Valve.
Repeat for the other side.
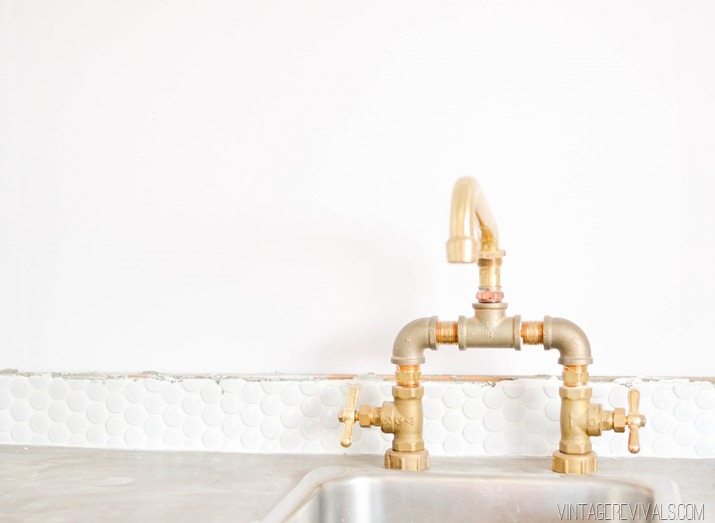
Your copper male adaptor will attach to the top side of the T, and the brass faucet arm should fit fairly snuggly on that!
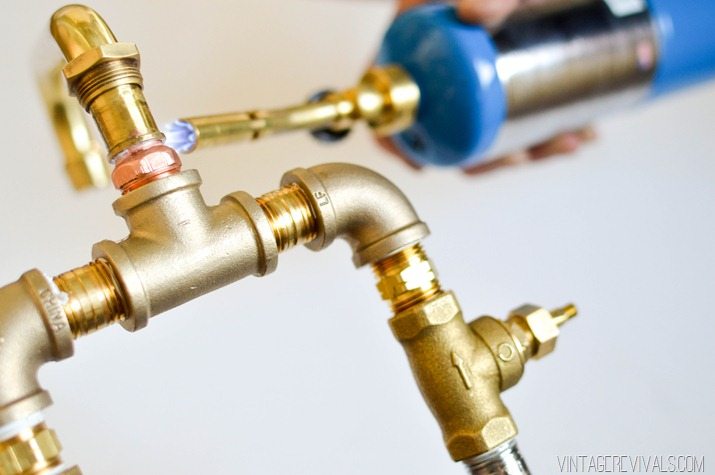
Next is soldering. Now. I know how you soldering virgins are feeling. I too was a soldering virgin. But it is not hard to do at all. And the best part is that you can start over as many times as you need to (you guys know how much I love that.)
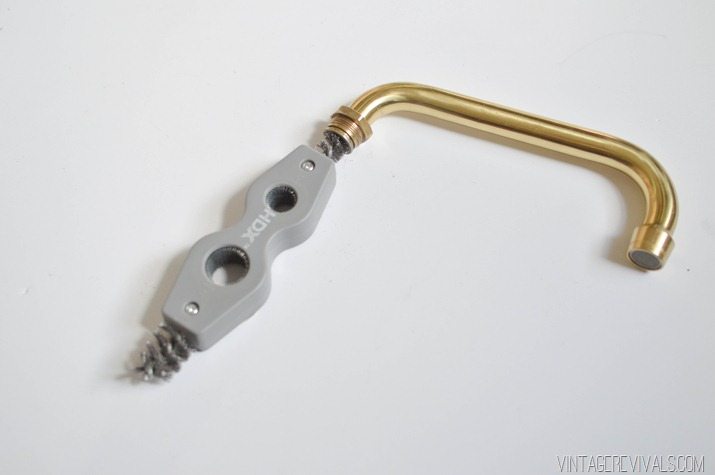
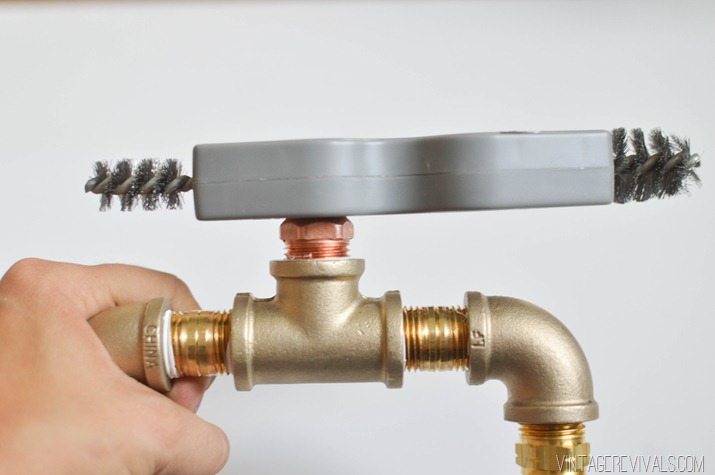
Before you solder, start by scrubbing the inside and outsides of the pieces that you are joining together.
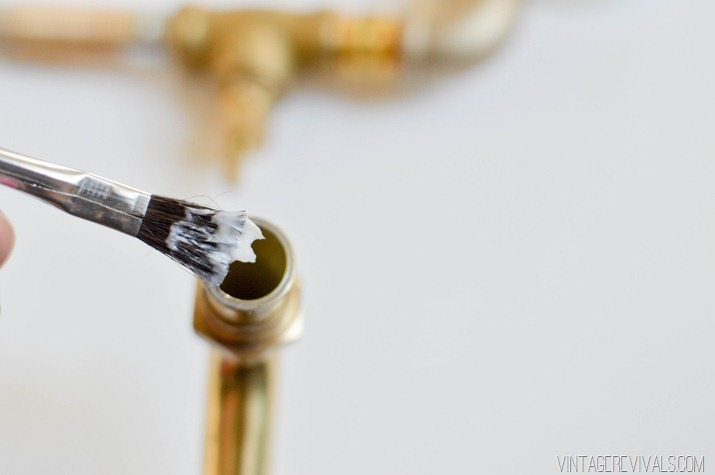
Brush on the flux (this is the magic ingredient that sucks the solder into the pipe)
Heat your pipe up so that it is nice and hot (all of the instructions for soldering are on the package of the kit, and I am sure there are hundreds of awesome videos that explain this much better than I do.)
Then it’s time for the actual solder. I don’t have a picture of this because molten metal, but it was really cool to see it disappear into the joint.
Obviously you will want to let it cool off before you get all manhandly.
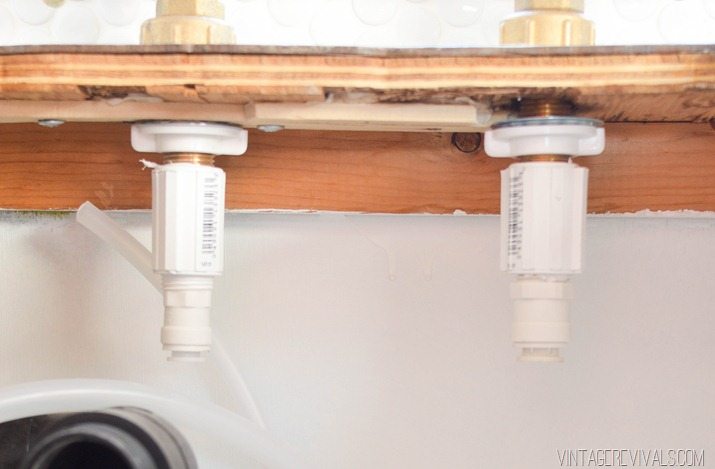
Before you install, put the washer caps over the holes in your countertop. Because plumbing is different for every situation, take pictures of the underside of your sink, and head to your local HD. The plumbing expert will be able to help you get exactly what you need to connect your pipes.
The picture below is of what ours looks like. PVC nuts that tighten the faucet to the sink, and adaptors that screw onto the nipples and have a place to push into the new pipe. Home Depot has every kind and size of connector that you will need.
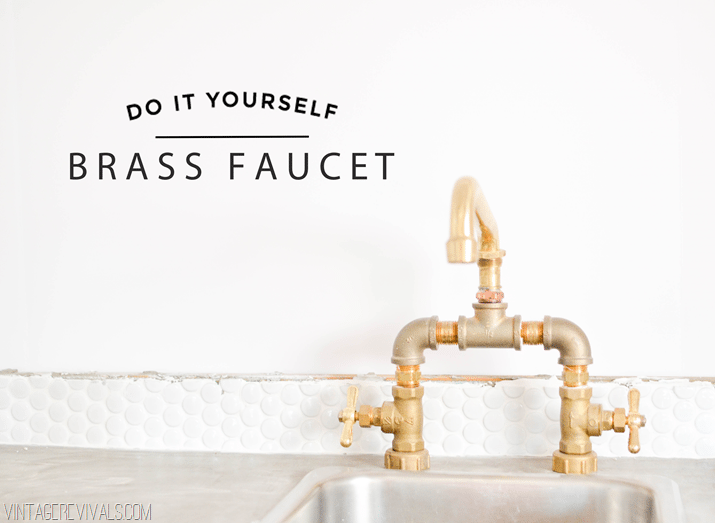
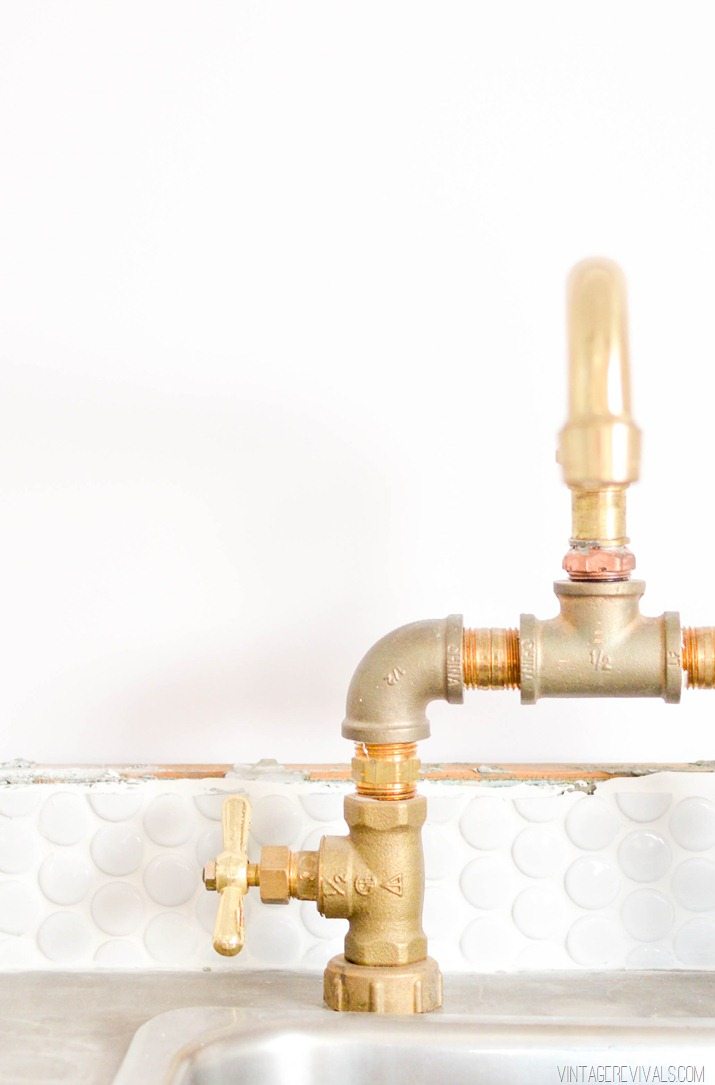
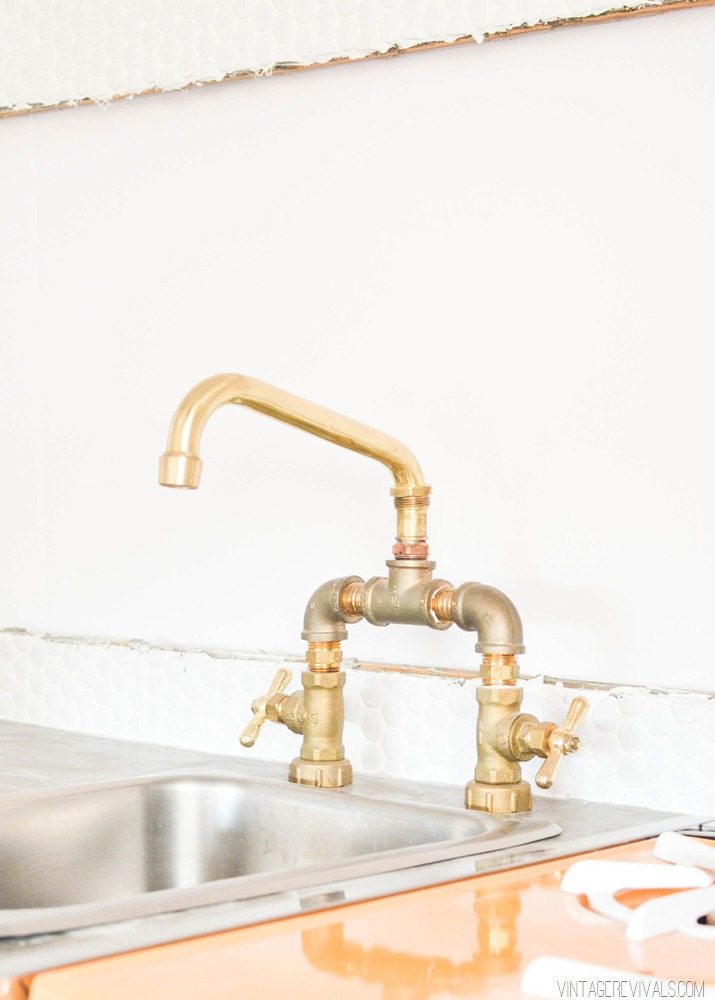
I cant wait to report back on how it works once we get the battery hooked up, the tank filled and the whole thing going!! But until then, lets just look at how pretty it is, shall we?
And if you are wondering if this would be good in a house, I am going to give you a resounding…I don’t know yet. The stop valves (where the handles are attached) are a type of gate valve, which basically means that it is a moving gate that blocks the water (or lets it in). Its not going to be as simple as lifting a single handle, but I think it would be gorgeous AND amazing. I will keep you posted!






Is there nothing you won’t tackle? Plumbing has been one item I have never taken on and this makes me want to dive in. I just love the end result and the molten metal comment just makes me want to see it more! Bravo, again.
Janeane
http://www.designwithj9.wordpress.com
omg–this idea is so amazing and steampunk glam that I want to marry it. As a serious DIY remodeler who is willing to take on all sorts of crap that I have no right to think that I can do, I love your blog. But this idea is so beyond it makes me giddy. And btw–in a pinch when your propane or map gas torch dies in the middle of sweating your kitchen copper waste line, you can substitute your crème brulee torch.
Hi Mandi, you could also look for some 90°elbows with female thread instead of the male that you used. This way, you wouldn’t need the nipples on the vertical pipes. I think that might create a less busy look.
However, I like this DIY!
You lost me at the first nipple!! bwhaaaaa!! Seriously ~ is there nothing you can’t do…. I wish I knew how to do just a portion of what you do. And how cute is that faucet. 🙂
What a pretty design for the sink, WOw what creativity and imagination
That is so awesome! I don’t see why it wouldn’t work inside, if you already have the two handle system for hot/cold water, but am sure my husband would stop me before I tried and messed it up (Our current kitchen faucet is just wonky and I despise it!)! lol So cool, and outside the box, it’s awesome!
I love seeing the process!!!!! You are one talented lady.
I have been waiting and waiting for this tutorial! Thank you, thank you! It’s great, and you’re the BEST! What was the ballpark price?
Did you paint your penny tile? Looks great.
Seriously such an amazing idea! So good
Amazeballs
Just AMAZING — I absolutely adore it!!!
This is crazy awesome, Mandi! I love it – the industrial look is so fabulous!
I will be SOOO glad when this industrial looking phase has passed.
Um… Is it just me or is there no way to control the water temp? If each faucet is for a different water source where’s the hot/ cold control?
Hey Jacquelyn! There isn’t a way to control it anyways (because there is no water heater) so it comes out cold and colder 🙂 Such a great question!
xo
m
I am really loving this series Mandi! I have admired finished products of similar vintage trailers but it is great seeing how much work goes into such a project!
I’m sorry – this MUST be said. You have been on a crazy amazing roll lately. Everything is jaw-dropping and I’m hating you (in the best way possible) more and more every day. Keep it up!
This looks amazing!! Trailers are NAHT supposed to be filled with pretty brass and penny tile but I’m pretty much dying over the fact that yours is. Damn girl!! 😉 Xo, Sarah
Can something be beefy, awkward, and beautiful at the same time? I just keep staring at it thinking: Weird. So cool. Odd. So gorgeous. Wait – what am I saying? Haha – those words describe me- A little beefy, awkward, and beautiful – that must be why I like this faucet. 🙂 Great project – switching out the handles = everything!
First! LOVE this idea. I’ve been on the hunt for those small ($1000+) brass faucets for my little trailer project. Ridiculous, I say!! Here’s my question… Am I missing something?? One of the faucets you replaced was a pump from the water tank. How will it pump? What can’t I see here??? Help! Thanks. And love your blog. I check it all the time. Super fun and your designs are RIGHT up my alley.
Hey Sarah! Such a good question! The pump is teeny and electric and lives by the tank. It has a small switch that we installed inside the cabinets that we will turn on when we want water.
Ahhhhhhh!!! Amazing. Thank you!!
Great DIY! For those who haven’t worked with Teflon tape before, I will just add that you need to make sure to wrap it in the right direction so that it doesn’t try to unwind itself when you mate the connector. This will give you a better seal in the long run. Thanks Mandi!
Such a great tip!! Thanks for sharing!!
xo
m
This might be one of the coolest faucets I’ve seen in a DIY project. I love the industrial look and the class the brass provides.
Question for you! In the space that goes between the copper male adapter and the faucet where you brushed the flux, there seems to be a longer brass connector between the faucet and the copper adapter that I’m not seeing in the parts list or instructions. What am I missing? This is stunning and I’m really excited to give it a whirl!
Love the look of the the faucet, I was asked to to the soldering for the project, and I have one question: It appears after I solder it together the faucet will be “locked” (soldered) in place. How do you swing the faucet out of the way if you want to put a large pot under the faucet?
You don’t 😉
xo
m
OK Thanks
Hi there.
Working my own version of a sink.
How did you attach this faucet to the top table of the sink ?
Best.
Josh
There are washers on the underside of the sink that hold it in place
xo
m
Thank you for sharing this! I know this is an old thread, but if you don’t mind – where did you find the replacement handle for the stop valve? I cannot seem to locate a simple brass handle that is the correct fit. Any lead would be appreciated!
Hey Yes, everything came from Home Depot!