There are a million and one tutorials online for how to install subway tile. Literally. Pretty sure that every blogger who has ever existed has posted a tutorial on subway tile. This is not that. Well, I guess it sort of is but here at VR I feel really strongly about sharing the things that I did wrong, just so you guys can 1. not repeat the same mistake and 2. know you are not alone in your DIY frustrations and suffering. Lets get this pity party started.

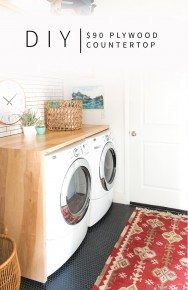
First things first, the tile that we used is Merola Soho Subway tile. The challenge was to take something very mainstream and make it my own, because I’m me and thinking outside of the box makes my heart happy. I contemplated installing it at complete random but after I thought about it for a minute realized that I still wanted it to look nice. So complete random was out. The look I realized was going for was planned randomness, the kind of randomness that doesn’t make you develop a twitch. There are about a million different ways to install subway tile but in the general style that I was going for, it seemed like there were 2 options. An Offset pattern aka Running Bond ( 99% of people do this). Which is basically offsetting the tile above at the 1/2 way point from the previous row.

While I LOVE this pattern, its everywhere and wanted something new.
Option 2: A 1/3 Step pattern. Which is dividing the tile into thirds and setting the rows at the 1/3 mark and the 2/3 mark.

The problem that I had with this pattern is all I can see are diagonal lines, which I don’t love.
So in an effort to create controlled randomness I decided to install them in a 1/4 Step pattern. I have no idea if its a thing, I maybe just made the name up but I feel like we should just go with it.

Once I’d decided on a pattern, it was time to get to work.
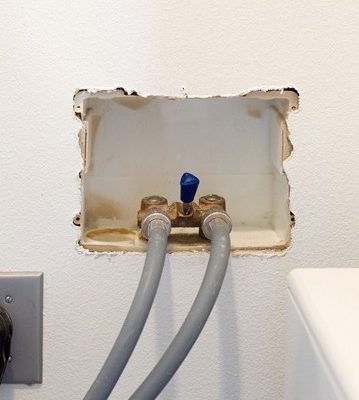
We installed concrete board on the wall before we started tiling. If you have an exposed edge (that doesn’t end on a corner) backer board can make the tile really thick (because you have to grout over the edge of it and it can look pretty wonkfest. But because all of the edges of our tile ended against something, and because I wanted to ensure maximum protection against any washer/dryer vibrations, we spent the extra $15.
The next step was to start. We had to work really fast because my cute husband put a massive amount of thinset on and getting in the zone and working fast was pretty critical.

When you are installing a pattern like this, making sure that it is level is make or break. Because we’d just installed the countertop (and knew that it was perfectly level) our job was a little easier. But I still checked everything with a level every 2 rows.

We started the tile directly against the countertop (with a spacer between them) and that was perfect…until we realized that you cant tile down a wall, only up a wall. Such a forehead slap. So we had to install a ledger board that was level with the countertop to finish the section…and scrape off all of the thinset below that point. DANG IT. #pregnancybrain #gravity


Once this section of tile was set, I did some math and by adding the width of the tile + the spacers came up with the thickness that the first tile against the baseboard needed to be cut to.

Then we removed the ledger board and tiled up the wall.
Unfortunately (seriously this is like the song that never ends!) I overlooked putting a spacer against the baseboard and had added that 1/8” into my math, which meant that we had to move the entire section of tiles up 1/8” to meet the upper section and not have a big fat grout line.
Insert slasher movie music.


NOOOOOOOOOOOOOOOOOO!
Mind you, this was all while I was literally a week away from giving birth. There was a lot of swearing.
Buuuuut dun dun dun dunnnnn! by some miracle it turned out absolutely perfect. Seriously. I dare you to find one spot on this wall that isn’t perfection. Man alive I’m pretty sure that this perfect tile job saved my sanity because had it have turned out wonky I would have lost it in the truest sense of the word.

So. don’t do what we did ok? Especially if you’re working with your spouse because people have been known to divorce over lesser things.
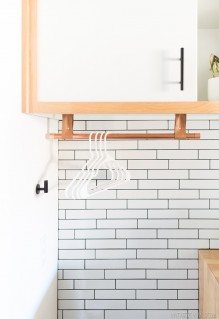
For our grout we used Fusion Pro in Charcoal. If you hear nothing else I say today, hear this. IT IS WORTH THE MONEY! Grout can be hard (you’ve got to have the perfect consistency, you’ve got to seal it, you’ve got to hope that it turns out true to the color etc.) This makes everything SO MUCH EASIER!!

A tip that I have when you’re using Fusion Pro is to wipe down your tile right before you spread it. This makes it so that it doesn’t stick to the tile surface as much and is easier to clean up. We used an epoxy float to lay the grout vs. a foam float and it was fantastic. You can get like 90% of the grout off of the tile before you even start washing.


See how the tiles look random but aren’t? Awwww yeah.


Check out the other projects from the laundry room here!


Love the “random” pattern. I’ll be doing a subway tile in about a month, so I might have to switch up from the regular running bond pattern now! Although, I would have definitely just tiled downwards and had to move real fast so I could get my spacers in on time.
It looks great! It’s no fun doing it the “right” way. Plus, it makes an entertaining post. 😉
Loved it! I would have never thought about the non baseboard part of the wall. 🙁
I just wonder how would it have been with a bright blue grout (like the ornament on the shelf). I love how blue and cooper match.
I mean this is a little embarrassing to admit, but I am a tile virgin and having no experience in this particular um… area of life, is there a way to explain to us inexperienced tilers why you can’t tile down a wall? It’s like middle school all over again with the cool kids and all their sexual prowess and me like “WHY ARE YOU LAUGHING? WHAT DOES BJ STAND FOR?”
HAHAHAHA!! This is the best comment I’ve ever had on this blog. You win Miggy! The reason is because the weight of the tile makes it slide down the wall and so it gets all wonky. When you tile from the bottom up the baseboard give it stability and then the spacers make it so that you can build up. Such a great question!!
xo
m
The end result was definitely worth the hard work, it looks awesome!
https://www.theartfulscavenger.com/#!Designer-Peeves/cmbz/5697dd6a0cf2e94e3fb7a77c
Turned out great! We have subway tile in our kitchen and I love it. I especially like the black grout you chose.
Total heart eyes all around! And Miggy! I love you!
Lol! OMG Mandi you crack me up ! so funny ….I LOVE that you talk about what doesn’t work and your mistakes… I think that’s one of the greatest qualities about your site that other sites are really lacking. And 1/4 step looks great btw. Kudos to u for surviving that SO pregnant.!! That takes someone w a great sense of humour.
The more you post this tile pattern, the less I understand it and the more I love it.
I knew you were supposed to start at the counter and tile up so you have full tile pieces where they are most visible (compared to under the cabinets). But I’d never heard about the weight issue. Thanks for the future headache prevention.
Random patter was definitely the way to go.
Thanks for sharing mistakes!
That pattern is anything but random. I love the look of it though, searching for “irregular” subway tile patterns is what brought me to this site.
Smashing job Mandy! So glad you found a “random” pattern that worked for you!
Actually, you can tile down a wall to a small degree. Often installers will do this if the floor is un-level. You can add a cleat, like you did, to the wall the exact distance of a tile or two up from the floor. Then, after the top portion is set and dry, preferably after at least 24 hours, you can tile underneath, removing the cleat and using painters tape to hold the tiles in place while it sets. After much research, I did this in my daughters bathroom and it worked fine. The reason I did it was not so much the floor, as it was because I wanted a full tile to fit perfectly on the tub and then around the wall.
Still looks amazing!! I love the classic white and black look. https://www.lovesthefind.com/
The Amish tile from the top to bottom.
Haha. That totally blows. I’m so sorry that happened but it does look really, really good!
With that small of a tile it’s easier to use Mastic in stead of thin set. And then it would be easier to tile that small area down the wall. It’s not easy but it’s easier with mastic. The tile has less slippage. Just a fyi. But the wall looks gorgeous. Great job.
Been installing tile for over 20 yrs.
Hi love you posts!!! Completely with ya on the tile placement!!!? Can you tell me what your floors are? If you diy’d them can you post the tutorial or link to it please. Are they concrete? I love the dark! Absolutely love your style!!! Beautiful!!!!!
Way late to the conversation here, but what sized spacers did you use? Looks really great!
I am about to tile my shower. Your post is very helpful. Very sorry for problems you had. Live and learn huh? Hopefully mine turns out as good as yours. By the way what size spacers did you use?
Very helpful and amusing!! Love it. Thanks for sharing…
Thank you. I was inspired to use the same “random” pattern on my re-tile project and it looks great. It also helps hide the fudging necessary in a hundred-year-old bathroom.
You may have just saved a marriage! I love the 25% offset and it helped alleviate our math problem with our tile rows. Never tile with a civil engineer. Never!
hahahahaha this made me laugh so hard!!!
I have one quick question. Did you attach the cement board over the drywall or did you remove the drywall and attach it?
We attached it to the drywall
Lessons for finishes.
Paint down
Tile up.
We are about to start ( right now, actually) our bathroom with subway tile on the walls and we actually are planning to do it hoe you ended up doing it! We definitely want that full tile above our counter top so my husband had planned to start there with a ledger and then go back and go from the bottom up. I do love your laundry room and have been planning to do Subway tile in ours! I’m pretty sure your laundry room is one I have always loved and randomly pinned over time- over and over! It’s just awesome!!!