Ombre is HOT right now. I have been in love with it for a few months but haven’t had a project to use it on yet. This lampshade was the perfect project. And it is SUCH an easy, high impact DIY.
![ombre-lampshade[7]](https://lh4.ggpht.com/-g-3UqXrwvos/Tp8XNLcEuyI/AAAAAAAAEvM/CPIm1OIQ2uQ/s1600-h/ombre-lampshade%25255B7%25255D%25255B3%25255D.jpg "ombre-lampshade[7]")
First things first. Get your lampshade and your yarn!

This is what the lamp looked like when we bought it from Restore for $49.00
![Ombre Lampshade 039[5]](https://lh4.ggpht.com/-FuFu54kCxKI/Tp8XPIME7II/AAAAAAAAEvk/6d442yn3Wm4/s1600-h/Ombre%252520Lampshade%252520039%25255B5%25255D%25255B3%25255D.jpg "Ombre Lampshade 039[5]")
Originally I wrapped the shade differently and it just didn’t look good. It looked striped and not awesome. So I started over with a change of plans.
You want to start by putting a little hot glue about 2” above the base of your shade. Start wrapping round and round and round.
To make it so that the yarn lines up gently push it down with your finger tips. When you get to the point that you are ready to incorporate your second color wrap it very loosely a few times around leaving large gaps.
Place your second color on with a little bit of hot glue. And don’t judge the fact that there is hot glue the entire way up the shade….
![Ombre Lampshade 053[5]](https://lh4.ggpht.com/-SbfksLdtEZA/Tp8XQgICg9I/AAAAAAAAEv0/UdSHZ2fo-vk/s1600-h/Ombre%252520Lampshade%252520053%25255B5%25255D%25255B3%25255D.jpg "Ombre Lampshade 053[5]")
And here is the secret tip of the day…. Put your first color of yarn inside the shade so that you can wrap the second one without it getting tangled. You will wrap over the first color of yarn to hide it.
Wrap your second color in-between the first color. Then with your finger tips push them down so that they are all together tightly.
![Ombre Lampshade 056[4]](https://lh6.ggpht.com/-IP_kCvNWQCg/Tp8XR1uvYUI/AAAAAAAAEwE/rql6_tBdchk/s1600-h/Ombre%252520Lampshade%252520056%25255B4%25255D%25255B3%25255D.jpg "Ombre Lampshade 056[4]")
After you rotate the colors every other one for a few rows wrap the second color around a few times and then incorporate another row or 2 with the first color. (you can see in the below picture where I wrapped over the first color of yarn and then brought it back out)
![Ombre Lampshade 058[3]](https://lh4.ggpht.com/-cJl4gEIRDks/Tp8XTJPkeRI/AAAAAAAAEwU/CmsmCzFkxmE/s1600-h/Ombre%252520Lampshade%252520058%25255B3%25255D%25255B3%25255D.jpg "Ombre Lampshade 058[3]")
When you are finished with the first color cut your yarn and glue the end in place. Then start wrapping the second color exclusively.
![Ombre Lampshade 060[3]](https://lh6.ggpht.com/-p6kj9Hca374/Tp8XUU0BfhI/AAAAAAAAEwk/ylBHsiIH3E0/s1600-h/Ombre%252520Lampshade%252520060%25255B3%25255D%25255B3%25255D.jpg "Ombre Lampshade 060[3]")
Repeat the blending technique with your third color. Remember to keep the yarn color you aren’t using inside your shade!
![Ombre Lampshade 062[3]](https://lh4.ggpht.com/-zzqrRrafxgs/Tp8XVYT3oMI/AAAAAAAAEw0/5Canq1T70DY/s1600-h/Ombre%252520Lampshade%252520062%25255B3%25255D%25255B3%25255D.jpg "Ombre Lampshade 062[3]")
When you have finished wrapping the third color and have glued the end in place flip your shade over to finish the first color.
![Ombre Lampshade 072[4]](https://lh6.ggpht.com/-rAoU51uUdJA/Tp8XWr3sddI/AAAAAAAAExE/p3oFWE2pKaI/s1600-h/Ombre%252520Lampshade%252520072%25255B4%25255D%25255B3%25255D.jpg "Ombre Lampshade 072[4]")
And then you are done! I am so proud of you!
![DIY-ombre-gradient-lampshade[7]](https://lh5.ggpht.com/-s7WYG3ibCL0/Tp8XYEVt4QI/AAAAAAAAExU/iMndzQHuH_4/s1600-h/DIY-ombre-gradient-lampshade%25255B7%25255D%25255B3%25255D.jpg "DIY-ombre-gradient-lampshade[7]")
Hailee’s husband Mark is an electrician and totally installed this light to a switch.
![006[3]](https://lh6.ggpht.com/-tmOoTpZMVxw/Tp8XZAQWf-I/AAAAAAAAExk/D21uC7KQam8/s1600-h/006%25255B3%25255D%25255B3%25255D.jpg "006[3]")
![010[5]](https://lh3.ggpht.com/-VQeUc1BDvH4/Tp8XaRgCPOI/AAAAAAAAEx0/DZg0GQ2zPpA/s1600-h/010%25255B5%25255D%25255B2%25255D.jpg "010[5]")
The base of the lamp was sprayed with Krylon Dual in White Gloss. Dual is a perfect product to use for a project like this.
![ombre-lampshade[3]](https://lh3.ggpht.com/-UYqOopwsaxQ/Tp8XbqMx2wI/AAAAAAAAEyE/gw58dnOT3Mk/s1600-h/ombre-lampshade%25255B3%25255D%25255B2%25255D.jpg "ombre-lampshade[3]")
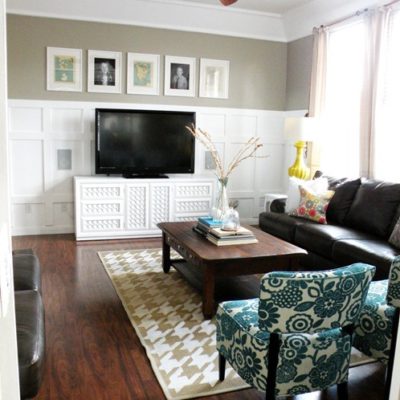
![DIY-houndstooth-rug[3]](https://lh5.ggpht.com/-9aKHtsLGVQQ/Tp8Xc9diKJI/AAAAAAAAEyU/bIrQrP6phpA/s1600-h/DIY-houndstooth-rug%25255B3%25255D%25255B2%25255D.jpg "DIY-houndstooth-rug[3]")
You can see the entire room reveal here.
![]()
Loving that lampshade!! That lamp was um…uuuuggglllyy before!! That was a rescue for sure!!
I totally didn’t realize that was yarn the first time I saw it in the room pics! Love it!!
that looks fantastic!!
-m
i love it SO MUCH! I usually try to take something that you or someone has done and put my own twist on it, but i love this so much that I might just have to do it exactly, but maybe another color although I LOVE these colors! LOVE! you are amazing
It is a fabulous looking piece and so unique. Thank you for the tutorial!
What a thrifty eye-catching project!! Thanks for the inspiration! Next thing you know, I’ll have everything wrapped in yarn…
Super cool project, Mandi! Love the result, but not sure I’d have the patience. Kudos!
Heidi 🙂
PS~ check out my new site!
http://www.heidimilton.com
Love it ! but I have just one question. Why did you start 2 inches from the base and then go back to finish. Why not just start at the base?
I love your guts, but please for the love of all that is good and holy, stop calling stripes “ombre”. Ombre is a gradation from one color to another, so gradual that you cannot pick out a single color band. This is not ombre. This is stripes. Y’all are driving me bananas with all these striped fake-ombre things.
I didn’t even realize there were three different colors of yarn when I first saw this! I thought you just wrapped two colors around a white shade! I love the tutorial, and I have the same question as Anessa, “Why did you start two inches from the base, and then go back and finish?”
I’m with Heidi – LOVE this, but I would punch myself due to aggravation if I tried it. And I’m pretty crafty! xo
Very cool!
Shari
turnstylevogue.com
Mandi:
I ABSOLUTELY LOVE this project!
Thank you for a great tutorial on this awesome project. I am always looking for new ways to spice up newly purchased shades or thrift store finds.
I can’t wait to try this out. What an absolutely creative girl you are : )
Cori
Um, that is a little bit awesome!
IT’S YARN??!! You are now my superhero! I totally thought that was fabric! So chic!
looks great. i recently used yarn on a lampshade too only i wound it around vertically. it turned out super cute, too.
Great Tutorial!
~Mrs. Delightful
[email protected]
That is so freaking awesome! I can’t even tell you how amazing everything in that room is but that lamp is killer! I love the bottom too!
That lamp is so fancy! Even before your fantastic makeover, I can see why it was $50 used.
Wow you are amazing! Wish I had that patience lol
LOVE this! Am definitely following your blog ASAP.
Houndstooth? Check.
Turquoise? Check.
ALL my favorite things!!!
I am looking for picture frames…like the one with the skeleton and that beautiful yellow one on your wall…Do you know where I could find some?
Gorgeous lamp!! And I love the rug in your room…I have to ask: where’d you get it?
Such a clever idea! Your lamp shade gave me the inspiration for a project for my baby girls bedroom. Thanks for sharing all of your AMAZINGNESS! Your ideas always suprise me!
Here’s the post about my project: https://the-shiny-side.blogspot.com/2011/11/pinspiration.html
Just saw you do this on Nate today 🙂 I’ve been looking for something to do with my plain shades in my living room. I’m so excited to try this out!
Loved you Nate yesterday! You inspired me!!!
Love what you did with this lampshade. I featured it over at my blog:
https://controllingcraziness.blogspot.com/2012/03/inspiration-for-weekend-8.html
I can’t even imagine how long that must have taken but the result is really great! Love the colour combination on the lampshade
Still one of the best lampshade re dos. Love it as much as the first time great job!
I’ve put together a round up of yarn craft tutorials on Craft Gossip today and included your post. 🙂 You can see it here
https://homeandgarden.craftgossip.com/15-yarn-crafts-that-dont-require-needles/
If you would like a Craft Gossip badge showing you’ve been featured, you can grab one here 🙂
https://homeandgarden.craftgossip.com/grab-a-craft-gossip-button/
Thanks for sharing your craftiness!