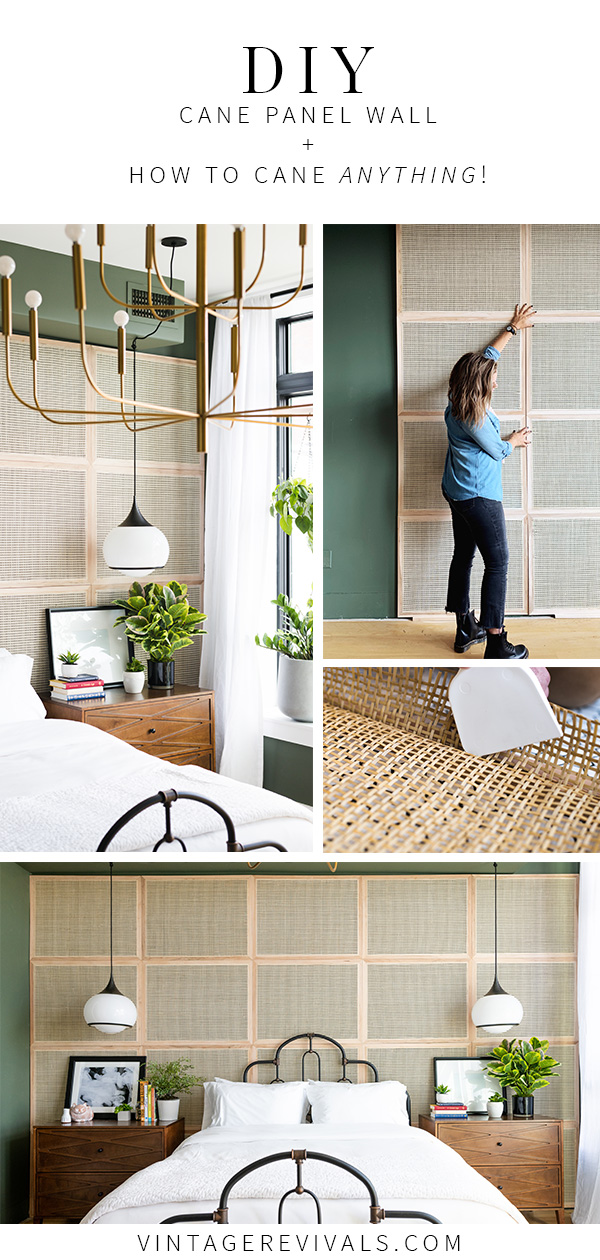
Raise your hand if you love caning! Keep your hand raised if you have NO IDEA how to use it! Get excited and settle in because this tutorial on how to cane is going to blow your mind! Caning is at the forefront of design trends now, and around my circles I havent seen a real tutorial for how to cane furniture. There’s been a lot of hack and glue and staples, but real life caning is a VERY doable DIY. Ready to learn how?!
What is Caning?
Caning in it’s most basic form is a weaving technique used on furniture.
The weave is made out of thin strips of cane and woven into different patterns.
There are a few ways to cane, the most time intensive is weaving each individual piece of cane onto the furniture. Bless your soul if you’ve got that kind of patience. We’re not doing that. For our project we’re using something called Cane Webbing. It’s pre-woven and comes sort of like a piece of fabric.
How Caning Works
The caning is probably wildly different than any other DIY you’ve tackled. (Don’t worry we’ll go over this step by step!) but here is the birds-eye view of how caning is done!
- A frame is built that has a groove cut around the face of it.
- Wet cane webbing is forced into the groove
- A small amount of glue is put onto the caning.
- A piece of reed splining is pressed in the center of the fold. It holds the caning in place and tight after it dries.
- The excess caning is trimmed off and the cane webbing dries taught.
There are no staples, or nails, just a little bit of glue!
Learning to Cane
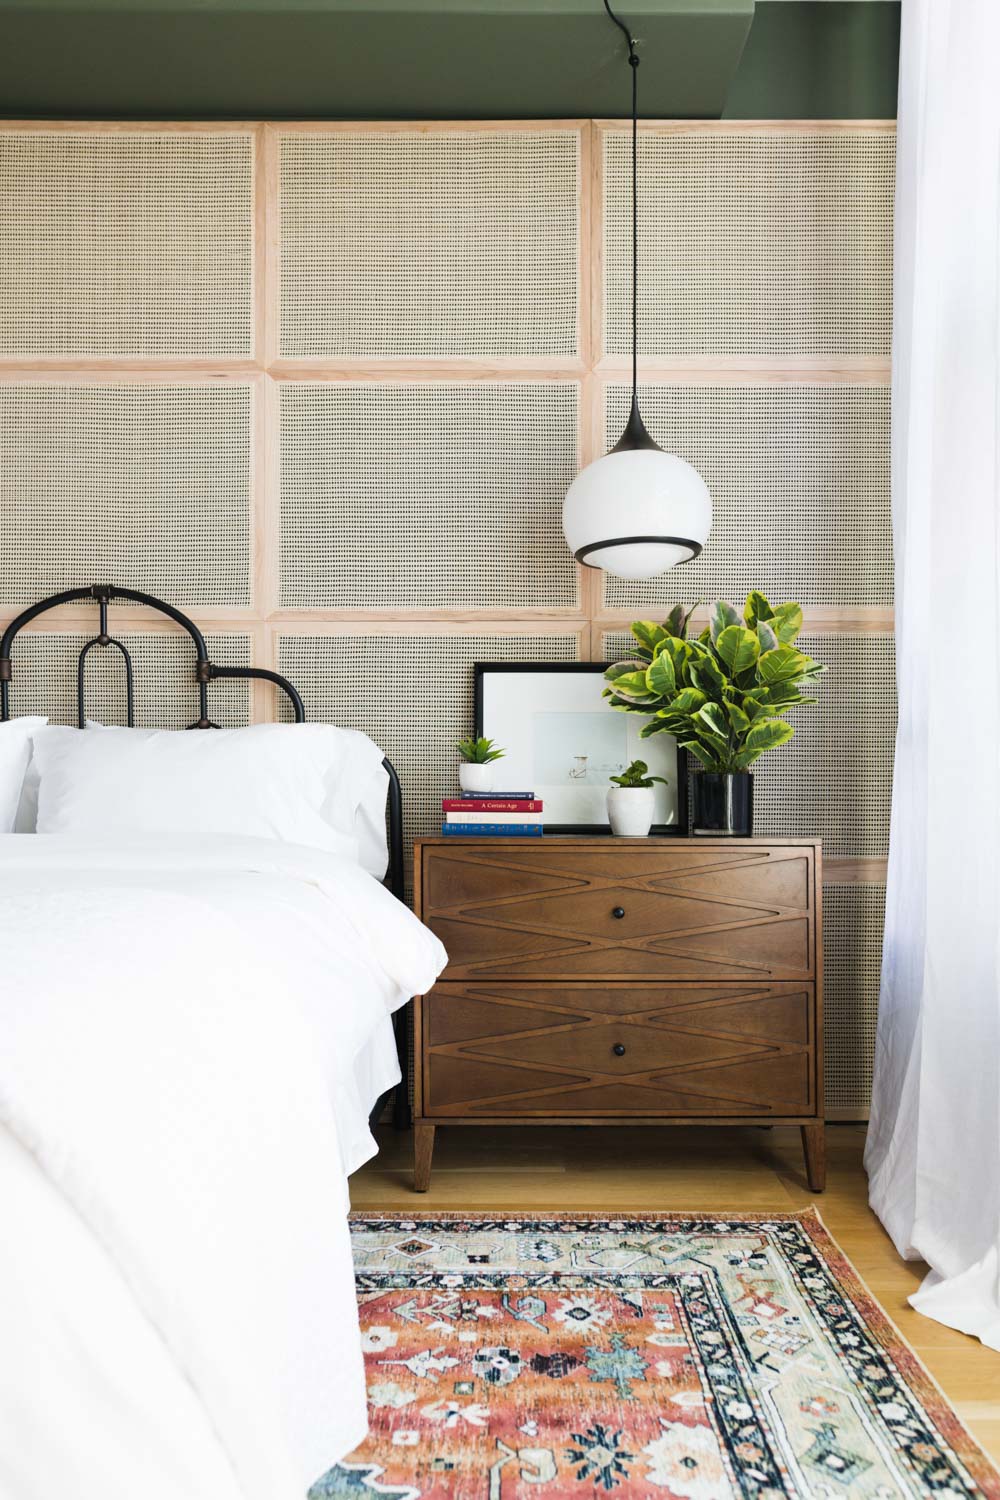
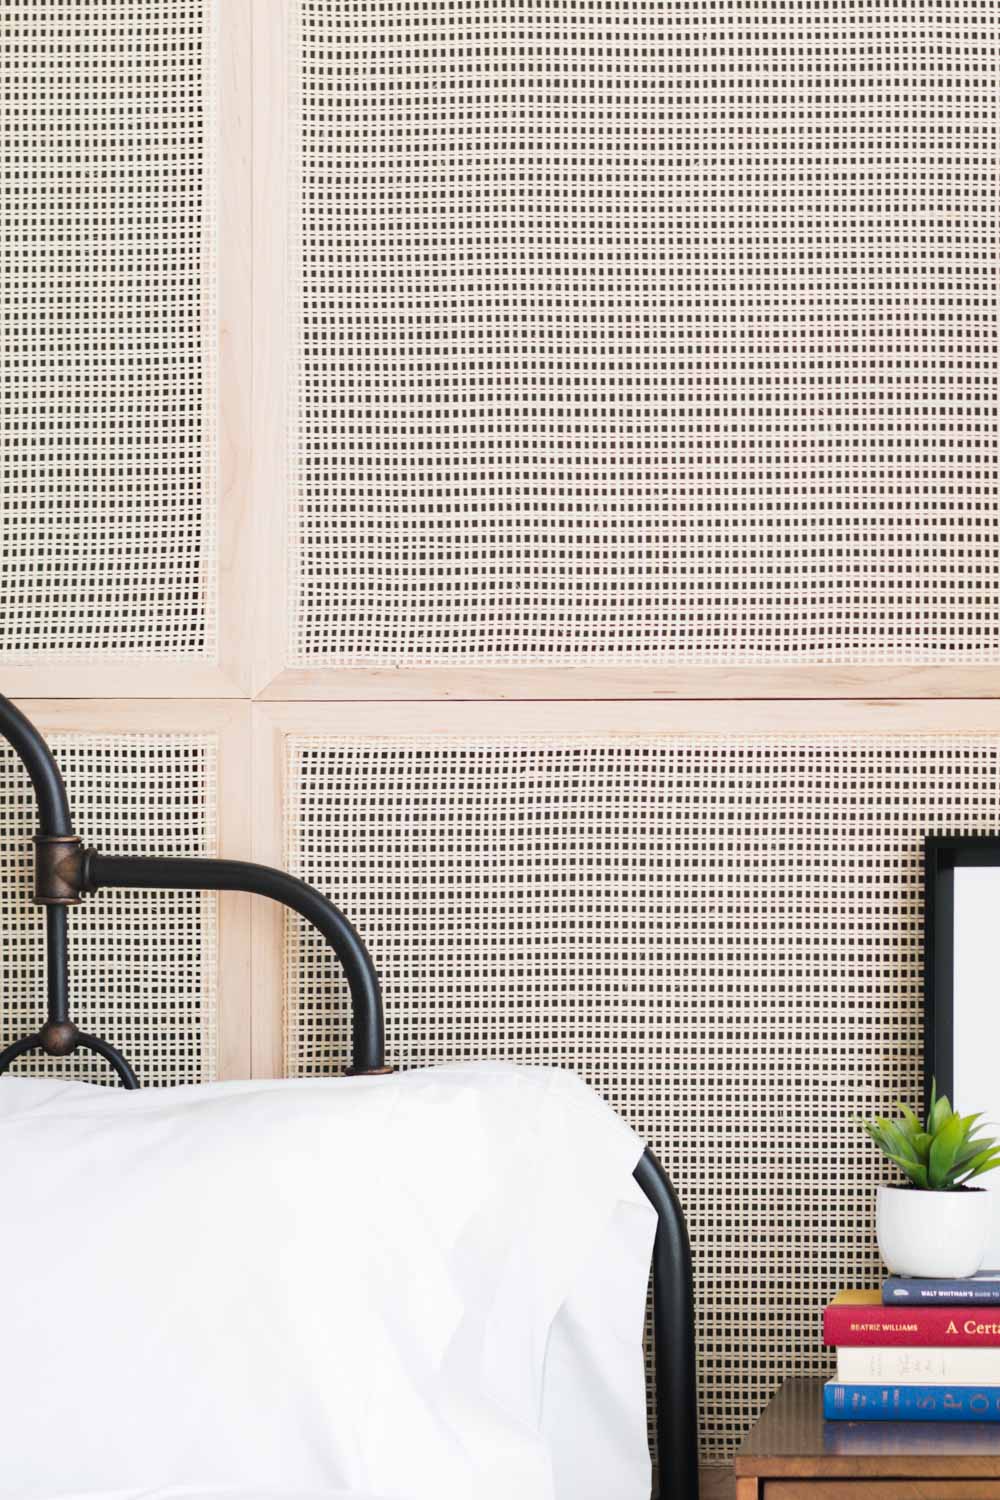
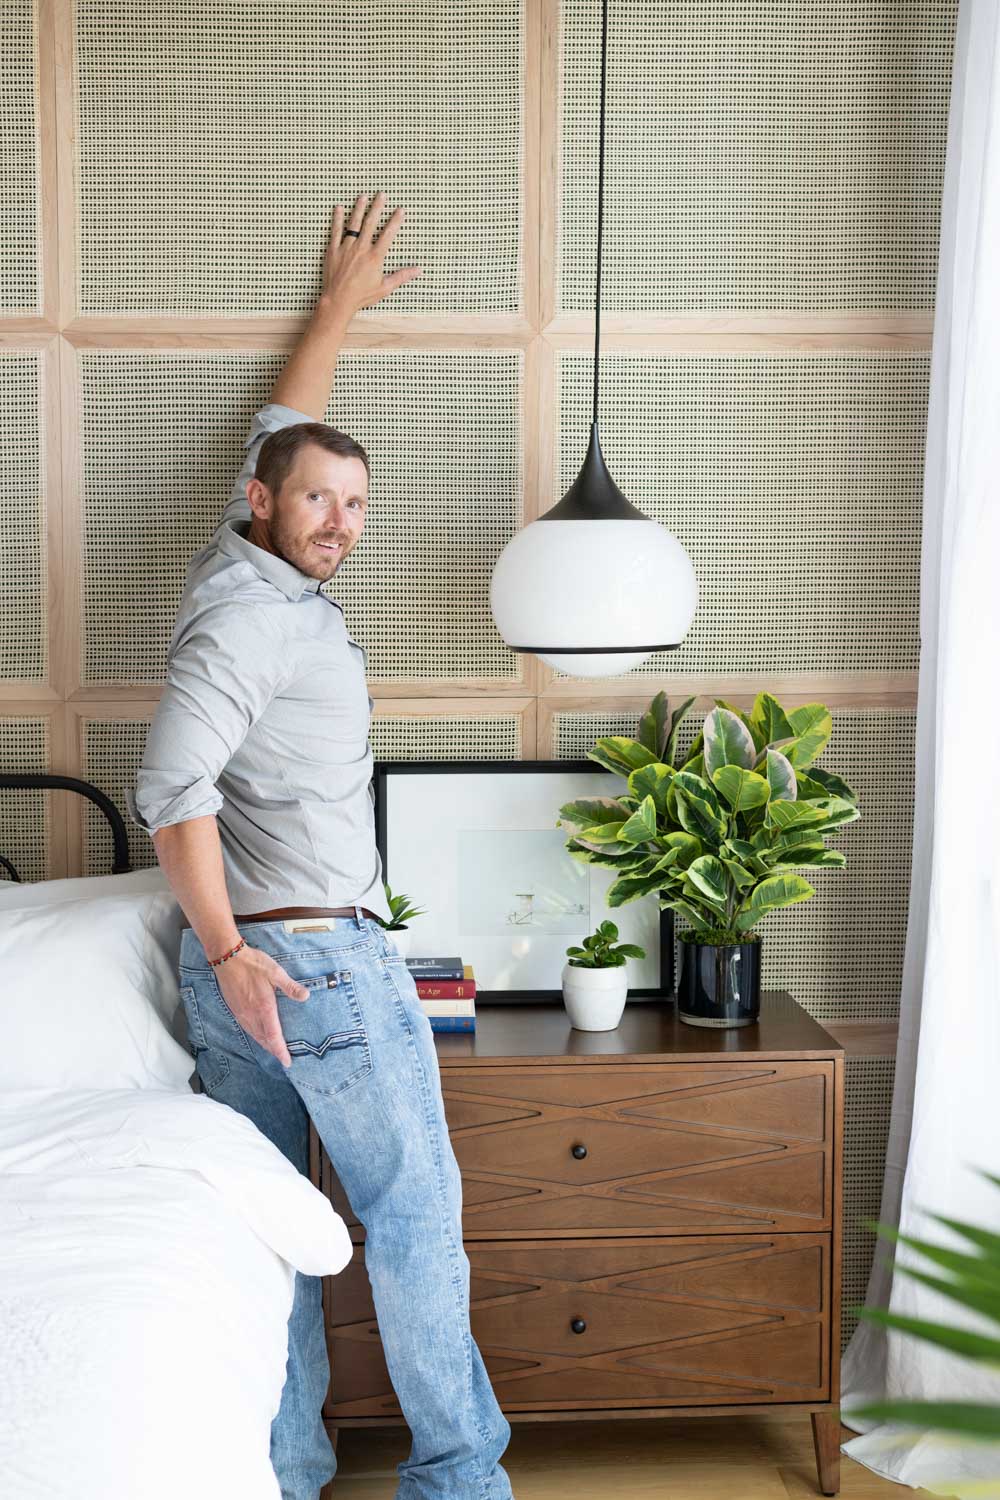
When Real Simple asked me to design the master bedroom for their 2019 RS House I was ALL OVER IT. But I knew that I wanted a statement making DIY in the space cause that’s sort of my thing.
There were a few requirements.
- It had to be awesome. Like the greatest thing I’ve ever done.
- It had to be able to be shipped across the country
- It had to be able to be installed in less than 3 days.
No biggie.
While I was thinking about it, the caned bench that Court built for our entryway caught my attention and I knew that caning was exactly what I needed to do!

First thing was getting all of the measurements and figuring out the spacing and size for the panels. Once I had those I ordered my supplies and we got started.
Using The Right Wood
Using the right wood can be a pretty big deal. When you are installing the caning and it’s wet it’s pretty loose and saggy not unlike my middle aged body. But as it dries it tightens up and the larger expanse of caning, the tighter it can get. Which in turn can cause the wood frame to bow inward.
For our frames we used Maple (one of the hardest/strongest woods) and even that bowed a little bit! We were shocked. To fix it we re-wet the caning and added a temporary support across the center of the frame. We kept it in place until the caning was completely dry and then removed it.
I can only imagine how easily soft wood like pine would bow. We definitely recommend using hardwood for a caning project! The center cross piece in the photo below is the temporary support to prevent the frame from bowing!
Supplies You’ll Need
Cane Webbing
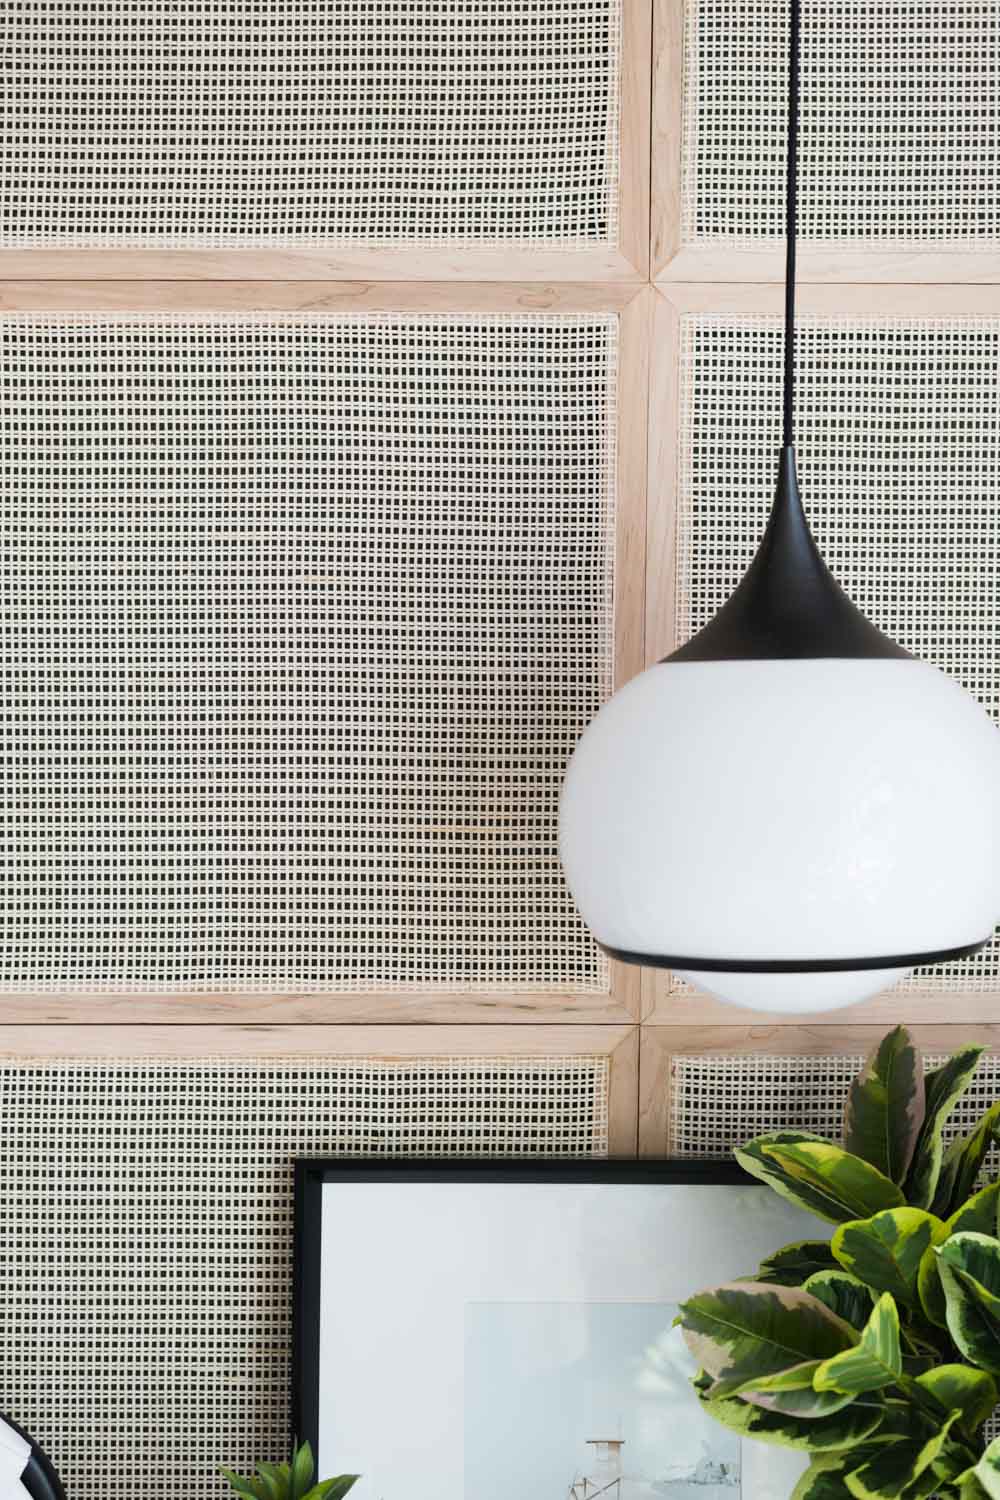
Cane webbing is made out of thin strips of cane and that is woven into different patterns. The most common pattern is called Open Mesh. The Cane Webbing we used is a Medium Danish Weave. It’s got a killer Scandinavian modern vibe and makes me want to build an entire house out of it to live in without my children.
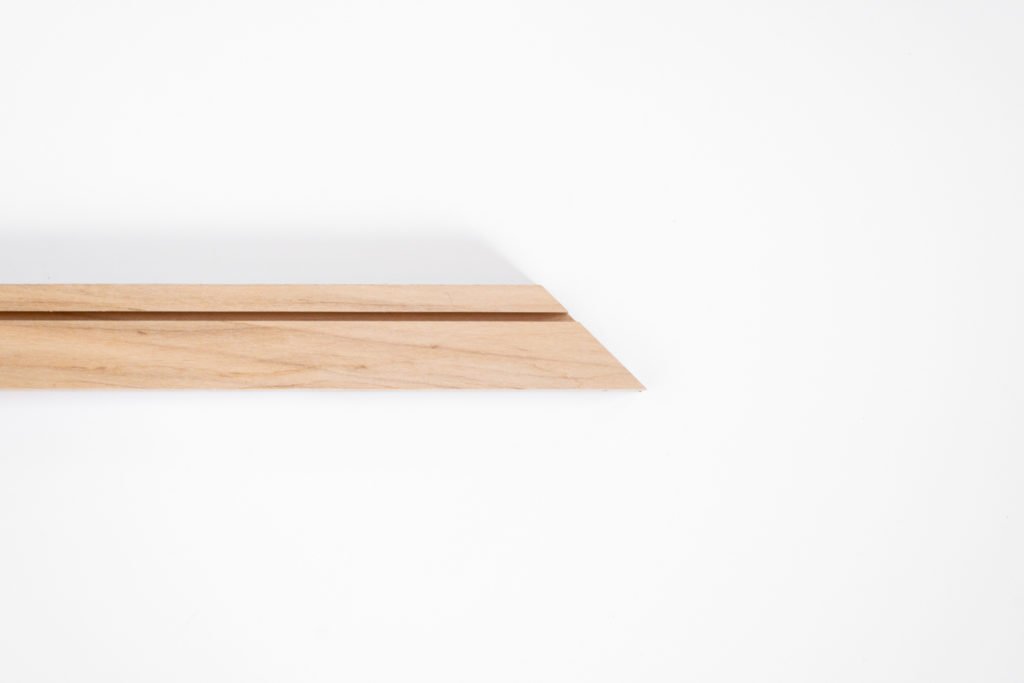
Splining
Reed Spline is the wedge-shaped reed that is used to hold the cane webbing into the groove around the frame. To determine the thickness and size of your spline, you’ll measure the width of your groove. Easy peasy right?! The most common size of spline is 3/16 which is about the thickness of 1+ 1/2 saw blades.
Glue
We tried 3 different types of glue and Loctite Go2 All Purpose ended up being our favorite. You could also try Wood Glue, or Elmer’s Glue. The one downside of this type of glue is that it’s not water soluble, meaning if you have to pull out the caning and replace it, it’s a dig job. But it was way less mess than wood glue, and it has a little bit of give when it dries, which I think helps the caning as it sucks in
Tools
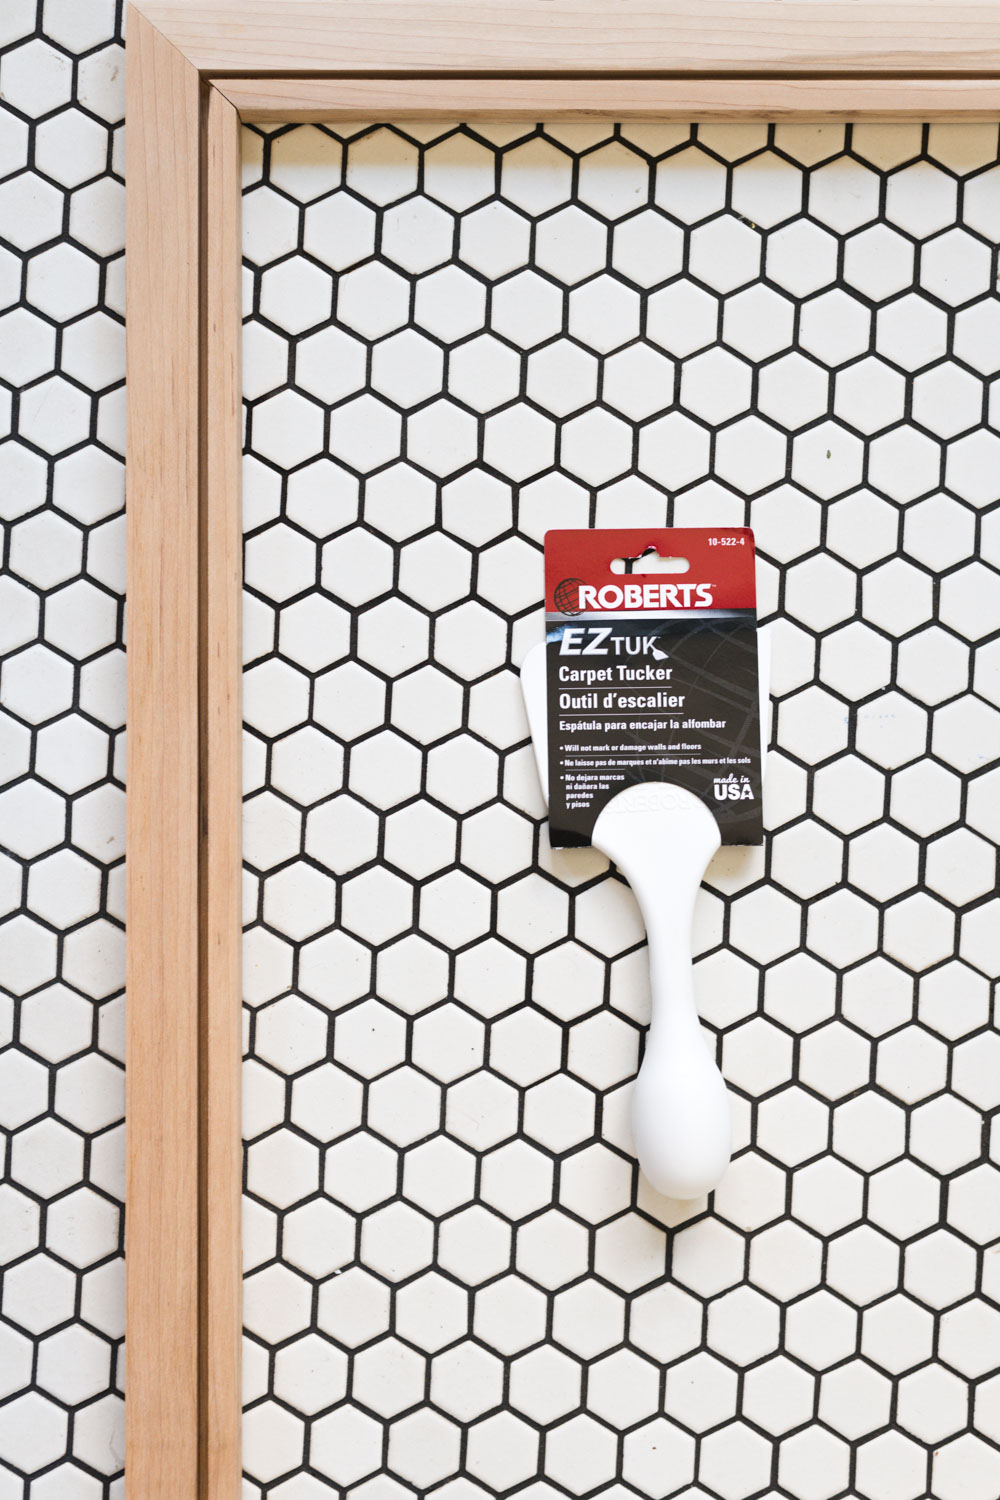
So you guys know that we like to do things our own way right? The tool we loved the most is 1000% not intended for caning use, but it was awesome. It’s a Carpet Tucker. It potentially might not be great for smaller projects like chair seats because it’s so large and flat. But we tried SO MANY THINGS and this worked so well for us! Maybe because we were doing such large expanses? It’s worth a try IMHO!
Scissors
Razor Blade
Where to buy Cane Supplies?
I’ve scoured the bellies of the internet and the best place that I’ve found is Frank’s Cane and Rush. Fair warning, it’s not a normal e-commerce site, so things take a little longer, but they’ve got GREAT customer service. I’ve ordered from them twice and its been wonderful both times. They have the best prices and selection of any place I’ve found!
How To Cane
*I feel like I need to start this tutorial with a disclaimer. We watched a ton of videos and read a lot of articles on the right way to cane. But like everything else we do, it had a hefty learning curve (which I love because then I can tell you guys what went wrong!) This tutorial is for the way that we found worked best. It’s a little outside of the universally accepted way and using different tools, but it worked great for us!
Building The Frame
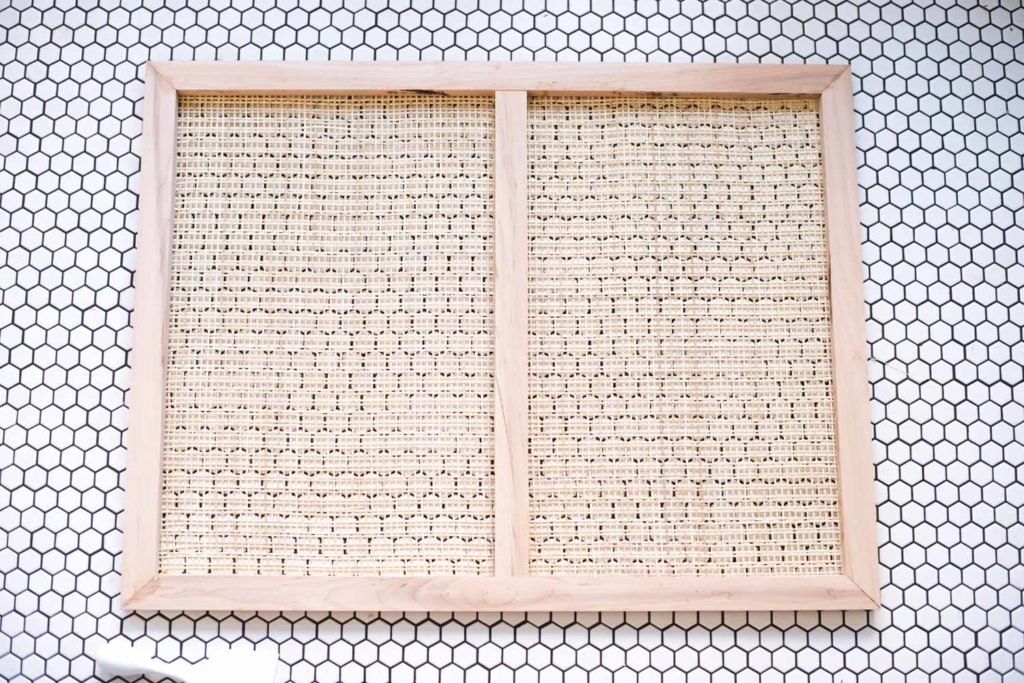
Start off by cutting the wood for your frame. This is totally personal preference on the size, our frames are 1.5″ wide. Keep in mind that if you are doing a large panel wall like we did that it will visually double that thickness when you butt 2 of the panels together!
Once your wood is cut to width it’s time get get your groove on!
There are a few ways to cut the groove into your wood. Our favorite is with the table saw. You could potentially use a router, but a table saw is definitely your best bet. You want at least 1/4″ between the groove* and the edge of the frame. Just run the entire length of the board through the saw to cut the groove, then cut it apart for the actual frame. Our total frame size was 26″x33.75″. Yours will probably be different depending on the size of wall that you are covering. 😉
**Remember, you’re cutting a groove, not cutting the full way through the wood! Lower your saw blade so that it is cutting 1/16″ deeper into the wood than the depth of your reed spline.
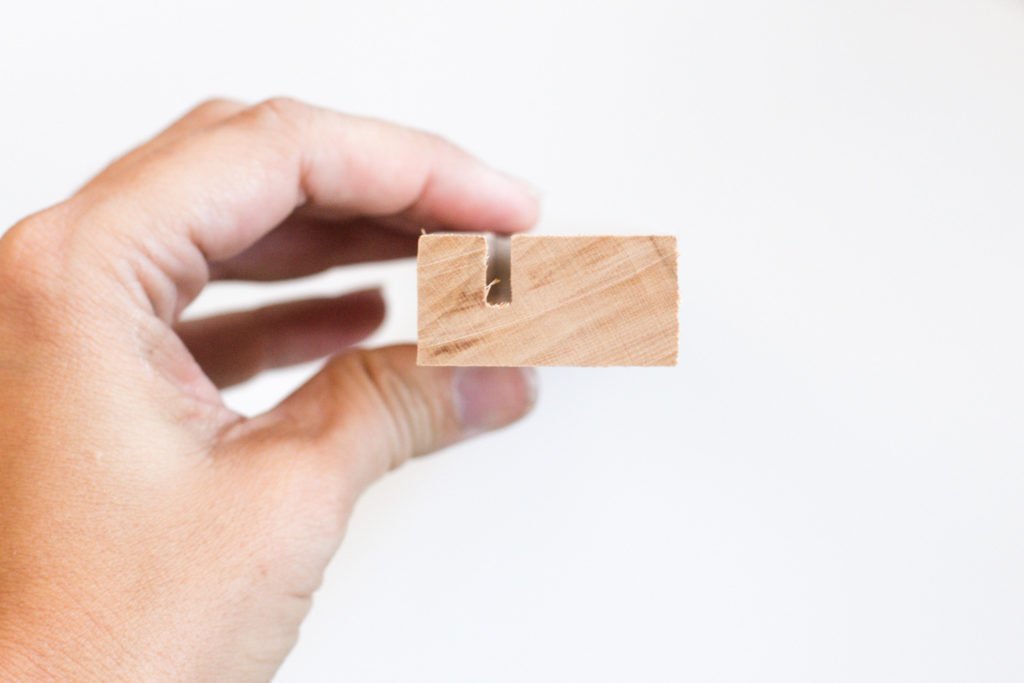
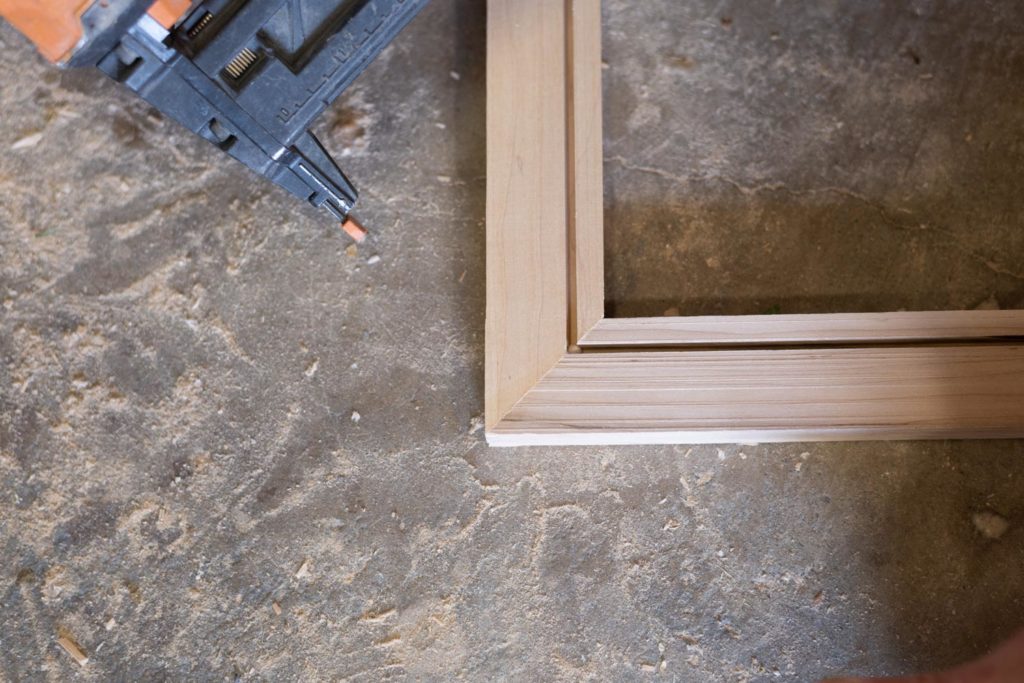
In order for the grooves to line up correctly, you’ll need to build your frame with 45 degree angled corners. Attach the frame pieces together with wood glue and finishing nails and give them a chance to cure. The groove should be on the inside of the frame.
How To Attach the Cane Webbing
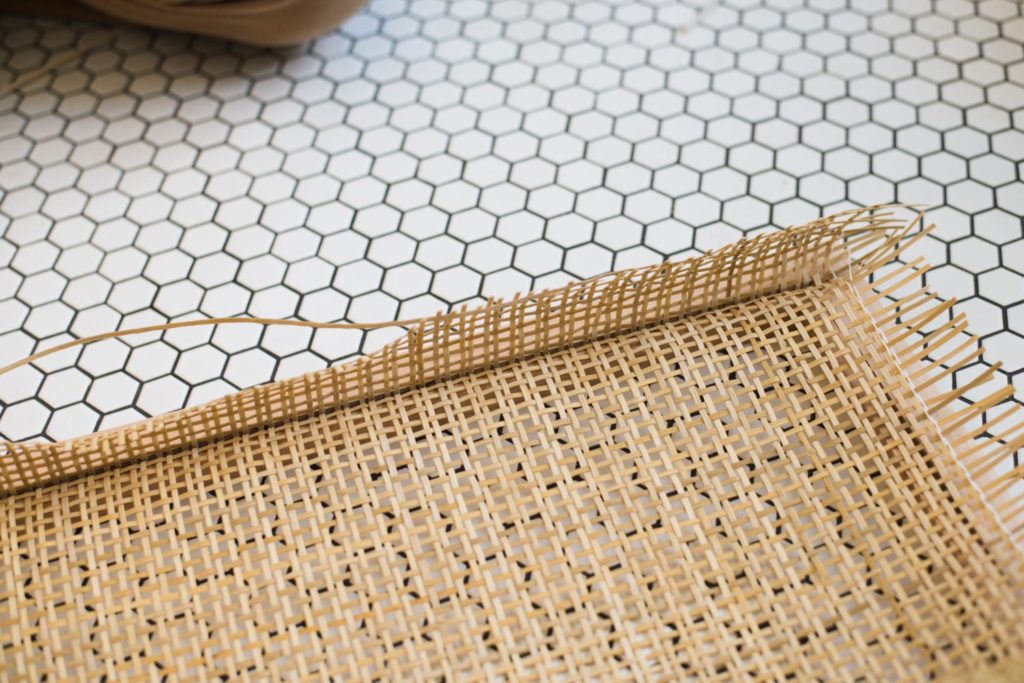
Caning is incredibly pliable when it’s wet, you can fold it right in half and it wont break. If it’s dry though it’s a totally different story.
Get Your Caning Wet
The first step in caning is to soak the webbing. We filled up our bathtub and put all of the panel pieces in to soak. They only need about 15 minutes to be ready to go, but can sit in the water for hours as well without doing any damage. It’s also a great idea to keep a spray bottle on hand so that you can mist the caning if it starts to dry out!
Caning has a front and back side. The front side usually has some sort of coating or finish on it. Being the natural wood lovers that we are, we rebelliously used the back side as the front because it is unfinished and matched our maple better! Basically this is me telling you that you can do whatever works best for your style and project!
Line Up Your Caning
Hands down one of the MOST FRUSTRATING things of this entire DIY is when you get everything installed and then realize that it’s crooked (been there done that.) Let’s prevent that from happening to you ok?!
The weave pattern that we used was a combo of vertical and horizontal pieces so it couldn’t have been easier to keep things lined up.

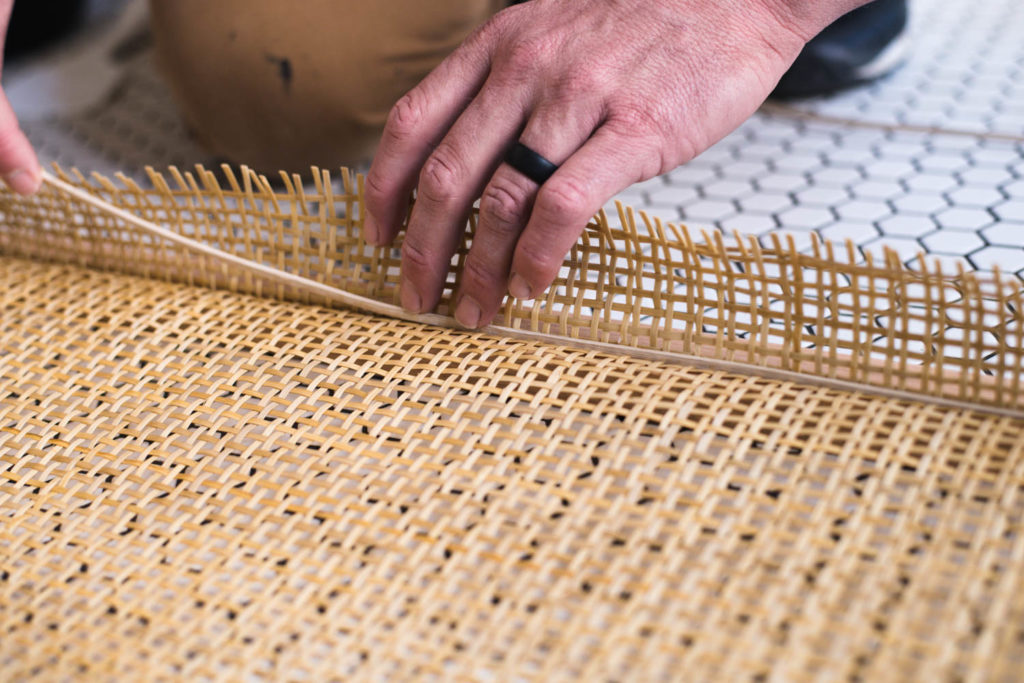
Line the caning up so that one of the pieces that runs parallel to the groove is sitting directly over it. This is going to be your guide. As you push the cane into the grooves, you want to push directly on top of this piece, keeping the line straight. It’s super easy to get off if you arent paying attention.
To push the caning into the groove, you’ll need something that is dull and sort of thin. It also needs to be strong. They make tools that are specifically for this, we ended up trying a bunch of different things and ultimately this carpet tucker from was our favorite.
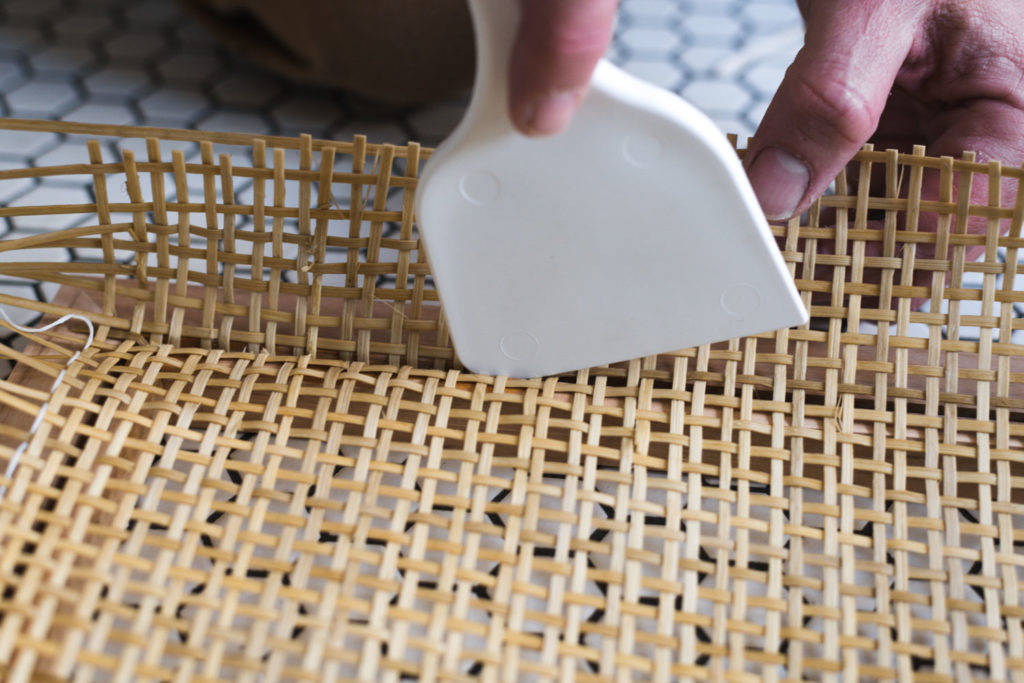
We did this in 2 passes. If you get too aggressive the caning might break. Starting with the rounded edge of the carpet tucker, we rolled the caning into the groove. After the first pass, we went back and pushed it in deeper.
See how in the below picture the caning comes up at almost a right angle? That is what you want!
Add A Bead of Glue
Add a running bead of glue to the groove. Make sure its not overspilling! .
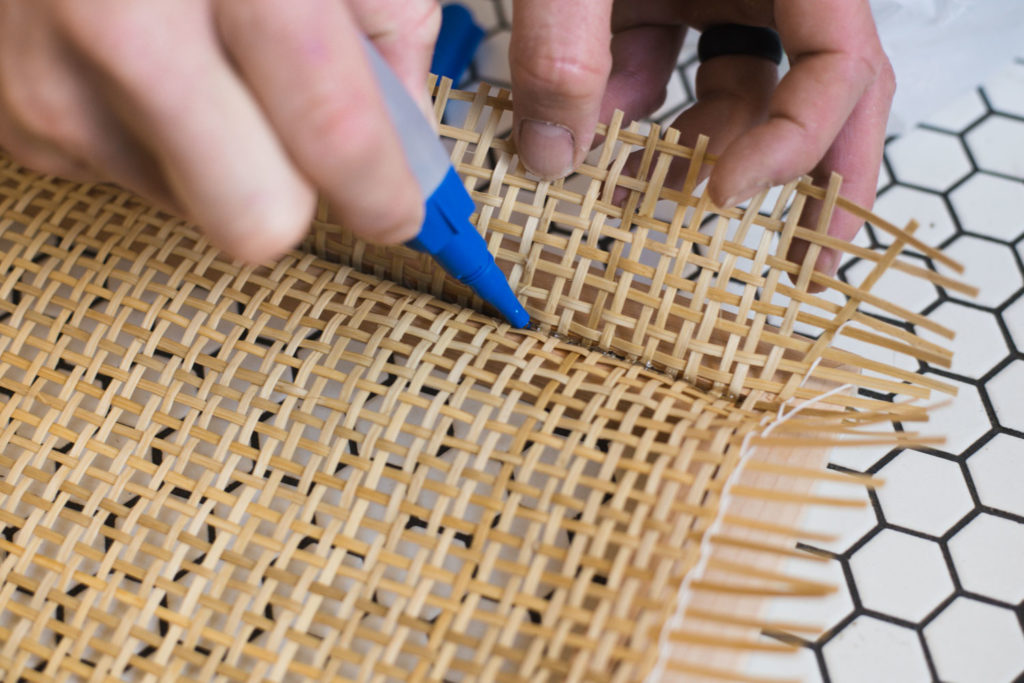
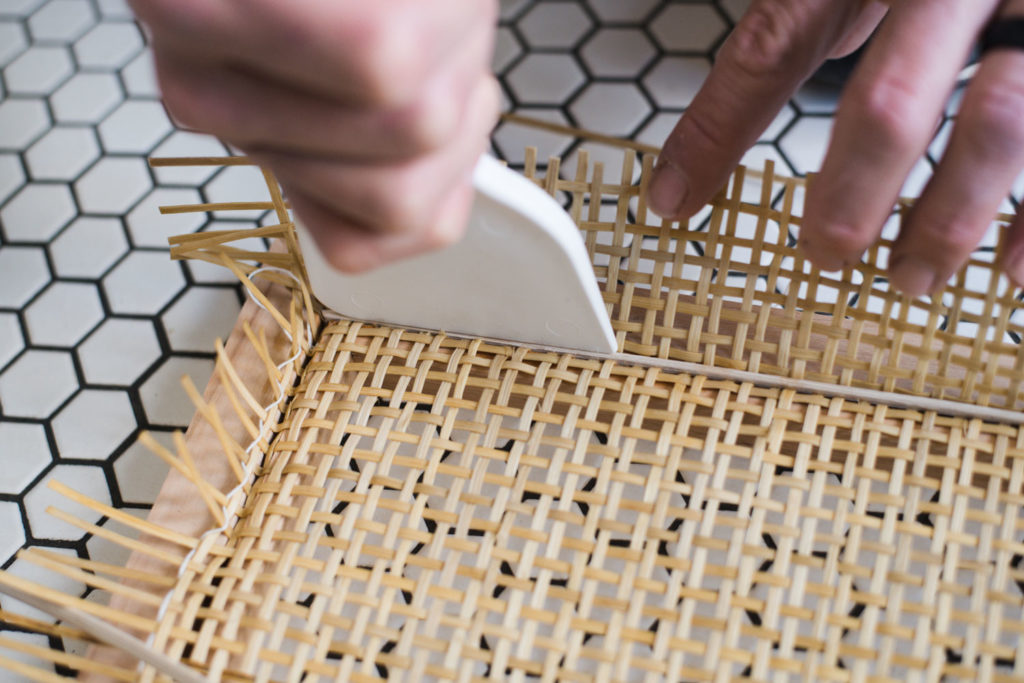
Add The Splining
Splining is a thin piece of reed that has a little bit of taper on it. You push it into place and it keeps the caning from pulling out of the grooves.
(Sidenote) the splining that we had on had when we replicated this tutorial for pictures is a little too small for the size of groove that we cut. The right size will sit flush or slightly above the face of the caning. Ours was down inside a little, but the technique is the same.
Cut it to length with 45 degree angles on each end.
Line it up and press it into place with your fingers.
Press it down with the carpet tucker (or you can hammer it if you want!)
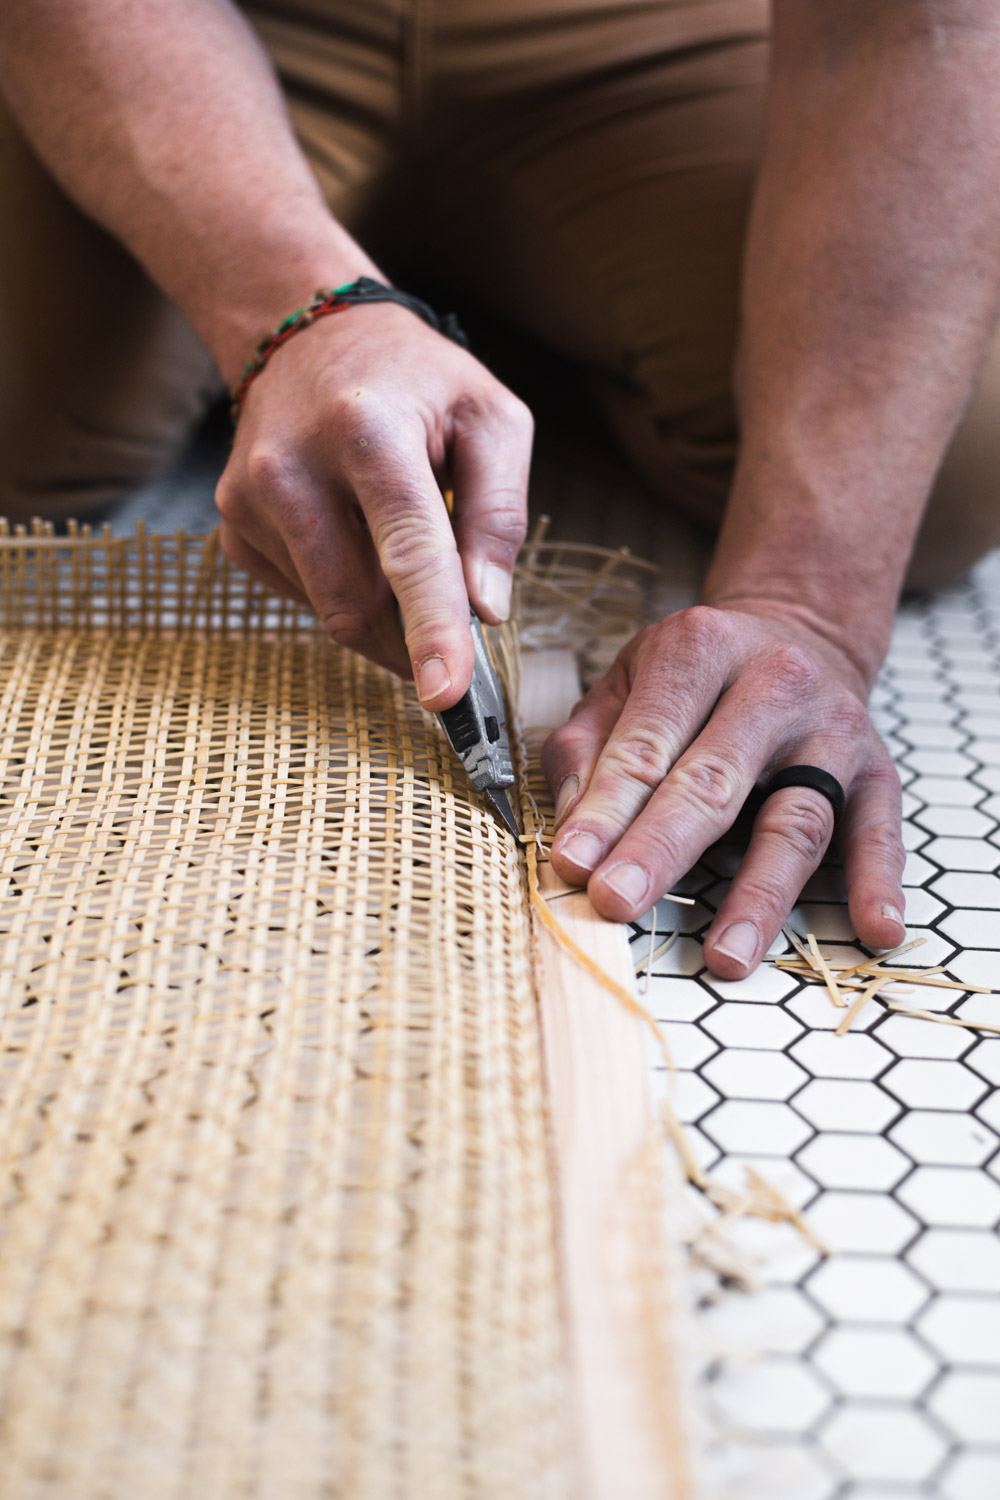
When the spline is in place, it’s time to move to the next groove! This is also different than traditional caning techniques where you line every thing up and use wedges to hold the caning in place before you tuck it in and add the spline. The reason you would do this is to make sure that everything is straight, but with the type of weave we used it wasnt a worry so much.
Pull the caning tight enough over the frame that its smooth, but DON’T WORRY IF THE DAMP CANING IS A LITTLE LOOSE!! As the caning dries it will tighten up significantly! In fact, we did not have one single panel that had loose caning after it dried and there were some I was worried about!
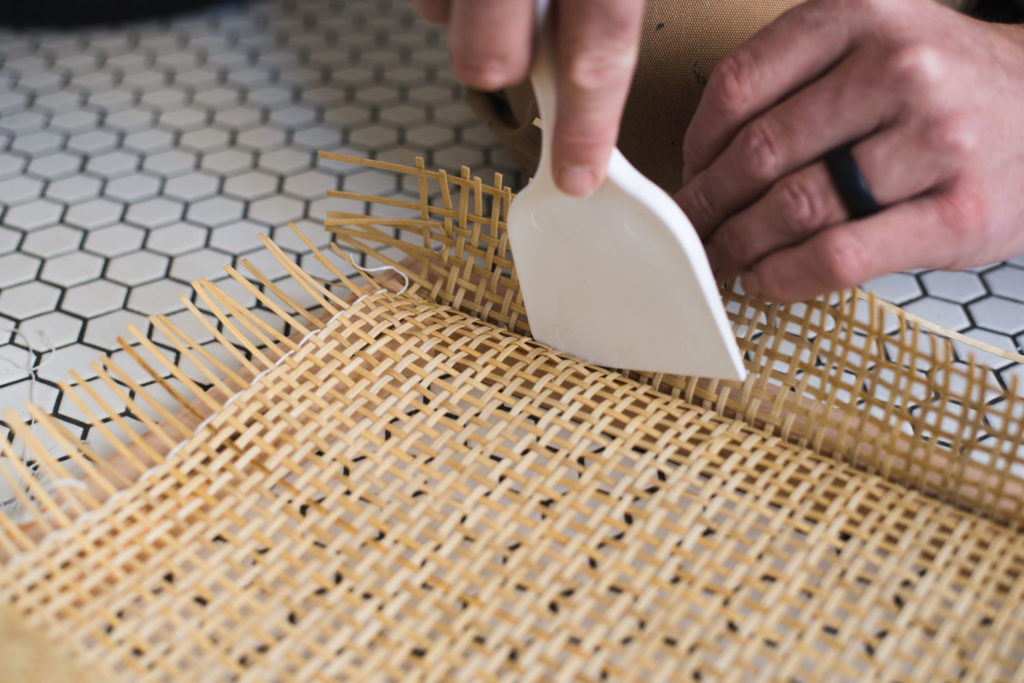
When all 4 sides of your frame is caned, take a razor blade and trim the excess caning off.
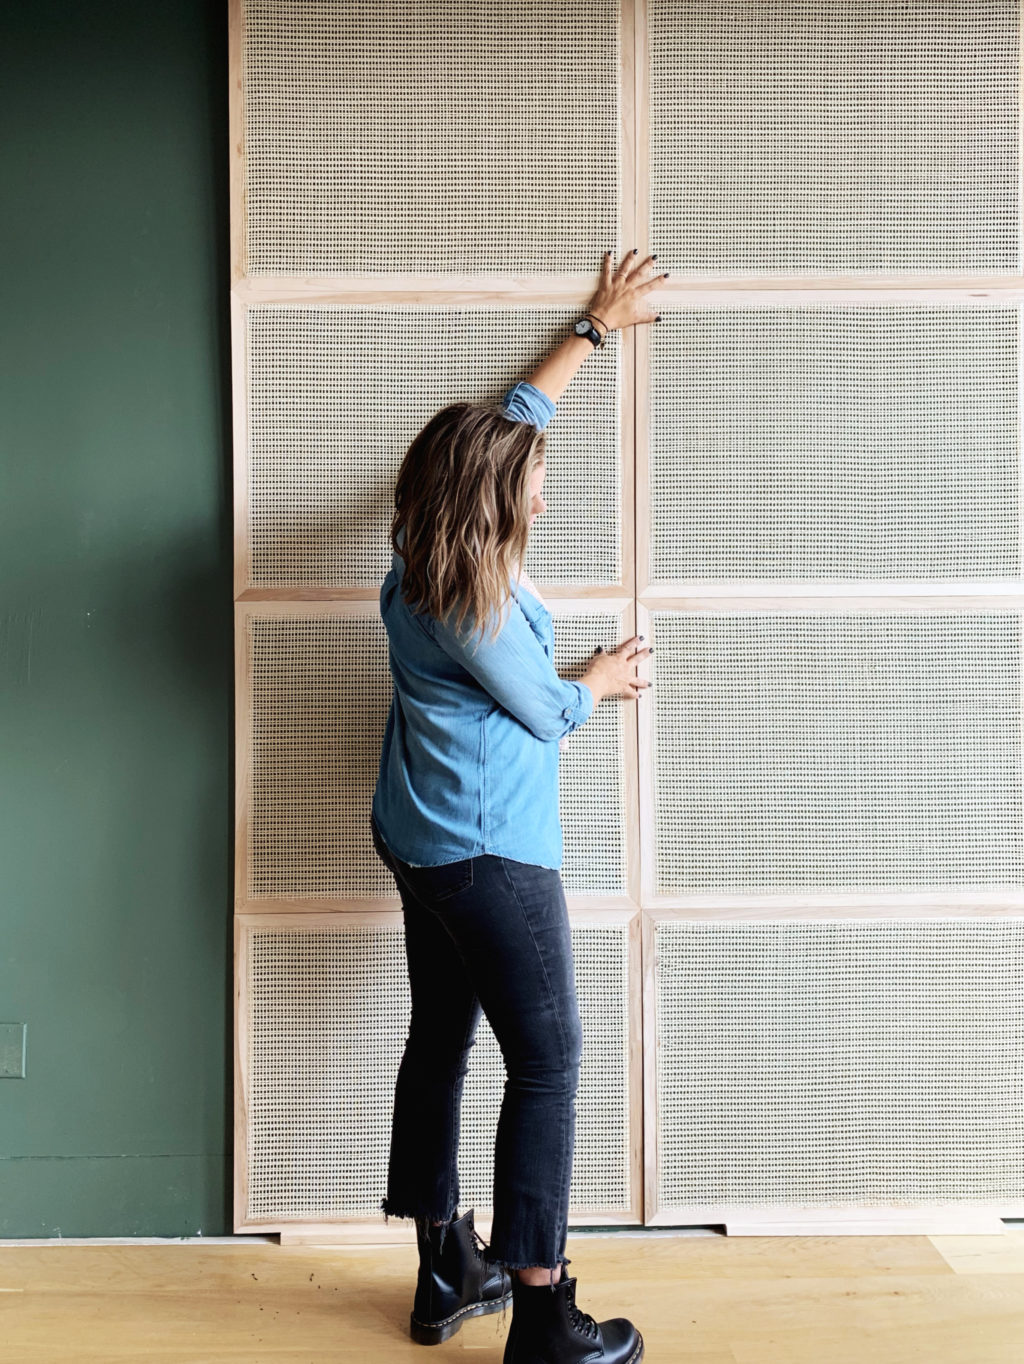
Assembling The Panels
Like I mentioned at the beginning of this post, we built these in a really manageable size so that they could be transported to NYC. When it was time to install the focal wall, all we had to do was screw them together!
We started by laying out a full vertical row of panels on the floor face down. All of the attaching was done on the back of the panels so it was hidden!
Using wood clamps, we clamped 2 panels together and used wood screws to secure them. We did all of this before we removed the support pieces.
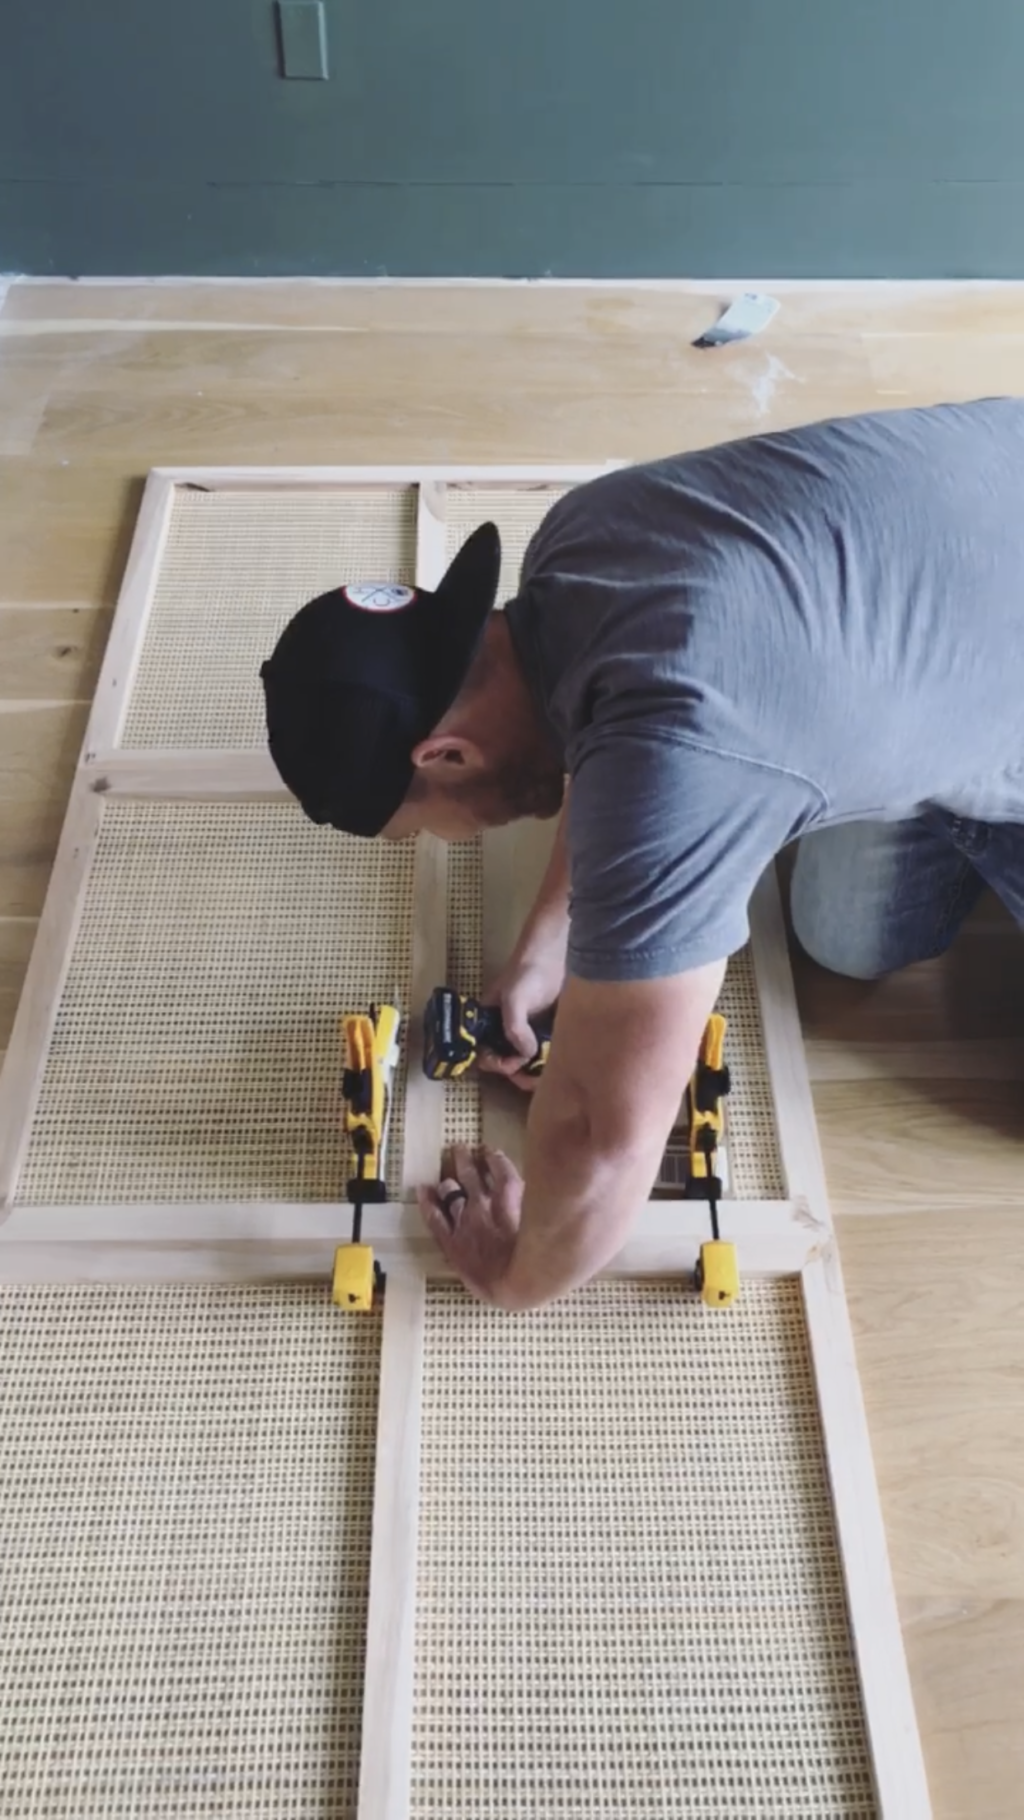
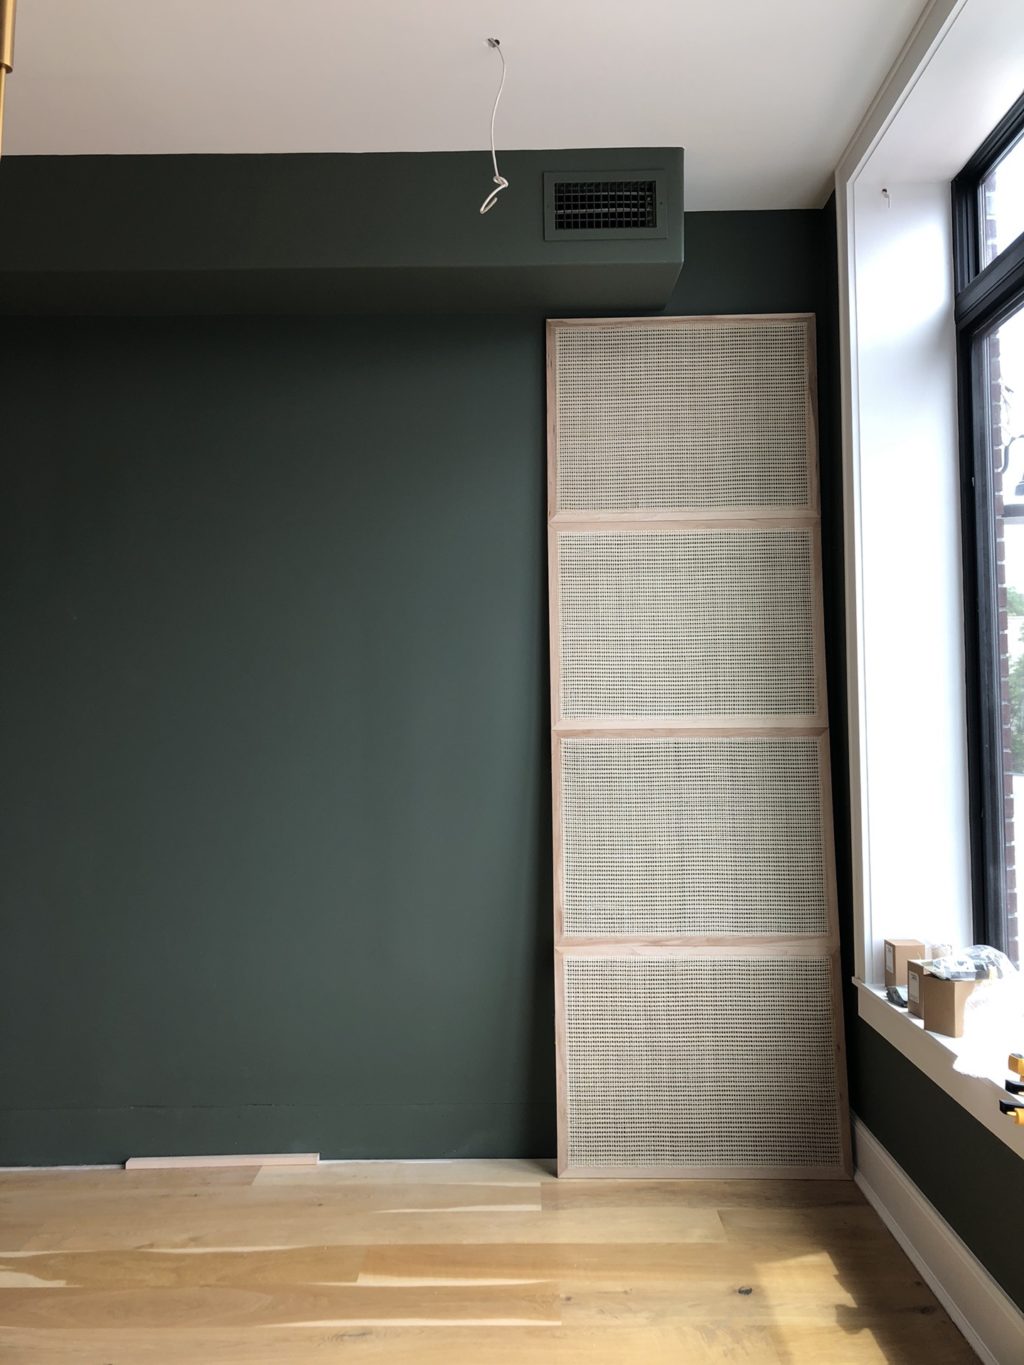
After all of the vertical panels were built, we stood them up and screwed them together, adding one at a time along the wall.
Like every house ever, the floors and ceiling werent straight, so if you find yourself in the same situation, build your panels to fit the smaller measurement and cheat the spacing on the floor leaving a bigger/uneven gap there. That way you can cover it up with baseboard and no one will be the wiser! You can see how we did that in the photo above!

When it was time to attach the panels to the wall we did that by using finishing nails through the face of it. The panels fit really snug, so we just use a handful of nails to keep it tight against the wall!
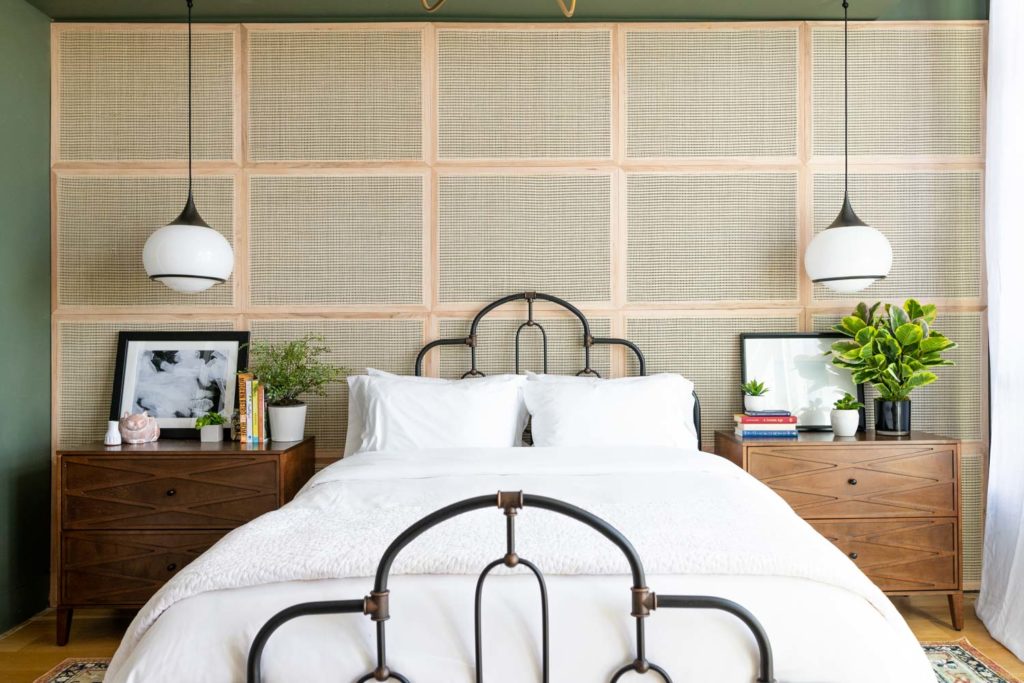
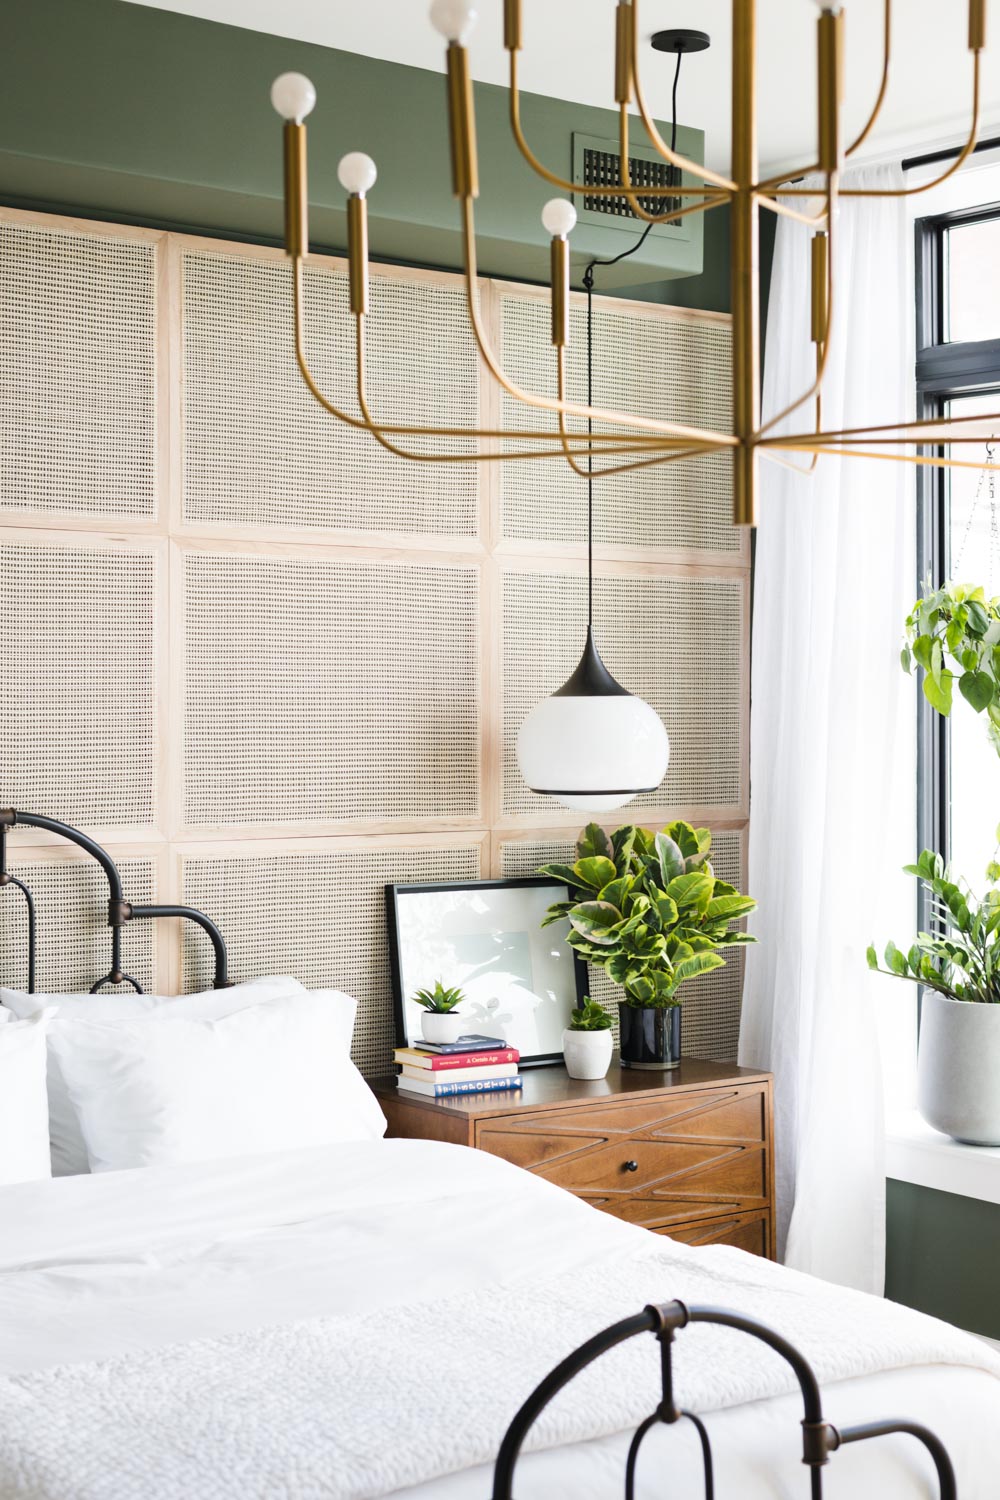

If you want to see the rest of the space, and get sources for all of the goods we used, check out the links below!
[mv_create title=”Real Simple House 2019″ key=”18″ type=”list” layout=”circles”]
Very innovative work. Great utilization of resources!!
This is really rad. I’m always so in awe of people’s creativity and figure crap out attitude! Thanks for the detailed tutorial!
This room looks so great. Love that caning installation.
Hi! Lovely room! Can you send me the link for the rug?
This is awesome, thanks for the tutorial!
THIS IS THE BEST TUTORIAL ON CANNING a project, EVER!!! I love your step by step instructions with gorgeous photos! I could read all of your tutorial. Ordering from the spot you did as well as the carpet tool! Thank you for taking the time to write such a fabulous tutorial.
what is the color of this paint? so beauty!
This panel is amazing and exactly what I’d been looking for! May I ask, how ,UCB was all the supplies? It seems you could market these. Maybe as pieces that could fit together to size as big or as small as necessary. Beautiful work. Thank you for the tutorial. Seems like a big job!
This panel is amazing and exactly what I’d been looking for! May I ask, how much was all the supplies? It seems you could market these. Maybe as pieces that could fit together to size as big or as small as necessary. Beautiful work. Thank you for the tutorial. Seems like a big job!