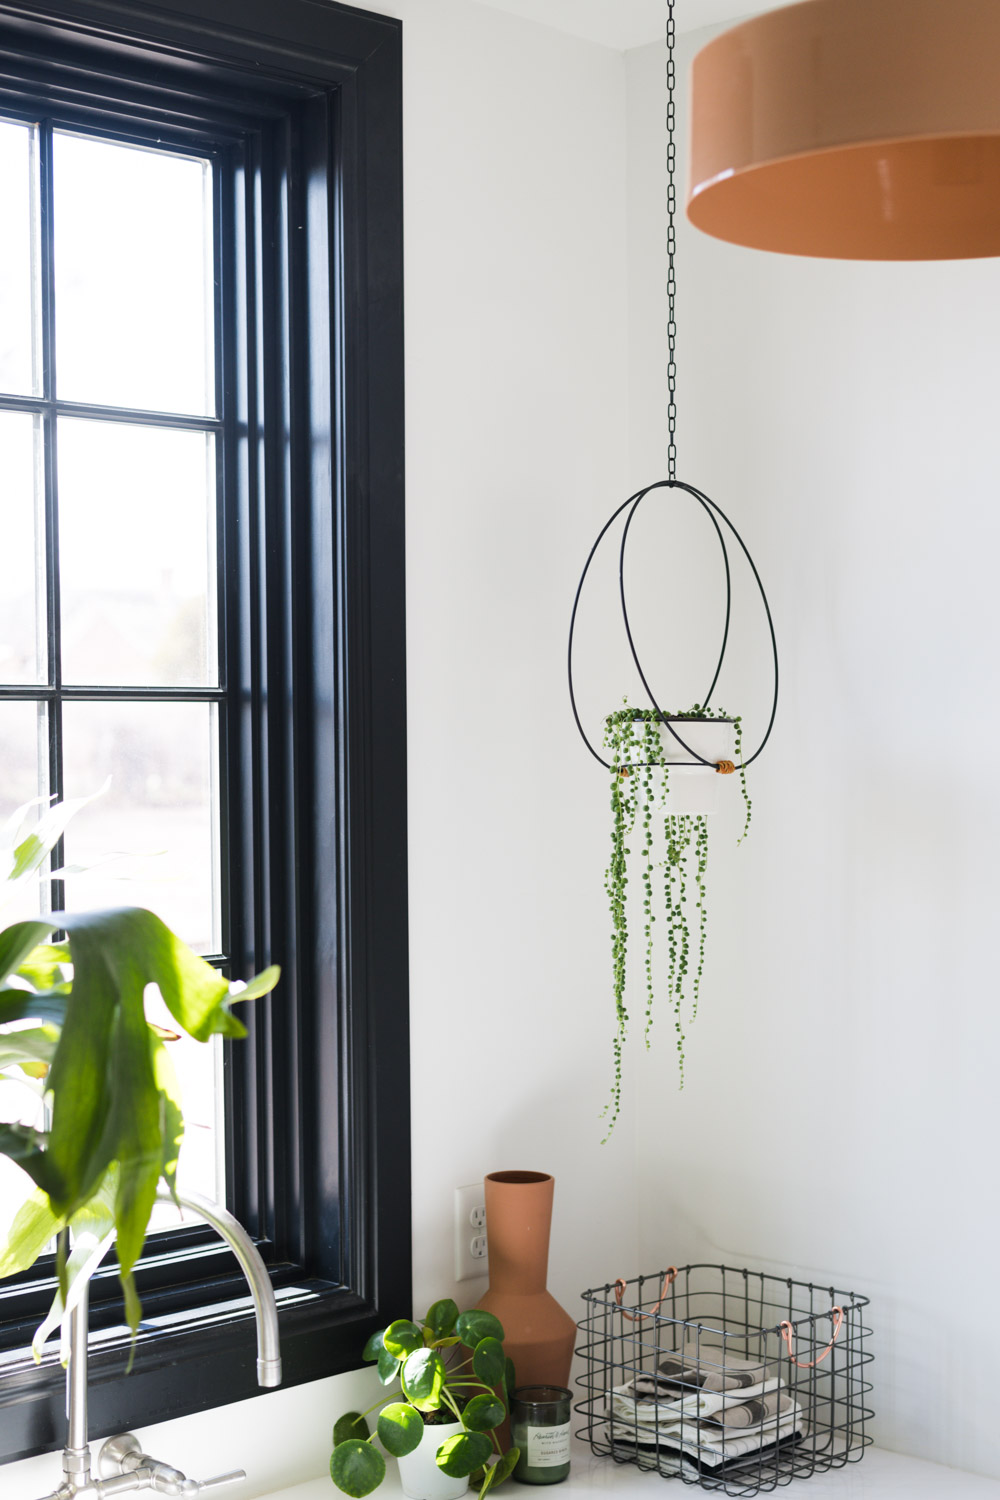
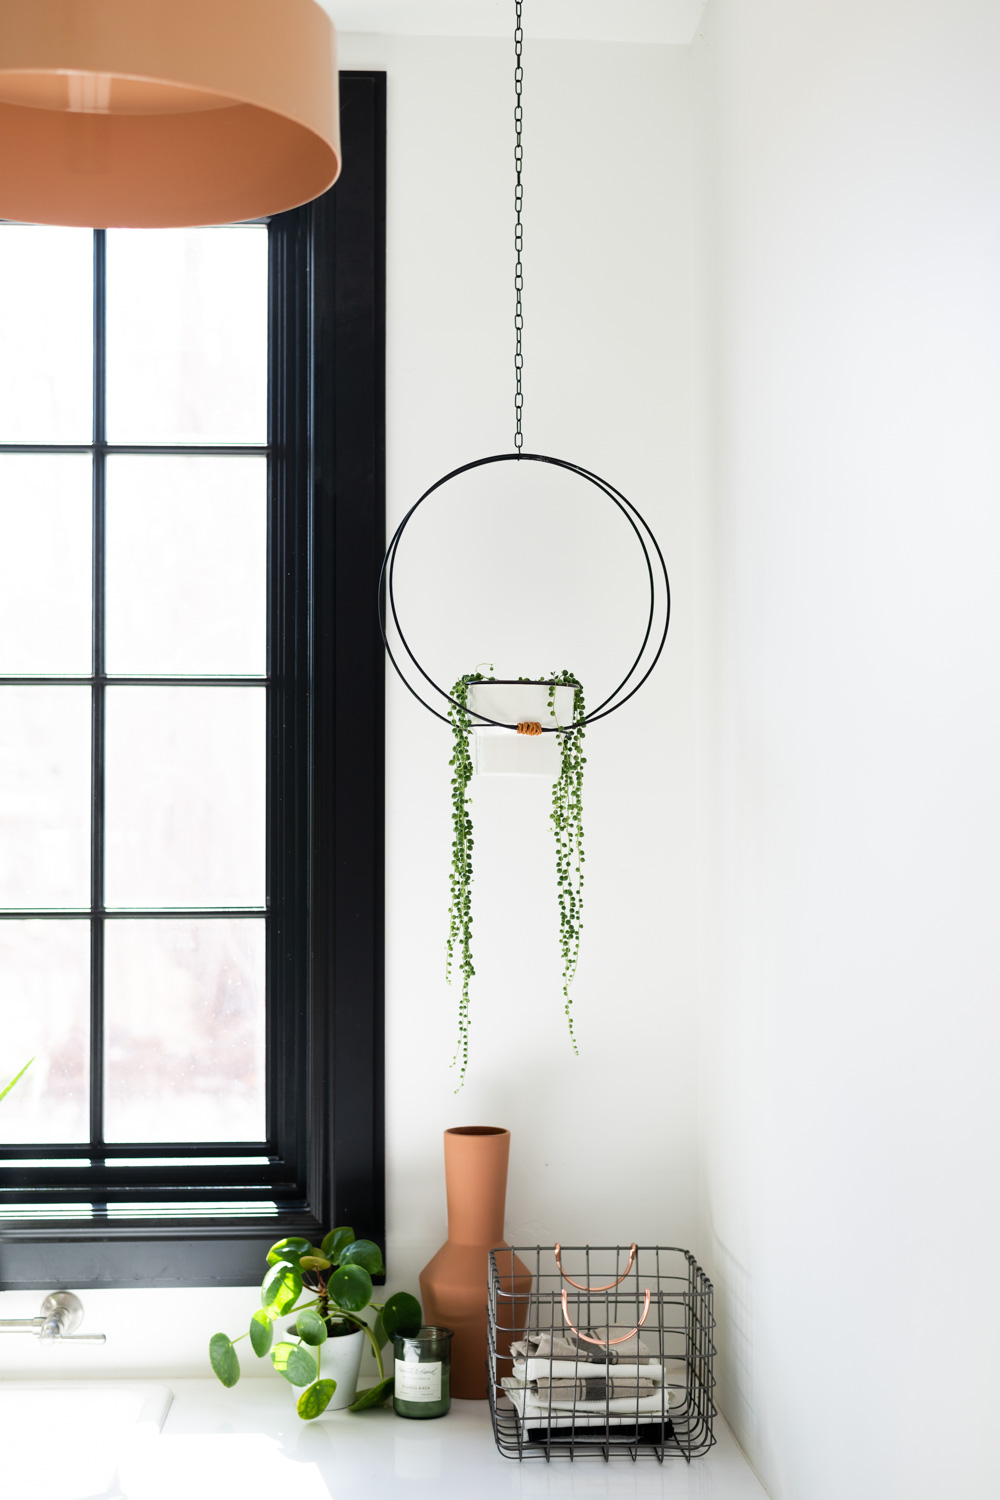
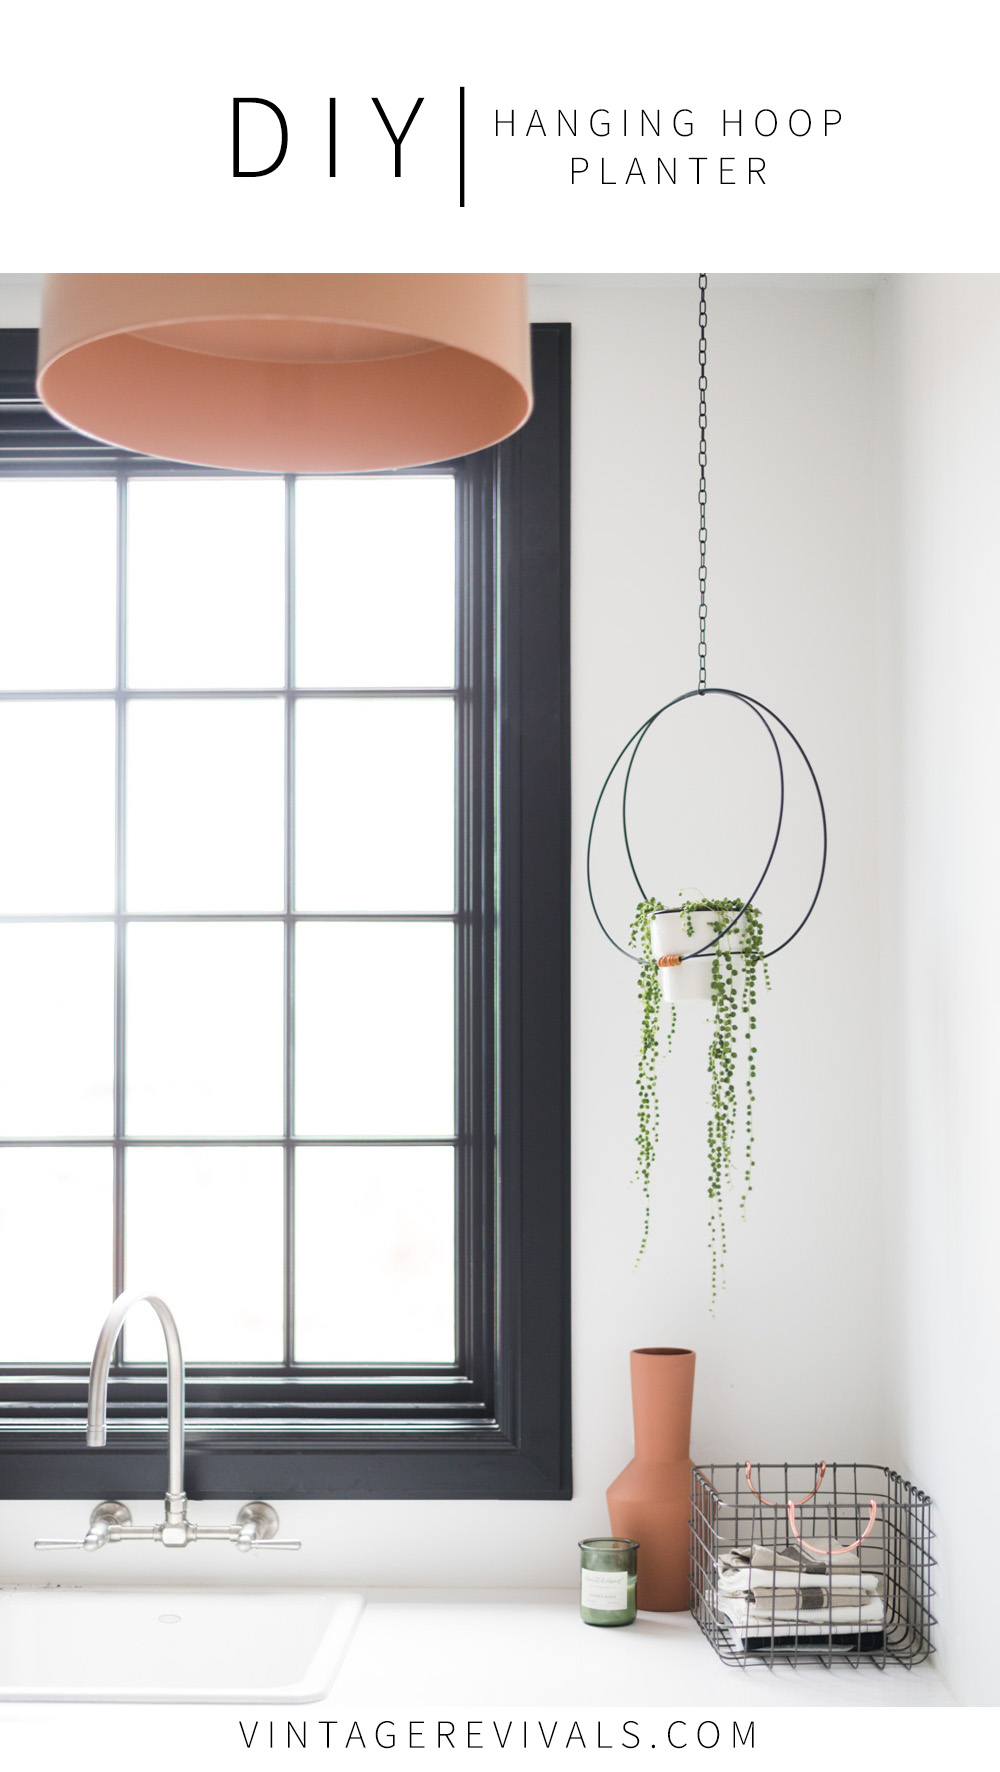
I am obsessed with this easy DIY hanging planter! It’s such an easy project, you just need a few floral (or brass) hoops. I love it because it’s such a statement maker. It will look amazing in front of a window or hanging on a wall by a bed, or even in your bathroom! As long as your indoor plant is in the right lighting condition it will thrive! There are some really great low light plants that will look amazing in this planter!

If you are a plant mama, you need this in your life!! I mean, what plant wouldn’t want to feel like they are on The Greatest Showman?! Every plant wants to feel that special. Heck, every human wants to feel that special! Zac Efron I love you!
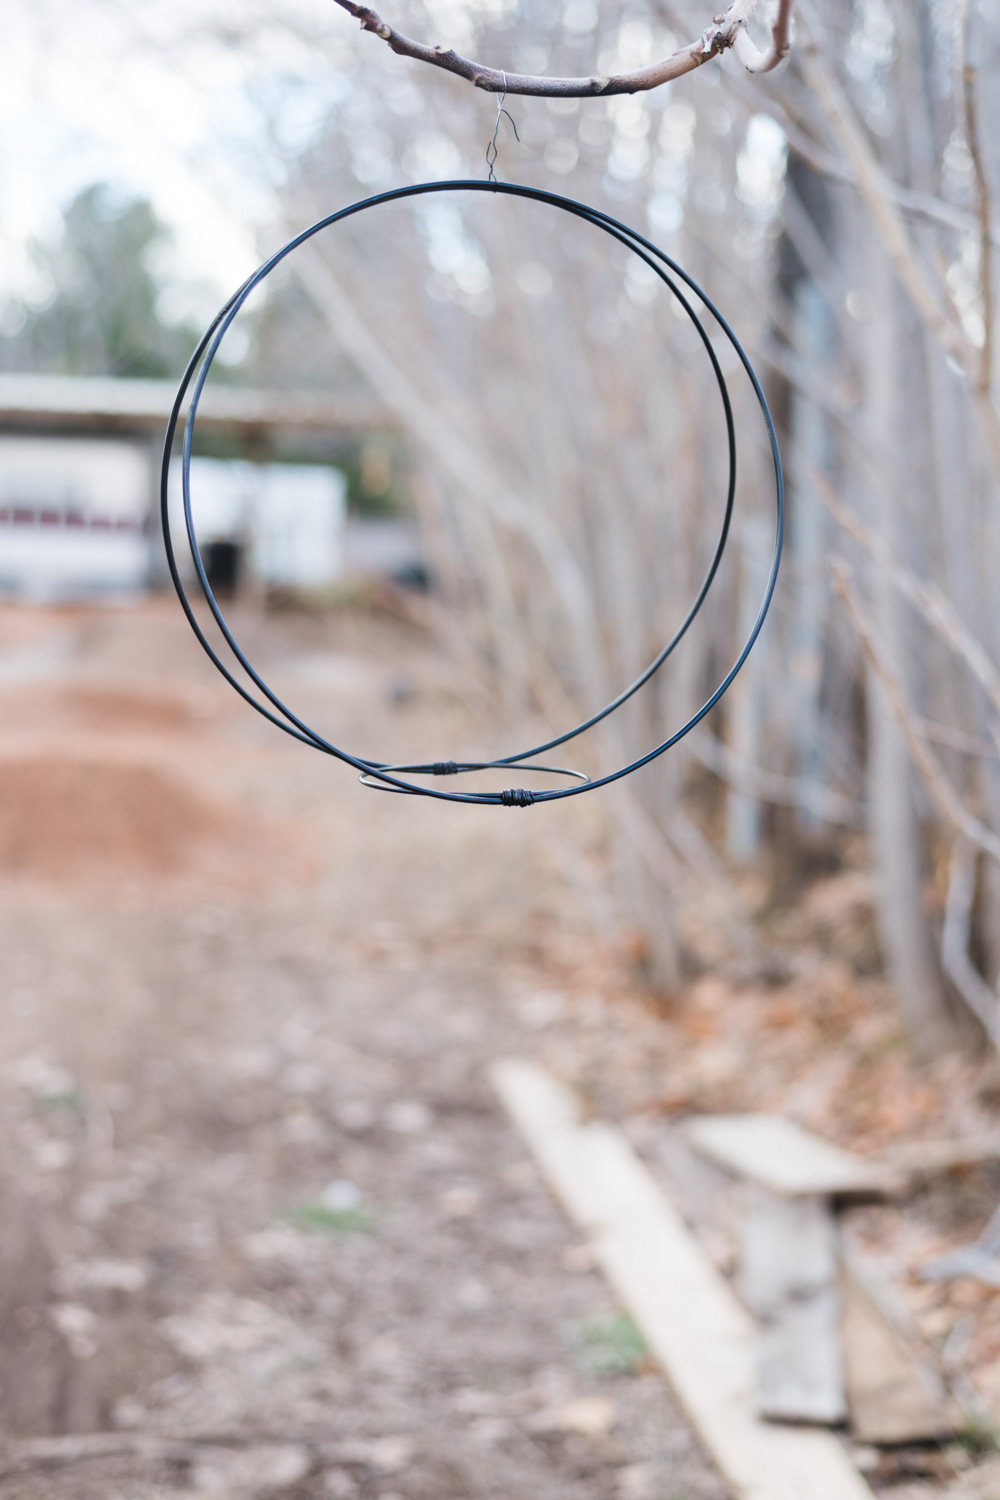
I’ve always got plant placement on my mind. It’s easy to put plants that don’t spill onto a piece of furniture or the floor. But indoor hanging plants need somewhere to grow down. Most hanging planters that you find tutorials for are a macrame style made from rope, but when I saw some brass hoops at the craft store a few days ago the idea for this planter happened in 3 seconds flat. I love it when the creative bug bites!
To Make This Project You’ll Need:
- (2) 14″ Floral Hoops
- (1) 4″ Floral Hoop–I used these IKEA planters (the same ones I used here!)
- Wire
- Leather Lace
- Chain
- Planter that fits snuggly in the smaller hoop
- Spray Paint* optional

Tip #1:
Floral rings are CRAZY different sizes. I bought 3 different ones (1 from Amazon, 1 from Michaels and 1 from JoAnn) they were all supposed to be 5″ but no 2 were the same. So if you are doing this project, make sure that you buy enough or stick with the exact same brand, otherwise it can get annoying.
Step 1: Make Sure Your Planter Fits Inside the Smaller Single Hoop
You want to verify that the planter that you are using fits snug inside the smaller hoop. The planter will need to have a taper or a lip on it, otherwise it will just slide through the ring. Once the planter is assembled and the leather is wrapped around it, it will hold the planter differently, but having it fit tight is super important.
Step 2: Join the Hoops Together
Using your wire, join the hoops together with the smaller one in between the larger ones. It’s really helpful to keep the wire on the paddle (as opposed to unraveling, cutting, and then wrapping) because you can pull it tight between wraps. Try to keep it straight and not bulky. When I wrapped it I put the smaller hoop on top of the larger ones. This will give it a little more strength when the planter is in it.

Wrap the hoops with the small one in between the 2 larger ones.

Step 3: Paint
I didnt join the 2 larger hoops together at the top because I didnt want to see the wire. But I did need to paint it, so I wrapped a small amount around them and onto a tree so that it could hang freely while I spray painted.

Make sure that you are getting paint that works with metal (Rustoleum 2X is my fave). Apply it in light coats so that you dont get any drips. Make sure that you get all of the sides of the hoops. Let it cure for a couple of hours before you start messing with it, this will give the paint time to adhere to the metal. If you dont wait, it scrapes off easier.
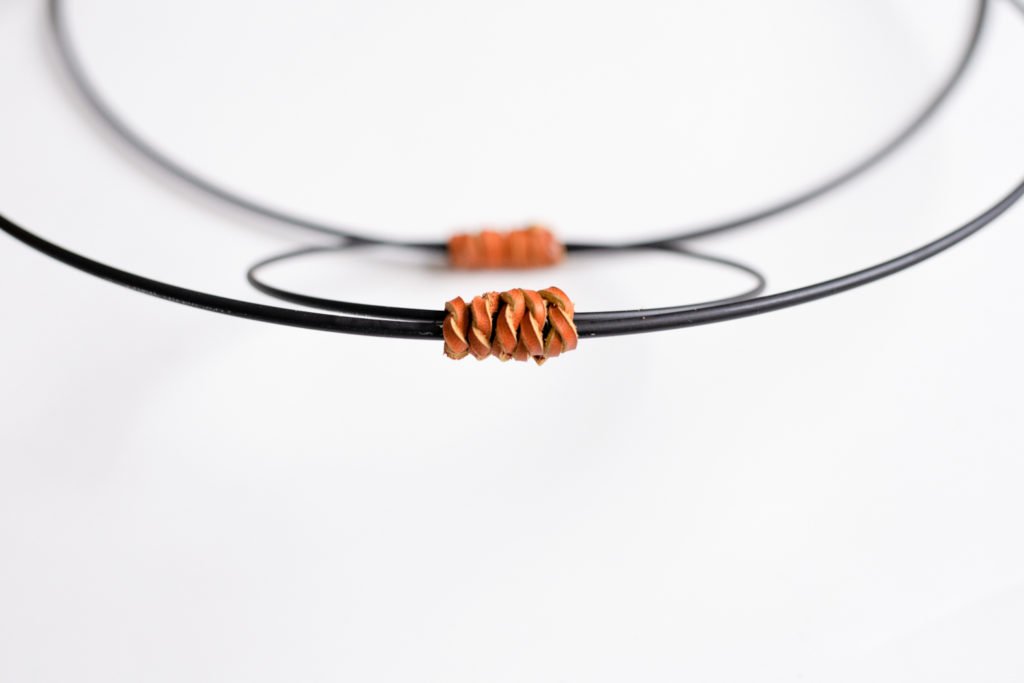
Step 4: Cover the Wire with Leather
Once your paint has cured, you can wrap the leather over the wire. There are a few different techniques that you can use for this part. The first side I did a tight uniform wrap. It was fine, but the wire was kind of bulky in some spots so I didnt love love it.

On the other side I did a simple knot (you know the first part of tying your shoes? That.) and I love it so much more! Once the knots were done, I clipped the edges and glued them down on the inside of the planter with hot glue.
Step 5: Attach the Chain
Like I mentioned earlier, one of the best parts of DIYing a planter is being able to make the chain as long as you want. The chain I used is from Home Depot and is only $.50 a foot!

Step 6: Hang your Planter and Enjoy!

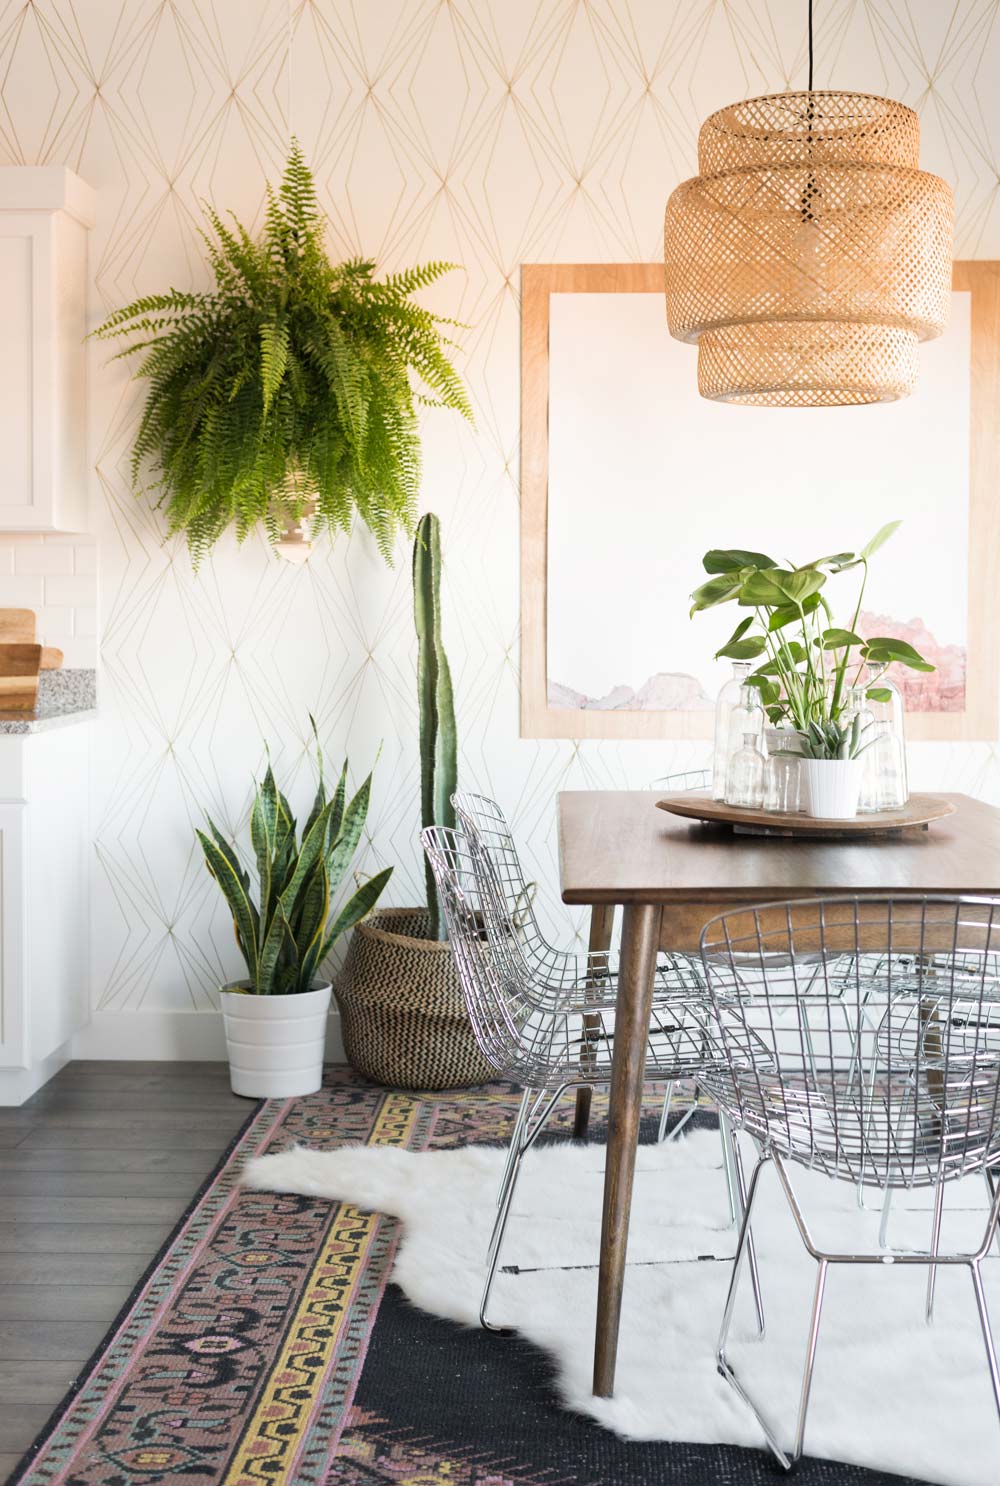
Want some more fun planter projects? I’ve got a ton!!
Let’s dive into more specifics about hanging planters shall we?
What Kind of Plants Should Be In A Hanging Planter?
Any type of plant that is a spiller needs to be in a hanging planter. There are lots of plants that vine as they grow, a few of my favorites are Pothos, Philodendron, String of Pearls, and Hoya. Other plants that love hanging planters are ferns. Ferns are like that squatty uncle that is as wide as he is tall. They also need intense drainage, when you hang a fern it moves it out of the way and if you have the right pot, it will drain really well.
Ceiling Hanging Planter vs. Wall Hanging Planter
This project will work regardless of if you are hanging it from a ceiling, or from a wall. I’ll show you both options! One thing that I love about DIYing a project like this is that you can make the chain as long as you need. We have 10′ ceilings in our house and it can look mighty lame to use a store bought hanging planter that is only 36″ long.
How High Should I Hang My Ceiling Planter?
You want the bottom of your planter to hang no higher than 7 feet off the ground and no lower than 6. That 1 foot space is your sweet spot. It makes watering easy to handle, and keeps the plant high enough that it isnt in the way. You want it to be far enough off of the wall that it has space for your plant to spread. I like to go at least 10″ from each wall, which when you’re up on the ladder and want the plant in the corner seems kind of far, but it’s perfect. If you are hanging a big bushy plant like a Boston Fern, or a Kangaroo Paw Fern, you can go even further off the wall.
How High Should I Hang My Wall Planter?
If you are following this tutorial and hanging it from the wall, you’ve got a little more wiggle room than if you are hanging it from the ceiling. I would keep it so that the bottom of the planter is in the 7-5.5 ft off the floor range. Wall planters should push the hanging plant at least 6″ off the wall and should be mounted on a stud or with drywall anchors.
If you make this project I would love to see it! Tag me on Insta @vintagerevivals
Love this SO much! Def making these this weekend! So good.
I love how modern and beautiful it looks! Definitely making one soon. I have some pretty gold hoops that would work really well 🙂 thanks for sharing ❤️
how do you deal with drainage in the ikea planters? I love the look but worry about how to ensure proper drainage
So excited to make this!!
making this today for my newly renovated bathroom! will tag you on insta!
Beautiful. That white pot was so white I actually didn’t even notice it was there. I thought the plant was just intertwined around the hoops.
This is absolutely gorgeous. I bought the recommended supplies to make one as a Christmas gift, and I just wanted to let you and others know that the smaller rings are too small for the white pot. I think you’d probably want a 5″ ring rather than 4″. The white pots are 4 3/4″ on the narrower part.
Thanks again for the idea!