This post is sponsored by Sherwin-Williams(R)
Oh man are you guys finally ready for some nursery tutorials?! If you’ve been following along with the One Room Challenge you know that I am overhauling my adorable niece Finn’s nursery. When we started it was a blank white box that was just begging for some whimsy! A 50 year old oil painting done by my great grandma was our inspiration and I am LOVING how the room is coming together!!
If you know me at all, you know that exciting statement walls are my literal love language. And I could not wait to get my hands on this room!! (Scroll to the end of this post to see some of my favorite statement walls!)
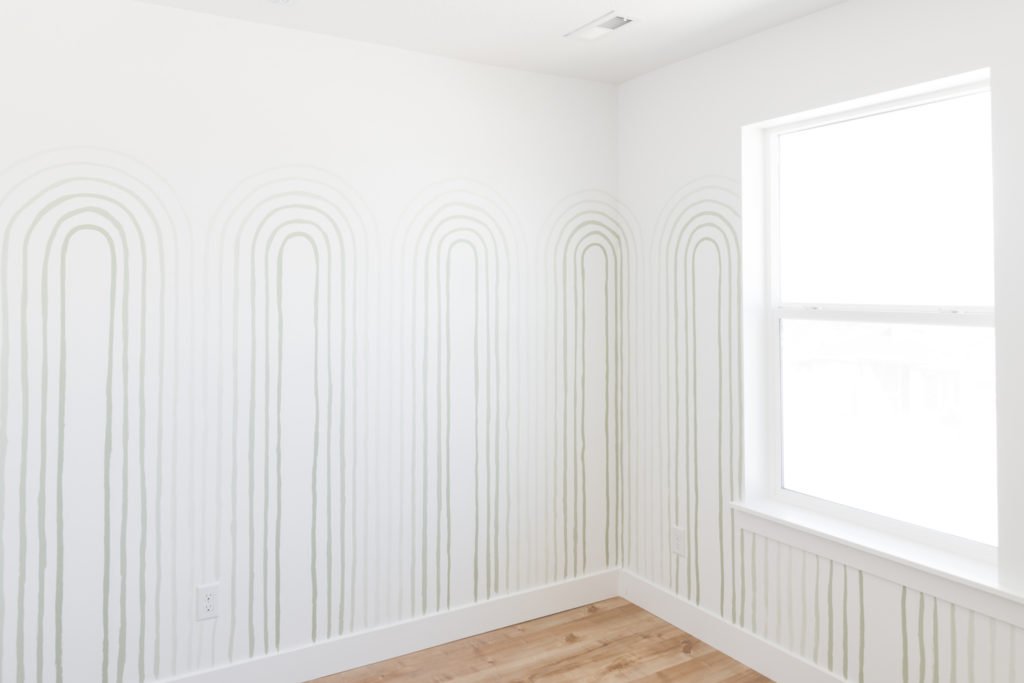
A unique pattern makes the space feel special!
This is where we started, a perfectly plain white room!
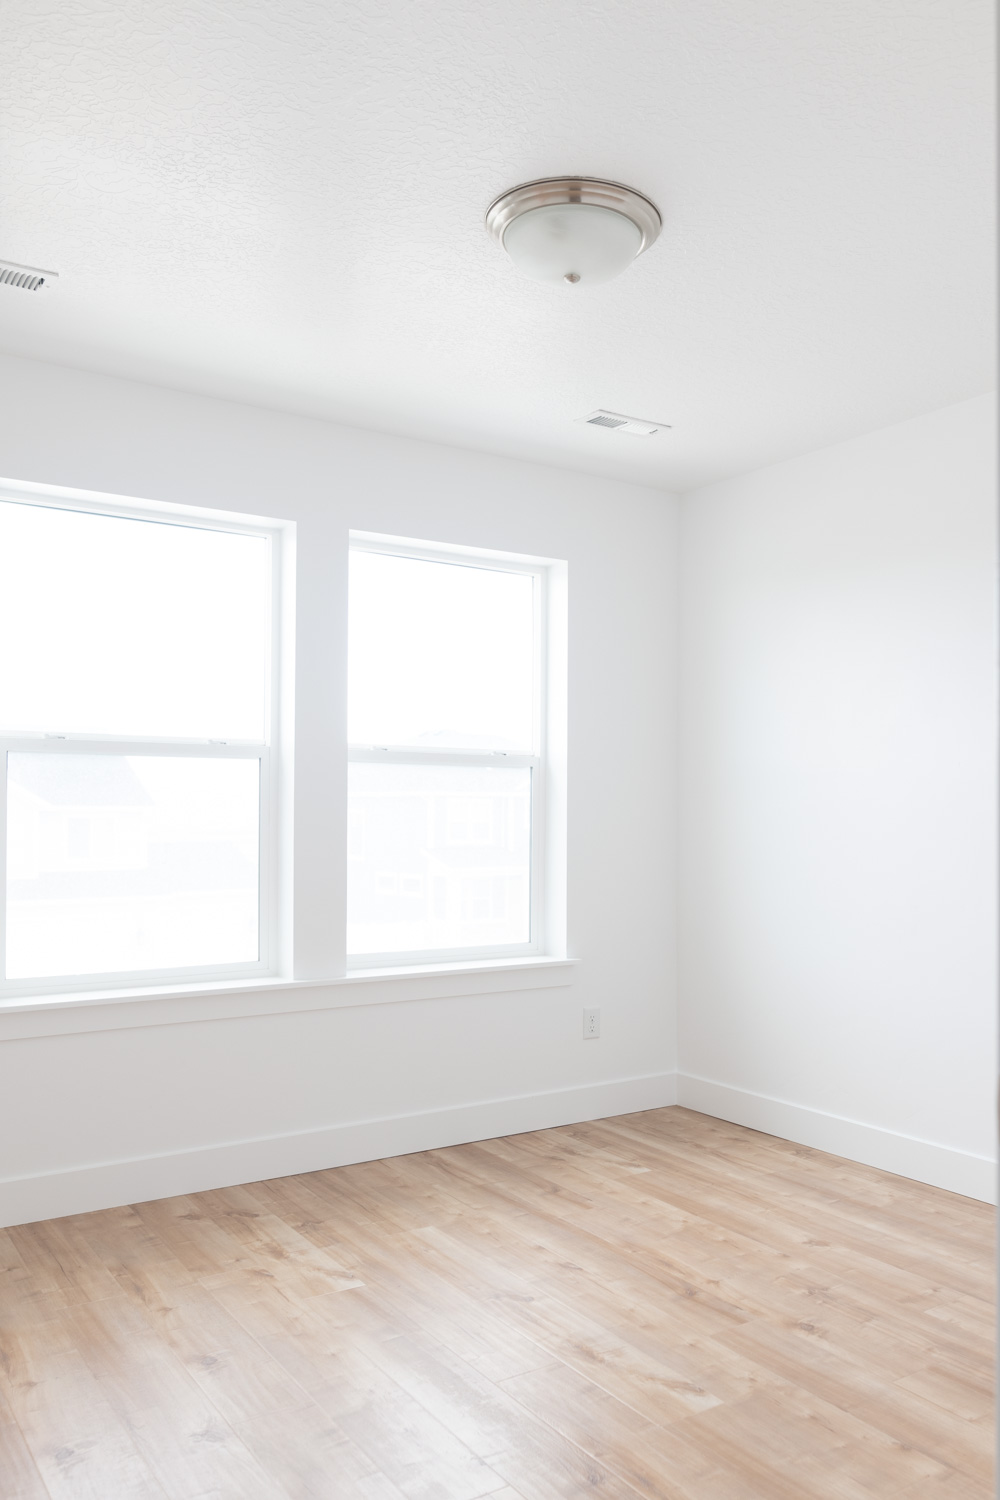
Not a bad jumping off point right?!
The inspo for this wall treatment came from my Sherwin-Williams fan deck. Not just the color inspiration, the shape!
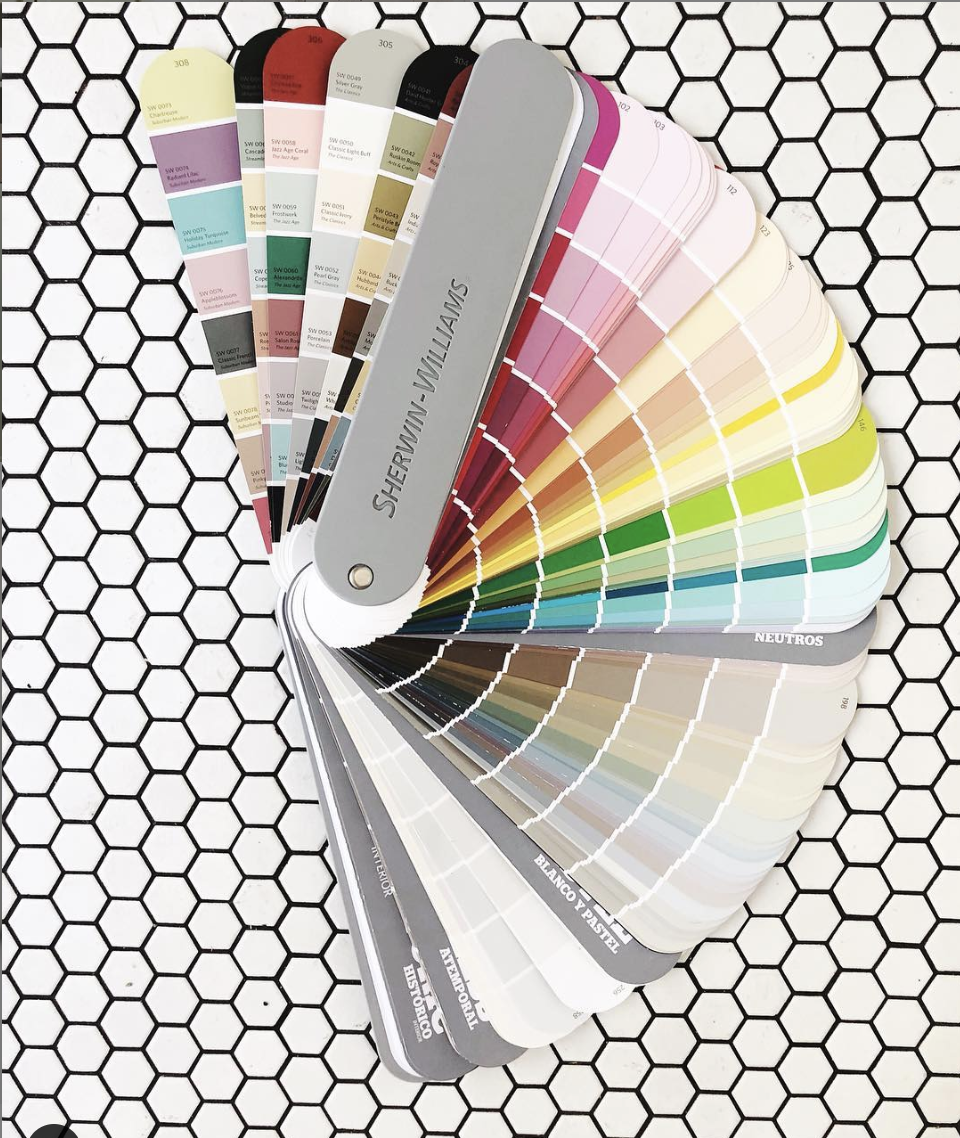
That long skinny shape with the perfect curve hit me right in the face with possibilities. Arches are having a moment in design right now and as soon as I saw the arch it was on like Donkey Kong (you know, saw with my heart, not just with my eyes?!) I learned A TON and had to troubleshoot some ideas so if you are excited about tackling this project, learn from my mistakes!!
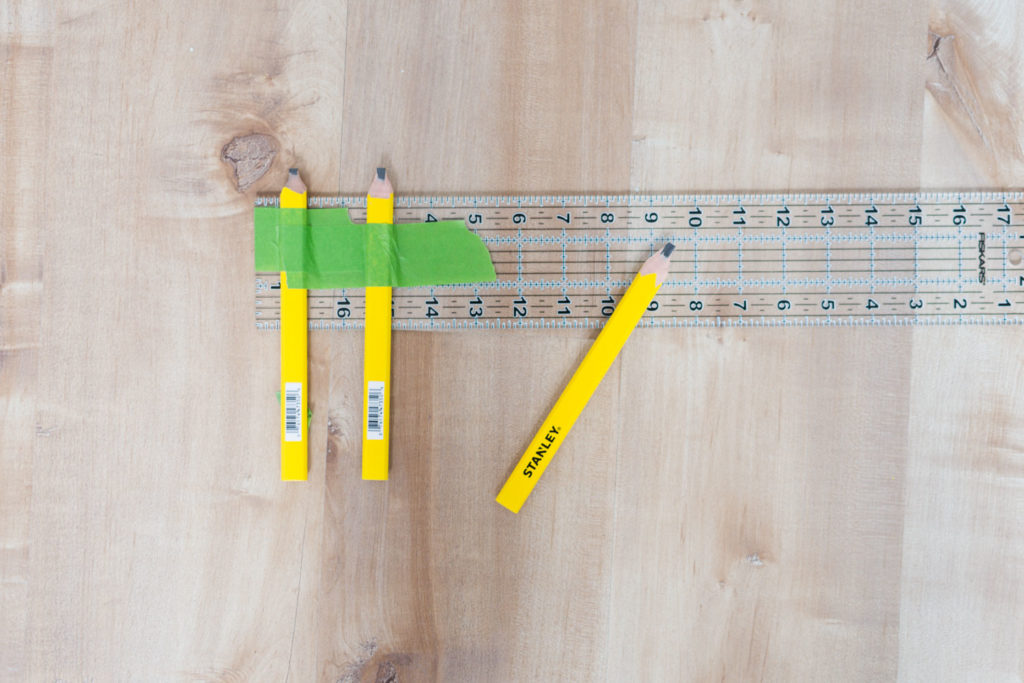
You’ll need:
2×4 at the height of the lowest arch. Mine was cut to 5′
Carpenter Pencils
Tape
Thin + stiff object that you can tape the pencils to. I used a fabric cutting guide and highly recommend it!
Level
Paint Brush
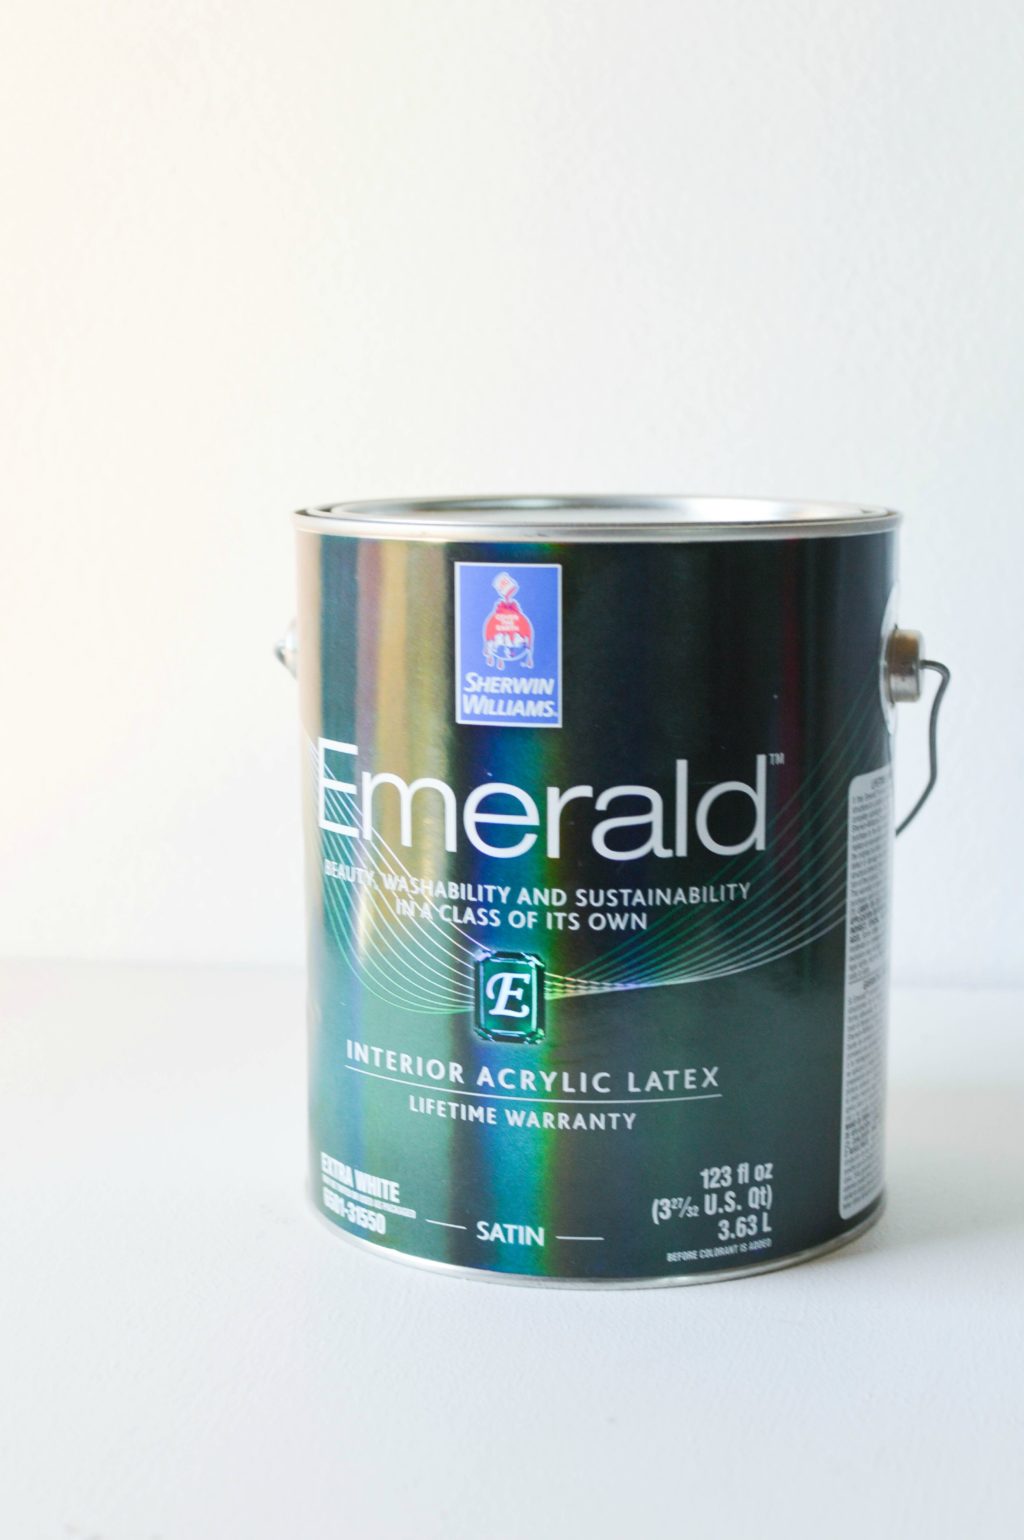
Sherwin-Williams Emerald Interior Paint
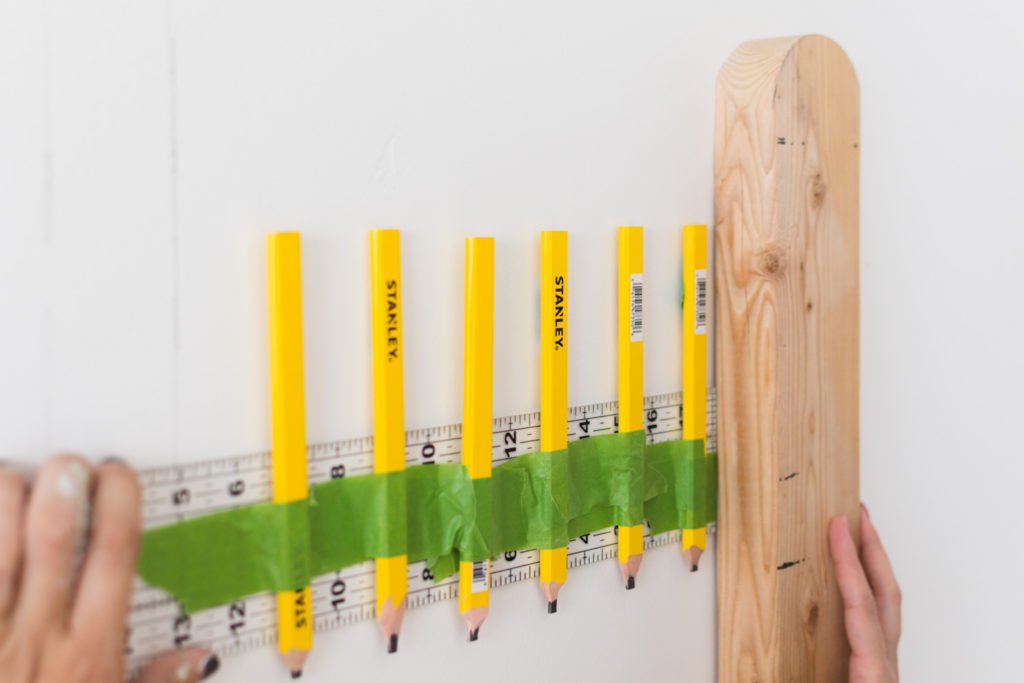
Cut the wood
To make the pattern on the walls, I used a scrap piece of 2×4 and rounded the end by tracing a cup and cutting it out with a jig saw.
Attach the pencils
I spaced mine 2″ apart, starting at the 1″ mark on the guide.
Finding the center of your focal wall
Take your tape measure and measure the total distance of your focal wall, divide that in half and mark. This is the center of your wall where your first arch will live!
Level your board
Place the straight end (bottom) of the 2×4 against the baseboard and flush against the wall. Use your level to make sure that it’s nice and straight. If you are doing this project on your own, you wont be able to hold the 2×4 and draw the arches, so you will want to use a finish nail to hold it in place. If you’ve got an assistant like I did- even better! Someone to hold the board AND sing N*Sync with, uh YES!!!

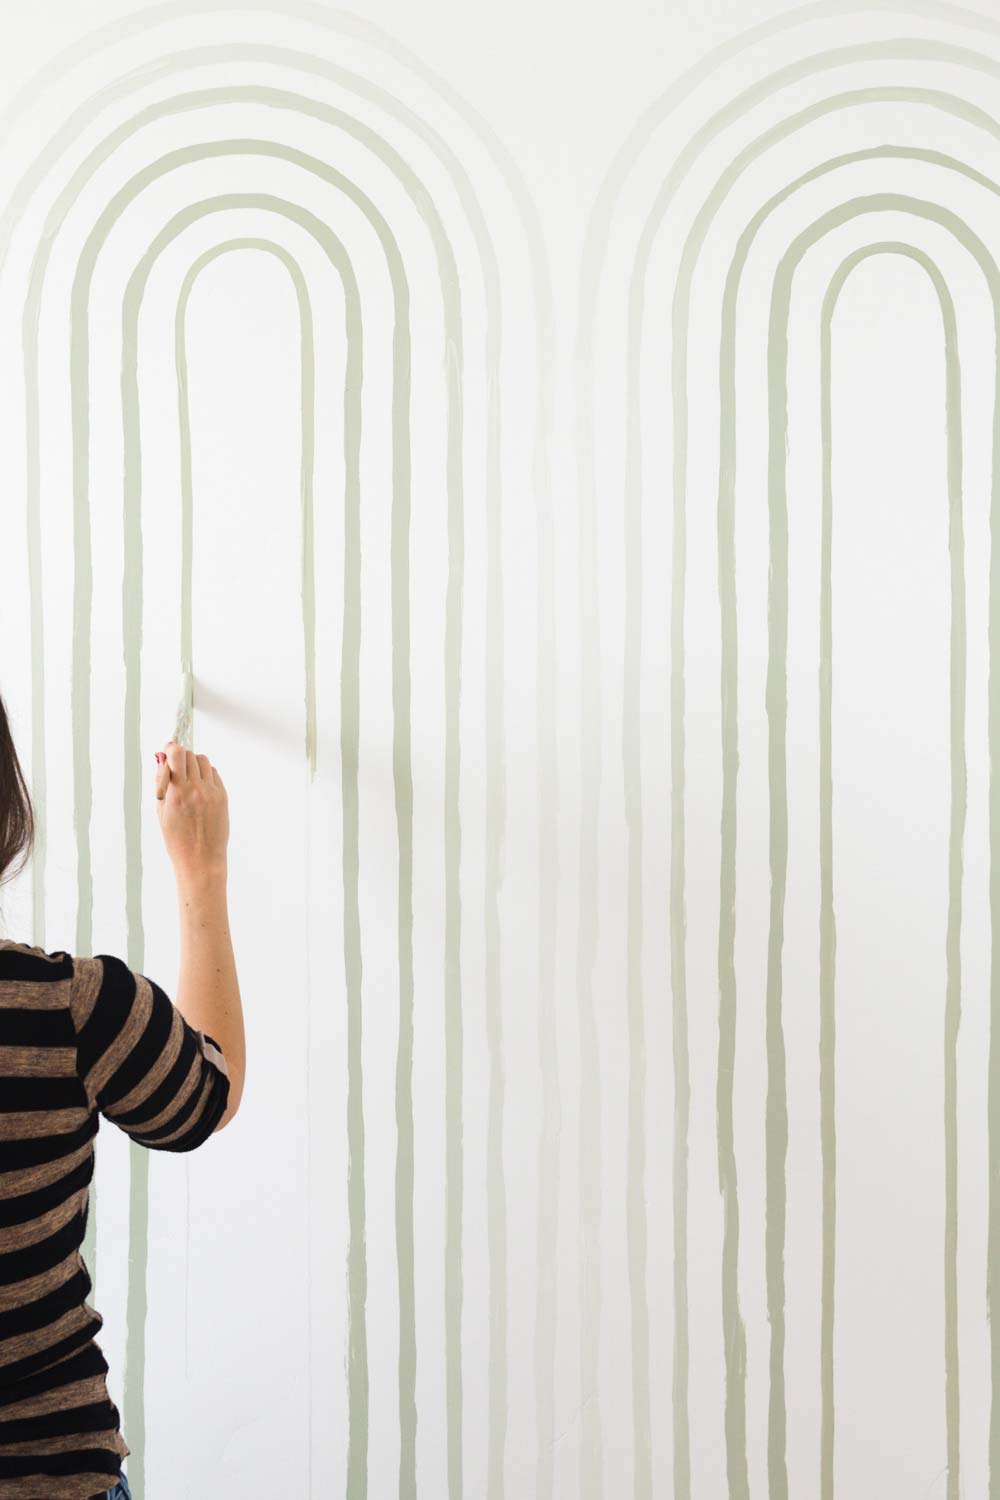
Draw the arches!
Making sure that you keep an edge against the 2×4, start at the bottom of your wall and angle the guide so that all of the pencils are against the wall. Draw it up and around the arch, and back down on the other side. This takes a second to get used to, but you’ll get the hang of it!
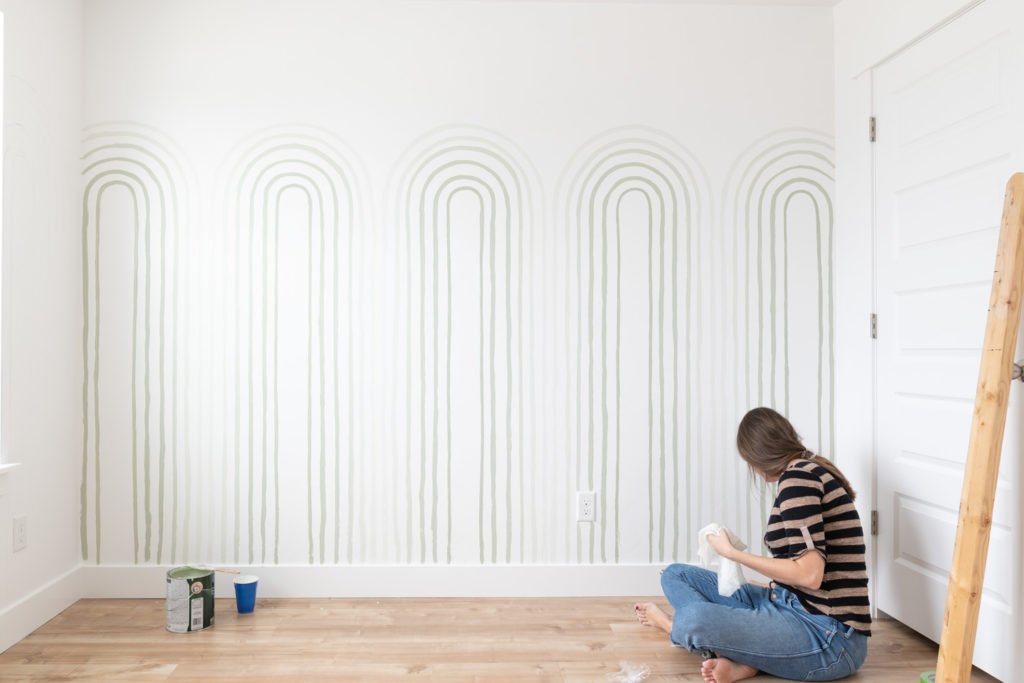
Time to paint!
The style of this wall pattern is approachable and whimsical, so straight lines are out the window. Don’t obsess about making each one perfect, when they’re all a little wiggly combined it makes a serious statement! You literally can’t screw it up!
The paint that I used is my eternal favorite Sherwin-Williams (R) Emerald in a matte finish. We used a combo of Mandi White (formula found here) and Softened Green SW 6177. You can read all about why I love using it on walls here!!

When you are mixing an ombre paint palette, there is a secret formula that you need to keep in mind.
Half and Half.
Start with your full strength color on the wall first.
Then dilute the colored paint with the same amount of white (half and half). After you’ve got that color on the walls, pour half of the second mixture into a new cup and add the same amount of white paint (half and half). Repeat until you’ve finished all of your colors! It is such an easy formula to follow!! Oh and make sure that you label your colors so they dont get mixed up!
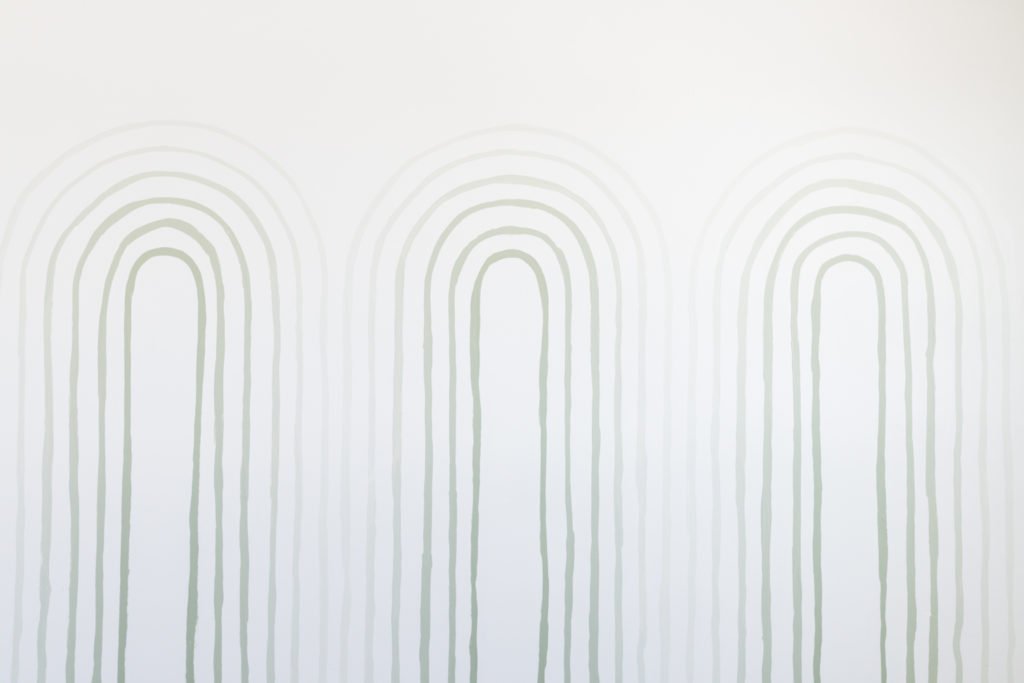
Can you even handle how cute it is!?
Watch the timelapse below to see it all come together!
At Home With Ashley | Casey Keasler | Dorsey Designs | The Farmhouse Project | Home Made by Carmona
House of Funk | House of Jade Interiors | House Seven Design | House That Lars Built | Inspired by Charm
Jana Bek | Jessica Brigham | Kelly Golightly | Murphy Deesign | The Pink Pagoda | Sarah Gunn
Sherry Hart Designs | Sugar & Cloth | Veronica Solomon | Vintage Revivals | Media BH&G | TM by ORC
[mv_create key=”3″ type=”list” title=”Kid’s Rooms” layout=”circles”]
I love all the patterns you come up with! So cute! I can’t wait to see it all put together!! ❤️
Could this work on textured walls? It’s beautiful!
Yes for sure!!
Very original! And yes I love the whimsey but not making the lines perfect!
What a great idea! Love it. I am interested to know how you handled the corners. I could see this being a problem for me…
What a CUTE wall treatment! I want one for my home. The color is really beautiful too.
OMG, this looks so good! And you make it seem pretty approachable, too. Just may have to try it in my living room. I’ve been waiting for inspiration to strike for awhile now, and I think this may be what I was looking for to finally tie the room together. That nursery is going to look so cute!