I am so excited for you guys to finally see the patio at the Granary! We partnered with Home Depot and Pavestone to tackle this patio paver project. I had high hopes that we could tackle it in a weekend, but per the usual, our undertaking was full of Merc Perks and went from a 2 day project, to a much much longer timeline.
Before we dive too deep into the how to, let’s have a quick recap shall we?! We’ve got so much going on around here that its easy to feel confused about where, and how, and why. (Feel free to skip ahead if you’re well versed in the Merc saga!)
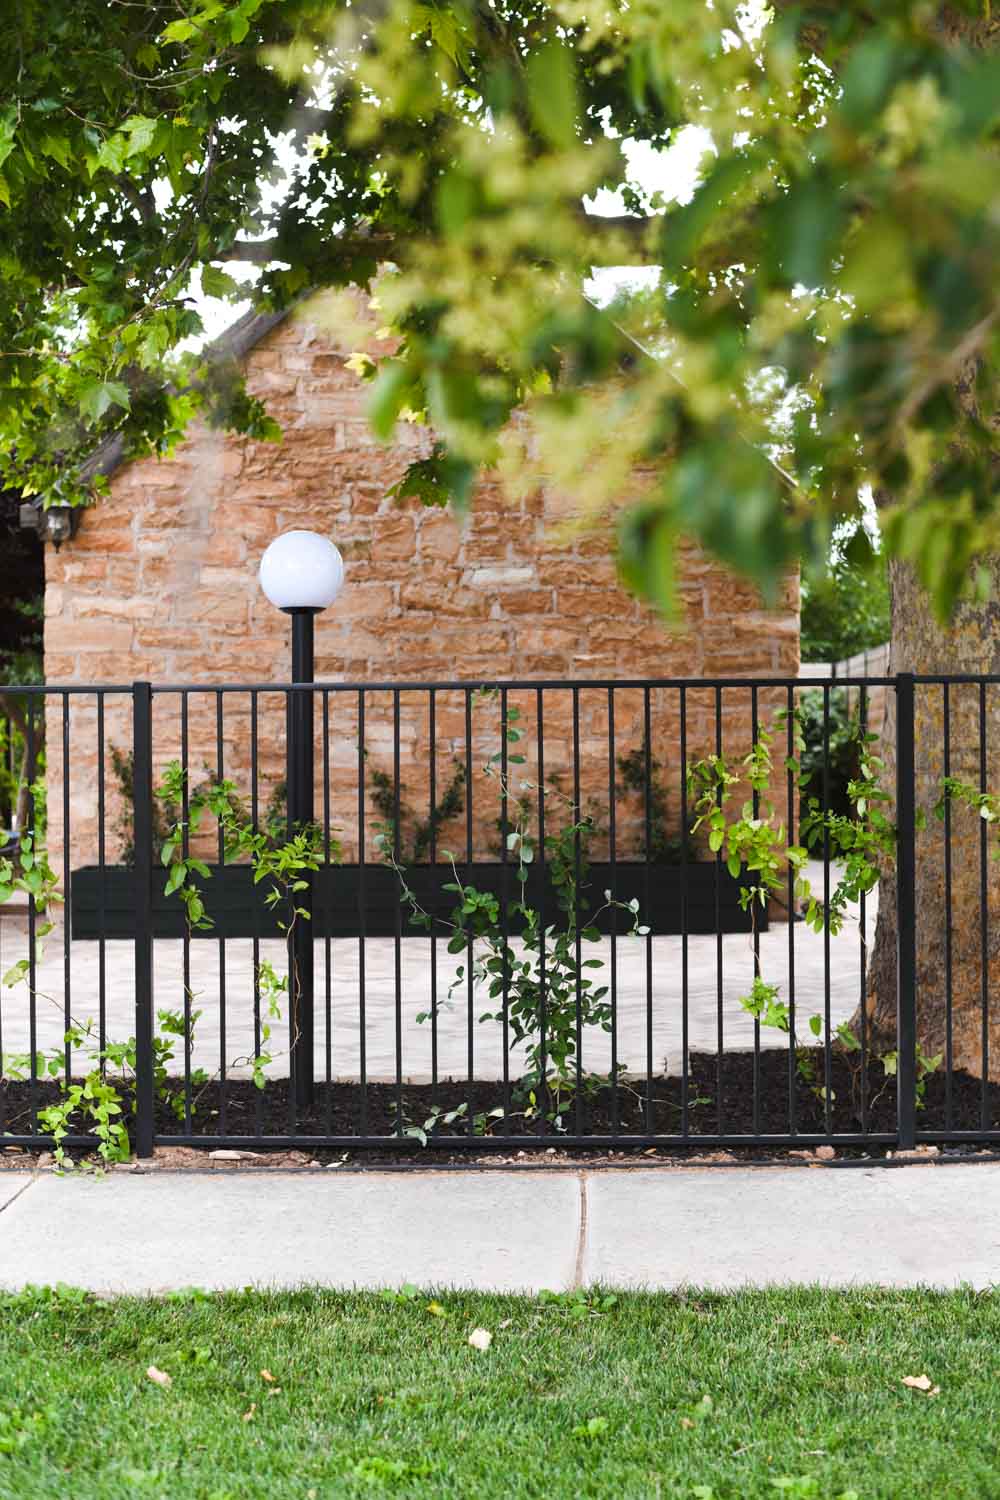
When we bought the Merc it had some extremely funky property issues. Things like an incredibly intrusive easement, to the simple reality that the building itself was the property line (yayyyyyy). It almost made it so that we didnt buy it, but me being the eternal optimist knew in my heart of hearts that it was going to all work out. So 18 months ago we made an offer to our neighbor and bought a portion of his property, which included the historic Santa Clara Tithing Granary. Learn all about that here!
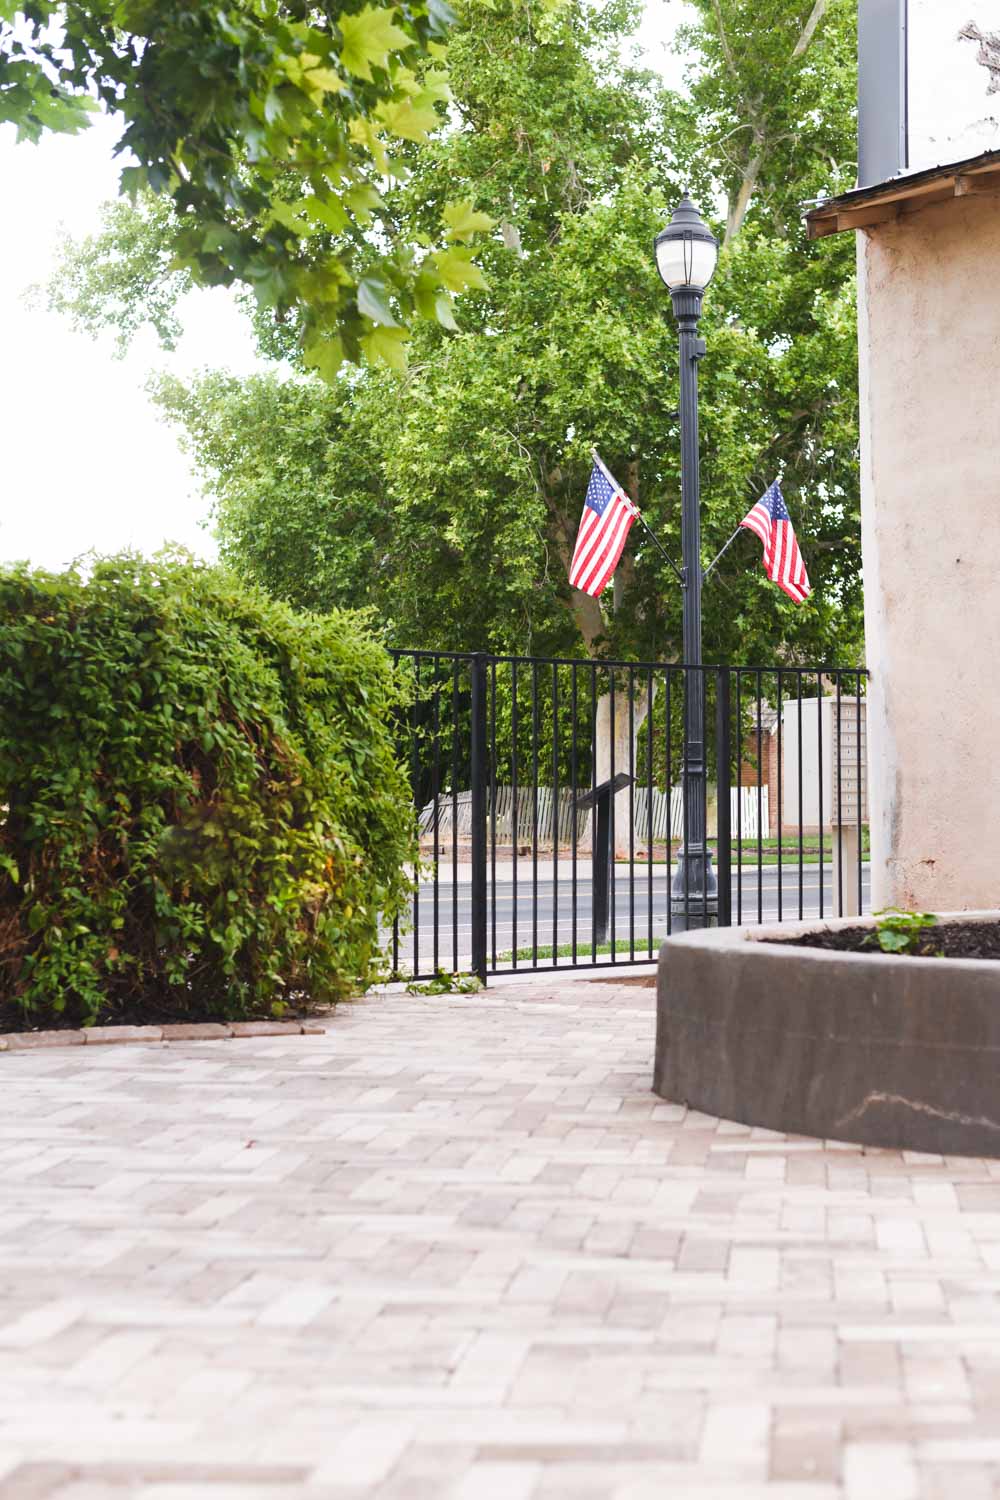
The Granary is a small building that we’re going to be turning into a studio airbnb. We’ve still got so much to do to it (electricity! plumbing!) but our game plan is to great this great space where people can come and stay. Earlier this year we turned the back patio into an outdoor seating/dining area and this paver project tackled the front. So we feel like progress is happening!
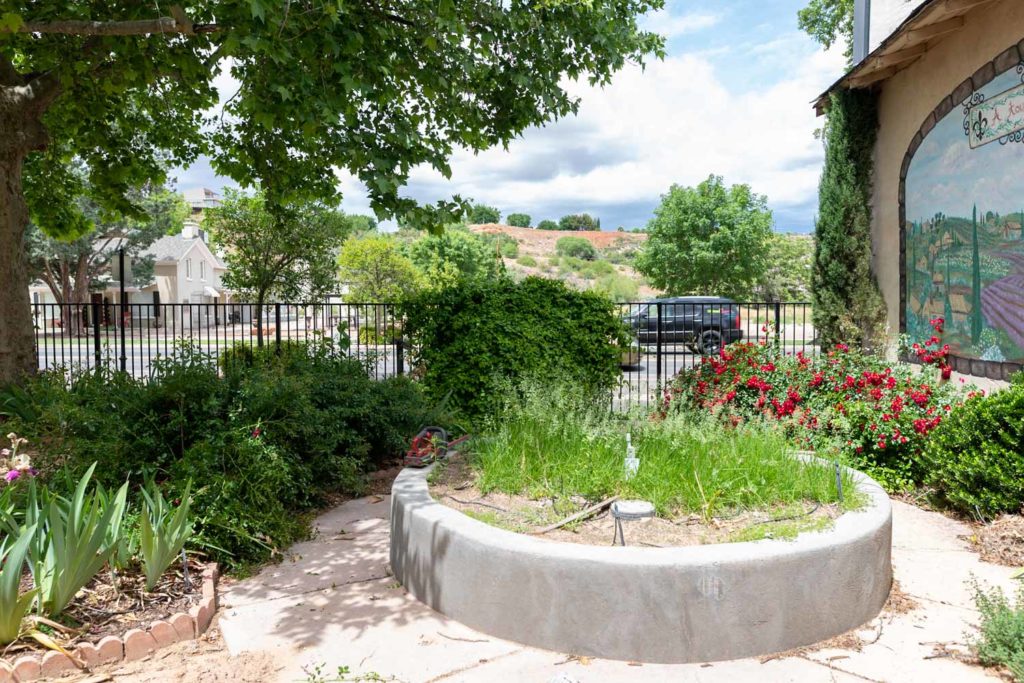
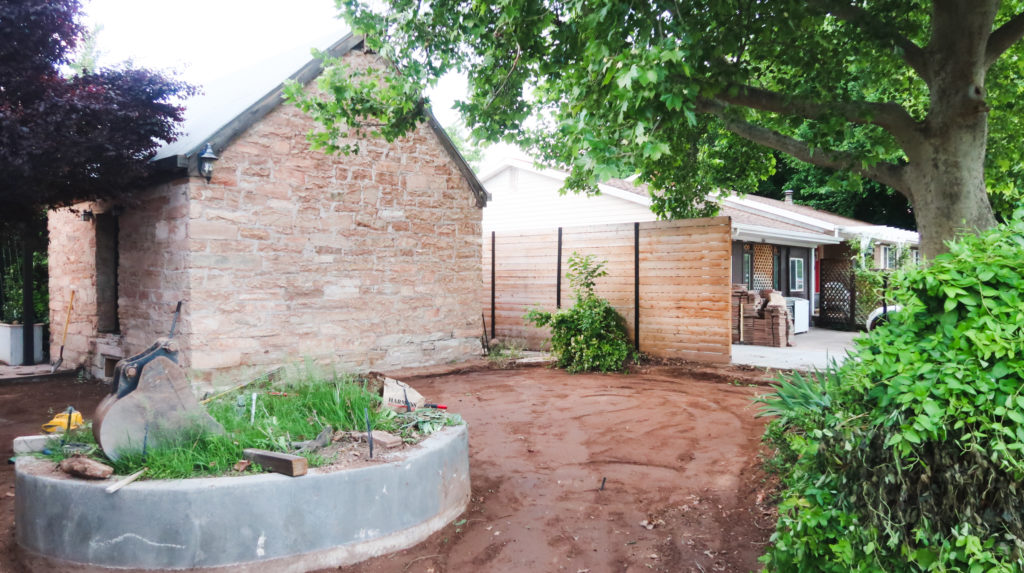
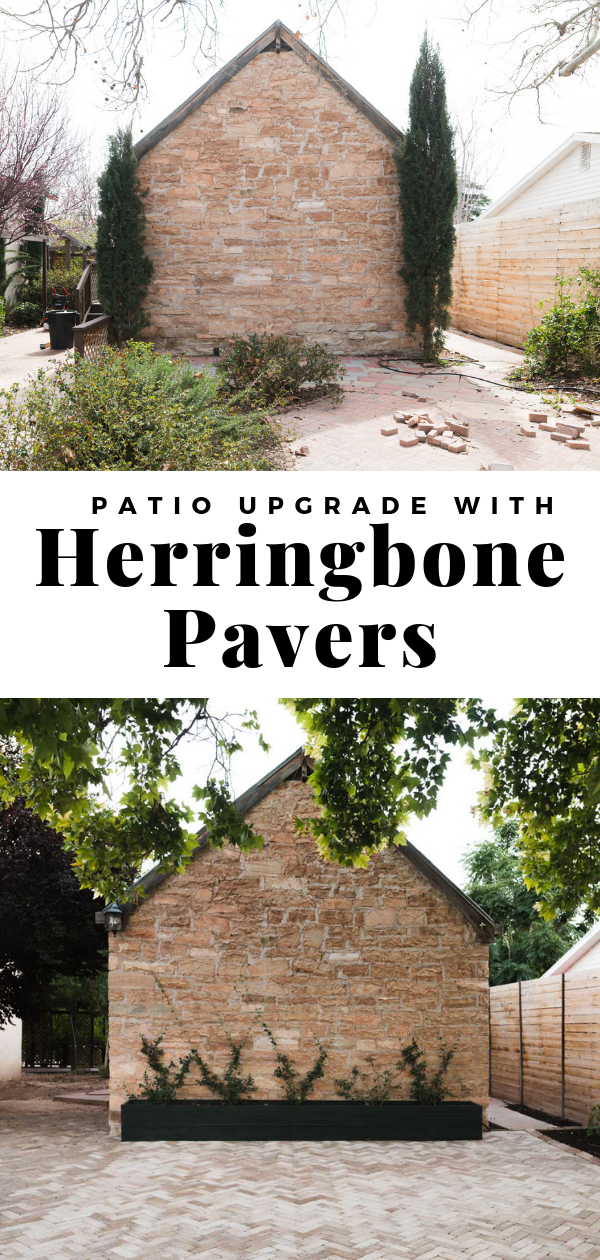
This is where we started:

Check out the loads of uneven and mismatched pavers, lots of overgrown bushes (which I still loved, we saved almost all of them!) and a big space that wasnt super functional. Our plan was to replace the paver area and reconfigure the garden bed a little, but for the most part, to leave the sidewalk and giant raised planter the way they were.

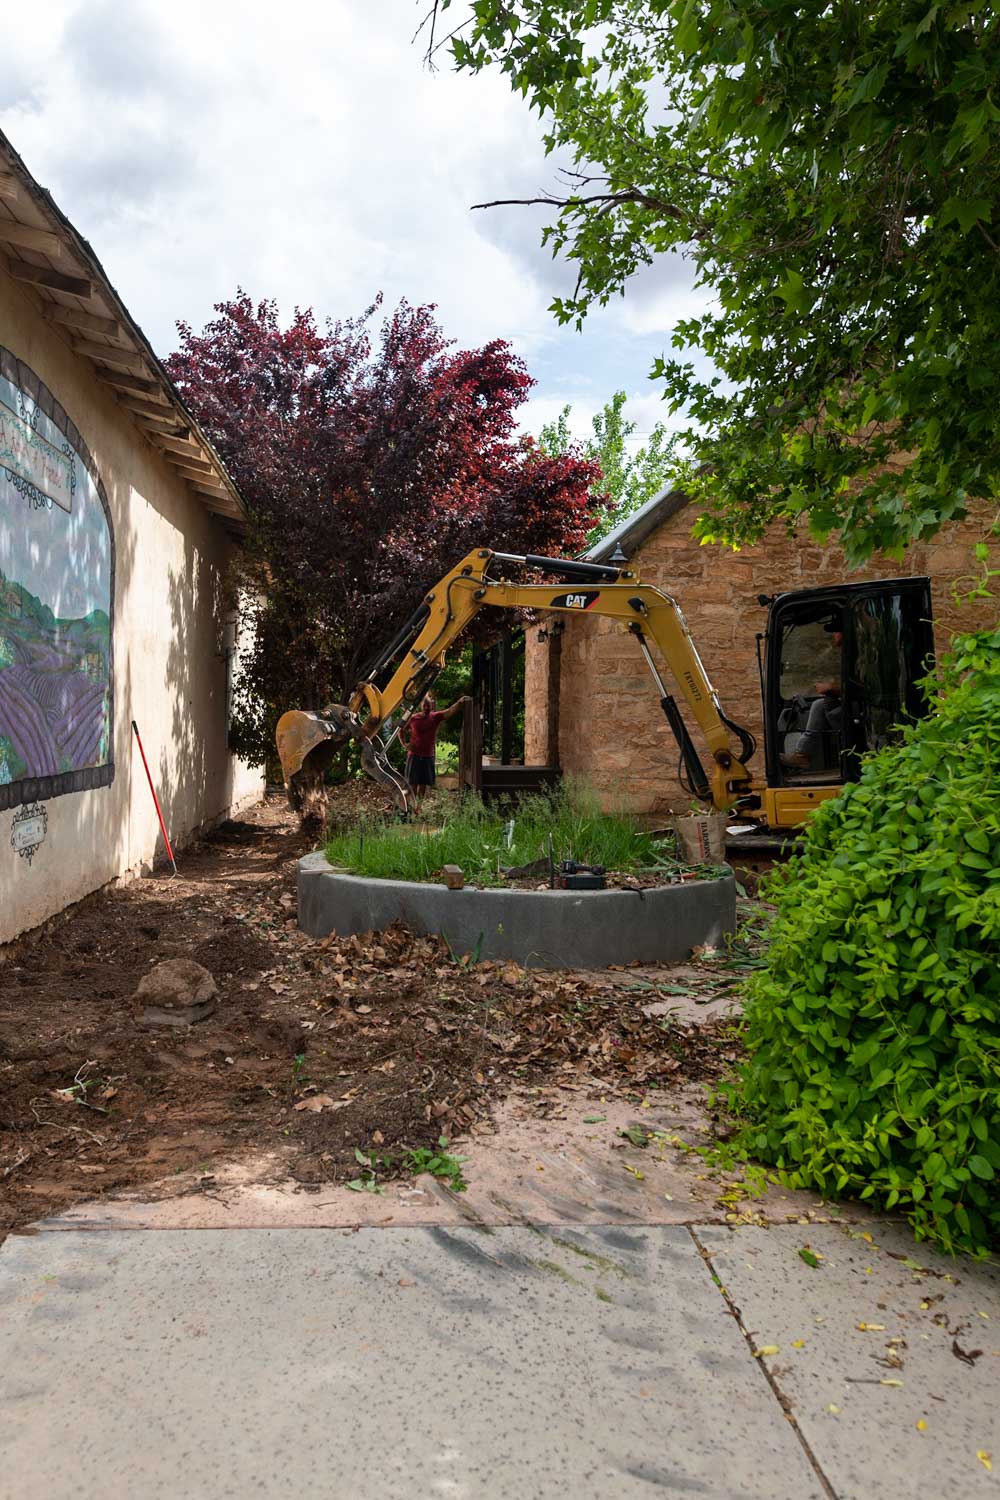
Hahaha, that was such a cute joke. (Also for reference, the wall with the mural is the west wall of the Merc that we’ll be tacking in Phase 2)
After we took out the pavers and bushes along the Merc (they needed to come out for Phase 2 anyways, so we decided to do it all at once.)it was immediately apparent that we had a bigger issue on our hands.

A much much bigger issue. Dammmmmit.
The slope in the ground was graded so that water ran into both the Merc and the Granary.
Every time it rained, every time the plants were watered, every time anything with any sort of moisture was triggered, away it went, into the foundations, OUR foundations! If you remember from Phase 1, water is Court’s mortal enemy. Water is the absolute worst for buildings and especially historic irreplaceable buildings. There was no way that we could ignore the reality that this was going to only get worse if we didnt address it.
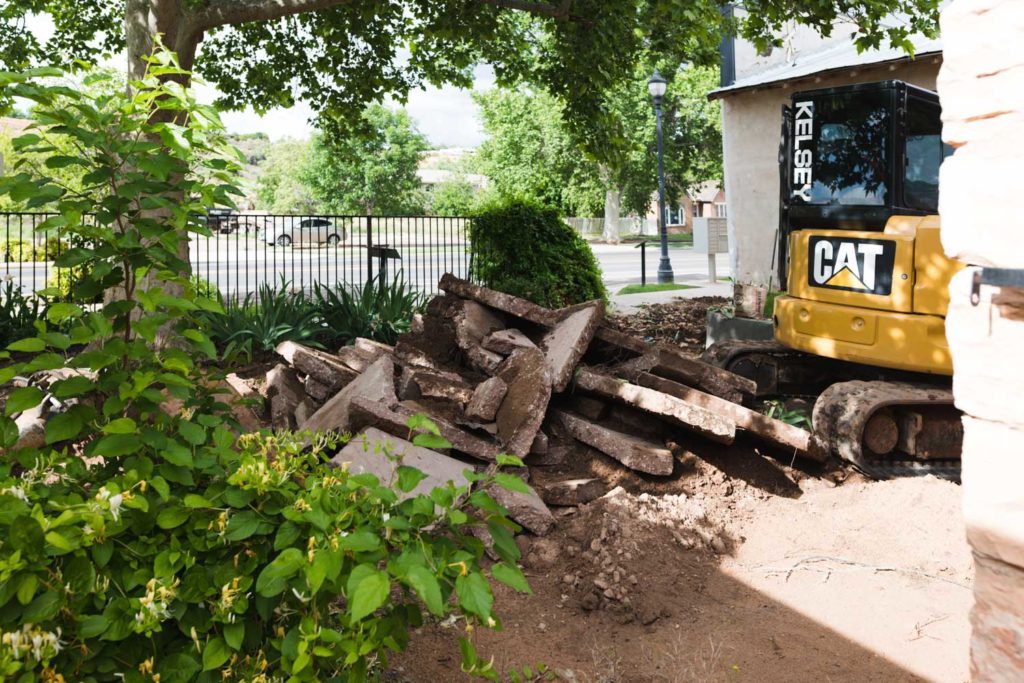
Luckily we’ve got a great friend that is an excavation ninja. (If you’re local to southern Utah, call Kelsey Enterprises and ask for Tanner!) He came over at the drop of a hat and assessed the issue (worse than we thought!) and got to work helping us remedy it. Which meant, all of that sidewalk that we were going to keep needed to go, and our weekend project turned into a much larger undertaking.
(There was a lot of cement removal.)
And a lot of dirt moved around.
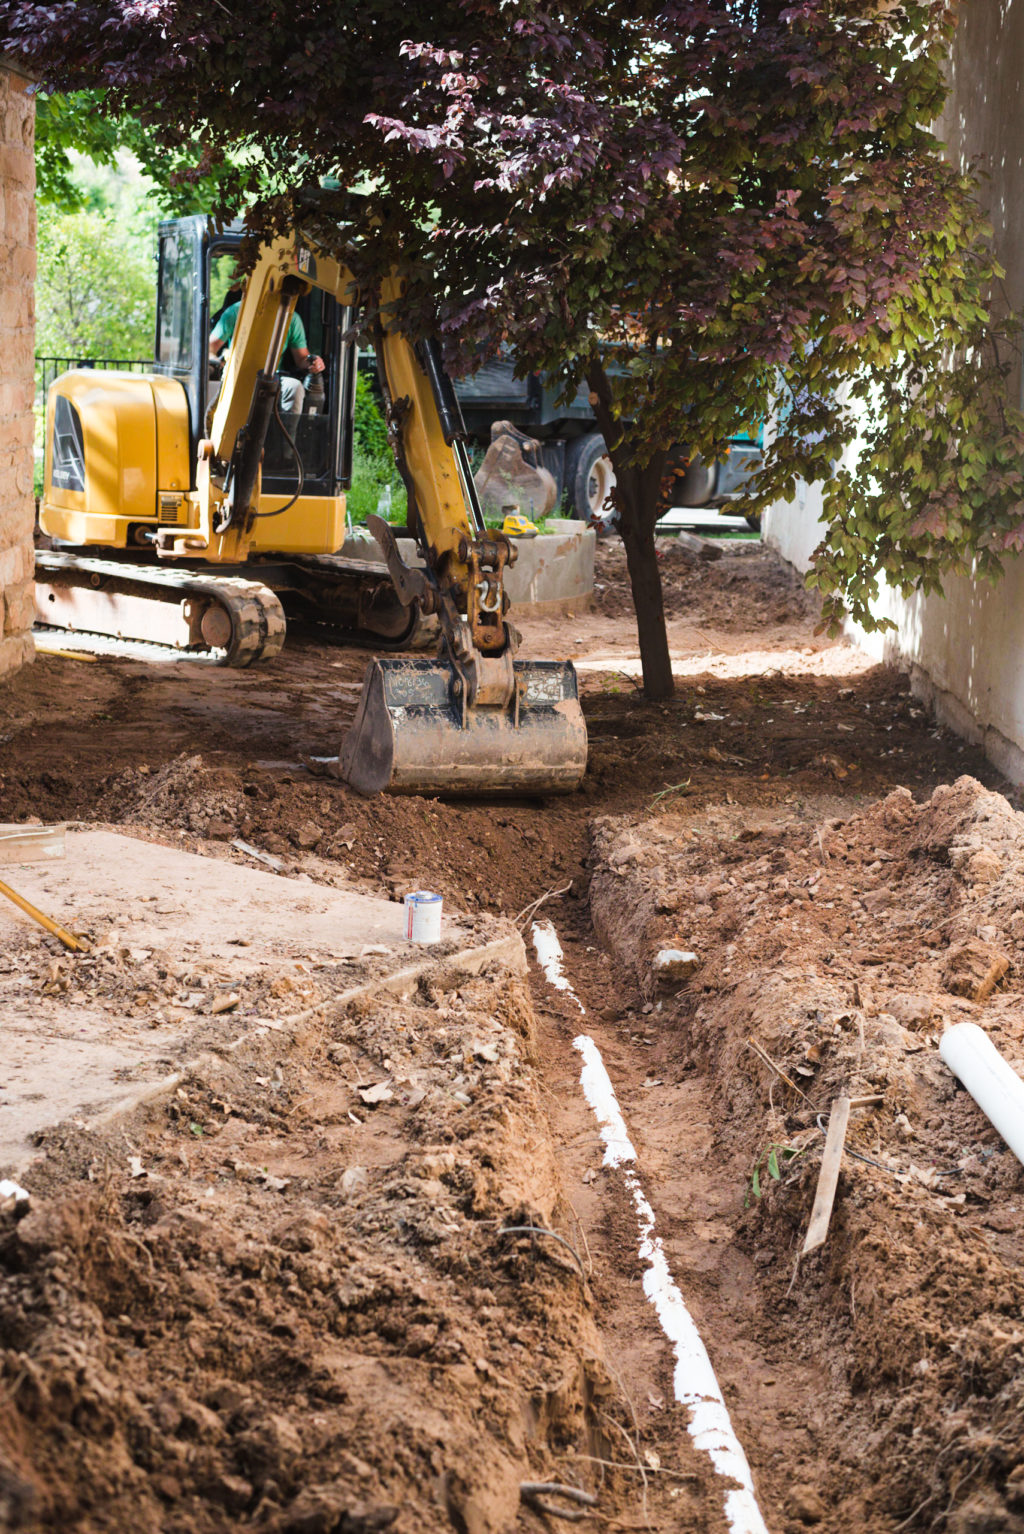
It took a few days, but after Tanner the hero was done, everything was graded properly with drains installed. And we could sleep easy knowing there wasn’t going to be a giant sink hole under the Merc that would swallow us all whole.
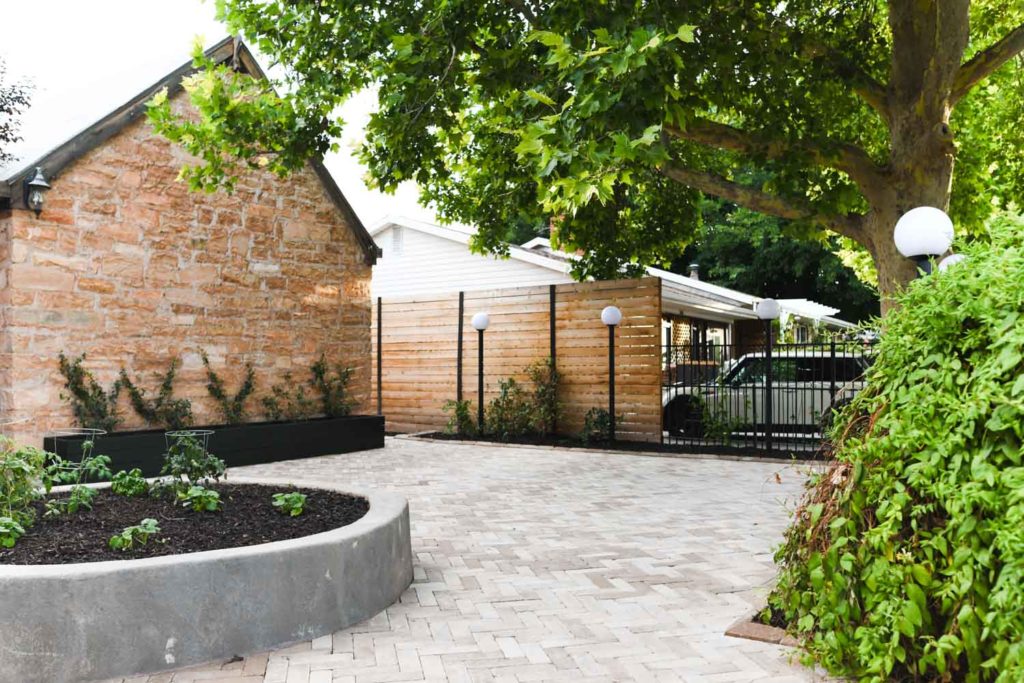
It also meant we were FINALLY ready to install our pavers, which is the real reason you all are here, so let’s get into it!!
The pavers that we chose are Pavestone Rumblestone Plank in Cafe. Pavestone has got so many great options, it was hard to choose!! I wanted something that was traditional, but still looked special. And I LOVED that we could order them from homedepot.com with their free shipping and magic orange love that they infuse into everything.
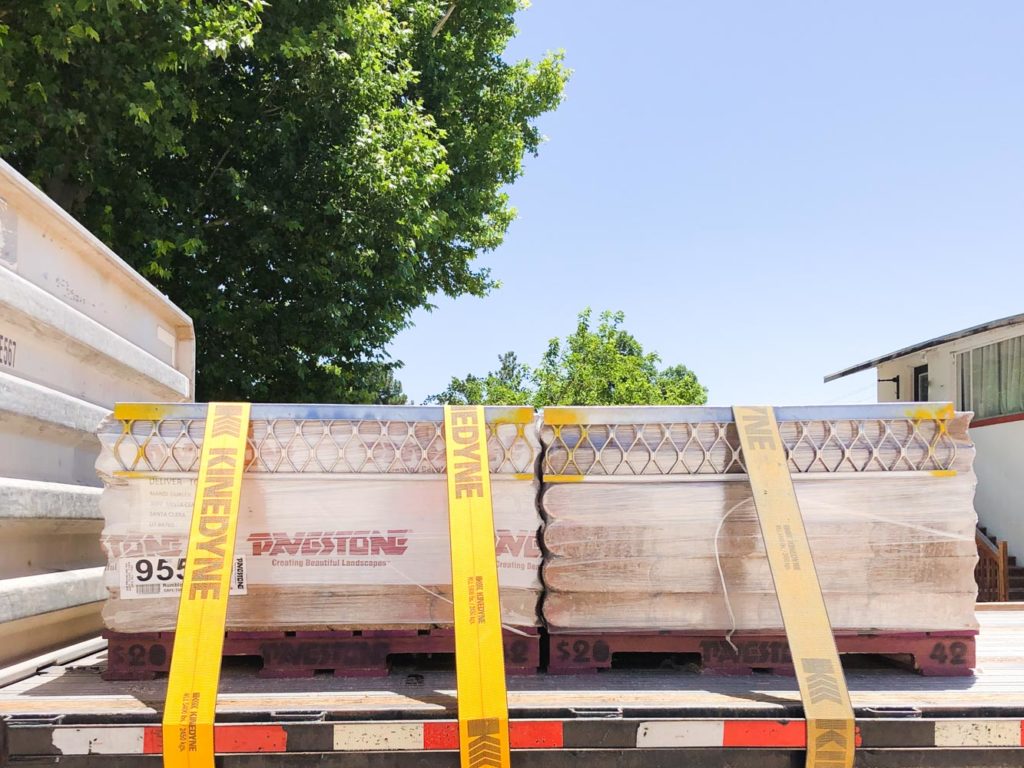
The pictures that I’ll share are very true to color, but if you are in southern Utah, feel free to come peek over our fence and see them in real life. Pavers are a big investment and if I can help you guys in any way, I’m happy to!
A few of my favorite features:
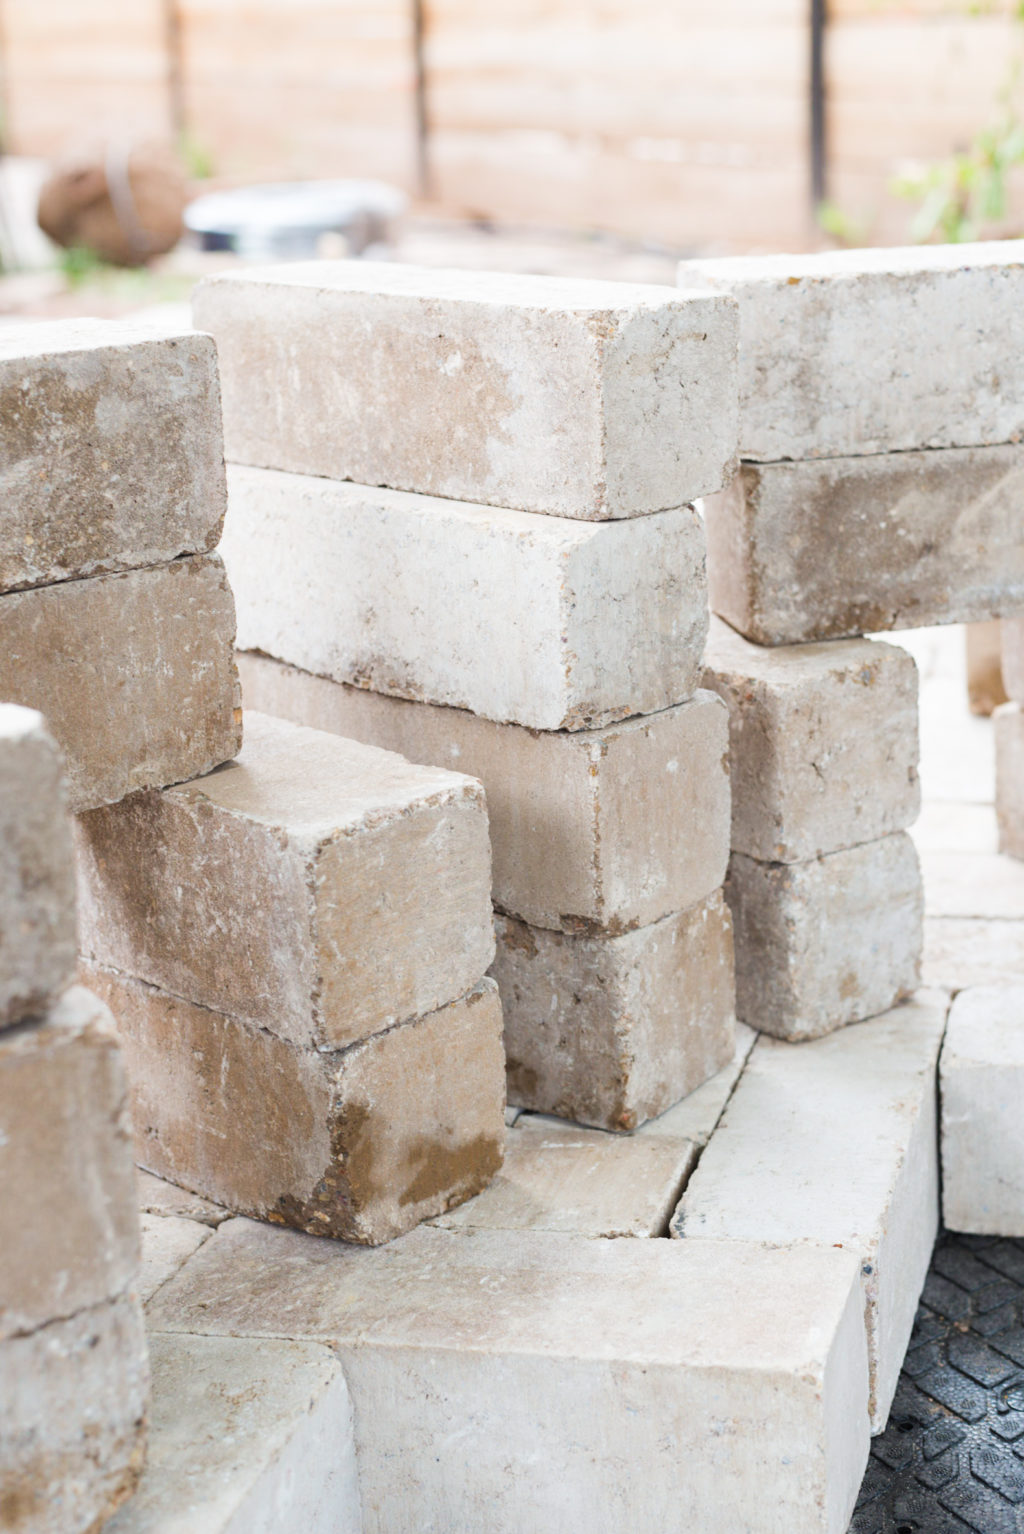
- Typical rectangular pavers have dimensions that are twice as long as they are wide. The Plank pavers are 3 times longer than they are wide, so they give off a totally different vibe.
- Plank pavers are twice as thick as standard pavers, which means you can use them in really intense applications, like driveways! (which we will be doing eventually)
- They have the perfect tumbled stone look. They arent overly distressed, they just look aged.
- The Cafe color is money. It’s a great neutral rock, it isnt too red (which is the default in southern Utah) and it isnt a cool grey. It’s a dream neutral and if I’m ever elected President, it will be the official paver color of the United States. Ironically though, it reminds me of the stone we saw all over France. So maybe I should run for President of the world?!
- The pavers are the same finish the entire way around. There isnt a “face” all sides are equally important and ready to be the star. This was a huge bonus when it came to off cuts and waste (I’ll get into it more later in the post!)
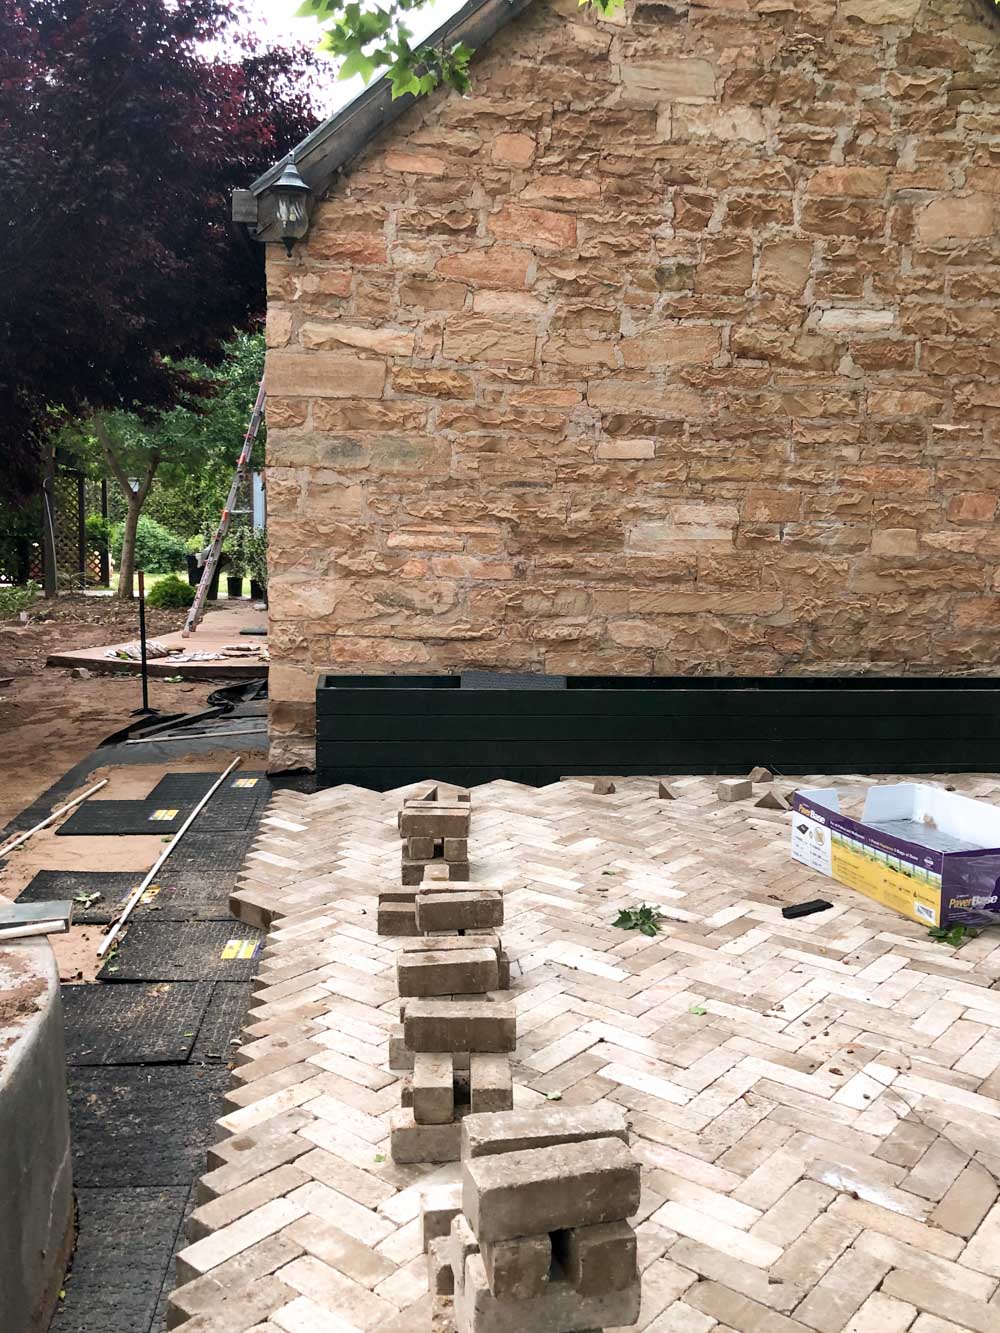
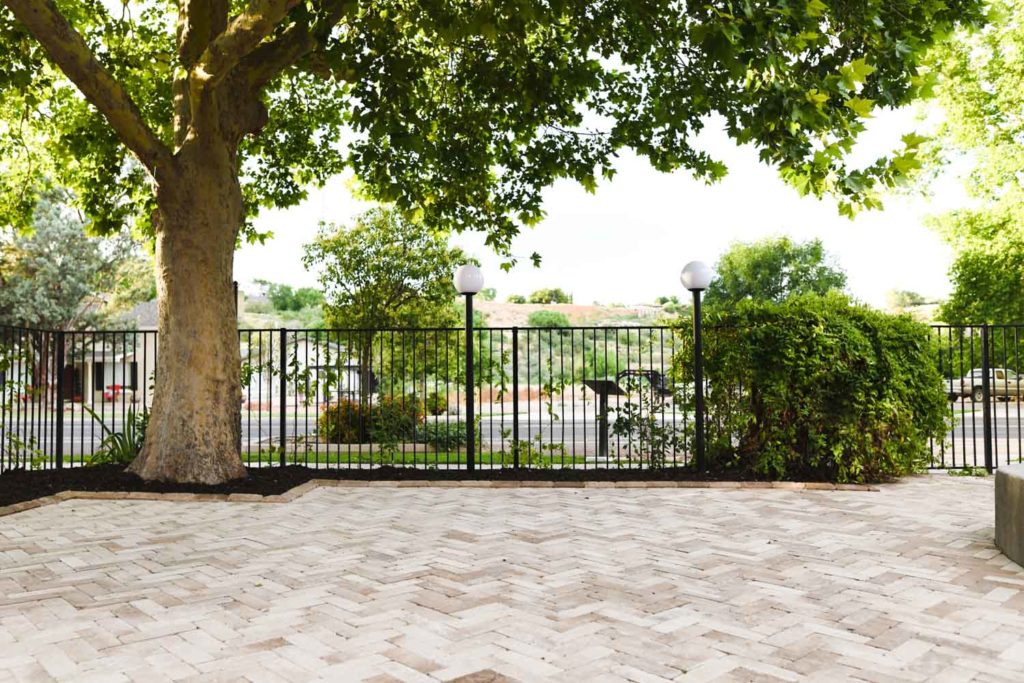
There are a few different ways to lay pavers that are this shape (basket weave, running bond, herringbone)
TIP: Check out this post to see 5 of the options I tried out!
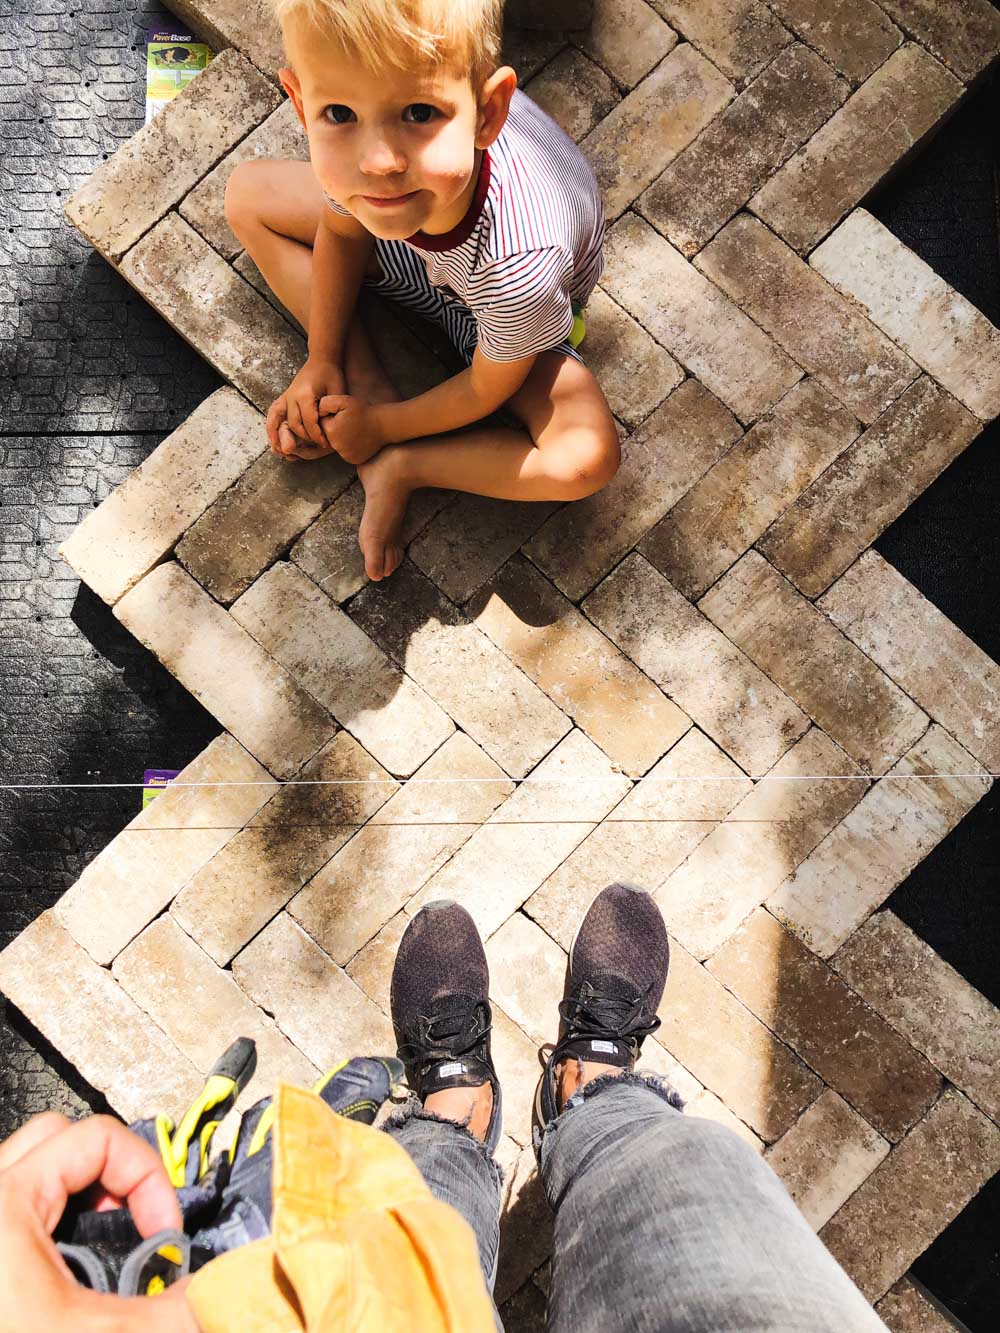
I knew immediately that herringbone was the direction that I wanted to go. It is more work, and can cause more waste, but come on, how could I not! Speaking of waste, I’ve only ever done herringbone in tile that has one face and there was a lot of waste from off cuts. So imagine my surprise that when I learned that most of our paver off cuts could be flipped upside down and used again! HECK YES!! Way less waste than I planned for!
Paver Base Panels
Something that we did to buck traditional paver laying was to use Paver Base Panels. Typically when you are laying pavers, you dig out 5-7″ of dirt and back fill it with compacted road base. This prevents the pavers from shifting and becoming uneven.
As you can imagine it’s an incredibly physical process, and we had one huge hurdle- the 100 yr old sycamore tree in the corner of our yard. We couldnt dig down 7″ because of the roots. So I did what any responsdible adult in 2019 would do, I started googling.
I found a product on homedepot.com called Paver Base Panels that had killer reviews and was wildly innovative. Get this, instead of digging a 5-7″ hole the size of our yard and filling it with LITERAL tons of road base (special sand that compacts hard) you replace it with these lightweight dense foam panels. Seems like we’re being Punk’d right!? Unfortunately the joke is on everyone who is still doing it the traditional way. These things are incredible!!
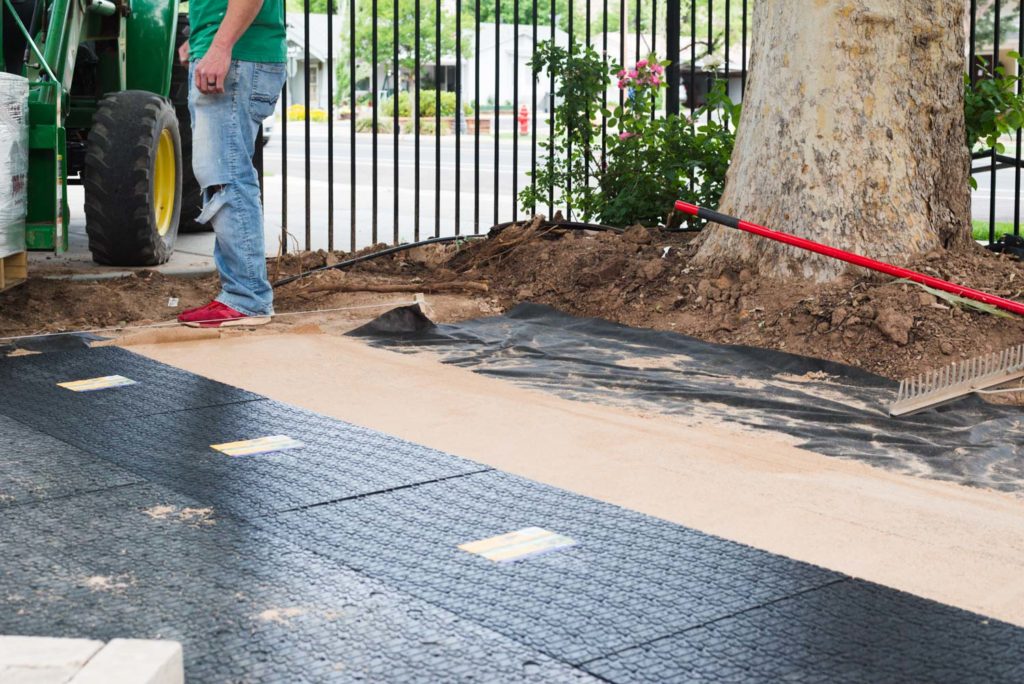
Installing our pavers was mentally easy, and physically exhausting. We figured out a great system though, Court carried the stacks of pavers over to me, and I laid them all in place.
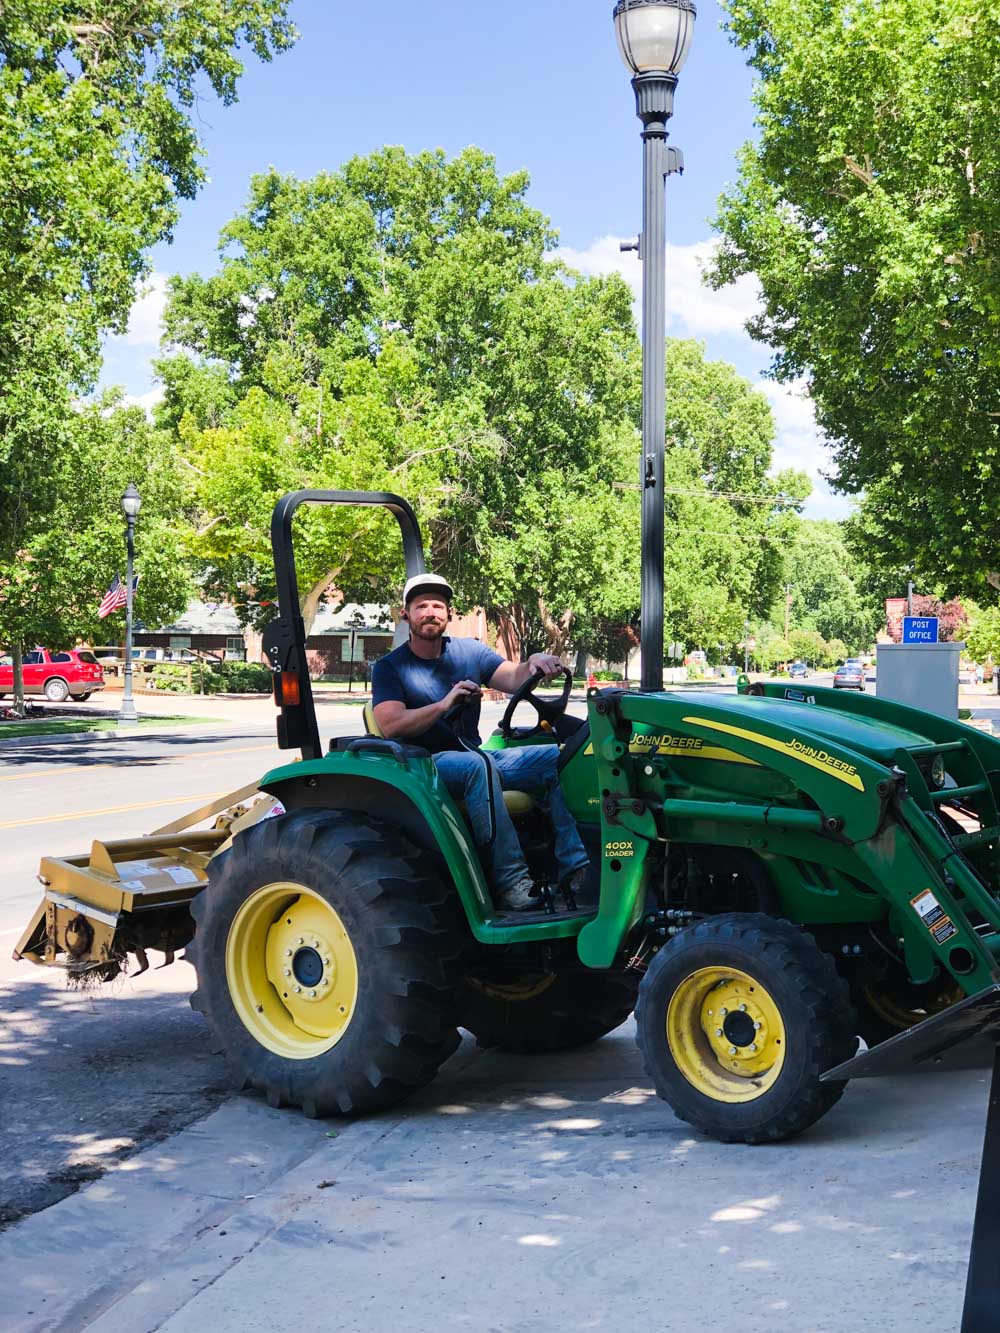
There were a few nights that our awesome neighbors came to help and it went so much faster. They also brought their tractor so Court reverted back to being a 7 year old.
Be crazy diligent about keeping your lines straight. One paver that is askew will shift the entire pattern, and the pavers are so heavy that it can be really hard to correct.
One thing that I loved about installing them over the paver base panels was that they are reposition-able (not so much if you use the traditional method!) I got into a really good rhythm of forcefully sliding them into place. It tightened everything around them and prevented gapping. Using a rubber mallet also works if want to try that!
To finish off the patio, we used Pavestone Rumblestone Edgers and OH MY GOSH WHAT A DIFFERENCE THEY MADE! If I’m being totally honest, by the time we got around to installing the edgers I was seriously over the heavy physical labor. You know that moment in a project when you’re ready to take every short cut imaginable just to be finished? Yep. That’s where I was. I debated on even installing them because I’m a flawed human being and I wanted to take a nap.
But guys. The edgers are a MUST HAVE. I mean, just look at them!
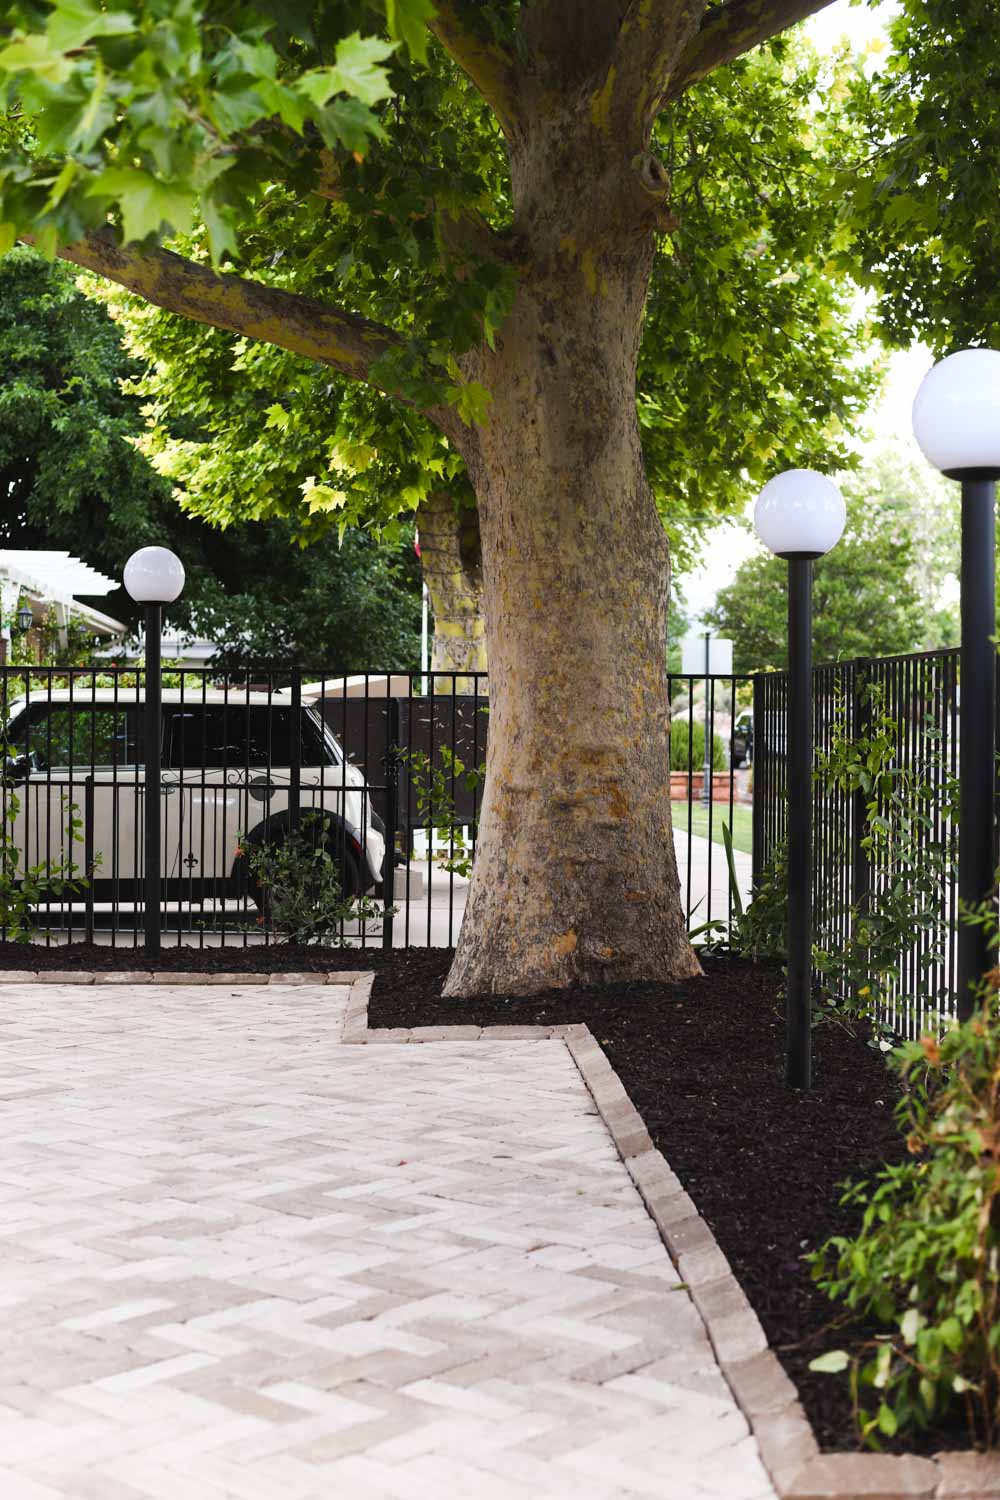
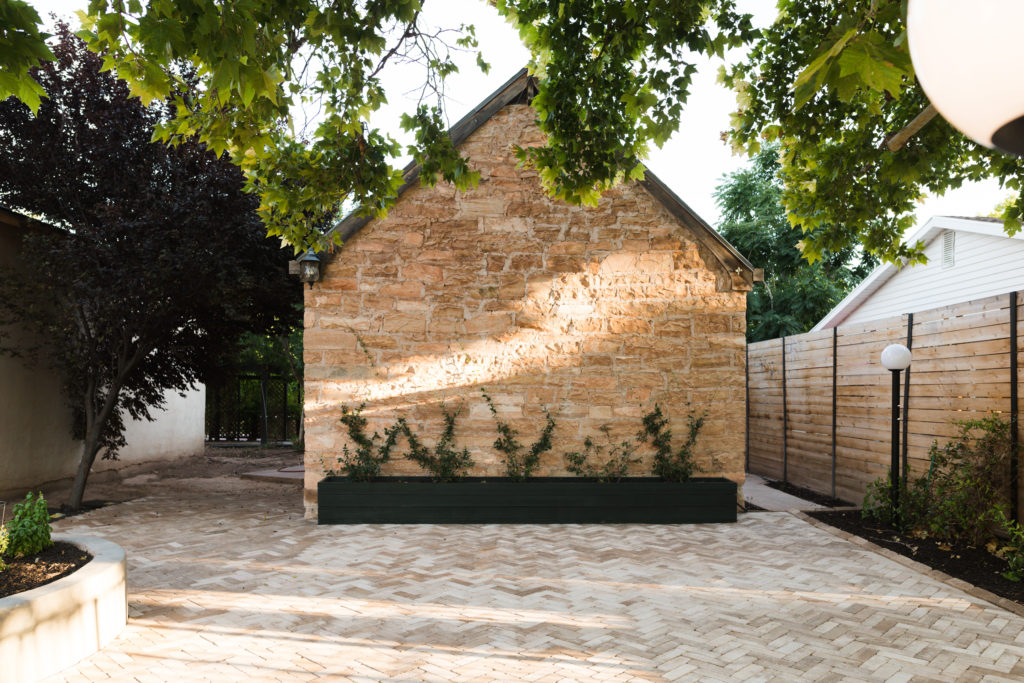
Ok are you guys ready to see how the pavers look!? I know that this is sort of the equivalent of sharing an open room with no furniture in it, but I just really want you to get the full paver experience, ya know!?
Now that is a fun before and after!

HUGE thank you to Home Depot and Pavestone for partnering with us on this project!
Congratulations! It is finished and gormigeous!
Gorgeous!
So amazing!!! Its gorgeous!
It’s ridiculously amazing!!! You guys are rockstars!!!!!!
So fantastic!!! 🙌🏼
Getting sooo excited to come and stay as a Airbnb guest – better start saving my pennies – Utah here I come!
This is beautiful! Wish I had a paver driveway out of those!
Your work is so full of useful information.
Love everything you’ve done, as usual. I am so impressed with your ability to make your vision a reality.
I did wonder about your choice of lighting. I have recently become a proponent of the dark sky movement (admittedly only because it now affects me).
I live on a quiet dirt road in a somewhat rural area. Recently, city folk discovered this peaceful place. Sadly, they’ve brought their bright lights with them. My quiet little neighborhood is now lit up all night long. Spotlights and outdoor lighting are obscuring my ability to see the stars at night.
Just wondering what it’s like in your area.
I was all set to buy strings of those outdoor lights for my backyard this summer. But one night I noticed my garden was full of a swarm of fireflies dancing in the dark. And the next day I read that light pollution may be contributing to a decline in the population. So I didn’t buy the lights.
I think the Merc’s outdoor lights would be cuter with hats on them anyway. I wonder if they exist? Personally, I really like dark-sky compliant light fixtures.
The rest of the patio is charming. That Granary wall is going to be a stunning focal point once the greenery has had a chance to fill in.
Looks so so good! I am so impressed!!
WOW! Beautiful!
So beautiful. Be able to see the finished project is awesome. AMAZING.
So lovely!
They are gorgeous!! Such an elegant look! Congrats!!!
Oh my gosh it’s so amazingly perfect and beautiful! Congratulations on another project checked off. You guys amaze me! I will have to see the price difference between using HD pavers versus pavers from a local paving company. Thank you for sharing – btw, herringbone is definitely my favorite, too!
OMG !!! That’s amazing, such a beautiful space now.
I absolutely loved the creativity involved and done to complete this amazing project!! It looks amazing, beyond beautiful!!
Love this! Question- i’m looking at these same pavers but i see that the colors range from light almost whitish to what looks like the cafe color. Did you but lighter ones and mix them in or does the cafe color vary that much? Thank you!