Way back in April I posted about my garden (this is only a short tangent so just go with it.) One reader left this comment:
Your house such personality! So I was shocked at how boring your yard is!
And guess what? I was like “YAH! My yard is boring!” So we are shaking things up a little. Today I am going to show you the first few steps to building Herringbone shutters and on Monday I will show you how I stained and installed them as well as a final cost breakdown.
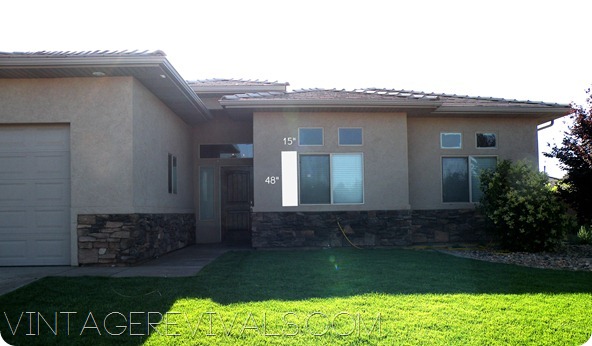
First things first you need to figure out the measurements. Mine are 15”x48”. Please note the paint in the small square windows on the right and that there are now 2 lights left in my chandelier that have not burnt out (more about that here)
This is the very rough sketch that I drew for Court.
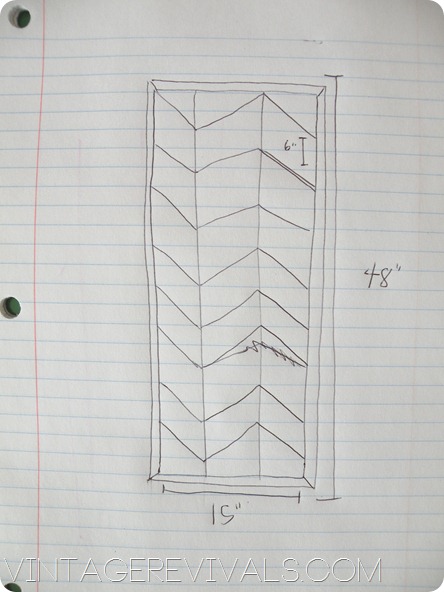
Because I wanted this to be as painless as possible and 6 divides evenly into 48 we went with 6×1’s in Cedar for the Herringbone pattern. (Cedar is significantly more expensive than Pine, each 8’ piece will run you just under $14.00. I love the natural color and varying wood grain in it though, and because this is going on the OUTSIDE of our house it needs to be freakin awesome.)
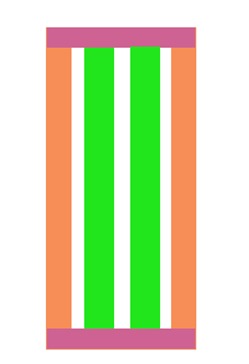
Now there are a few different ways to build the base pieces. This was my original idea:
BUT because my cute husband was taking his day off to help me we used his idea. Either way will work and Court’s way will use less wood (which means it will be cheaper!!)
We used 1×3.5’s in Pine (because you wont see them) to build the structural base.
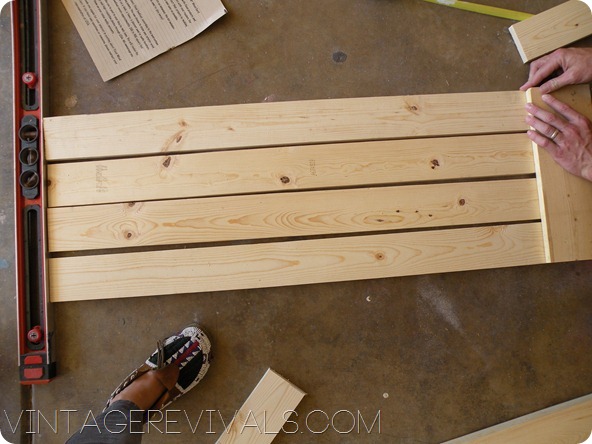
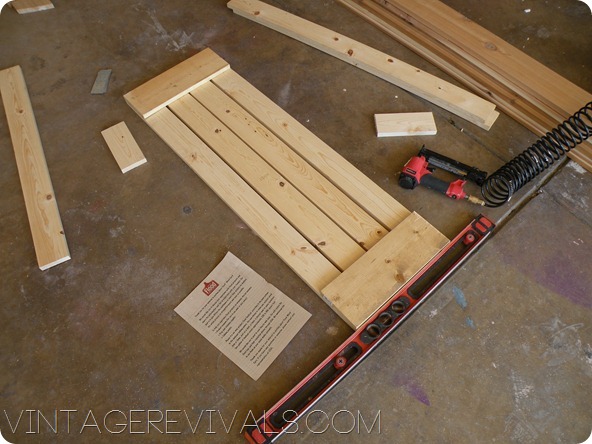
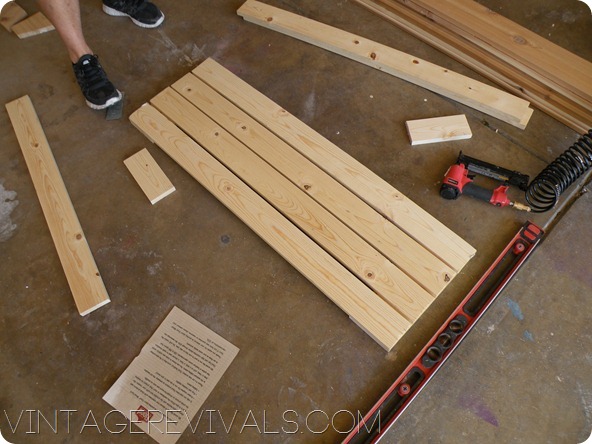
Cut a guide the width of your shutter (ours was 15”) and lay your boards out on a flat level surface. Use your guide to evenly space out the boards and use a nail gun to nail 1 or 2 nails in each 3.5” board. Your 15” guide boards will be removed once your herringbone pieces are attached, this is just to keep the boards straight. Use a level and make sure that everything is looking good.
Secure a guide piece to each end of your boards.
Then flip it over. This is your surface that you are going to attach the Herringbone to.
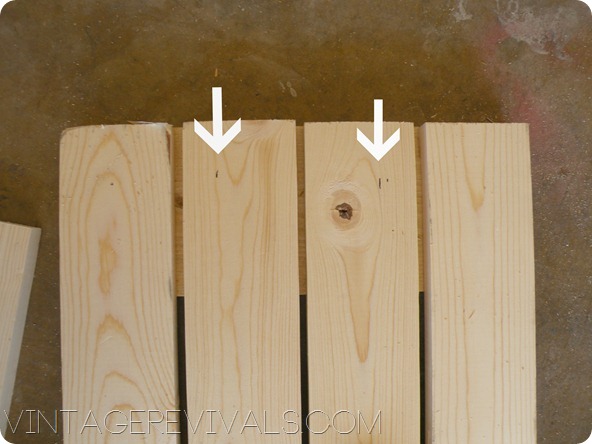
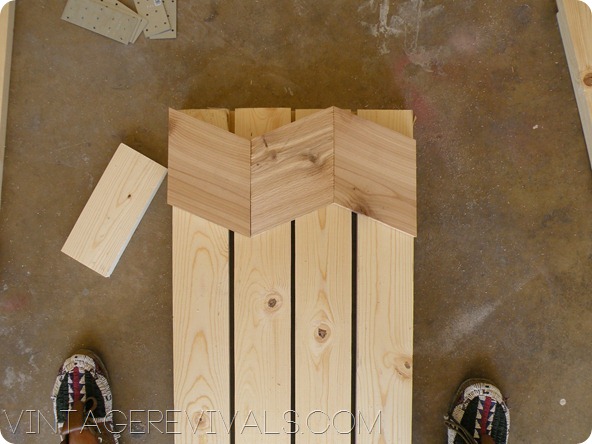
The next step is to mark where your points are going to go (meaning where one piece ends and the next one begins). You do this by taking the total width of your shutter (15”) and dividing it by the # of pieces you want to use. We wanted it to be 3 pieces across so I marked each 5” mark.
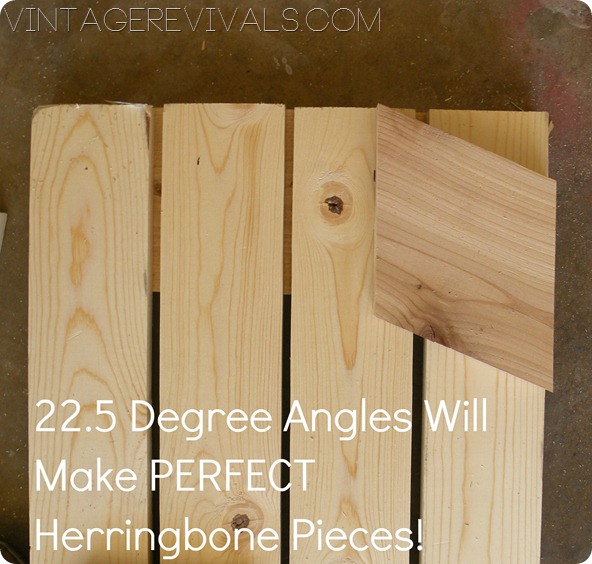
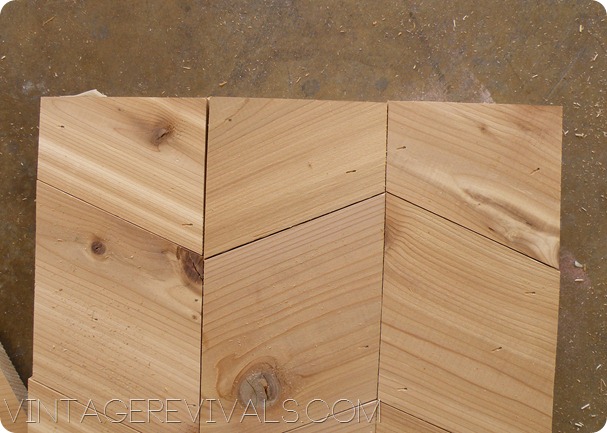
The secret angle to making perfect herringbone is 22.5 degrees. Cut a 22.5 degree angle on one side of your board and line it up to your mark. Mark where the edge should end on your shutter base and cut another 22.5 degree angle. You have your first piece! The edges you cut are ALWAYS going to run vertical and are always going to touch each other.
For your next piece you are going to do the exact same thing, but this is a mirrored image of your first. Our wood had a good side and a bad side so we had to rotate the saw. If your wood has 2 good sides then you are in luck, you can just flip your piece over and will not need to rotate your saw.
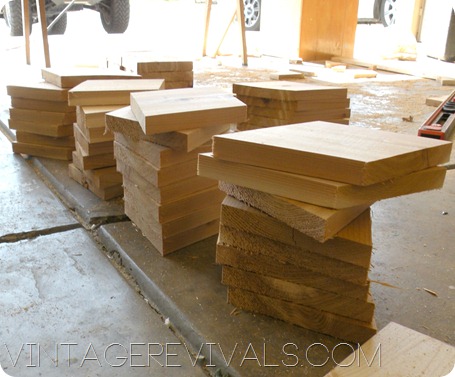
Your 3rd piece is going to be an exact copy of the first one. Line them up and make sure that they all fit. When they do use one as your template piece to make about 5,000 more.
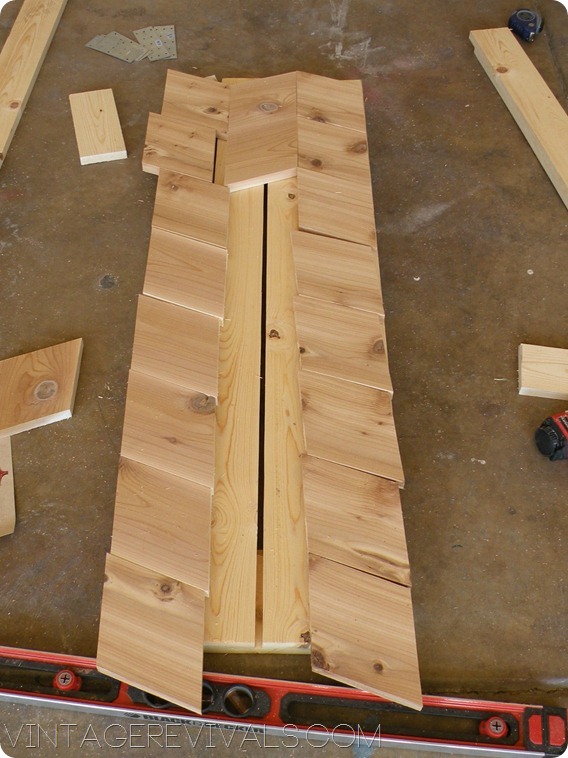
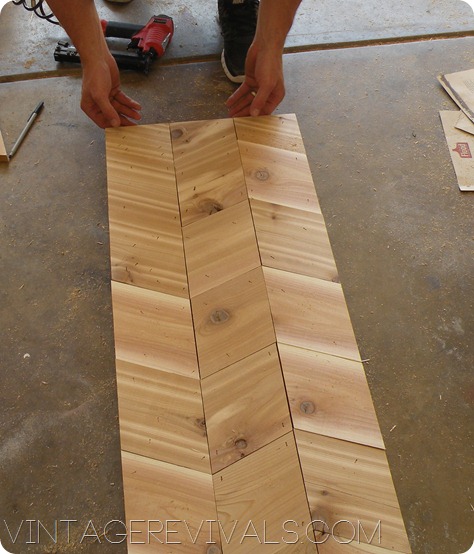
After you have enough wood cut piece your shutter together. We did this to make sure that it was lining up the whole way down before we nailed them in.
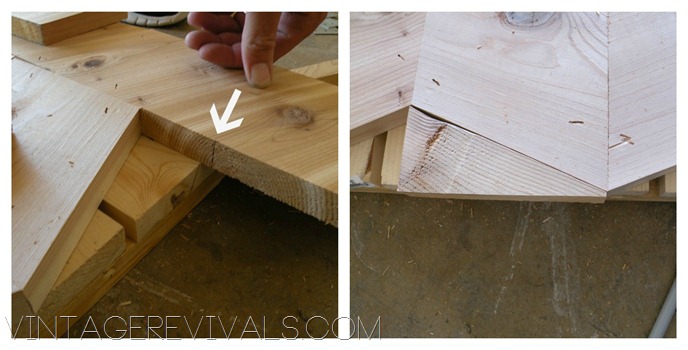
NOW you nail them down. We used 1 1/4” Porter Cable finishing nails. Don’t nail down the very end pieces though, you need to trim those puppies so that they are squared.
Hold your piece against the edge and mark where it needs to be cut. You are going to cut this piece with NO angle. It should just be a straight normal cut.
Awesome right!? I will be back on Monday to show you guys how to finish it up and show you final shots!
Love Your Guts, Mandi


Love this.
So cool! Love all the knots and the grain. Perfect for you!
Awesome! I can think of several uses for this technique. I can’t wait to see the finished product.
I’m more focused on your shoes. What are those?
just saw you on a commerial for “Craft Wars”, can’t wait to watch!
Amazing!!!! I can’t wait to see the rest. Seriously, so excited!
Those look awesome!
Can’t wait to see the finished product!!!
Very cool! I can’t wait to see the finished shutters!
INSANE! Yeah, it’s a fact: YOU ROCK!!
xo Becca
What a great idea and a new take on shutters…out with boring, in with pizzazz, Mandi style!!!
love it! and LOVE your shoes!
This comment has been removed by the author.
Looks like someone got sucked in by the herringbone shutters that run rampant all over Europe & had to copy them 😉 It’s funny that everyone thinks this is a brand new idea just because it hasn’t shown up much is the U.S. Even the Caribbean is crawling with herringbone shutters. It’s great to see people getting excited over a European staple though. There are so many beautiful architectural designs that have been around for hundreds of years over there that it is fun to see them showing up here 😉
Dumb
Super dumb
Those shutters are the business!!!!
These will be awesome, but I’m stuck on your shoes too! lol Can you tell us what they are?? Pretty please?
Oh my goodness! What a lot of work. We just buy our shutters pre – made back here in the East. Maybe it will go faster after the first one. What color are you going to stain or paint them? Ann
SO awesome!! 😀
I just found your blog a few days ago and I love it. Best blog I have read yet! Gah, your like my new hero! Much love!
Great idea! This would make a super cool headboard too…