You guys! Have you signed up for the VR newsletter yet? Every week the girl I love most (that would be Jamie) has an AWESOME secret project that is only available through the newsletter. Hello, who doesn’t want a secret weekend project?! (Don’t worry, you can sign up at the end of this post!)
Last week Jamie shared a picnic table update that is just so simple that I just had to share it over here too.
//
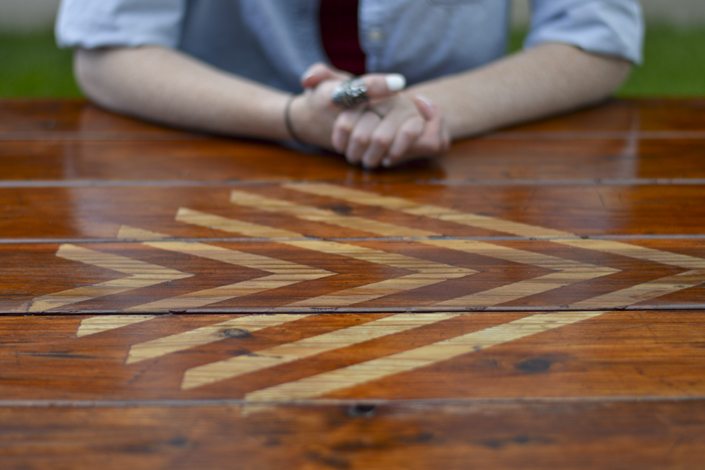
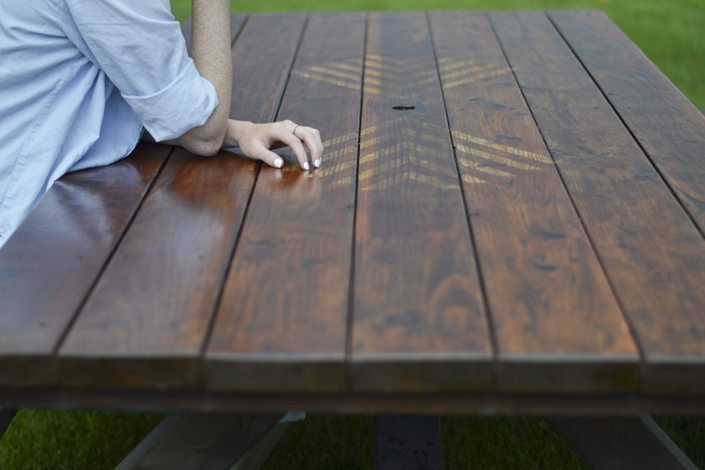
Hey there everyone! It’s Jamie, and I’m saying Happy Independence day to all my fellow Americans out there! I hope you all have a fun safe holiday and it’s spent with family and loved ones. Our family time here has already started, and of course my mom wanted to get cracking on some projects together. One of them being to restain the picnic table. This year, I decided to put a twist on it.

We talked some ideas over about painting a design on the table, but after sanding it, I couldn’t bear to cover that wood with paint. It’s way to gorgeous! So instead we decided to have a colored stain and a clear stain to let a design show through.
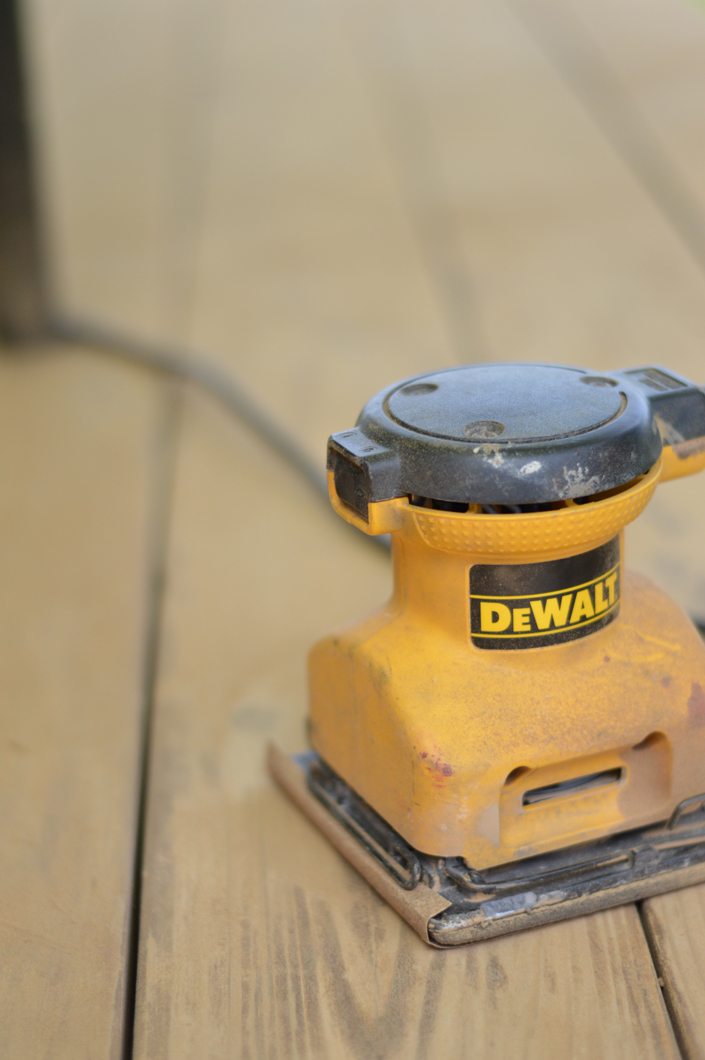
The table is old and needed a good sanding. This is where I mentioned that I fell in love with the wood. Seriously if I didn’t have to stain it, I wouldn’t have. The raw wood was so so SO pretty. But this baby has to survive outside in Idaho weather. It’s snows in July people. I’m not joking. Start with a coarse 60 grit sandpaper to get the old junk off. Then move to 120 grit to finish. If you want it ULTRA smooth you can use 220 after that.
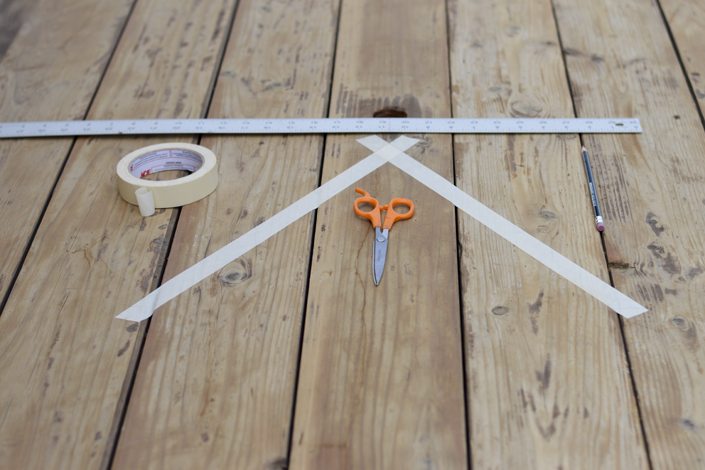
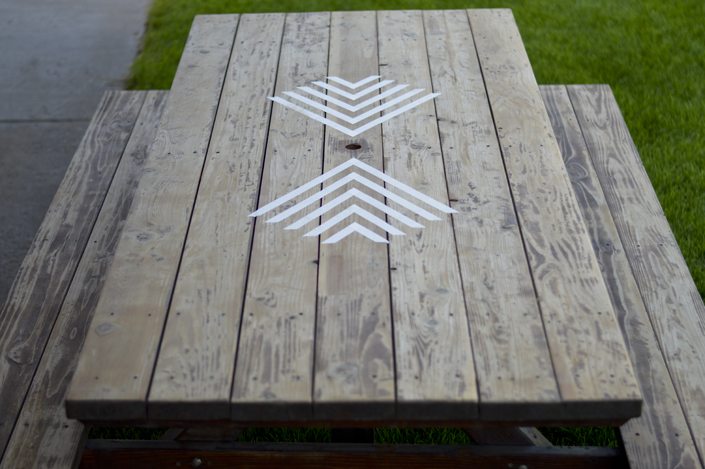
I already had an idea for a pattern that I wanted on it. I honestly kind of played it by ear. I knew I had to account for the umbrella hole smack dab in the middle of the table. So with some tape, scissors, a pencil and a t-square. Start by making a 90 degree angle.
Moving an inch down at a time, I continued with this angle pattern. (I overlapped so I could cut straight edges later).
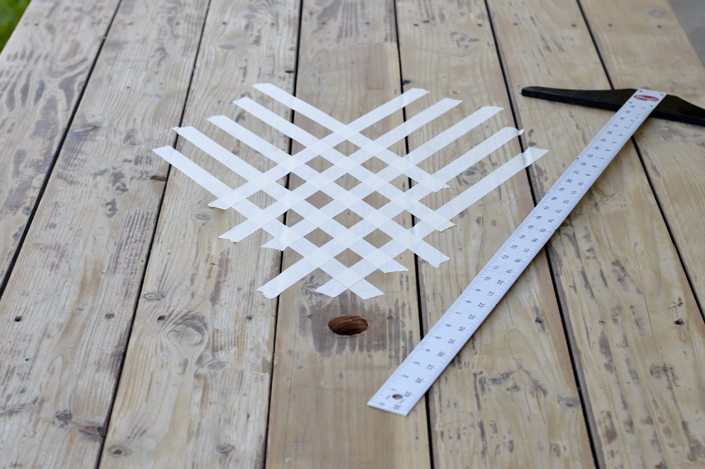
Tada! After cleaning it up with the t-square and am exacto knife. I was totally sold on the pattern.
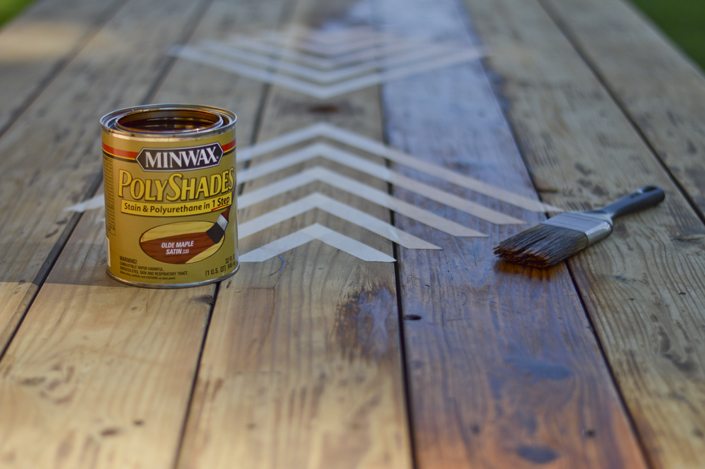
My mom’s favorite stain is the olde maple satin 1 step from Minwax. I always like to paint the table from the inside boards out. And then you have to resist taking the tape off till you know it’s dry. I know it’s so so tempting cause it’s totally the funnest part.
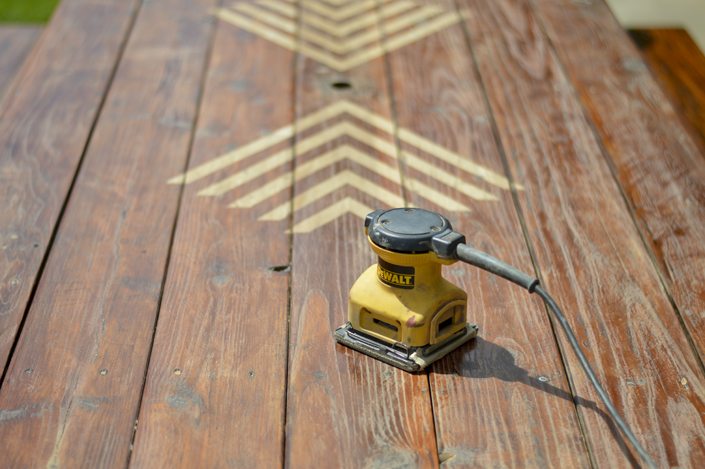
After I was finished painting, waited till it was dry (impatiently), and took off the tape, the separation between the stain and the unstained patterned was a little much. It was just way to drastic, I was going for subtlety here. So we decided to do a light sanding (emphasis on the light).
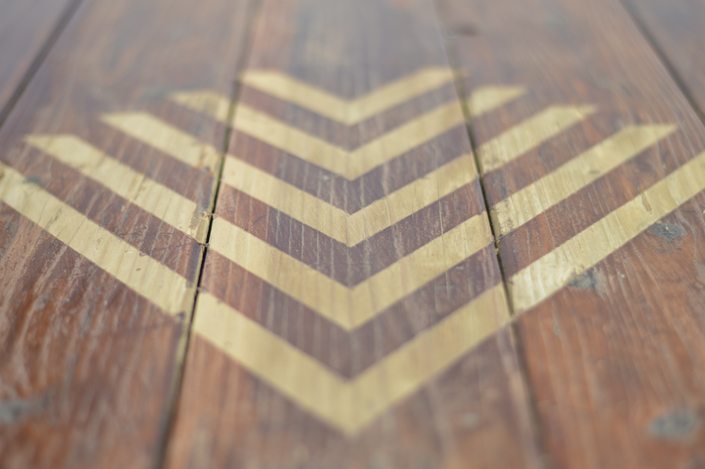
Problem solved! It’s a Christmas miracle! Hallelujah chorus, it’s beautiful and this natural organic vibe that I was totally going for. Freaking win.
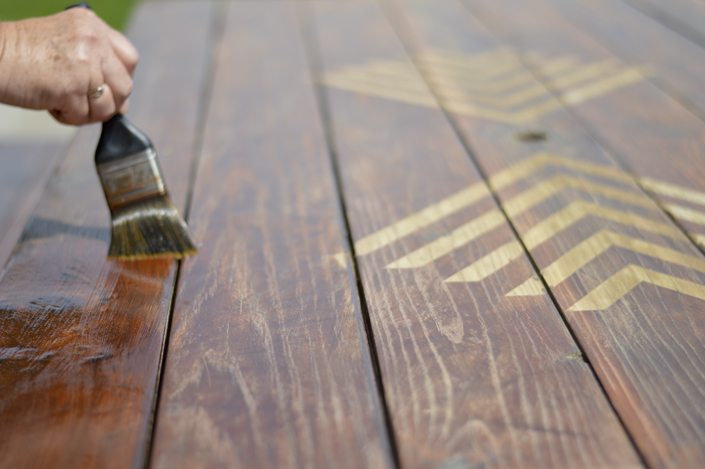
BUT! We still gotta protect that table remember? So we gotta put a clear coat on top of evvverrrryyything and protect it from that crazy Southern Idaho weather.
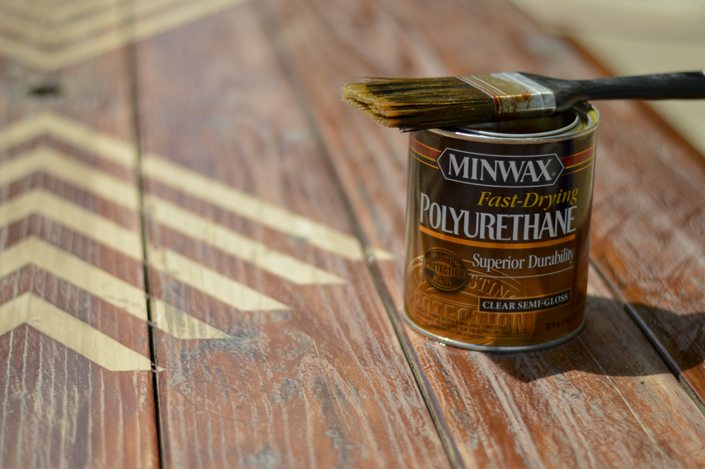
Light quick coat over the whole thing. Thanks to my momma for helping me out with this coat of paint.
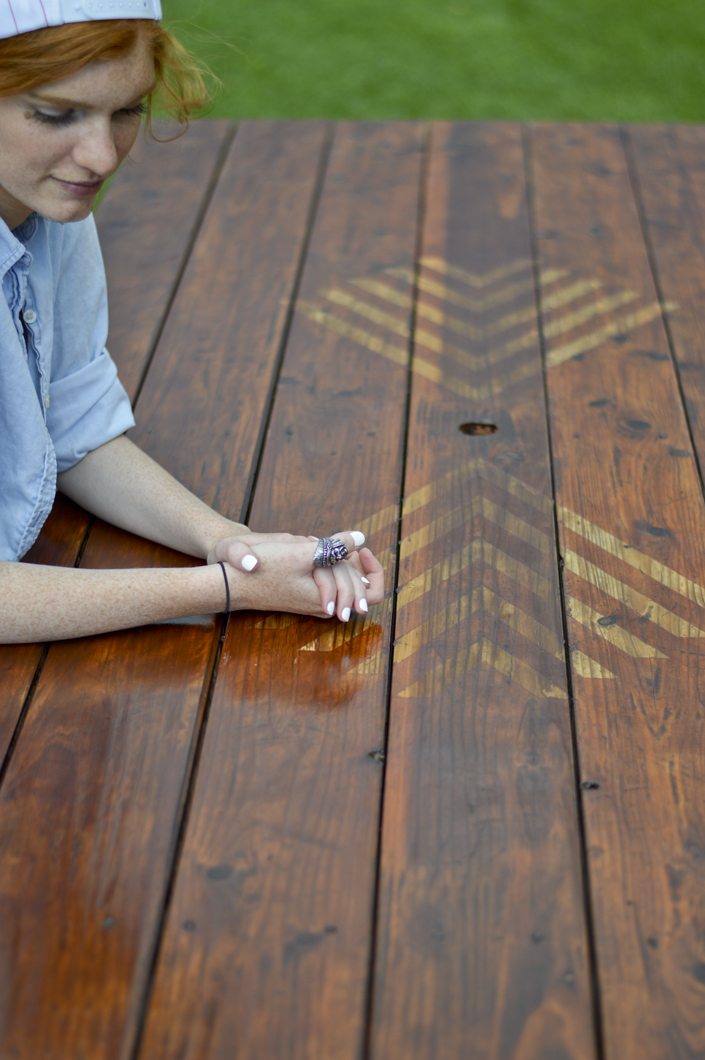
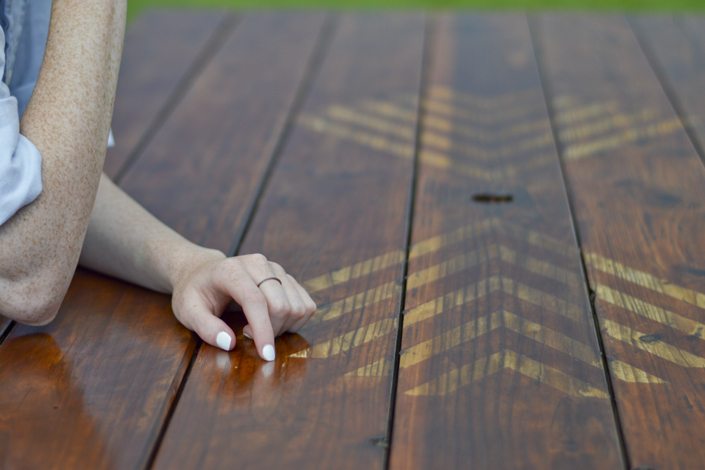
And thanks to my pretty sister, Janae! Isn’t she gorgeous?! She basically steals the photo. We’re all pretty in love with the new table, and being where we live, it’s only warm for about 1-2 months we’re definitely going to be getting as much use out of this as we possibly can!
I also love your guts,
Mandi again! Can you see why I had to share it? It totally makes me want a picnic table, just so I can copy this idea.
And make sure you sign up for the newsletter, because let me tell you, alllll of the projects are just this amazing.

Looks FAN-freaking-TASTIC!! Love and adore!
Beautiful! Aren’t pretty outdoor spaces just the best. Mary Wilding
Wow, I love the design!
Great job Mandi. Something so simple made an ordinary bench into an extraordinary work of art. I love minimalist work like what you’ve done here.
I don’t know how i found your blog but i am so glad i did!
I love all of your projects they are new and original.
keep up the great work!
Amazing! We have an old picnic table and I wish the natural wood was nice enough to leave unpainted! I’d do this in a heartbeat!!
This looks fun to do. Love the aesthetics Different