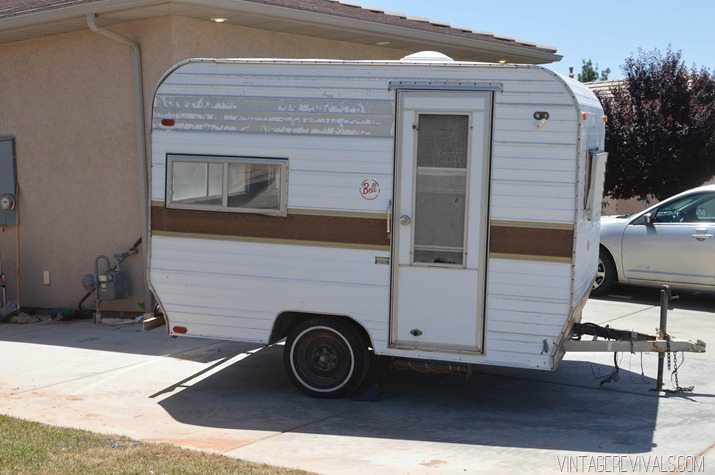
Dudes! We are overhauling a 1972 Bell Travel Trailer! Follow the entire series from the beginning here! Huge thanks to The Home Depot for sponsoring this post!
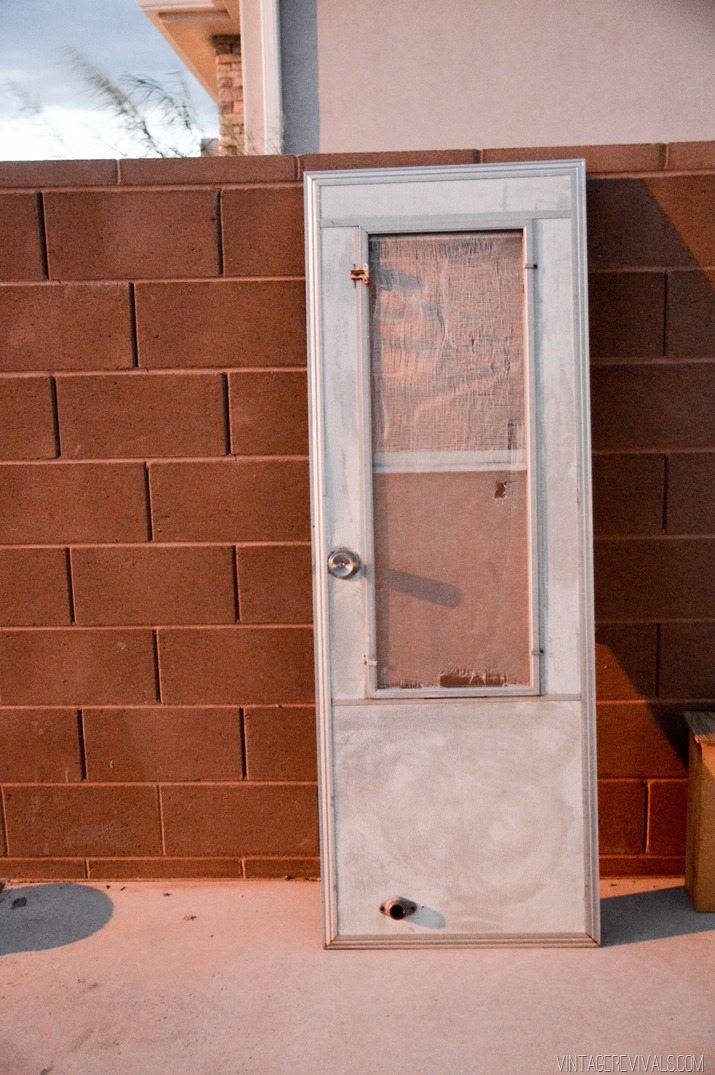
It seems that with the Nugget, even the most well intentioned projects have gone awry. And OF COURSE that is the case with the door. Could we have just painted it to match the trailer? Sure. How about adding an accent color with it? Obviously. How about figuring out how to replace the aluminum with wood panels? Errrrr.
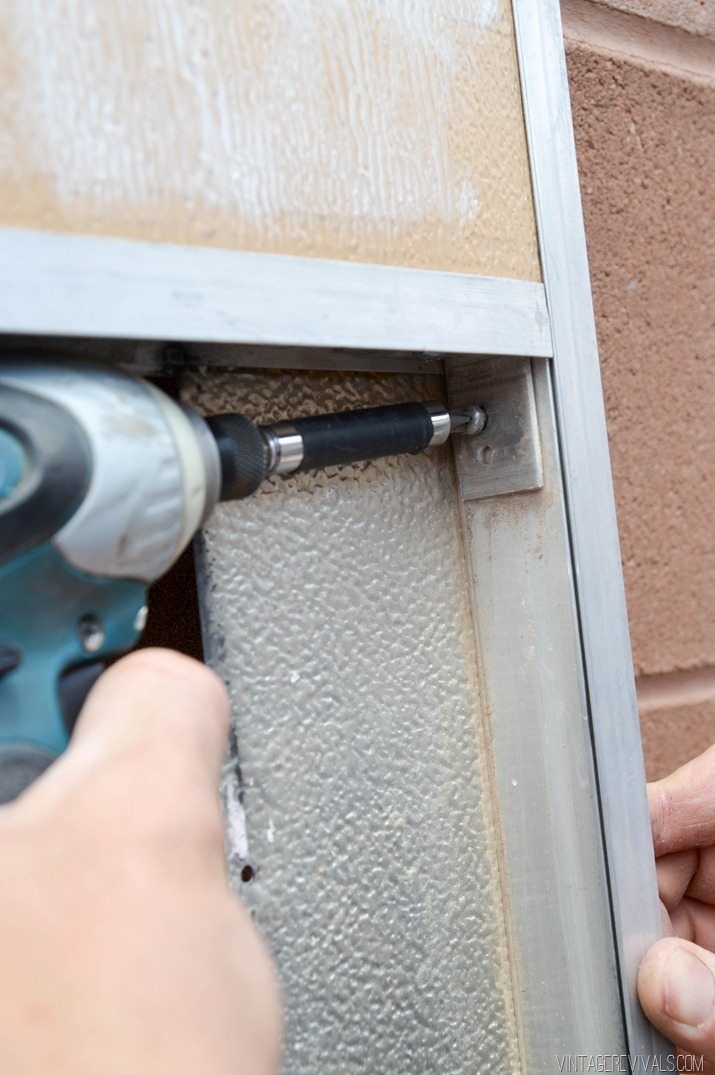
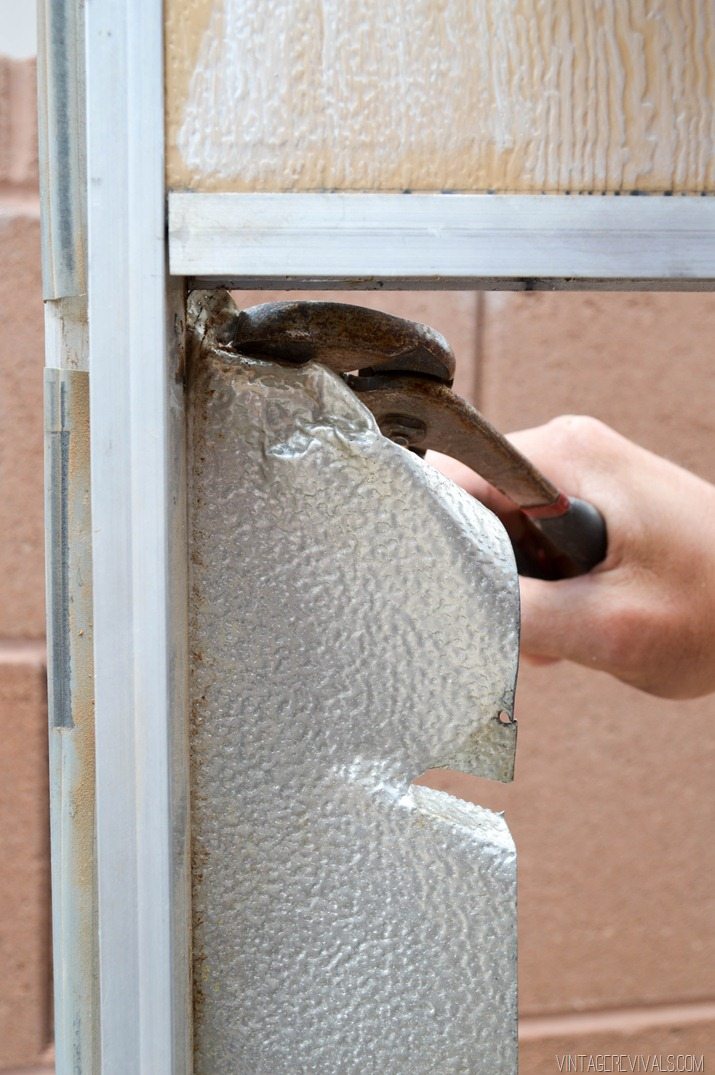
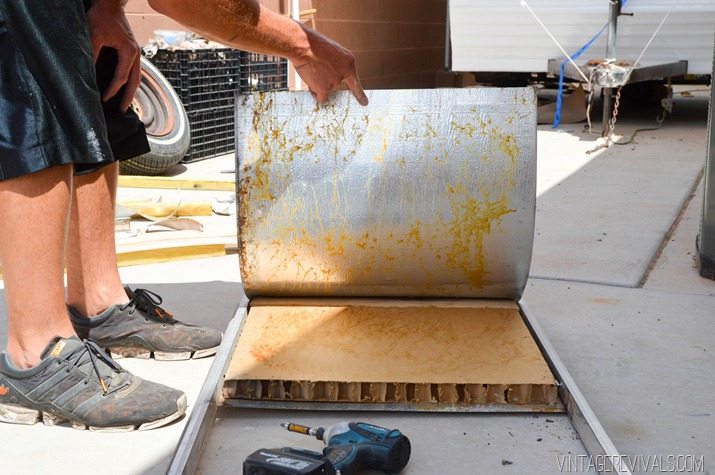
That was plan #1. From what we could tell, the door frame was in 2 pieces, an outer frame (that you could see) and then an inner piece that pushed the aluminum flush to the outer frame. So I thought it would be a great idea to take the door apart and find out. (Do you know where this is going?)
Its going here.
And here.
And here.
Oh, and of course here.
And then it took severe left turn into a brick wall and exploded.
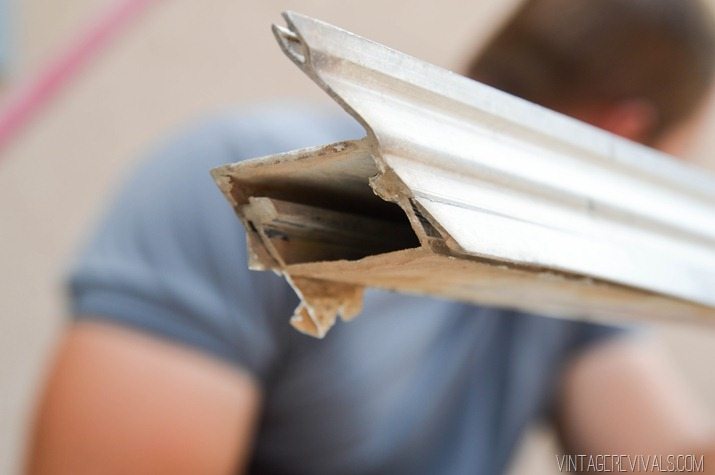
The frame was in fact not 2 pieces, just 1.
So we figured that we were this far into it. We might as well try to use the table saw to cut a bigger groove in it (in hopes of fitting 1/8” ply inside) which just might have worked if Court didn’t accidentally cut through the entire lower 1/3 of the frame.
That was fun. Its not everyday that you get to ruin something irreplaceable.
In hindsight I would totally have just taken the door off and sold it on Ebay. But you know. Sometimes you just have to try and see if what you have in your mind is even possible. You know?
Now that we weren’t working in the parameters of the old door, and could truly do whatever, I decided that a mid century esq door would be just the ticket.
The original plan (well…the second original plan) was to make a Dutch door because that would be FREAKING AMAZING. But it was not to be. The hinges were built into the actual door frame and that was not something that we were willing to replace. So a simple single door was the winner! (But mark my words. A Dutch door IS in my future.)
Before we go any further lets chat about weight, because that is the biggest factor that you have working against you while you are working on a trailer. The original door was surprisingly heavy because of the thick glass window. (We decided to use light weight plexi for our windows) but we still wanted to make the door as lightweight as possible, so we made it hollow-ish.
To start we measured the width that the door needed to be, and subtracted 1/2” to compensate for the 2 pieces of 1/4” ply that make up the face and back of the door.
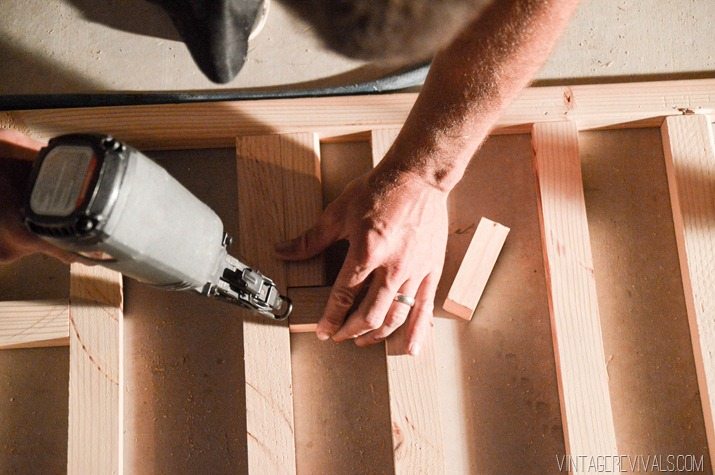
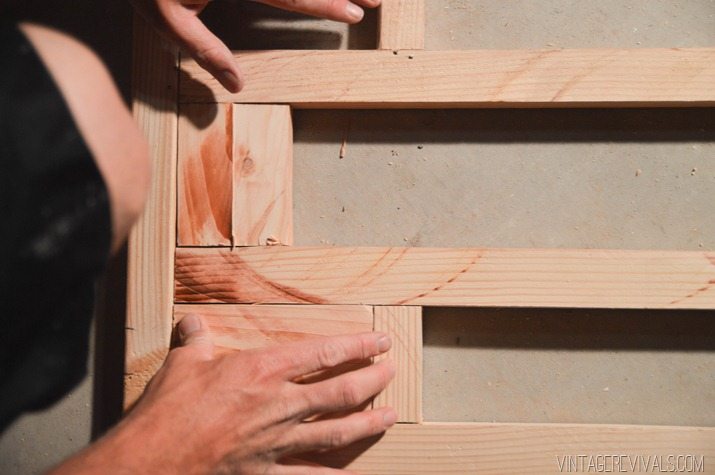
We started by building the inside frame
And then added cross pieces that made up the top and bottom of the window. We put in the small vertical pieces that makes up the other side of the window.
Last we put an extra piece where the door knob and lock goes so that it is really solid in that spot.
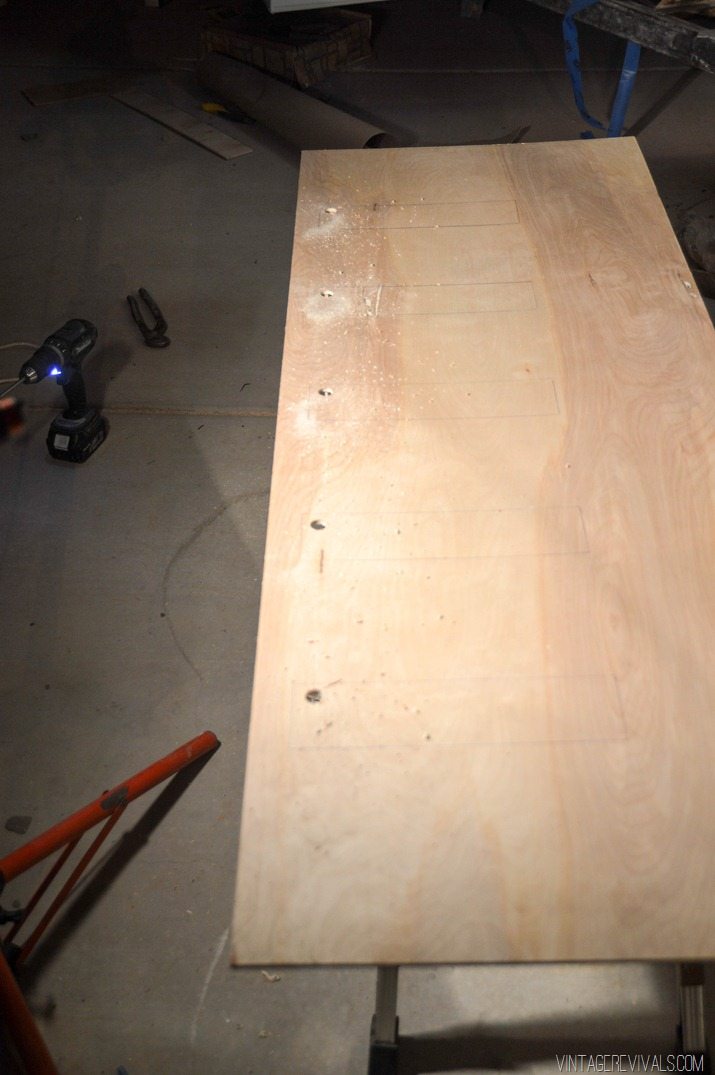
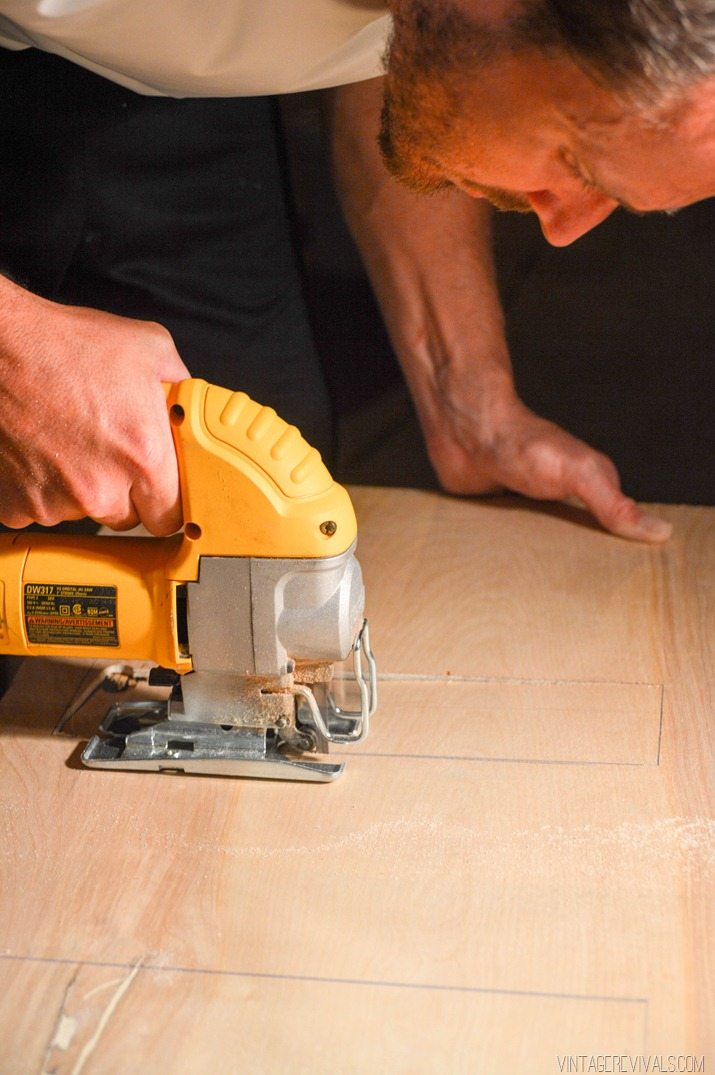
Then we measured and marked the pieces of 1/4” ply and used a jigsaw to cut the window holes out. This is our jigsaw. It is basically the 3rd member of our marriage.
(When you are doing a project like that and you want the wood to look nice I would recommend seeing of your local Home Depot carries Purebond Plywood, it is beautiful!!)
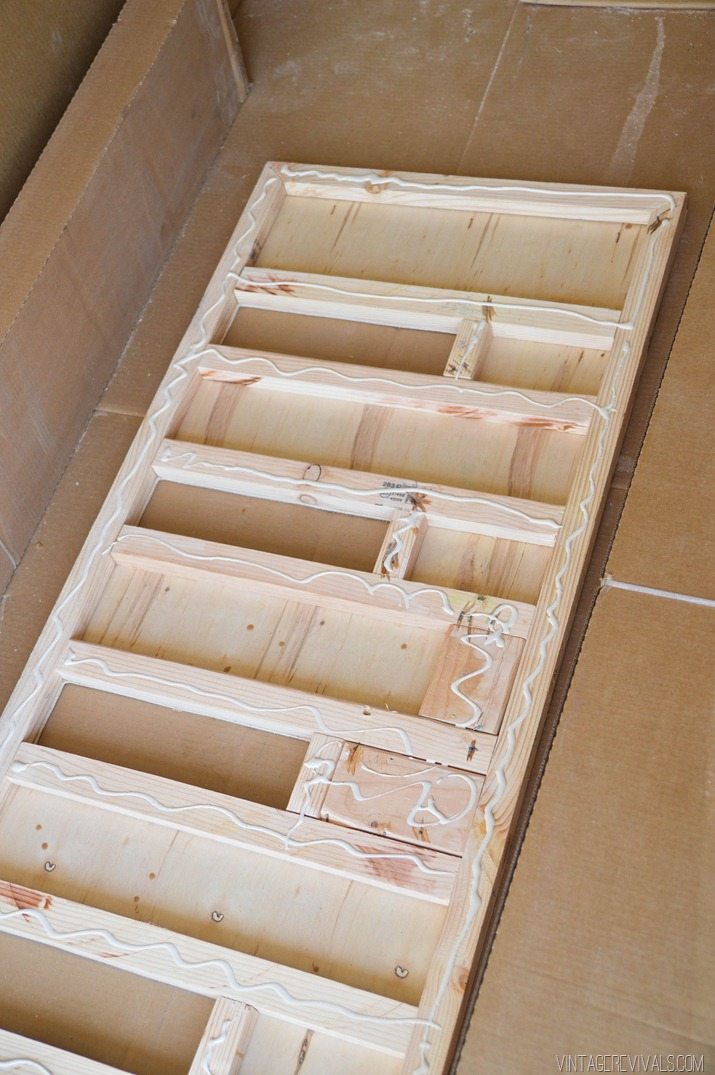
We decided that instead of nailing it on we would try our hand and gluing and that way, if it needs to be attached tighter then we could nail it. Good news, the glue is AWESOME. We used Titebond III because it is waterproof and has amazing reviews.
We glued one side and let it sit for 24 hours before we flipped it over and glued the other side.
Once everything was dry, we measured and cut the plexi for the windows with a fine blade on the jigsaw.
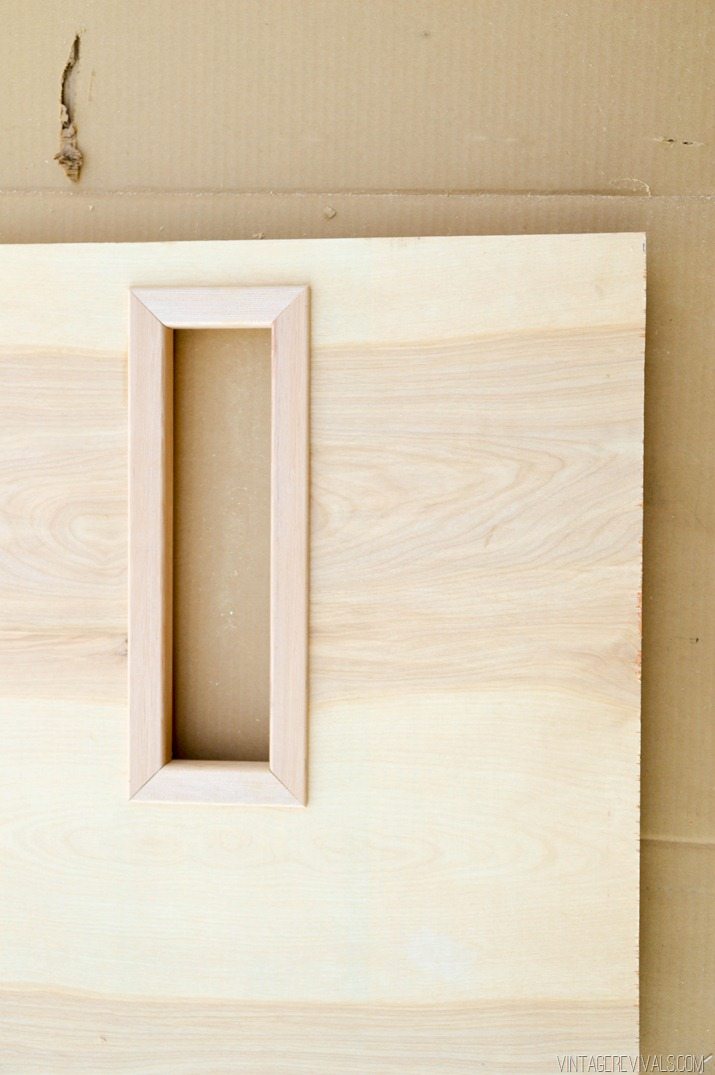
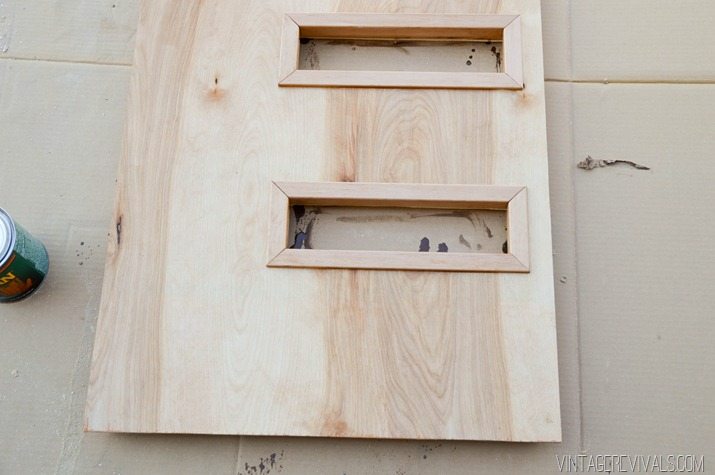
The last step was to add the window trim that actually holds the plexi in place and finishes it off.
I debated on using white PVC as trim….
But ultimately decided that even though wood would be WAY more expensive, that it was the better choice.
We measured and cut all of the pieces at 45 degrees. While we were putting the windows in we realized that we had to trim one side of the window trim down the width of a saw blade, so we really quickly (and very carefully!) ran them it through the table saw.
Before assembly we put a few coats of Helmsman Spar Urethane on the door and trim pieces. Spar Urethane is ideal for outdoor pieces and has UV protectant in it. It is really easy to work with too, so that was a bonus!
When you are working with Spar Urethane, you will want to lightly sand between coats with extra fine steel wool, and then wipe it down with a tack cloth. We did 3 coats on our door.
After everything was dry we assembled it and glued with Titebond 3.
I was SO grateful to learn that Home Depot sells a door hole drilling kit. Unfortunately because the front of the door has a 2” overhang we weren’t able to use it the way that it is intended. BUT we still used all of the parts and saved a bunch of $ buying it as a kit.
After deciding exactly where we wanted the knob, we drilled a pilot hole to get started. Then we used a 2 1/8” hole saw to bore the hole into the door.
We did this on both sides so that it didn’t tear through the back end and splinter the wood.
Then we used a 1” spade bit to drill the hole into the side of the door for the locking mechanism.
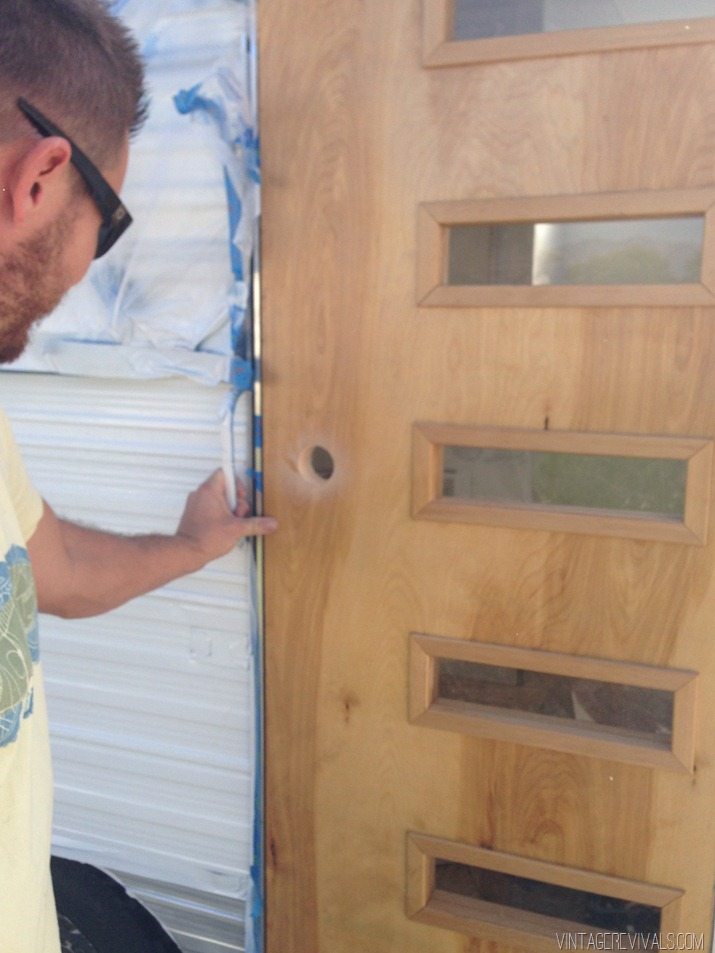
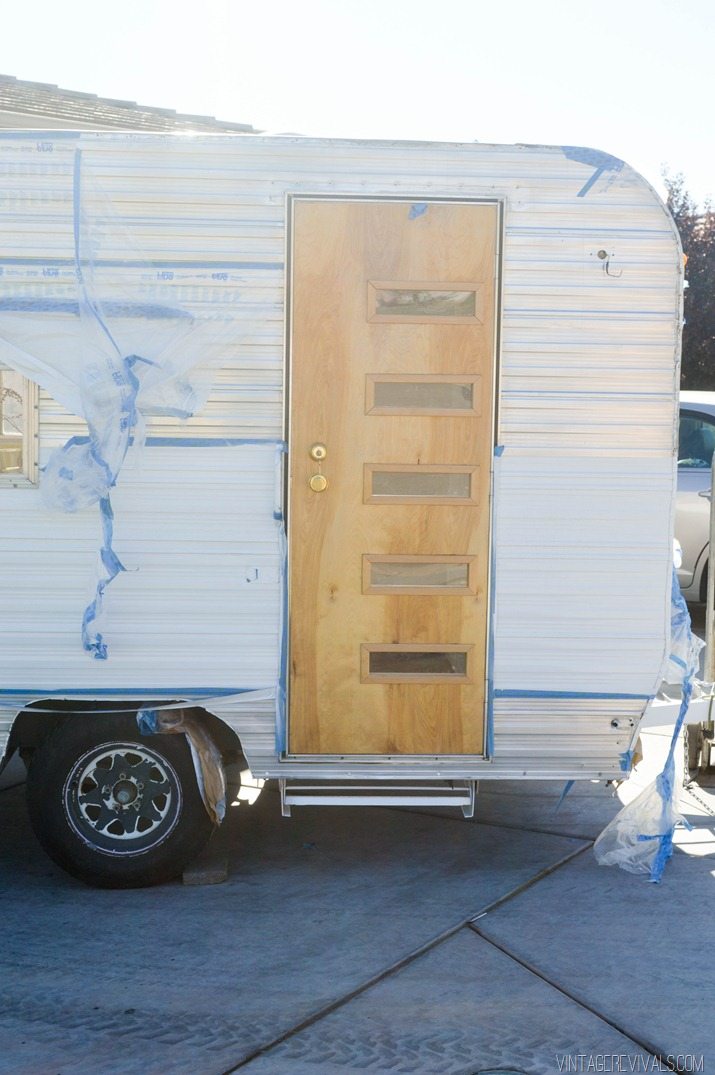
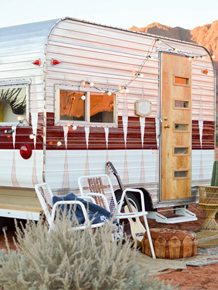
I am SO thrilled with how this door turned out! WAAAAAAAY better than the one that I had imagined originally.
I seriously want to do this on a bigger scale for my front door. I LOVE how it turned out!!







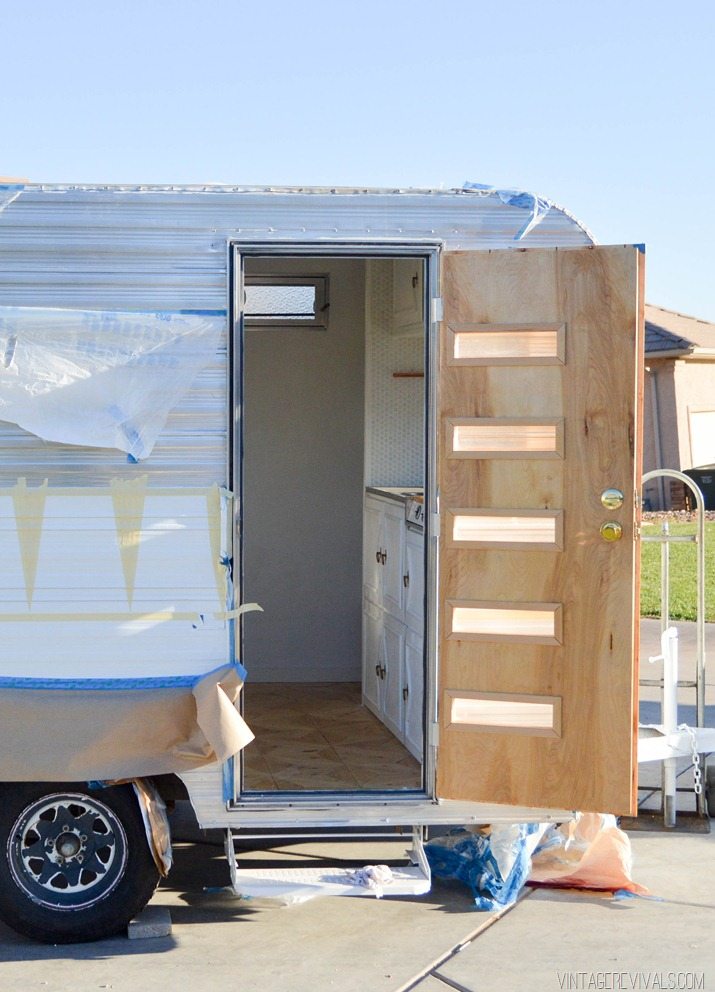




Are there any paint plans for the door? 🙂
Nope! The door is staying wood!
xo
m
Love the door. Now you have me thinking…
I freakin love this door of yours! so perfect for the nugget! and talk about complete ingenuity, creating a door from scratch. great work 🙂
wowza. that is all.
You made a door. Your made a door! Awesome. I have loved the Nugget journey and your bravery for all the tasks you and your hubby tackle – very impressive!
Wow!!!!! That is so awesome!!!!
Very Cool.. Looks great!
Wow, Looks great. Just one question, why did you offset the windows to the hinge side?
It seems like most mcm doors I see, they are toward the handle side. Or in the center.
My thoughts exactly… The window placement? Or maybe size? Just a teeny bit bigger may have balanced it out more or made it appear more like an authentic/original mcm door? Either way, so cool to have made a door from scratch (though I cringed at seeing the original ruined)!! And soooo relieved that the wood window trim was used as opposed to the white.
Another great installment on the rebirth of the Nug! As always, thanks for sharing the trials & tribulations.
Is it safe to assume the nugget has A/C? Since you won’t have the open windows and screen anymore for ventilation. And if you are in a buggy environment, you’ll have to keep the door closed. And I wonder how long the wooden door will hold up when you move the nugget. And how difficult it will be to communicate with your hubby while he’s outside grilling the steaks and you’re shut inside making the lemonade.
Sorry not to be a cheerleader, but we all have our likes and dislikes. Now I’ll go pat my house’s screen door and let it know it’s in no danger of destruction. This is a re-make, not a renovation, and I guess the nugget would have been sold for scrap if you had not taken it on. At least you are problem-solving and teaching us about which tools do what and helping us chose the ones we want. I now tour HD tool department every time i go in there and covet some “man-stuff” I never would have before subscribing to your posts. Its been very educational and I thank you. But I still hate that door.
PS
What will happen when it gets rained on?
You must have an angel for a husband. Or a saint.
Wow people…what kind of doors do you have on your homes? Mine have all been wood and they get rained, snowed, and hailed on. 3 coats of urethane is as good as 2 coats of paint. And i love the wood look, glad you chose not to paint. As to a screen or window that opens…well i will be eager to see what you come up with. You can always have a screen on the inside that is in place when the door is open….
I agree completely. Urethane will do the job perfectly. And the wood look is the best! Way better that the original door in my opinion. I’m on my way to buy the stuff to make a similar door now for my fixer trailer. I think I’m going with 4 squares. Diamonds would be nice too but I don’t trust my math skills. ? I’m keeping the original screen because I won’t have ac. That’s needs repair too but the door was I salvageable.
So creative! I love how all of this is turning out.
Oh yeah, that turned out great. Good call! We need to replace our front door too and I would love to build something like this!
SERIOUSLY!! Like, could you BE any MORE talented??!!! AMAZING. Just blew me away…right through the front door.
You guys can seriously work major magic! The whole trailer looks amazing!
Love the determination! Its amazing what guts can do! Love your blog and can’t wait for the final reveal for the nugget, and the room makeover. I keep checking every morning to see if you have revealed the final product. Cant wait to see! I have had my own journey in crafting and its a really good feeling when we step outside what we THINK we can do! Bravissimo!
This is incredible! What a fabulous tutorial! 🙂
Mandi! This is helpful, you have no idea! We own a tiny mid century built house and I’ve been wanting to replace the front door to match those of a lot of the ones in our neighborhood. Most are a lot like the one you built, some have square glass windows. Love it!
I would actually consider camping if I had this little beauty,
Wow, that door just upped the “class factor” of the Nugget. Great idea, great outcome.
Wow. Just wow.
Wow those take some skills to do that, I help build a house once and never realized how much work it was, my hat goes off to those who do this type of work
Very inspiring and great details!! My camper is in need of some major leak repairs and not sure where to start. Hoping your blog will help me out! Thanks for sharing all this beautiful hard work with such beauty!
Hey, great site I am so inspired. By any chance did you take pictures of how you did the window trim? I would love to try it out.
Very cool. Could the inside spaces have been filled with insulation before the second side put on so that the trailer could be used in cooler weather? I’m looking to refurb an old trailer myself, maybe even to live in now that I am in my dotage so any advice you have regarding weatherization of a trailer would be tres benefico.
Ditto, what everyone else has said…just purchased a 32′ RV that needs a total renovation. Don’t think I’ll be tearing out and rebuilding as much as you did because paint can do wonders. New window coverings will play a big part in my redo. My son is a carpenter/builder, and he will love doing something similar to the floor. He once did a bathroom floor using pallet material cut and beveled into about 6″x1.5″ wide pieces…beautiful. Have bookmarked your site and sent it to my son also. XO Curious about the name Nugget…where it came from?
P.S. you failed to show/tell how you installed the Plexiglas in the door…did you use two pieces, one on the inside and one on the outside? Thanks.
Mandi thanks for the info ( it took me forever to load this with my slow internet lol alot of pics), we have a work trailer that is completely falling apart because of our workers. Really liked your article.
John A,
Service Manager
Pacific Coast HVAC
How did you paint the exterior silver? spray paint? Thanks!