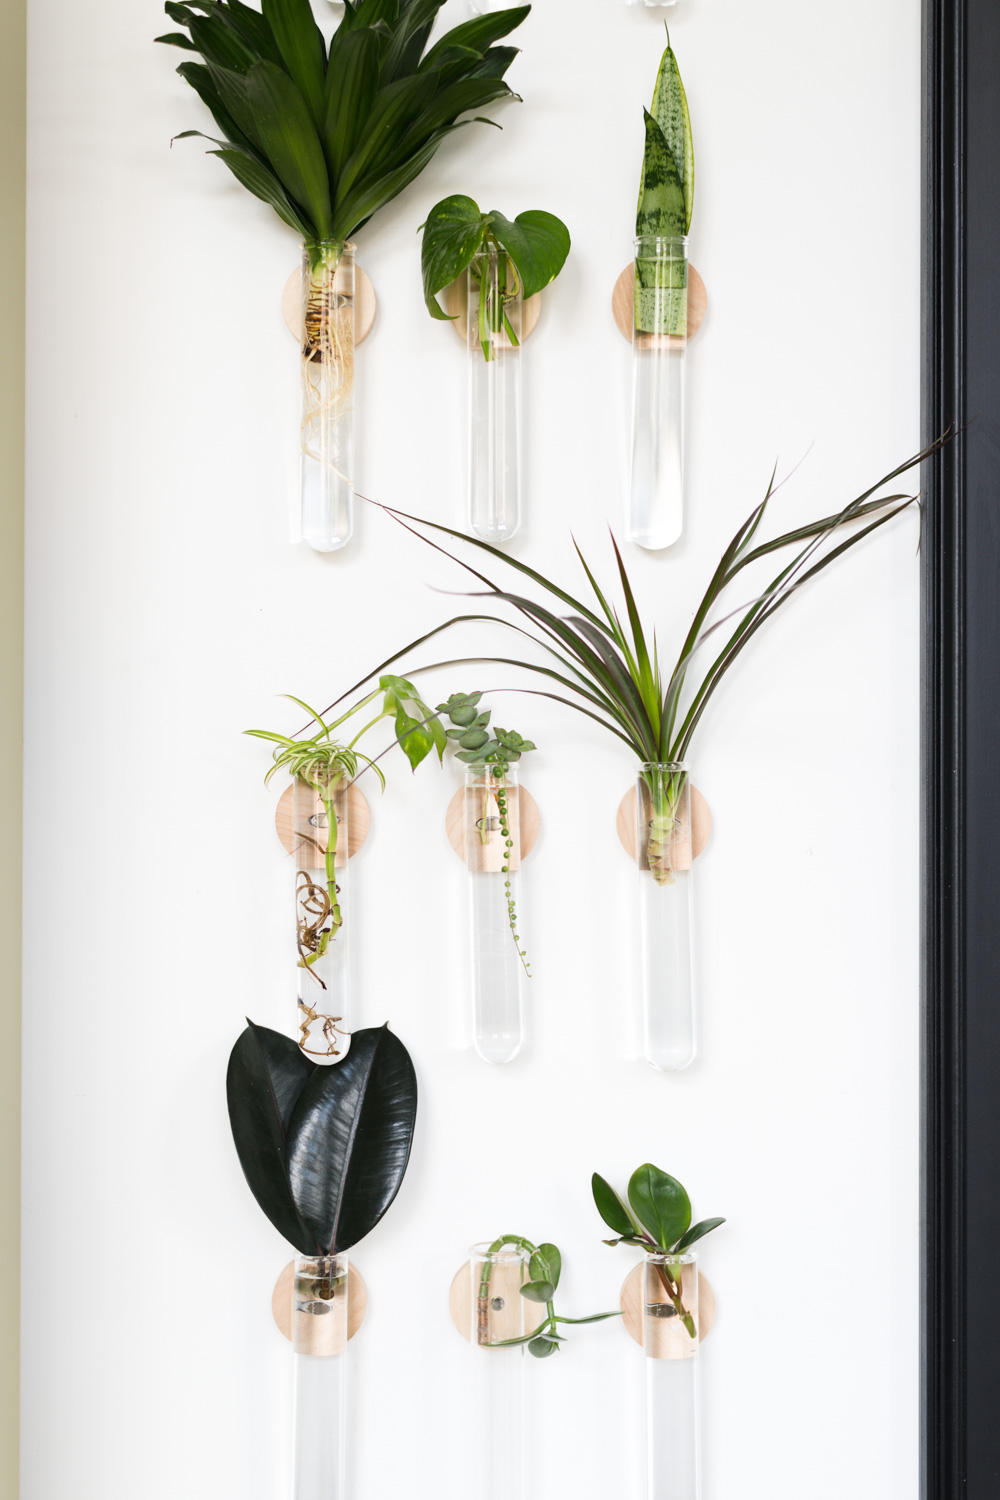
Guys. The plant obsession is taking over my life- and I’m SO HAPPY ABOUT IT!! Today’s DIY project is a modern propagation planter! You can also use it as a bud vase and a million other things. I feel a follow up post coming on.
*Just interested in buying them? Click here to go directly to our shop!!*

So lets kick this off by talking about Propagating!
What is Propagating?
Propagating is the process of taking a cutting from a plant, putting it in water or soil and over time new roots grow, thus creating a new plant! Picture taking a finger, cutting it off, placing it in a cup of water and growing a new human. I was getting some high society status points by using the word thus, but then totally killed it by talking about human fingers. Plants are cool, I am not.

A lot of propagation starts out by rooting the cutting in water. When the roots have grown a couple of inches, then you transfer it to soil. So having a clear container to see the roots can be super important. There are all different types of propagation depending on the type of plant, if you want to know more about your favorite plants and how to propagate them you can check that out here!
Keep The Water Fresh
To propagate, you need a clean container that can easily have the water replaced (you’ll want to do this every few days with your cuttings) I’ve been using cups, but they are so big that the small cuttings fall inside and it just turns into a frustrating balance game. You need something small, like a test tube And also adorable, because hello, this is your house!
Test Tube Propagation DIY Project
As I was writing the tutorial for this project I came to the realization that while the project is easy enough to make, the gear to do it is a little more expensive than I would’ve liked. (about $115 for 5 completed planters) That’s why we’ve decided to offer these pre-made plant prop stations in the Vintage Revivals Shop for a limited time! You can buy them pre-made here! As far as I know no one has ever tried a DIY and Buy option for a project, so let’s see how it goes!
If you are DIY or die like myself, here is the tutorial!

Supplies:
Wood (we use Birch Plywood)
Test Tubes (Jumbo and Medium)
Neodymium Magnets
Glass Glue
Super Glue
Painters Tape

Tools:
10mm Drill Bit
Step 1: Cut Your Discs
Start by cutting the 3″ round discs out of wood. When you’re using a hole saw, make sure that your drill is nice and vertical. Even better than a drill is a drill press! This will make it easier to drill because the teeth of the saw will hit the wood at the same time and your disc will be evenly shaped!

Step 2: Sand the Disc
This is a super important part for the finish of your disc, a light sanding along the edge makes all the difference! Use 220 grit sand paper!

Step 3: Drill the Keyhole Hanger
To get your disc to lay flush against the wall, you’ll want to use a keyhole router bit to cut the hole in the back. Use the hole that was drilled all the way through your disc when you were cutting it with the holesaw as a guide for your keyhole.

Step 4: Drill Pocket for magnets
On the face of your disk, take a drill bit that is the same size as your magnets (ours is a 10mm) and drill down the depth of 2 magnets. You can mark this depth on your drill bit by using painters tape!

Step 5: Glue 1 Magnet in the Bottom of the Pocket
Put your Super Glue inside the pocket that you just created and put one magnet inside.

Flip the disc over and put a little more glue inside the hole against the magnet from the back. Let it dry completely before coming in contact with the second magnet that you’ll be attaching to the test tube!

Step 6: Attach Magnet to Test Tube
Take your painters tape and put a small piece so that it sits flush against the lip of your test tube. Don’t wrap it all the way around the tube, you still want to be able to see through the glass. This step is super important if you are making multiples! You’ll want all of your test tubes to line up and this is a quick and easy way to make sure that all of the magnets are glued in the right spot!

* You want the magnet on the test tube and on the wooden disc to attract so make sure that you are gluing the back of the magnet to the test tube!*
Place your magnet face down and put glass glue (NOT super glue!!) on the back of it. Line the top of the magnet up with the bottom of the painters tape and let the test tube rest on top of the magnet while it dries.
Step 8: When the glass glue has cured, remove the painters tape and stick the magnets together!
TA DAAAA! You are a rockstar!! Attach a screw to the wall and hang!

The magnets wont effect the plant growth at all and you’ll be able to easily change out the water so that your little planties can thrive!


Can’t wait to see these popping up all over your house!! If you are interested in buying some, head over to the shop before they’re gone!!
Haha… I just commented on your rubber tree plant post asking about these and wa la… here is your post! These are so fun! Love them!
You are a genius! I love the design!
Love this!! so clever.
I love this! Mandi, when are we going to see Merc reveals?! I’m dying over here!
Nice but one thing missing is that you can’t root some plants in water for extended periods, or they won’t take to soil. They won’t necessarily die, but they won’t get any bigger either.