This post is in partnership with The Home Depot
Tiling is one of the most doable DIY projects there is, and I’ve tackled my fair share. This post is full of my tips and tricks, and the lessons I’ve learned along the way!
Tiling Tip #1 Get all of your supplies on your first trip to The Home Depot.
There is nothing worse than running out of adhesive, or being faced with the decision to wipe up the grout with your good towels, or let it dry before it’s cleaned off.
The supplies you will ALWAYS need when tiling are:
Tile (this is the one I used for this project!)
Adhesive (we’ll talk about which one in just a minute!)
Spacers (*depending on the type of tile!)
Microfiber Towels
Tile Saw and/or Tile Cutter
Permanent Marker or Wax Pencil
Tape Measure
Level (I always have a larger one and a small one handy!)
Flathead Screwdriver
Homer Bucket
Tiling Tip #2 Figuring Out How Much Tile You’ll Need
One of the most frustrating things to happen when you are tiling is running out, mid project. Or even worse, running out when you have 3 pieces left. (I still have a single piece of tile missing in our main bathroom because I ran out!)
Measure the sq/footage that you’ll need by measuring the height and width of where the tile will be. Then plug those numbers into Home Depot’s handy tile calculator! You simply select your tile size and it will tell you exactly how many you need to fill the space! I always add 5-10% more for pieces that need to be cut or scrapped!
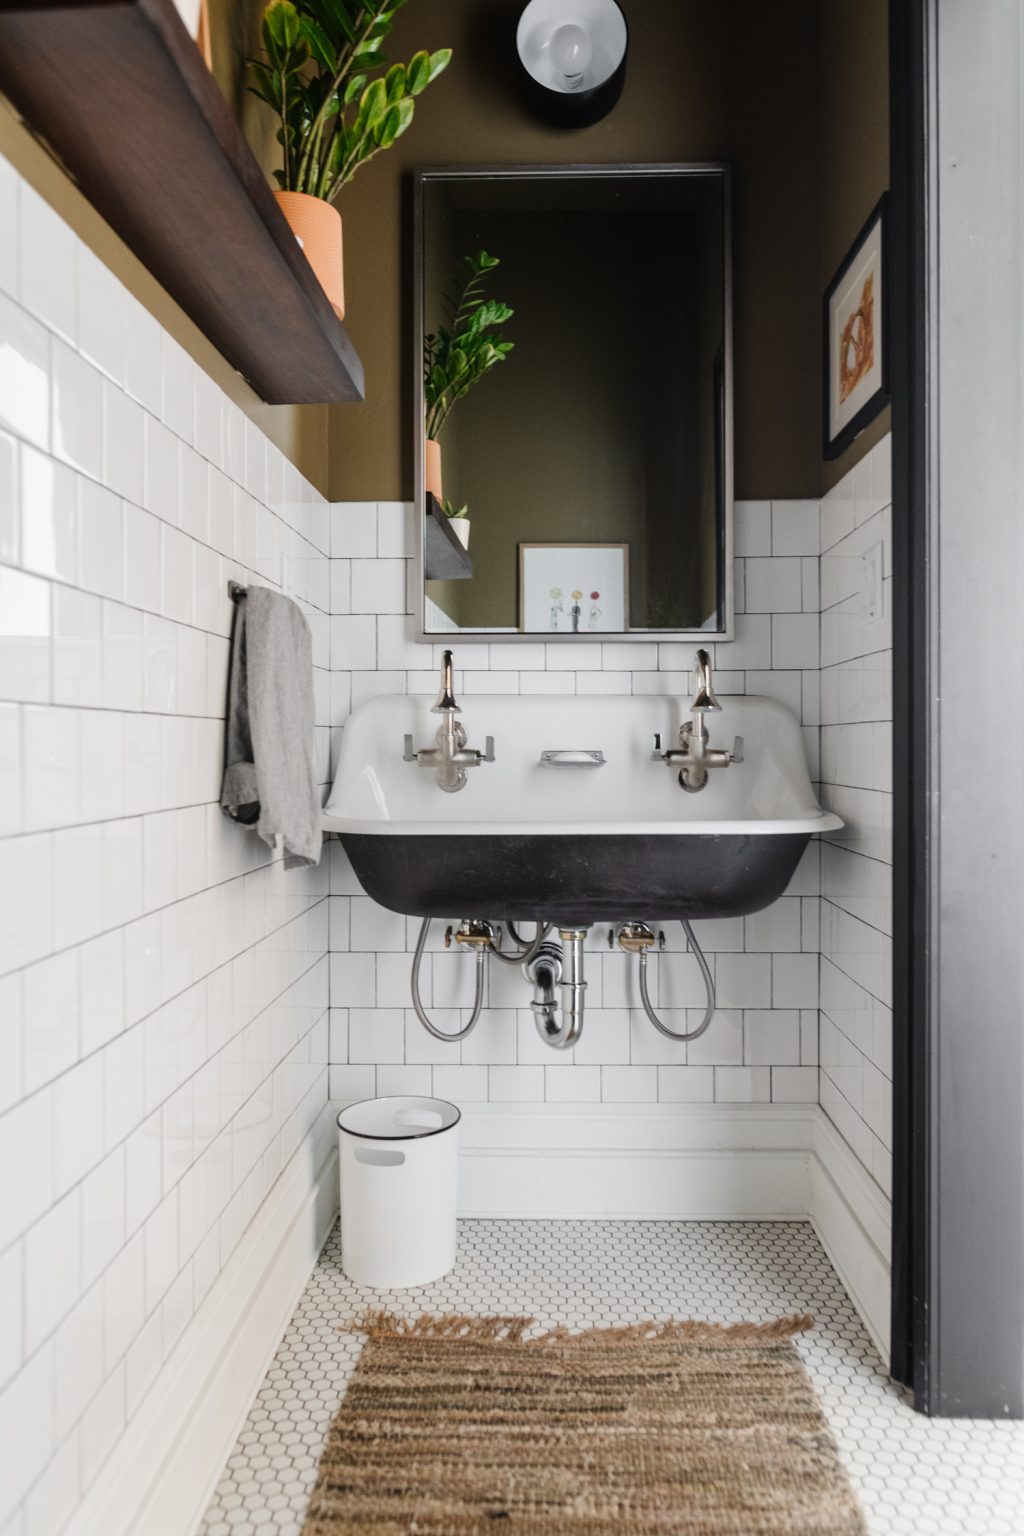
Tiling Tip #3 Start In The Middle
If you google, you’ll get mixed reviews on this one, but it is one of my non negotiables! I always always always start my first few rows of tile in the center of the wall. Here’s why.
The last thing that I want to have happen is have my tile be off centered (pay especially close attention if your tile is patterned!!) Have you ever seen a space that has a full tile on one side of the wall, and a pencil thin one on the other? It’s not a good look, and one of the biggest mistakes that rookies make.
There are 2 ways to figure out how to perfectly center your tile.
- Math. Taking the width of each tile + each grout line between each tile and divide it by the total width of the wall. It will likely be down to a fraction of an inch and IMHO has a lot of room for error.
- Start tiling in the center of the wall! Mark the exact halfway point on the wall and start there, either by centering a tile on it, or putting the grout line on it. Then work your way out. If you found the dead center of the wall, your cut for each end piece should be the same! Do this for the first few rows, then once you know what your cut should be (because you’ve measured and repeated it a couple of times, mass cut the tiles to fit!
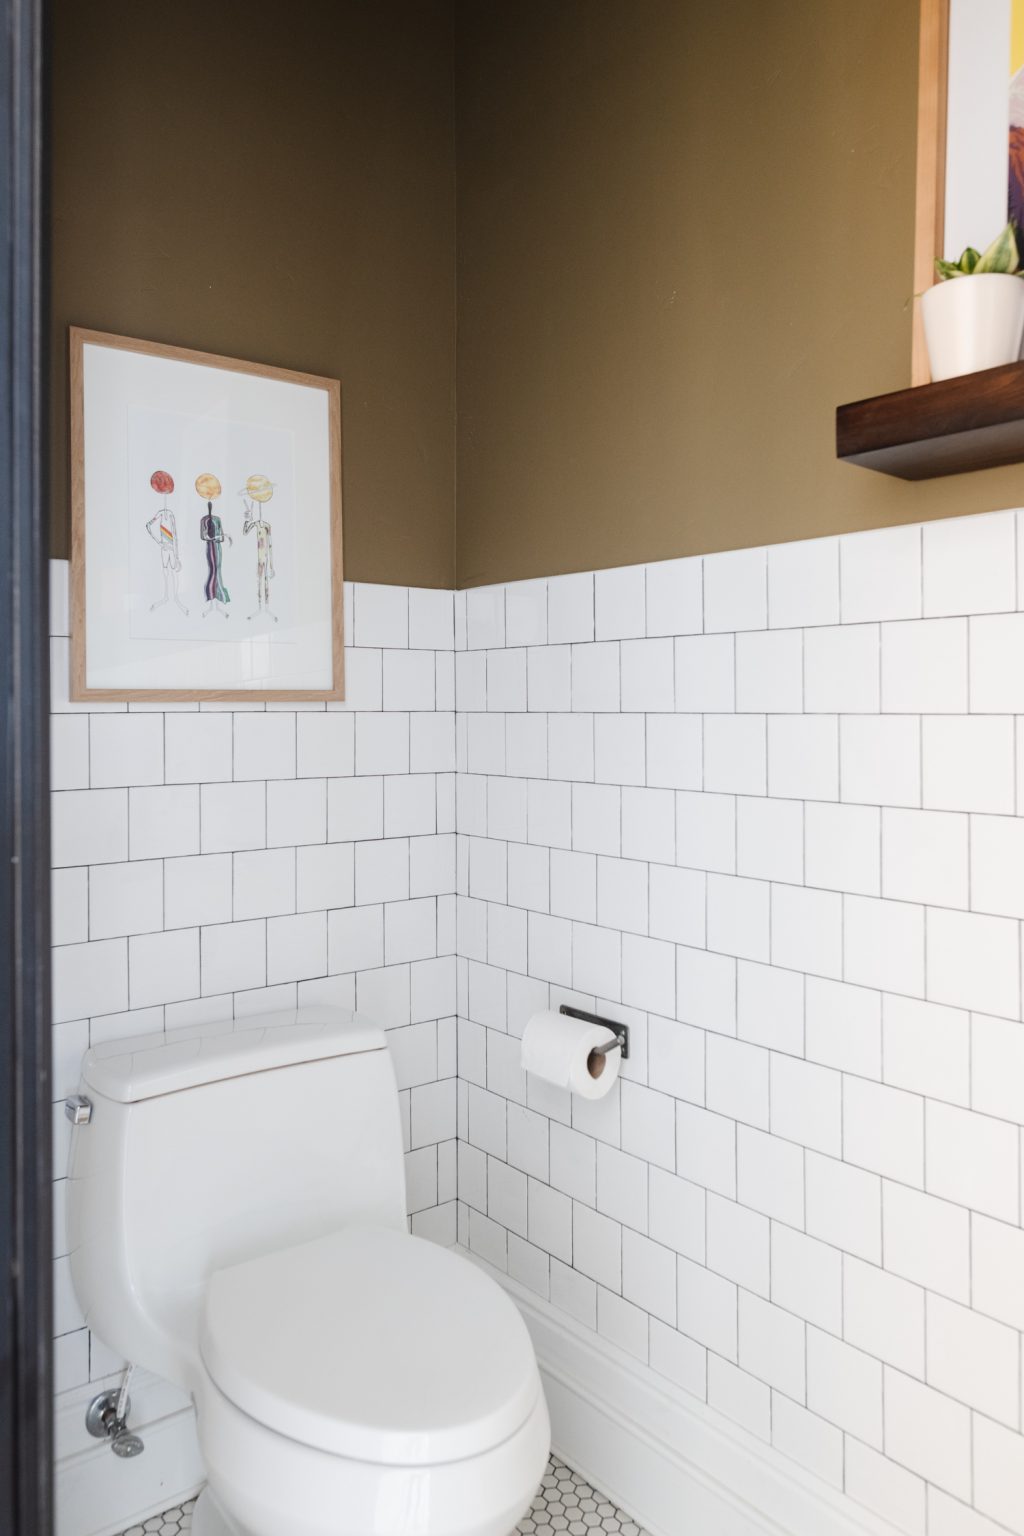
Tiling Tip #4 Pay Attention to Your Corners!
When you are doing a brick or step pattern, the way the corners meet is super important! See in the picture below how each corner has a large and small tile, but they alternate rows? It would be super weird if each line instead of having small-big or big-small had big-big or small-small.
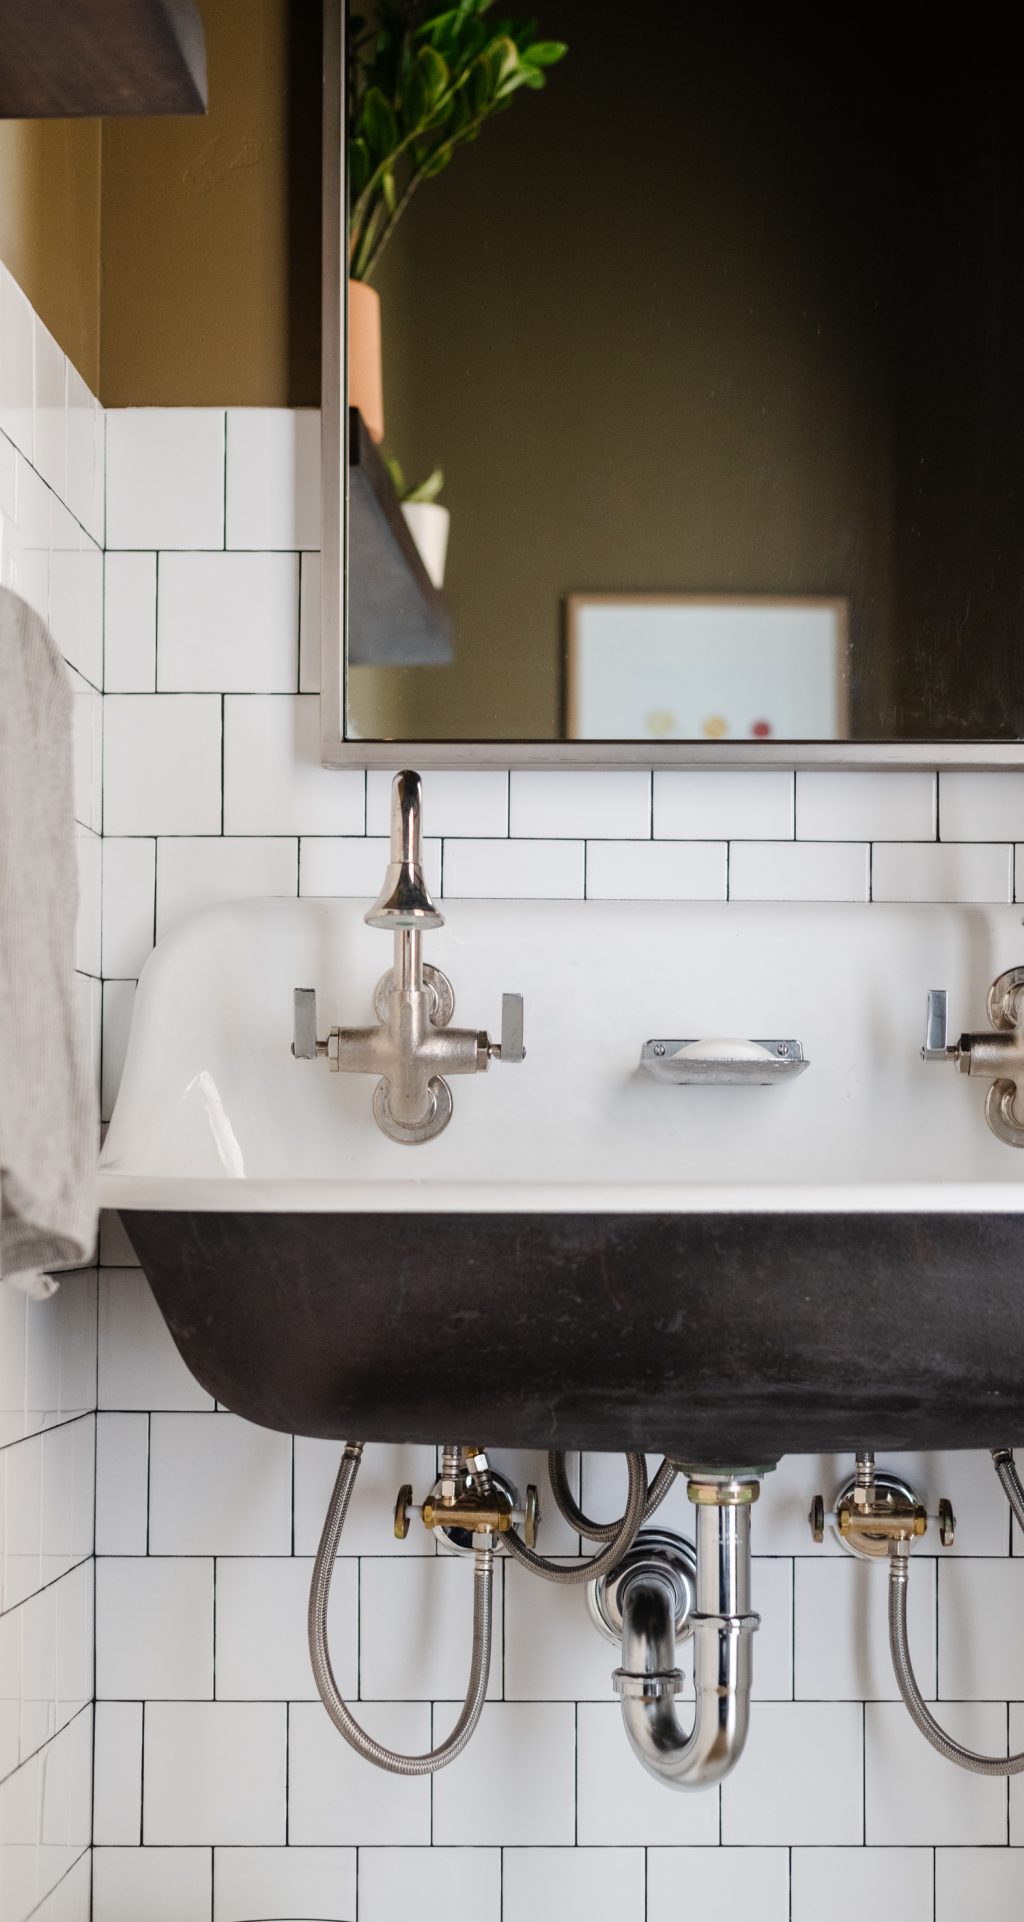
Tiling Tip #5 Regularly Wash Your Tools
Things get super gunked up when you are doing a tiling project, and keeping things manageable, also means regularly stopping to wash off the tools! For your sanity, do not skip this part. I always try to, because I’m usually in a hurry and taking 2 minutes just feels impossible. But it makes a huge difference on your sanity, and can help you have a better finish.
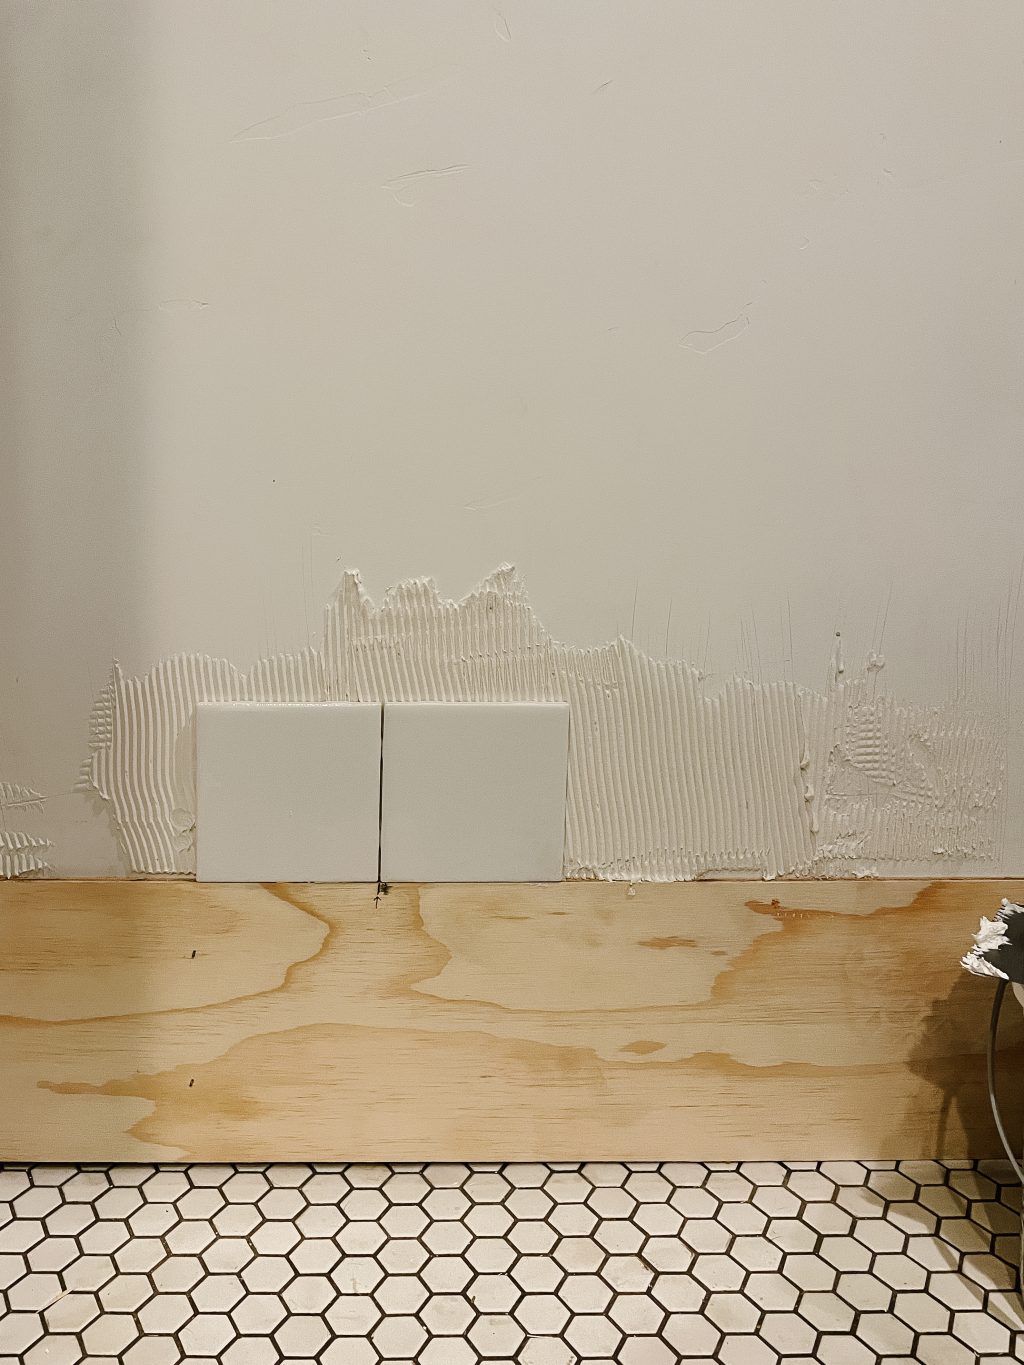
Tiling Tip #6 Prep Is Key
No one wants a crooked tile job, and there is nothing that will make you feel like the whole thing was a giant waste of time like ending up with tile that isnt level.
Don’t assume that your floor, or counter is level. Chances are that it’s not (especially your floor!!) This is where ledger boards come into play. A ledger board is a temporary support that helps you set a level tile line. You can set it into place with screws, or nails (I usually use a finish nailer) and then that is the jumping off point for the tile. It fixes any wonkiness that naturally happens in a home and will give you a perfectly level tile line!!
Tiling Tip #7 Premixed Products are THE BEST!!
I am all for saving money where you can, but using premixed adhesive and grout are a LIFE CHANGER.
Acrylpro is my go to for all things tile. It works great over sheetrock, and is approved for intermittent water exposure (like on shower walls!) And the best part is that its easy to clean up (if you get smears, drops, or are a general mess maker like me!)
For grout I am a diehard for Fusion Pro! One of the biggest things that DIY tilers struggle with is mixing the grout to just the right consistency. The grout can’t be too runny, too thick or not mixed well. All of these things can have dire impact on the ease of your job as well as the durability long term.
Fusion Pro is a single component product, which means that it comes pre-mixed (you dont even have to stir it!) It doesnt need to be sealed, and it has Microban in it to prohibit the growth of bacteria, mold, and mildew! And it comes in a range of colors.
If you are new to tiling, The Home Depot has a GREAT How To guides on their site! Quite literally everything that is DIYable, has a guide! Specifically for tile, you can learn everything from how to install wall tile, to how to install a tile floor! They even have a how to cut tile video! I am all about learning as you go, but it’s pretty smart to start with at least a base level knowledge, and I can’t think of a better place than the Home Depot for that!
You can watch this entire $150 bathroom makeover come together in this highlight reel!
I love this!! Watching you update this bathroom over stories was the inspiration I needed for my own bathroom. For the past year I have had a hard time deciding on my backsplash but once I saw your tile go up everything clicked. Thank you for being such an inspiration and showing just how doable it can be to complete these projects. I am literally headed to Home Depo to get my tile right now!!
I love the bathroom – really simple but so nice. I would love to know where you sourced that garbage container if you don’t mind sharing.
Love your work…any chance you remember what color of grout you used? It looks fantastic!
Nice blog here Also your site loads up fast What host are you using Can I get your affiliate link to your host I wish my web site loaded up as quickly as yours lol
Fantastic beat I would like to apprentice while you amend your web site how could i subscribe for a blog site The account helped me a acceptable deal I had been a little bit acquainted of this your broadcast offered bright clear concept
is so bad