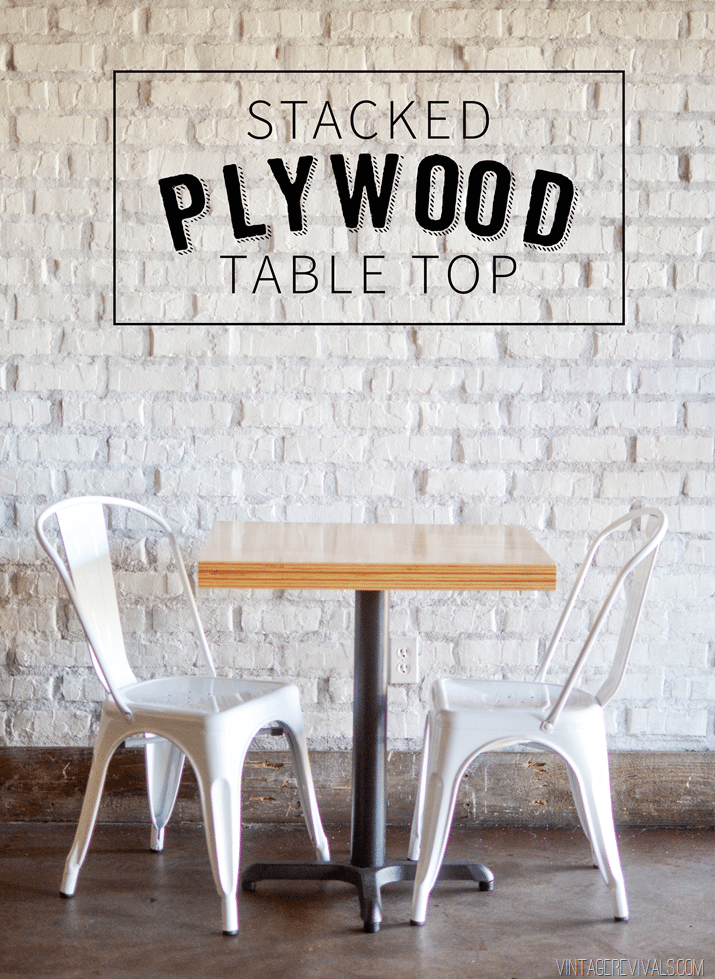
DIY Stacked Plywood Tables

By Mandi | 09/21/2015 | 19 Comments

Happy Monday my loves!! Have I got a fun and suuuuper simple project for you today! As some of you know, we’re in the process of renovating and rebranding our family restaurant Durango’s Mexican Grill. Its been quite the adventure to say the least.

DIY Stacked Plywood Tabletop_-11

One of the biggest perspective adjustments that I’ve had to make is making sure that things are restaurant worthy. Its one thing to build a table for your house that you know 5 people are going to use and its going to be wiped off once or twice a day. Its another thing entirely to build something that literally hundreds of people are going to use, that’ll be wiped off every 20 minutes. And to do it on a budget no less.

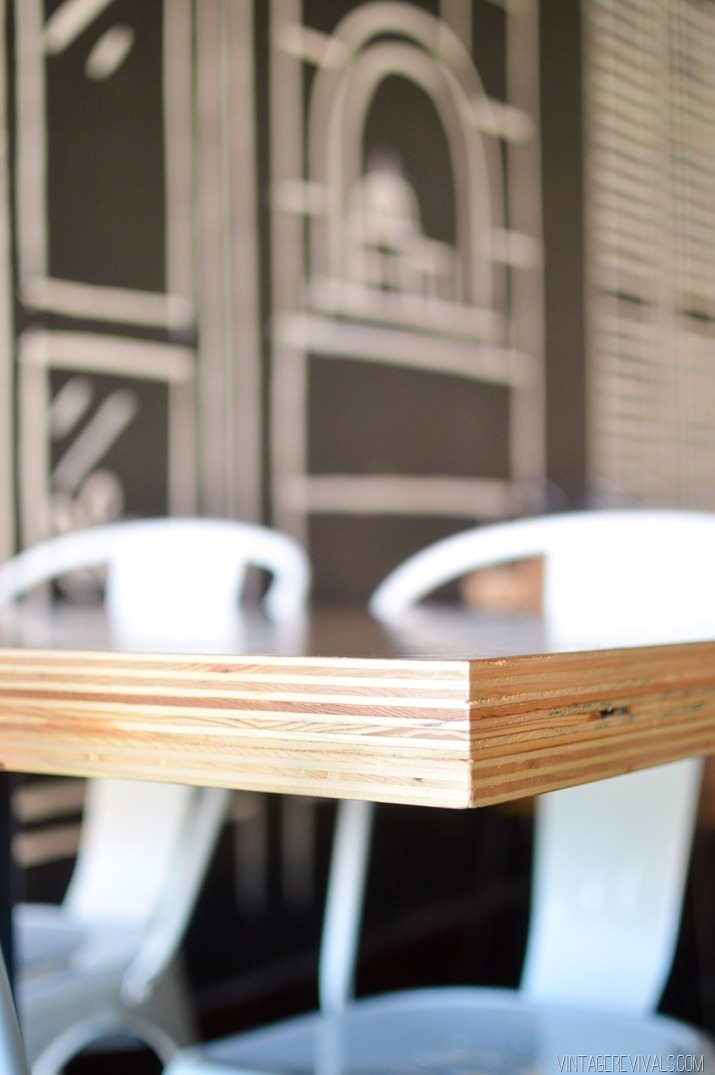
When it came to tables, I wanted something super simple and modern. Not a lot of detail, but still cool. Oh and did I mention that we needed 28? Yeahhhhh. I’d seen some really cool raw edge plywood table tops at a few restaurants in Salt Lake but I kind of felt like they were a little thin. So we took the basic idea of plywood and beefed it up (on a budget!)

DIY Stacked Plywood Tabletop Tutorial


This is TOTALLY a project that you could do for your kitchen table, coffee table, desk, shelving, basically anywhere.

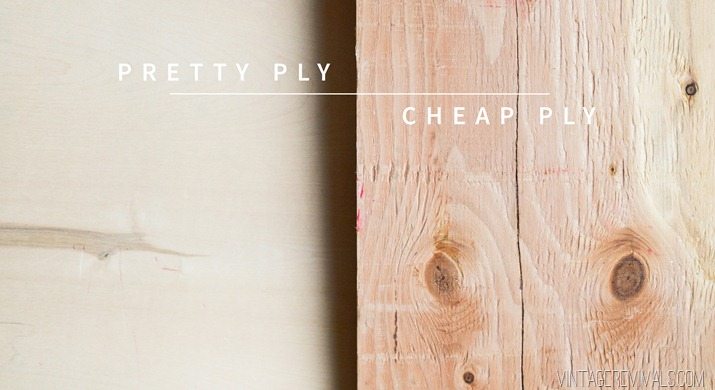
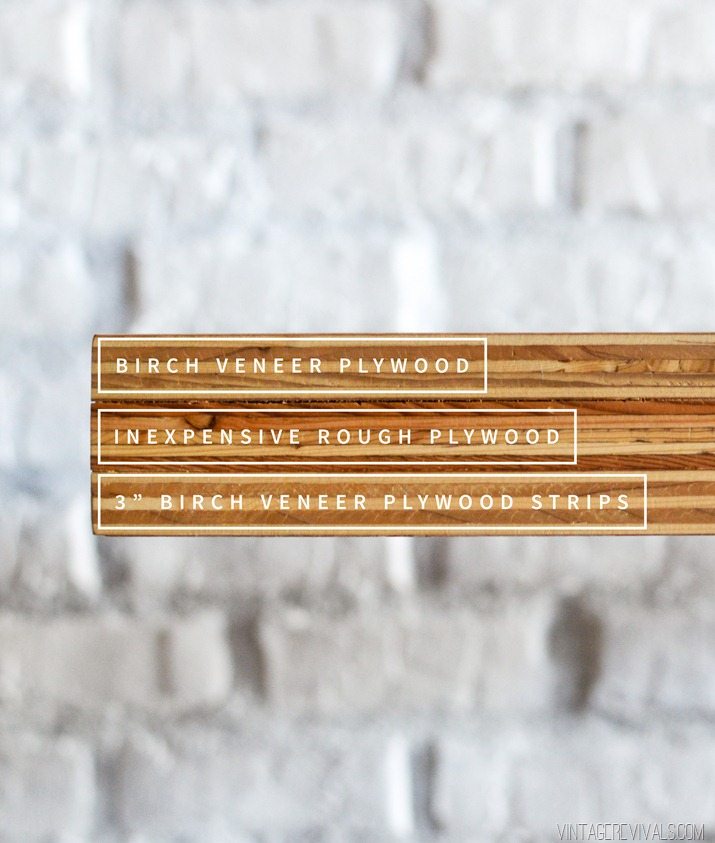
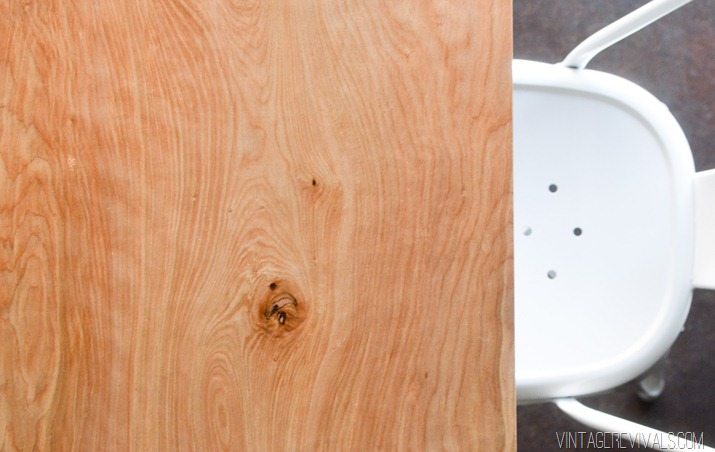
We were really driven by the budget that we had to work with so in order to keep costs as low as possible, we used 2 different types of plywood. The really nice pretty kind with a birch veneer (that runs about $50 for a 4×8 sheet) and the not so pretty kind that is rough pine (that runs about $25 for a 4×8 sheet).

DIY Stacked Plywood Tabletop_-13 copy


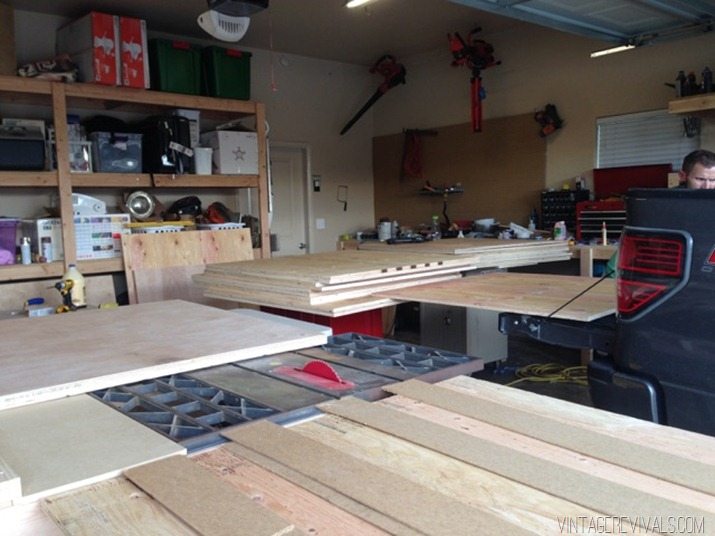
Because we were making so many, we set up a work station in our garage so that we could easily mass produce and precisely duplicate the table tops. (Hi Court!)

IMG_7740

We made 3 different sizes of table tops, but regardless of the size of your table the process is the same.

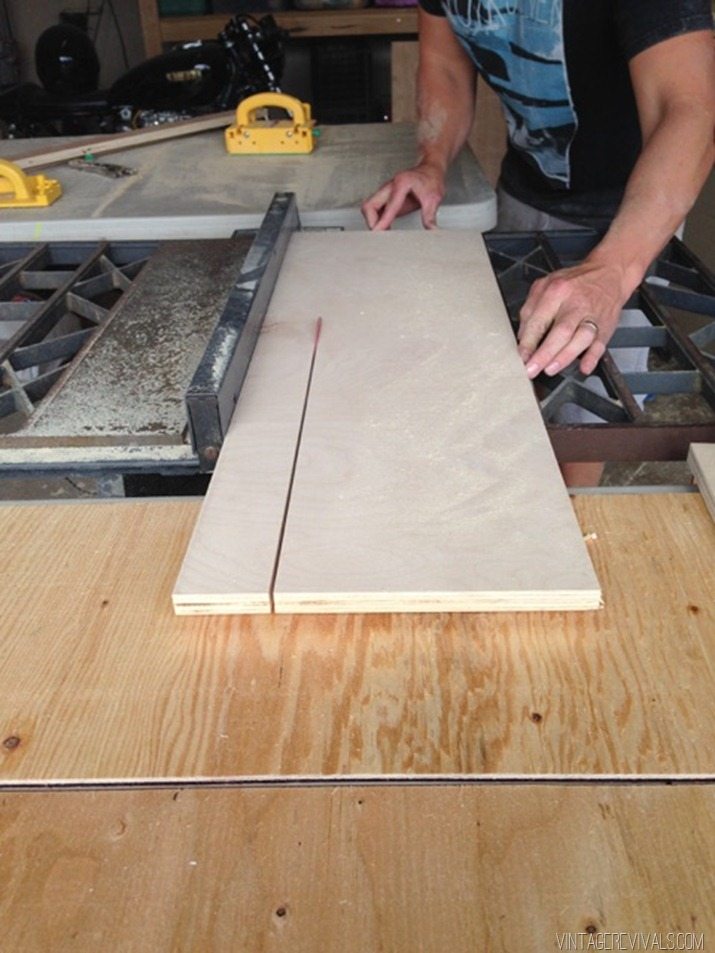
Start by cutting the desired size of your table out of both types of plywood. If its an option, you’ll want a table saw for this. You can possibly have it cut at your local hardware store, but chances are that they might not be exactly the same (just a heads up).

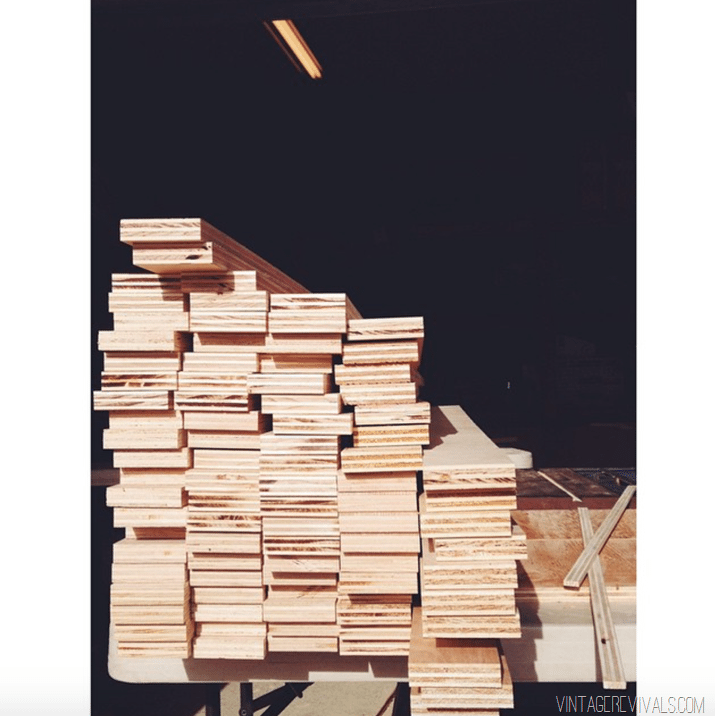
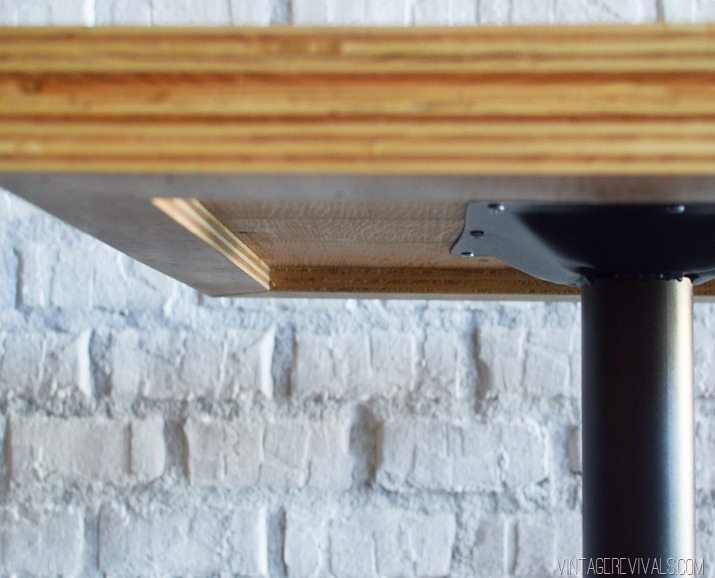
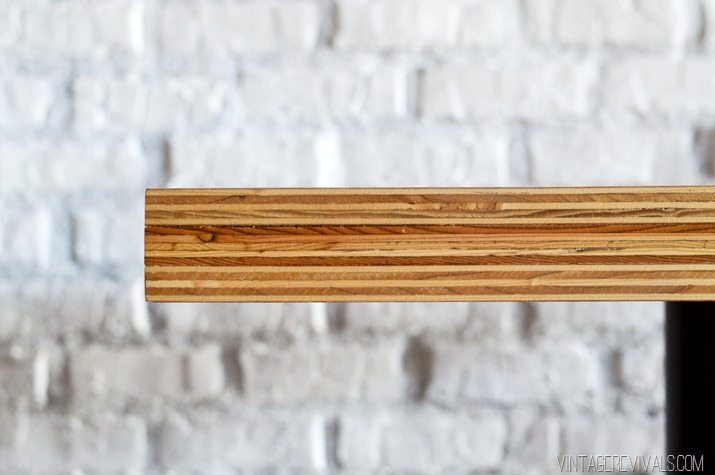
Once we had our table tops cut we used the remainder of the wood to cut 3” strips for the lip on the very bottom of the table (that way it looks like its 3 layers thick, but its really only 2).


Our GRR-RIPPER pushblocks were the perfect tools for this when the wood got small.

IMG_7811


Lots and lots of strips.

Screen Shot 2015-09-21 at 5.59.35 AM

To join the corners of these bottom pieces, we cut them at a 45 degree angle and fit the mitered edges together. (We also made sure to use the nice wood for these because I didn’t want someone to cross their legs and catch their clothing on the rough wood.)

The next step is to sandwich wood glue between the 2 large boards and set it with screws (make sure that they are long enough to catch the second piece of wood, but not too long that they go through the front of it!)

After you’ve done this step, you’ll add the lip piece on with glue and finishing nails (again so that the screws dont snag clothing).

DIY Inexpensive Stacked Wood Table

Once everything was dry and we made sure that it was completely secure and then used a belt sander on the edges to make sure that everything was smooth without rounding out the corners too much (Court did that part). Meanwhile, I used a palm sander and 400 grit sandpaper to smooth the top.

Because the durability of the finish is so critical in a restaurant scenario we had a cabinet maker spray an automotive clear coat on them for maximum durability (added bonus is that that they won’t yellow). Have you ever been in a restaurant that has sticky tables, even after they’ve been wiped off? Blech. An automotive clear coat makes that a non issue.

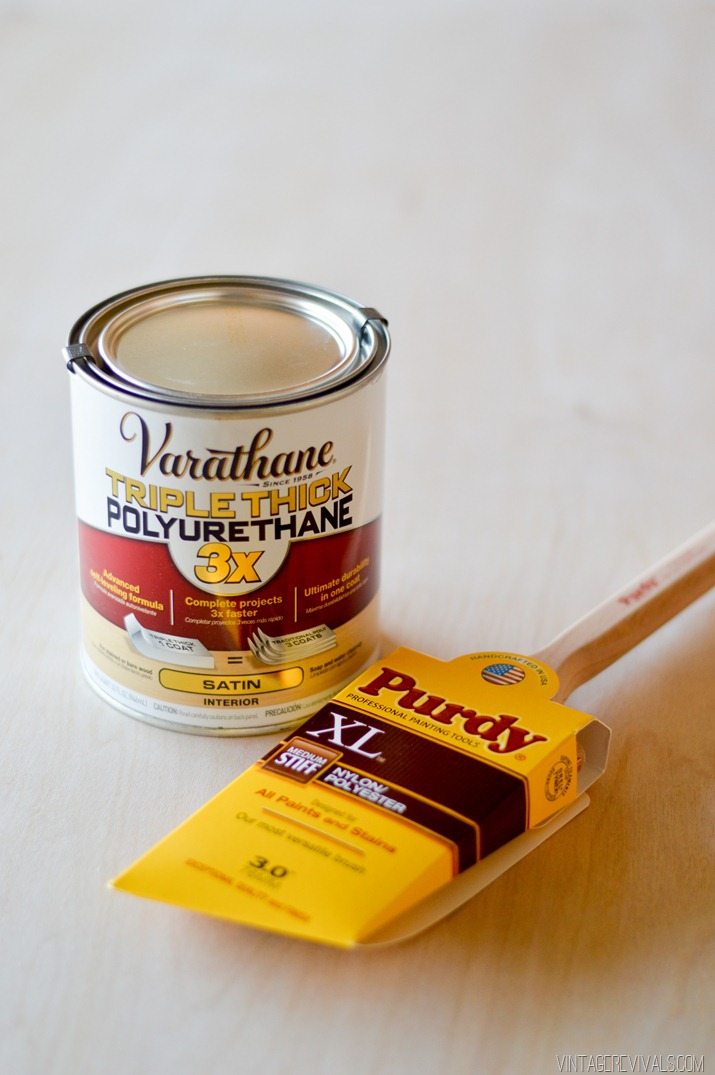
If you’re doing this project at home, you probably don’t need something that intense. My FAVORITE clear coat is Varathane Triple Thick. It is almost magical.

DIY Stacked Plywood Tabletop_-8


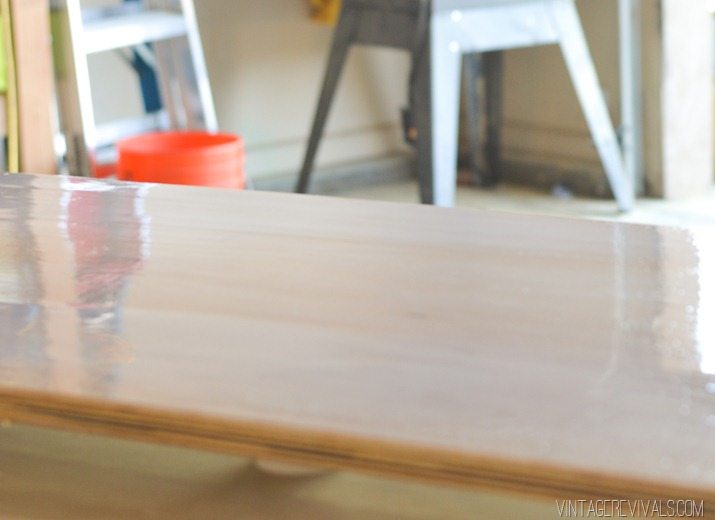
When you’re applying it, pour a fair amount onto your piece and use a Purdy brush to spread it. You want it to be nice and thick. The color will look milky until it dries. Just like with any other product that you brush on you dont want to manhandle it or you’ll possibly ruin your finish. Just brush it on and walk away until its dry.

DIY Stacked Plywood Tabletop_-10


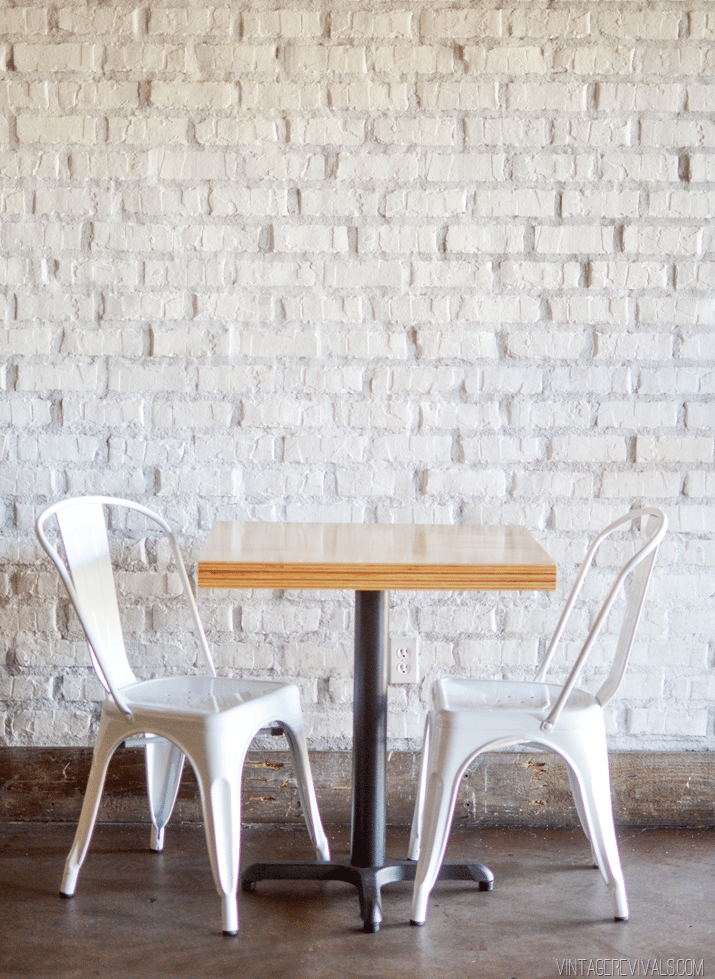
We installed our tops onto really basic matte black cafe table bases, but if you are looking for something a little bit more amazing, a conduit pipe base (like this one) would be out of this world!
DIY Stacked Plywood Tabletop_-6 DIY Stacked Plywood Tabletop_-7

DIY Stacked Plywood Tabletop_-4

DIY Stacked Plywood Tabletop_-3


We built and installed these in the restaurant in May and they are doing so well, still looking brand new!

DIY Stacked Plywood Tabletop


Cant wait for you to see what else we’ve been working on!

LoveYourGuts14

A Few Favorites!

By Mandi | 09/18/2015 | 6 Comments

Hey hey!!  This week has just flown by. I’ve been in the thick of a few room makeovers (sharing on the master starts next week!!) and I am having a hard time coming to terms with the fact that baby growing means things don’t happen as fast as they would have pre-baby growing.  Its a frustrating cycle that I’m still figuring out.  

As I mentioned in this post, coming up with a name for the baby has been our family’s favorite pastime, so I thought it would be fun to combine our bi-weekly bump shot with our favorite names from the week. Here is week 23:


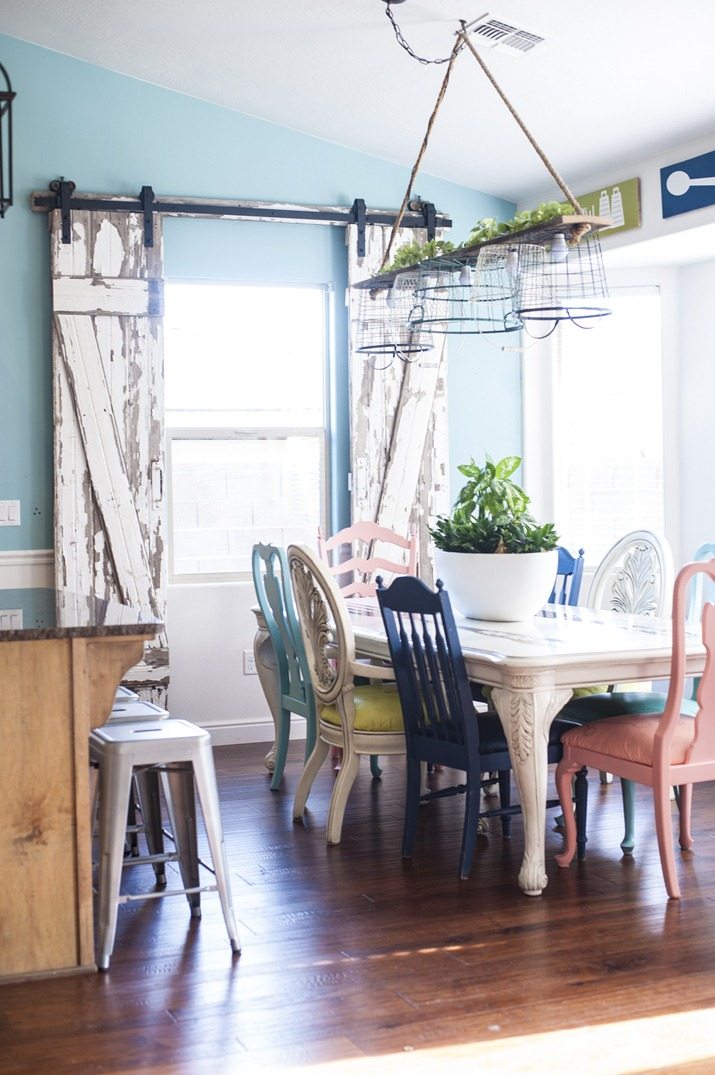
I’ve been meaning to share this forever, but have you seen the sliding barn door window treatment that Brooke did? So creative!!

White-Chippy-Double-Barn-Door


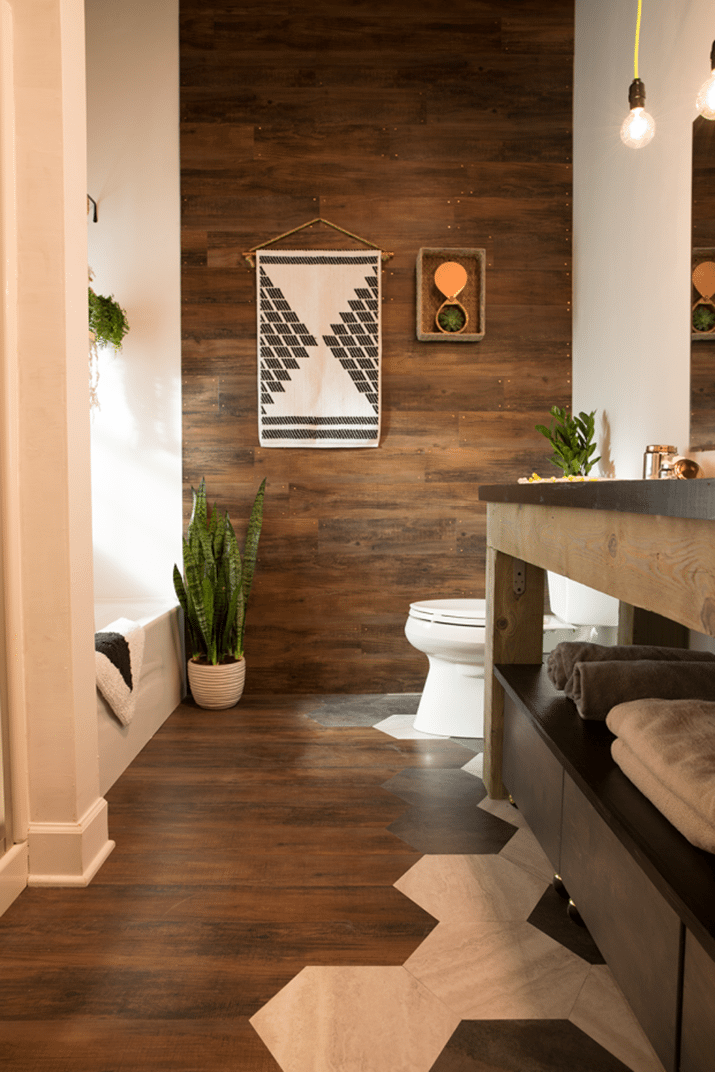
My friend Monica blew my mind with this $1000 bathroom makeover. Seriously that girl has skills. You’ve got to see the before.

CW_7332-620x930


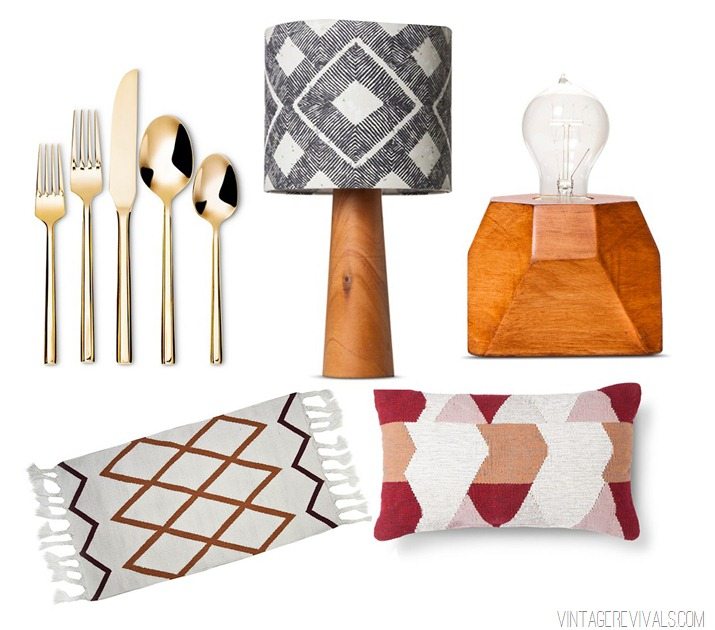
Have you seen the new Threshold line at Target?  I’m not ashamed to admit that I’ve adopted quote a few of the little guys.  Here are my favorites:

Target

Gold Utensils | Rug | Tall Wood Lamp | Geo LampKilim Pillow

They also have these great little copper candles that would be PERFECT socket covers if you are making the giant rope lights (you’ll obviously have to get all of the wax out first!).

Have an awesome weekend!!

LoveYourGuts14

Striped Ripple Wall Art and Secret Motives

By Mandi | 09/17/2015 | 18 Comments

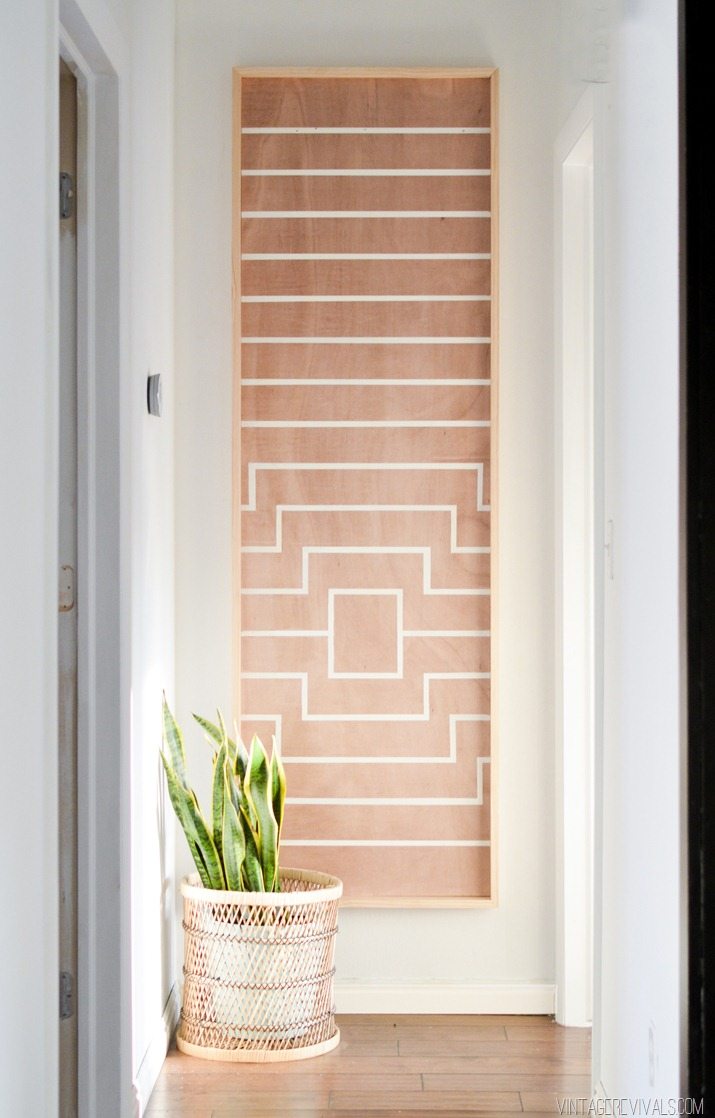
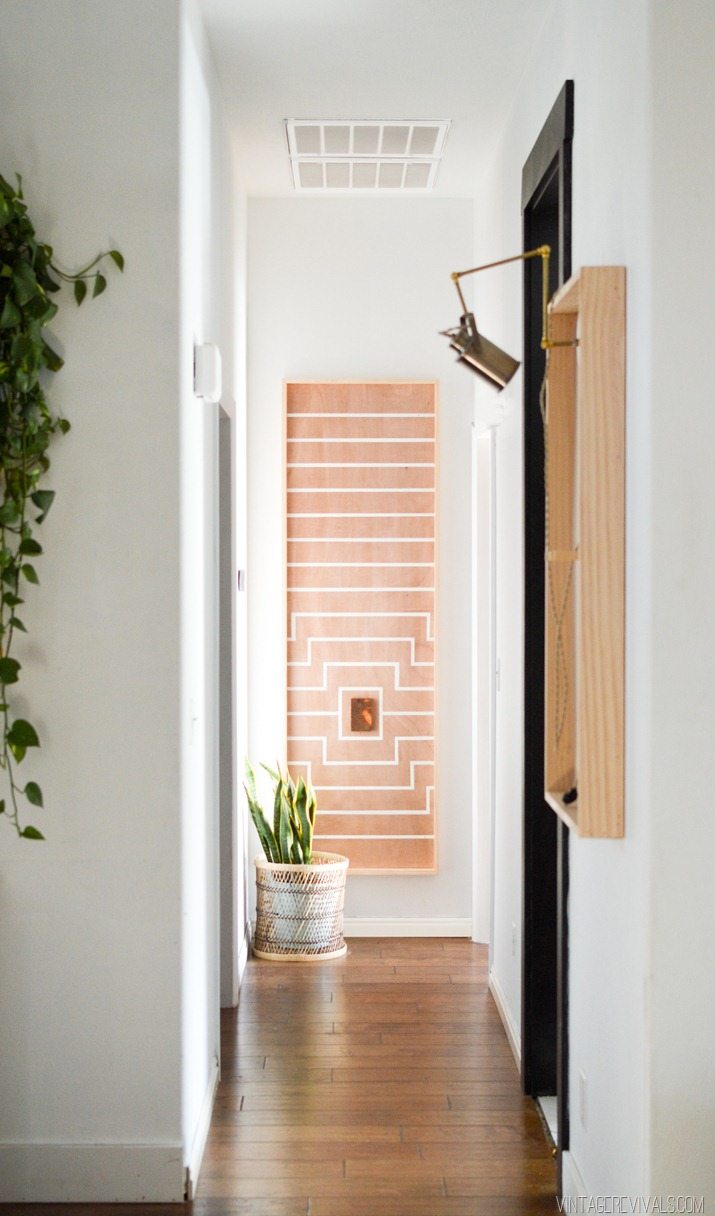
Please tell me that I am not alone in having forgotten places in my house. You know the ones that just never get any love? The hallway leading to my bedroom is totally one of those spots. Its dark, it always forgets to be painted, it never gets any art, its like the quiet geeky girl in the the 90’s movies that just needs a little makeover to shine.

Its so forgotten that I don’t even have a before picture. And I have before pictures of EVERYTHING.

So what’s a girl to do? Well, first things first.

Art.

If I’ve said it once, I’ve said it a million times. Art is hard. I wanted it to be impactful. The kind of impactful that when you catch it out of the corner of your eye from the entryway you say “Wow!…mesmerizing…I have to touch it.” & cant help but walk down the hallway to look at it. (Pssst. I have ulterior motives. I figure if I can get them in a trance and that far down the hall, when they glance in my bedroom and see all of the laundry they might feel bad and want to help me fold it. I’ll let you know if I’m on to something.)

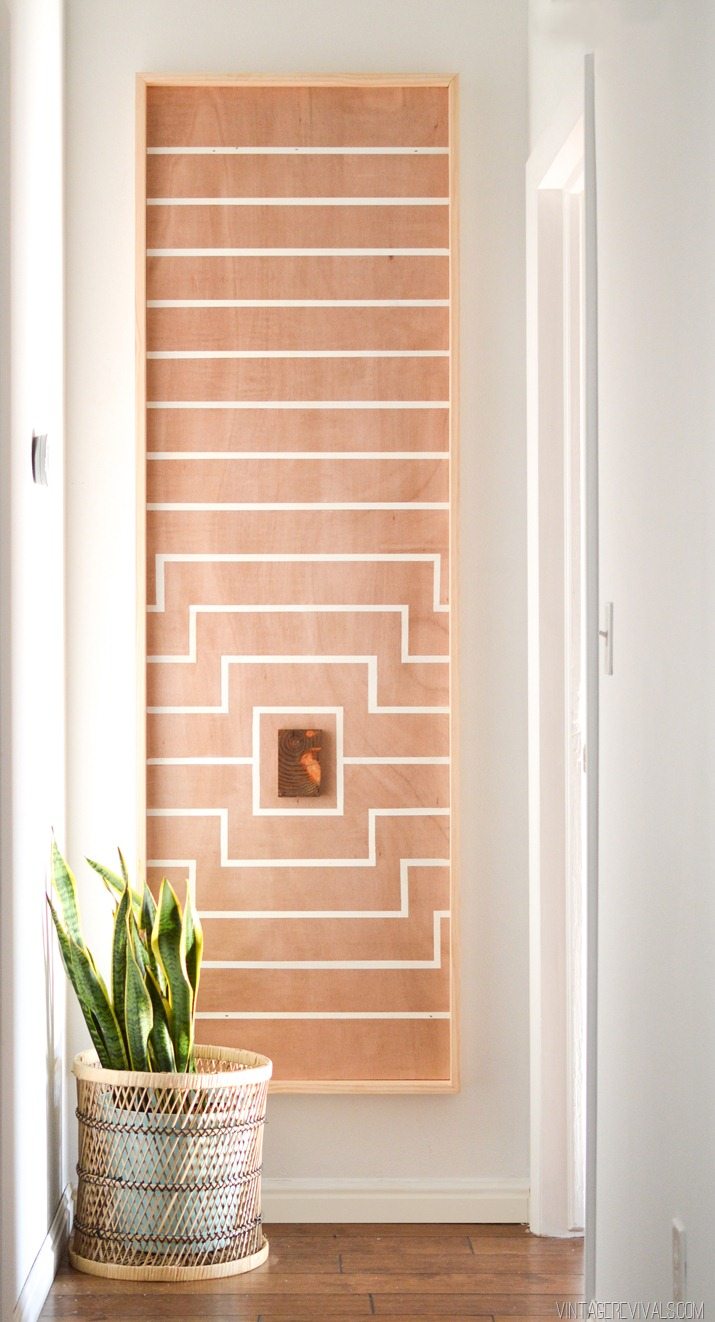
Ok so back to impactful. It needed to be BIG! Have you ever seen a 2×7 piece of art floating around Target? Not so much. Of course it needed to be DIYed. (and even if it didn’t, I would have because its my favorite.)  So I teamed up with my Scotchblue friends for this fun tutorial.

Striped Ripple Wall Art Tutorial

Here’s what you’ll need:

Plywood (cut to size) – this project was 2 feet by 7 feet
3 pieces of 1×3 boards – the length will depend on the measurement of your Ply, mine are  listed below.
A small scrap of wood
Paint in the color of your choice – this project used white
Wood Stain
Paint brush
Pencil
Ruler
Razor blade
Nail gun
ScotchBlue™ Painter’s Tape Multi-Surface with Advanced Edge-Lock™ Paint Line Protector

Note: Follow all ScotchBlue™ Painter’s Tape instructions on ScotchBlue.com for proper surface cleaning and prep, adhesion and removal.

Start by deciding the size of your art. I mapped out a few different sizes and ended up at 2’x7’. I bought a 4×8 piece of birch plywood and had the guys at Home Depot cut it down to size for me (if you have a table saw you can do that part yourself but I always think its easier to have them cut it.) I also bought (2) 1”x3”x8’ and (1) 1”x3”x6’ pieces of select pine for the outer frame.

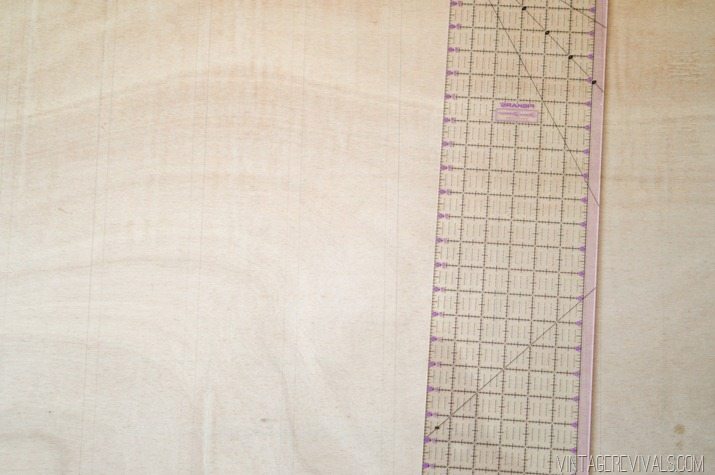
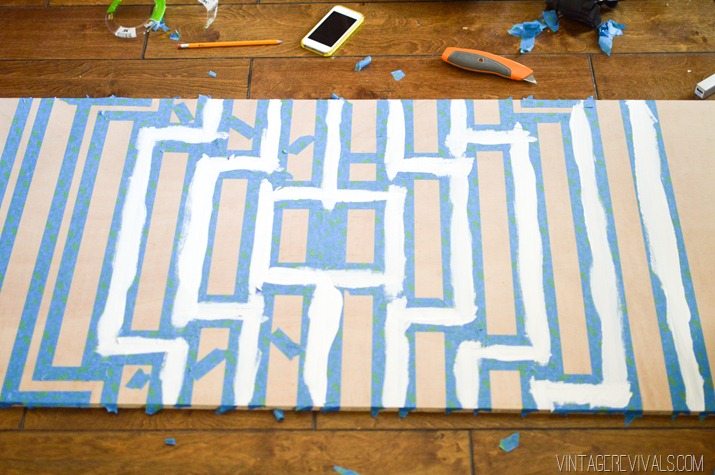
Beginning at the top of the plywood, use a pencil to mark two horizontal stripes, 1/2” apart (this will be your paint line). Repeat until you reach the bottom of the board, leaving 4 inches between each set of double lines. Do this lightly with a pencil (you’ll be erasing some of the marks so a light hand is your best friend!)  A fabric ruler makes this really easy.

Striped Ripple Wall Art


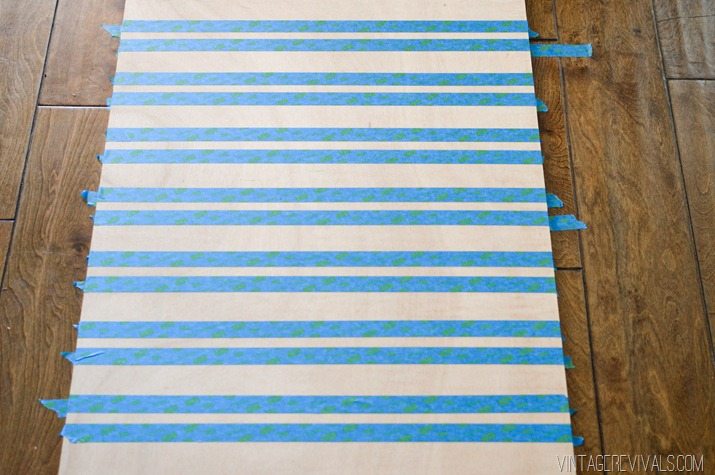
Using the lines as a guide, apply ScotchBlue™ Painter’s Tape  along the outside of the marked lines.

Striped Ripple Wall Art-2


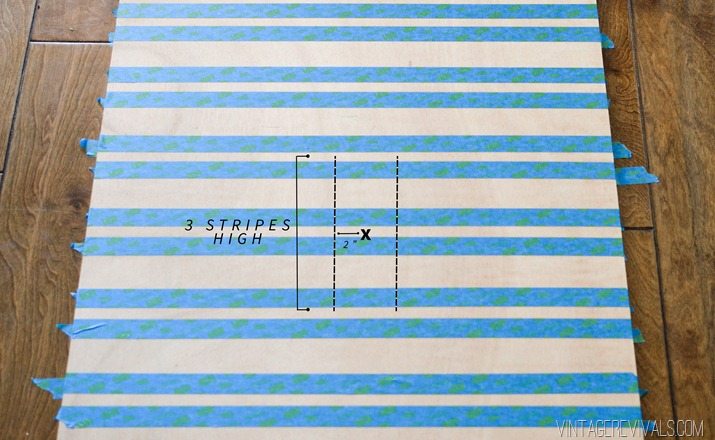
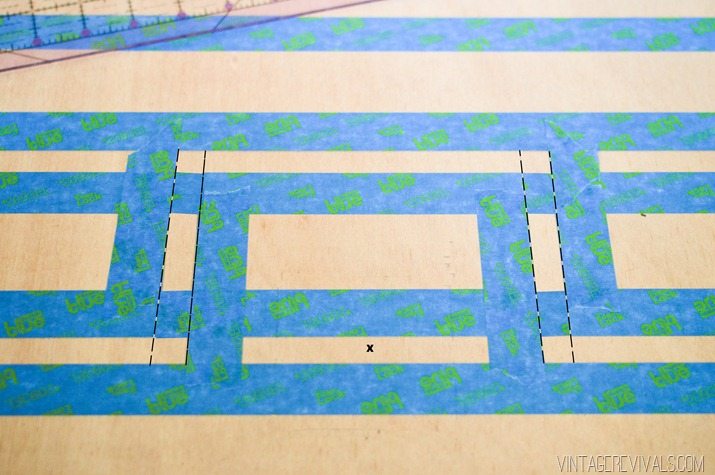
When you have your stripes taped its time to find ground zero, AKA the spot where your ripples start. Approximately three-quarters of the way down from the top of the plywood (feel free to use your own creative interpretation) use a pencil to mark the dead center between the right and left edge of your wood. Using a straight edge draw a vertical line 2 inches away from that mark on either side that extends the length of 3 taped lines. We’re going to call these vertical lines the connectors, just for clarity’s sake.

Step 2 copy


Starting at the line that you just marked (2” away from your center point)  measure 1/2” (because that is the thickness of our painted line pattern) and mark a second parallel connector line.

Step 3B


Tape on the outside edges of both of those lines.

Step 3a


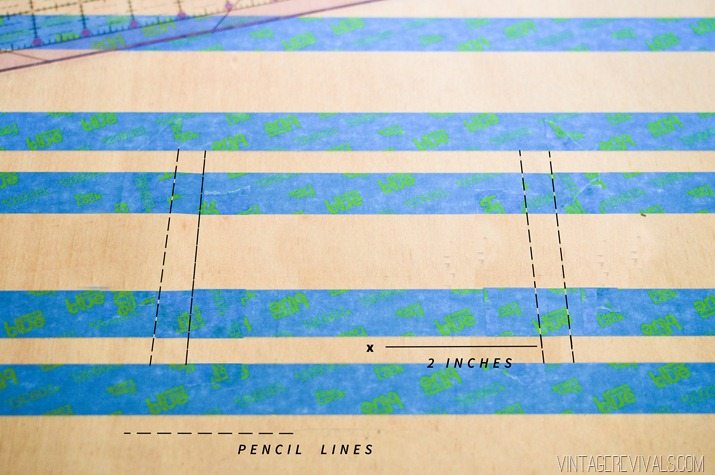
Use a razor blade to cut the tape from the original horizontal lines that crosses into the 1/2” vertical line that you’ve created. When you have the first ripple taped and cut it should look like the picture below.

Step 3


Ok, this next step might sound a little confusing but if you follow the picture AND the words, we just might pull it off!

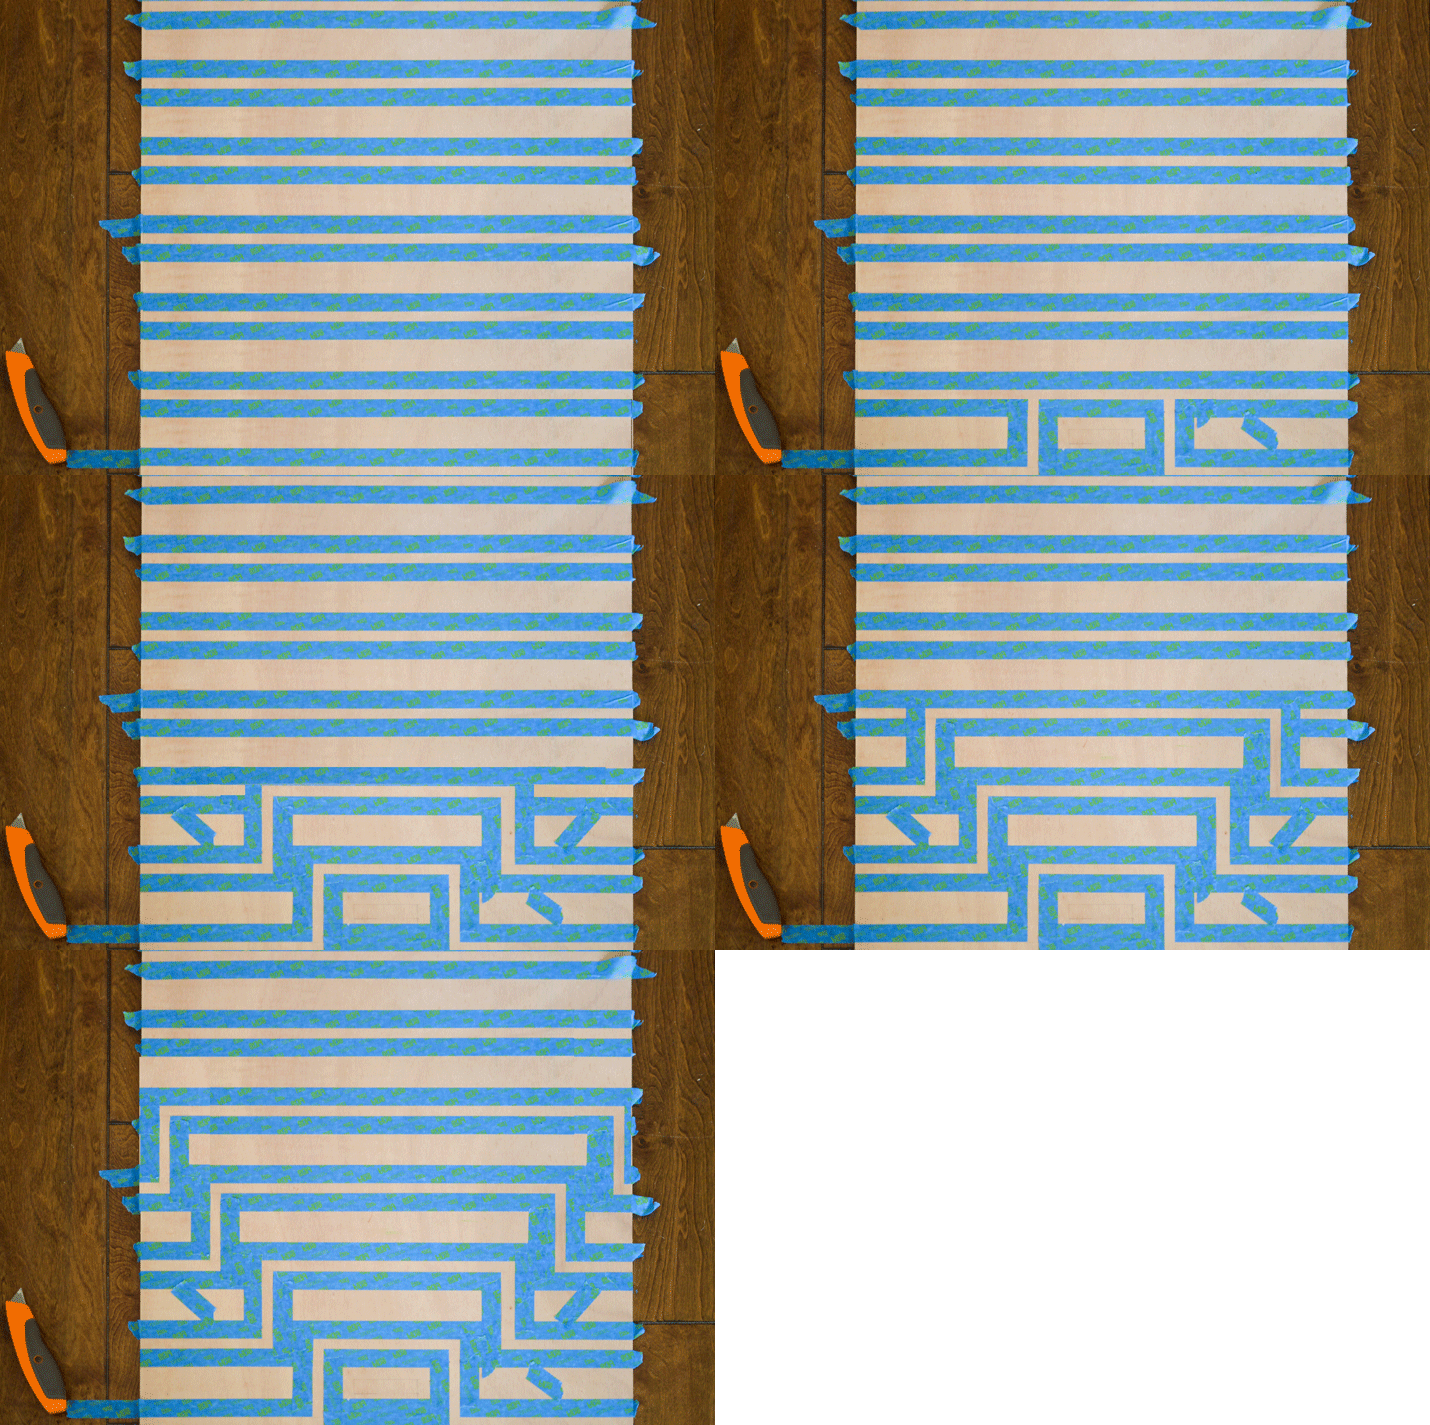
To make your next ripple you are basically going to measure and mark 2” from the outside edge of the 1st connector line that you’ve created. This will be the inside edge of your 2nd line. Draw a vertical line to the next highest taped off horizontal line. Measure 1/2” (for your design) and mark a parallel line. This is the outside edge of the 2nd connector line. Use a razor blade to remove any tape on the inside of the 1/2” space you just created. Repeat on the other side.

Step 4


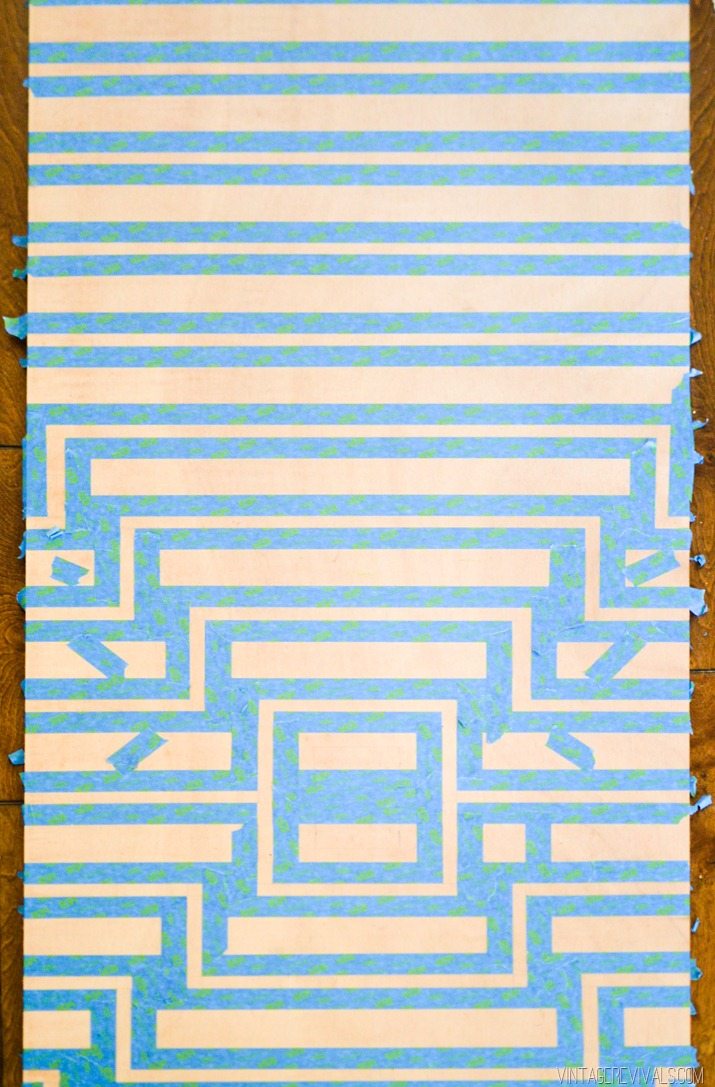
So basically, you are going to measure over 2” and shift up one section for each vertical connector line. Keep repeating this step until you reach the edge of your wood.

Ripple-GIF


Repeat on the other side (you can use your fabric ruler to match the first set of lines that you taped off).

Striped Ripple Wall Art-5


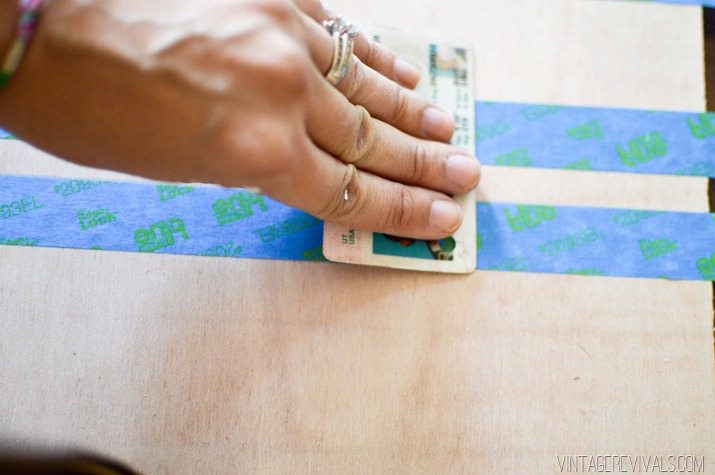
I like to use an old credit card or drivers license to seal the tape nice and tight to the wood. This will make sure that your tape will stay where its supposed to and wont bleed.


Striped Ripple Wall Art-7


Striped Ripple Wall Art-6

Paint your little heart out! There are about a million ways to make this design amazing, so use your creativity!! (Just make sure that you are painting in the right spaces, sometimes it can get confusing when you’ve been looking at it for an hour!) Once your paint is dry, pull your tape off at a 45 degree angle.

I built a really simple frame by measuring the sides and attaching 1×3’s with a nail gun.

To hang the piece on the wall we marked the studs and nailed directly through the front of the art (on the painted line so it could be touched up and hidden.)  I did this for a few reasons, I wanted the piece to be completely flush Second, this is a really big piece and the piece of mind that comes from knowing I don’t have to say “Don’t hit the art!” every time Dyl runs down the hallway is worth filling a few nail holes.

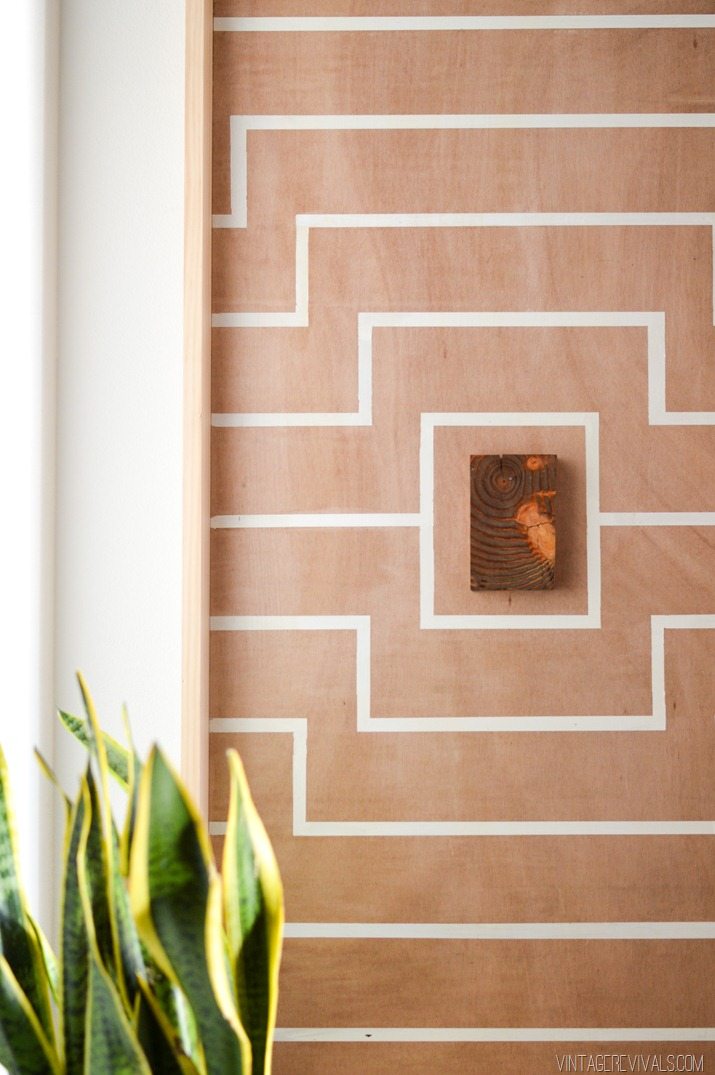
I had originally hung it without anything in the center but I felt like it needed a little oomph.

Striped Ripple Wall Art-13 copy


I grabbed a scrap piece of wood and did a quick stain job after I had cut it to size. I LOVE how it turned out. I love the quirkiness that it has with the crazy knot inside. It was just the dose of personality that the piece needed.

Striped Ripple Wall Art Tutorial

Striped Ripple Wall Art-10 Striped Ripple Wall Art Project


So what do you think? Are you mesmerized enough to come and help me do laundry?!

The hallway still needs some major love, this was like a haircut, we still need the makeup, wardrobe, and the gorgeous but sensitive popular guy to round it out. Stay tuned!

And of course I need to give a massive high five to my friends at Scotchblue for teaming up with me on this project. (They’re the best!)

LoveYourGuts14

Cold Dead Fingers // 14

By Mandi | 09/16/2015 | 3 Comments

Happy Wednesday!!  The weather here has been crazy (lots of rain and flooding) and it makes me want to wear sweats and snuggle up for a nap…every 2 hours. Needless to say, adventures on the thrifting front have been a little fruitless after my last great score. Lots of bad pressed wood and metal folding chairs for some reason.

Luckily for all of us, there are treasures popping up all over the #colddeadfingers hashtag.

I am LOVING this rattan + Navajo rug on the wall combo.  Its one of my favorite ways to change up a basic picture situation.

Speaking of rugs. Can you even handle this runner?


I am loving this $10 MCM chair and that funky drawing (it kind of reminds me of one of my uncles!)

Free chairs? Absolutely!!

Ridiculous side-of-the-road score this weekend, thanks to the treasure-spotting queen @cararosaen. A photo posted by Lindsay-Jean Hard (@linnylot) on


I love going way back in the hashtag archives and drudging up things that I may have missed, like this cabinet. If you aren’t following Cassity’s #birchhouseremodel you are sorely missing out, the ceiling are KEEEEELING me!!

Can we all just pause for a moment and oogle at this guy? Right leg people. Thats what I’d give.


Don’t forget to hashtag your favorite secondhand finds #colddeadfingers for a chance to be featured (and so that we can all be mighty jealous of your good fortune!)

The Baby Is A…. (Gender Reveal!)

By Mandi | 09/11/2015 | 43 Comments

Lets just get on with the vid, cause I know that’s why you’re really here. 🙂

Ok so guys, normally I am horrible about keeping things on the DL. Seriously, if I ever buy you a Christmas present, don’t try and guess what it is because my foolish grin and sparkly eyes will give it away every dang time. Its like playing a game of Hot and Cold with a second grader, my voice gets higher and my smile gets bigger with every step closer.

But for some reason, this secret wasn’t hard to keep. I blame it on Pinterest. Everything has to be a big to do. ESPECIALLY announcing baby situations.

We have THE BEST Dr. in St. George (Brad Thompson) and had an ultrasound at 14 weeks. We were preeeeettttty sure about the gender then, but didn’t say anything to anyone until it was officially official at 18 weeks. Then the girls were out of town and so the secret just drug on and on. The bonus is that Darcy (my talented videographer and amazing friend) and I were able to come up with a really way to tell the girls.

Cutest Gender Reveal Idea Ever

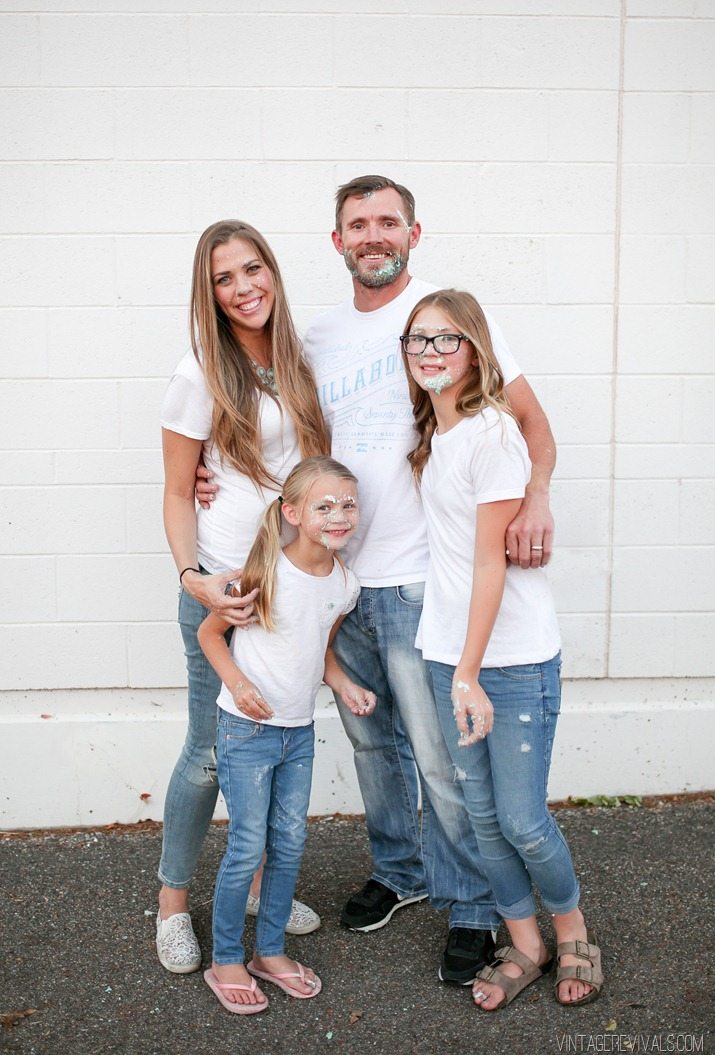
Lots of gender reveals are based around cake. Do you know why? Freaking pregnancy, that’s why. We brainstormed a million different creative ways to share the news but it just kept coming back to cake. If you’ve forgotten, cake wins everything. To make it really special we decided to do a cake smash, onto the girls. They had no idea what was happening and were totally surprised.

Cutest Gender Reveal Idea Ever-3


Even better than the cake smash though was finding out that they are having a little brother! Dylan STILL asks me if its “really real that we are having a baby brother?!”. Most conversations at our house center around names  as you will soon come to realize. (I feel like boy names are SO hard!)

mandi_babygenderreveal-7152


I cant believe its really happening, we are having a baby boy!! Everyone (especially Court) is over the moon excited. I’m a little nervous because I know nothing about boys,  I only have sisters and daughters! Its going to be a pretty big shock to our little estrogen filled life!

So right now I am knee deep in a nursery makeover (I tried to resist but my efforts were futile). Court who is normally very unopinionated about anything home decor related has some serious opinions about the little man’s space. Its adorable on every level imaginable.

mandi_babygenderreveal-7162

Cutest Gender Reveal Idea Ever-4

Screen Shot 2015-09-10 at 6.16.17 PM

Check out our pregnancy announcement video here!

LoveYourGuts14

…Its Like Disneyland for Adults

By Mandi | 09/09/2015 | 29 Comments

So this post might seem like its totally out of left field but I just have to share. There is this fine line that we get to walk as a bloggers. I get to do really cool stuff with really awesome brands but I don’t usually talk about it here. Because honestly, how do you talk about these amazing experiences without coming across as braggy or like you are just talking about something because you feel obligated? Its dang near impossible. But today I just feel like I am going to burst if I don’t finally talk. 

Confession. This is so weird.  Every time I go into a public restroom and I see the Kohler mark on the toilet or sink it makes me grin like a fool.  Seriously, do public restrooms do that to you? If they don’t, well then chances are you haven’t been to Kohler Wisconsin.

2014-07-10_Brad_05-26_JOB005866__MG_0363 1


Last October (yep, this post is almost a year in the making) I had the opportunity to attend a brand event with Kohler.  You know THE Kohler.  Like creator of the bathtub as we know it, Kohler.  Going into it I thought that it would be like any other trip, I had no idea that it would change me the way that it did.  Still, almost a year later, I think about all the time. (I actually searched the MLS listings when I got back because I want to have a little house there for during the summer.  Court thinks I am delusional because “How can he run the restaurant from Wisconsin?” Sigh.)

Kohler_-4


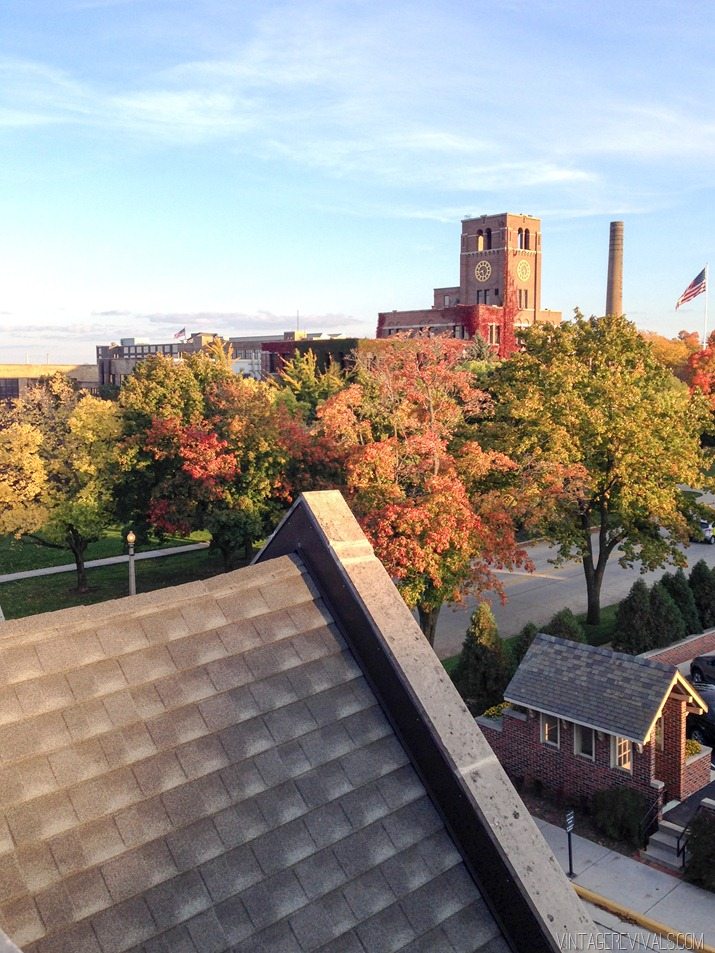
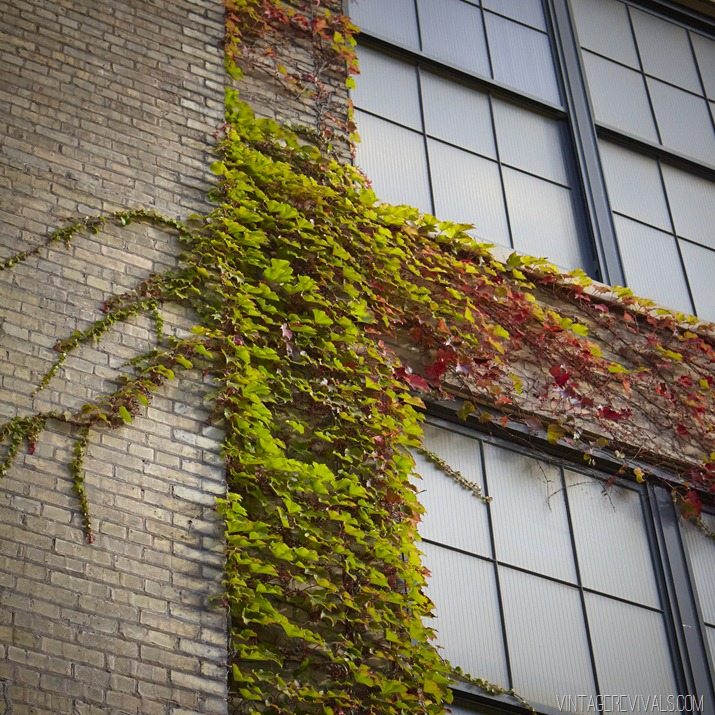
The Village of Kohler (that’s actually what it’s called, how cute is that??!) is absolute perfection. You know the feeling that you get when you go to Disneyland? Everything is thought out and completely beautiful and feels like it was plucked from a storybook?  Kohler is like Disneyland but real.  The village was master planned by Fredrick Olmstead (who also designed Central Park).  Every house, every tree, every trash can fits together perfectly.  The factories sit right in the center of the town in beautiful ivy covered brick buildings.  It’s hard to put into words, it just feels so welcoming.  I cant even imagine the dreaming and foresight that had to take place for a town to feel like this still, 100+ years after its creation.

2014-07-10_Brad_02-55_JOB005866__MG_0012

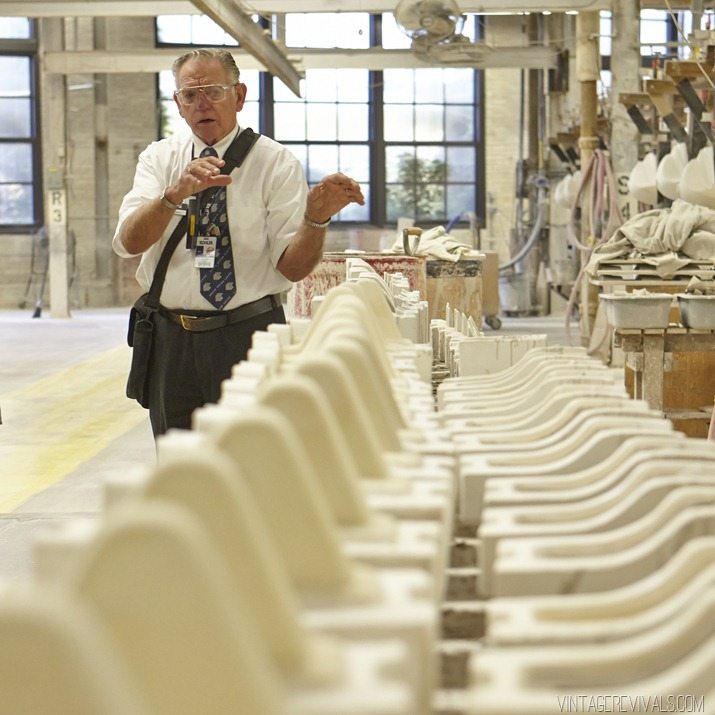
The highlight of the trip (well, one of them) was the factory tour.  The tours are given by retired employees, most of whom have spent their entire lives working in the factories. Their love for this place runs so deep its contagious!

The pottery factory is full of unfinished toilets and sinks and everything inside is white and has a fine layer of dust on it.  Um. and how about those windows?!  Natural light for days.

2014-07-10_Brad_02-58_JOB005866__MG_0035


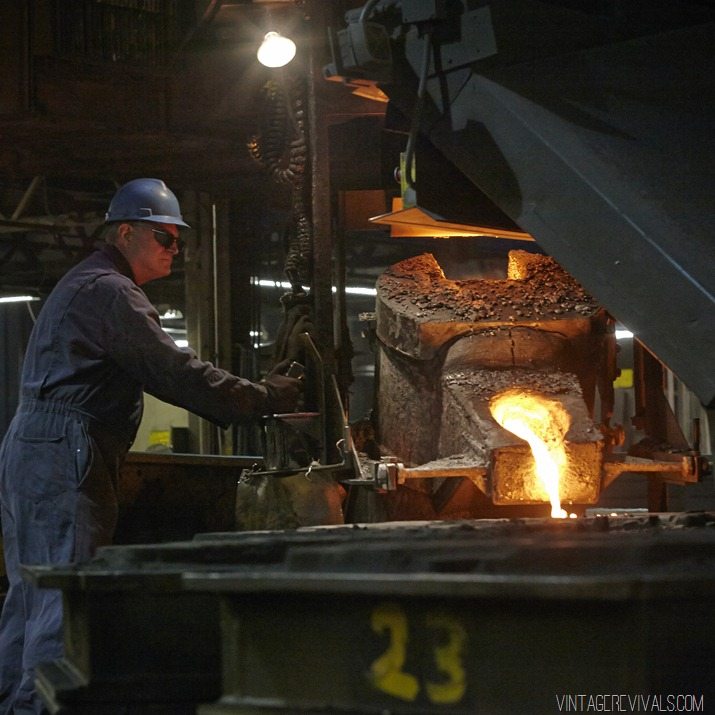
The Foundry (where they do all of the iron work and casting) is dark and loud and full of huge machinery.  The stark contrast between the 2 buildings is incredible, as weird as this sounds, its super picturesque. Its just exactly what you picture it being.

2014-07-10_Brad_04-54_JOB005866__MG_6883

The thing that surprised me (though it didn’t really looking back) was the attention to detail.  Even a pock mark on a sink made it unworthy for a customer. The standard for quality is unimaginably high. (Which I guess is how you stay a leader for 100 years.)

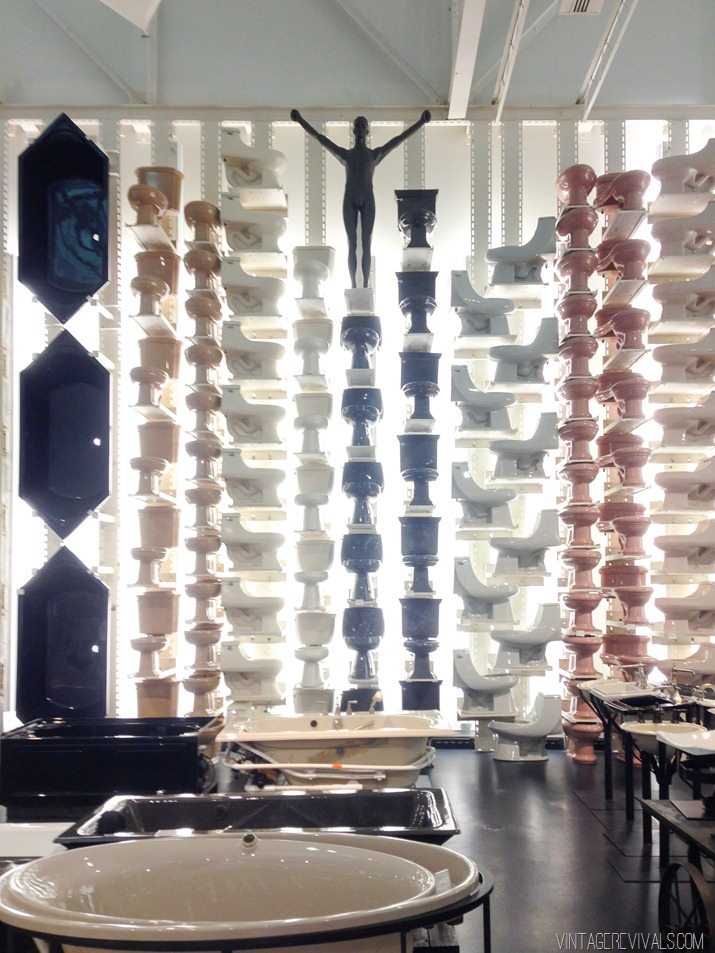
The Design Center is the heart of the city.  Its a mix of a showroom and a museum (both history and art) I loved seeing the trends from the past century.  There was so much, and surprisingly so little that changed. 

2014-07-10_Brad_03-07_JOB005866__MG_6821 

Yep, that is a giant wall of toilets and bathtubs.

Kohler_


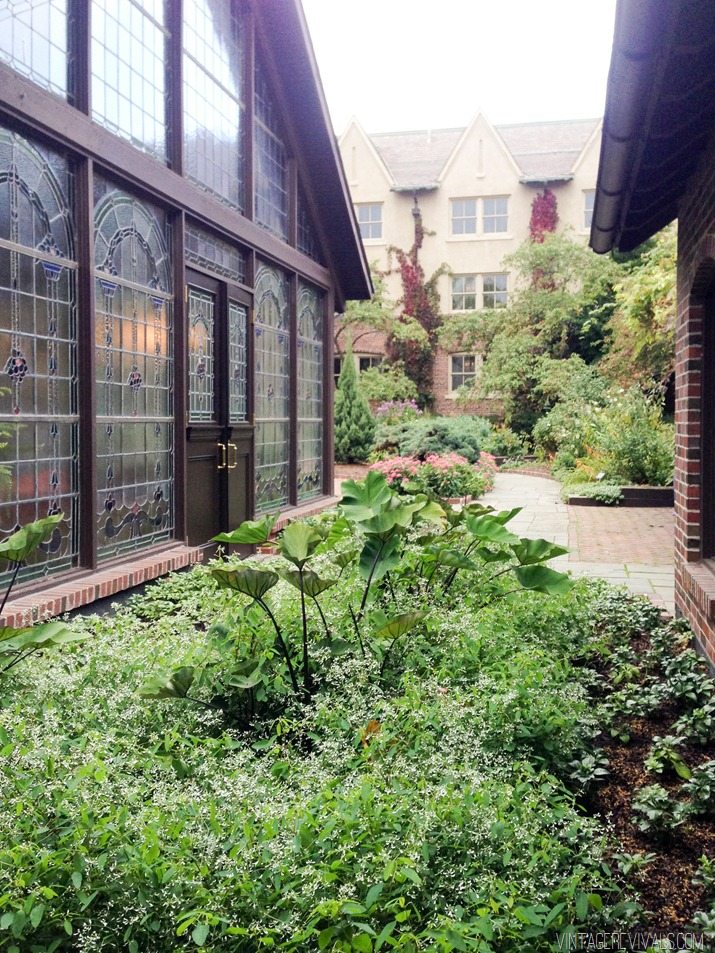
We stayed at The American Club (it was originally a place for immigrant workers to stay and save money so that they could bring their families to the US).  Its full of long dark paneled hallways, stained glass, tapestries, and natural gardens.  If it wasn’t for the state of the art bathrooms (because of course) you would think that you’d been transported in time.

Kohler_-2


I guess the reason that this trip in particular impacted me so much is because the feeling of community and the standard for excellence permeates every facet of this little town and this company.  I am dying to go back and take Court with me.  Its so easy to dream of what could be in a place that IS a dream realized.

Its incredible to me that Kohler can be on the forefront of innovation while still holding so tightly to their heritage.  Maybe its just me, but its easy to get so caught up in where you are going that you forget to stop and realize the beauty of where you’ve been.

Processed with VSCOcam with f2 preset


tumblr_neyb7zYaOo1s3qnw9o1_1280

tumblr_nmwvs7isqz1s3qnw9o1_1280

tumblr_nopvnlZsbp1s3qnw9o1_1280

They are just so unapologetically themselves.

Its inspiring. Inspiring enough that I have a fangirl moment every time I spot a Kohler product (even if its in a public restroom!) Because I know that even if to most its just a toilet, that its not just a toilet.  It was made in this tiny town practically by hand and has 100+ years of creation and innovation behind it.

Ok I’ll get off my soap (errr. toilet?) box now . I feel like I  just need to move so that I can start fresh and Kohler-ify everything in my house.  Sounds like a pretty great plan! I’m dying to know, have you ever visited Kohler? Did you love it as much as I did? Should we all go on a trip?

LoveYourGuts14

Giant Macramé Rope Lights

By Mandi | 09/08/2015 | 39 Comments

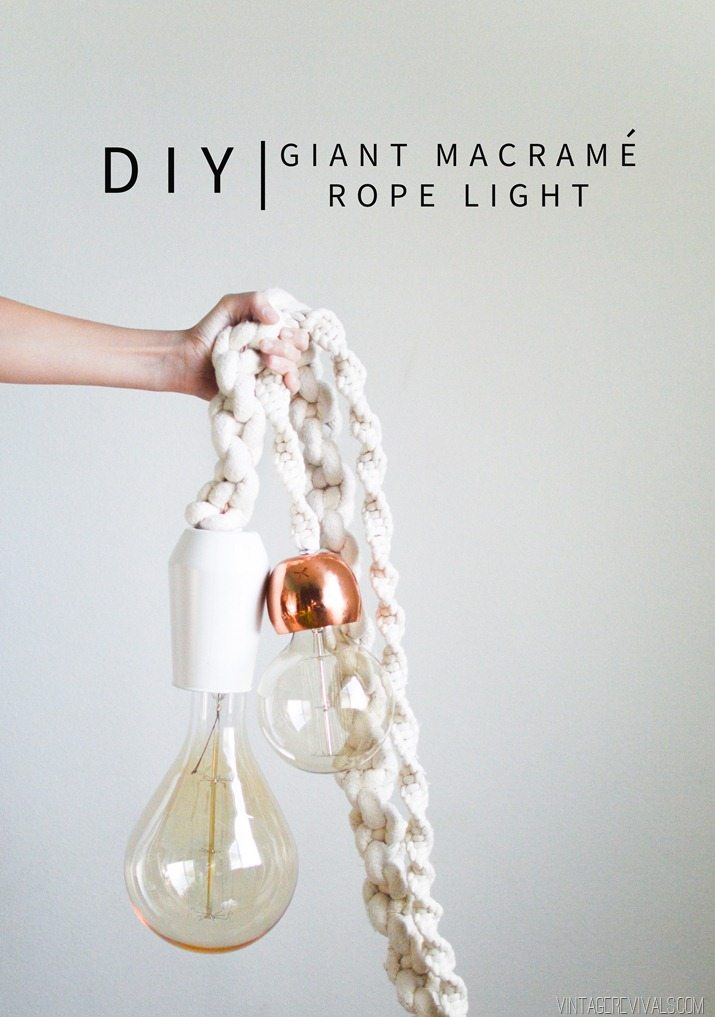
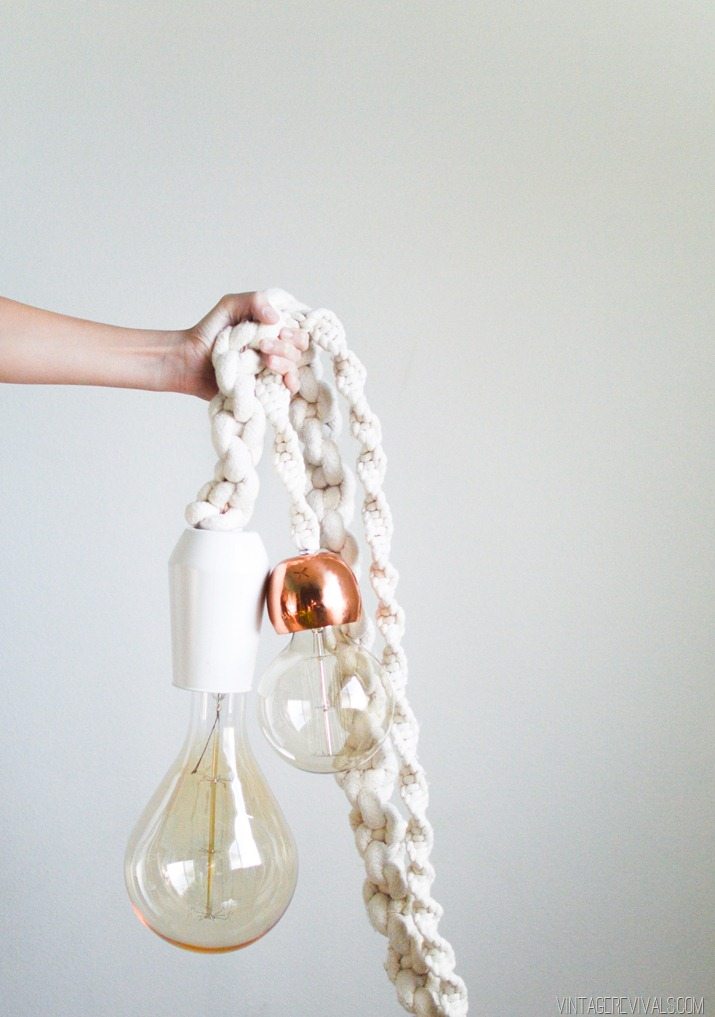
Hope you lovies had a great long weekend! So this tutorial could not be more simple. I am telling you guys, these giant macramé rope lights will change.your.life. they are that good.

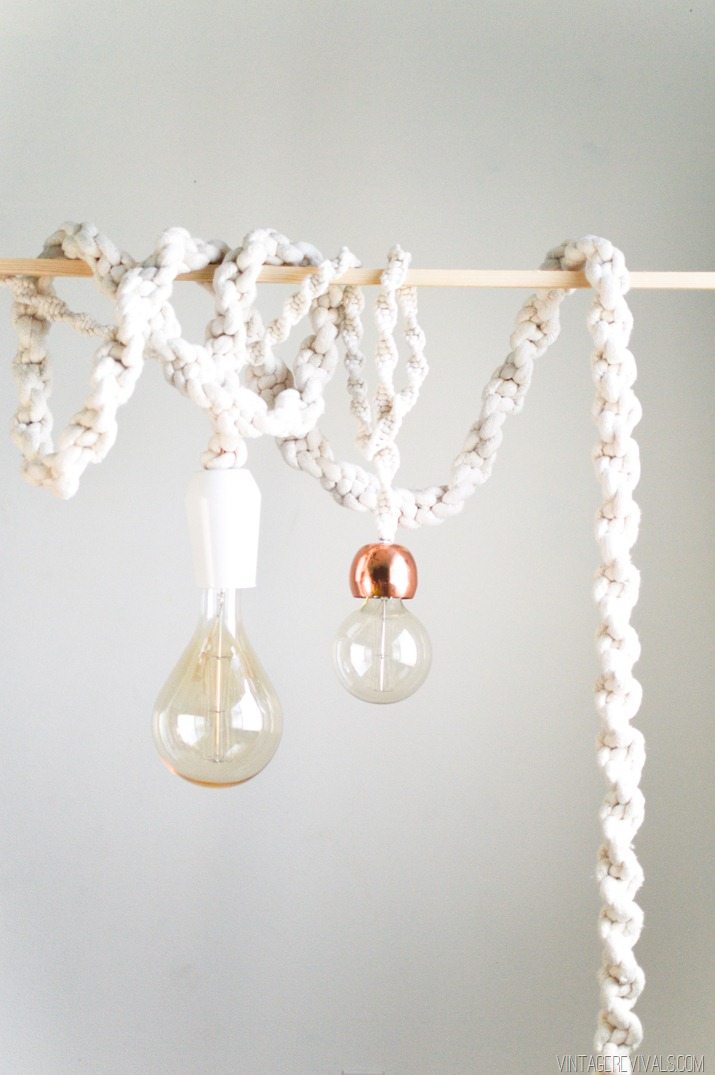
So when I say giant, I mean HA-UUGE.. Not just the rope, the light bulbs too.

DIY Giant Macrame Rope Light Tutorial

The knot for this project is as easy as can be. Its a great way to be productive AND watch Netflix because once your hands get the memory down you can sort of go on autopilot.

You’ll need:

Rope or Cording (make sure you use a coupon!)*
Lamp Cord
Socket Kit
Small Vessel (that can be drilled into)
Glue

*So don’t throw things at me, but I’m not sure how much cording to tell you to buy. Let me explain. For the huge rope, I bought 35 yards ($1.49/yd) and it easily covered 15 feet of lamp cord. For the smaller one I bought 40 yards ($.59/yd) and it covered 8 feet. Obviously the thickness plays a massive factor in how far it goes. The good news is that you can use clear tape to connect the ends together if you need to add more and you’ll never see them (also make sure that you use at least a 40% off coupon at JoAnn when you are buying it.)

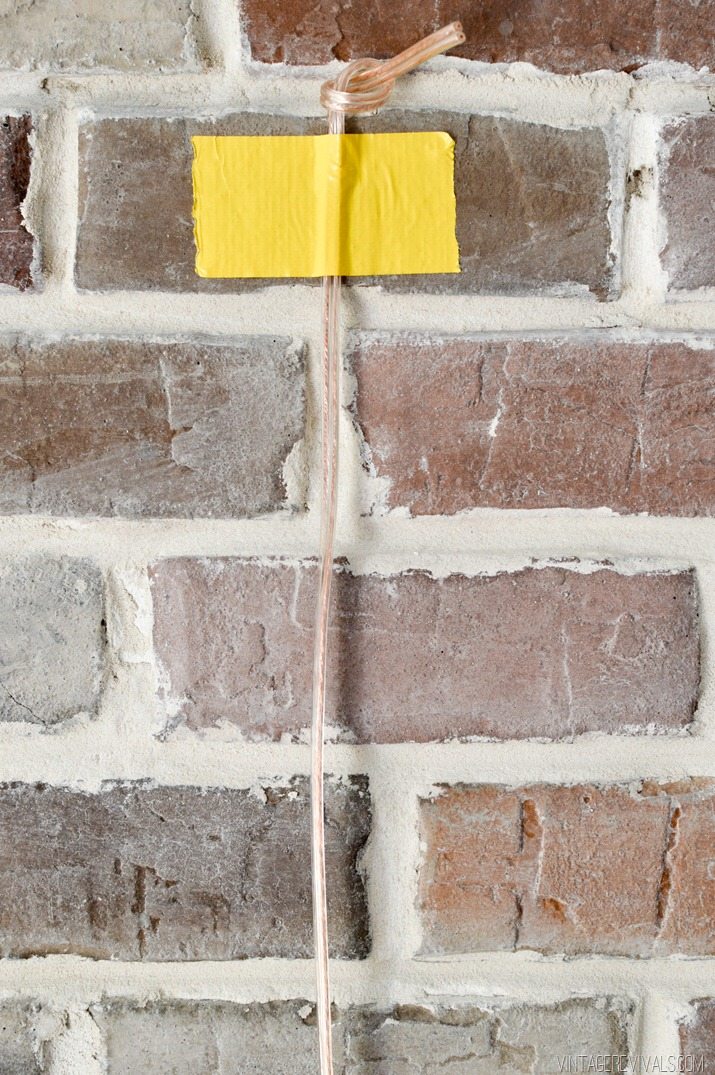
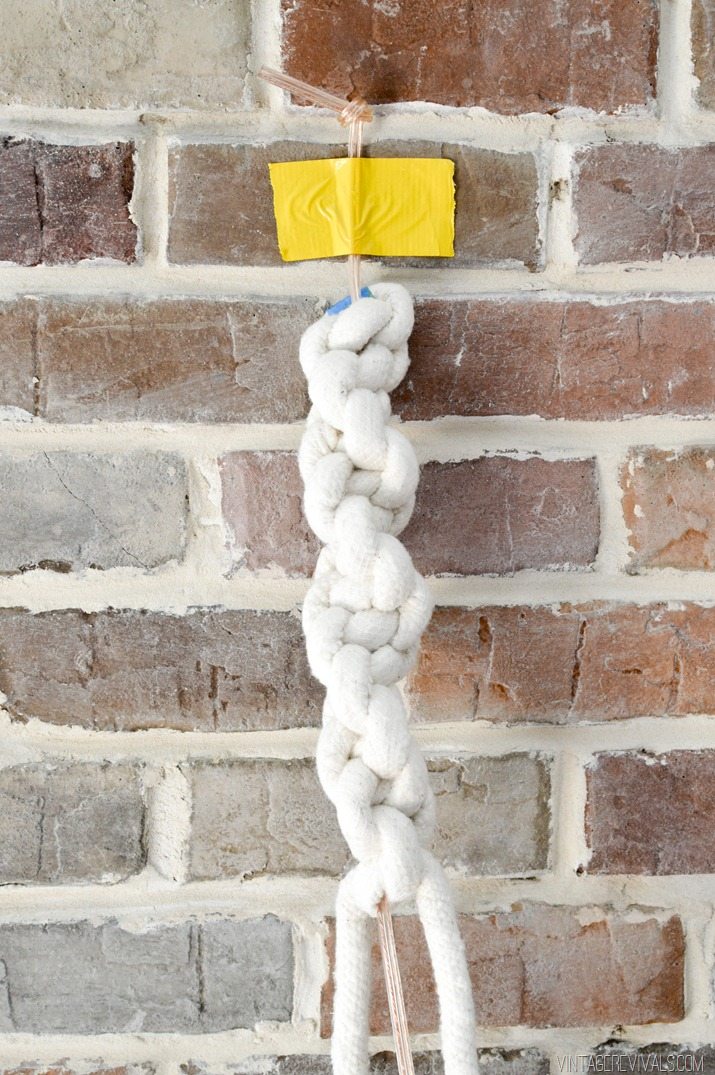
Start by securing your lamp wire. For pictures I have it taped to a wall, in real life you’ll want to tie it around something like a chair back or doorknob to keep it stable.

Giant Macrame Rope Lights


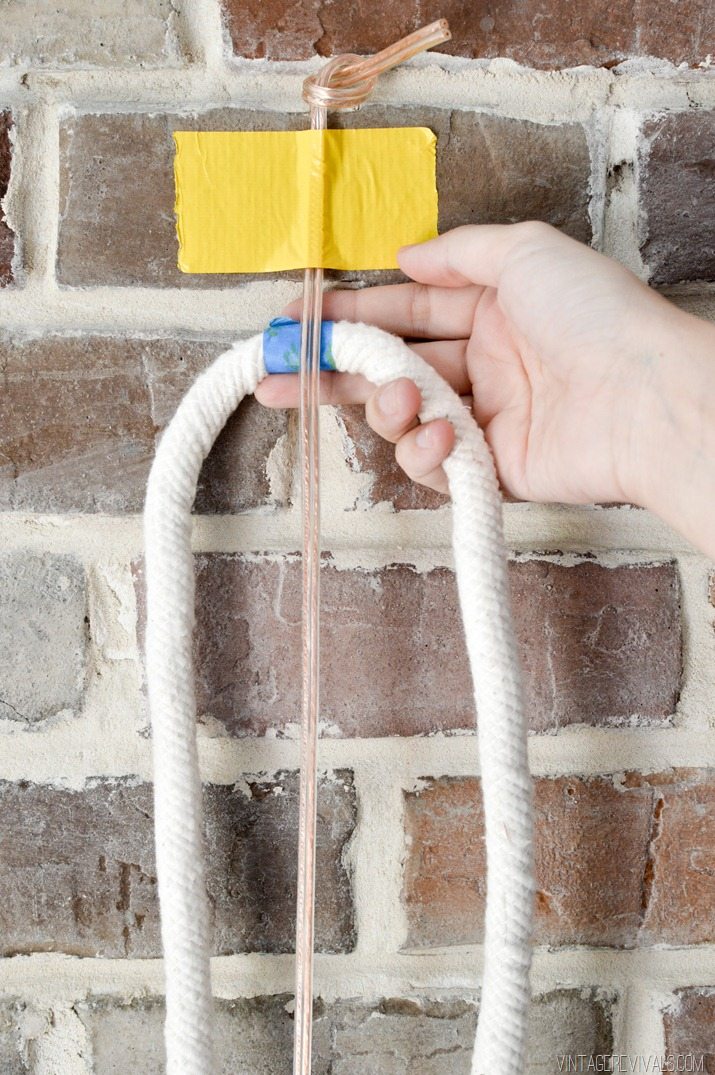
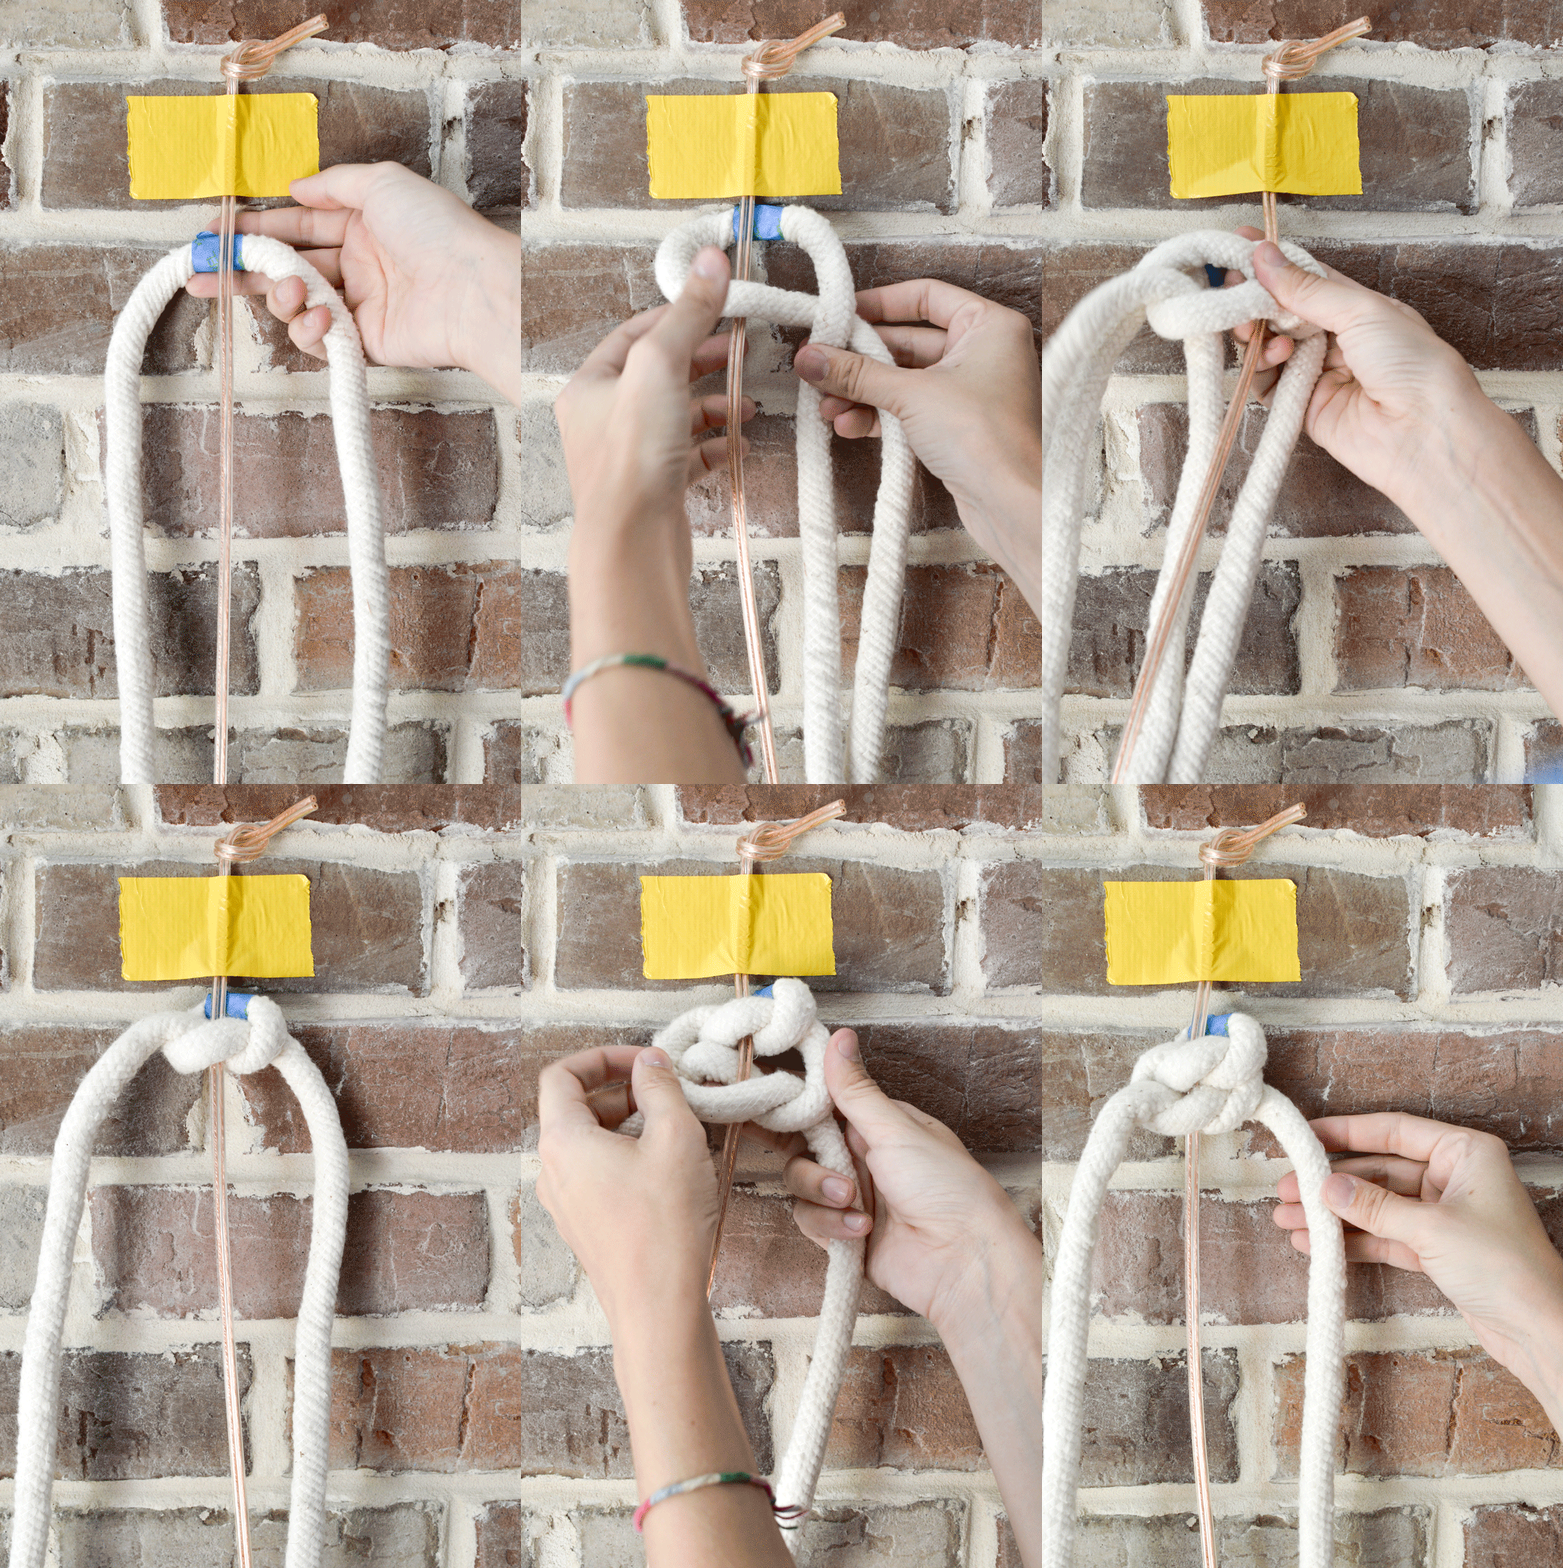
Find the center of your cording and place it behind the lamp wire.

Giant Macrame Rope Lights-2


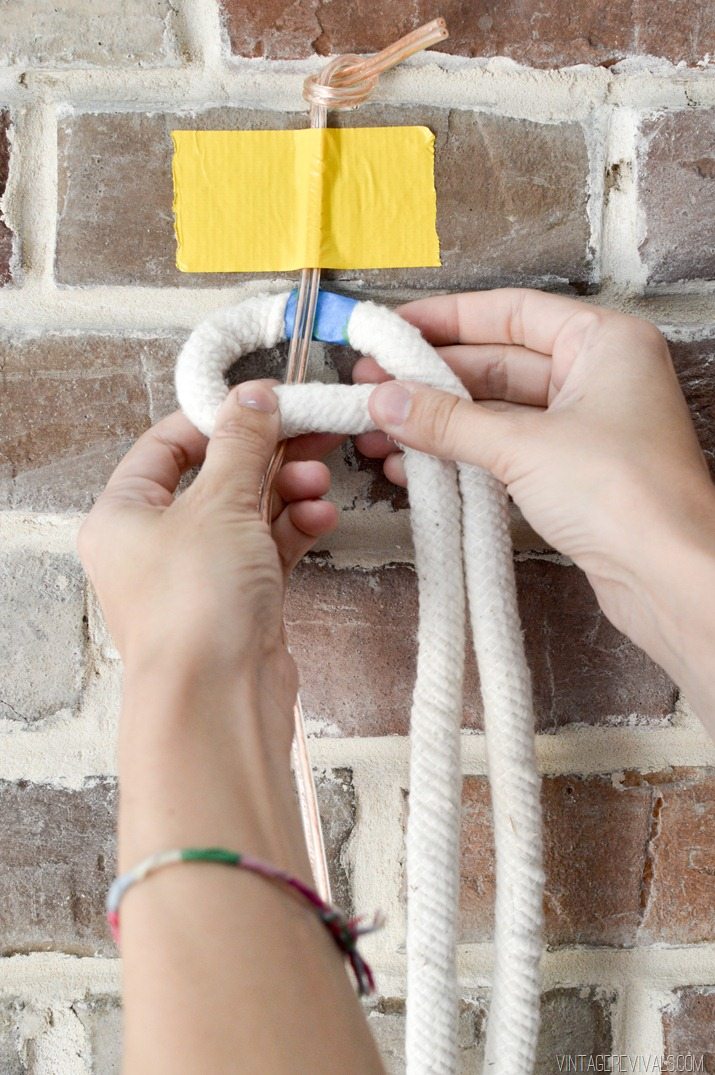
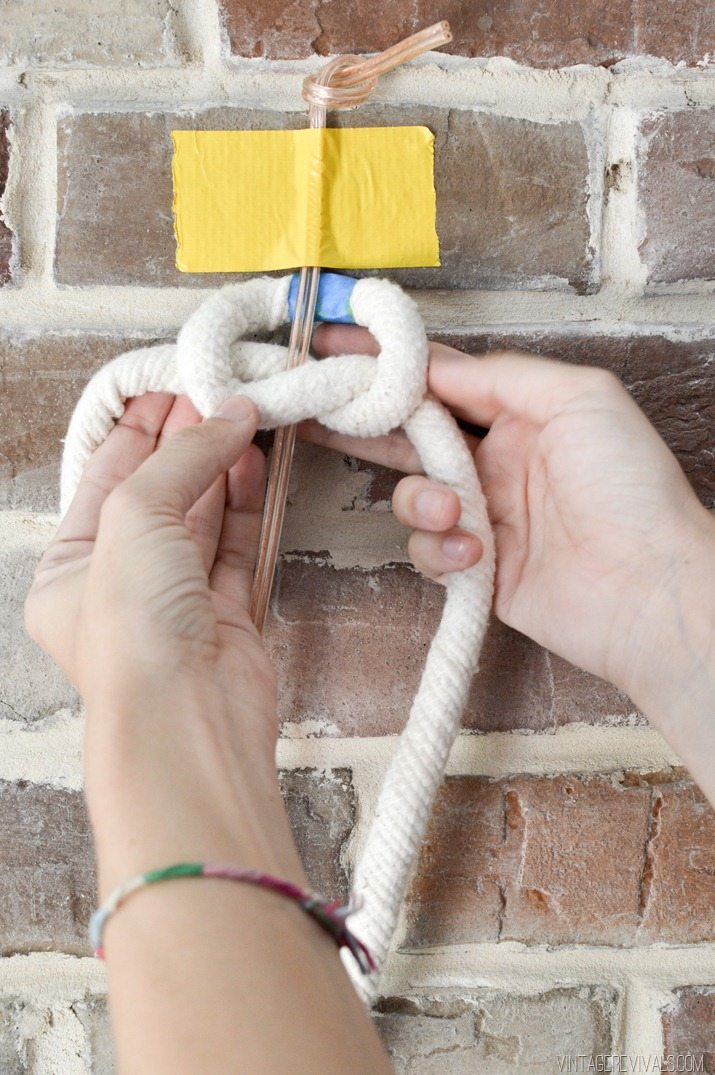
Take the left side and put it over the front of the lamp wire.

Giant Macrame Rope Lights-5


And under the right side of the cord creating a small loop on the left side of your lamp wire.

Giant Macrame Rope Lights-6


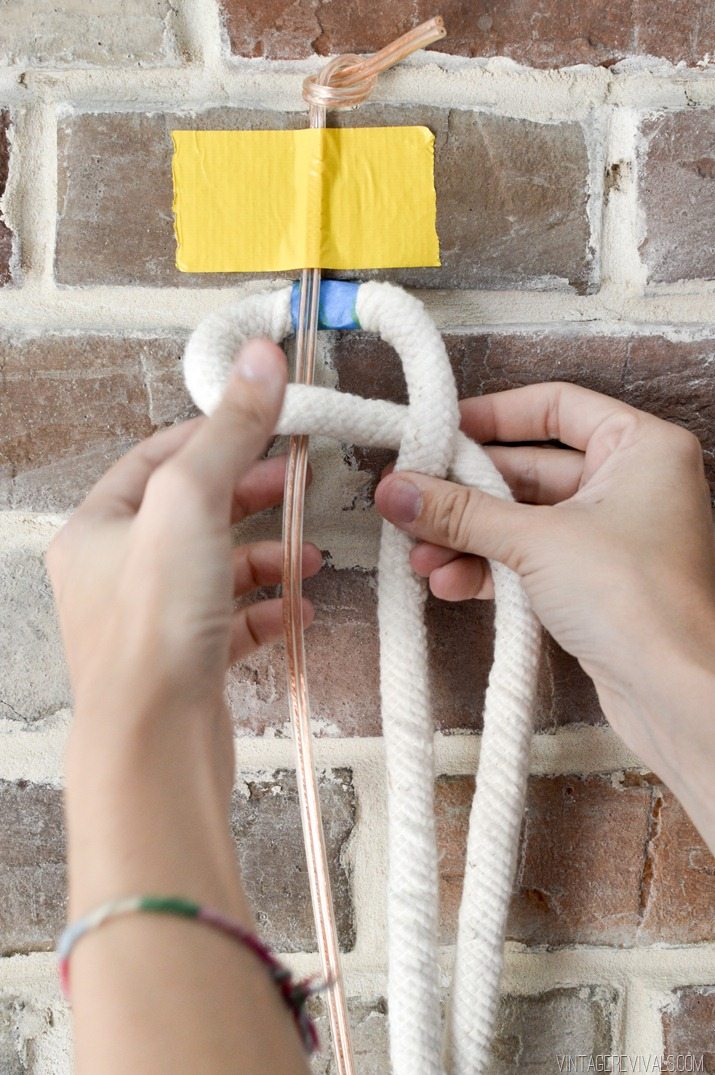
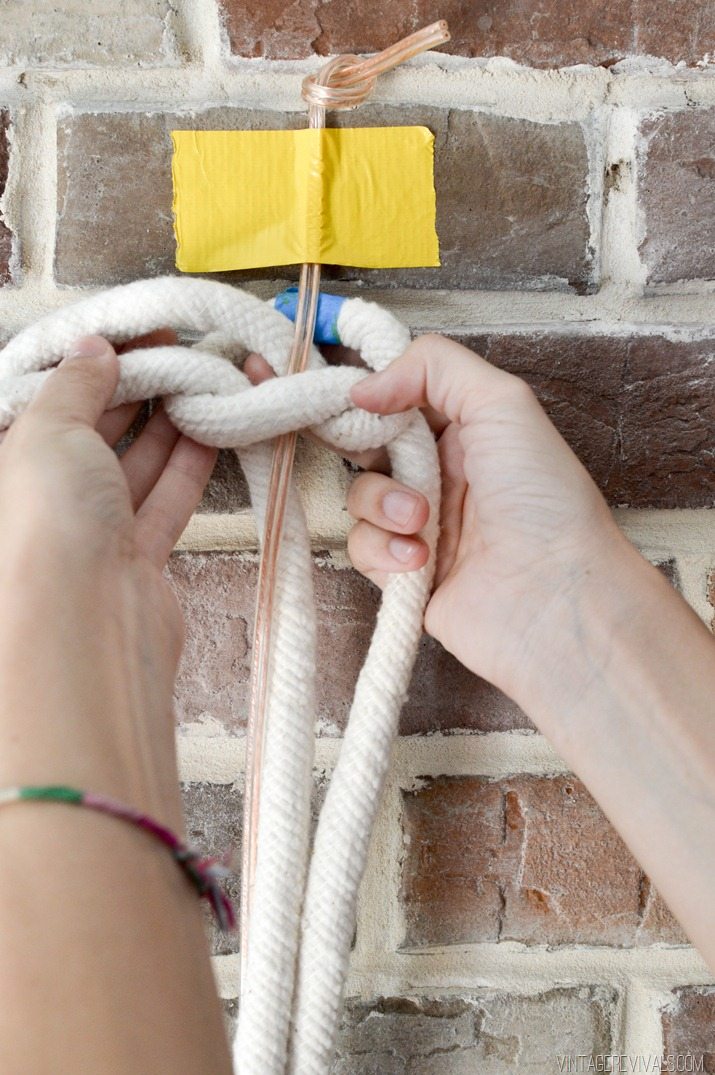
Then take the right cord and place it behind the lamp wire.

Giant Macrame Rope Lights-7


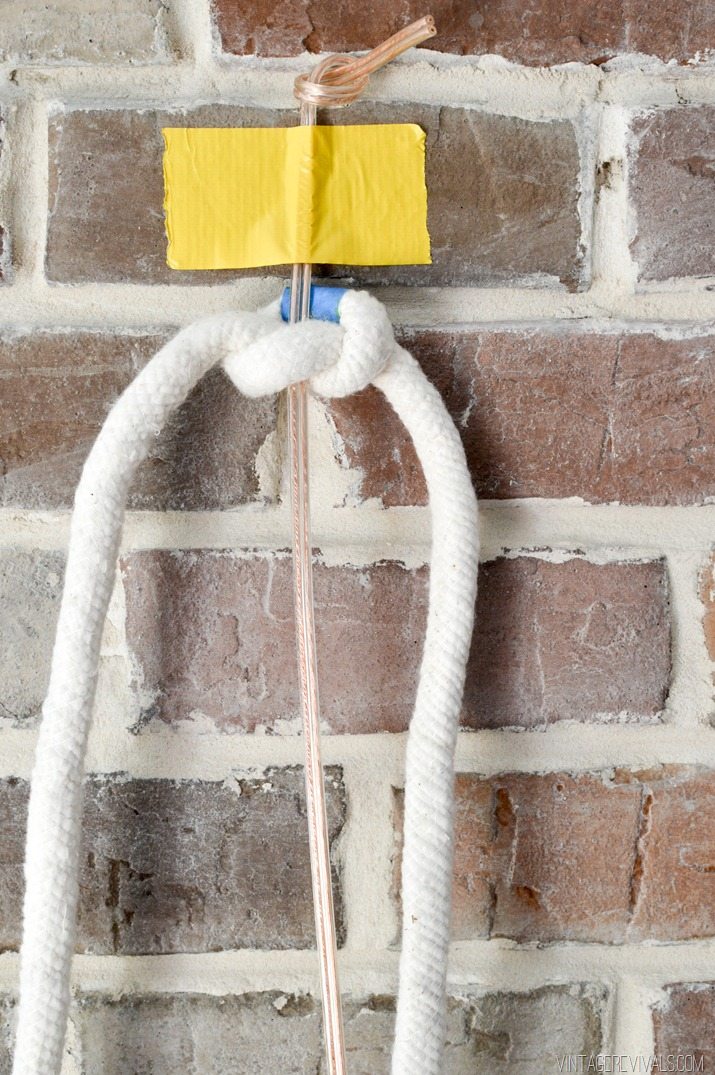
Pull the entire length of it through the small loop that you created on the left side of the lamp wire.

Giant Macrame Rope Lights-9


Giant Macrame Rope Lights-13


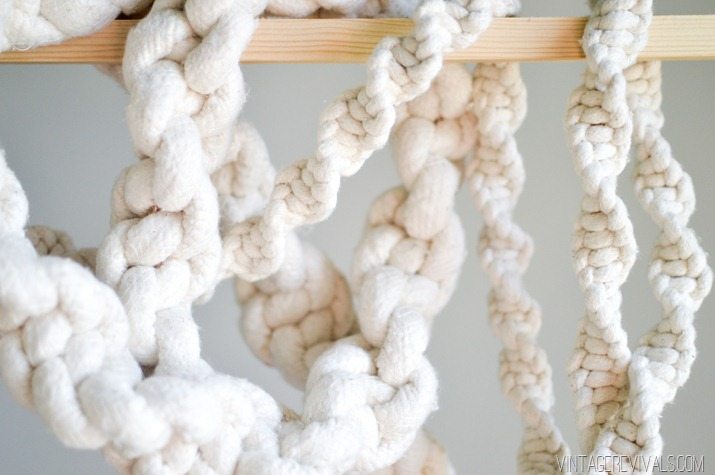
Repeat your little heart out. As you are creating more and more knots the design will start to spiral. As long as you are starting with the left side and taking it over the top of the lamp wire the spiral will go in the same direction. If you take the right side over, or put the left side under the spiral will switch directions and you’ll have to undo the knots.

How-to-tie-a-Macrame-Knot


Pretty soon it’ll start to look like this:

Giant Macrame Rope Lights-20

Once all of my knots were done it was time to wire the socket. You can do this before you start knotting if you want, its completely up to you.

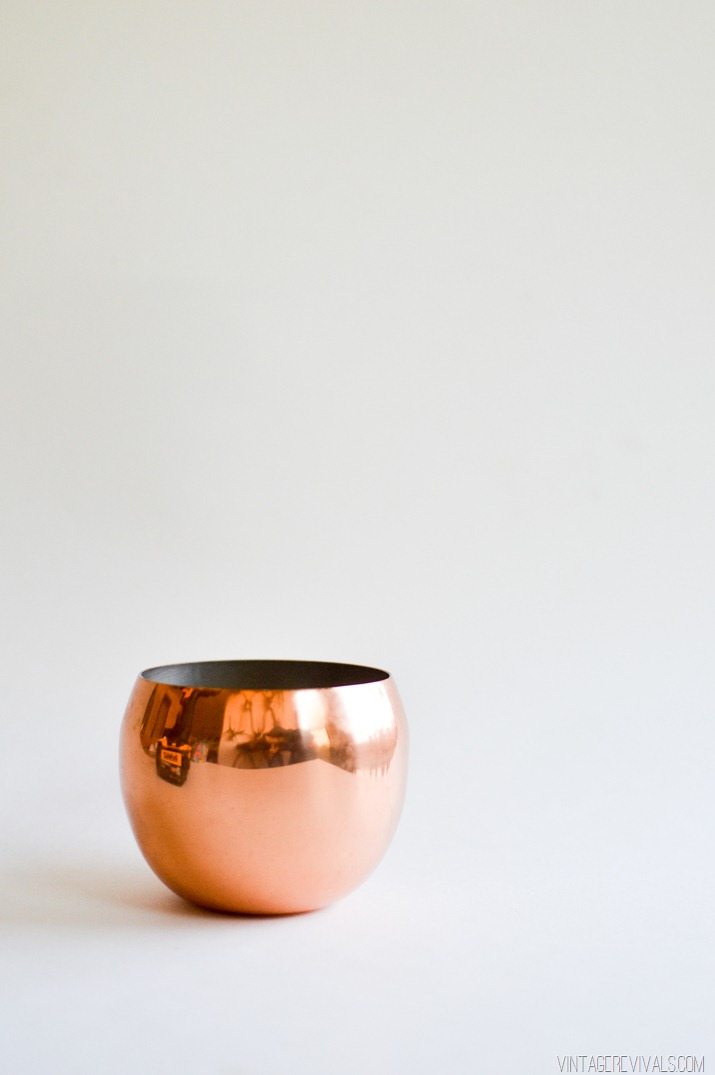
For your socket cover you’ll need some sort of cup or planter. For my lights  I used a thrifted copper cup and a clearance plastic cup from Target that I spray painted white. But you can use anything! A wooden bowl, a ceramic planter, really the sky is the limit!

Giant Macrame Rope Lights-21


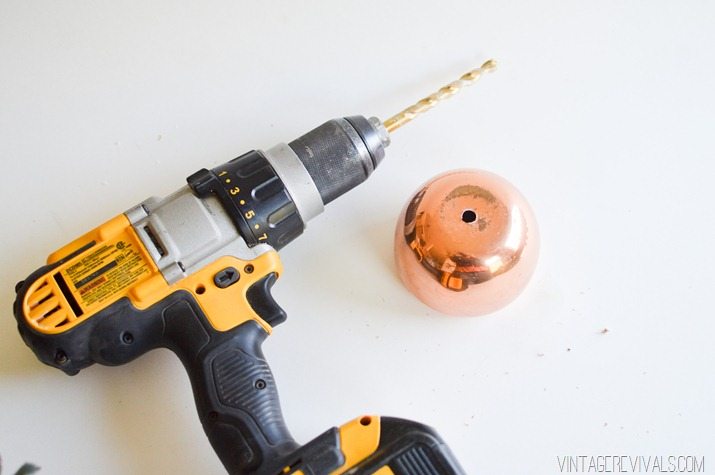
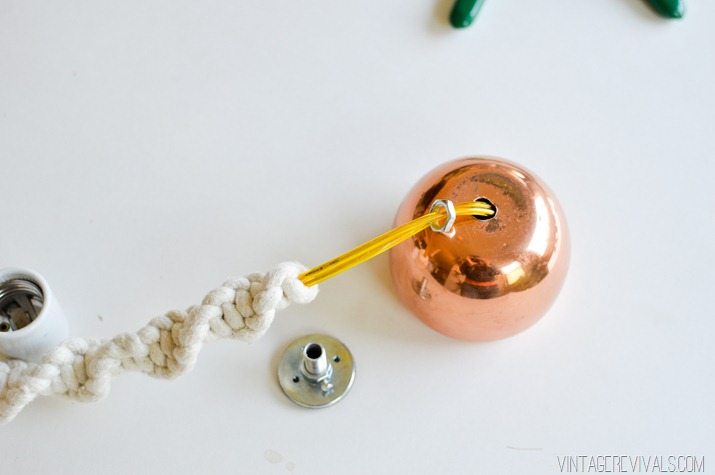
Start by drilling a hole into the bottom of your cup.

Giant Macrame Rope Lights-22


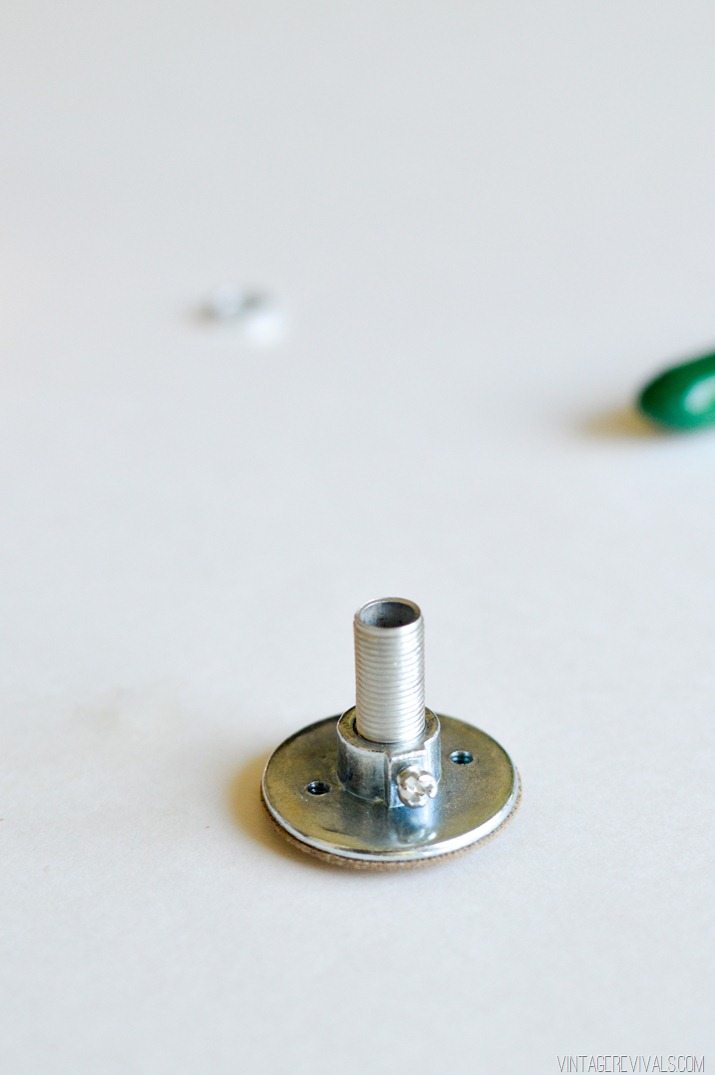
Then attach the treaded nipple to the socket base (make sure that you tighten the little screw on the side so that your socket doesn’t unscrew when you are twisting the light bulb!)

Giant Macrame Rope Lights-24


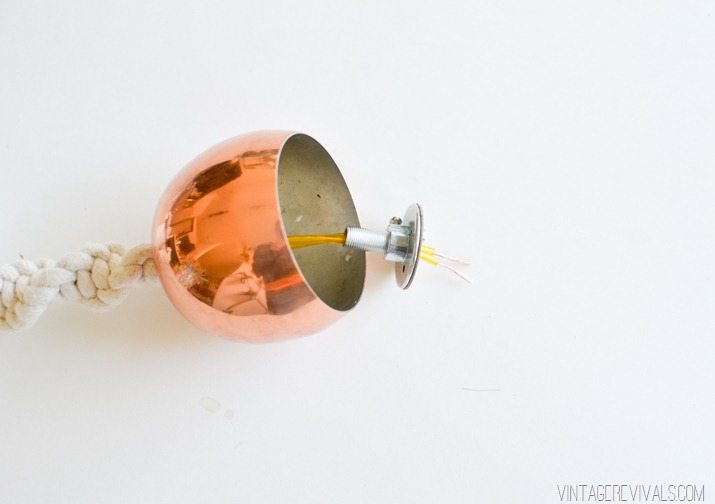
Put the washer, then the cup, then the socket base onto your lamp wire.

Giant Macrame Rope Lights-25

Giant Macrame Rope Lights-26


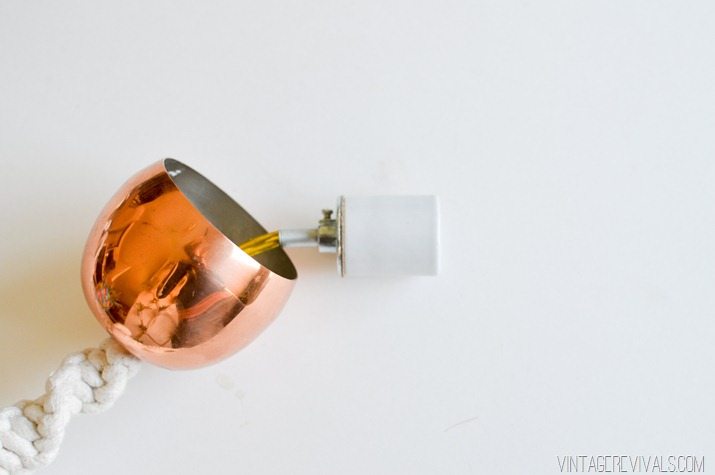
Attach the socket according to the instructions provided.

Giant Macrame Rope Lights-27


Then screw the washer onto the threaded nipple.

Giant Macrame Rope Lights-28


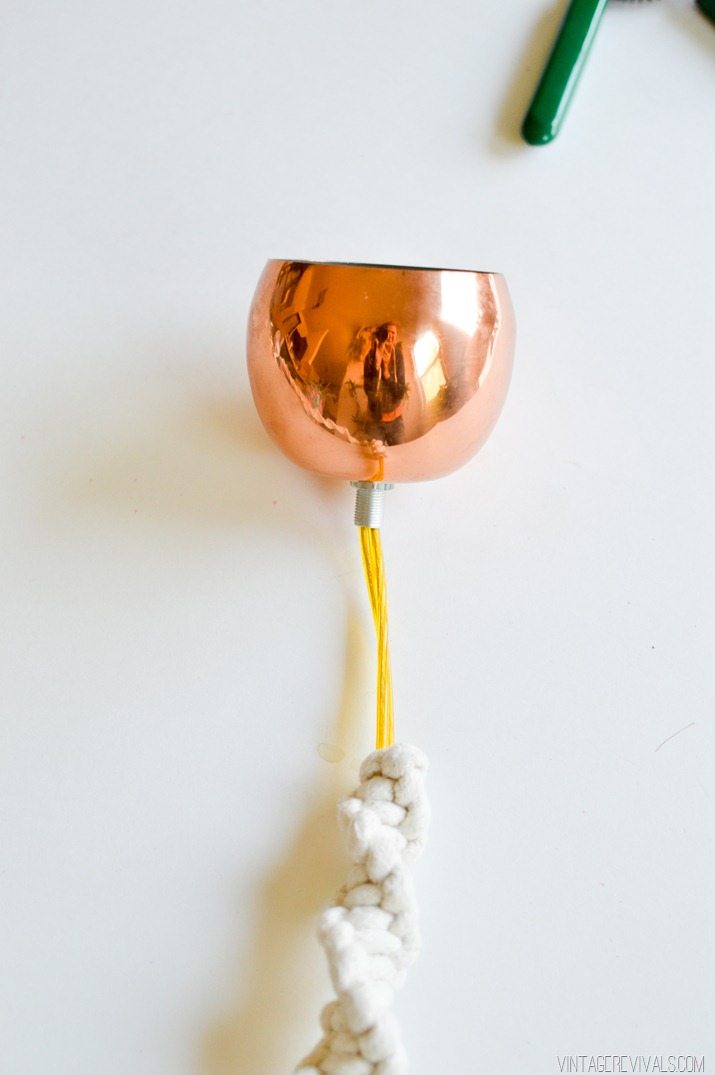
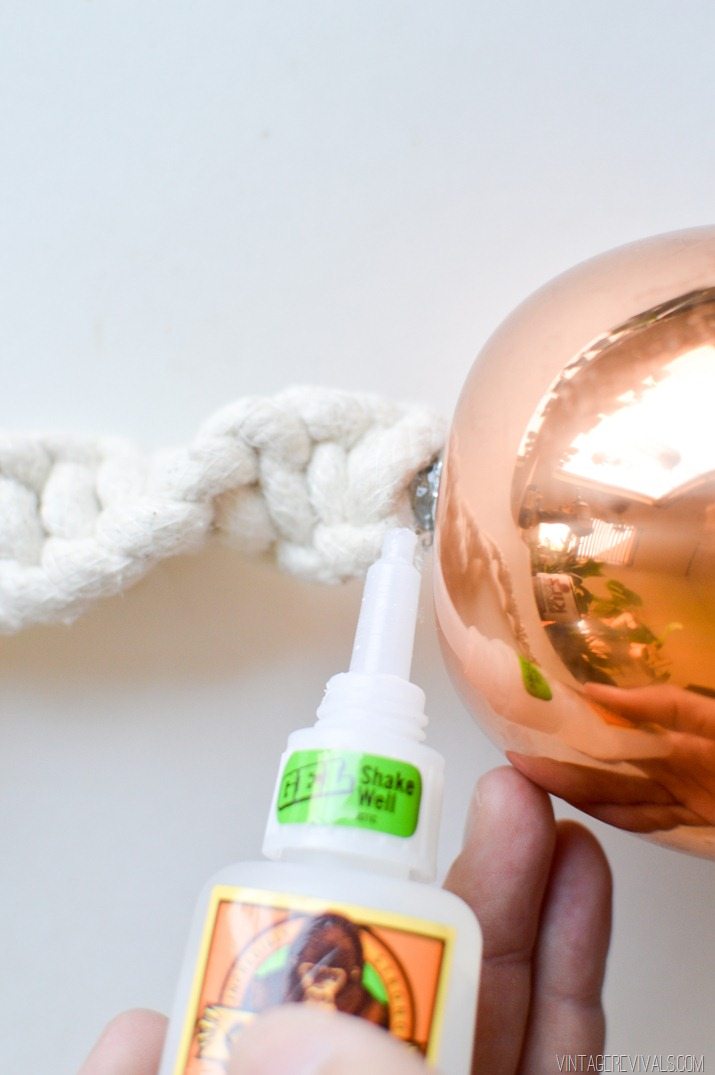
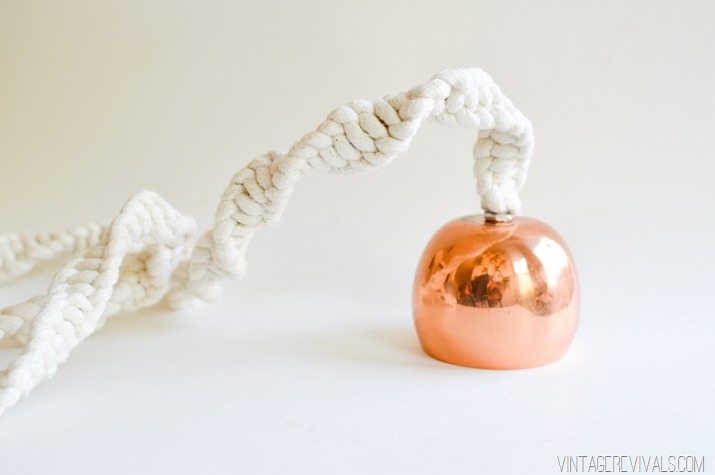
Slide your rope up (this the the only adjustment that you wont have to do if you wire your socket before you start on your knots) and around the end of the threaded nipple. Glue in place.

Giant Macrame Rope Lights-29


Ta Da!!

Giant Macrame Rope Lights-31


Now for the details on the giant light bulbs. Man oh man are they the stuff of legend.

I found them at a light bulb store when we were in LA but after some internet sleuthing, I found the best prices at School House Electric (way better than what we got them for)

Did I mention that they are massive?


So here is the thing. A light blub that big, its not just a bulb. Its the entire light. So while they aren’t cheap (around $40.00) they are freaking showstoppers.

Giant Macrame Rope Lights-36

Giant Macrame Rope Lights-35   Giant Macrame Rope Lights-37

Giant Macrame Rope Lights-42


Seriously though, can you imagine how fantastic 3 or 4 grouped together would be? I might just have to make that happen….

LoveYourGuts14