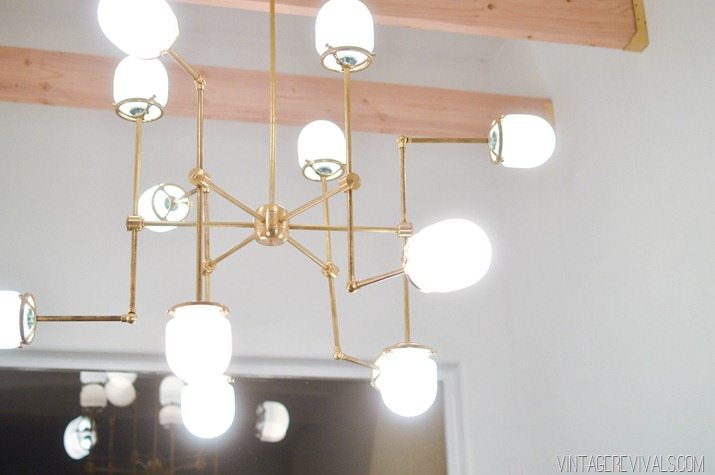
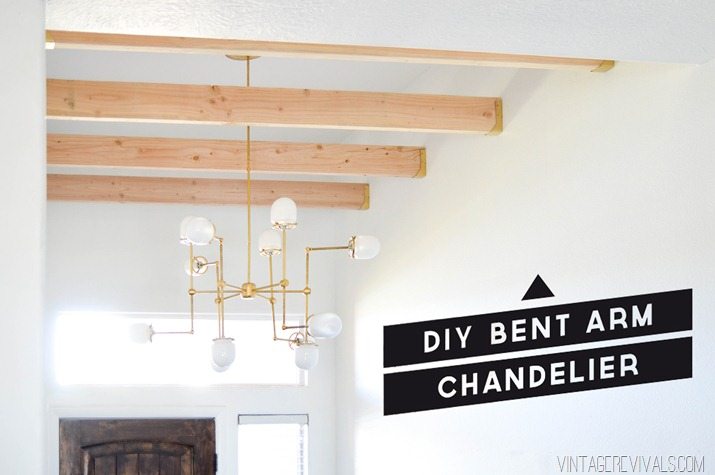
DIY Bent Arm Chandelier

By Mandi | 03/10/2015 | 36 Comments

Building lights is sort of my thing. It is honestly my DIY spirit animal. That being said this light pushed me to the brink. Not because it is hard, but because I was trying to figure out the best way to do it in the most uncomplicated way possible (which complicates things). So after trying out 3 different types of wires and few hardware swaps I am SO excited to share with you the most simplified version of this brass bent arm chandelier!

DIY Brass Bent Arm Chandelier Tutorial

A few weeks ago I was thumbing through a magazine and came across this gorgeous light from Circa lighting. I loved all of the different angles and the whole feel of it. I also love Lindsay Adelman and her branch lights so hard. I knew that I could use both of them as a jumping off point for an amazing light in the entryway.

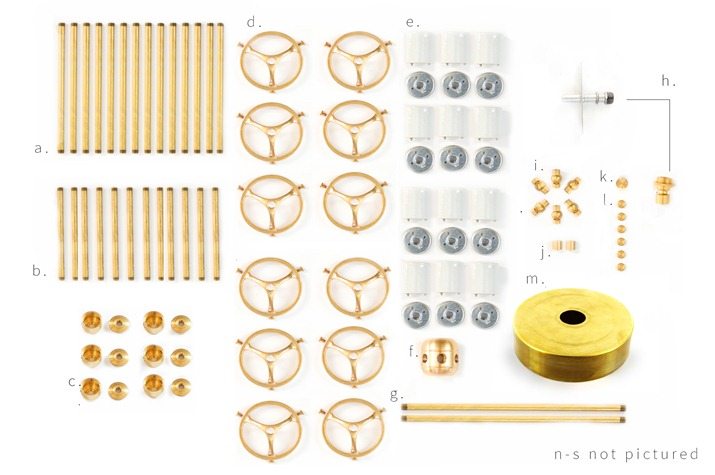
After spending a few hours on Grand Brass looking at all of the parts that they had, and a lot of sketching I came up with a plan (and ended up with a lot of parts.)  All of the serial numbers for the parts are listed after their description.

DIY Brass Bent Arm Chandelier Parts

a. (12) 8in. X 1/8 IPS HOLLOW BRASS PIPE STEM (PIBR08-0X8)
b. (12) 6in. X 1/8 IPS HOLLOW BRASS PIPE STEM (PIBR06-0X8)
c. (6) 1/8F sides X 1/8F bottom X 1/8F top SMALL CLUSTER BODY (BOS2X8)
d.(12) 3-1/4in. SPOKED HOLDER CAST BRASS with 1/8F TAPPED HOLE (HO3-1/4S)
e.(12) PORCELAIN SOCKET (SO10045C)
f. (1)1/8F sides X 1/4F bottom X 1/8F top JUMBO CLUSTER BODY (BOJ6)
g. (3)* 12in. X 1/8 IPS HOLLOW BRASS PIPE STEM (PIBR12-0X8)
h. (1) 1/4IPS PIPE PENDANT HANGING CROSS BAR SET (CB208)
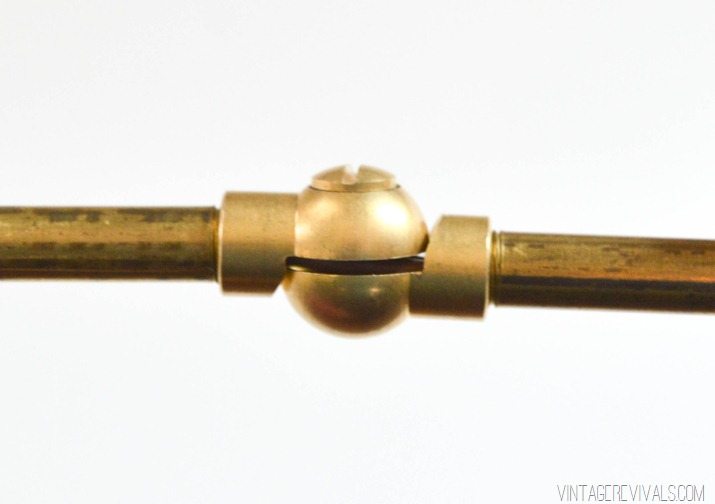
i. (6) 1/8F X 1/8F ips. ADJUSTABLE FRICTION SWIVEL (SV140)
j. (2)* 1/8F THRU 5/8H X 5/8W STRAIGHT COUPLING (NE438)
k. (1) 1/4 PLUG WITH SCREW DRIVER SLOT (FI1/4PLUG)
l. (6) 1/8 PLUG WITH SCREW DRIVER SLOT (FI1/8PLUG)
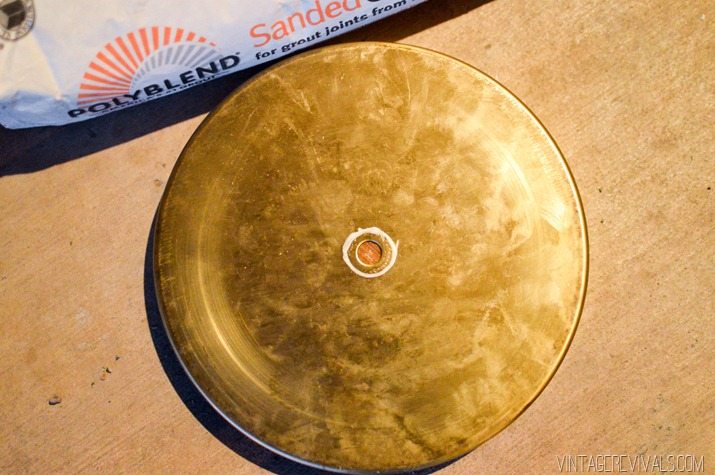
m. (1) 8in. BRASS FLAT BASE W/RETURN (BAFL08NW) (We had to drill our hole larger, so if you dont have a                 tool to do this they have some that are smaller in diameter with a bigger hole.)
n. (12) OPAL 3-3/4″ DIAMETER X 4-1/8″ HEIGHT WITH 3″ FITTER ROUND BOTTOM CYLINDER TUBE (GLC304)
o. (12) 22-10 Crimp Sleeve
p. (2) large wire nuts
q. (2) Medium wire nuts
r. (1) Wire stripper/cutter
s. Lamp wire

*dependant on the height of your ceiling

While this project isn’t horribly hard (now that we know the right way to do it) it’s definitely not on a beginner DIY level.

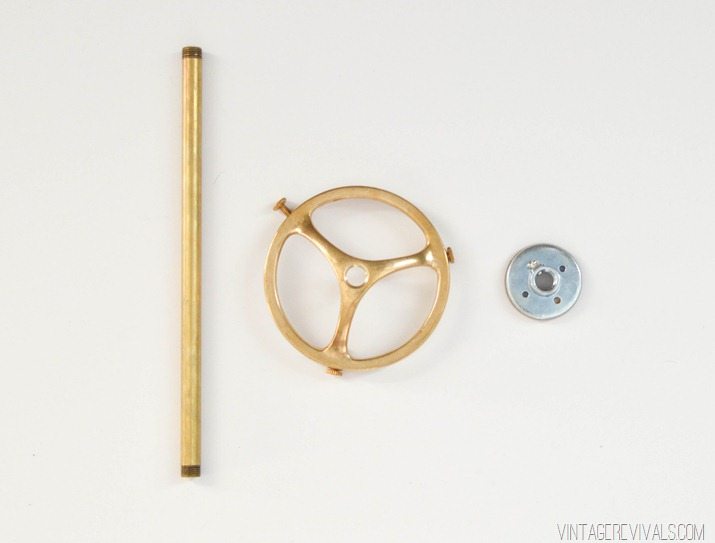
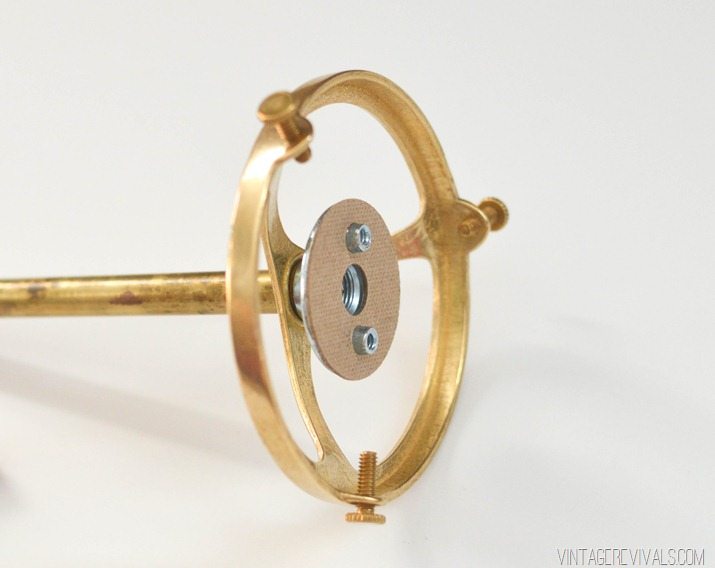
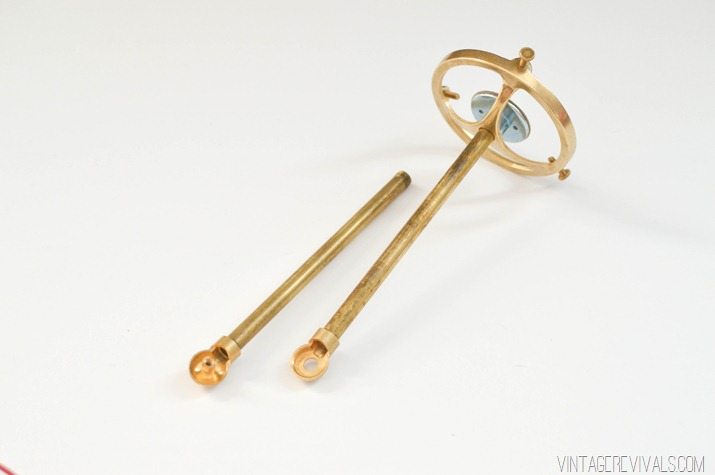
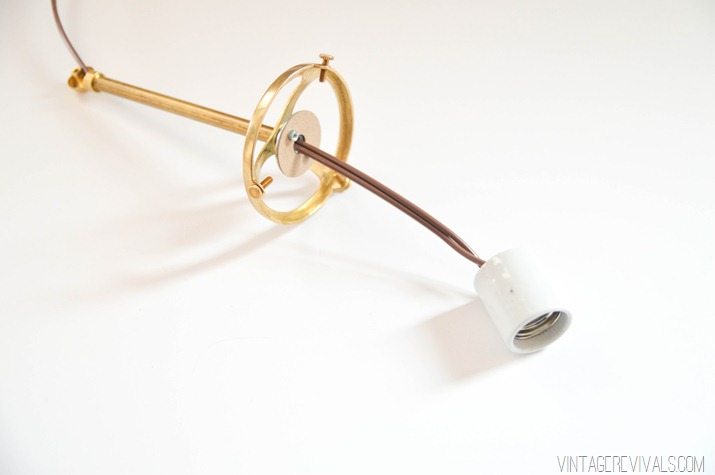
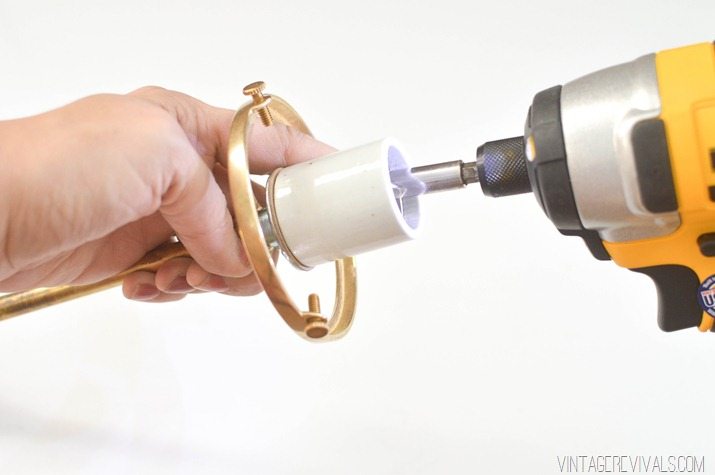
You are going to start by assembling your short arms (these are the arms without the bend) using the 8” brass pipe (a.), the spoked holder (d.), and the metal base for the socket. (Make sure that once everything is assembled you tighten the small screw on the socket base.)  This will keep your entire socket from unscrewing when you are changing the light bulb.

DIY Brass Bent Arm Chandelier-9

DIY Brass Bent Arm Chandelier-29

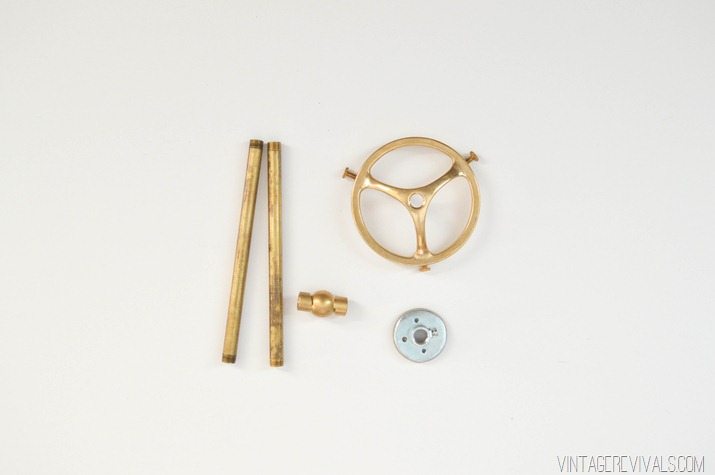
Next you are going to assemble the longer arms using 2 of the 6” pipe (b.),  the spoked holder (d.), the metal base for the socket (e.) and the friction swivel (i.)

DIY Brass Bent Arm Chandelier-10


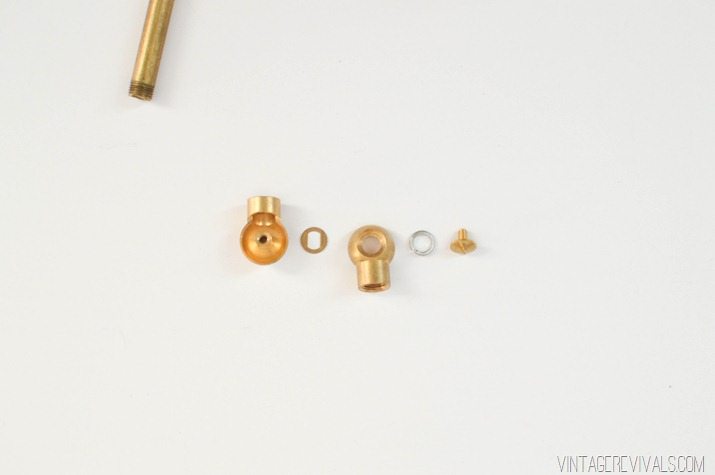
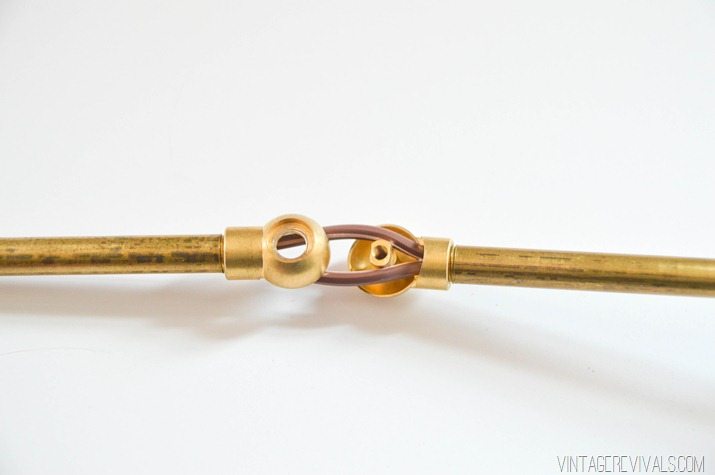
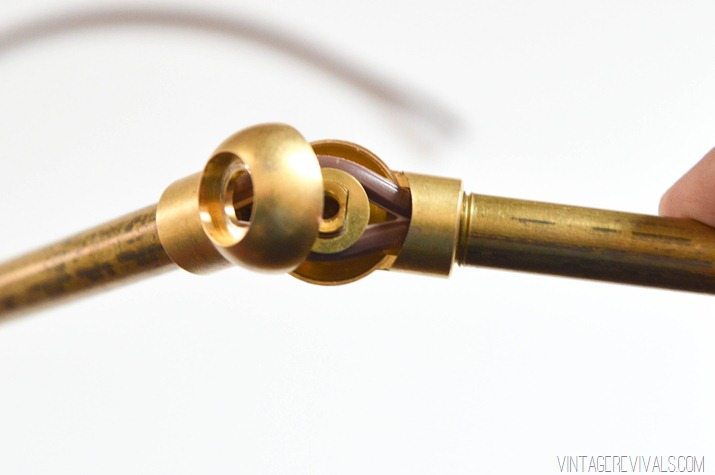
Take apart the friction swivel (dont lose the little bits!) and attach each side to the brass pipe.

DIY Brass Bent Arm Chandelier-13

DIY Brass Bent Arm Chandelier-15


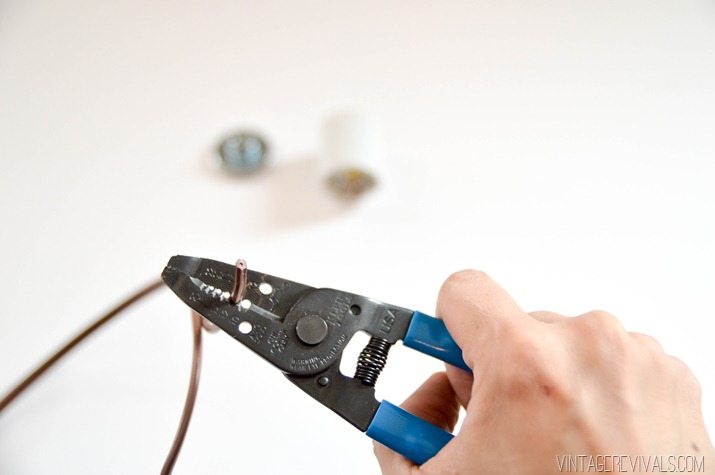
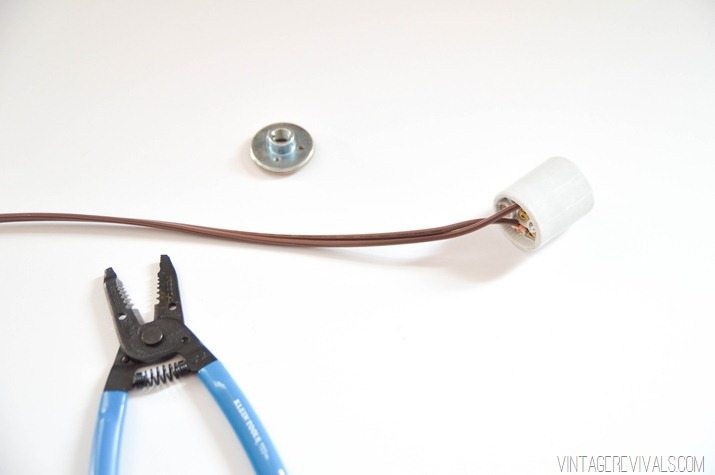
Wire your socket by checking for the textured edge on your lamp wire. The smooth one is hot and will be connected to the gold screw inside your socket. The textured edge is going to be connected to the silver screw.

DIY Brass Bent Arm Chandelier-19

DIY Brass Bent Arm Chandelier-20


Then feed the other end of the wire through your socket base and brass tube.

DIY Brass Bent Arm Chandelier-21


Attach the socket to the base.

DIY Brass Bent Arm Chandelier-16


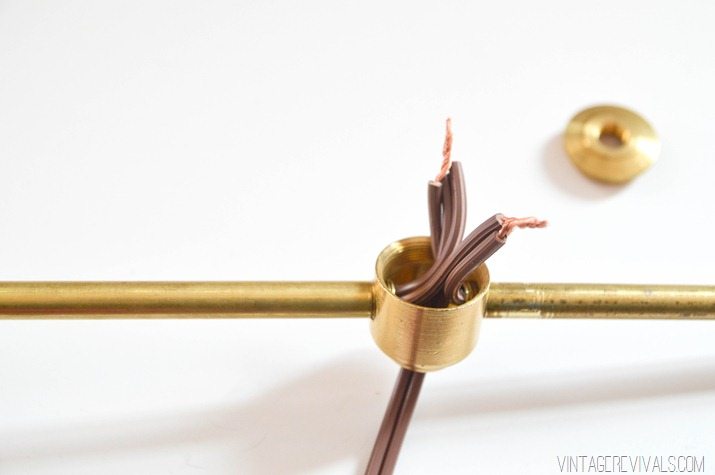
When you get to the friction swivel you will have to split your wire to go around the post in the middle (I just split mine from the bottom, up to this point).

DIY Brass Bent Arm Chandelier-22


Reassemble the swivel using all the little parts that you didn’t lose (because you are AWESOME!!)

DIY Brass Bent Arm Chandelier-23


I didn’t tighten the screw down all the way until I was completely done with the light (it made things a little floppy) but it gave me a little more play with the wire.

DIY Brass Bent Arm Chandelier-24

The next step is connecting your short arm and long arm to the hub and adding a 3rd wire that will connect everything to the main body of the chandelier. This was hands down the most complicated part of the entire light.

So here is what I learned.

Starting with the fact that the wires in this picture are WAY too long. But it is all I had to show you so sorry about that ;).

DIY Brass Bent Arm Chandelier-26

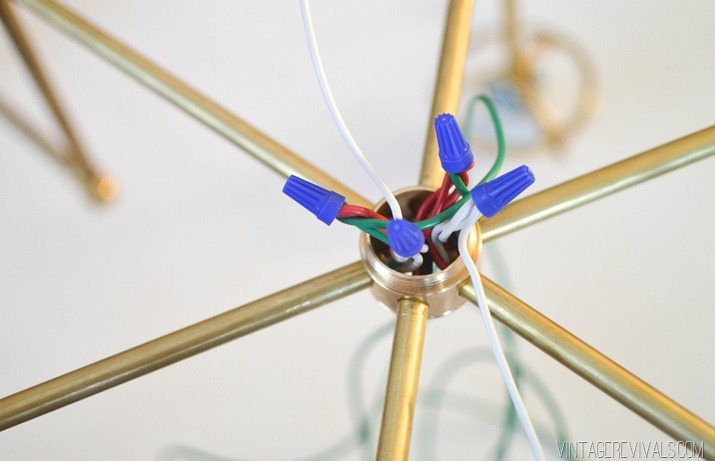
Make sure that the wires that are coming into the hub are on the same sides (hot, hot, and hot, neutral, neutral, and neutral)  this will give you a little more room because they aren’t crossing over each other and adding more bulk to the situation.

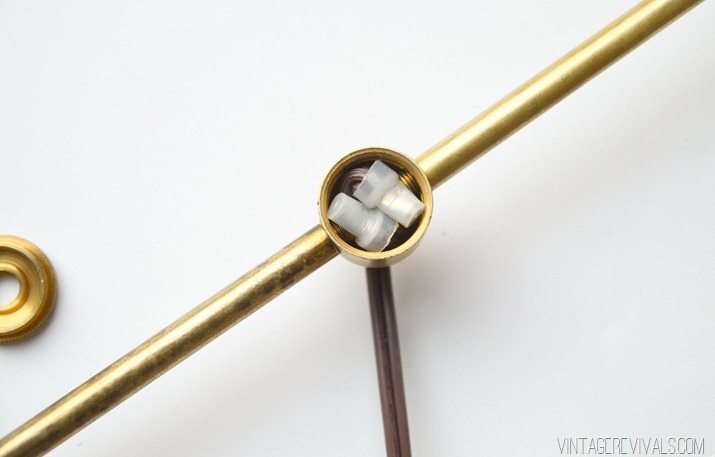
Cut and strip the wires as short as you can while still being able to mange them (I think ours ended up about 1/2”-3/4” long)  Twist the wire together and clamp it with a wire clamp (we had to trim a small amount of the plastic off of the edge of the wire clamp)

Lay it in as flat as possible. Once you have both of your wires clamped and sort of inside, gently pull on the 3rd wire (it is still exposed at this point, it hasn’t been covered up by the brass tube) and suck everything inside the little chamber.

DIY Brass Bent Arm Chandelier-27


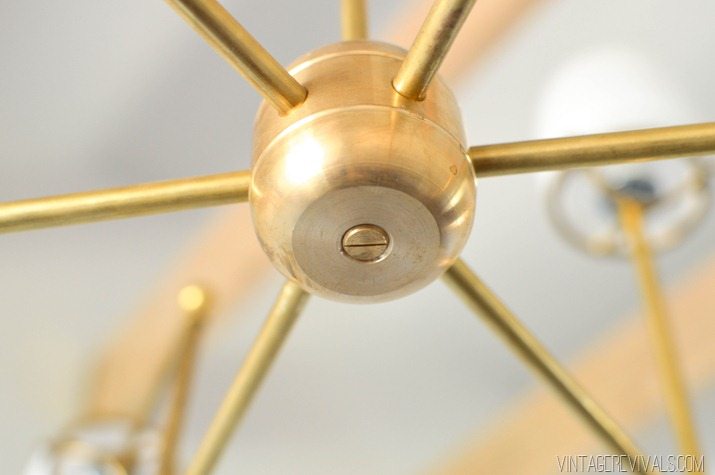
Then add the cap and the screw plug.

DIY Brass Bent Arm Chandelier-33


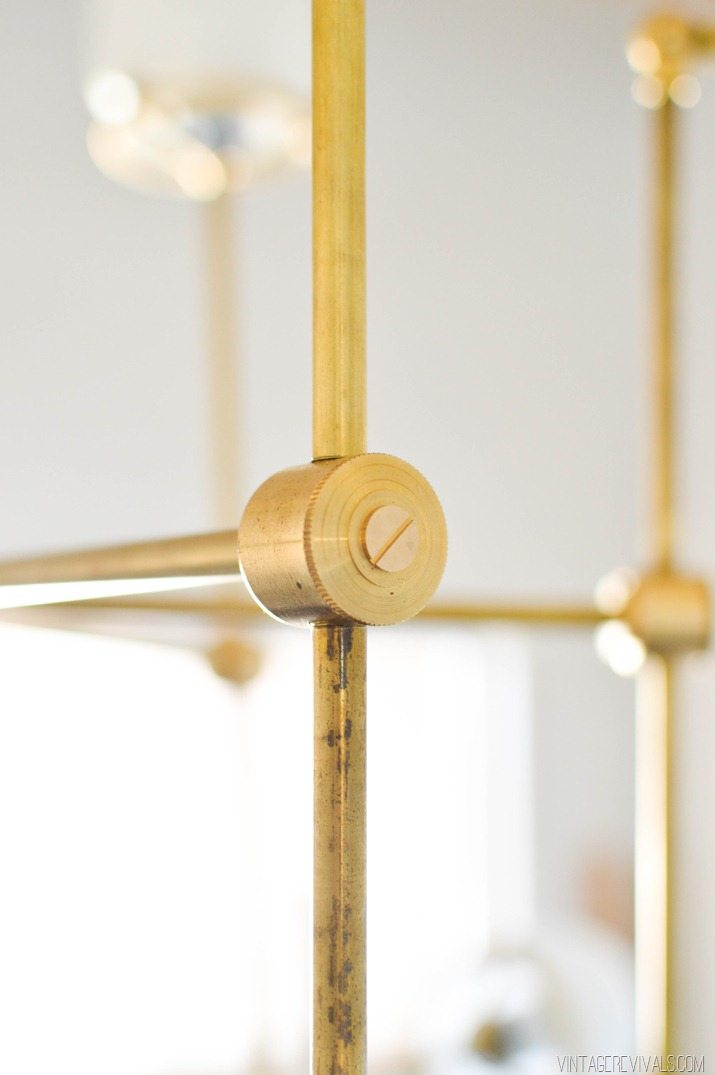
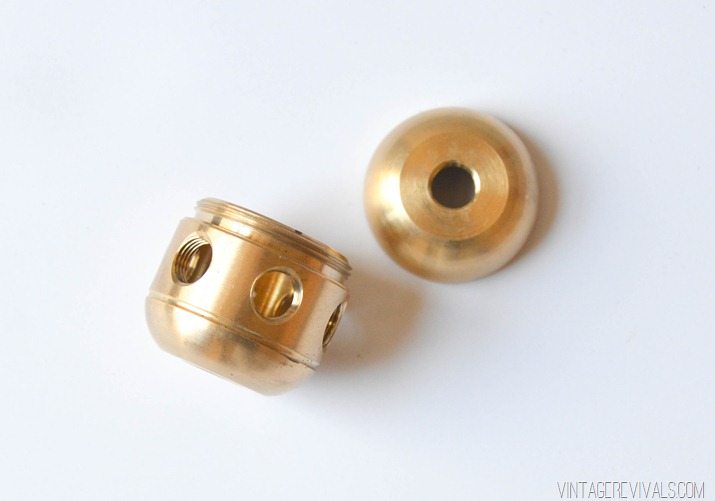
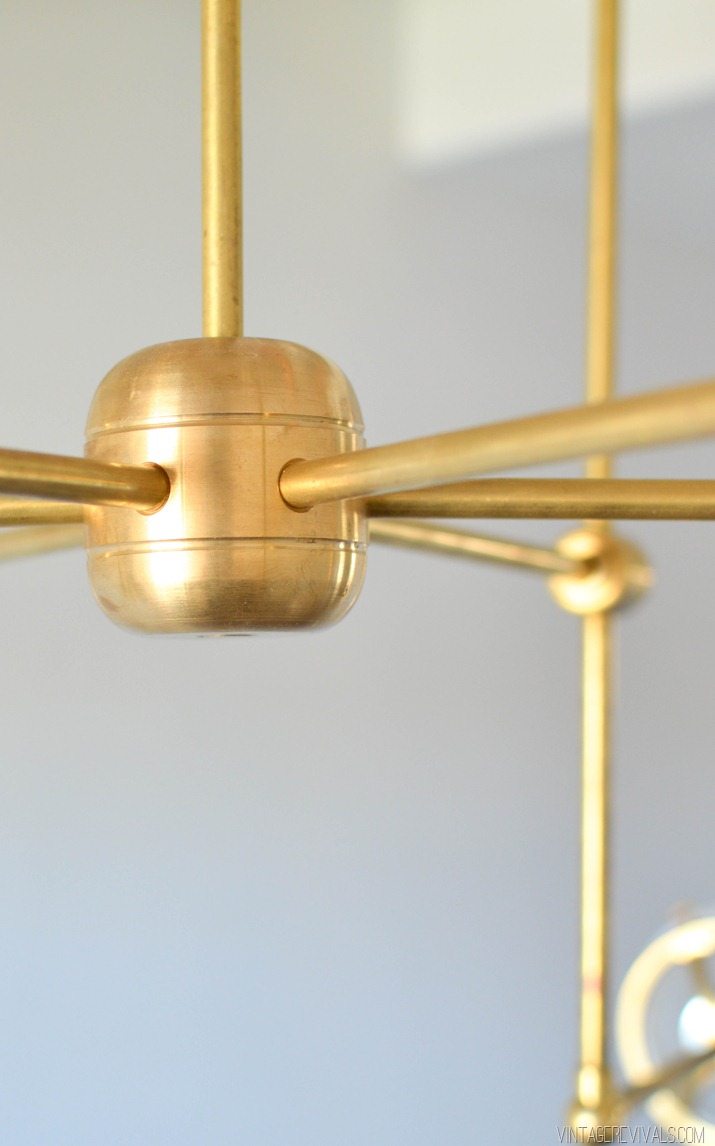
Thread your 3rd wire through an 8” piece of pipe (a.) and connect it to the main body of the chandelier (f.) The body of the chandelier is an egg shaped brass piece that screws apart. When it unscrews, the piece with all of the holes is the bottom section. (This is a mini version)

DIY Brass Bent Arm Chandelier-32


Repeat for all 6 arms. When you are attaching them make sure that they alternate which arm (long or short) is on the top.

Once you have all of your wires in the main center hub take all of the hot and twist them together,  adding one more long length of wire. This will be the main wire that runs up the stem to the ceiling. We found that it worked best to twist one group and then after the wire nut was on to tuck it down inside so that it was out of the way before twisting the second group.

To assemble the stem that comes out of the ceiling you are going to use the 12” pieces of pipe with the straight couplings. The amount that you need is based entirely on how high your ceilings are and how low you want your light to hang. This will attach to the hole in the top of the upper body section. The bottom section has a larger (1/4”) hole that you will cover up with the screw plug.

DIY Brass Bent Arm Chandelier-35


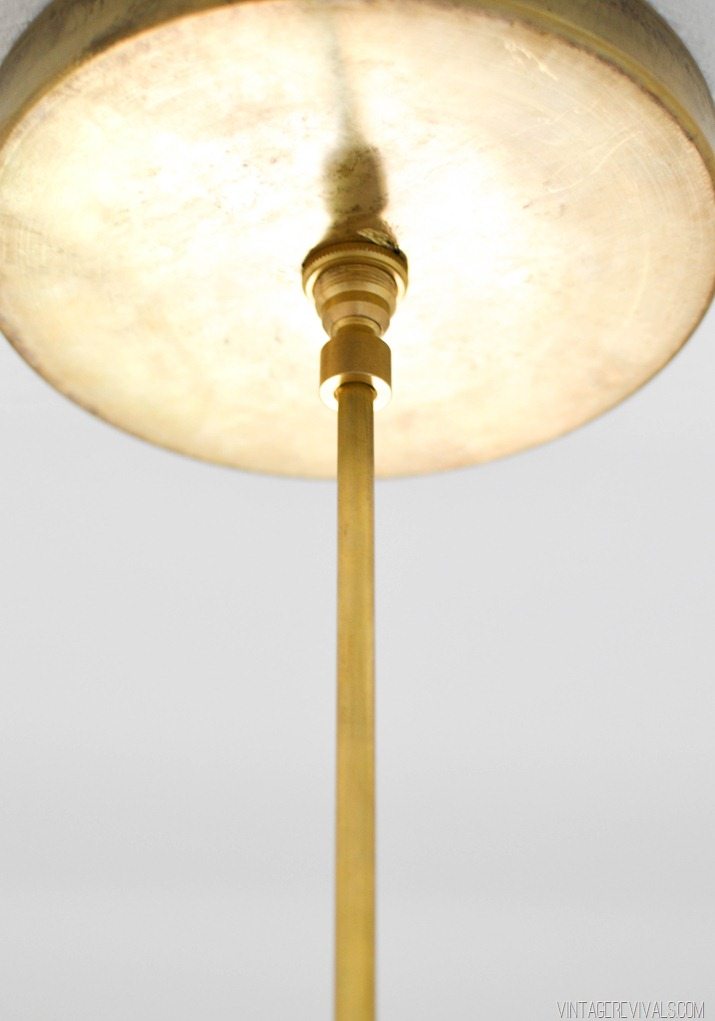
Add the large screw ring for the canopy (it comes attached to the hang straight coupling), the canopy, then the hang straight coupling and the cross piece in that order. Tighten everything up. I mentioned above that the canopy that we ordered had a hole that was too small. We used a hole saw that we had left over from this project to make it bigger.

DIY Brass Bent Arm Chandelier-17


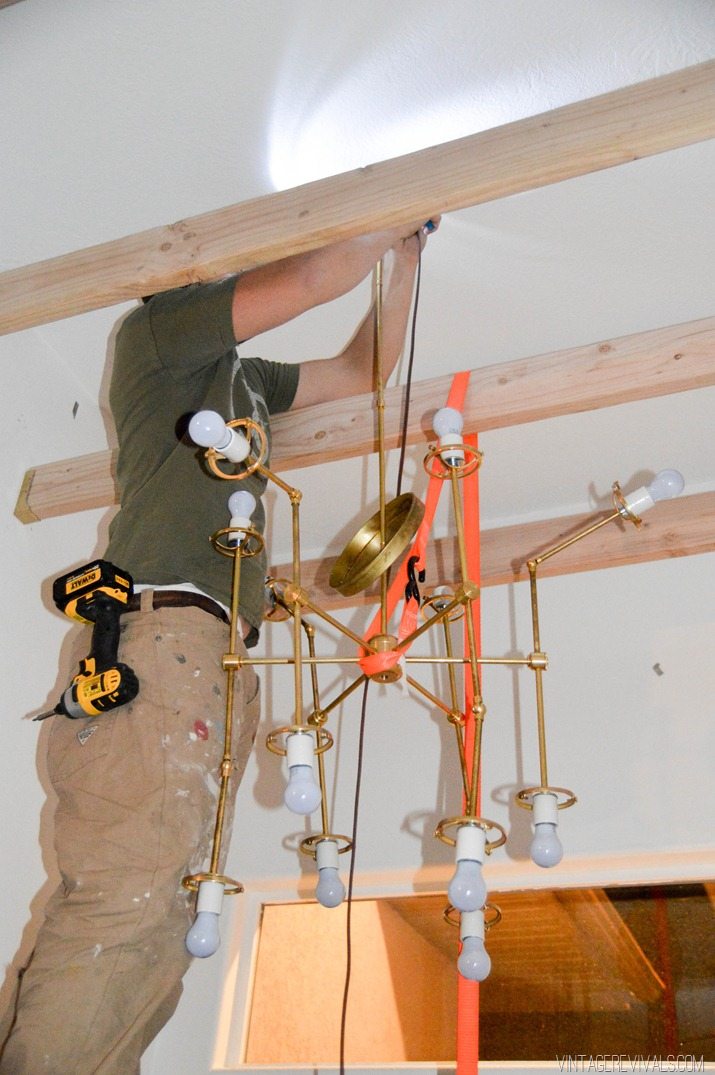
Now comes the fun part. MAKE SURE THAT YOU TURN YOUR BREAKER OFF BEFORE YOU WIRE YOUR LIGHT! (yes that was me yelling, it is critical.)  Attach it to the ceiling with the cross bar, wire it to the house wires and bring the canopy to the ceiling and tighten the screw ring. Dont attach the cross bar first, and then try to screw the light into that, it will just twist your wire up. Get the hang straight attached to the cross bar first.

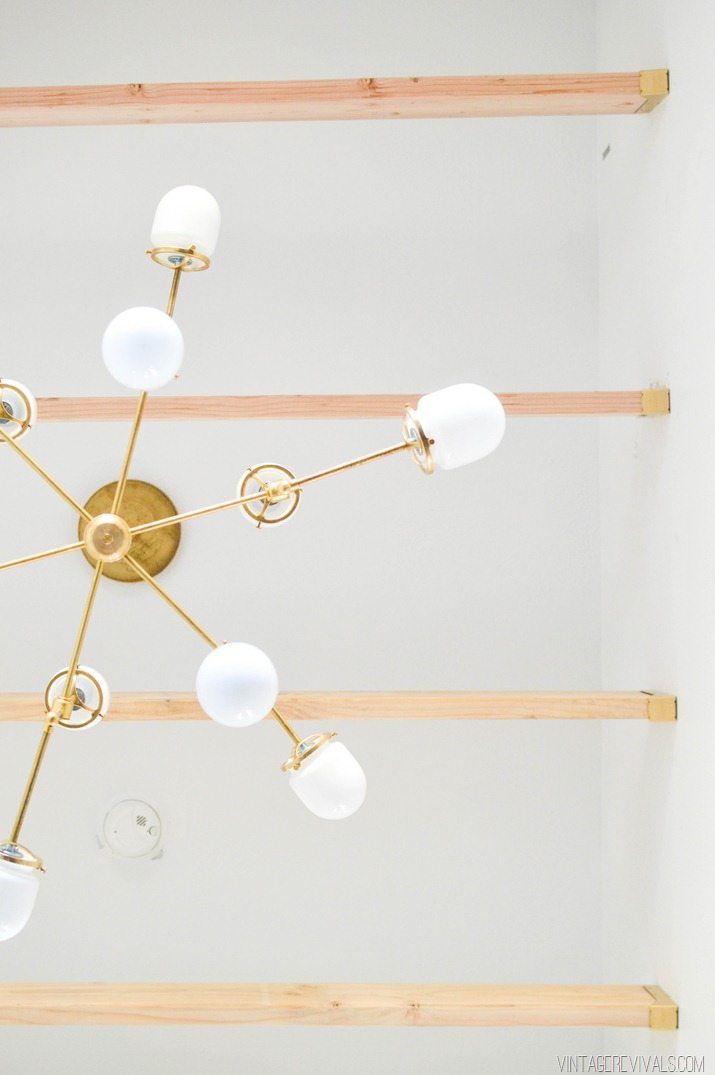
Apparently the ceiling beams are good for more than just looking awesome. How’s that for MacGyver?

DIY Brass Bent Arm Chandelier-31


When everything is wired, tightened and light bulbs are in, flip your breaker back on and cross your fingers that everything went smoothly!

DIY Brass Bent Arm Chandelier-39


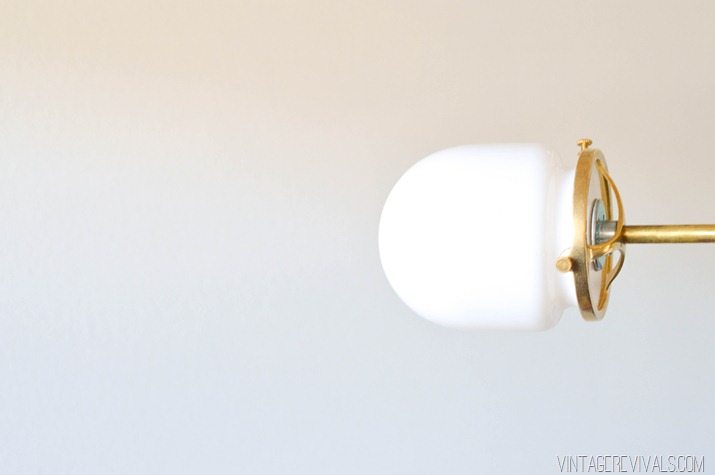
The last thing is to tighten the screws on your swivel elbows, and finish it off with the glass shades.

DIY Brass Bent Arm Chandelier-37

If you make it through this entire tutorial, you are a rockstar!

So what did I learn rewiring the same light 15 times?

The first thing that I did was try a different type of wire because lamp wire was super thick. Even though it had a good amount of insulation on it, it was no match for the sharp edges of the pipe. Lamp wire was the only kind (I tried 3 different varieties) that didn’t have the coating stripped off of it. Go with lamp wire.

When something seems too small, that is because it is. The original main body of the chandelier was teeny. Too teeny to fit 6 wires into. Trust me I tried.

DIY Brass Bent Arm Chandelier-40


The bigger one that the final light ended up with was SO MUCH BETTER.

DIY Brass Bent Arm Chandelier-34


The last thing that I learned? The projects that push you to your breaking point and you hang in there and dont give up, usually end up being your favorite.

DIY Wooden Beams-14


We’re thinking of adding them to the shop, so stay tuned!

Dont miss the Shop My House sale that is happening over at Joss and Main!!
17694__SITE_large

LoveYourGuts14
 
 
 dont miss any of this series


Shop My House!

By Mandi | 03/09/2015 | 6 Comments

Happy Monday you guys!!

I have such a fun post today.  One of the biggest complaints that I get from you guys is that because I thrift so much, you can never find the same things for your home that I have in mine.  Today that ends. I’ve teamed up with the always inspiring Joss and Main for a sale this week of hand picked items inspired by my house!!

17694__SITE_large

Joss and Main is an online flash sale site, that means that the items are available for a very limited time (in my case for 1 week).  I love it because you still get the thrill of the hunt!

Normally I don’t talk about the process of behind the scenes things like this one, but this was SO cool I just have to tell you about it.  They requested a few pictures of my house and then I picked out maybe 10 things that I loved that were on their site.  The rest of the items were completely up to them (which you know how I like to control things…) I was BLOWN away at the exactness.  It is literally furniture doppelgangers!! 

Here are a few of my favorites:

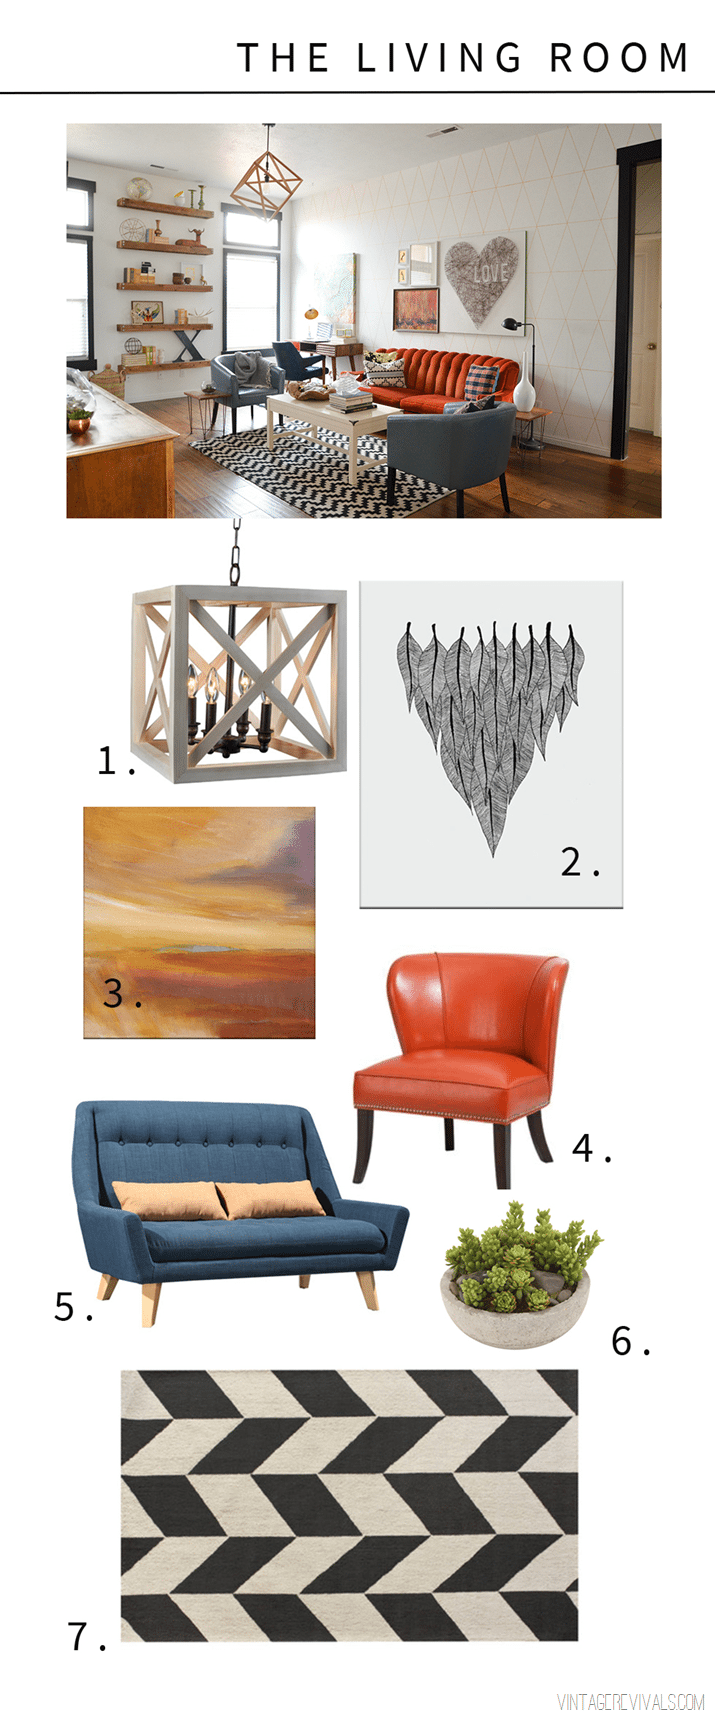
Shop This Living Room

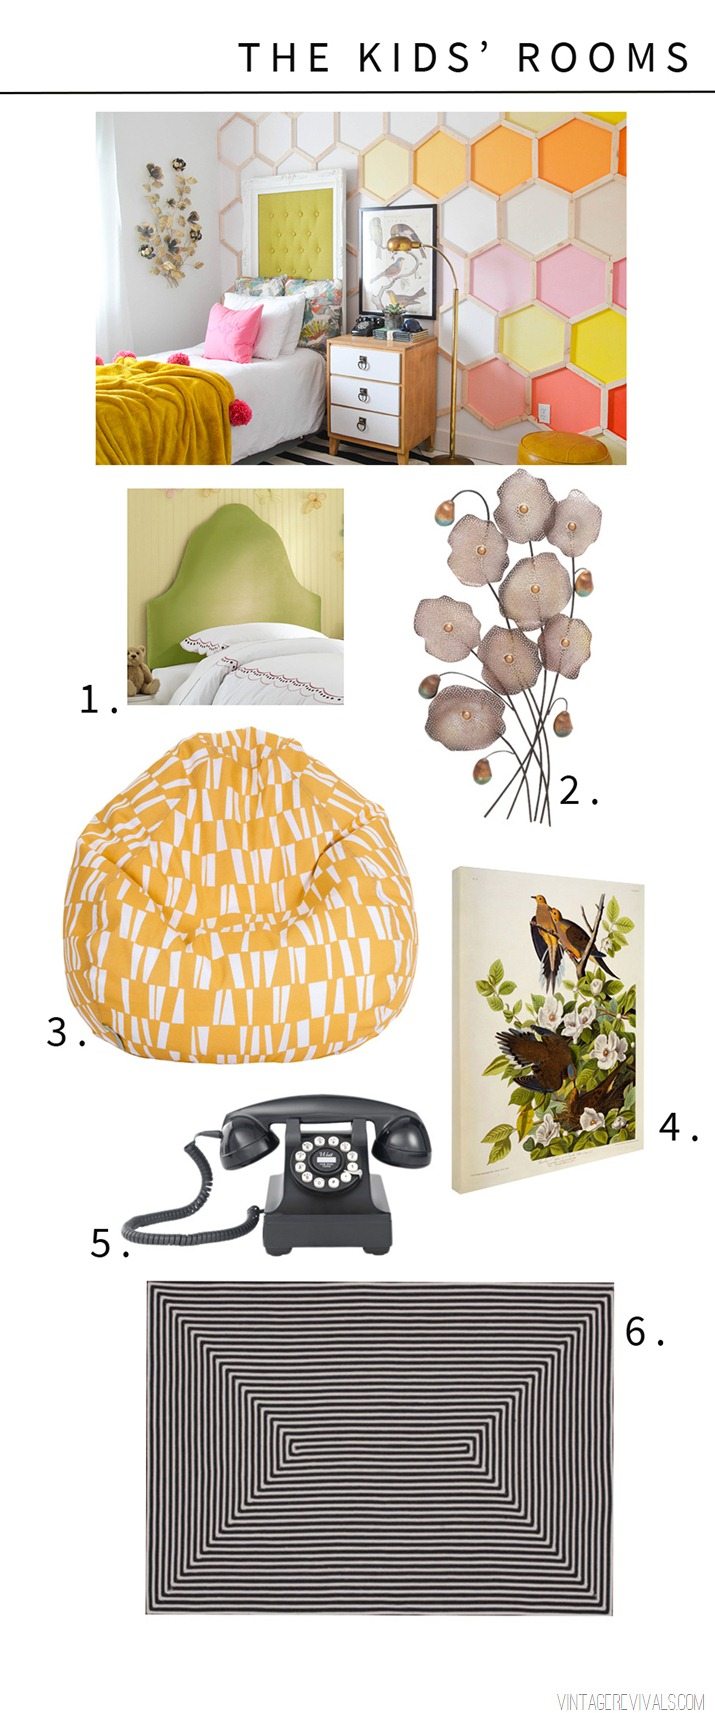
Shop This Kids' Room


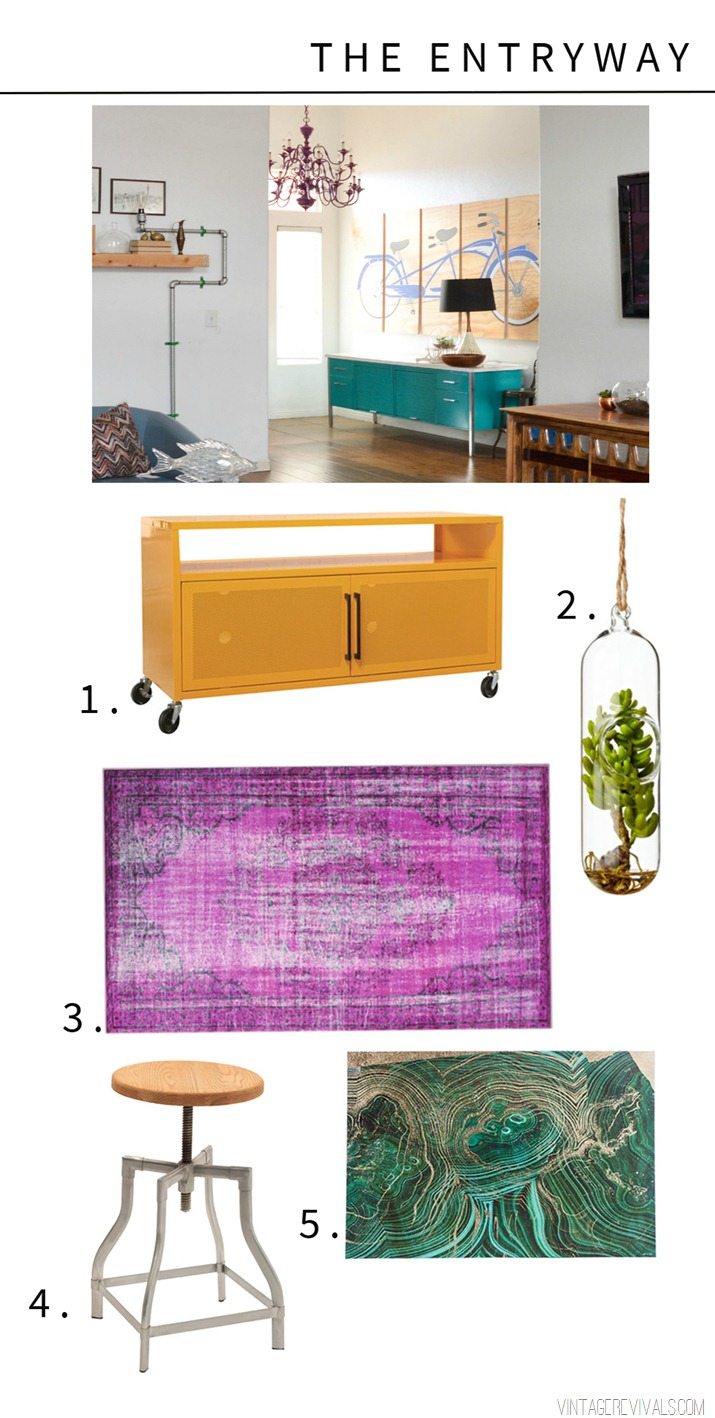
Shop This Entryway

Shop This Room


Crazy right?!

Check out the entire gigantic array of the items here!  If you don’t have an account with Joss and Main you are TOTALLY missing out!  Make sure that you take 2 seconds to sign up for mounds of decor inspiration!

LoveYourGuts14

Industrial Ceiling Beams in the Entryway + Video

By Mandi | 03/04/2015 | 368 Comments

Dun dun dun duuuun! Its #100reveal Thursday!! Do you know what this means?! A tutorial for a project that you can create for less than $100 at The Home Depot, the before and after transformation of GE reveal® light bulbs, and 10 more chances to win a $100 gift card and GE reveal® package!! (check out last weeks project here!)

VR_Intro Post_For Twitter


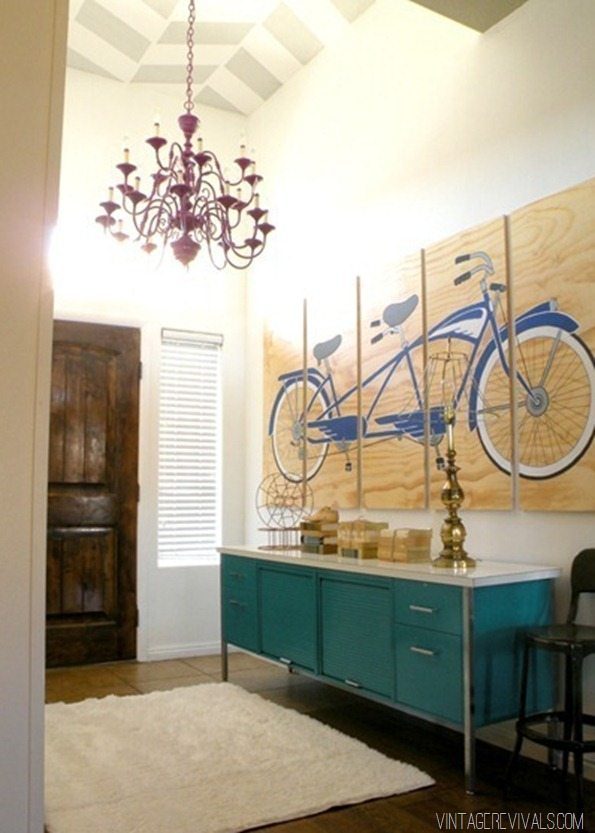
The living room makeover is well underway (you can check out the posts here) and lets be honest, you cant have this awesome loft living room with an entryway that looks like this:

entryway-makeover-reveal


The whole industrial loft vibe that we are going for is being carried into that space as well (because of course!)

Step one was to get rid of the purple chandelier. I am pretty sure that it was the happiest moment of this journey thus far.

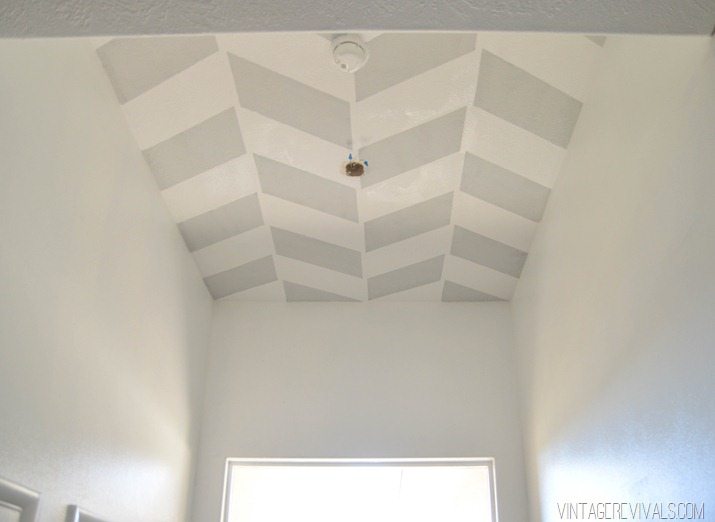
Step two was painting over the herringbone ceiling.

DIY Wooden Beams


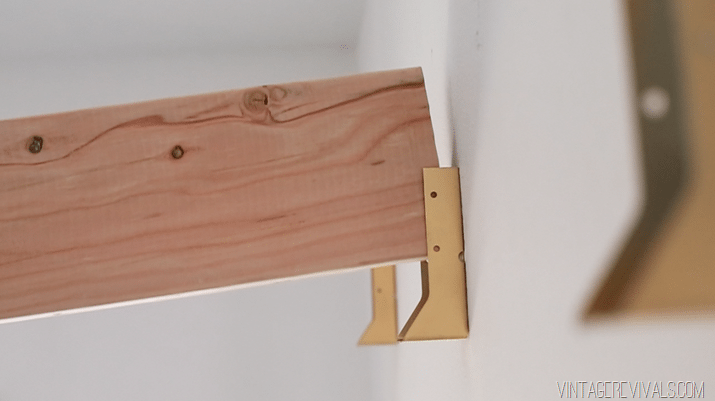
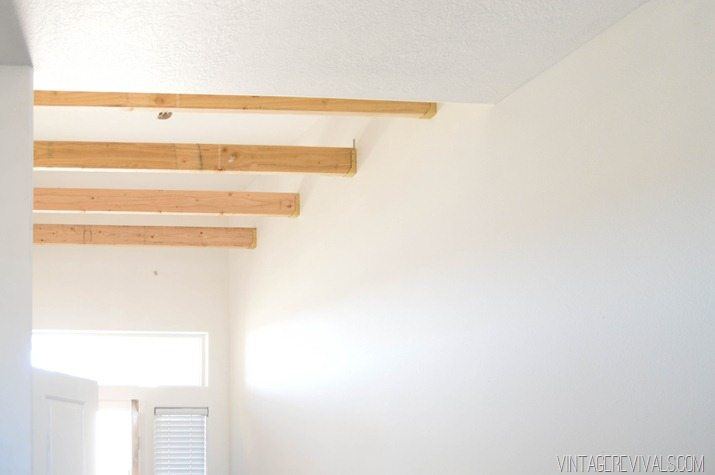
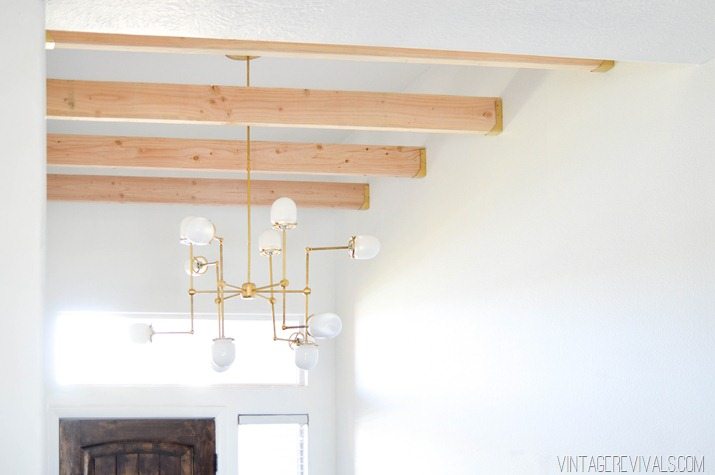
The challenge for this project was to create beams for less than $100 from The Home Depot. The space is pretty teeny, so big chunky beams (4×4’s or 5×5’s) would completely overwhelm it, and I needed an even number so that the chandelier could hang in the center. I decided to run with the industrial vibe and decided to use joist hangers to hold them. (If you remember back to the first video in this series when I am talking to Court and he is ignoring me? That is what I am trying to explain…)

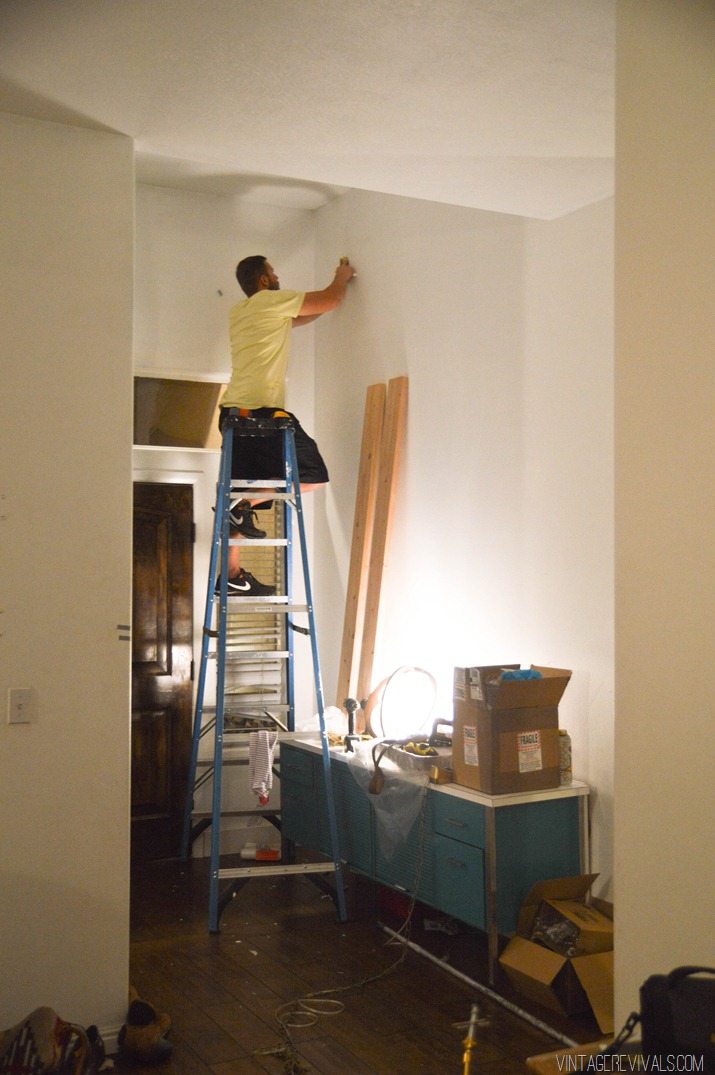
This is a horrible picture, but it kind of gives you a size of the space we are working with.

DIY Wooden Beams-6

Somehow (miracles do happen!!) all of the studs running up the wall lined up with exactly where we needed them, except the last one (furthest away from the door). We used drywall anchors to secure that beam and it’s not coming down without a fight.

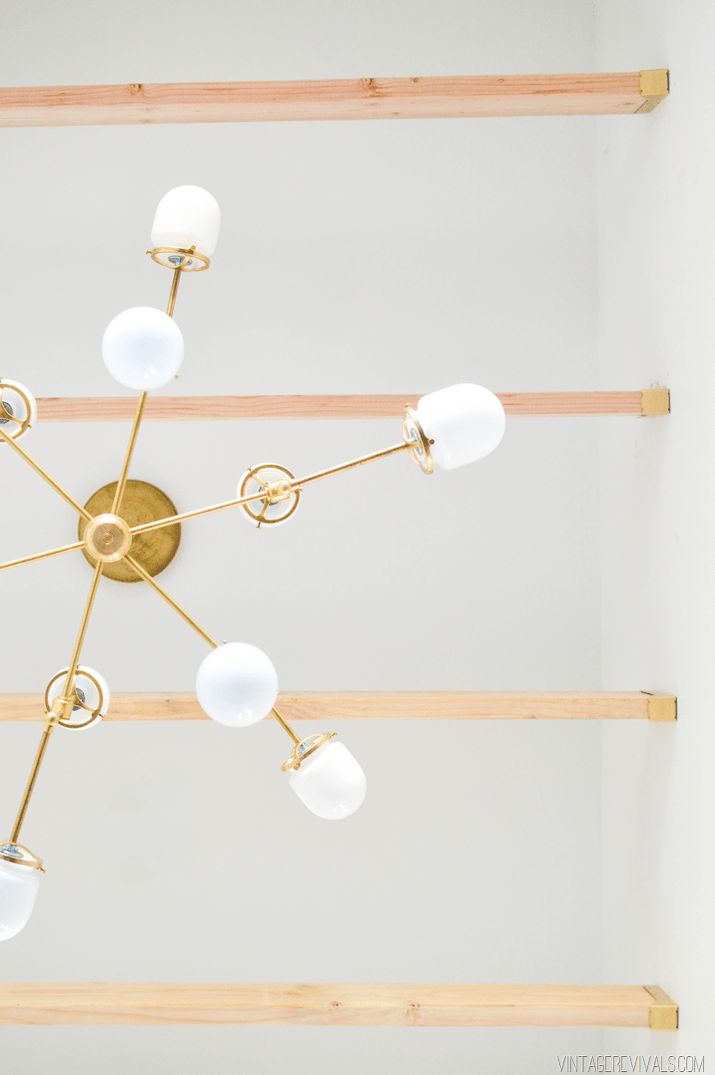
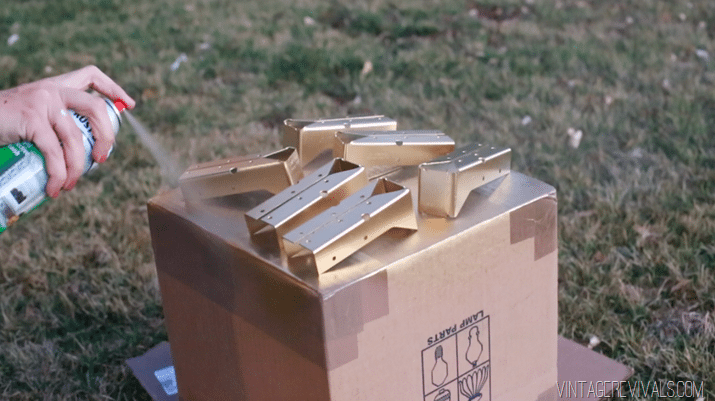
To tone down the unfinished construction vibe, the joist hangers got a coat of Rustoleum Gold spray paint.

Screen Shot 2015-03-04 at 10.48.09 AM


Screen Shot 2015-03-04 at 10.48.39 AM

The wood that we used is 2×6 pine board from The Home Depot (naturally) just like the ones that we used for the shelves in Macie’s Boho Bedroom.

Once they were cut to size, the boards slid right in!

Screen Shot 2015-03-04 at 10.49.31 AM


DIY Wooden Beams-7


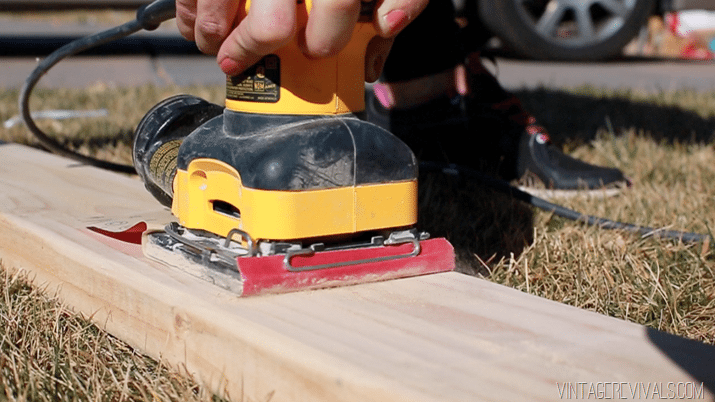
Thennnnn I took them out and sanded the markings off. 🙂  And added a light.

Screen Shot 2015-03-04 at 10.49.08 AM


Much better.

DIY Wooden Ceiling Beams #100reveal-2

DIY Wooden Beams vintagerevivals


Tell me that you’re not COMPLETELY obsessed with the light?! Do I dare you. Well guess what? It’s a DIY!

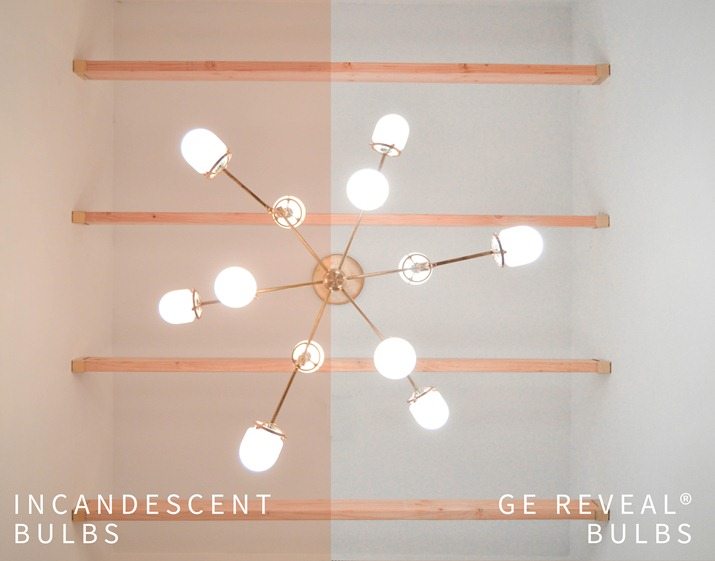
How is this for a before and after? GE reveal® light bulbs are basically magic. This picture was taken at 10:00 at night.

GE Reveal Lightbulb Before and After

DIY Wooden Beams-8


Before you go don’t forget to enter the giveaway for 1 of 10 $100 Home Depot gift cards and GE reveal® LED packages that I’m giving away this week!

I’ve been thinking about the giveaway submission and I’ve decided that we are going to play “Would You Rather?” So leave your best “Would You Rather?” questions in the comments below! Please keep it clean, any offensive comments will be deleted and will not be eligible for this week’s giveaway! (Giveaway rules and info are here.)


ge_reveal_giveaway copy

LoveYourGuts14 


I’m so excited to be a GE reveal® #100reveal sponsored blogger. Opinions are my own, projects have been chosen by me, and additional products used in the project were selected by me and provided by GE reveal®. 
 
 dont miss any of this series


Grouting Brick Veneer

By Mandi | 03/04/2015 | 67 Comments

This is the 2nd post of a 2 part series! If you want info about installing brick inside your home, you’ll want to check out this post!

How-to-install-brick-veneer-inside-your-home_1

One of the perks of having friends that do this stuff is that they were able to come over and help me learn the right way to do it, instead of fumbling my way through for the first little while. It was sort of refreshing!

Once all our brick was installed, it was time to grout.

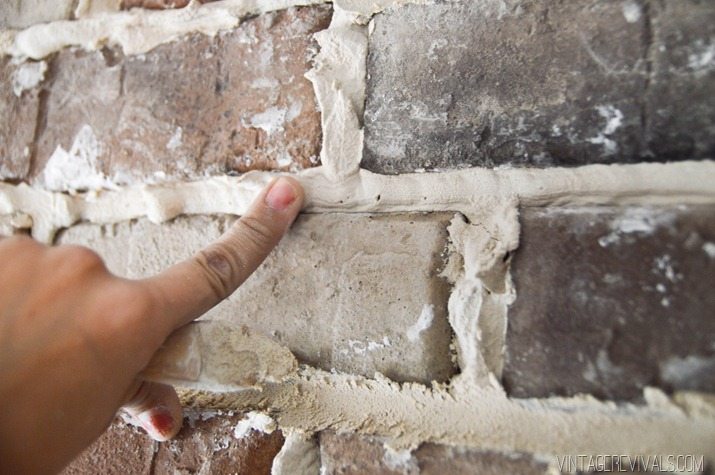
When you are grouting brick, your best friend is a brick grout bag and a chip brush (you know the kind that you get at Home Depot for $1.50?)

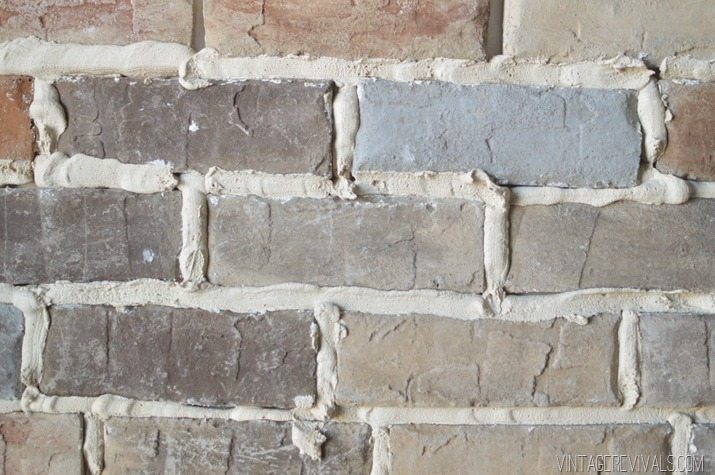
(Another really important tip is to make sure that you are using sanded grout. We’ll get into it more in a second but its kind of a big deal.) The grout that we used was Polyblend Sanded Grout in Antique White. You can find this at Home Depot for around $15 a bag. We used 13 bags for the entire living room.

Unknown

When you are mixing 13 bags of grout, you will most likely want to invest in a grout mixer. Its basically a giant beater that you attach to the end of a drill. I cant even imagine how much arm muscle it would take to hand mix that much grout.

The key to this entire party is the consistency of the grout. If you mix it too thick you wont be able to squeeze it out of the bag. If you mix it too thin it is a huge waste because you lose most of it out of the bag when you are tightening it.

The right consistency is somewhere between a Frosty and that gross frosting at Costco they put inside their cakes.

Satellite

Then you just go to town.

How To Install Interior Brick


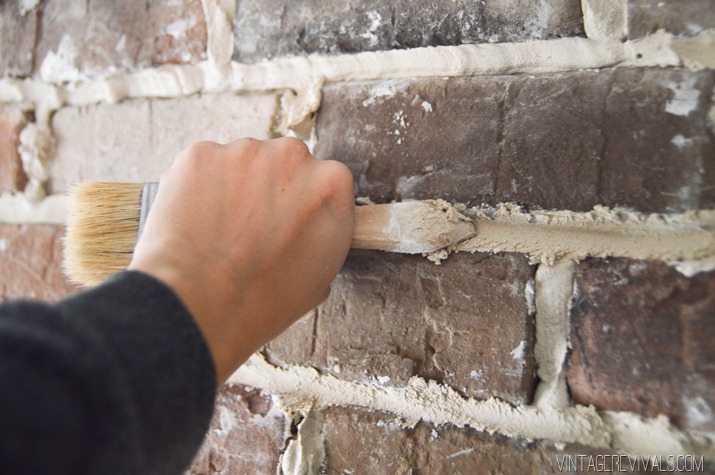
I feel like it worked best for me to work in medium sized sections and fill the horizontal spaces first, then go back and fill all of the verticals.

How To Install Interior Brick-2

That totally looks like a Frosty right?!

After about 15 minutes check your grout. You’ll know its time to shape it when it barely yields to pressure under your fingertip but is still wet. Depending on the temperature and humidity of your house this can take anywhere from 15-45 minutes. Just keep a close eye on it and you will be golden.

How To Install Interior Brick-18

Don’t use your fingertips to smooth it (unless you are wearing gloves!) the combo of the tough texture + lime will make your hands hurt for days.

The best tool for the job is an inexpensive chip brush. (As you are using it, the handle will wear down to the perfect shape.)

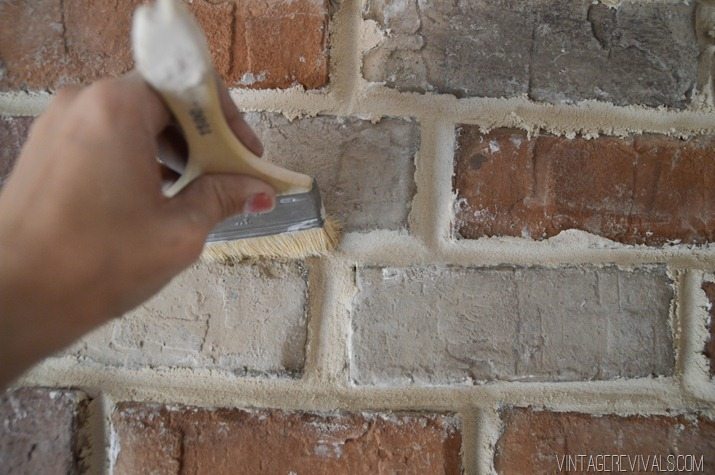
Ok so your grout is ready, all you do is hold your chip brush at an angle and swipe it over the grout.

How To Install Interior Brick-12

This is where your inner artist comes out. You’ll totally develop a technique depending on the look that you are going for. I wanted ours to be messy and full, but still have a slight indent. If you want it to be full and flush with the brick, you’ll hold the brush vertically and swipe it with the side of the handle.

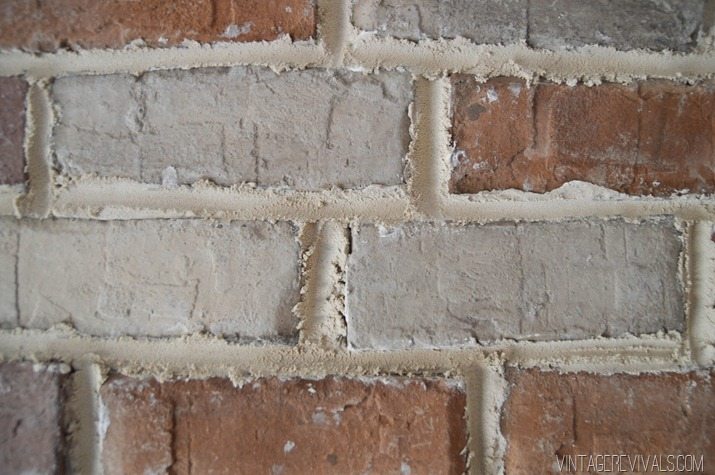
This is what it should look like after the swipe.

How To Install Interior Brick-13


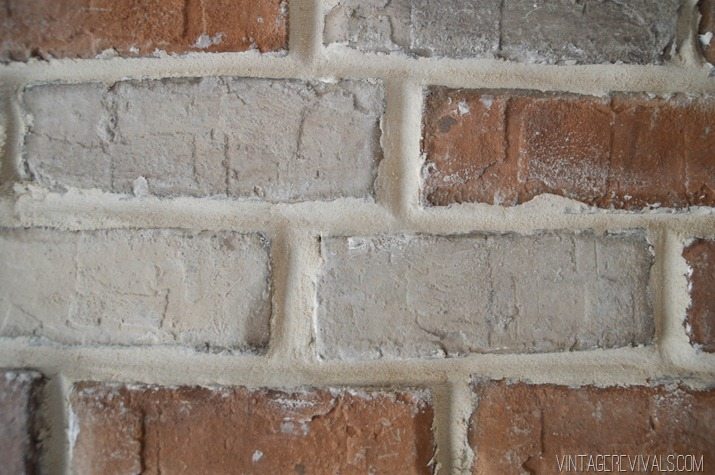
See all of the rough edges? THAT is why you want to use sanded grout. Flip your brush over and brush all along the grout. Because of the sand, it will crumble away, unsanded grout will just smear.

How To Install Interior Brick-14


If you are doing this and you can see lines in your grout from the brush it is still too wet and you need to let it dry a little bit more.

How To Install Interior Brick-15


There is a pretty good sized window of time between when you are actually applying the grout and when it is ready to shape. If you work consistently you can work in a circle of applying the grout and shaping.

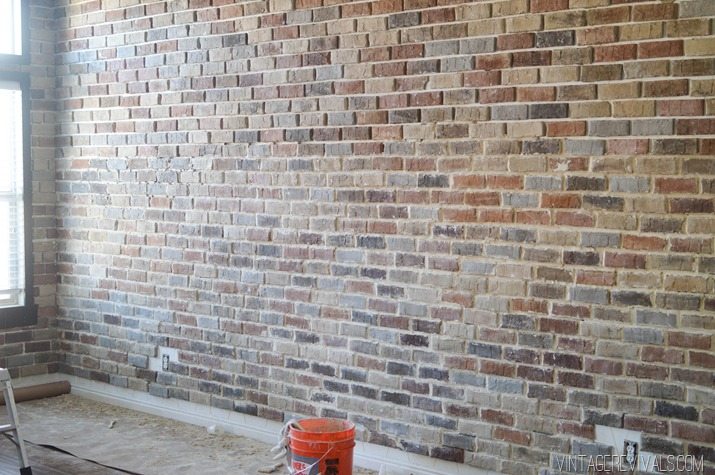
It took me about 6 hours to get 1/2 of the large wall done by myself.

How To Install Interior Brick-5


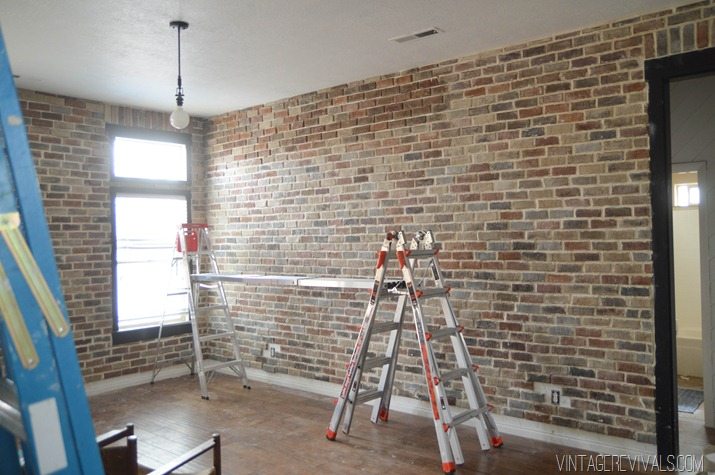
Once Court was home, he grouted and I shaped and it took the rest of the day to finish all but 1 section close to the ceiling. (You can see it in this picture)

How To Install Interior Brick-8


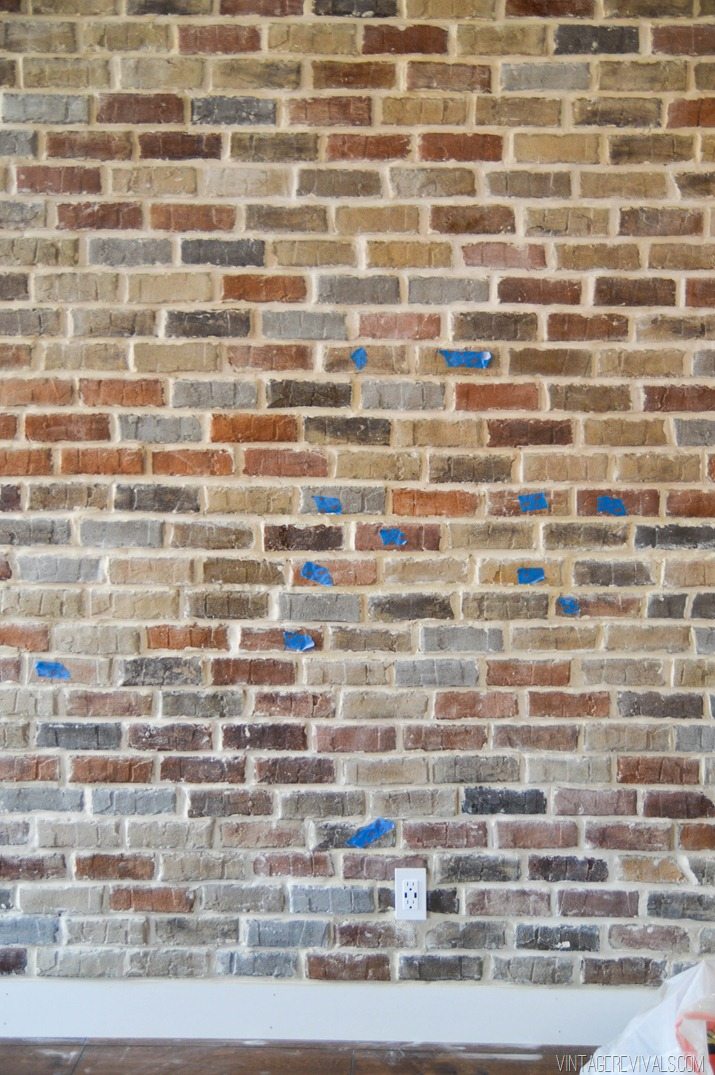
Once you have everything grouted step back about 4 feet from the wall and look to see where you eye spots a problem. If you are looking at it up close under a microscope you will see a million things. But if you step back, you’ll see the things that really need to be addressed.

Mark those spots with painters tape so that you can fix them all at the same time.

How To Install Interior Brick-17


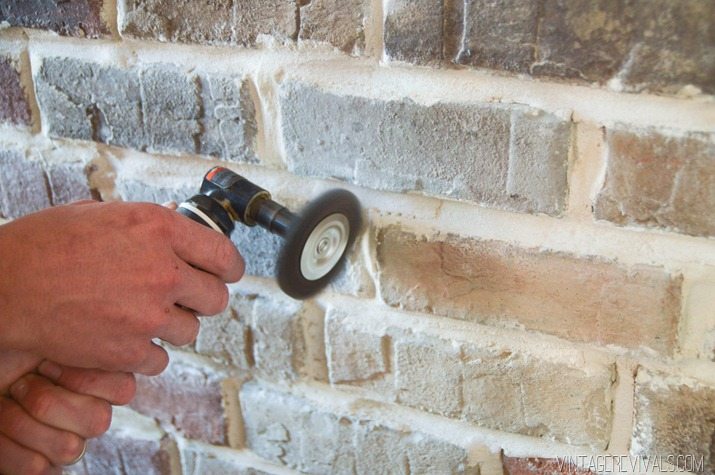
Most of the spots that were marked in the above picture needed more grout along the edge of the brick. If you happen to have a spot that needs less grout, using a wire brush attachment on a dremel or polisher is a fast and easy way to fix it.

How To Install Interior Brick-16

How to install brick veneer inside your home-17

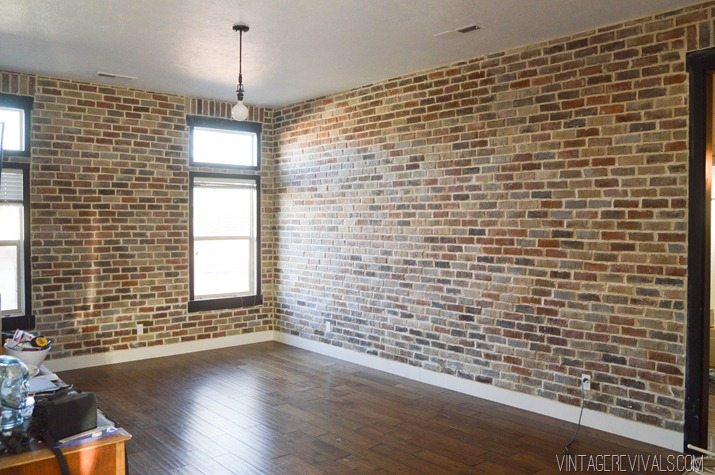
The original plan was to whitewash it (that’s why the brick is so many different colors, I used an assortment of leftovers that Quickstone had on hand to keep the price down) but I’m torn now because I LOVE the natural color. But it is seriously dark. I need to see how it looks with the couch (yes, I made a decision! stay tuned!) and what happens when the room starts coming together.

So what are your thoughts? Light or Dark?

LoveYourGuts14 
  
 dont miss any of this series


The Ever Intrusive Future Homeowner

By Mandi | 02/27/2015 | 89 Comments

How would you solve this situation?

You are decorating your entire house for someone you’ve never met. You have no idea if they are male or female, a family with 7 kids, or an elderly couple. You have nothing to go off of as far as likes or dislikes, you literally know NOTHING about them. You also have no idea when they will move in. But you think about them. You think about them every time you want to be brave enough to change a paint color. You think about them when you pick out your lighting. You think about their opinion with every single home decision that you make.

Sounds sort of insane right? THAT’S BECAUSE IT IS!!

Helloooooo its hard enough to make up our own minds when we know every single thing about ourselves.

One of the biggest things that come with homeownership is the resale value of your house right? I get it. But here’s the thing. Those people? They don’t live there. You do!

Whenever I think about this future homeowner I always picture a nerdy guy with a comb over and a sweater vest tapping me on the shoulder saying (in a nasally voice) “But I don’t liiiike brick.”

He kind of looks like this guy from our family Christmas pictures:

home_owner

(Ironically this is a picture of my husband who actually does own our house…)

People have bad taste, its just the way it is. What if the future owner of your home has horrible taste? Does that mean that you have to live in a place that caters to his sad sad world? In order to not do anything to offend the maybe future homeowners we feel like we need to do things that are inoffensive.

Vanilla.

Heartbreaking.

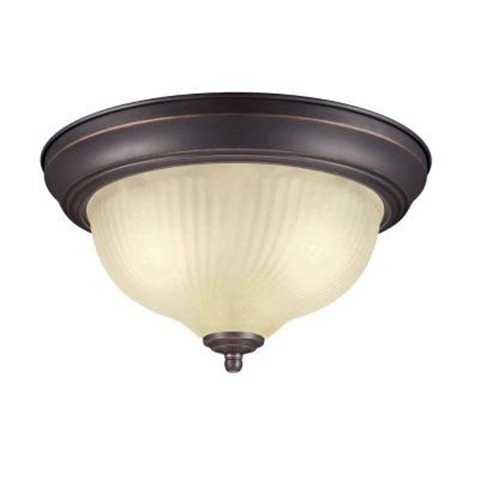
The boob light.

62cadcce-1e2d-4a3c-9d5d-fe2d5cafb9a2_400

WHYYYYY?? You know what is offensive? Boobs. On your ceiling!

How about beige?

home-design

(Source)

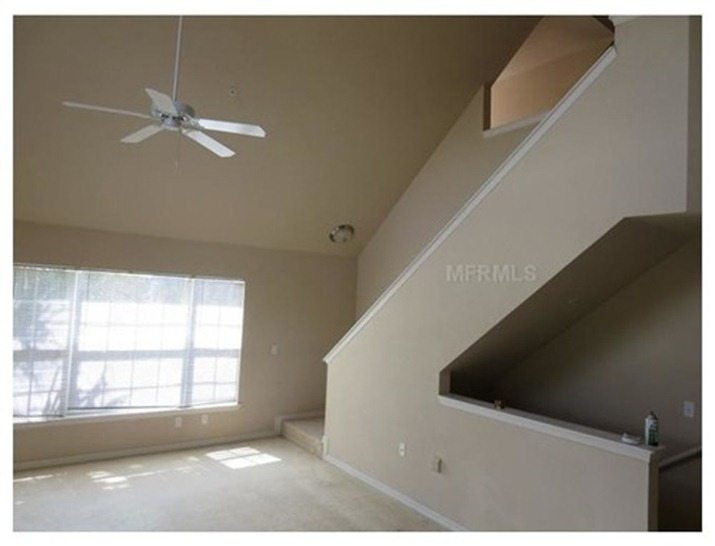
Southern Utah is full of beige builder grade houses. Trust me, I bought one.

So in a effort to keep our homes in the pristine beige world that they entered as, we just leave it? So that Joe Blow will maybe want to live there someday?

You guys.

Think about your favorite room that you have ever seen (in person or online). I am willing to bet that it’s not builder grade neutral with boob lights. I am also willing to bet that there are people that fiercely love it and people that hate it. That’s not bad!

There are so many things that you can do to inexpensively update your house and not decrease it’s value. Like paint. Its just paint, you (or the new homeowner) can always take it back to its beige-y beauty if it is so desired.

But more importantly, what can you do to make your home a place that you love? There is something that needs to be said for understanding that yeah, this might not be your dream home. But still doing your best to make it that way is ok!

Everything is going to offend someone, and guess what? You’re the only one that has the power to change what offends you in your own home.

I was talking to some friends this week, one of them is building a house and asked if it would be a horrible idea to paint the kitchen cabinets white because it is on trend and it will go out of style eventually. Here is what I think, if you love it DO IT! Everything will go out of style. Except Taylor Swift, she never goes out of style (now you have that song stuck in your head, sorry.)   Everything you put in your house has a timestamp on it. It’s what makes the world go round. It’s what gives you nostalgia. Think about it, classic styles still evolve and that is not only ok, its AMAZING!

So lets make a pact, if you have beige walls and boob lights, and hate them lets change it!! Don’t be scared, come into the light! It’s way funner over here!

And tell that intrusive future maybe homeowner to shush it.

LoveYourGuts14

Let the Living Room Makeover Begin!! + Video
By Mandi | 02/25/2015 | 719 Comments

Its HERE!! The moment that I officially un-officially move into a loft!! There is a lot of information and awesome things to remember in this post, so if you are a skimmer, settle in cause you wont want to miss this!
VR_Intro Post_For Twitter

First things first, I have teamed up with GE Lighting to completely overhaul my living room AND entryway in 4 short weeks. We are doing it real time Nugget style (hopefully with a few less redoing it twice projects…)  Every Thursday I will be sharing a #100reveal project that you can duplicate for less than $100 from The Home Depot and showing off the transformative power of GE reveal LED light bulbs (which will basically give you a room makeover in and of themselves) and a video (!!!) from the series that the unicorn sisters and I have been working on.

Also every week we are giving away (10) $100 Home Depot gift cards and a GE reveal® light bulb kit.

For all 4 weeks. (Enter at the end of this post!)

That’s $4,000 to The Home Depot and GE reveal® LED light bulbs for 40 of my luckiest friends!

So lets’ kick things off with the first episode in our video series shall we? Janae did SUCH an amazing job on it. Please pay attention at :33 and note how Court is TOTALLY ignoring me. Its real life yo.


The living room. I feel like having images that live forever on the blog makes people think that what they see is the reality at all times.

Living Room Makeover @ Vintage Revivals-2-2


You guys. How about a little reality check?

GE Reveal Light bulb-2

When the orange couch died we had to have some seating in there. So I moved the Laundry Couch out of my bedroom and into the living room. You know what a Laundry Couch is right? The place that you store all of your clean laundry? (Now that it is in the living room, we have a laundry floor.)

There are random chairs. No rug or coffee table. No art. No desk. The entire thing is just really depressing to look at. Amiright?

GE Reveal Light bulb-3

The obsession with living in a loft is what pulled me out of the funk. I think its a great idea before you rip everything out and start completely over to stop and look at the space and see what things you LOVE and keep those. Looking at the living room, the things that I loved were the black moulding around the windows. I feel pretty confident in changing everything else.

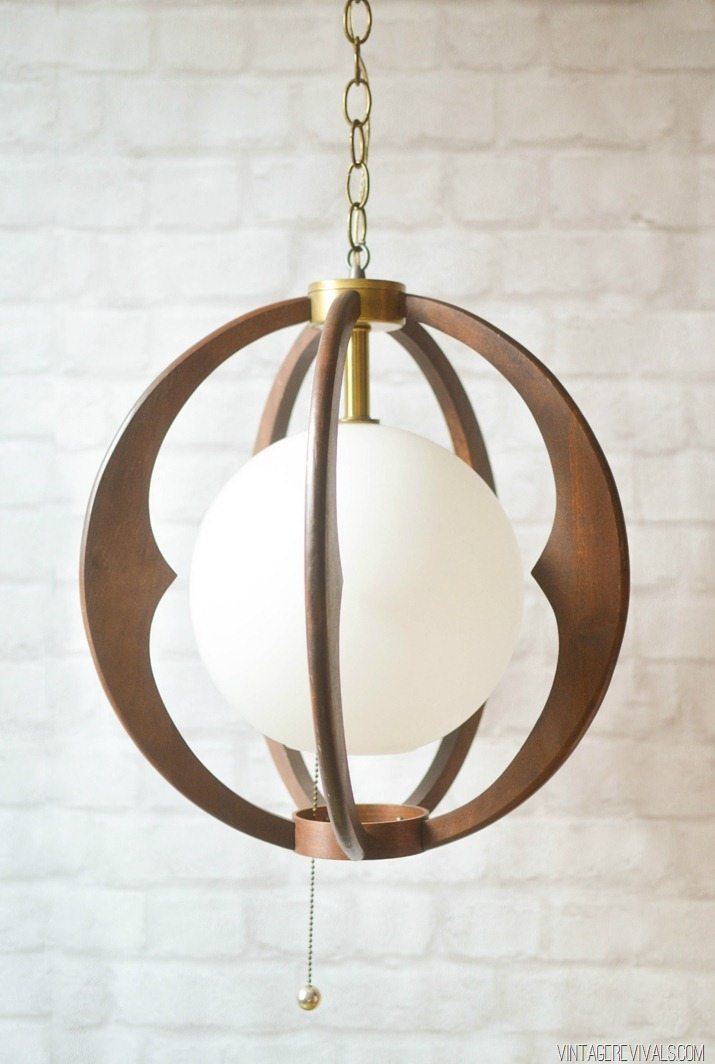
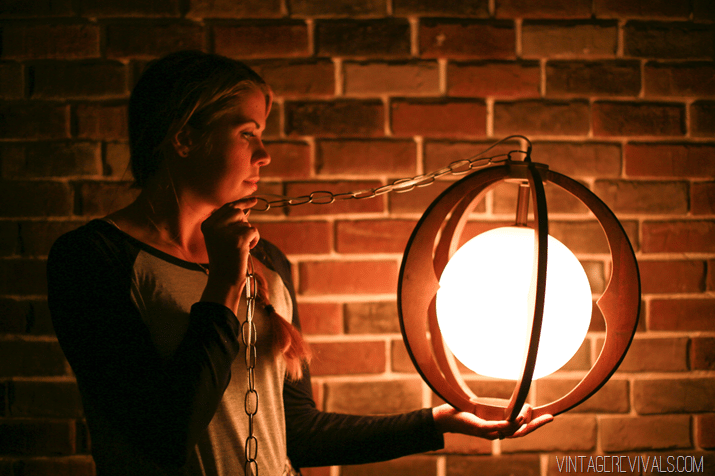
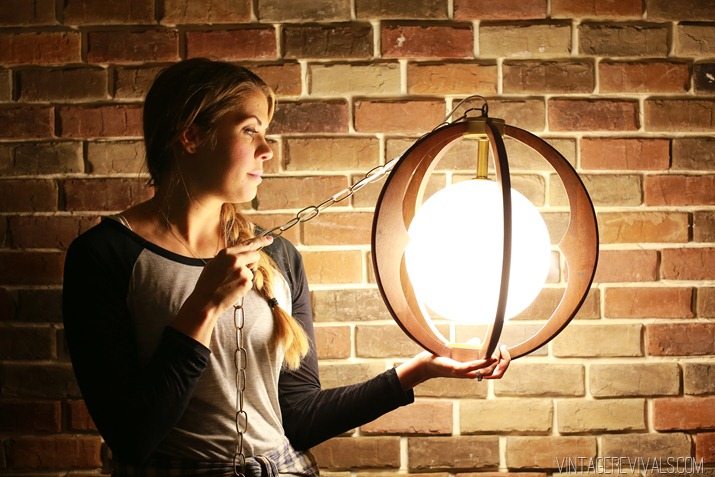
If you’ve been reading for a little while, you might remember the awesome Craigslist light that I had installed in Ashy’s room that was too little?

MidCenturyHangingLight


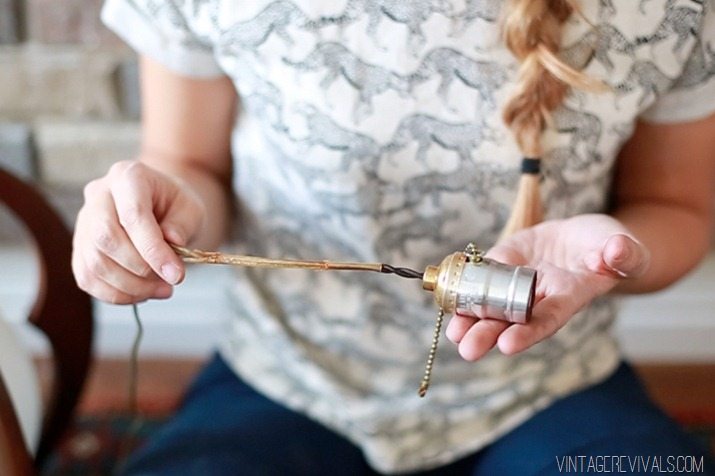
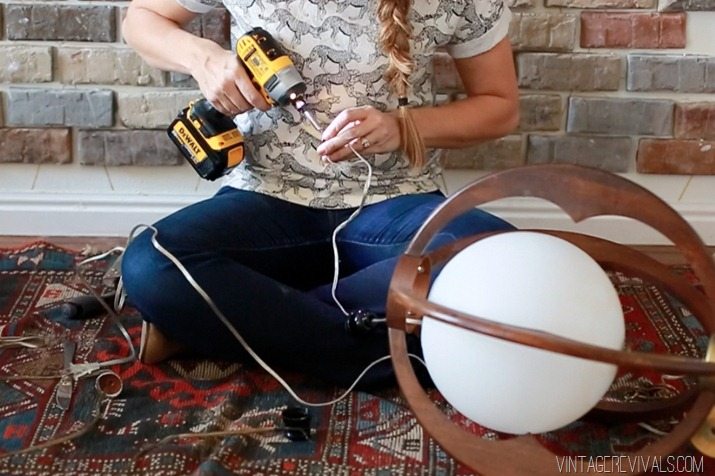
That cute light has haunted my dreams. I knew that it needed to be in the living room, but the problem was that we had cut the cord seriously short when we were hardwiring it to the ceiling. It is really easy to look at a light that has a less than ideal cord situation and feel like its not going to work, but the simple fact is that rewiring a light is one of the easiest projects you can tackle.

rewire 1


*One thing of note that will make you probably want to hurt puppies if you forget. When you are wiring a light with wire that already has an outlet on the end you have to work backwards. Start with the elements that are closet to the plug and work your way down to the socket…ie the chain will go on first, then the fixture loop, all the way down to the socket being last. If you miss a piece or forget to do this you’ll have to rewire your socket.

Rewire 4 copy

Lamp cord has 2 wires. The way to tell them apart is by the ridge on the outer edge of one. The smooth wire is Hot and will connect to the gold screw in your socket. The ridged wire is neutral and will connect to your silver screw.

Ok so have you guys ever used GE reveal® LED light bulbs? I never had, and I was sort of dumbfounded at the difference they made. They just make everything prettier. Seriously. I feel like I have totally been missing out my entire life not knowing about them!

Check out the difference. (Both of these light bulbs are 60W)

Before GE reveal LED Light Bulb

9V9A6966

So not only is the GE reveal® light brighter, but can you see the color difference? All of the dark yellow tones are gone! You guys. This is like Photoshop in real life.


dont miss any of this series


Turning The Living Room Into A Loft (!!!)

By Mandi | 02/24/2015 | 40 Comments

I mean. Did you think that it wouldn’t happen?

The living room is being turned into a loft! (Well obviously not an actual loft but a totally loft-like space!!)

Now I know what some of you are thinking. Already?! I loved your living room! etc. etc. Well the truth is that my living room looks nothing like it did 2+ years ago when I shared it with you. The orange couch was the star, and with it’s demise, is now having a child actor moment in the storage unit. Almost all of the other furniture was sold at the last Hoard Sale, and dang it, I wanted a change.

Living Room Makeover @ Vintage Revivals-2-2

I know when I start to get antsy (like looking for another house) its time for something new. I have been utterly consumed with living in a warehouse space, the problem is that Court doesn’t love old things. That will never happen in my marriage. So I had to find a way to make the space we have feel loft-ish. The good news is that we have really high ceilings so its totally doable.

0aff540b7455d0118ca2f642cd3ecd08

The plans include:

1. BRICK! Ok so I am just going to say this so that you know how entirely obsessed I am. Brick is the new Leather. I feel like that wraps it up in a neat little package no? After seeing how it transformed Durango’s it was an easy choice.

2. Lots of new lighting to brighten up the space.

3. A settlement on the couch debate (still haven’t decided, I need to move everything in and try it out)

4. Art of course, but not just any art. If the plan actually works it is going to be FREAKING AMAZING art. We’ll see.

5. Plants and lots of them.

So what do you think? Do you support the loft movement?

LoveYourGuts14 
 
 dont miss any of this series