Finding A Routine

By Mandi | 09/12/2014 | 15 Comments

So.  Routines.  I have serious envy for people who are routine driven.  It is something that I want, but it is so foreign to my brain that it has been really really hard for me to find something that I can do over and over again.  

Don’t get me wrong, I am ALL for jumping in with both feet, but then I fall off the bandwagon after a little while and end up back on my routine of no routines.  It’s a real problem that I am hyper aware of.

Our summer was crazy, we were gone far more than we were here and by the time school rolled around, even my routine bucking ways were craving a change.

So when Dylan started morning Kindergarten, it. was. on.

On a typical day I would wake up and jump on the computer to work.  There was a lot of “grab some cereal” and “give me 5 more minutes to get this post up” and believe you me, that wasn’t a great way to start anyone’s day.  Instead I am trying out a new technique called priorities. 

The biggest change that I have made is that I don’t open my computer or get on my phone until the girls are at school.  That way I am not distracted and parenting on automatic.   This is pretty huge for me (I am one of those blurry eyed email checkers that jumps on my phone before I have even formed a coherent thought.)

I have been making sure that they have a good breakfast.  Dylan always has the same request,  puppy dog pancakes (i.e. pancakes that look like a dog face if you squint your left eye and close your right), our current favorite topping is Lingonberry jam and fresh peaches.

Real Life-9 

While the girls are eating I clean the kitchen, that way I can be in the same room and we chat about life.  After I drop them off I pick up the living room, and take a little time for prayer and mediation. Then I am finally ready to work.

It amazes me how just a few changes like picking things up before I jump head first into a project makes my life so much happier…at least until I come in from working on The Nugget all day to find that the girls have made a clay/paint/My Little Pony mess and we get to start all over again.  I just love those creative little souls.

My #cleanfeelsgood moment is when I can sit down to work, with the dogs snuggling next to me.  There is just this huge internal sigh of contentment.  I feel like I am really ready to tackle my day.  I think as moms and women (I hope I’m not the only one that feels like this) we become masters a juggling.  Kids, work, projects, meals, volunteering, being a wife, and taking care of ourselves and everyone around us.  This moment that I have carved out in my day, for a minute at least, makes all of those things stop competing for the foremost thought in my brain.  I can just breathe and actually choose what becomes the most important thing.

Inquiring minds would like to know, What’s your Clean Feels Good moment like? Share your moment using #cleanfeelsgood and #sweeps on Instagram with @ScotchBrite_3M to be entered for a chance to win!
Real Life-7 

These little dogs just make me so happy!  Gertie Girl has got the funniest personality, she is such a grumbler.  Speaking of grumbling…  Court is way more excited to help me with projects when we can actually find the things we are looking for.  Strange how that happens.

So there you go friends,  a little peek at trying to manage real life.  It gets hairy sometimes but man, I am grateful for it.

Now get snapping so you can win some prizes!!


Love Your Guts


*I’ve teamed up with Scotch-Brite™ Brand for this post.  All words, ideas, and pancake making skills are 100% mine.  Thanks friends, for supporting the people that support Vintage Revivals!

The Nugget: Retro Diamond Sharpie Wall Pattern

By Mandi | 09/10/2014 | 50 Comments

Dudes! We are overhauling a 1972 Bell Travel Trailer! Follow the entire series from the beginning here!

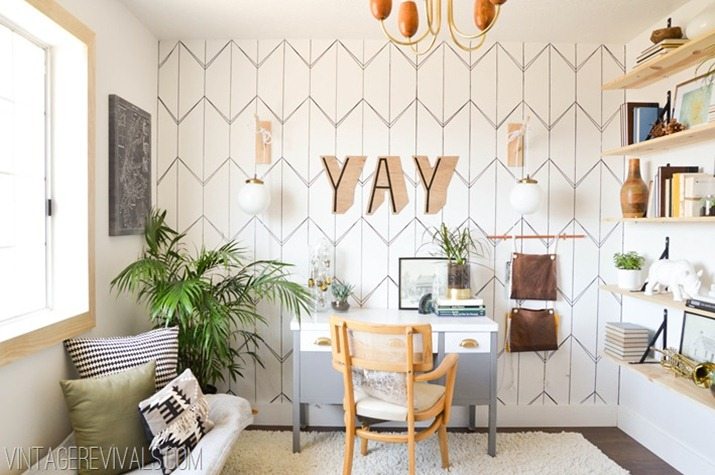
Hey guys!! Happy Wednesday! If you have read Vintage Revivals for any amount of time you probably know that Sharpie Paint Pens are my right hand man for awesome walls. They are just so great for designs that are too detailed for tape or stencils, and they are SO much cheaper and easier to cover up than wallpaper.

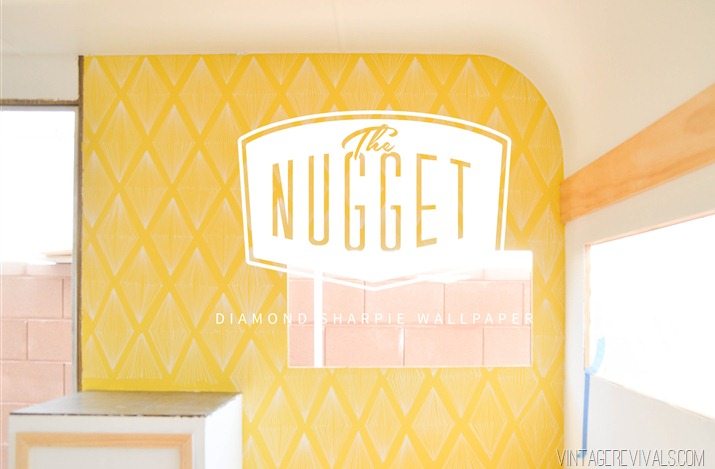
Diamond Sharpie Wallpaper vintagerevivals


I knew that a largeish scale pattern for the the walls in The Nugget was what I wanted. (You know when you just picture something that way from the get go?)  But I had a hard time trying to decide what pattern to do. I tried (and failed) a few with a black paint pen on the white walls and it just didn’t look right. The patterns were too weird and it just looked crappy.

So much trial and error is happening in this little guy. *sob

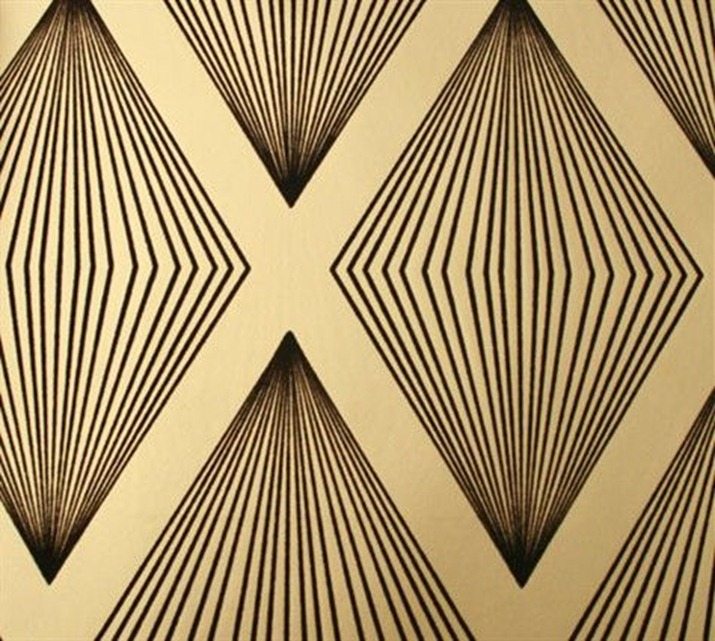
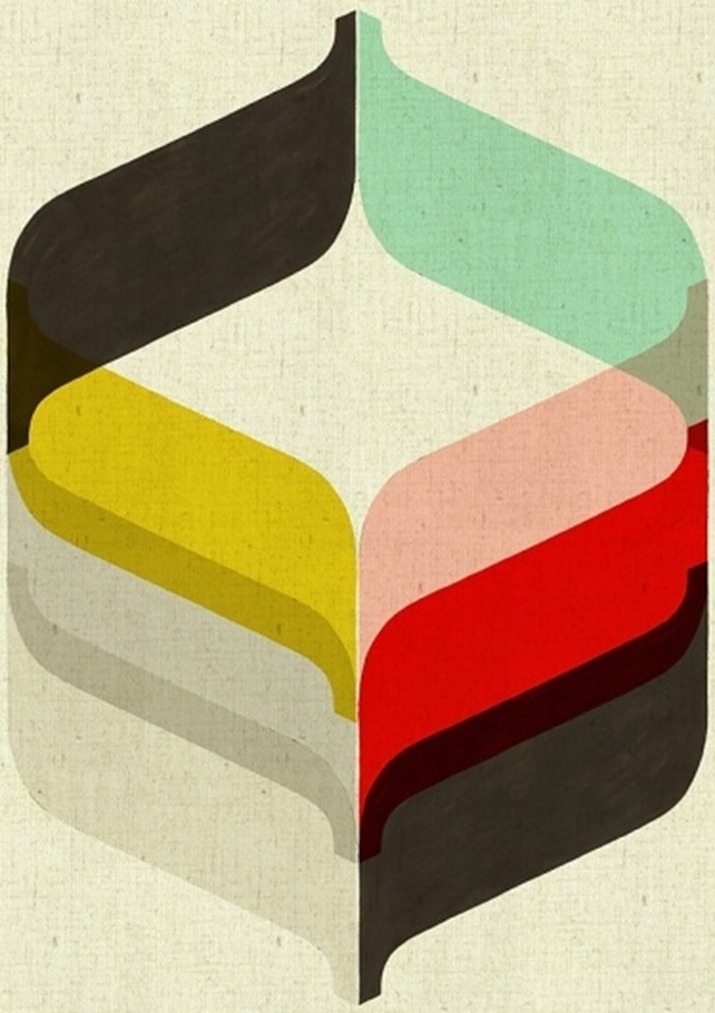
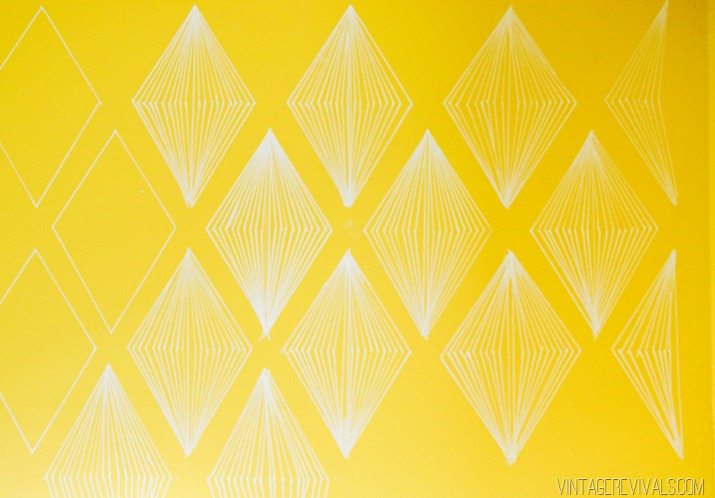
After the little “come to Jesus” that I had with myself over the blah-ness I went out on a Google quest to find a really amazing retro but not too retro pattern. One search lead to another and I stumbled upon this amazing wallpaper pattern by Romo.

e048d78745cb65e6fe0229f656549479


Isn’t it so good!?! The paper itself didn’t come in the colors that I was looking for but the pattern was perfect.

Trying to find the easiest way to replicate it was a bit of a brain bender. Stenciling was out because of the negative space and the lines are just so teensy. Vinyl would have been a great option but The Nugget lives outside all year round and I can picture walking outside in the heat of the Southern Utah summer and see it rolling off the walls. Of course the answer was a Sharpie but getting them all exactly the same needed a little bit more than just a ruler.

A stencil for the dots was just the ticket. They are evenly lined up, and easy to replicate, and all of the guesswork is taken out of it.

We recreated the image of the wallpaper in Photoshop and marked all of the corners and spots where the lines joined up. Ok, so notice how I only marked 1/2 of the lines on the right diamonds? I did that so that I could line the left side of the pattern up on top of them. That way everything was nice and even. Its totally one of those 3 steps forward 1 step back projects.

PATTERN OVERLAY


Then I saved that layer as a PNG and uploaded it into Design Space and cut it out with my Cricut Explore. I cut it out of heavyweight posterboard and in hindsight, I didn’t need something that heavy, but it worked really well.

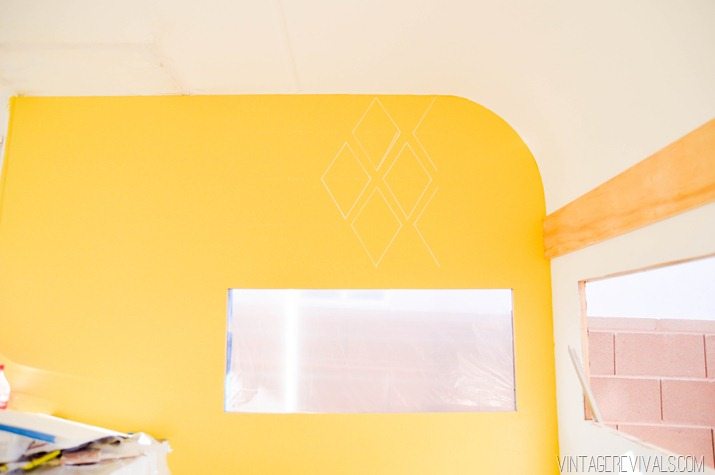
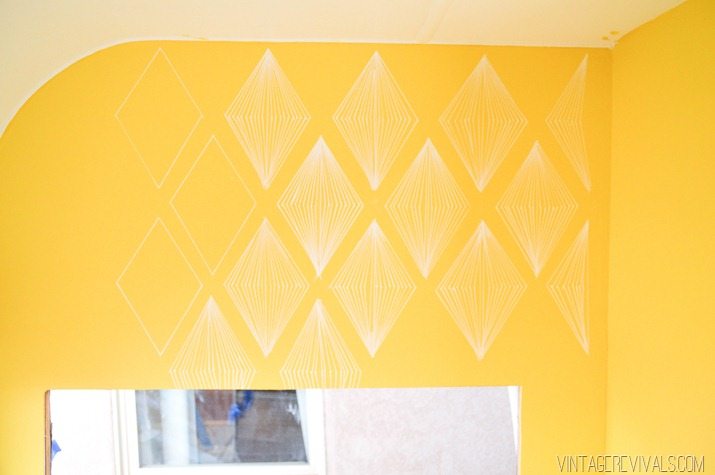
I placed the stencil on the wall and used the paint pen and marked all of the dots. When I pulled the stencil away I was left with a sea of perfectly positioned marks.

Geometric Diamond Sharpie Wallpaper vintagerevivals.com-5


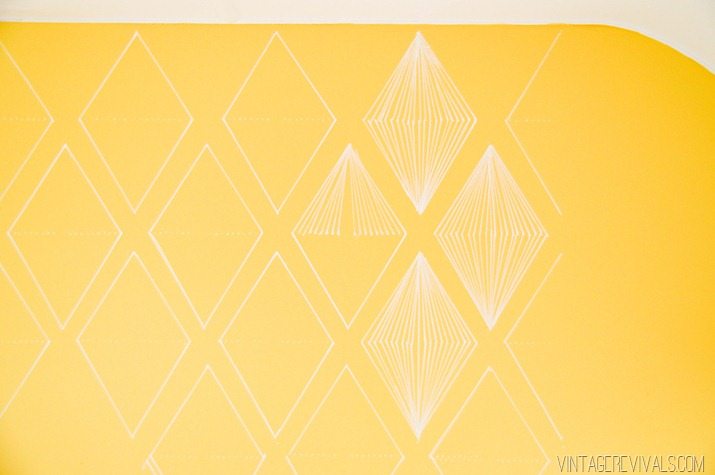
When I reached this point I used a ruler to connect the outer dots on all of the diamonds first (to make sure that the spacing was right before I finished all of the inside details.

Geometric Diamond Sharpie Wallpaper vintagerevivals.com

Geometric Diamond Sharpie Wallpaper vintagerevivals.com-2


Then I just connected the top point to each mark in the middle, and down to the bottom point.

Geometric Diamond Sharpie Wallpaper vintagerevivals.com-4


This is one of those simple but time consuming projects. (Sheesh, doesn’t it seem like I am doing a lot of those lately?)

The Nugget-  Demo and Paint Round 2 vintagerevivals.com-18

Now for a PSA about Sharpie Paint Pens. Please note that these are PAINT PENS not regular Sharpie Markers. You can paint over these without having to prime your walls. If you use a regular Sharpie it will haunt you until the day that you die and then it will haunt your children. Please for the love of all that is good in the world do not use a regular Sharpie marker. PAINT PENS not Markers. PAINT. PENS.  (Do you guys think this was clear enough to not get emails about it?)

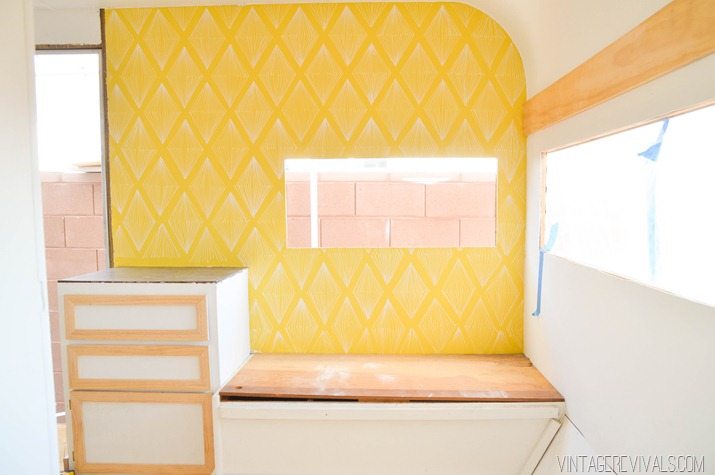
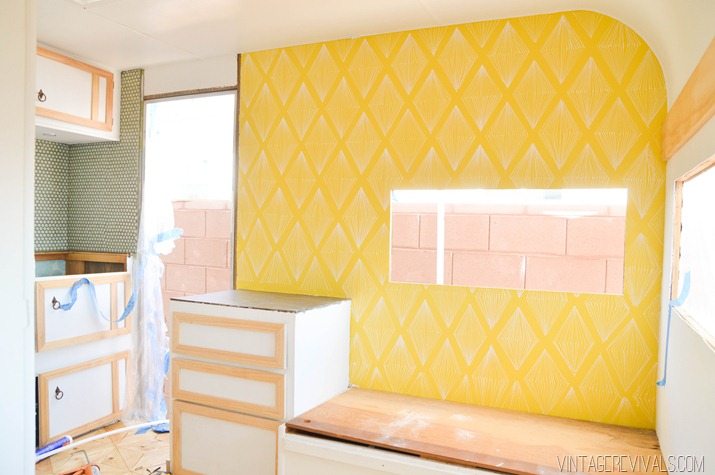
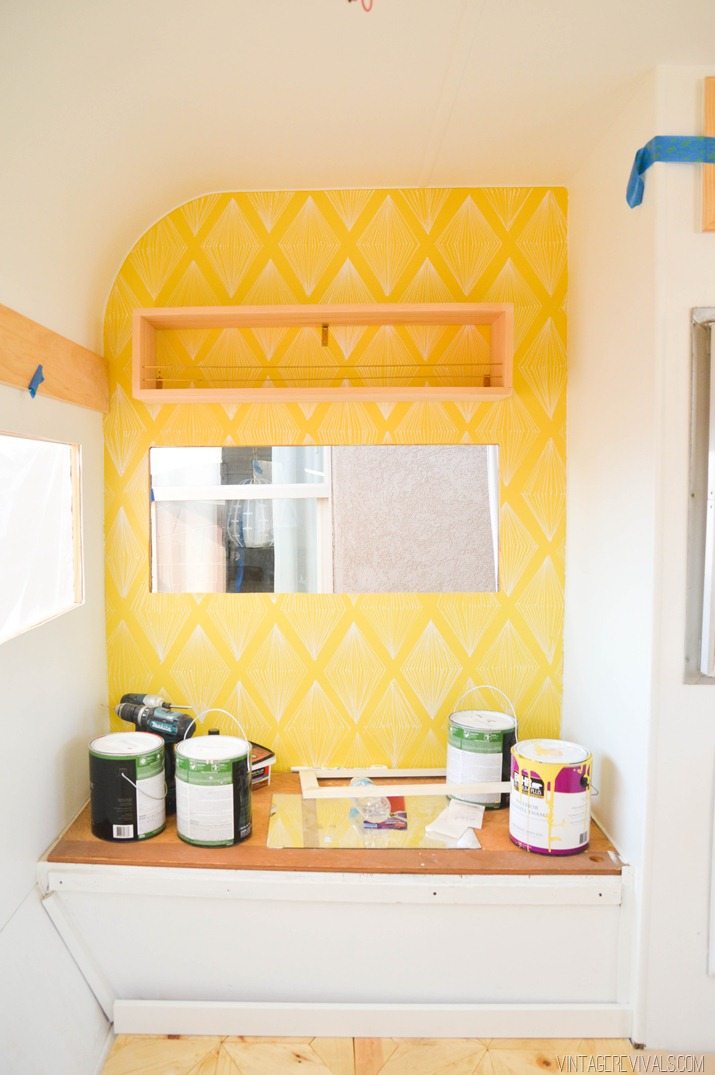
This project just about did me in. It took 2 project days (about 10 hours) and sort of made me want to give up on life, but every time I would come back after a break and my heart would skip a beat because the walls looked so amazing I knew that it was worth the time.

So there you go, an amazing wall treatment for less than $10!

Geometric Diamond Sharpie Wallpaper vintagerevivals.com-2

Geometric Diamond Sharpie Wallpaper vintagerevivals.com-3

Geometric Diamond Sharpie Wallpaper vintagerevivals.com-5

If you need more Sharpie Wall ideas, check out these projects (click the picture to go to the tutorial):

HomeOfficeMakeoverIdeasvintagerevivals.com3_1

DIY Wallpaper Tutorial @ Vintage Revivals-1[3]


Love Your Guts 


dont miss any of this series


The Nugget: Demo and Painting Round 2!

By Mandi | 09/09/2014 | 30 Comments

Dudes! We are overhauling a 1972 Bell Travel Trailer! Follow the entire series from the beginning here!

You know when you are in the middle of a frustrating project and you just want to rip out the walls and start over? How about when you have this grand vision for a project and then executing said grand vision results in lackluster feelings? Oh yes, it happens to all of us. That is exactly what I had going on at this point in the Nugget overhaul.

The Nugget-  Demo and Paint Round 2

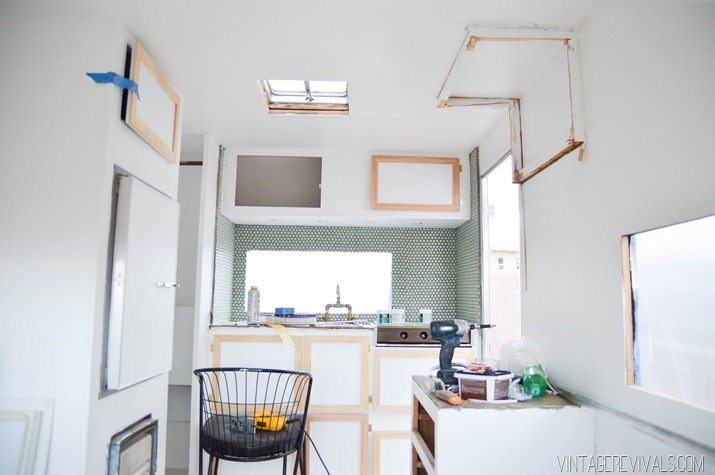
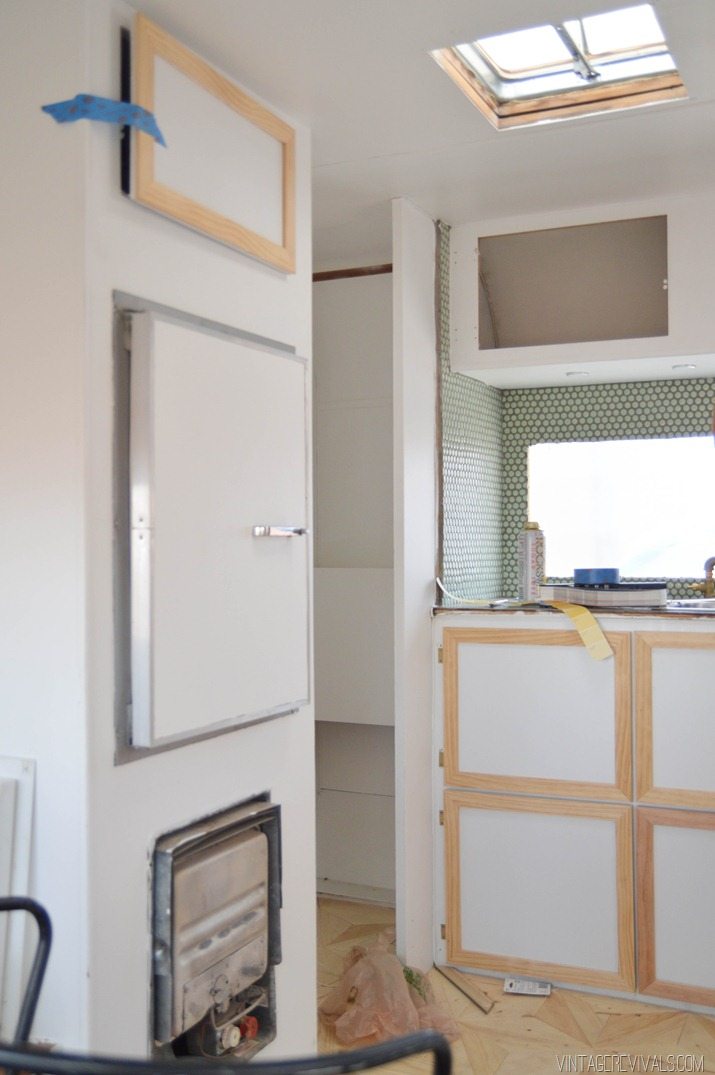
Everything was painted white, the floors were done, I had started on the cabinets (don’t worry, they aren’t done in these pictures) and I was just feeling so meh about it. There was no sparkle or fun. Remember this post I wrote about feeling not fearless? Yes. That was in the throws of the moment.

It is such a small space, and there is only ever one Nugget. Needless to say,  I was totally overthinking the entire thing and in so doing, completely forgot about personality.

I had a few people come over and look at it and the response was the same “The floors are amazing, but the rest isn’t very Mandi.” One late night, Brooke came over and threw around a few suggestions. Sometimes talking to the right person at the right time makes things fall into place in your mind.

So I went back to my color inspiration…

9b8d556f485f66479b1e8a5ede2d3882


The next day demo round 2 began.

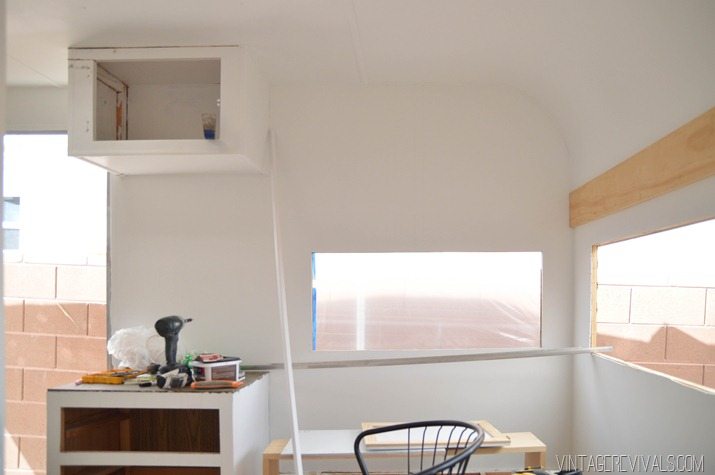
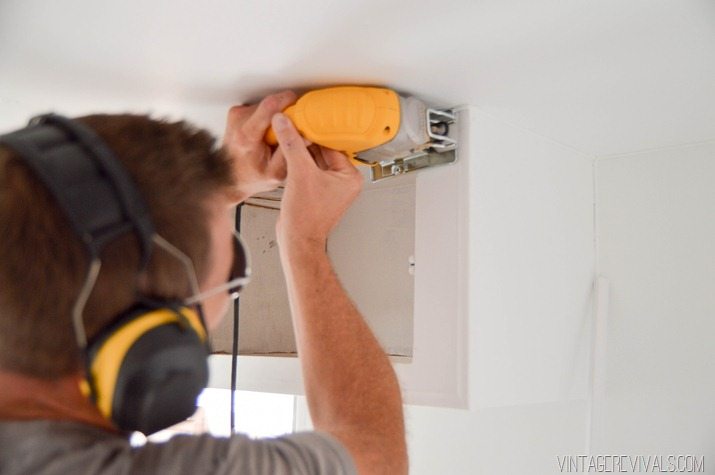
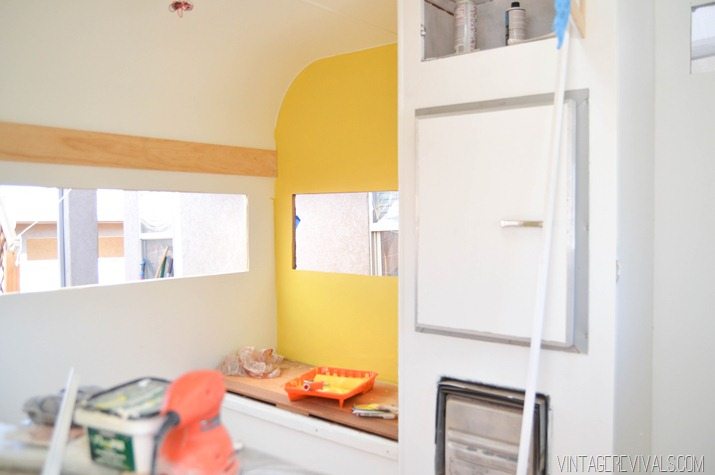
The upper cabinet just inside the door came out.

The Nugget-  Demo and Paint Round 2 vintagerevivals.com

The Nugget-  Demo and Paint Round 2 vintagerevivals.com-3

The Nugget-  Demo and Paint Round 2 vintagerevivals.com-4

The Nugget-  Demo and Paint Round 2 vintagerevivals.com-5


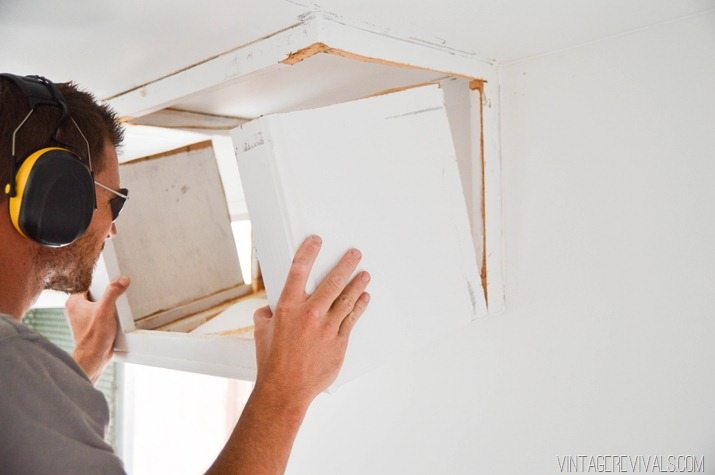
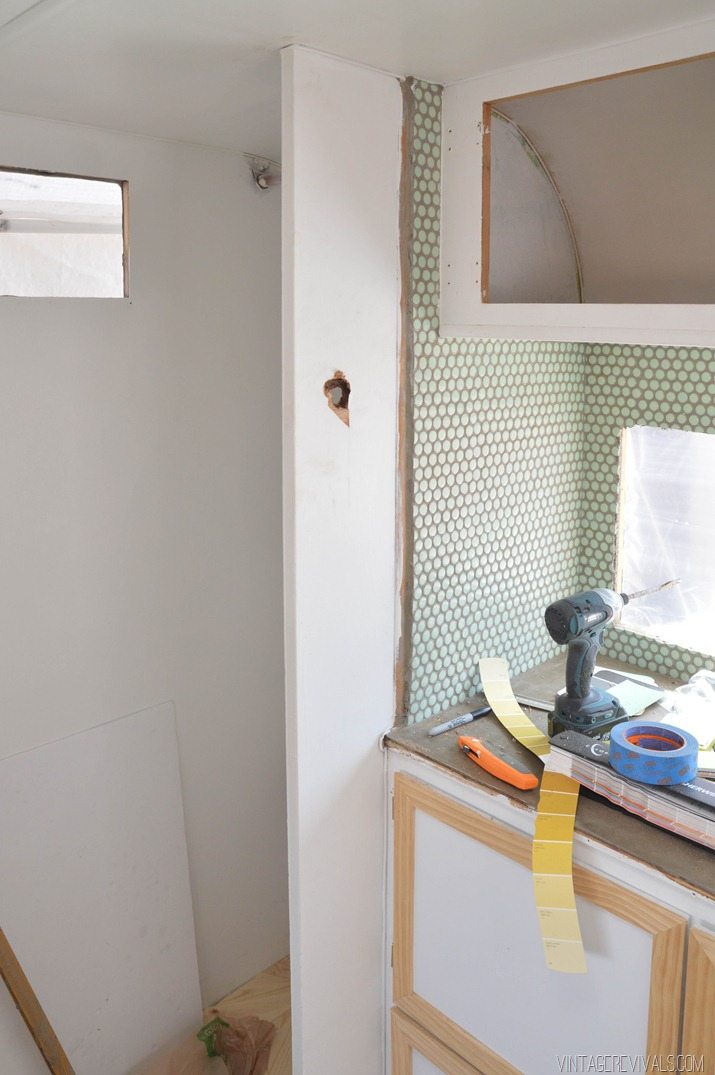
I had some big plans for the inside of the closet. I knew I didn’t want to put the door back on, but even with the door off, the opening was so teensy that you still couldn’t see the inside very well.

The Nugget-  Demo and Paint Round 2 vintagerevivals.com-2


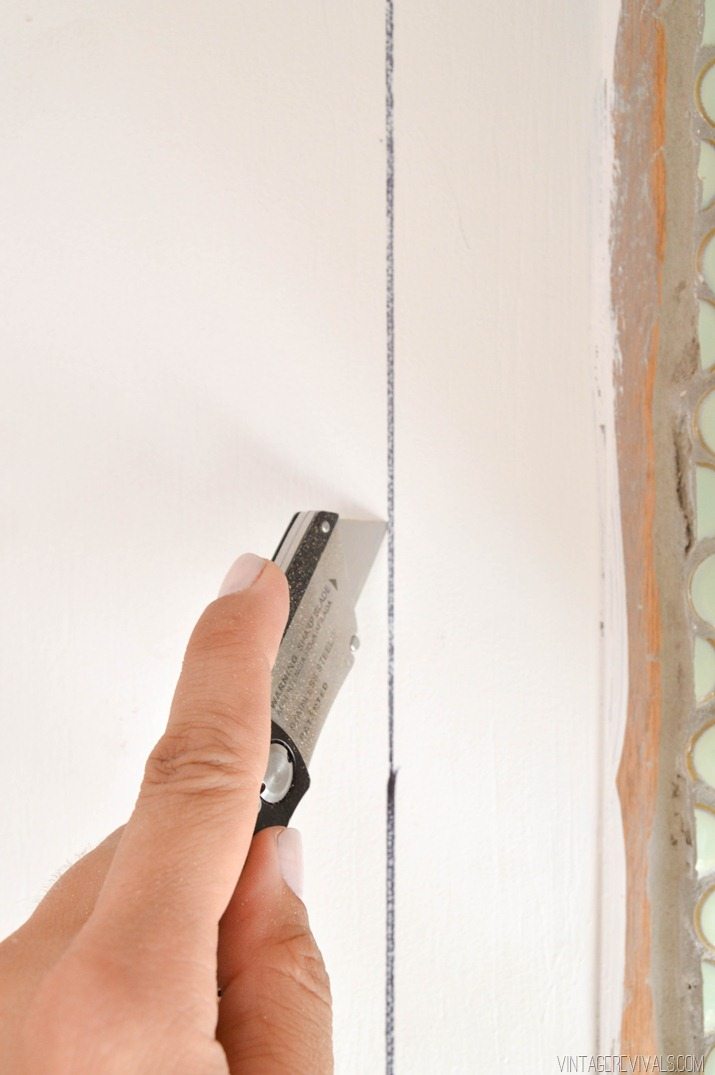
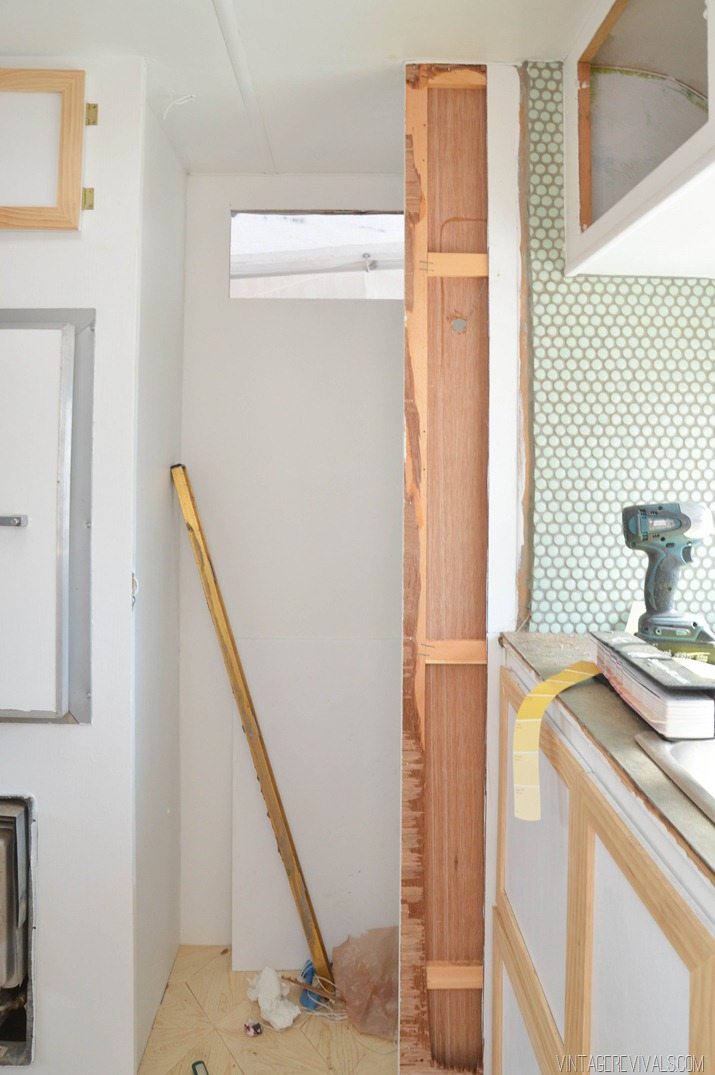
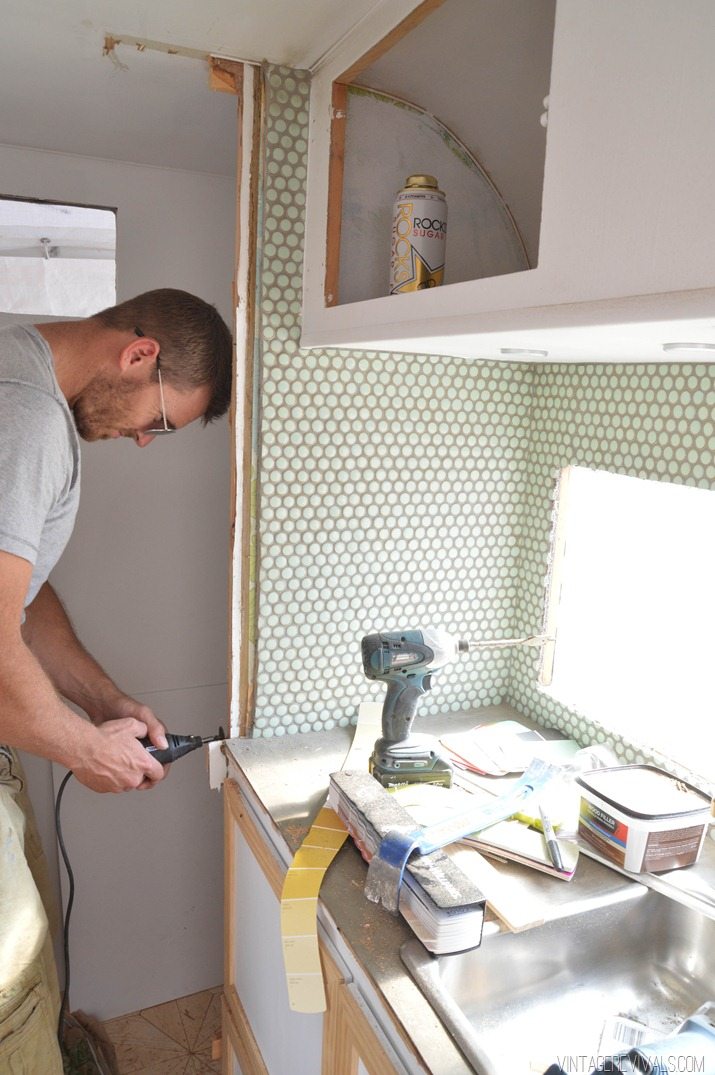
So we decide that the closet wall needed to be shortened too.

The Nugget-  Demo and Paint Round 2 vintagerevivals.com-7

The Nugget-  Demo and Paint Round 2 vintagerevivals.com-9

The Nugget-  Demo and Paint Round 2 vintagerevivals.com-11

The Nugget-  Demo and Paint Round 2 vintagerevivals.com-12


It is FREAKING AMAZING how roomy The Nugs feels without the overhead cabinet and the bunk, seriously, it is a completely different space.

After the walls were patched (using the same technique that I used here) it was time to paint! The paint color that I used was Glidden’s Spicy Pepper. It is the perfect shade of yellow with a touch of green. I had it color matched in Behr, and I have to say regular Behr isn’t my favorite. The paint is really watery. If you are going the Home Depot route, Behr Interior Marquee is worth spending a few extra dollars because it is significantly better.

The Nugget-  Demo and Paint Round 2 vintagerevivals.com-15

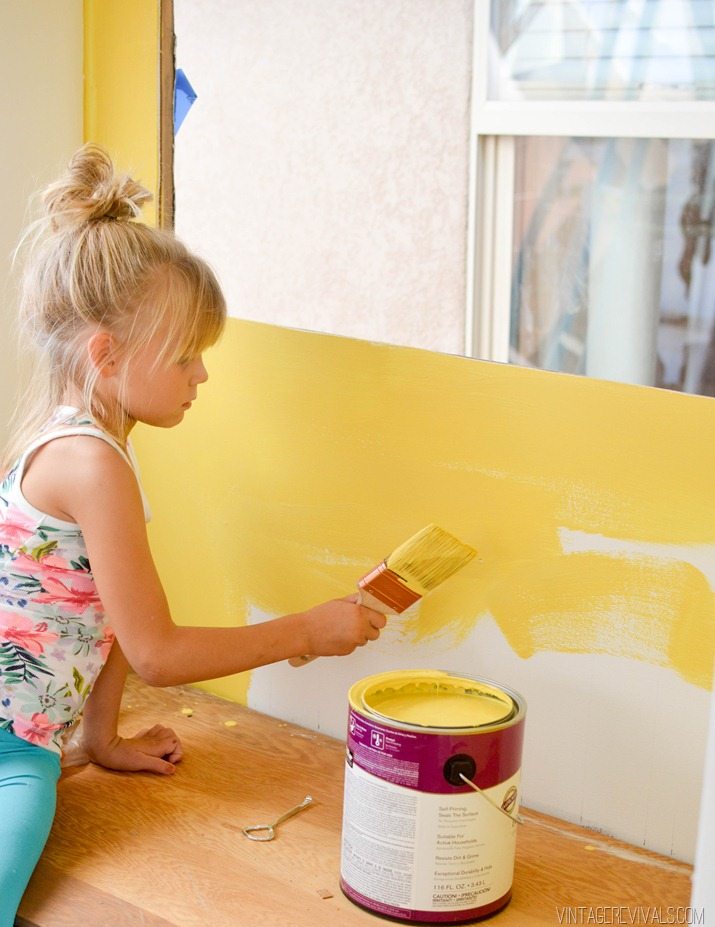
I let my girls help me paint the lower part of the walls because the cushions cover it,  so if it’s a little lumpy then its ok. Of course they loved it.


The Nugget-  Demo and Paint Round 2 vintagerevivals.com-20


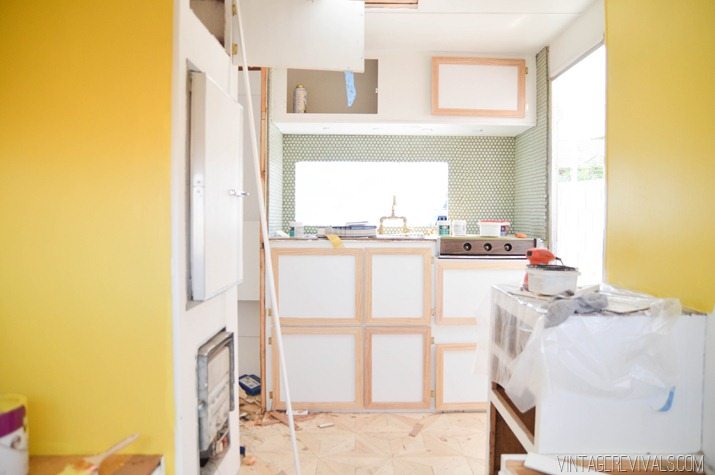
I was a little nervous that the yellow would feel really clashy with the green penny tile, or that the entire thing would feel like a freaking Easter egg, but it doesn’t! It feels just like The Nugget was meant to feel.

The Nugget-  Demo and Paint Round 2 vintagerevivals.com-16

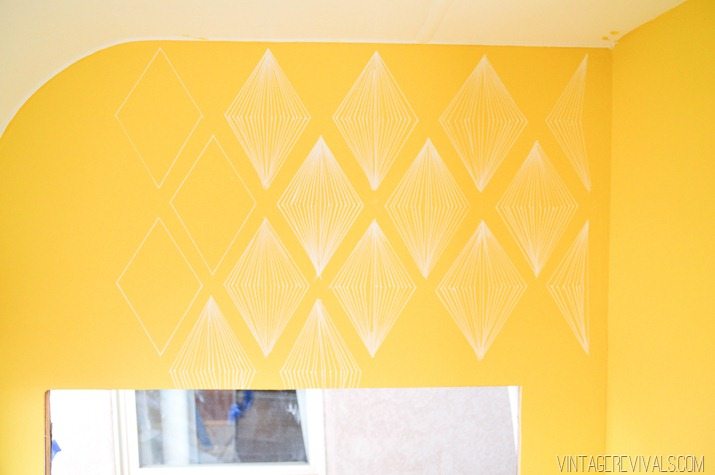
Once everything was painted and dried it was time for the Sharpie. What can I say guys, Sharpie Paint Pens will always win in my book. Full tutorial coming tomorrow for this project!!

The Nugget-  Demo and Paint Round 2 vintagerevivals.com-18

I LOVE how it turned out. Like love love love.

We still need to finish off the edge of the wall that we removed, but it is really insane to have so much space.

Taking out the cupboard meant that we lost a bit of storage, but never fear, we added 5x more than what we lost. No lie. Cant wait to tell you all about it!

So what do you think? Do you love the yellow too?

Love Your Guts 


dont miss any of this series


Ashy’s Bedroom Makeover: Before and a Game Plan

By Mandi | 09/08/2014 | 51 Comments

You guys!! I am super excited about the latest room makeover that is cooking! It is for my 16 year old sister in law Ashy. Ashy is such a fun and awesome girl. Ashy is probably the most carefree person that I know. This girl is fearless. She is also very (very) opinionated about the room design. There have been a lot of ideas tossed around and I am happy to announce that we have finally found just what she is looking for. The style that we are going for we’ve coined Desert Nomad. It is going to feel really laid back and comfortable, super collected,  erring on the masculine side, and have a little bit of 70’s retro.

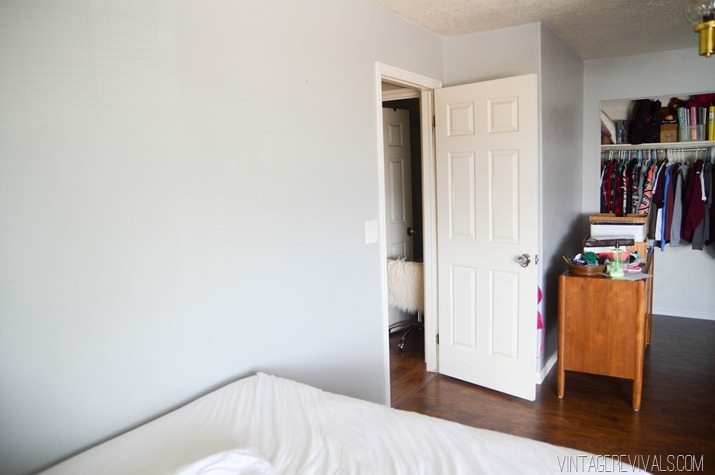
Ashy Room Before-4


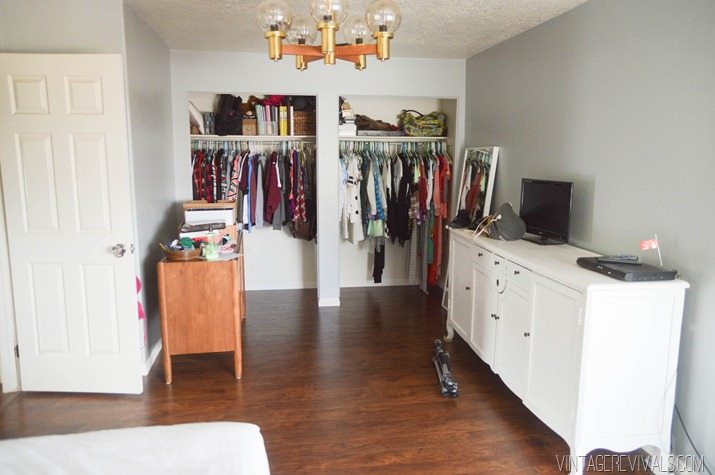
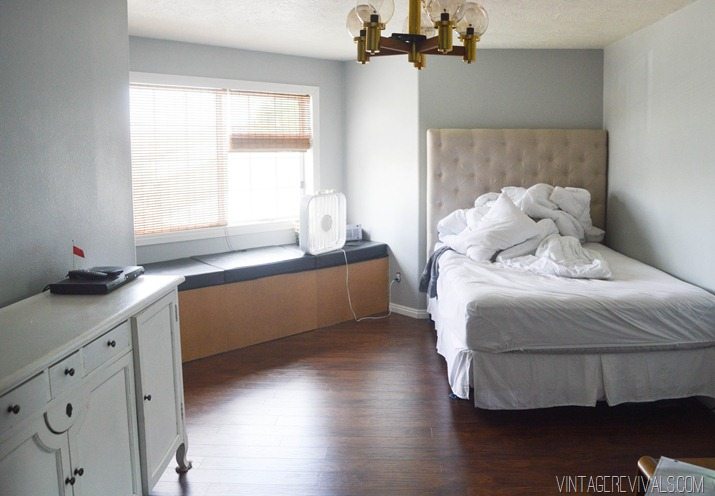
The space that we are working in is pretty fantastic. It is a really big room,  with a big window and lots of closet space.

Ashy Room Before-3


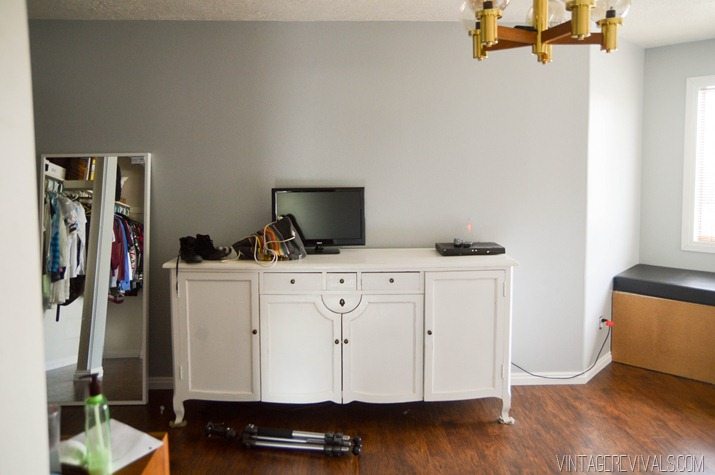
The furniture that was in there previously (the white buffet and the tufted headboard) doesn’t reflect her style at all. In fact, you know that a teenager is excited to get rid of something when they willingly help you move it out. Here is the thing, if you don’t love something, you can always sell it and use something different. Just because that white piece is probably someone’s dream piece of furniture, doesn’t mean that Ashy has to like it, or that we need to keep it in her room. Remember, it’s your house and you can do what you want!

Ashy Room Before


The colors that we are using are going to be a really good mix of rich tones and beigey neutrals.

The biggest design dilemma is that we need a lot of comfy seating. Ashy has friends over all the time, and so we really need it to be a functional space for the way she uses it.

Ashy Room Before-2

I have some massively fun projects in store that might give you some elementary school flashbacks (in a good way!)  and the entire room is being reconfigured.

Here are a few of the inspiration ideas that we have for the room:

Remember this type of string art from Elementary School? Picture this on a much grander scale…

image


Did you know that Nate has a new fabric line out in Joann’s? Life.Changing. I bought the entire roll of this gorgeous diamond print.

image


This retro painting by Kenneth Noland is a major source of our color inspo and overall vibe.

image


I cant wait to show you the first project that we tackled…it has something to do with that fab window seat.

I have been having a really great time blogging The Nugget in real time, so I think I am going to try my hand at that this makeover too. Inquiring minds want to know,  would you rather see it real time or the big reveal first with the projects after?


Love Your Guts

The Nugget: DIY Geometric Wood Flooring for $80!

By Mandi | 09/04/2014 | 112 Comments

Dudes! We are overhauling a 1972 Bell Travel Trailer! Follow the entire series from the beginning here!  This Nugget project is sponsored by my friends at The Home Depot.

I just need to say, that this project thus far on the Nugget has been my favorite.

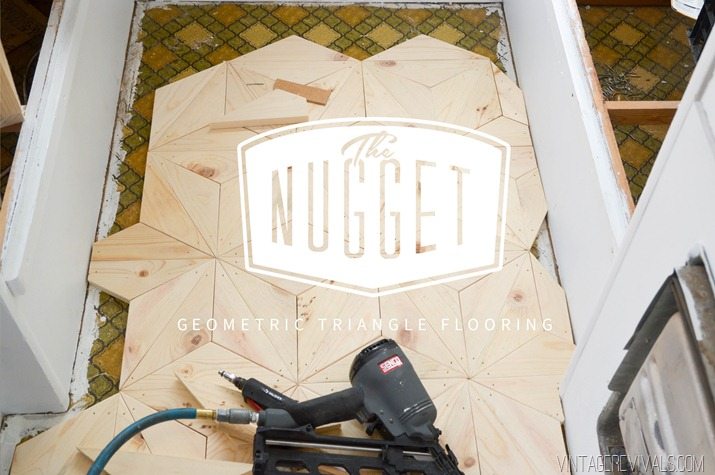
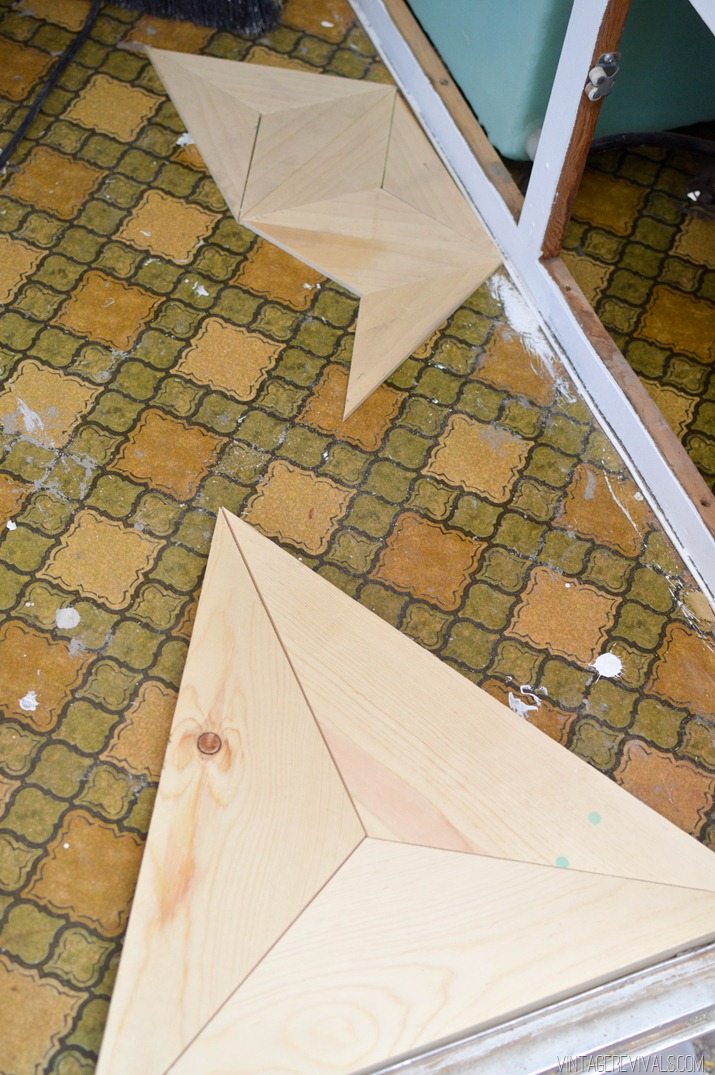
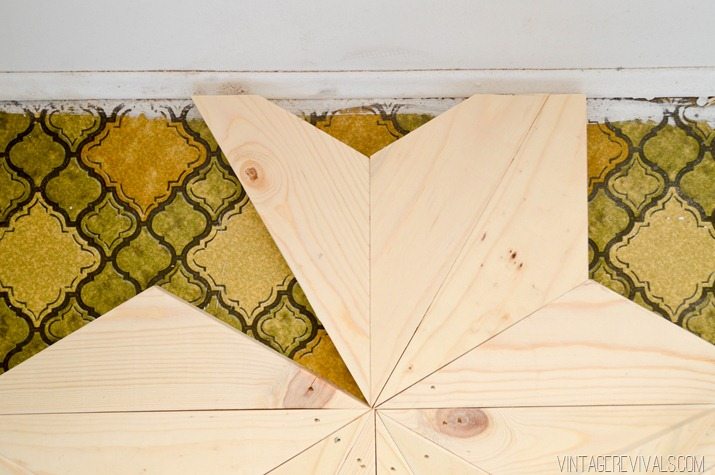
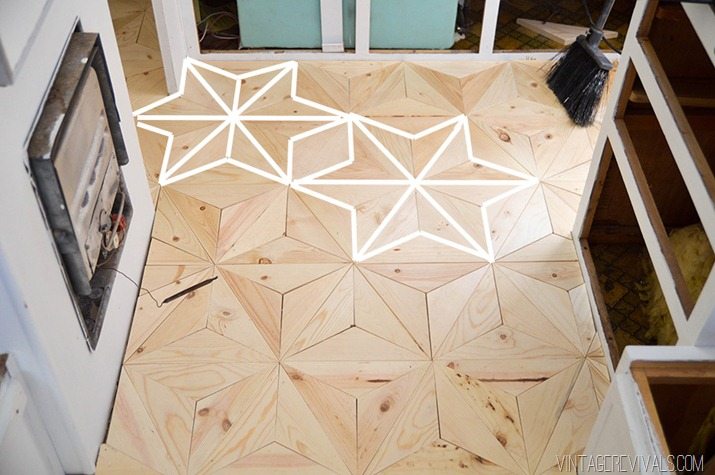
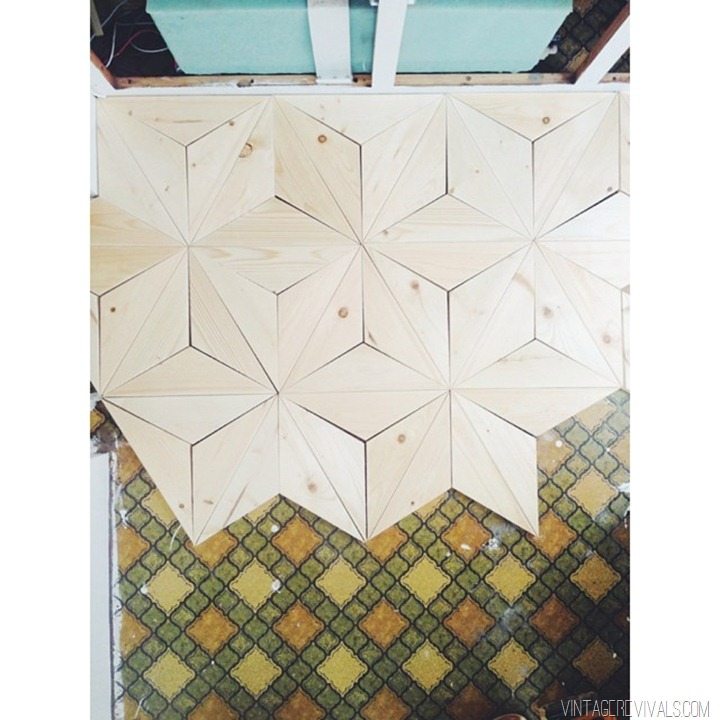
DIY Geometric Triangle Flooring vintagerevivals

The original plan for the little Nugs was to lay this gorgeous hardwood down in a herringbone pattern. Unfortunately after talking to a representative at Milstead headquarters (the company that makes the flooring) about it, I came to the conclusion that it was just not going to be a great plan. Hardwood is designed for use in a climate controlled area. Extreme temperature swings might make it behave like a 3 year old…in the checkout line at Old Navy (why do they do that to us?!)  It is just not equipped to hold up under that type of stress. Spending lots of money on it just didn’t seem like a great plan.
Designing such a small space means that there can only be a few Stars. If everything tries to be center stage than the whole thing turns into a freaking circus. I really wanted the floor to be one of those star players. When I went back to Home Depot, I felt like everything else that I looked at was going to blend in too much. Granted it would be durable and very nice looking, but it wasn’t going to be something that you noticed right off the bat.

So after a heart to heart with myself about it, I decided to take it the completely opposite direction. Hand cut pine 1×4’s that cost us 2 days and $80 (for the entire floor!!). It is such a small space that doing something completely crazy like making your own floor is manageable. Is pine the most durable thing on the planet for flooring? Um, no. But I love character and with the way that we are planning on using The Nugs it is a pretty great solution. And hello, $80!!

I need to give a massive thank you to everyone on instagram that voted which pattern they loved the most. I love it when your friends confirm what your gut is already telling you.

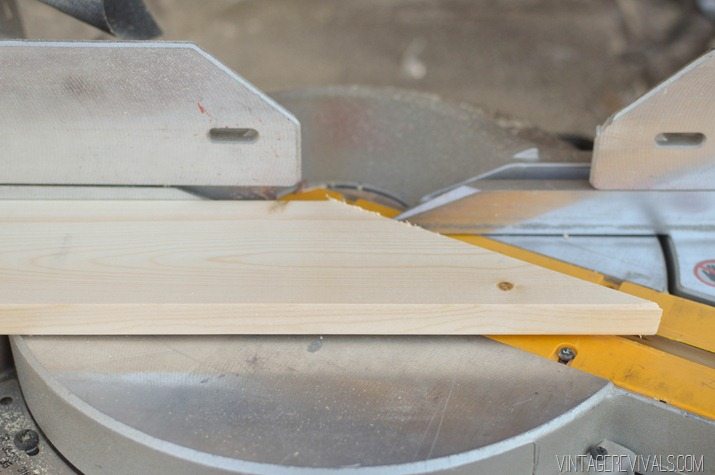
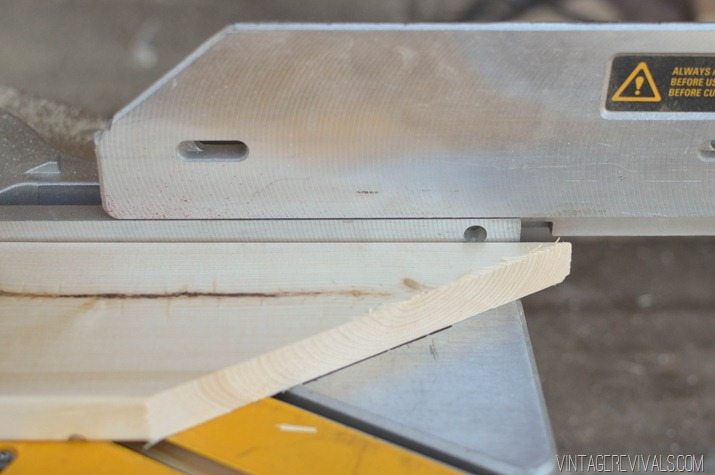
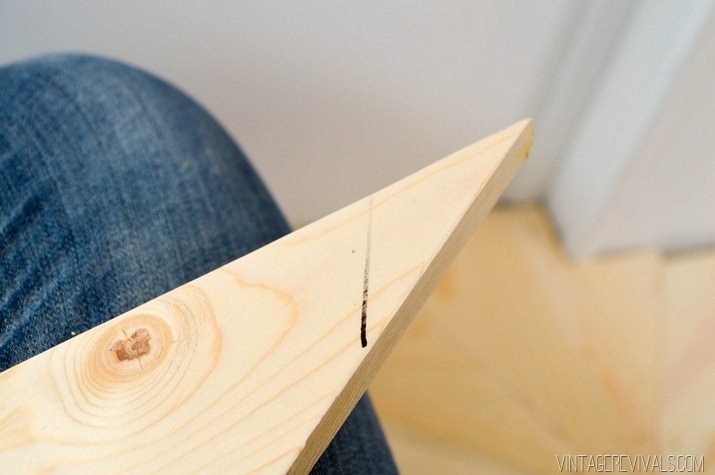
Once I knew what pattern I wanted, it was just a matter of cutting the wood. The triangles needed to have 30 and 120 degree angles.

DIY Geometric Wood Floor vintagerevivals.com-7


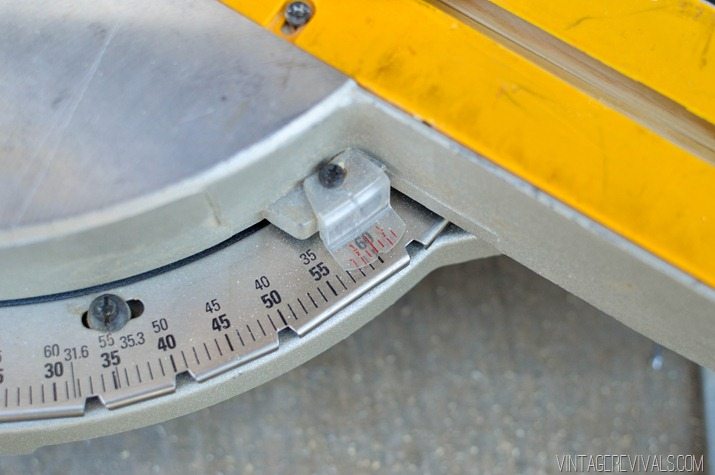
*One thing to note, when you are working on a miter saw, 90 degrees is 0, you subtract your angle from that. So to cut a 30 degree angle, I needed to set my saw blade at 60 degrees. Because 30 + 60 is 90. (The reason most people overlook this is because the most common angle is 45 and that is exactly 1/2 of 90, so you set your blade at 45.)


This sliding compound miter saw from Dewalt is the stuff dreams are made out of. My little rinky dink miter saw didn’t cut up to 60 degrees, so I borrowed this one from my bro in law. It is at the top of my Christmas list.

DIY Geometric Wood Floor vintagerevivals.com-2

This project is EXTREMELY simple, its just really repetitive. (Sort of like the hexagon wall that I did in Dylan’s room)

We went to Home Depot and bought (10) 1×4’s for this project. Then we cut approximately 5 zillion triangles out of them. Jk. It was only 4 trillion.

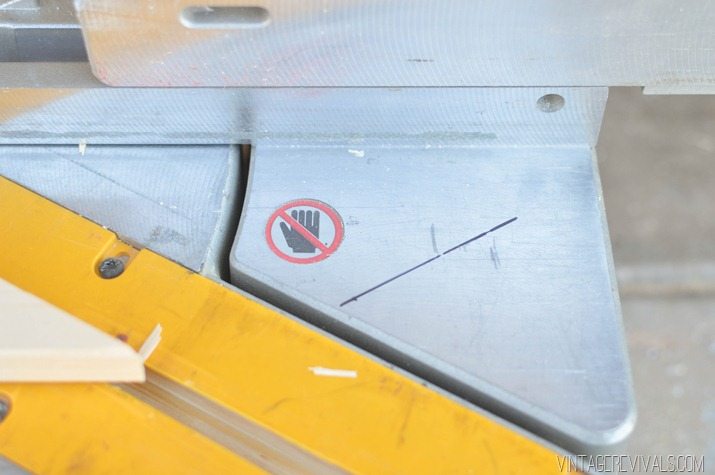
To make all of the triangles the same I marked a line on the saw base.

DIY Geometric Wood Floor vintagerevivals.com-3

Then after I made a cut I would rotate the board and line it up.

DIY Geometric Wood Floor vintagerevivals.com-4

DIY Geometric Wood Floor vintagerevivals.com-6


Using a 1×4 gave us the perfect sized triangles, I also tried it with a 1×6 and 1×3’s and it is pretty crazy to see just how different the sizing is with adding or taking out an inch or two.

DIY Geometric Wood Floor vintagerevivals.com

Each triangle got a light sanding on the edges and knots to get rid of any splinters, and then it was time to start laying it down!

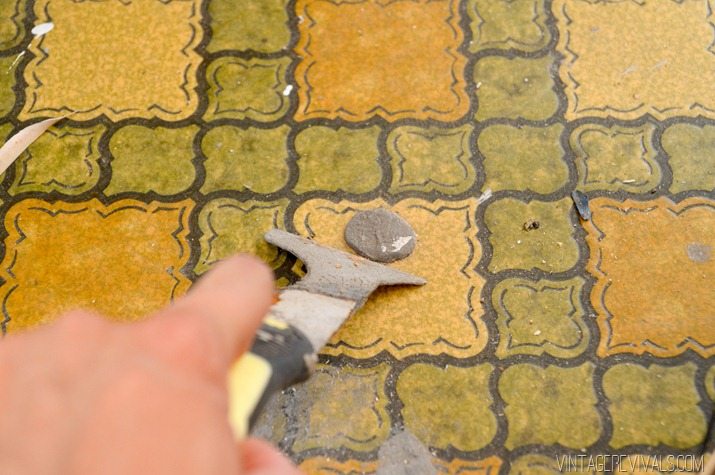
We prepped the floor by pulling out the carpet nails and scraping all of the paint and thinset off of the linoleum. Then we swept and vacuumed and swept and vacuumed until we were sure that it was nice and clean.

DIY Geometric Wood Floor vintagerevivals.com-8

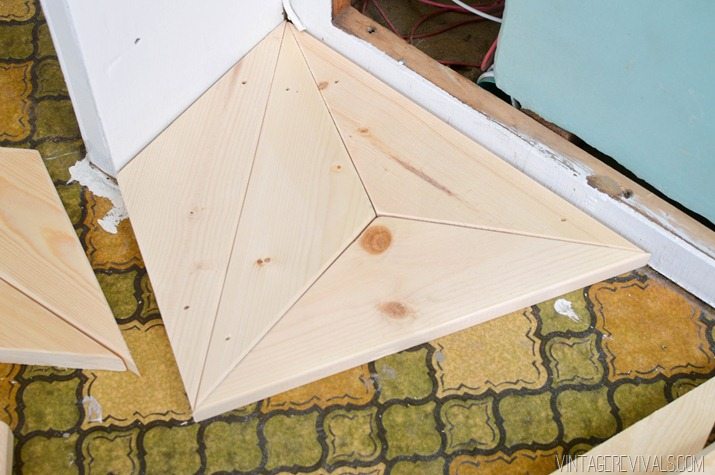
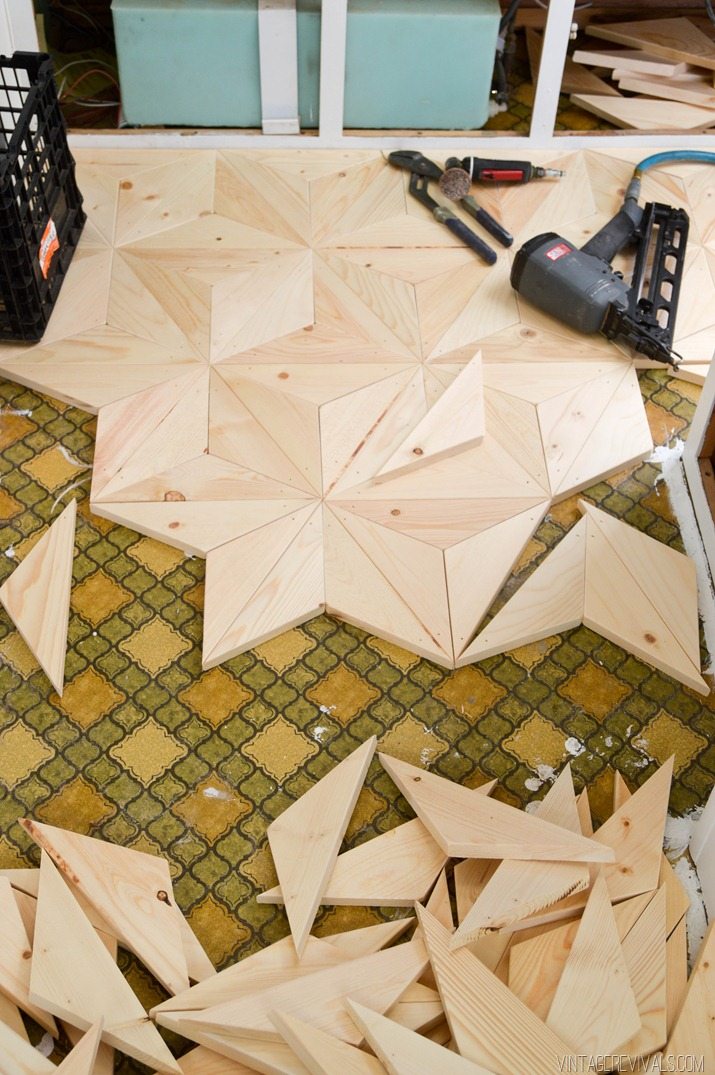
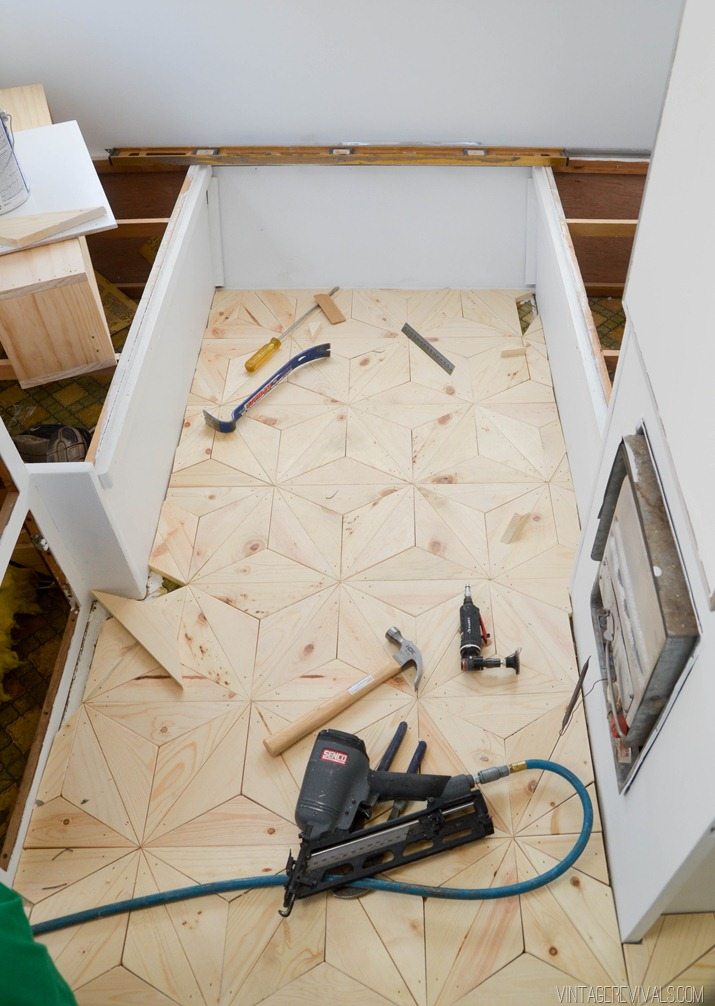
We started along the edge of the cabinets and dry fit the pieces.

DIY Geometric Wood Floor vintagerevivals.com-9

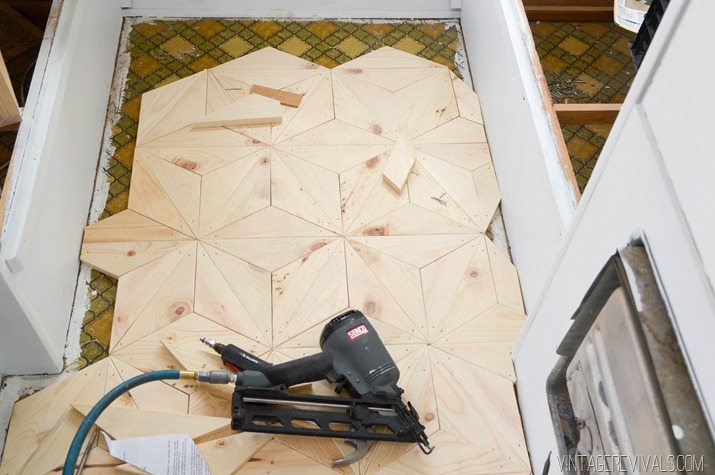
You want to work in kind of a big section as opposed to fitting and nailing down each triangle on its own,  that way you can make sure that everything is lined up before you commit.

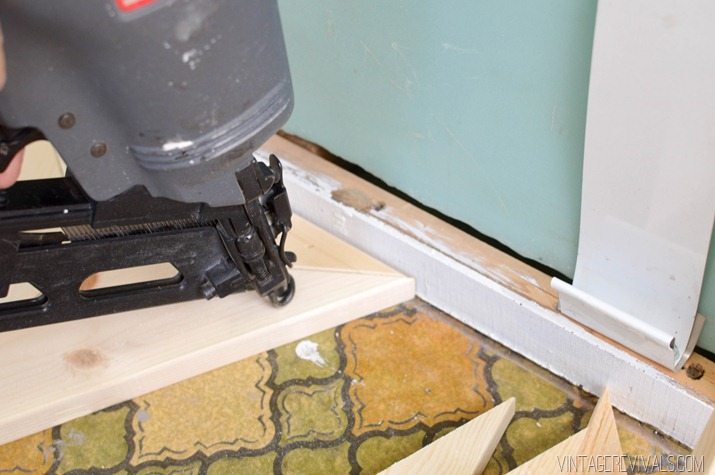
Once we were happy with it, we used a finishing nailer to nail it to the floor on each corner. We used 2” finishing nails and double checked that they weren’t going all the way through the underside of the trailer. The nailer that we use and love is this one from Senco, but I have heard really great things about the Ryobi Airstrike Brad Nailer, and its about 1/2 the price.

DIY Geometric Wood Floor vintagerevivals.com-10

DIY Geometric Wood Floor vintagerevivals.com-16

DIY Geometric Wood Floor vintagerevivals.com-20


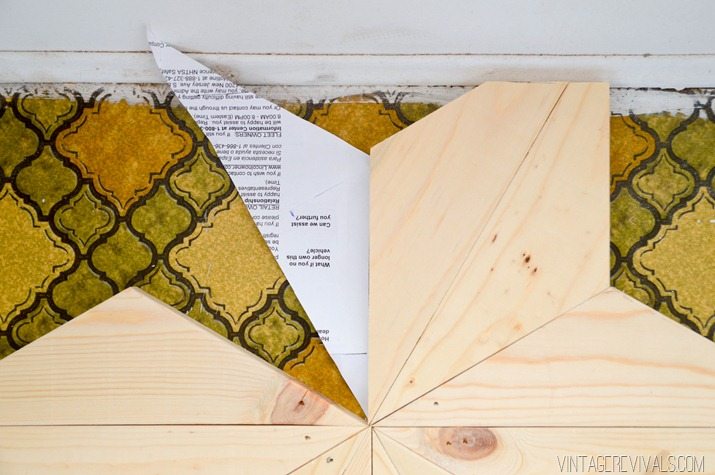
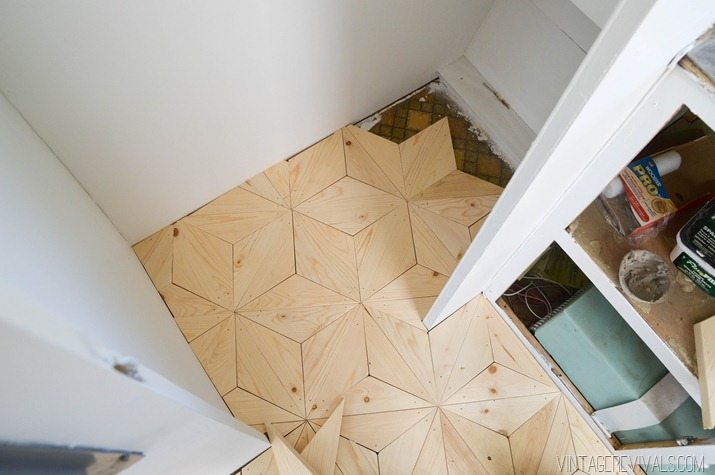
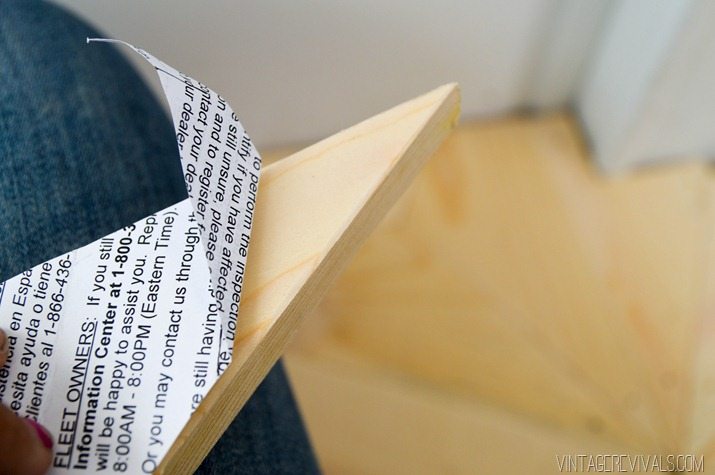
Working on the edges wasn’t as hard as you might think. We made a template of the triangle out of paper and after lining it up, folded the paper so that we could see the exact angle that needed to be cut.

DIY Geometric Wood Floor vintagerevivals.com-22

DIY Geometric Wood Floor vintagerevivals.com-23

DIY Geometric Wood Floor vintagerevivals.com-24

DIY Geometric Wood Floor vintagerevivals.com-25

DIY Geometric Wood Floor vintagerevivals.com-26


Inside the closet wasn’t horrible either,  we just used the template and it worked great!

DIY Geometric Wood Floor vintagerevivals.com-21

We used wood filler to fill all of the nail holes and finished it off with a few coats of satin polyacrylic.

I am completely and utterly obsessed with this floor.

DIY Geometric Wood Floor vintagerevivals.com-28

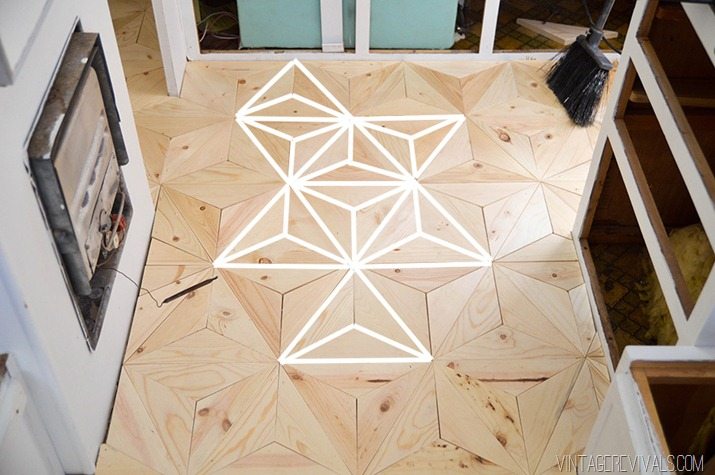
It is so fun when people see it to find out what shape they see,  the star? The tumbling blocks? Or the triangles?

DIY Geometric Wood Floor  Triangles vintagerevivals.com-28 copy

DIY Geometric Wood Floor Cubes vintagerevivals.com-28 copy

DIY Geometric Wood Floor Star vintagerevivals.com-28


One of the factors when it comes to working on trailers is adding weight. The total weight added for the flooring was around 40 lbs. Each pine board weighed in around 4 lbs, and we used 10!

Maybe a new floor isn’t up your DIY alley, but um…can you image this pattern on a wall or a table top?! Dreamy.

HUGE thanks to my friends at Home Depot for teaming up with me on this project for The Nugget!!

Love Your Guts 


dont miss any of this series


Stacked Plywood Bench with Hairpin Legs

By Mandi | 09/03/2014 | 24 Comments

Hello my darlings!!

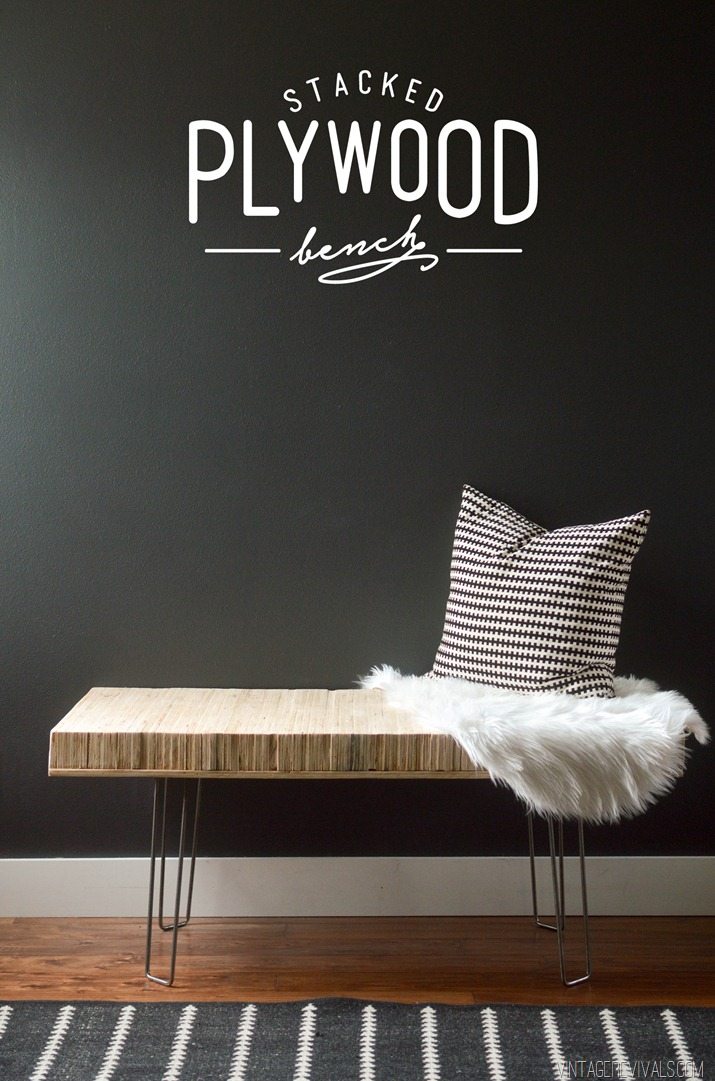
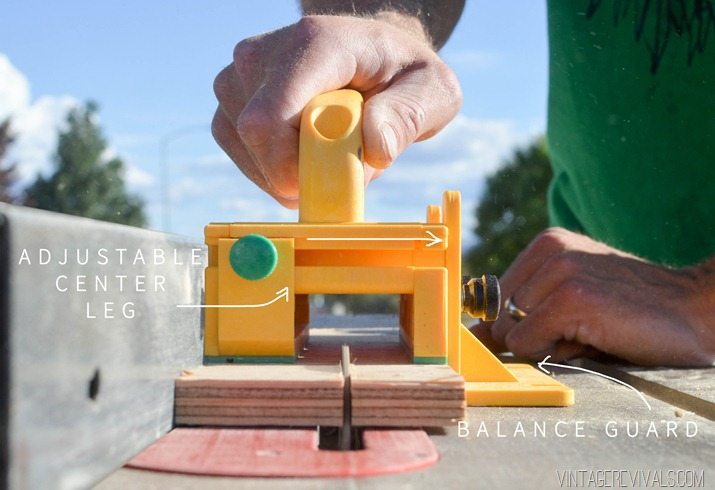
So I have a really fun surprise today,  remember last week when I showed you how to use the MICRO-JIG GRR-RIPPER and built that awesome stacked plywood bench?

DIY Stacked Plywood Bench Tutorial vintagerevivals


I thought it would be fun to team up with MICRO-JIG and run a giveaway for a 3D Pushblock and 4 hairpin legs so that some lucky soul can make their own!!

GRR-RIPPER-Giveaway


The legs I used in my bench project were 18” and these ones are 14” so they would be perfection for a coffee table build!

So this is a bit random, but my Brother in Law is the king of cool gadgets. He always finds these crazy things that no one has ever heard of, and convinces everyone around him how life changing they are. I just have to say that it felt pretty awesome finally being the one that has an awesome tool to share with him.

GRR-RIPPER I LOVE YOU!!

DIY Stacked Plywood Bench vintagerevivals.com-14


Running giveaways is not the norm here on VR, but this tool is seriously a must have for anyone with a table saw. (Ahem, Christmas is 115 days away…)

To enter for this awesome prize package, all you have to do is enter below!

Love Your Guts

The Nugget: Master Plan (and A Few Sneak Peeks!)

By Mandi | 09/02/2014 | 13 Comments

Dudes! We are overhauling a 1972 Bell Travel Trailer! Follow the entire series from the beginning here!

A few of the project plans for The Nugs are unconventional at best, and before we delve into them (and to avoid the side eye from die hard camping fanatics) I thought it would be fun to share the grand vision with you guys!

Is it bad if I say that basically, The Nugget is just a really fun project? I have been wanting to redo a trailer for so long that finally tackling it, is an award in and of itself. I applaud the freedom that these little guys give people, and I am having such a blast thinking outside the box. It has really pushed me creatively and it just makes me so happy every time I look at the transformation so far!

Vintage Trailer


So what does The Nugs have in its future? Events, and lots of them. Parties, photo shoots, weddings,  workshops, basically anywhere that the work and fun details wont be lost on a just a few woodland creatures.

1169729_265200793687671_996315108_n


Are we camping in it? Yes(ish)  Court and I are really excited to take the girls adventuring. Picture a little thing I like to call light camping. Nothing too far or for too long. Trips to the lake, or fun overnighters. I would really love to visit some of the gorgeous places that Utah has to offer (Torrey is at the top of my list!)  We really want it to be a comfortable place to hang out in,  Big plans like four wheeling this baby into the back roads, or blazing our own trail through the wilderness? Probably not going to happen. Campsites and a place to wipe our feet sounds a little more Nugget friendly.

I have thoroughly enjoyed troubleshooting storage solutions, (wish I could say the same for Court…)  I feel like I have come up with a few projects that will be just as magical inside your house as they are in the trailer. As pretty as I want The Nugget to be, it also needs to be functional. There isn’t a lot of space to decorate, so combining the two has been quite the challenge.

Vintage Trailer Wall Pattern


One thing that I love so much about vintage trailers is that there isn’t really a right or wrong way to use them. You just fill them with love and projects and you get to do whatever you want, they are just so cute that no one disagrees!

Love Your Guts 


dont miss any of this series