If you ask any plant lover what their biggest frustration with plant parenthood you will hear over and over the problems with hanging plants.
Hanging plants look amazing, but man alive can they be hard to water. You know those infomercials where people hilariously struggle to do simple tasks? It’s like that, but it actually happens!! Water running down your arm, overflowing onto the floor, blindly missing the soil. GUYS, THIS IS REAL! 😂
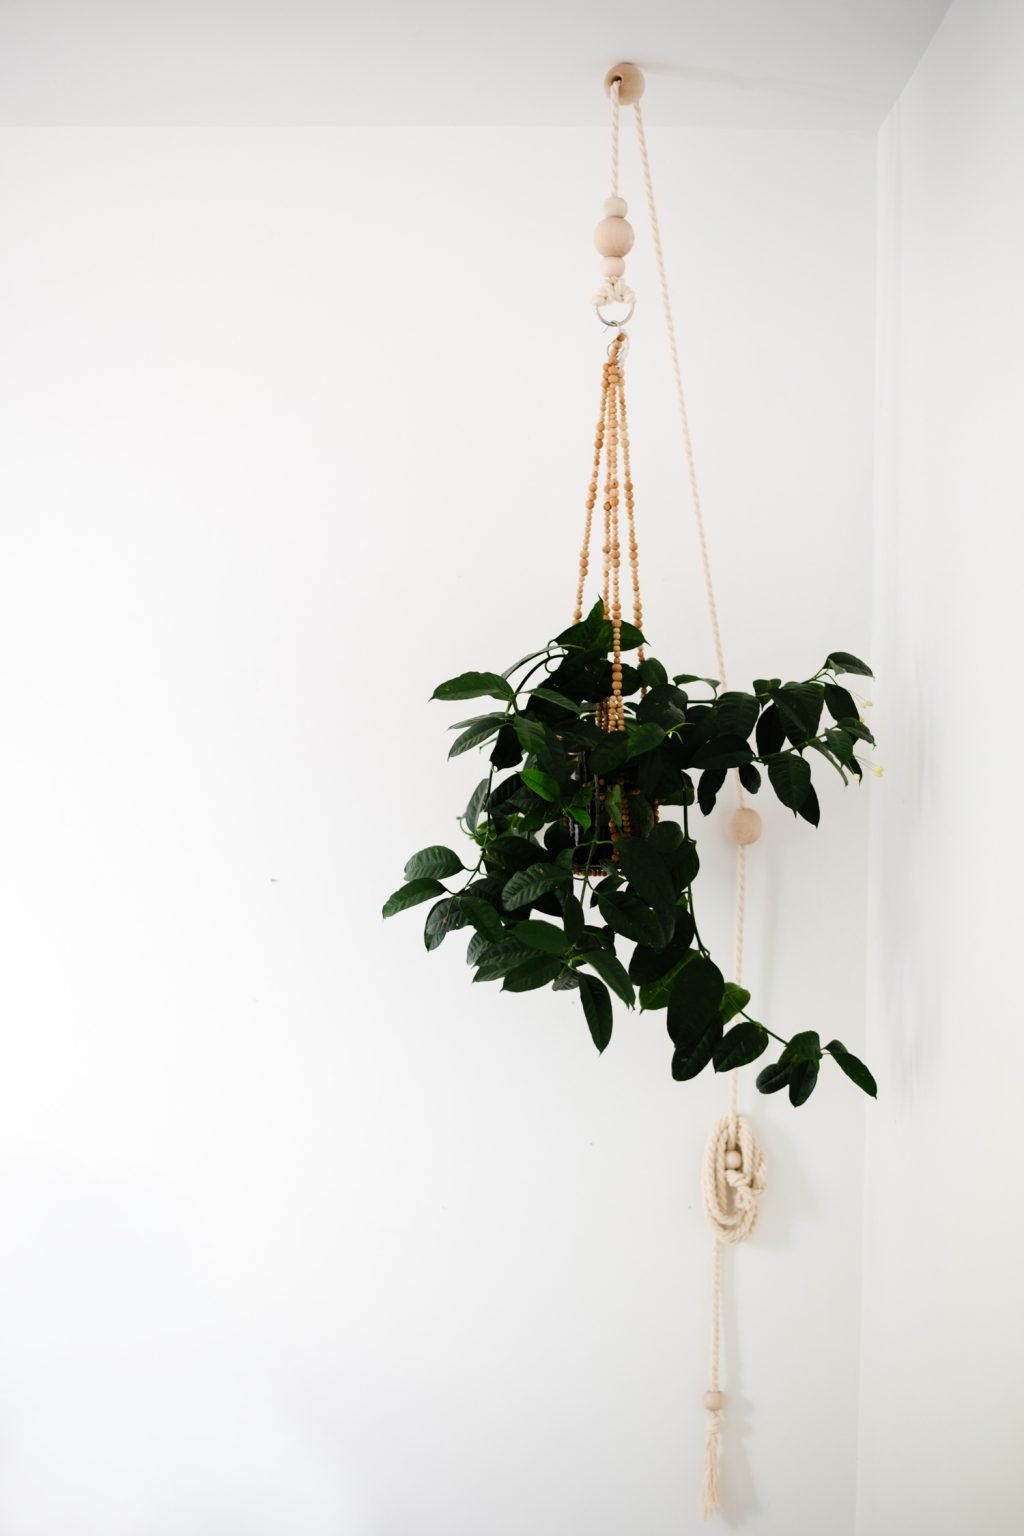
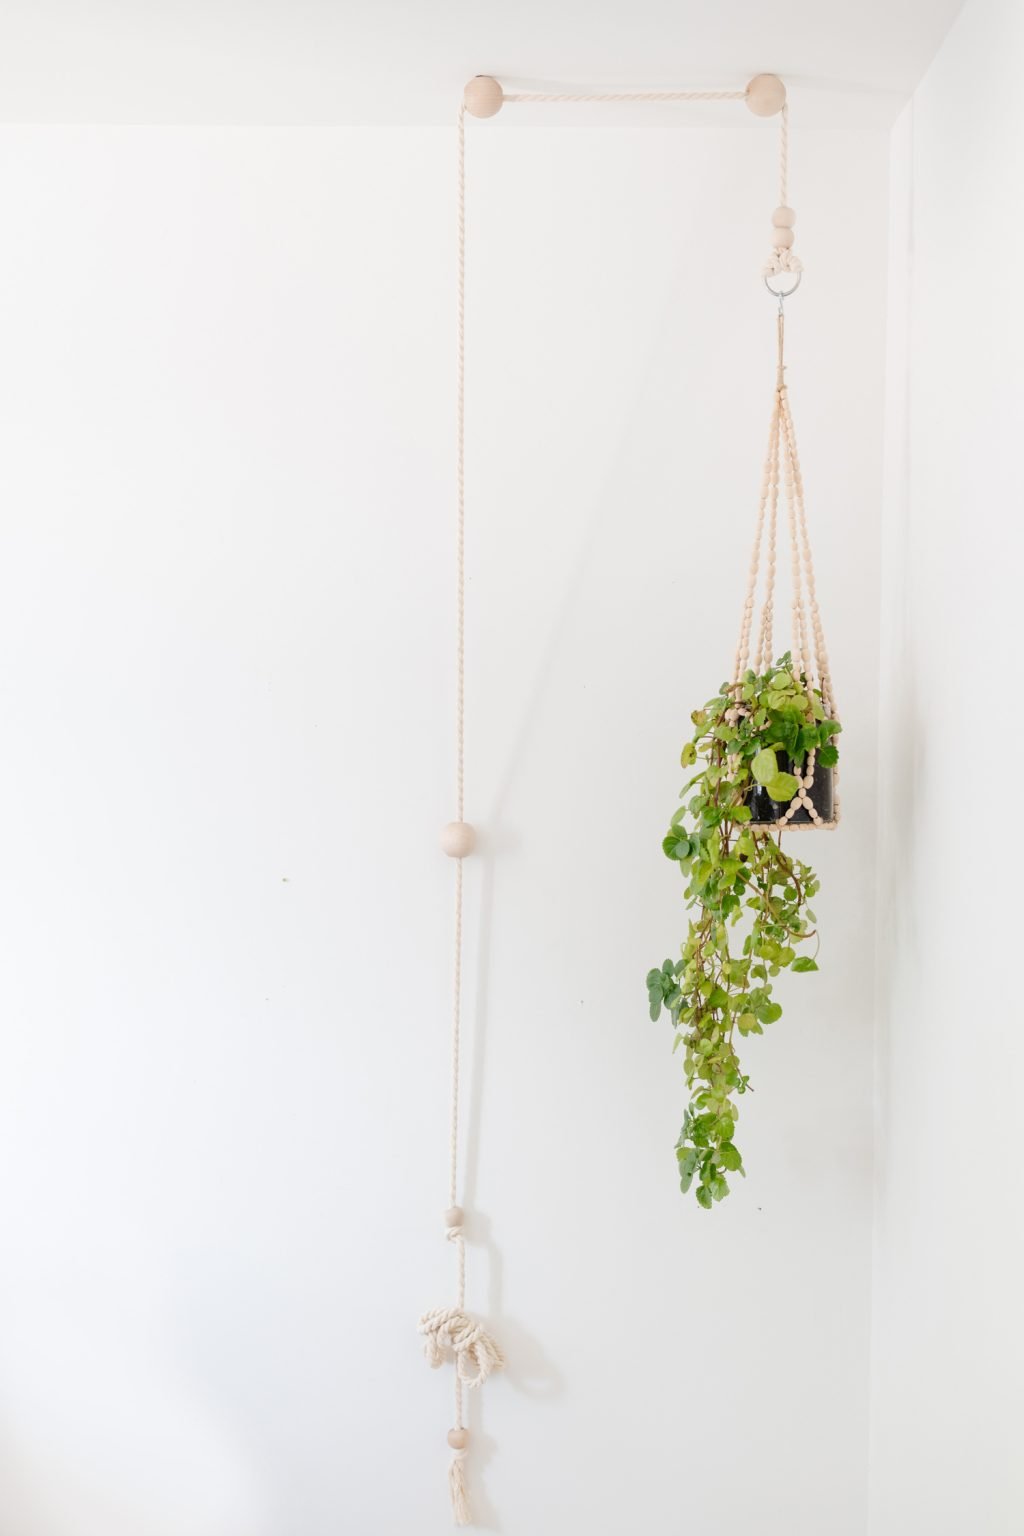
So like any good designer, I took what was frustrating me the most (because I have 5000 hanging plants) and made a project out of it. I needed a way to easily lower the plant to water it (or take it off to soak) that looked incredible and was life changing functional.
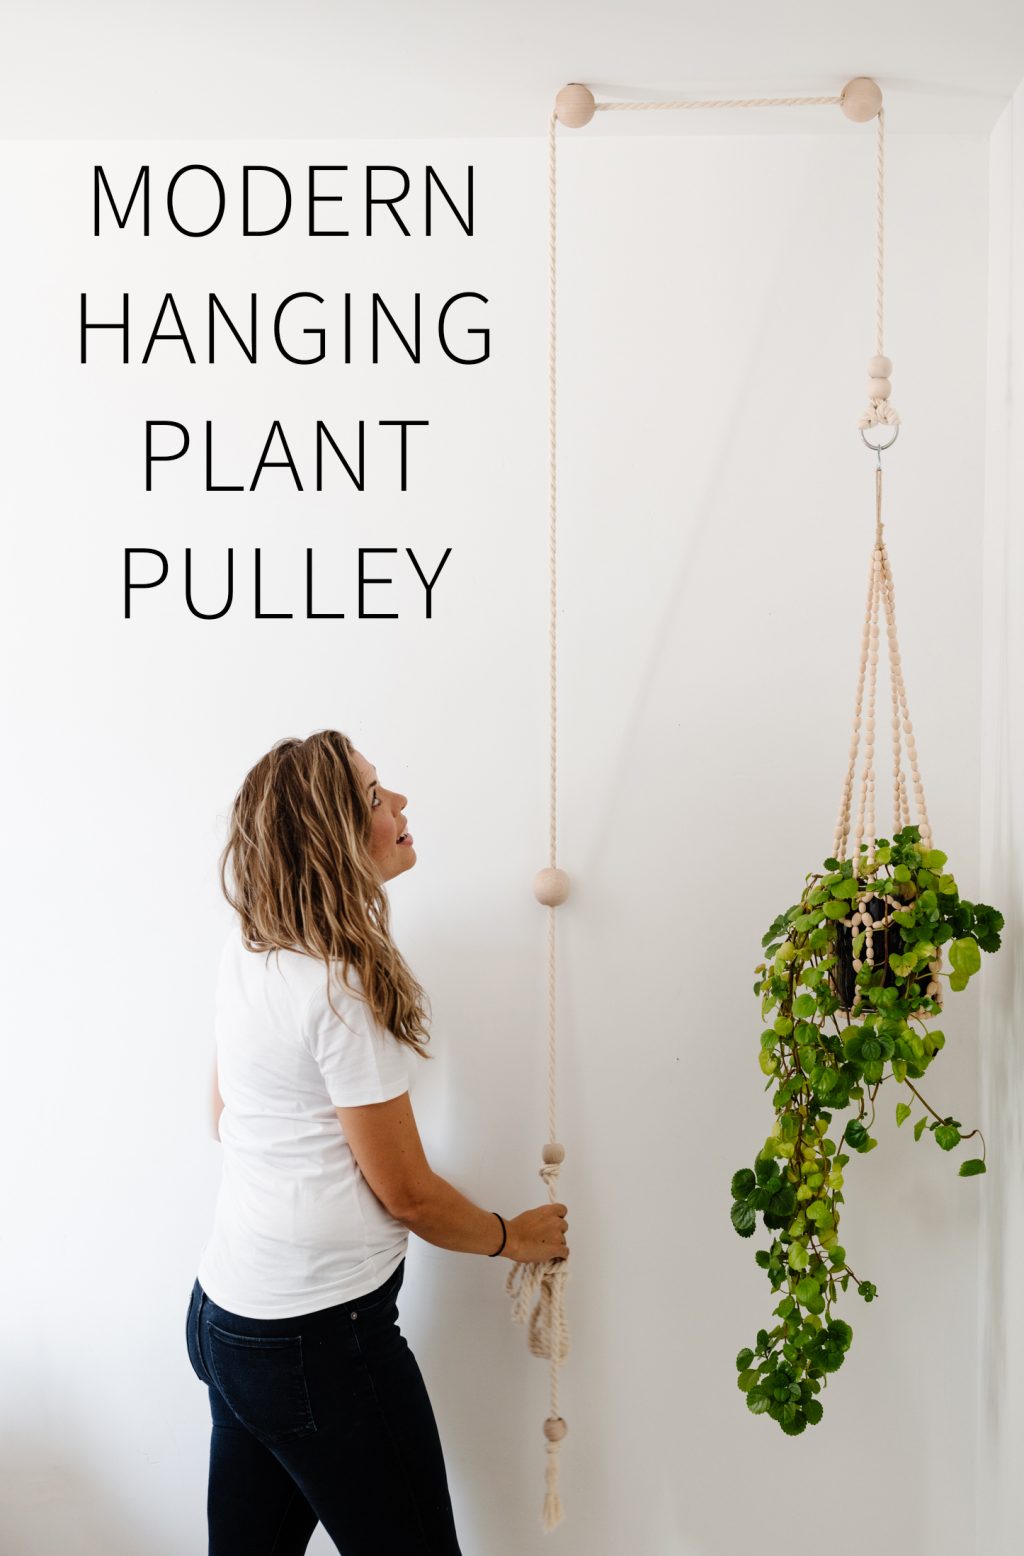
This is how our BRAND NEW Modern Plant Pulley came to be!! You can score one or one hundred in the shop right here!!
There are 2 things you need to know.
The design is customizable, and it makes plant care simple.
The best part is that they are completely customizable for your space and aesthetic and we did everything in our power to make it easy for you to install, no DIY skills required!
Included in each Modern Plant Pulley is:
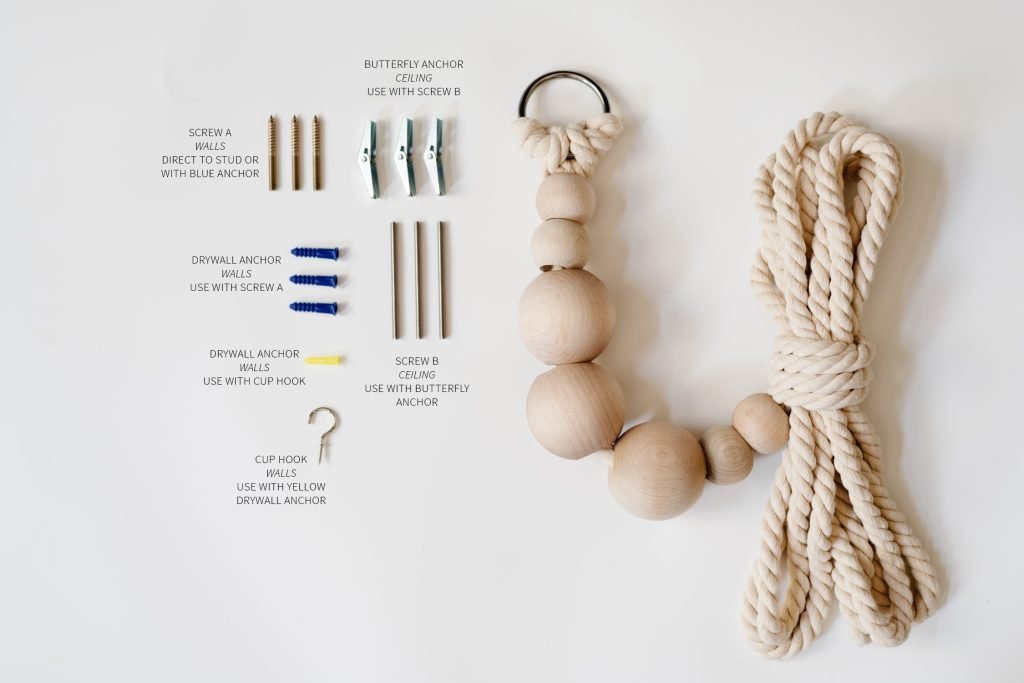
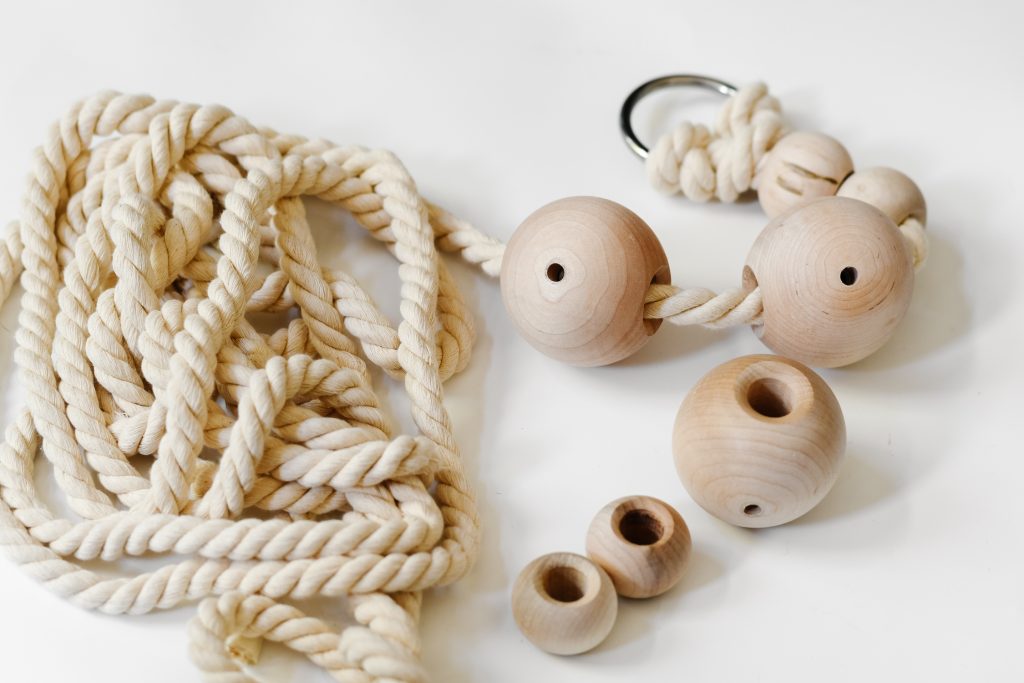
18′ natural cotton rope with ring
(4) 1.5″ premium maple balls
(3) 2.5″ premium maple balls
Mounting hardware kit
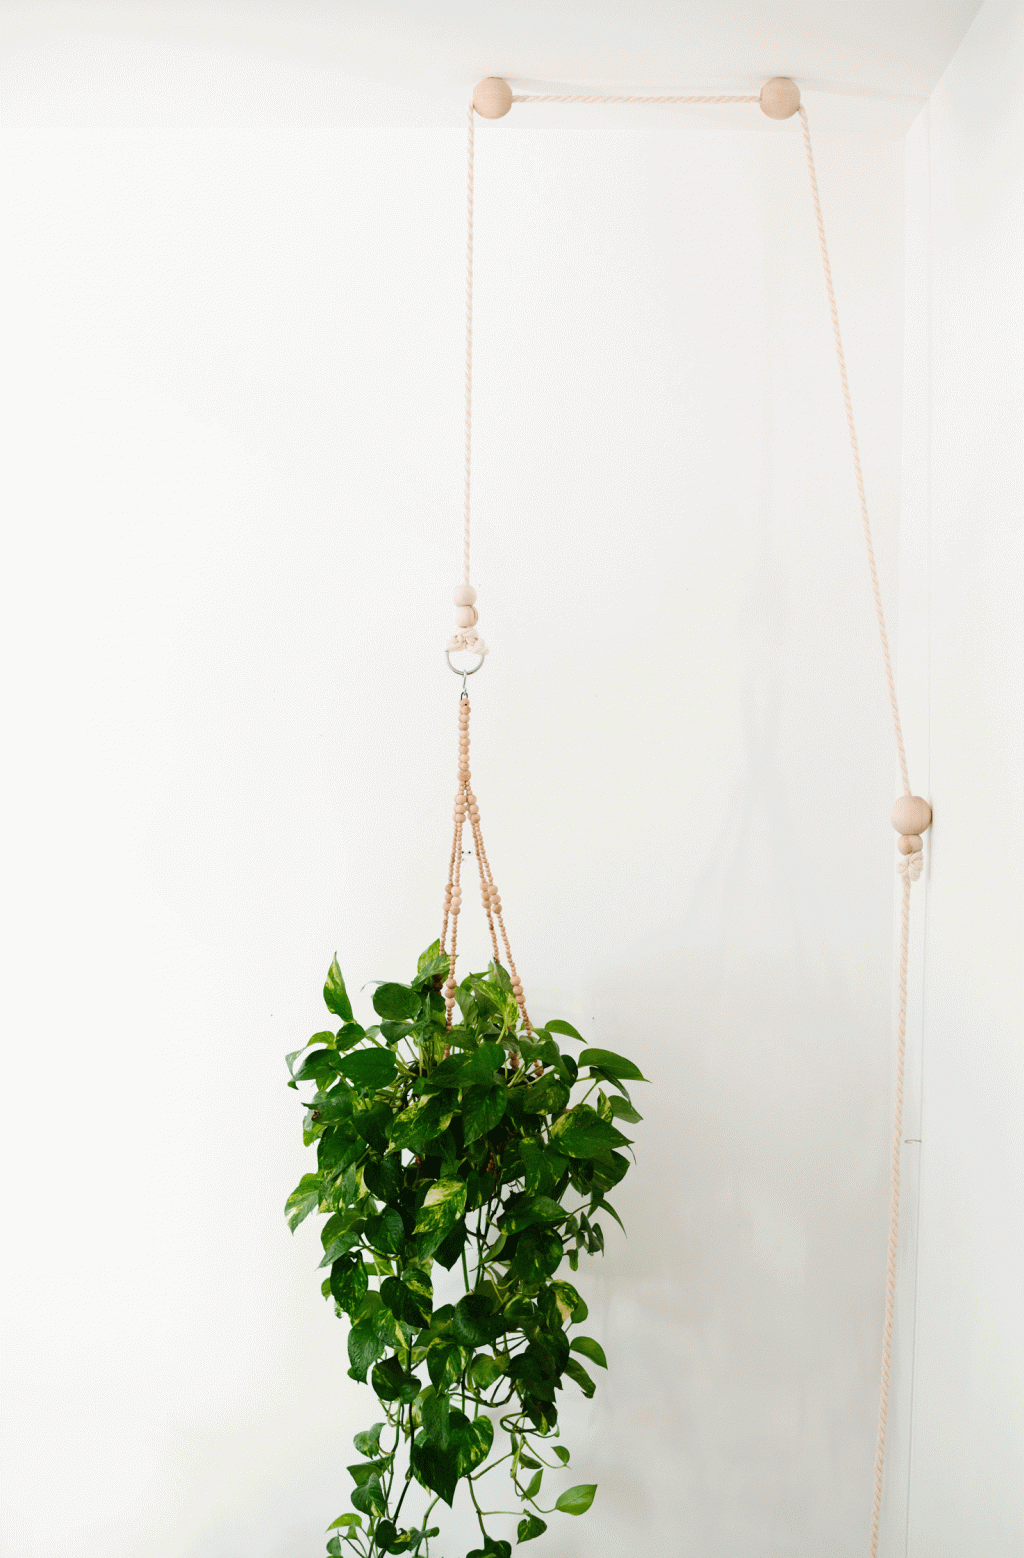
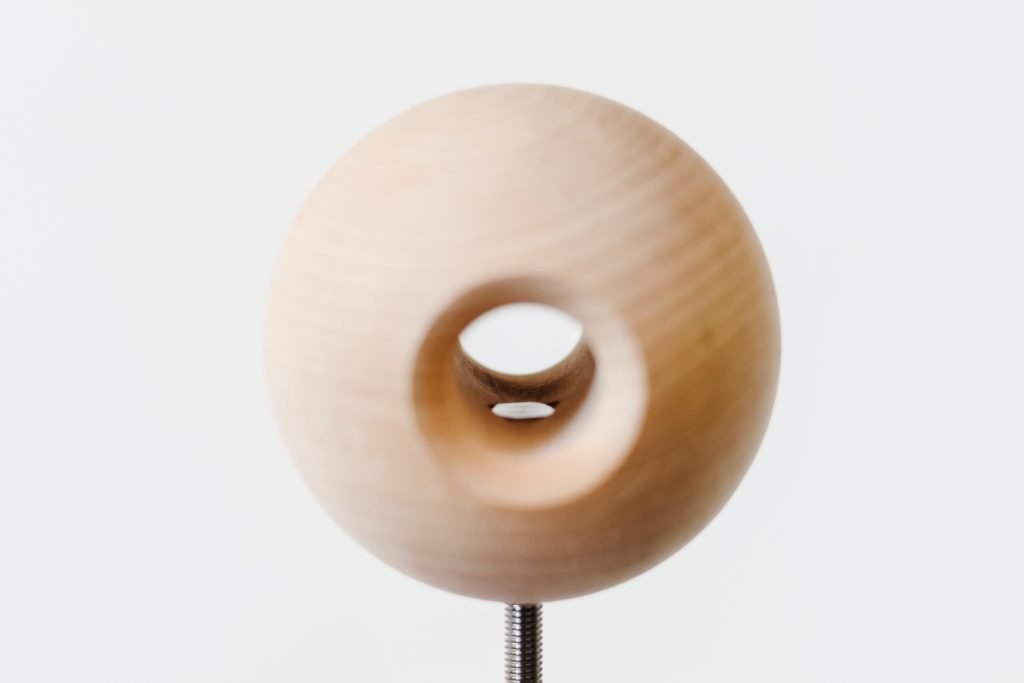
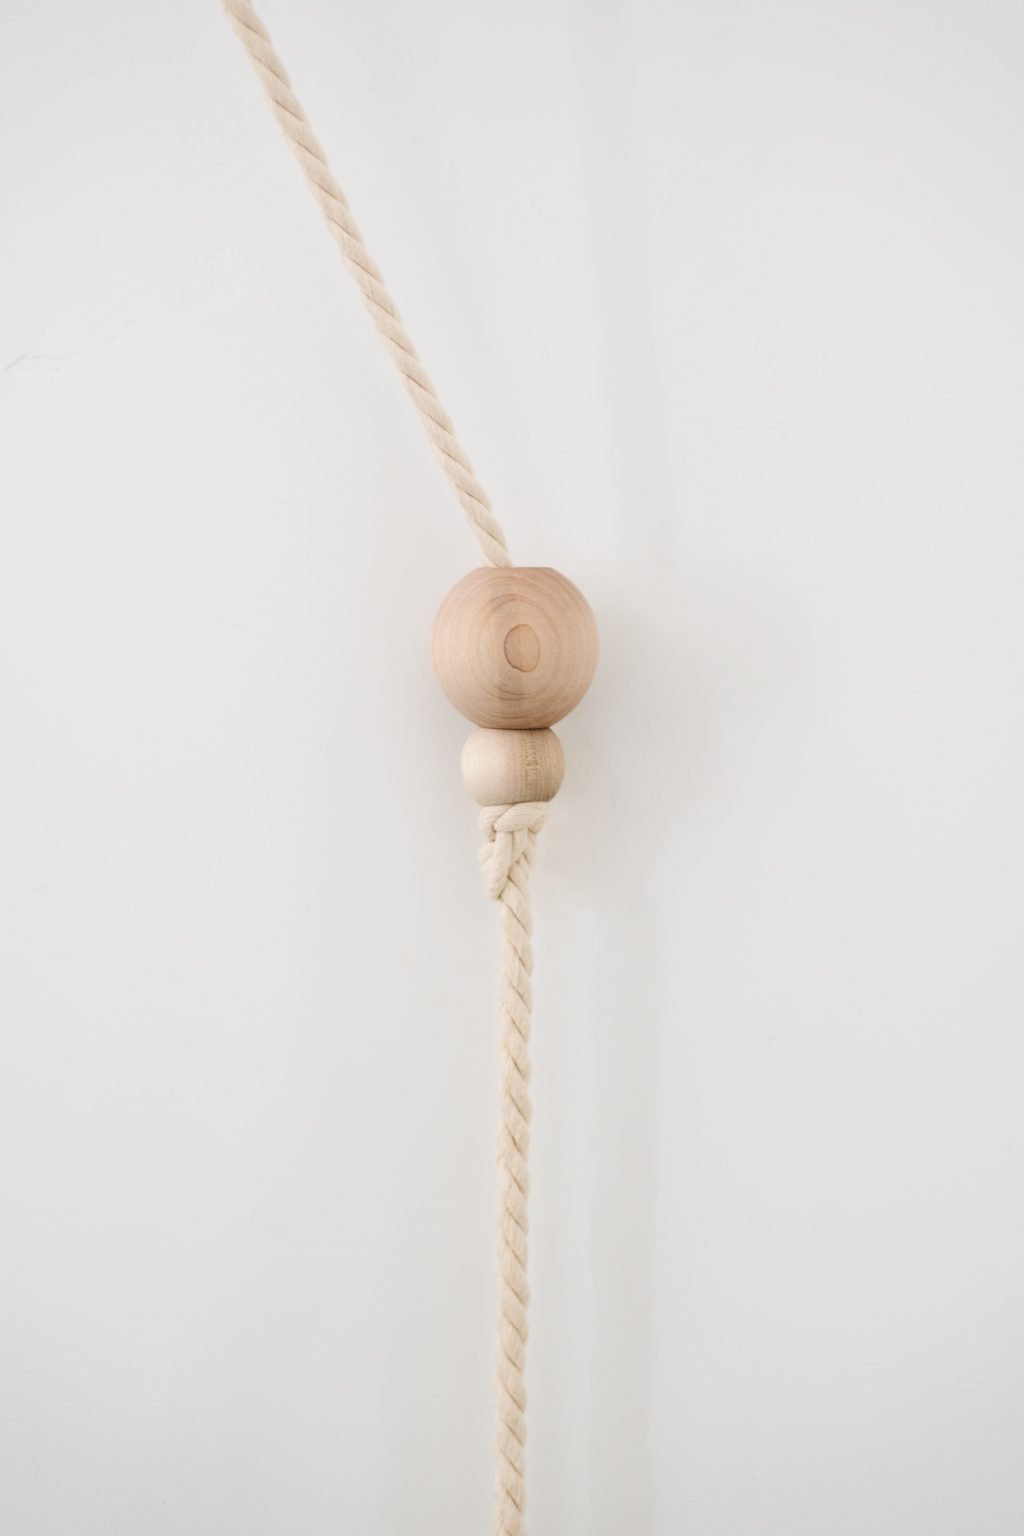
The magic is in the 3 giant balls. They are designed and manufactured (by Court!!) to be used in 3 different ways.
- Mounted to the wall
- Mounted to the ceiling
- Unmounted
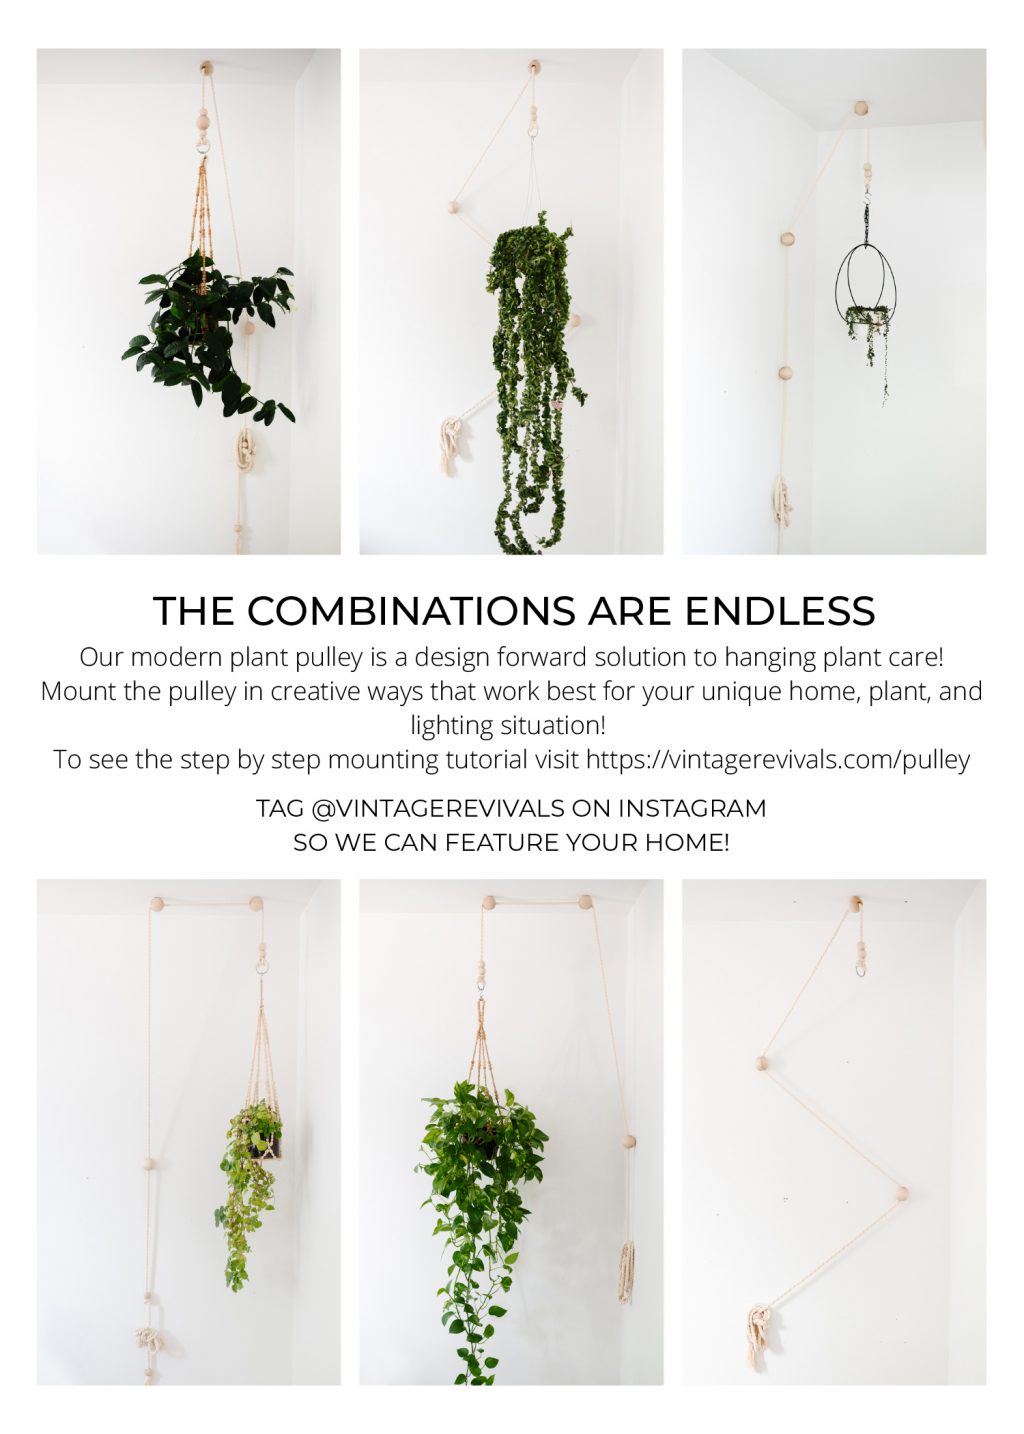
The possibilities for design combos are almost endless!
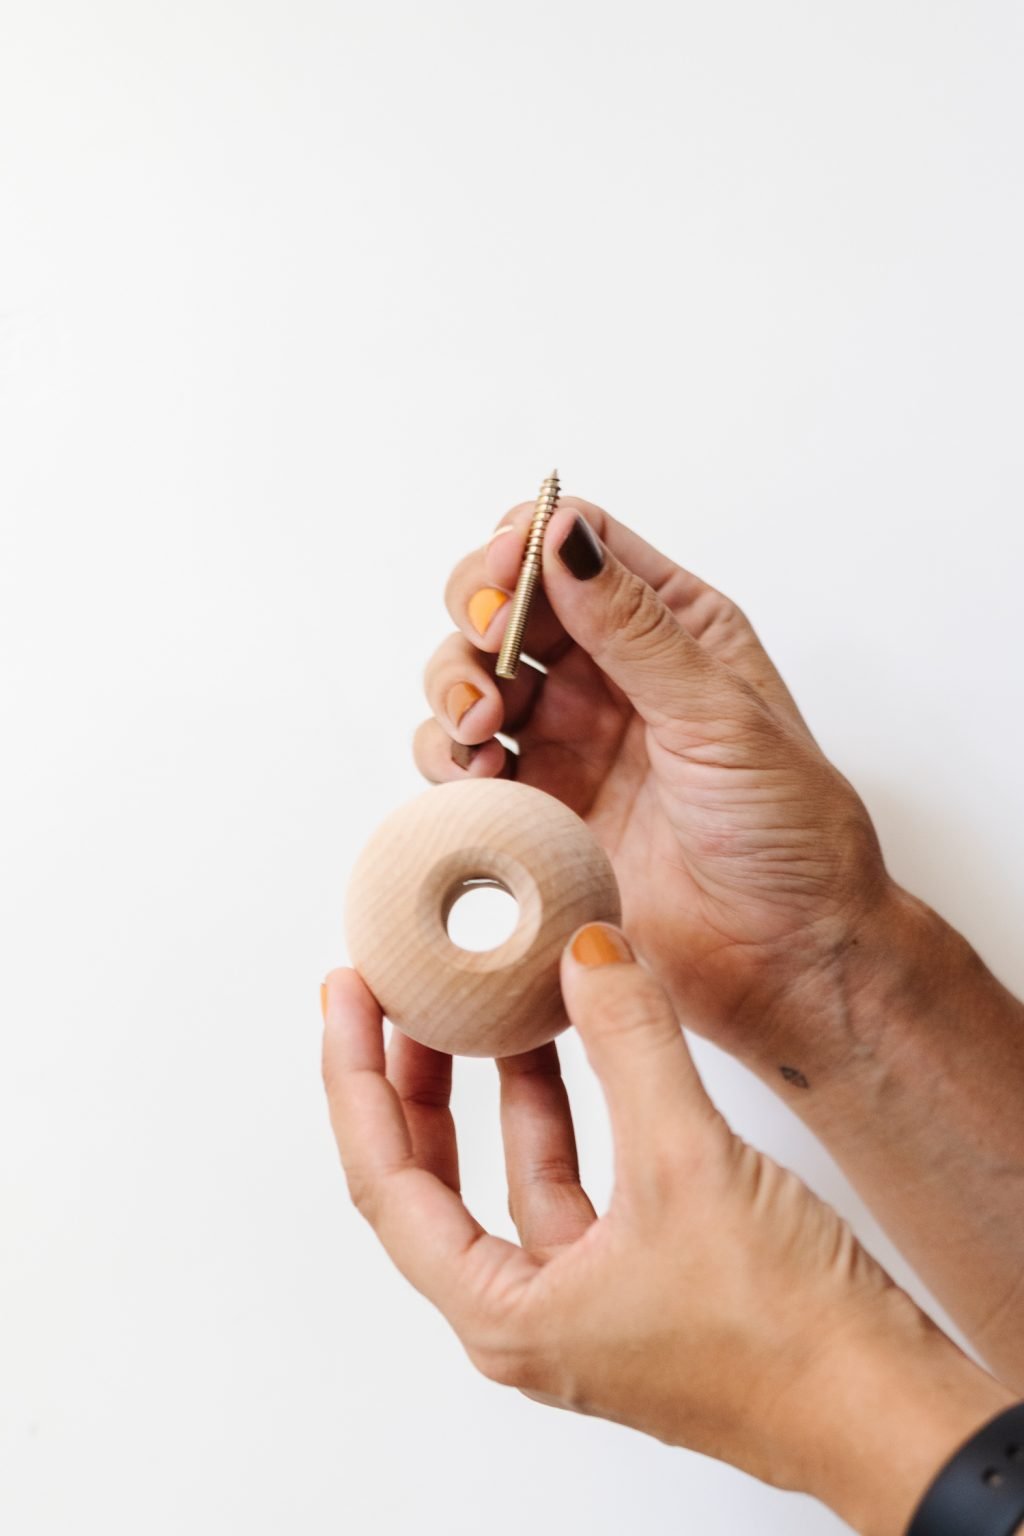
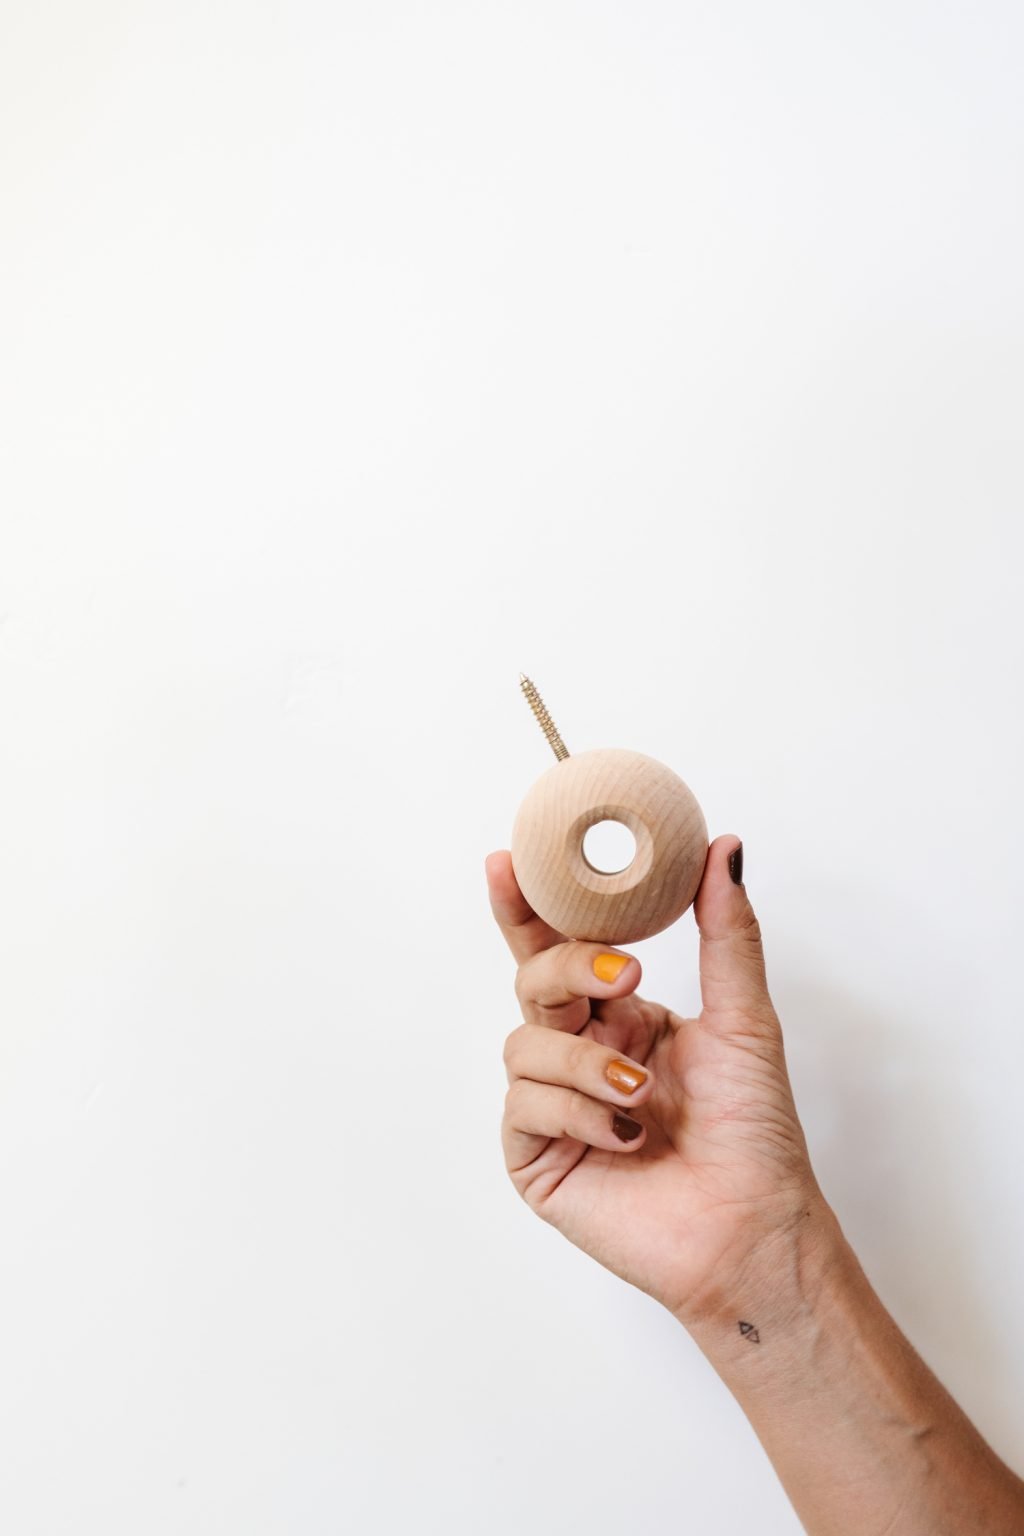
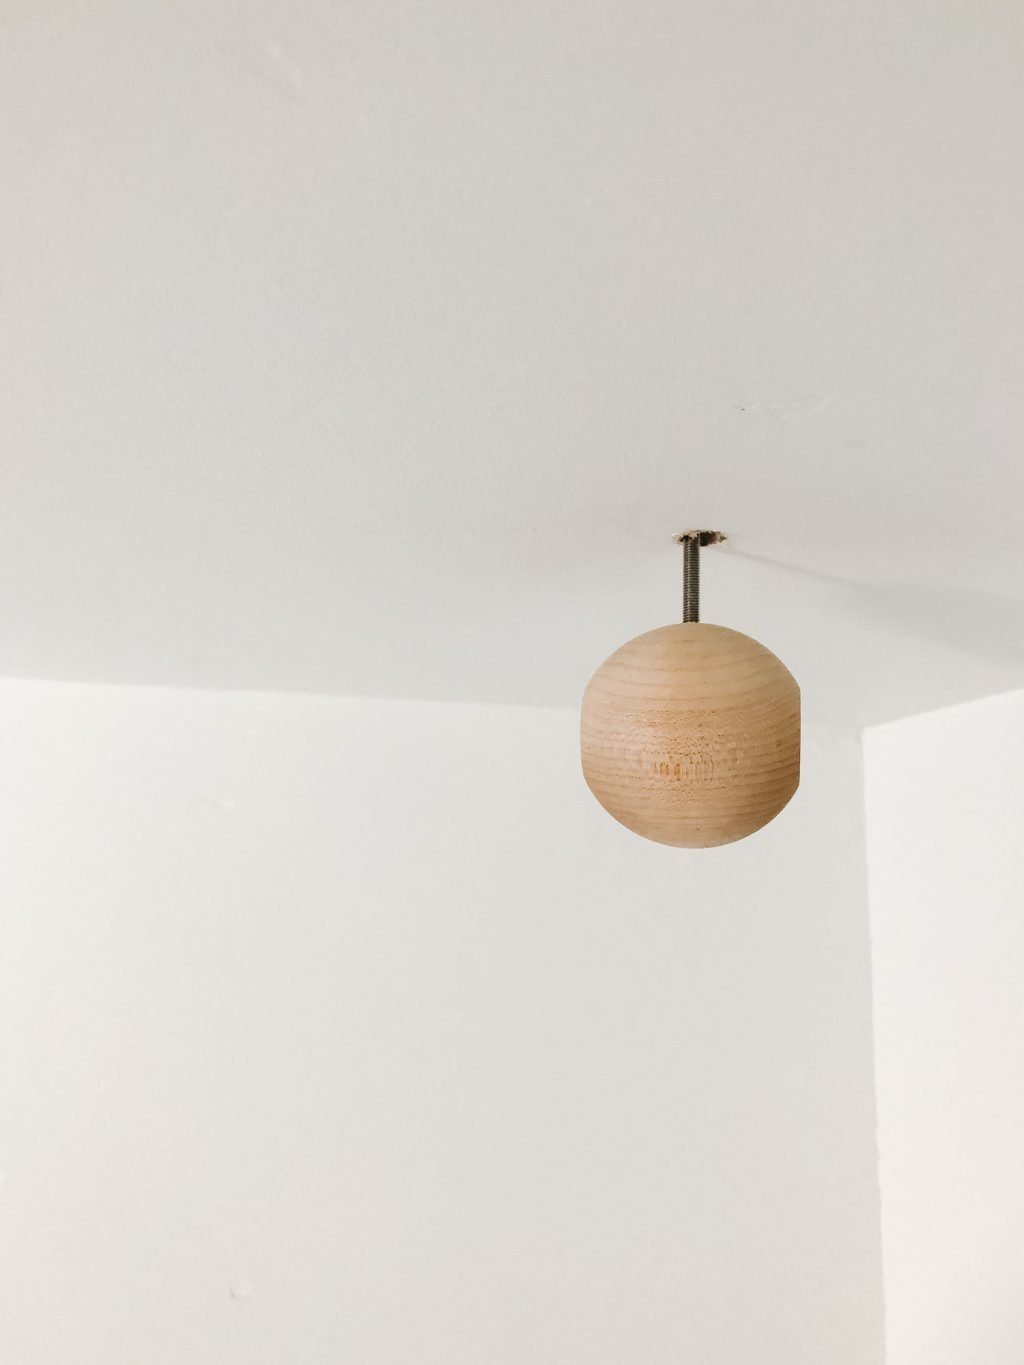
Inside each ball is a hidden component that the screws from the mounting hardware easily screw into!
How to hang your Modern Plant Pulley
If you prefer a video walk through of installation, check out this highlight reel on Instagram!
Decide your design!
Do you want two balls on the ceiling and one on the wall?
How about one on the wall, one on the ceiling, and one as a design element on the rope?
Maybe one on the ceiling, and two on the wall?
You can decide what is best for your space, and your plant! Here are some of my favorite ways to hang them!!
Remove the balls from the rope
Slide the rope off of all, but the small ball by the ring (they are removable, but we recommend keeping that one in place!)
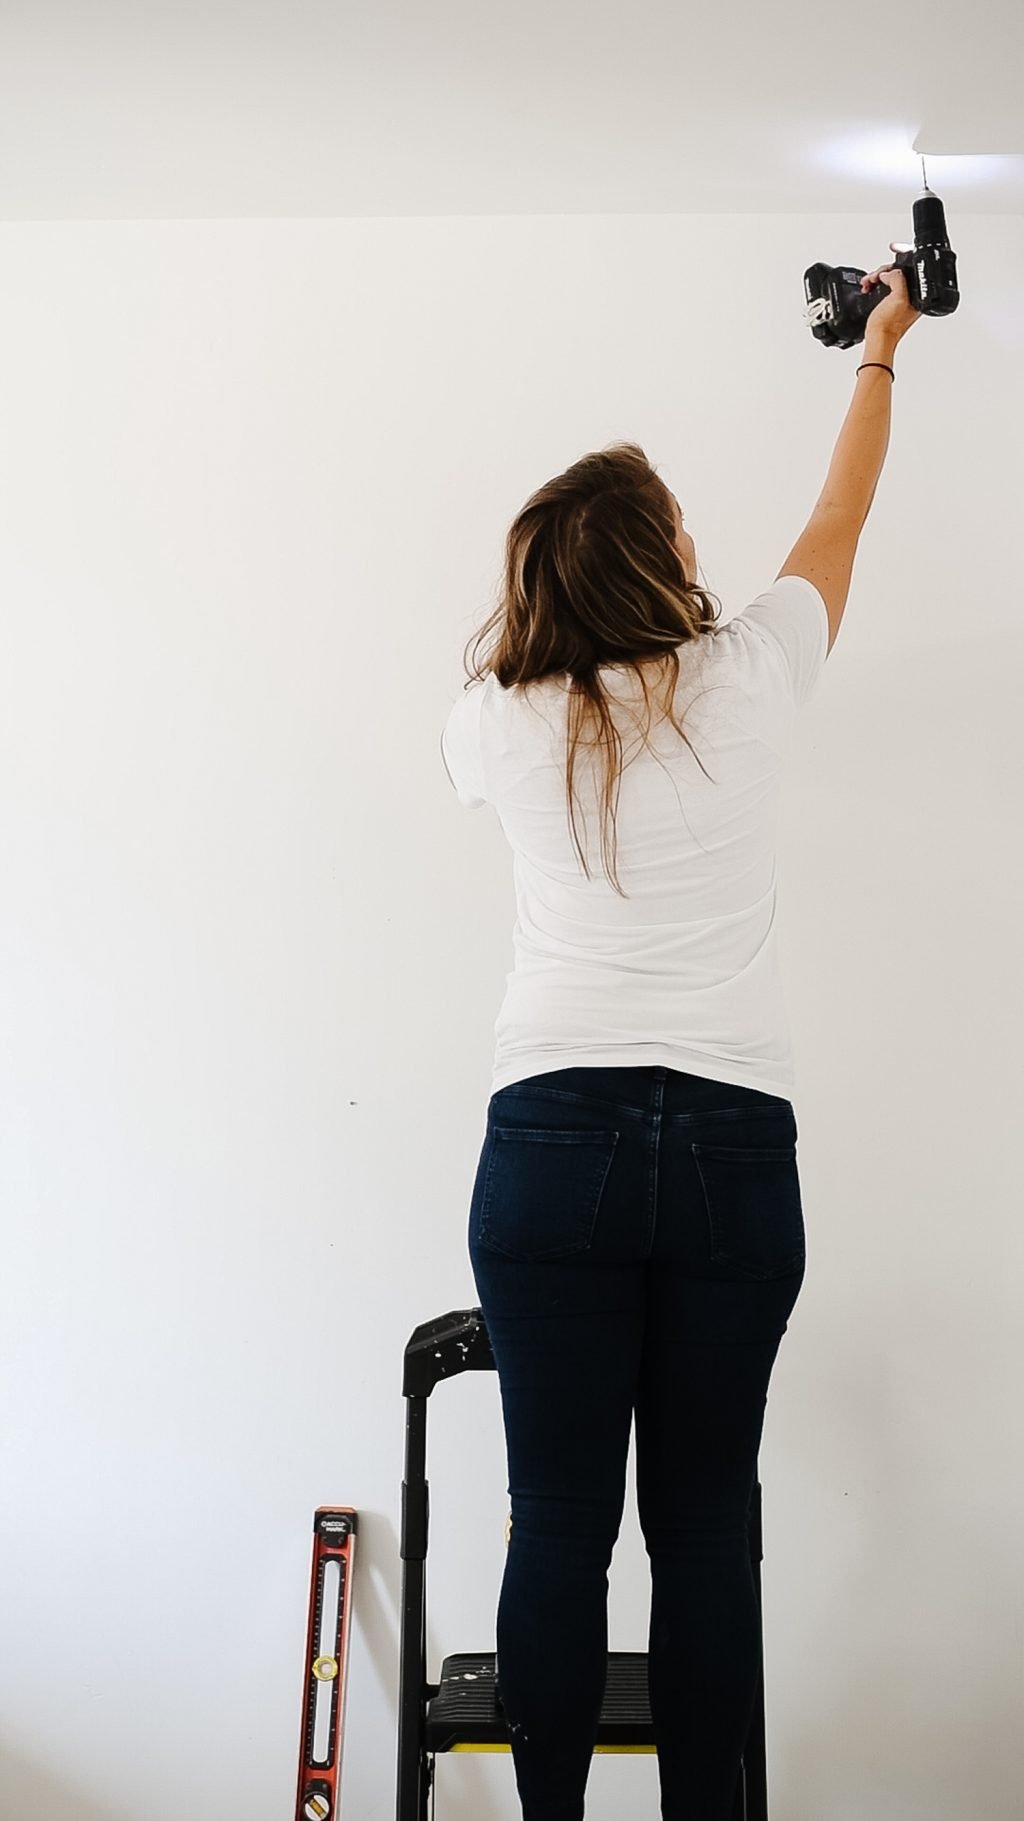
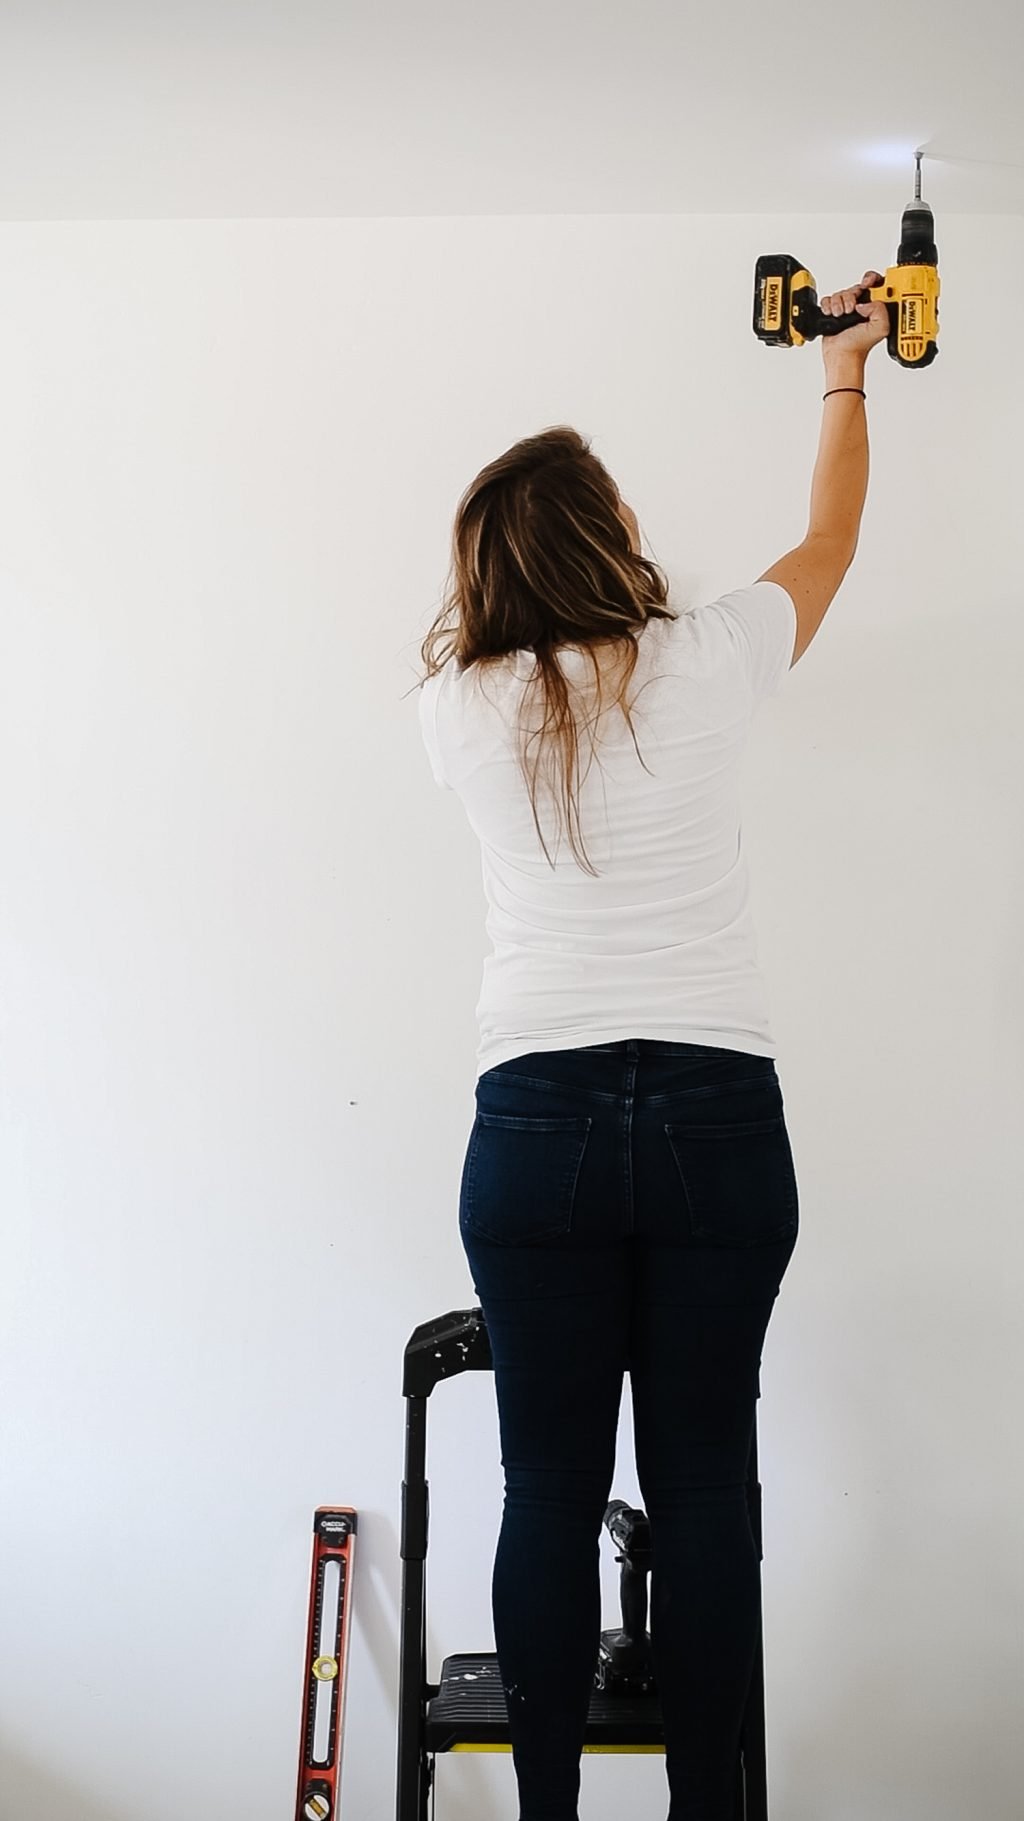
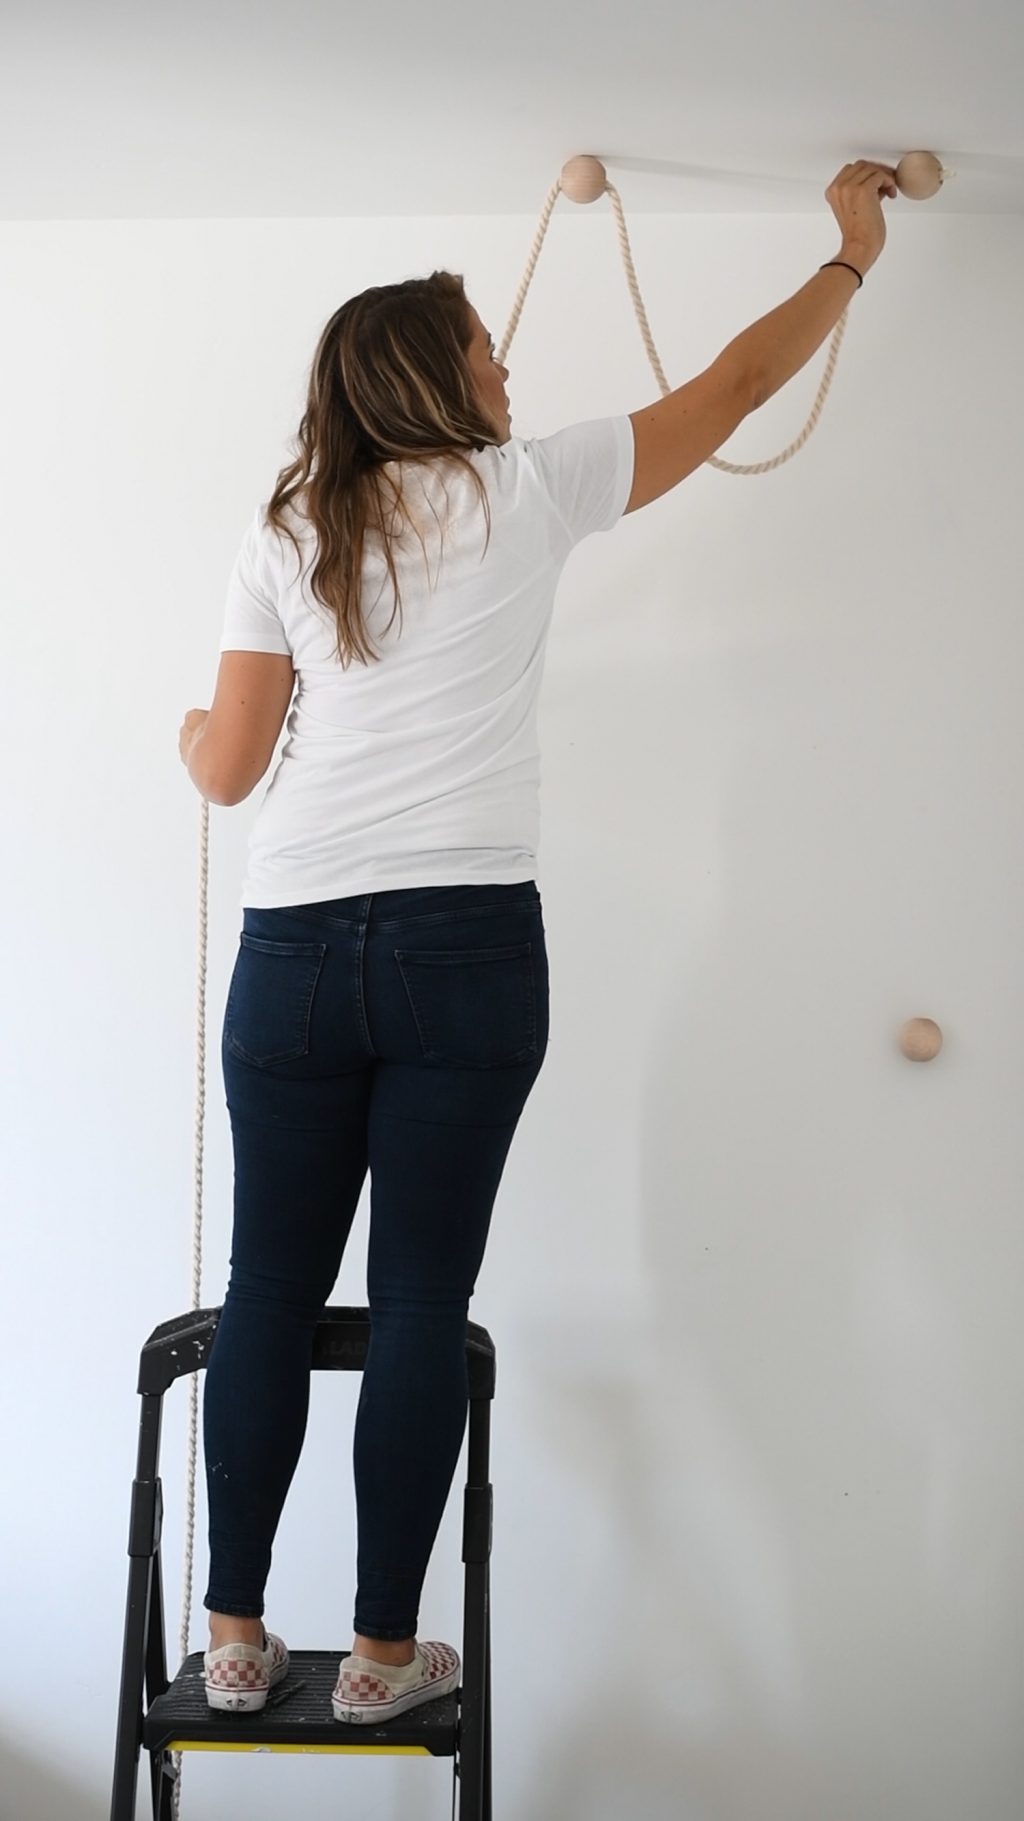
How to Mount the Ball on the Ceiling
Tools You’ll Need:
Stud Finder
Drill
1/8″ drill bit
1/2″ drill bit (if you aren’t mounting into a stud)
1/4″ for the blue anchor
The first step is to figure out if you are going to be drilling into a stud. You can use a stud finder to do this, or you can use an 1/8″ drill bit to drill a test hole!
If you find a stud:
If you have a drill with an adjustable chuck
The easiest and fastest way to put a double ended screw into a stud is with a drill! Just pretend that the screw itself is a drill bit. Tighten the chuck around the screw and drill it into place, stopping when there is about 3/4″ of the screw poking out of the wall.
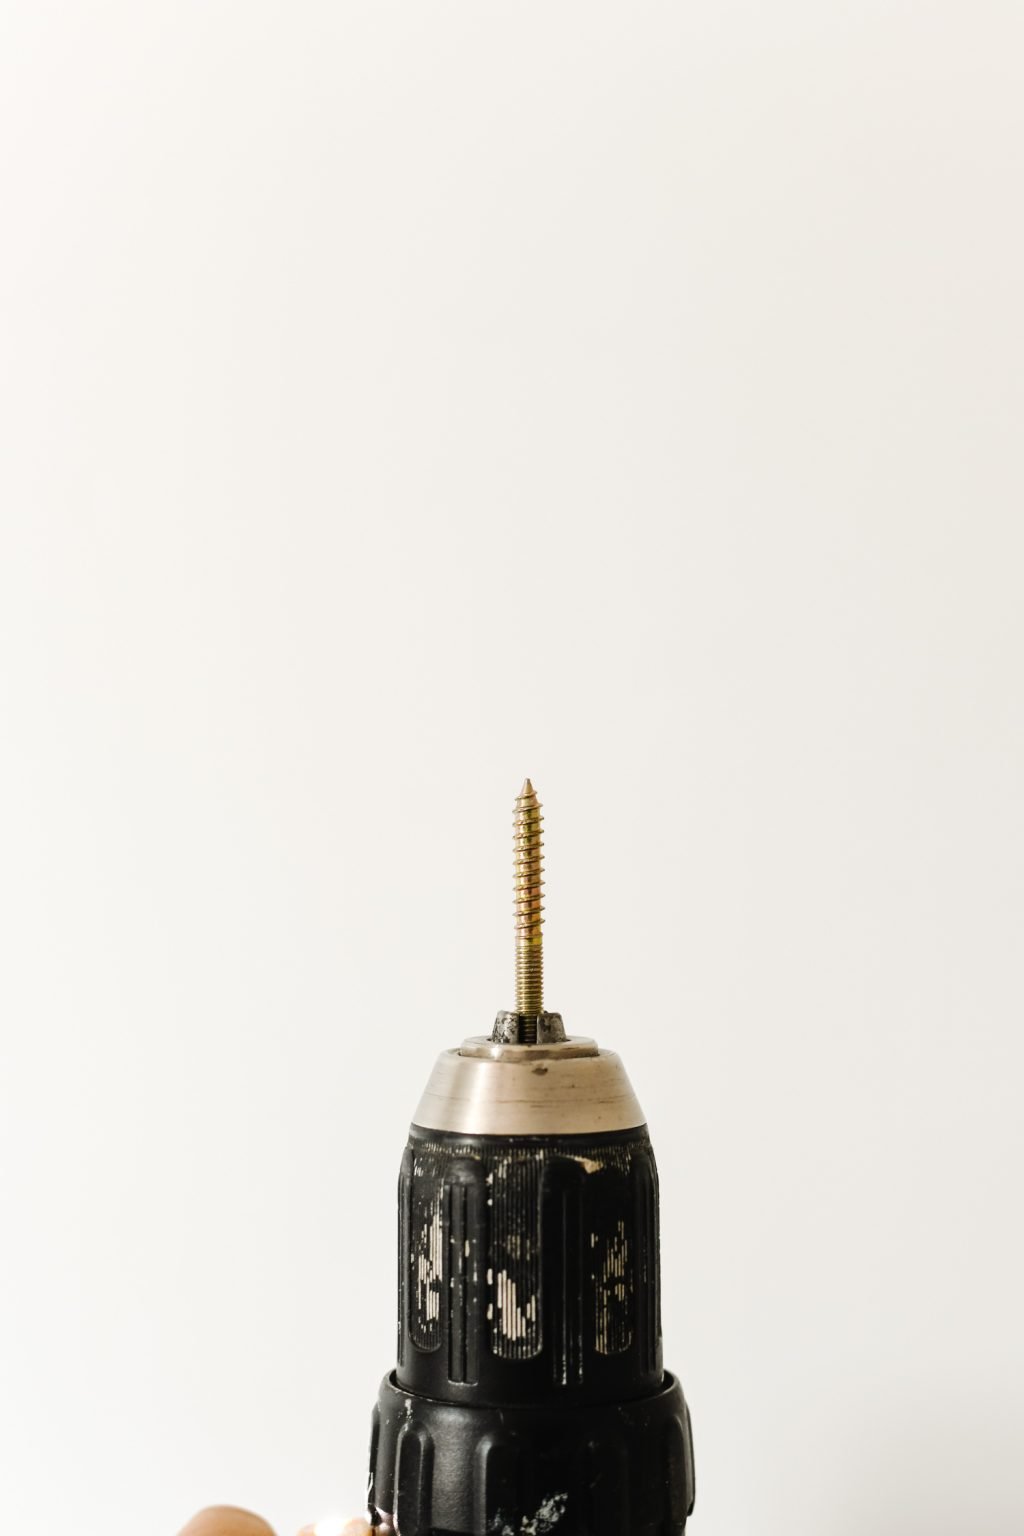
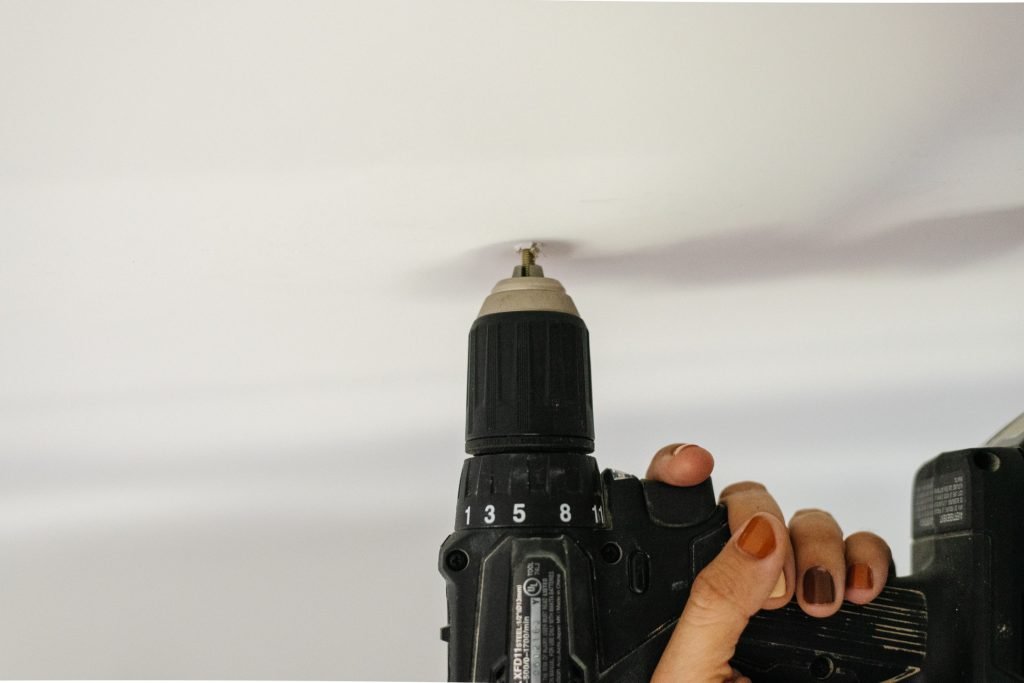
Then just loosen the chuck and screw the ball onto it!
If you don’t have a drill with an adjustable chuck
Use one of the double ended screws that has a sharp pointed end. (Screw A)
Put the flat end into the ball and twist it until it stops.
Drill a pilot hole into the ceiling with a 1/8″ drill bit
Twist the ball into place until it’s tight and the holes for the rope are facing the correct direction. These screws are long enough that you wont need a drywall anchor, they will go directly into the stud.
Without a stud:
To mount this ball you will use one of the screws without the pointed end (Screw B)
Using a 1/2″ drill bit, drill a hole through the drywall (yes it’s huge, no you wont see it!)
Put one of the flat ends of the screw into the ball and twist it until it stops
On the other end of the screw, thread the butterfly anchor on with the tips pointing downward (toward the ball). Dont thread it on too far (maybe 1/4″ down) or the “wings” wont be able to open up!

Push the butterfly anchor through the hole in the drywall and make sure that it opens. The ball will be loose and wiggly, and you’ll see some of the screw, but it should be secure enough to not pull out. If it does pull out, then the butterfly anchor was threaded too low onto the screw, move it up and try again.
When the anchor is opened up, start twisting the ball while holding slight tension on the anchor (you can do this by gently pulling the ball down while you screw!) the screw will tighten into the anchor and your ball will be tight against the ceiling! Make sure that your holes are facing the right direction!
How to Mount the Ball on a Wall
The first step is to figure out if you are going to be drilling into a stud. You can use a stud finder to do this, or you can use an 1/8″ drill bit to drill a test hole!
With a stud:
If you have a drill with an adjustable chuck
The easiest and fastest way to put a double ended screw into a stud is with a drill! Just pretend that the screw itself is a drill bit. Tighten the chuck around the screw and drill it into place, stopping when there is about 3/4″ of the screw poking out of the wall.
Then just loosen the chuck and screw the ball onto it!

If you dont have a drill with an adjustable chuck
Use one of the double ended screws that has a sharp pointed end. (Screw A)
Put the flat end into the ball and twist it until it stops.
Drill a pilot hole into the wall with a 1/8″ drill bit
Twist the ball into place until it’s tight and the holes for the rope are facing the correct direction. These screws are long enough that you wont need a drywall anchor, they will go directly into the stud.
Without a stud:
Use one of the double ended screws that has a sharp pointed end. (Screw A)
Put the flat end into the ball and twist it until it stops.
Drill a pilot hole into the wall with a 1/8″ drill bit and set your drywall anchor by gently tapping it into place with a hammer.
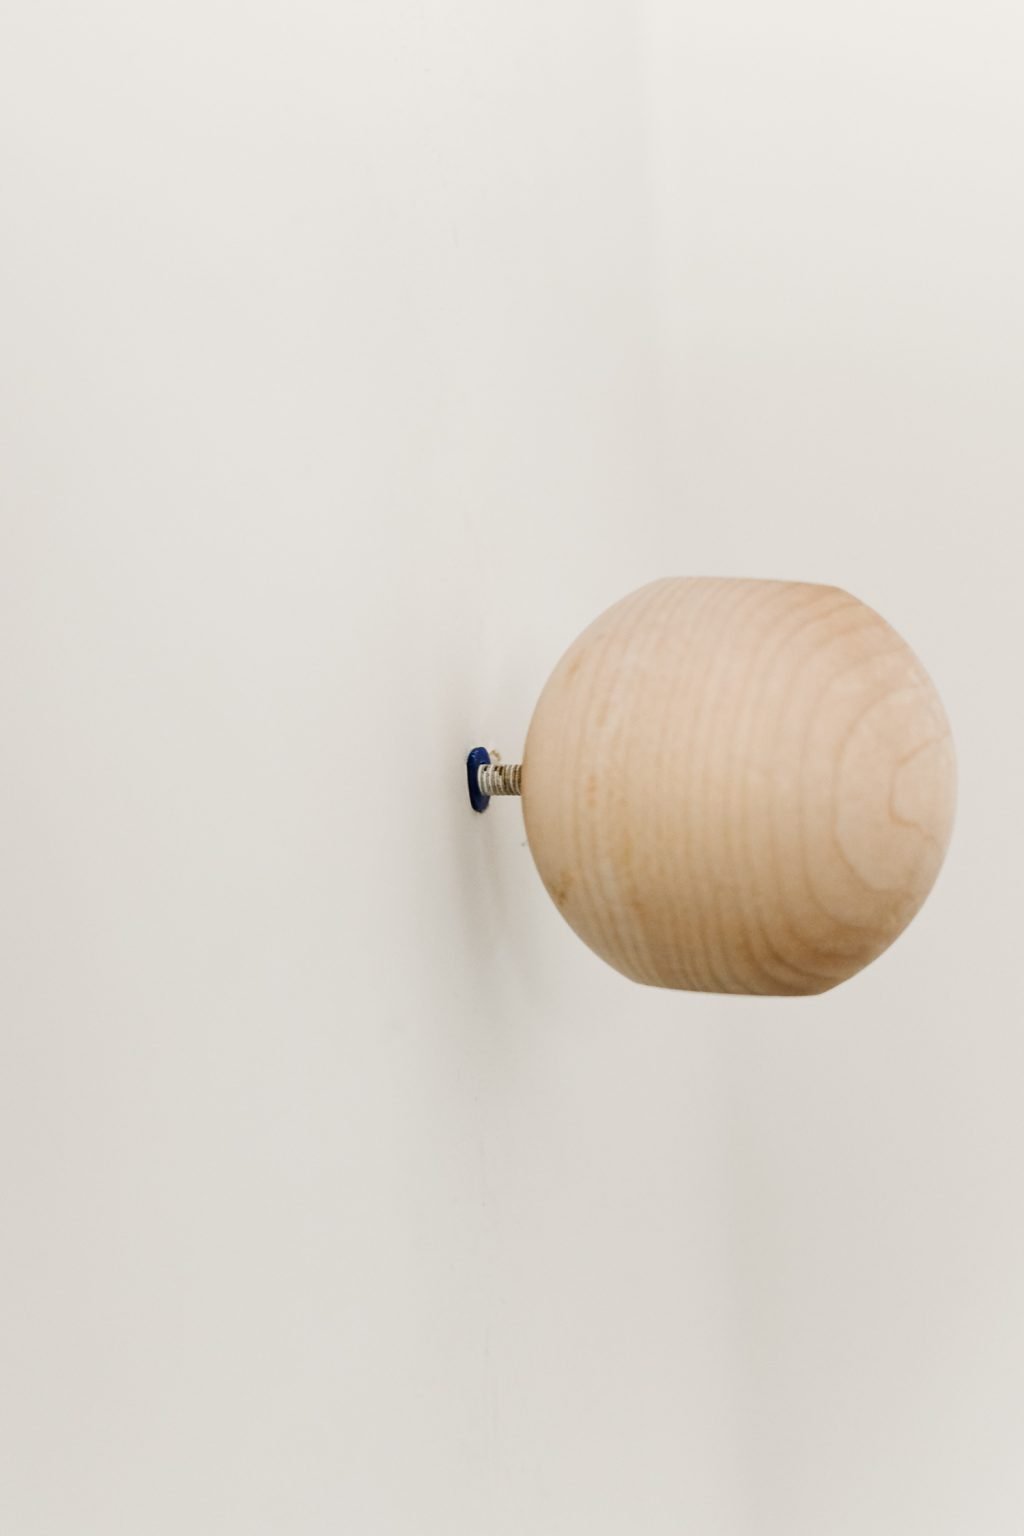
Twist the ball into place until it’s tight and the holes for the rope are facing the correct direction. Careful to not over-tighten it!
Attach the Rope
Once all of your balls are mounted into place, thread the rope through and add one of the small balls.
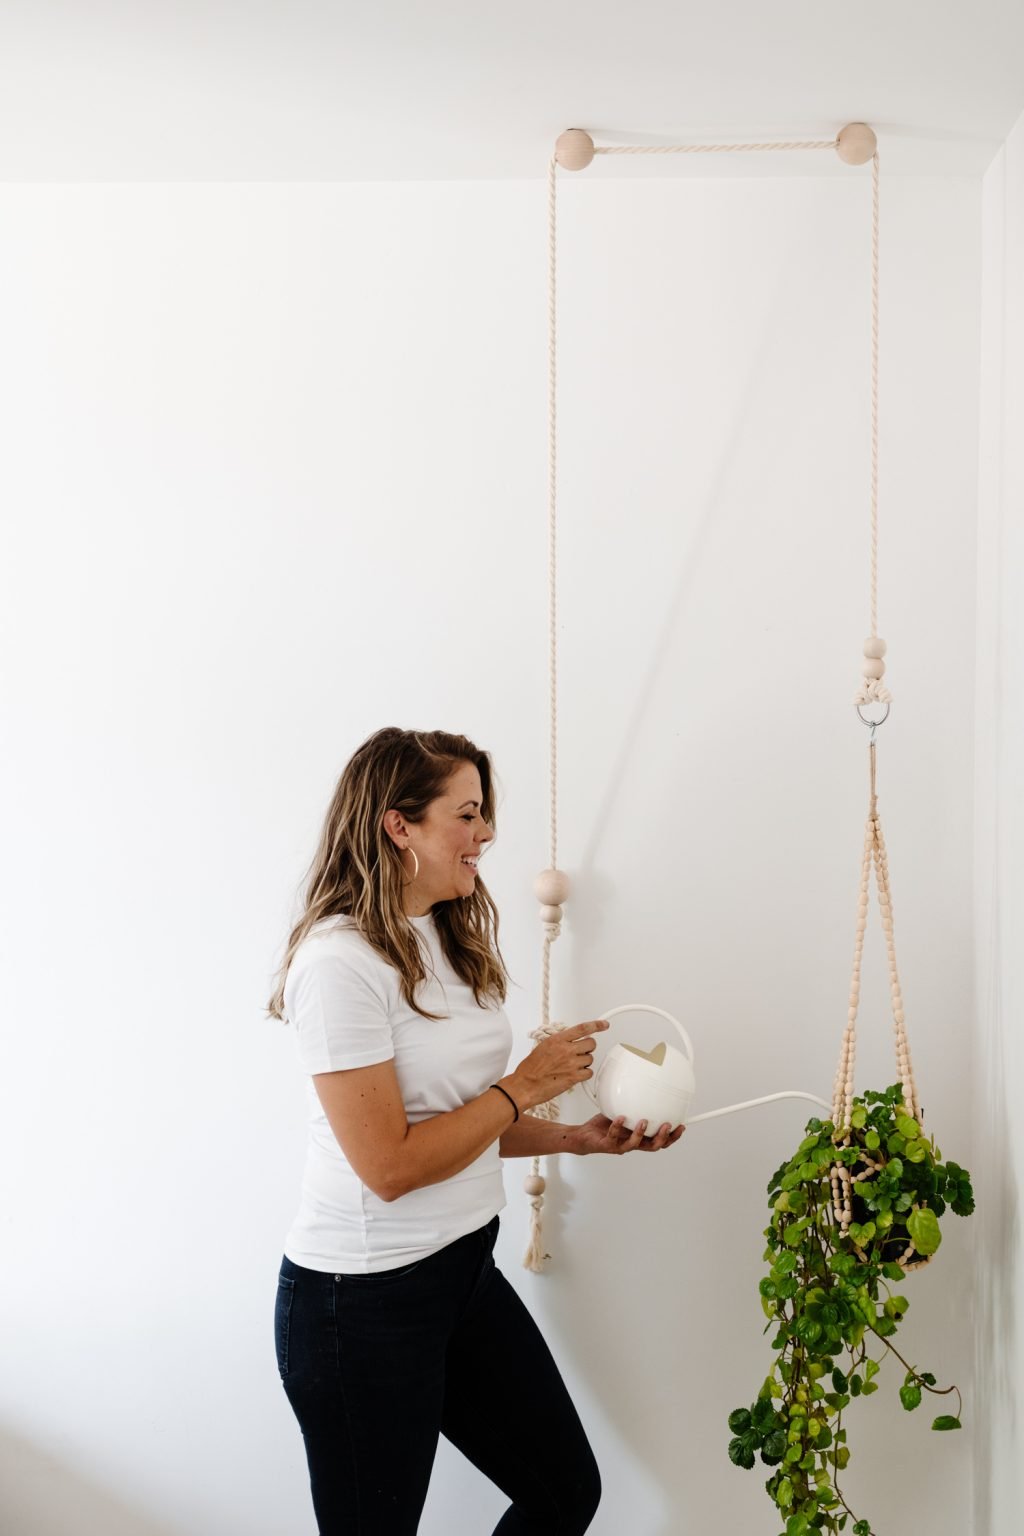
Set the Perfect Watering Height of the Plant
HOLD THE ROPE!
Hang your plant on the ring (I use S hooks if the planter has a closed loop top!)
Lower the plant to your dream watering height! Mine is just above my waist!!
Mark, hold, or pinch the rope where it is positioned on the lowest large ball.
Take the plant off the rope.
Move the small ball to that special spot in the rope and tie a knot underneath the small ball.

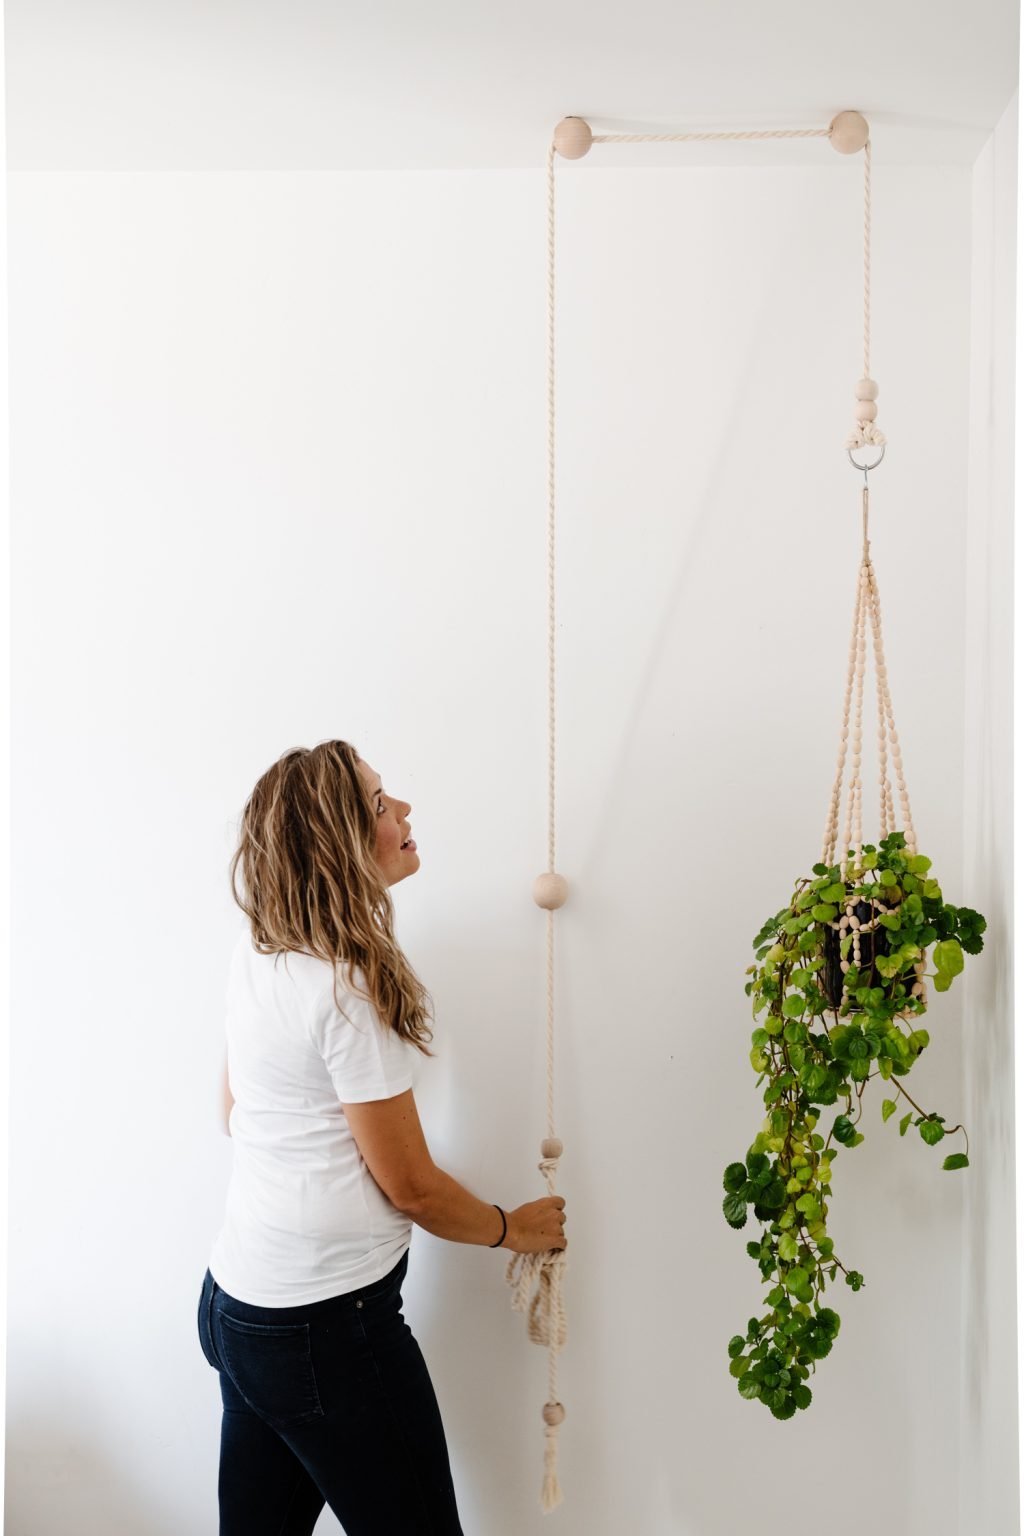
Hang the plant again! The small ball should meet the large ball and stop, holding your plant at the perfect watering height!! TA DA!!!
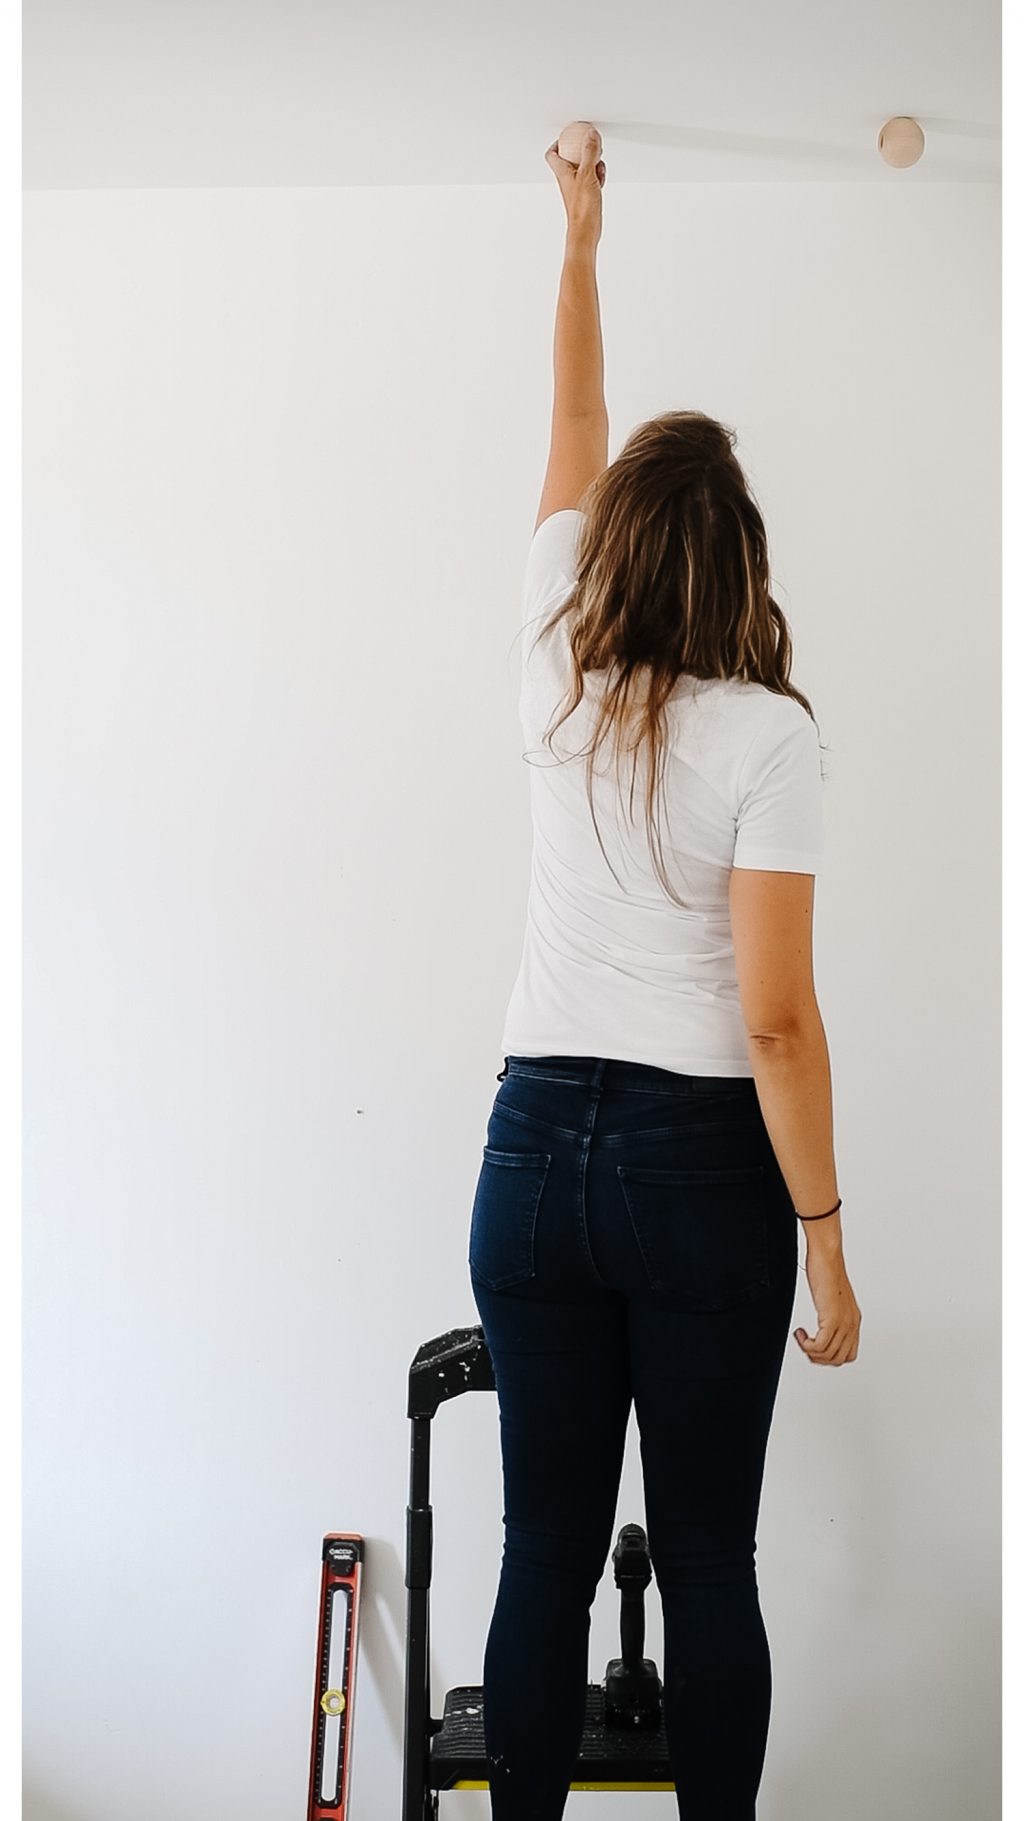
Set the Hanging Height
Using the rope, pull the plant into the spot where you want it to hang. If your plant is heavy, you might want to support the bottom while you raise it up! Everyone loves a supported bottom, am I right?!
When your plant is in the right spot, mark the wall where the small ball + knot are.
Make sure everything is lined up to your liking (you can even use a level to make sure the rope is in a straight line!)
Using the 1/8″ drill bit, drill a pilot hole into the drywall and set the yellow anchor.
Screw the cup hook into the anchor and put the small ball + knot underneath it! This hook holds the plant in the right spot and when it’s time to water you can easily unhook the ball and lower the planter!

Finish it off!
You’ve got a few options for finishing off your pulley!
Option 1: Cut the excess rope underneath your small ball + knot for a super clean vibe.
Option 2: Add the last small ball, and wind up the excess for a floppier, boho vibe (this is what I prefer!!)

I can’t wait to see your configurations!!
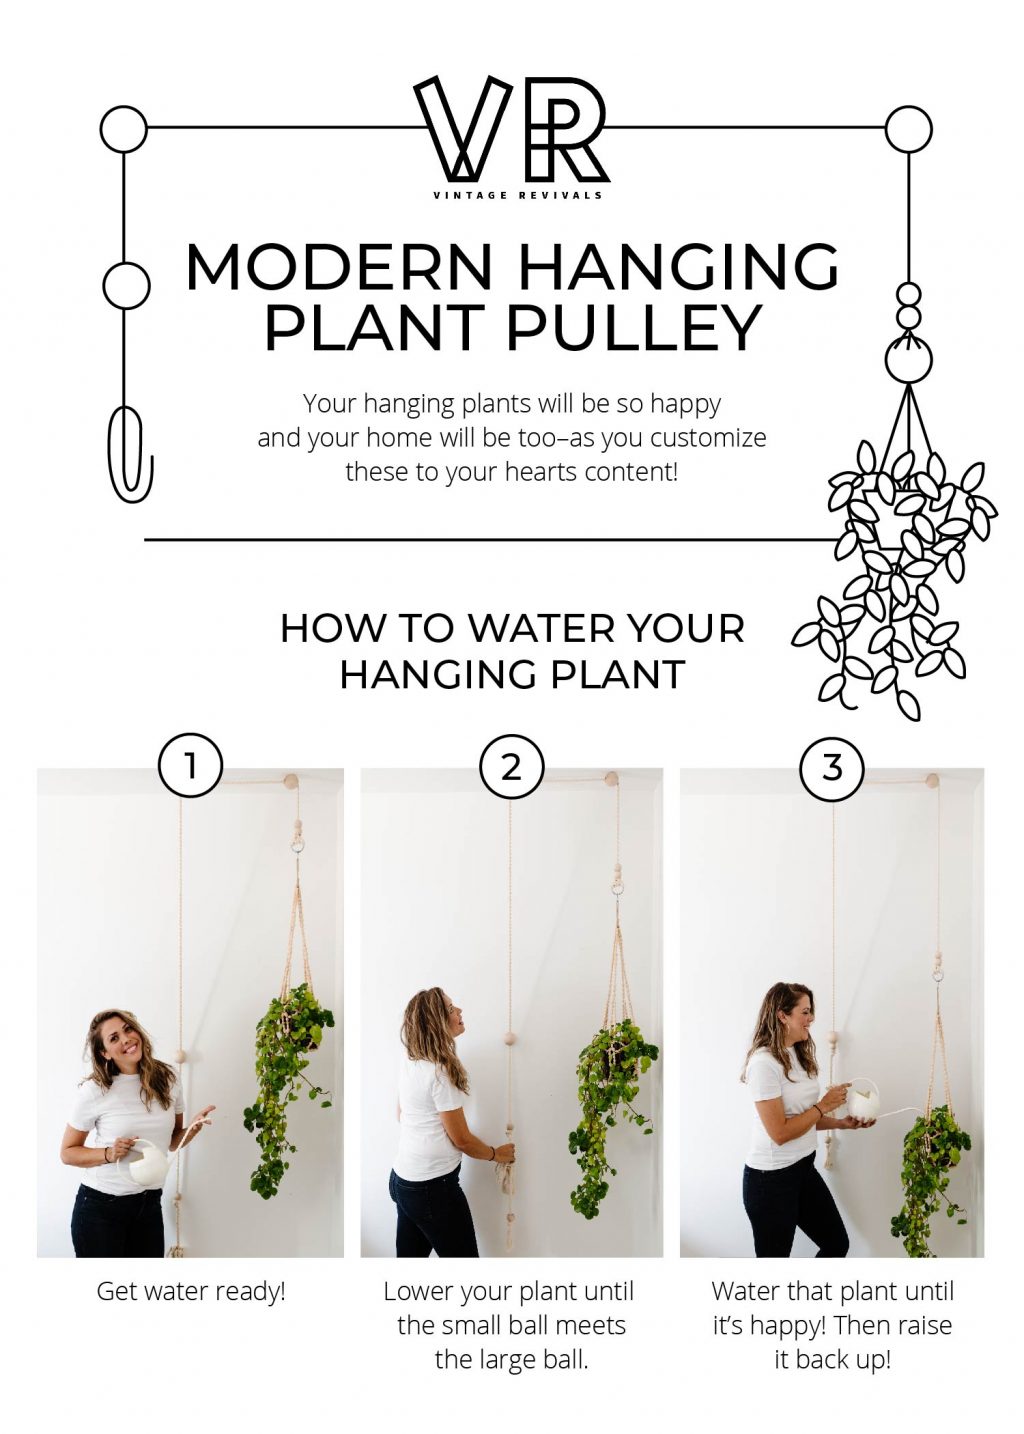
Watering You Plant:
When it comes time to water + care for your plant, unhook it from the hook in the wall and lower it until the balls meet! That’s it!!
Questions?! Leave them in the comments below! You can buy a Hanging Plant Pulley here!
Very incentive.
This is so clever and yet so simple. You and Court are genius.