Its PLANT WEEK!!!!!!!! Do you even know how exciting this is?!? Its like Shark Week but WAYYYYY better and with a lot less fear (mostly). Every day this week I have got an amazing project for you that will make the love in your plant-lovin heart swell to massive proportions.
I feel like marbling is one of those fun crafty type projects that everyone needs to try at least once, its just so pretty to see everything swirl together. The problem is that almost all of the tutorials online use fingernail polish. Which is great….unless you want to do something bigger and then before you know it you’ve spent $78 on nail polish. My brain was churning about this and I realized that you don’t need nail polish, you just need an oil based paint! Like (dun dun dun dun dun duuuuuun!) Spray Paint!!

So here is how you do it.
First things first, you’ll need a container large enough to fit your planter in it. My planter was pretty big so I used a storage tote but a 5 gallon bucket would totally work.
*I recommend trying it out a few times on paper cups to get the technique down before you start on your planters.
Round up your spray paint colors. I used a selection of RustOleum and LOVED the way that the metallic gold turned out, so use that!
Tape off your designs (if that is what you are going for)

Fill your container with water and start adding spray paint.

You have a pretty short window of time to work (you’ll see why in a second). Hold your can about 10 inches away from the water, if you get it too close it splashes the water up and creates little texture bubbles on your finished piece.


Gently tap the sides of your bucket to swirl the colors. By gently I mean create soft waves, not splashes (because texture bubbles)

Slowly dip your planter into the water. If you go too fast, or if your paint is too dry, the paint surface will break and you’ll get gaps with uneven edges (and not in a cute way.)

Submerge the planter in as far as you want and hold it there for about 30 seconds while you lightly fan the paint surface to quicken the drying. Using painters tape made it so that any wiggling that happened (and subsequently added more paint) didn’t stay on the planter, it came off with the tape.

This next step is a 2 handed job so I don’t have a picture but…use a spoon to swipe away all of the remaining surface paint. This will make it so your planter comes out with a clean design.
If you look closely in the picture below you can see texture lines in the lightest part of the paint. That is because the surface was starting to dry. Move fast and you wont get those!


Let it dry completely before removing the tape.


Ok so are you ready for a real life moment? I had this surface all prepped and ready for dipping (so pretty right?!)

I was using a large light weight plastic planter and it was SO HARD to push it down all the way (it wanted to float dang it!)
I got so wrapped up in making sure that the entire thing was covered that I didn’t realize that my hand was in the paint…
Or my wedding ring.

There were a few swears that followed but it came right off after an hour long soak in the jewelry cleaner.
Moral of the story. Don’t wear your wedding ring to a marbling party.
Now, I don’t mean to over sell tomorrow’s project but I am being completely honest when I say that it is my favorite project that I have done in a year. #anticipation #anti-ci-p-a-a-a-tion


The week after I got engaged put my engagement ring covered in paint stripper. My husband look at me and said that he was glad he got a diamond, since it probably would have eaten any other kind of stone
These are totally awesome!! I am definitely go to be giving this a try, thanks for sharing this great idea!
Steph
HOLY CANNOLI YES. This is fabulous. Can’t wait to try it. Thank you for temporarily sacrificing your wedding ring for DIY crafting awesomeness.
This looks amazing. You’re so creative.
This is so great! Now I know what to do with all the left over squirts of my spray paint! I love your blog and all of your projects, If you are ever in my neck of the woods we can go “yard shopping!”
MARBLED EVERYTHING!!!!
this is the best DIY I have seen in such a long time.
glad your ring is ok, that is totally something I would do.
Great! Love it! Given me loads of ideas buzz buzz buzz brain buzzing
This is awesome! What others things could you use this technique for? I love the marbling.
You could do it on anything!! (As long as it can be put in water)
This is fantastic! Seriously, my favorite project you’ve shared in awhile! I’m going to gather supplies when I get home from work today and try to recreate this beauty!
Seriously!! Love this. So fresh and amazing. Also, a simple DIY anyone can do
Hi Mandi. This is a great! I really have to try it. I’ve been a big fan of your blog and you really are amazing!!
Just a quick question that what is the best way to get rid of the liquid after all? I mean, to make it environmental friendly?
These look amazing!!!!
Oh boy, good thing you were able to clean your wedding ring! That happened to me recently when I was painting some furniture (RED OF ALL THINGS). I did scream a little, my husband may have thought I was murdered. This is great as usual Mandi, you do love those cacti! 😉
Those came out fantastic. I am going to try this for sure.
I feel like you should know this, lol, but wd40 removes spray paint quickly and doesn’t hurt you jewelry. Not that I’m speaking from experienced or anything 😉
Great project, I’ve done this on my fingernails but never thought to do it I home decor projects.
While it looks absolutely beautiful I wonder what do you do with the leftover color? Down the drain?
It all scoops out when you run a spoon or something over it! It’s like magic!
xo
m
These are really cool! Add a very nice pop of color to the planter! I gotta try this! 🙂
Fantastic idea – I love the blue one.
Mandi!!!! You have been killing it with these posts lately! These marbled pots took my breath away, they are absolutely gorgeous. (Especially the pot with the round cactus.)
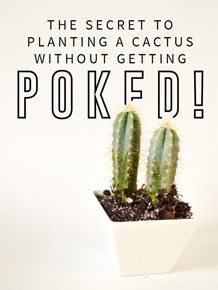
Plus, my mother and I have been arguing for months over a certain cactus that is just barely hanging in there after we killed off about a dozen others. others. And today I see your post about keeping those suckers alive and your caption: from a reformed plant murderer. LOL!
Great idea! I love how your planters turned out, especially with the gold! I’ve seen people do this with nail polish before, but never with actual paint on white objects. Thanks for sharing!
Did you swipe the paint away from the pot before you lifted it out? That was the only thing I couldn’t quite understand. These are amazing! And — boy, do I have a lot of pots to decorate. Gonna do it. Yes I am.
These planters look so elegant. Can’t wait to gather the supplies and try it :] Brilliant post!
These look so epic!!! I just have a quick question. Would other types of paint work or just spray paint? Obviously I’d have to mix normal paint with some sort of thinner but I’m not sure what. Do you have any ideas?
It needs to be oil based so that it will float on the surface of the water. You could use fingernail polish or lacquer but spray paint is the cheapest option for sure!
xo
m
You dont need to prime your gallon tote or pot at all? It will stick to anything, even clay pot?
This is perfection – really really creative and beautiful. Love it! Thank you for posting x
Does this work on clay pots too?
Yep!
I Love Love your beautiful planters! I have not yet tried this technique with spray paint but I can’t wait to try it out! I saw a marbleizing idea a couple years back glancing through a magizane at my dentists office, the artist marbleized the top of a acrylic jewelry box, but used nailpolish and swirled it first with a toothpick before dipping but I really like the finer detail the spray paint adds!
I tried this out! I love it and it looks like I bought it from the store! Thanks for sharing your creativity <3
Can you tell me what colors you used?
I just want to give a heads up to anyone that skipped over the “practice first” part of this post ? that if you overdid it or don’t like the results, immediately whisk up the leftover paint from the water, dip the object back in the now clean water and it rubs off clean again. A green scrub pad and dish soap will get it off your hands while the paint is still in the gummy phase. Not that I know from firsthand experience or anything haha.