HOLY. We survived!! A complete kitchen renovation (including wall removal and construction!) in 10 days. I’ve never been more elated to share a project with you guys! We partnered with Samsung to launch their latest appliance color Tuscan Stainless Steel and overhauled the kitchen at our family cabin. Are you ready to see how it turned out!? You can read all where we started here!
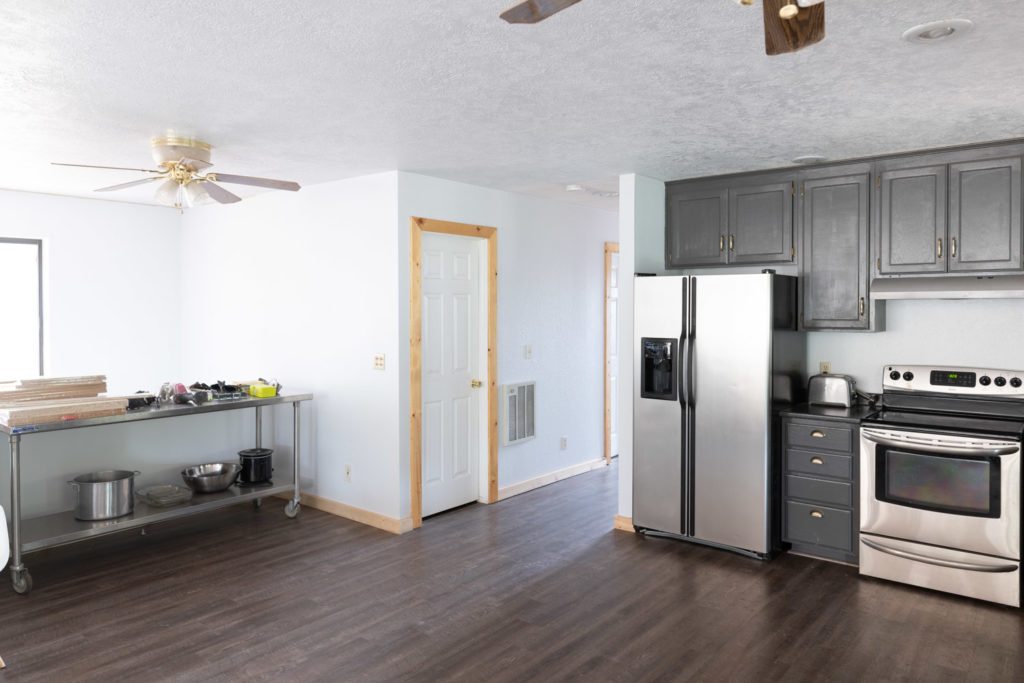
Technically this is where we started when we bought the cabin 5 years ago.
Grody.
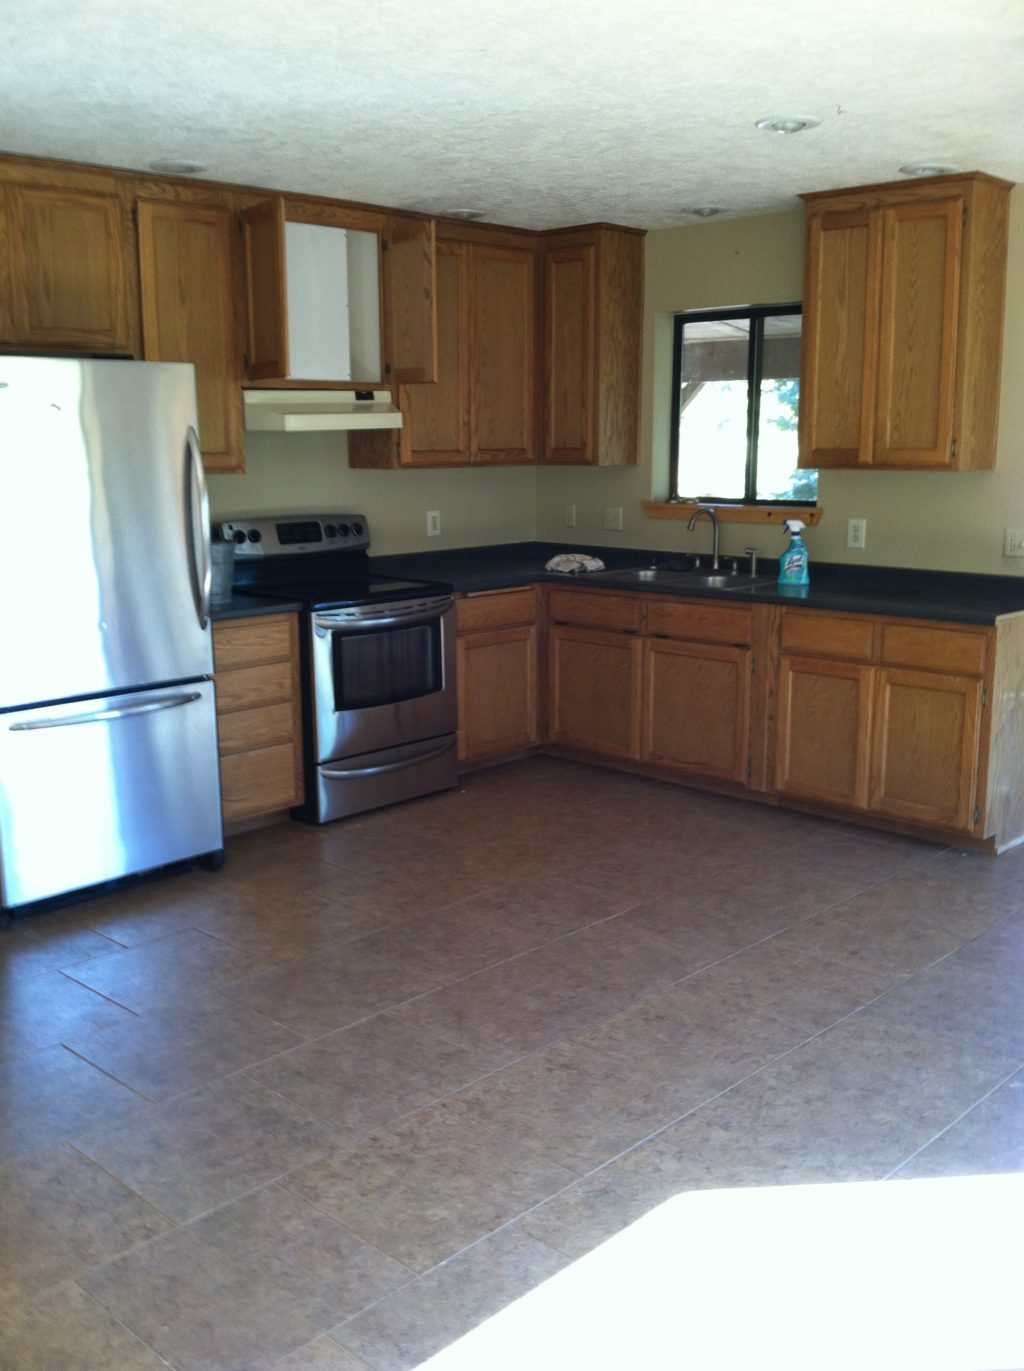
But this is where we were starting with this reno. Less grody but not great.
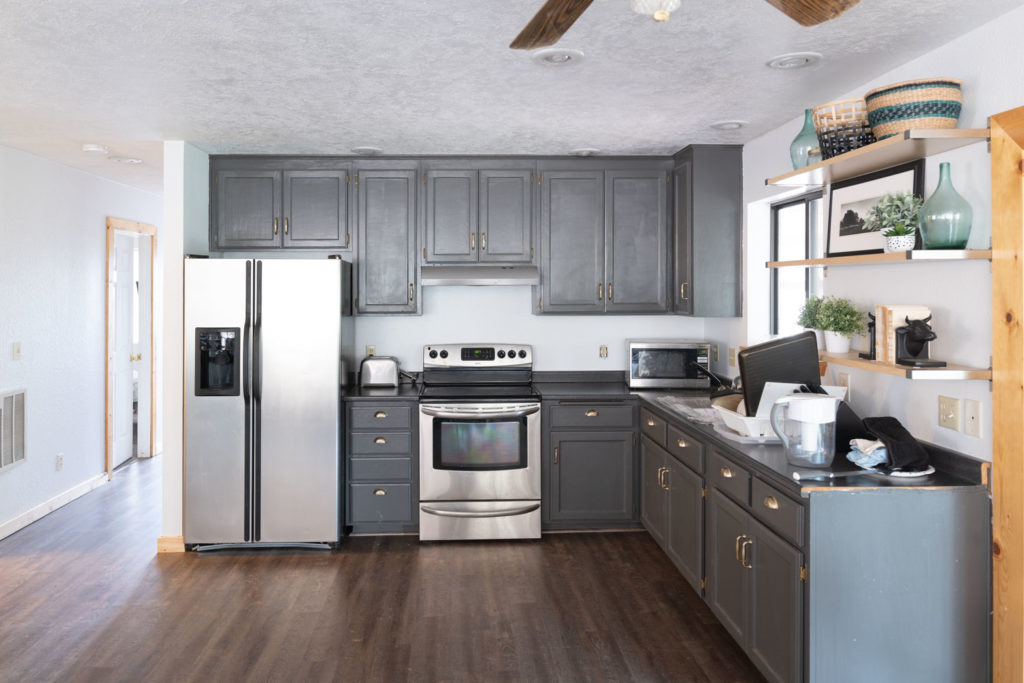
Some of our biggest frustrations were
- zero storage
- outdated cabinets
- remnant countertops
- 15 yr old appliances
- cut glass and brass ceiling fans
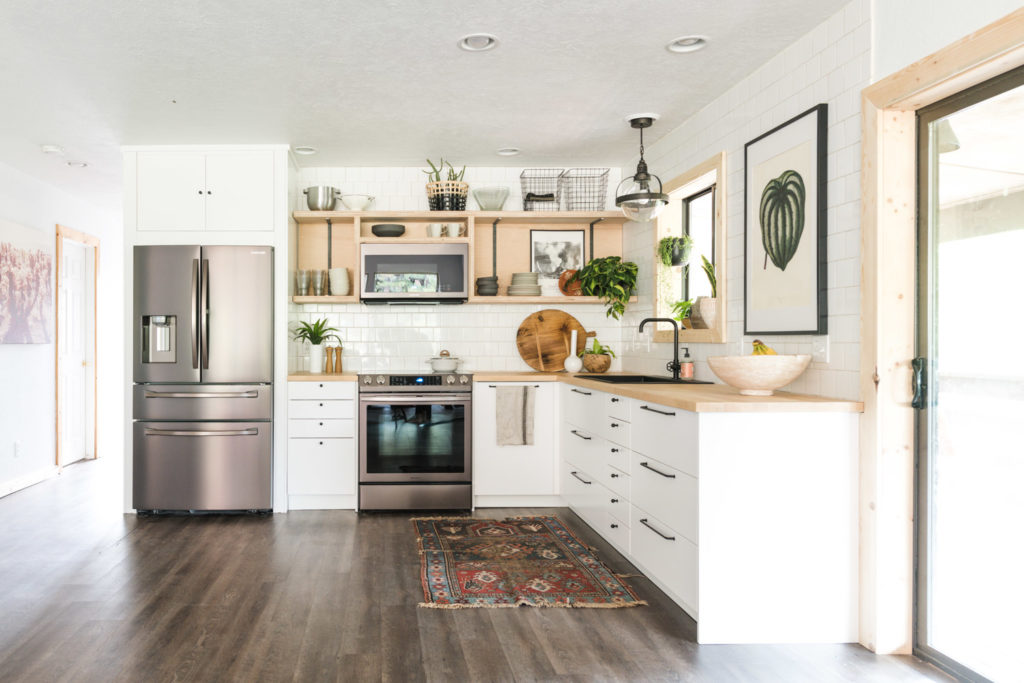
And this is what it looks like now!!
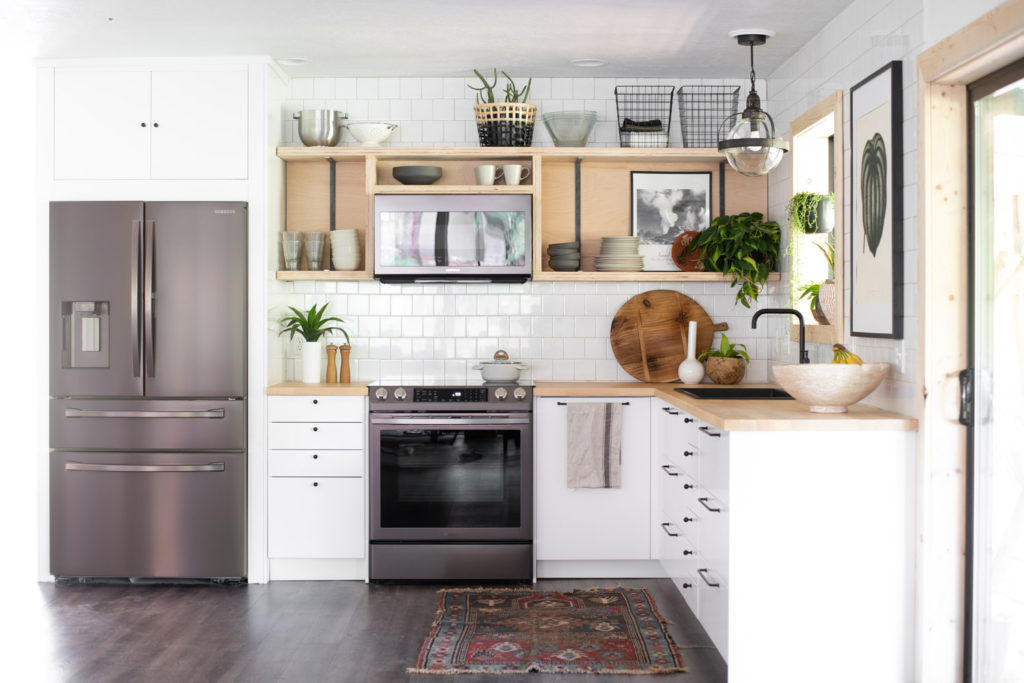
Could you just die!? It looks incredible!!
The view from the other side is just as magical.

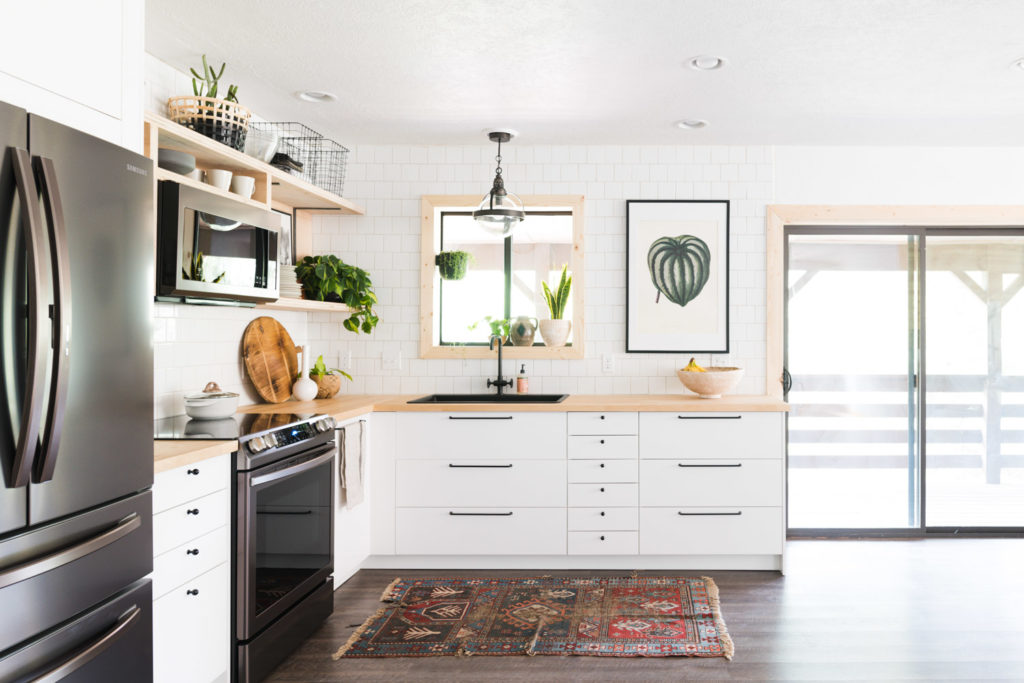
There is just so much to talk about!
Tuscan Stainless Appliances
Let’s start with the epicenter for this whole space. The warm bronze of Samsung’s Tuscan Stainless Steel appliances. What an impactful change from standard stainless right?! I was at the unveiling of the color in February and loved it then, but seeing it again I loved it even more.
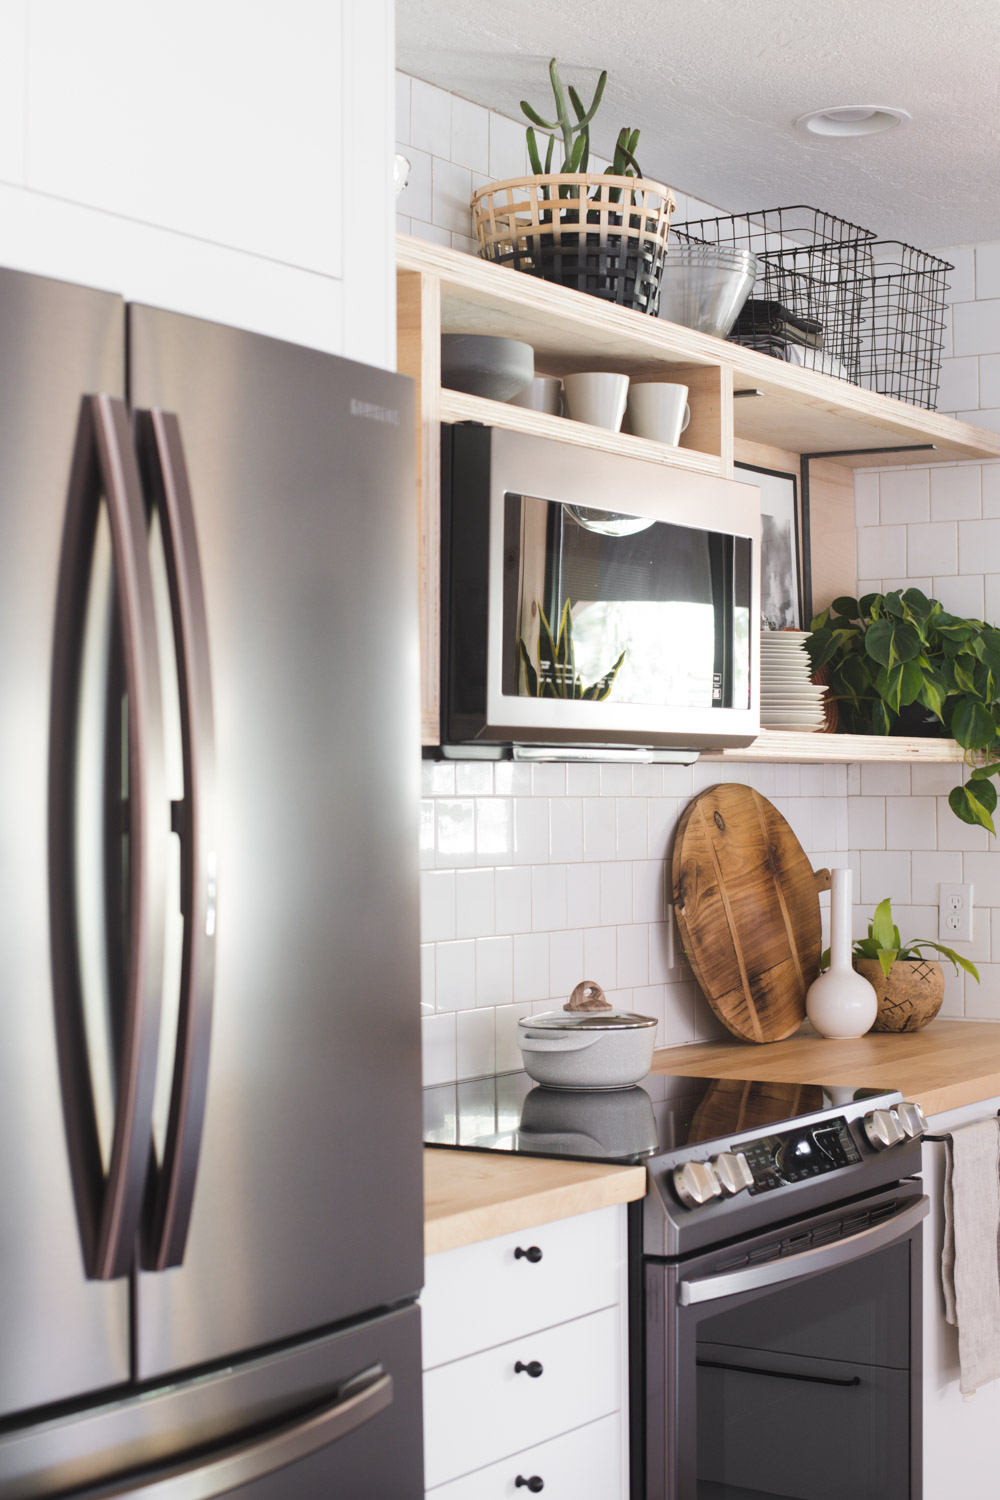
It was less brown than I remember and changes based on the light in the space. It could easily be integrated in with stainless appliances (like if you need to replace just a fridge) without looking out of place. I love that it has a mix of matte Tuscan stainless and chrome.
It completely elevates the whole renovation!
Cabinetry
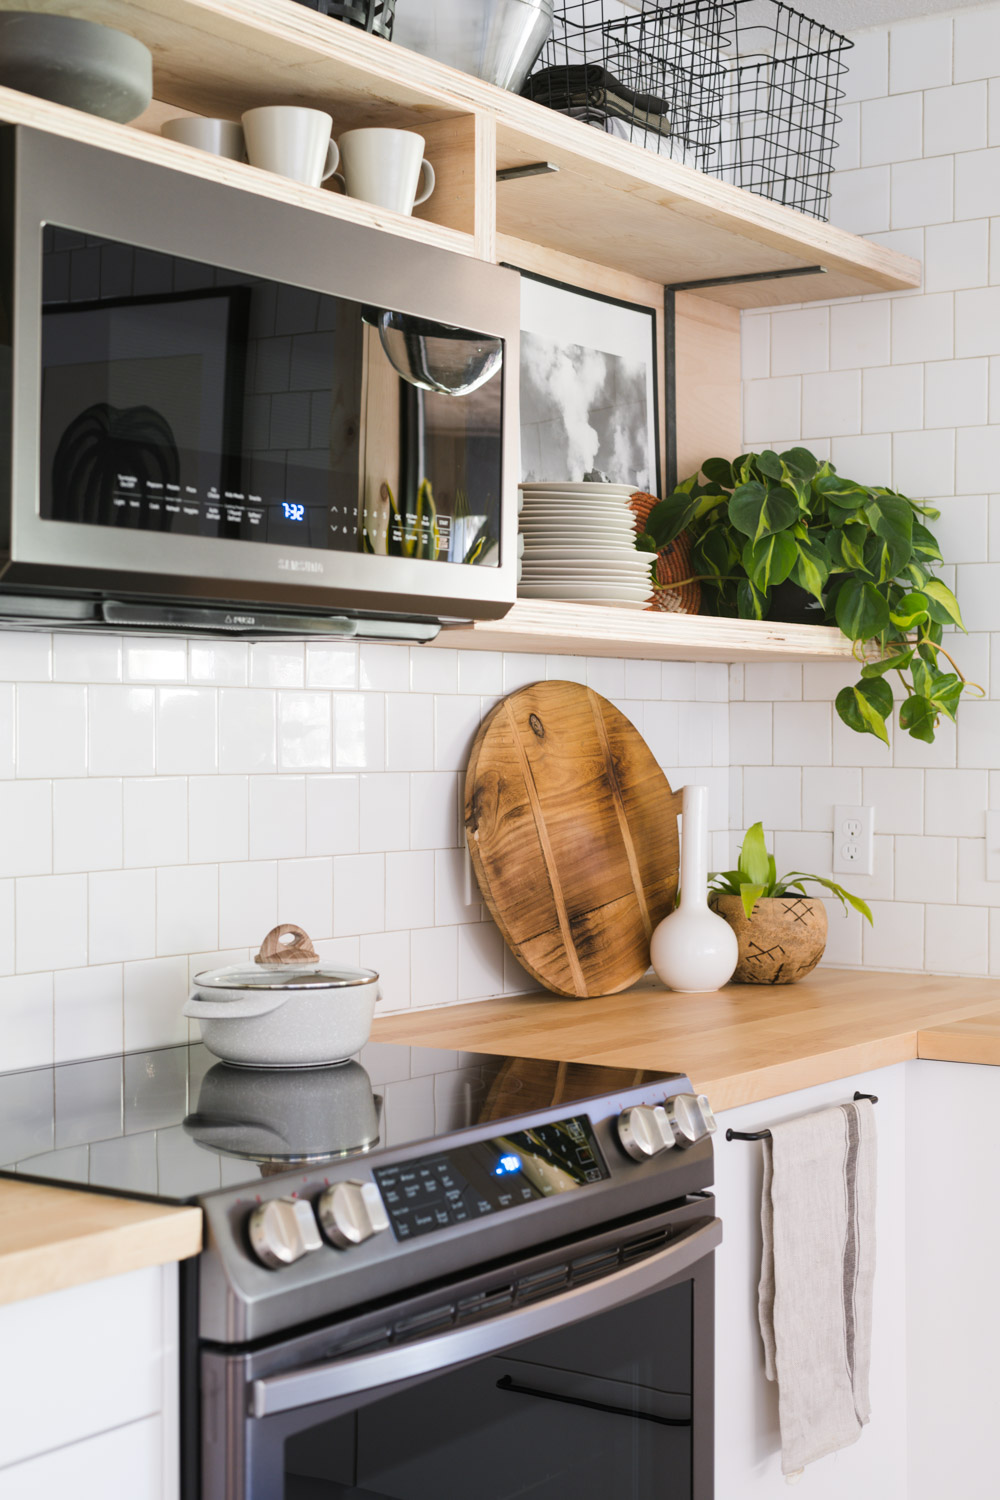
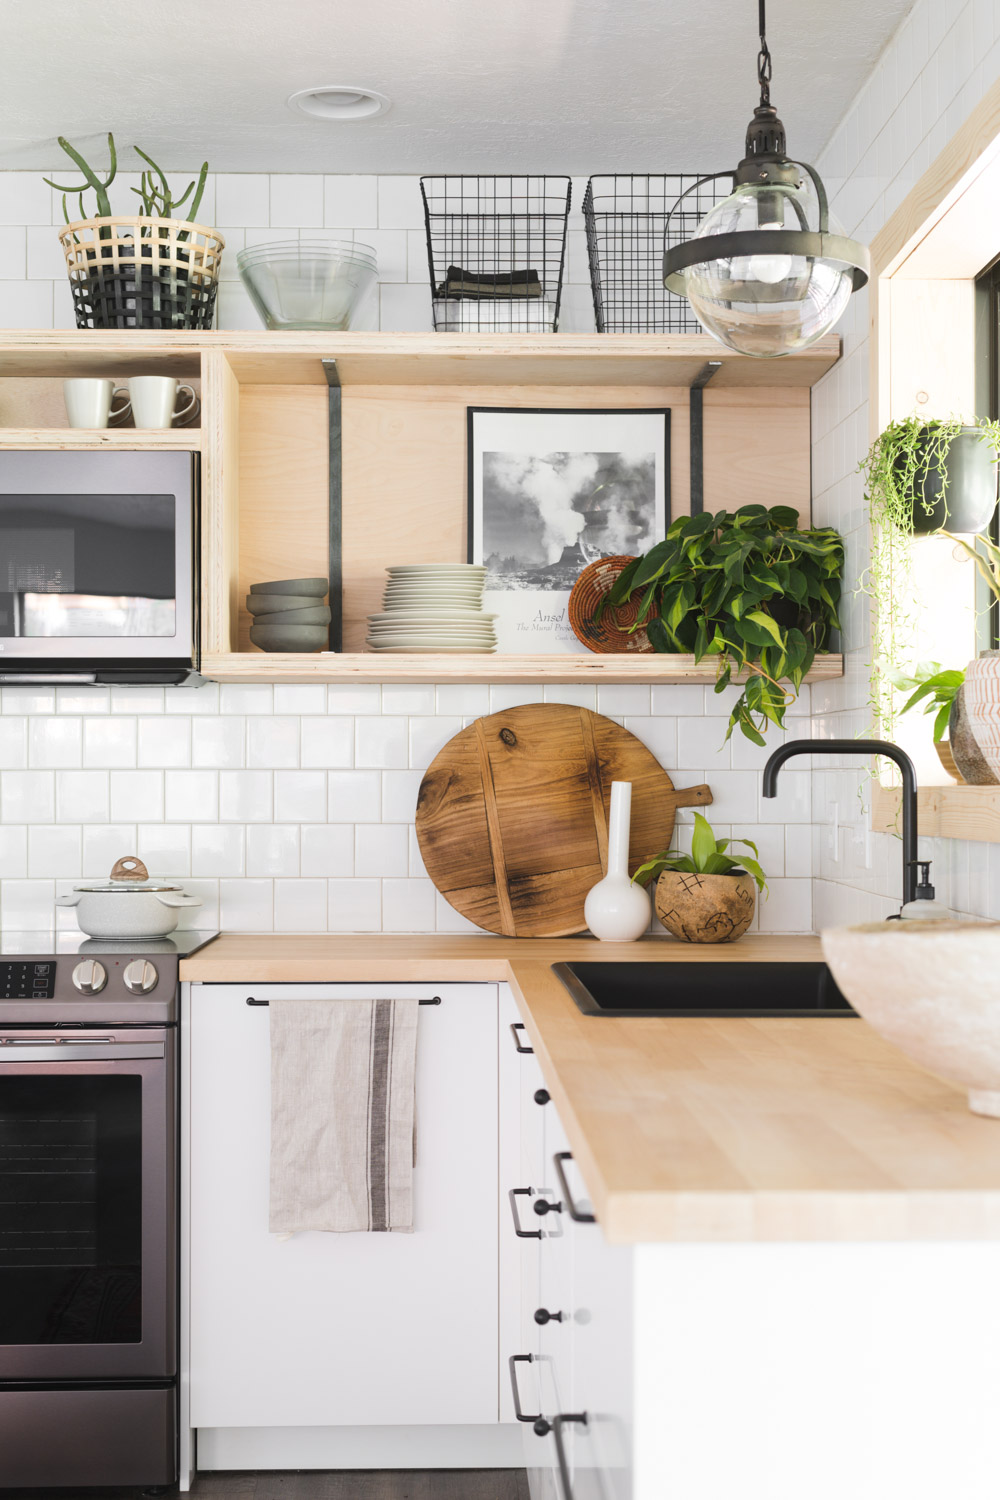
One of my biggest worries using an IKEA kitchen was that it would look too basic, but I think it looks awesome! The custom shelf makes all the difference right?!
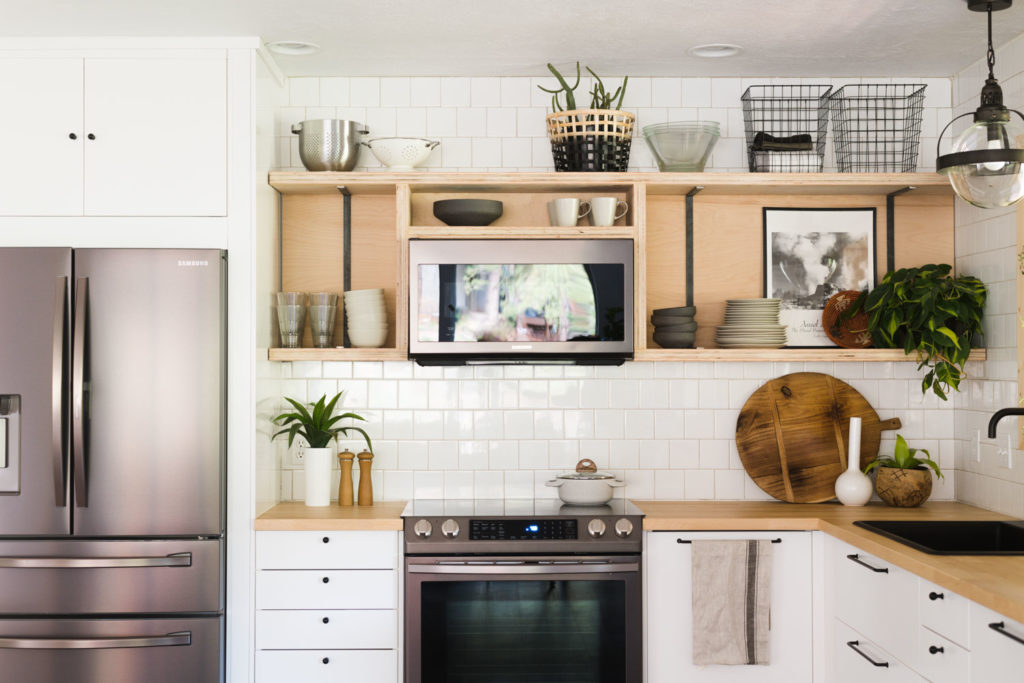
We built the shelf out of plywood, and metal straps. I LOVE the industrial vibe that raw edge plywood, gives off. One trick when you are working with raw edge plywood is to cover the whole edge with wood filler and then sand it off. It will fill in all of the small holes and gaps and make the edge look more finished.

Hands down our biggest frustration with the space was storage. We literally had 1 upper cabinet that served as a pantry for 5 families. It was a nightmare!! I decided to take the non-functional bump out by the stairs, frame it in, and add floor to ceiling cabinets.
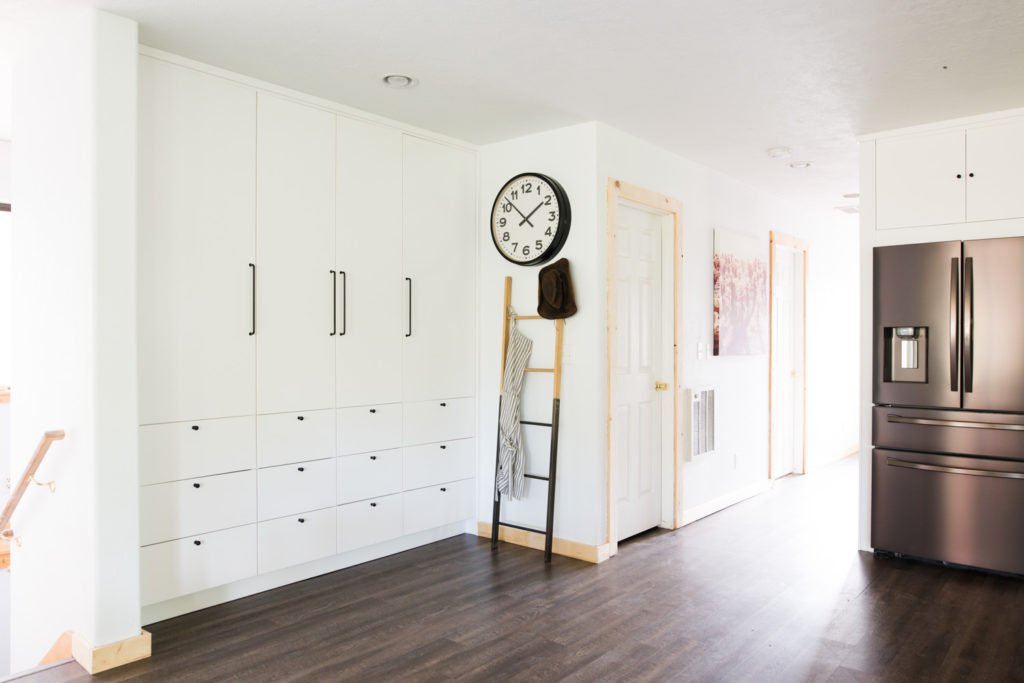
While I was a little bummed to lose the natural light, this is going to be the biggest game changer! I mean, just look at all of that storage!!!
We covered both walls with 4×4 white tile (you can get it in stock at Home Depot!) My go to is white grout, so that is what I did on the first wall, but it just didnt feel right so I ended up covering it with this product in Oyster and I am so happy with how it turned out. Changing the grout color in a space can freshen it up more than you can imagine! If your kitchen is feeling meh, you should try it!
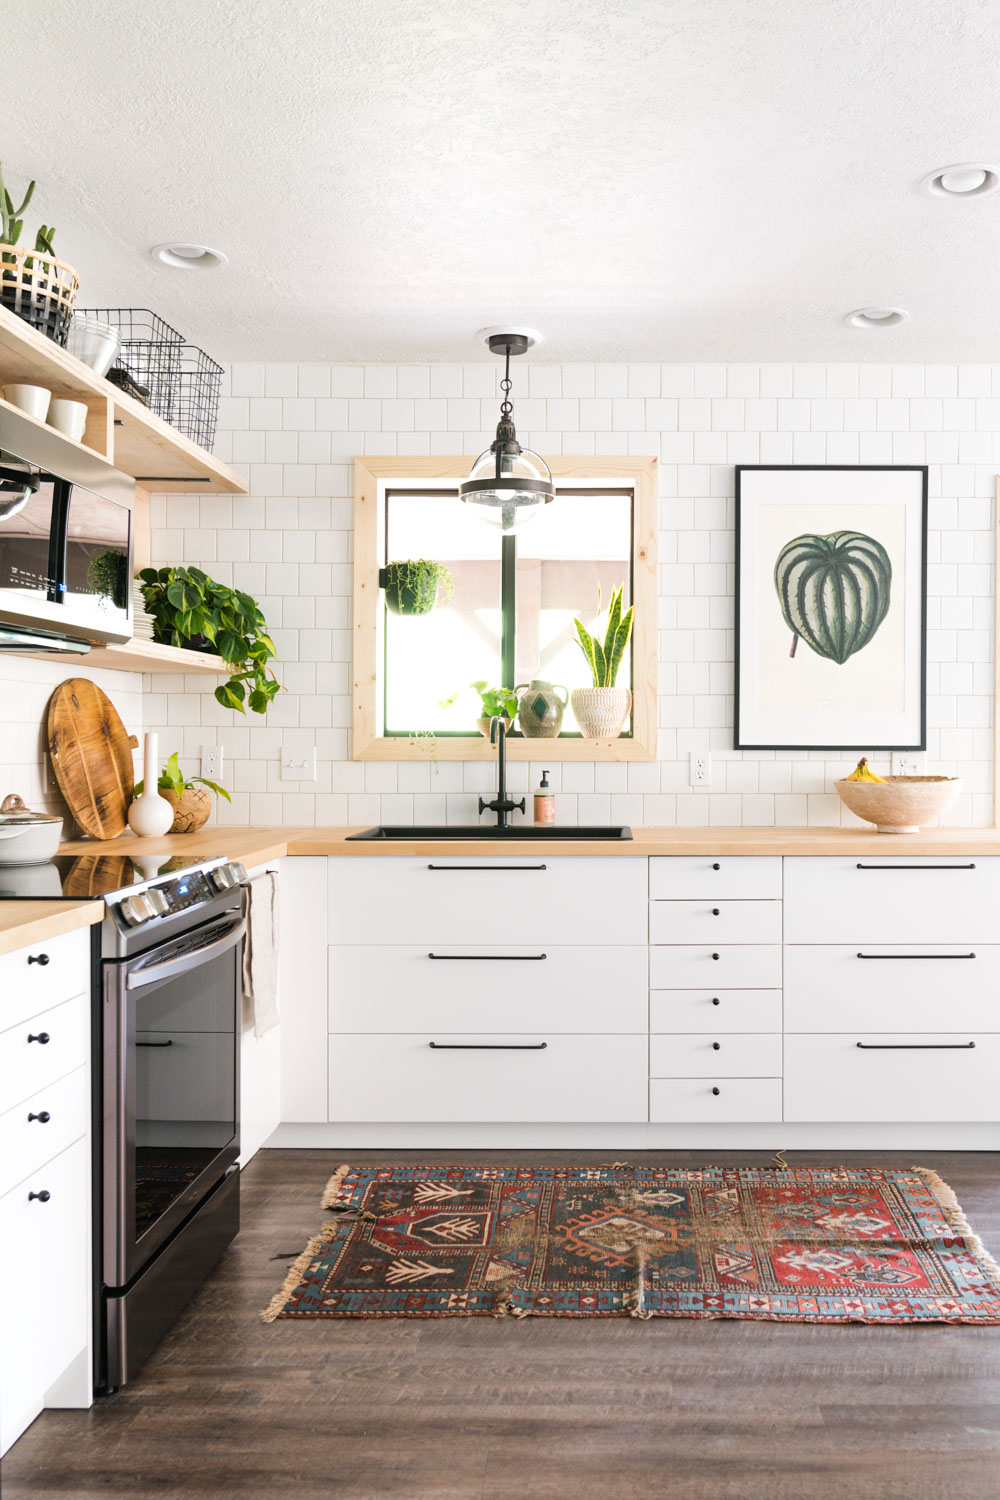
Being a cabin and all I wanted to keep with the raw wood vibe we were already embracing by using a natural wood countertop. The original plan was to use a stainless sink, but after we (I) accidentally cut the hole too big I swapped it out for this larger black composite sink. and HOLY COW what a happy accident. The black looks significantly better than the stainless did!
Want to see the ENTIRE renovation happen in less than 5 minutes? Watch the timelapse video below!