There have been a few versions floating around blogland of how to make mirrors like this:
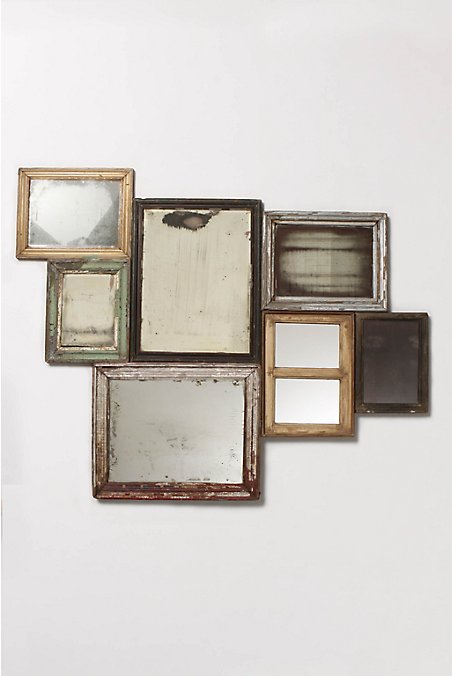
This was my inspiration:
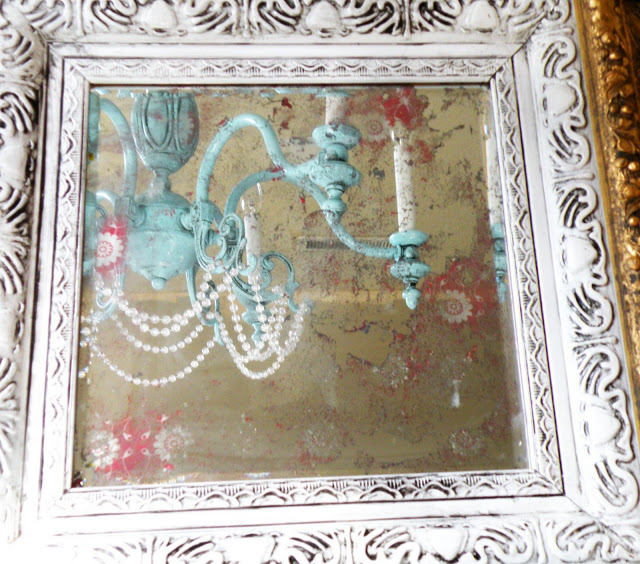
The issue that I have with most of the tutorials are the mirrors are just completely gone in spots. Theres no color variation, no depth. This is the difference:
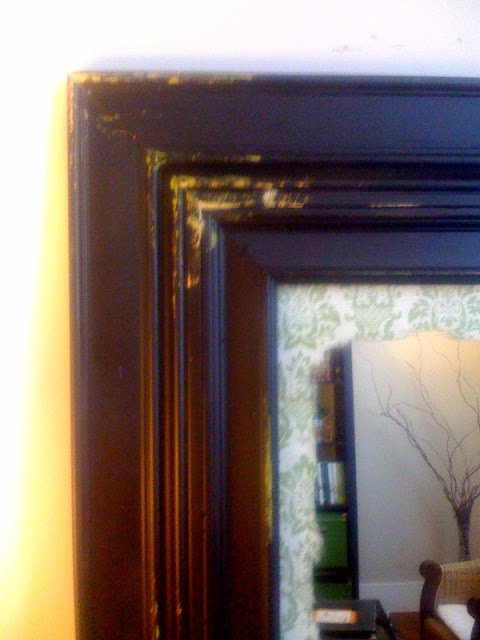
This mirror was done using oven cleaner:
See how ALL of the reflective coating is gone?
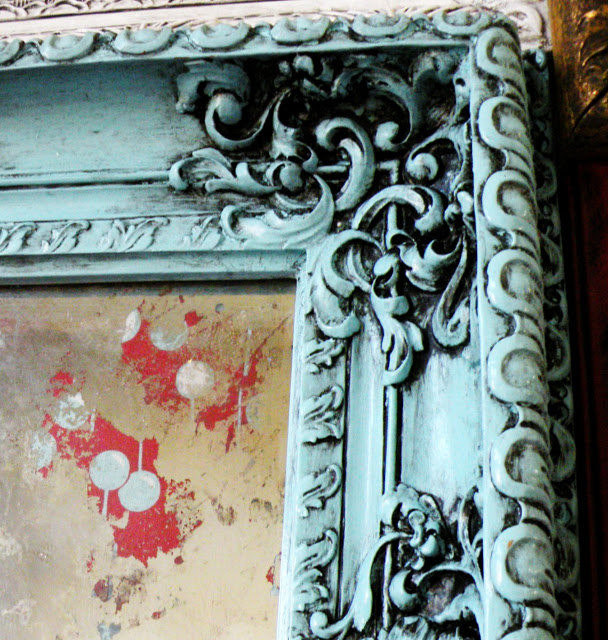
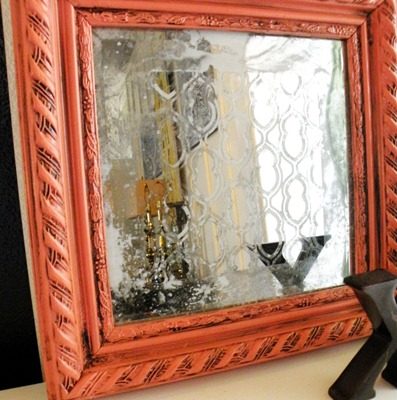
These are what some done with acid look like:
Much better right?
So heres how to do it.
You will need:
Neoprene Gloves
Jasco Brand Paint and Epoxy Remover
Muratic Acid
Old Shirt or Carpet (So that your mirror doesnt get scratched)
Possibly a scraper.
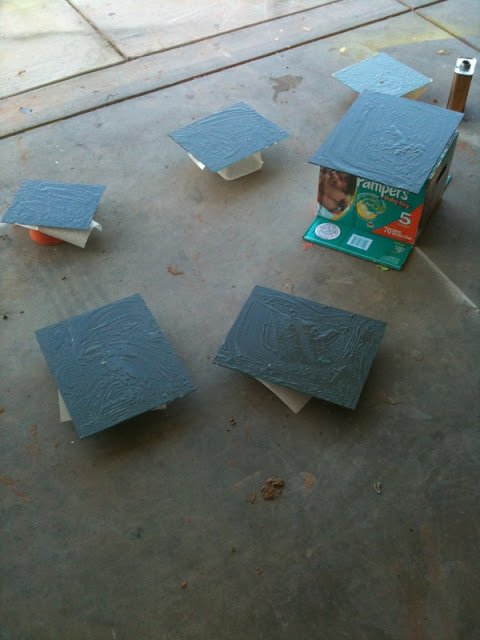
Ok so first you want to lay your mirrors out face down on a surface that cant be damaged by the paint remover.
PUT ON YOUR GLOVES!!!
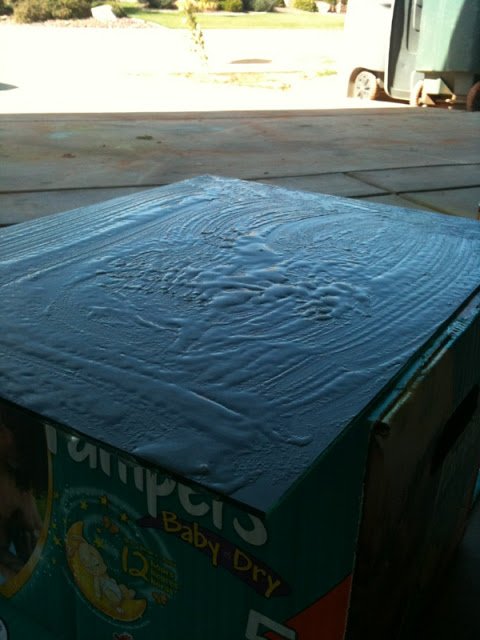
Pour some of the psint remover onto the back of the mirror and with your hand gently spread it around so that the entire surface is covered.
Wait 15 minutes.
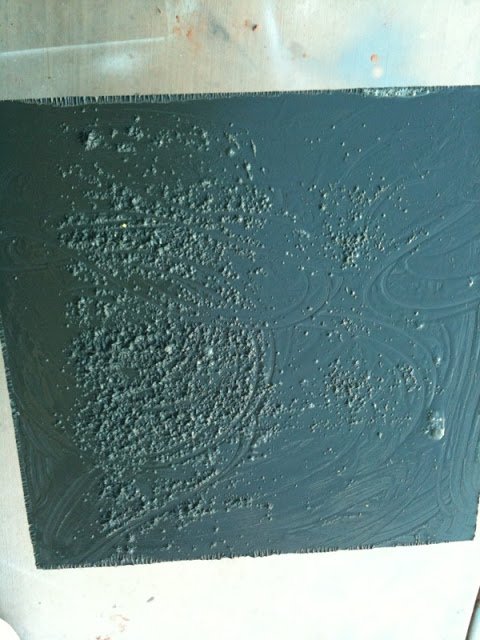
In an ideal world every mirror would do this:
and that would turn into this:
but it doesnt always work that way. If your paint doesnt bubble then you will have to scrape it off. I use a floor scraper (I think thats what its called) with a razor blade on the end. I hold the mirror still and my husband Macho slowly scrapes the paint off. This will work just as well but it will take a little more work.
Once you have taken the paint off the back take your mirrors somewhere that you can wash them off with the hose (empty lots next door work great or the curb.) Then dry it off. The back will look pretty much like the front of the mirror.
WASH OFF YOUR GLOVES, BUT STILL KEEP THEM ON!
Next you are going to bust out the Muratic acid. If you do not have any at your house you can get it at Home Depot. It is a chemical that they use to clean swimming pools so it will be by that stuff. As far as I know you can only buy it in boxes with (2) 1 gallon jugs. Its about $11.00.
Pour some acid into a spray bottle and spray around the edges of your mirror. IMPORTANT! Each mirror is different! If you have compromised (scratched) the surface of the reflective coating then the acid will work faster so be prepared!
After 10 seconds wash off the acid with your hose and see if it has started to work. If it hasnt put more on and wait a little longer, keep doing this until you get the style that you like. If it has make sure that it is the effect that you want. There was one mirror that I did for this project and the acid worked instantly and pretty much ate all of the reflective coating away (its the small rectangular red one on the left side). If your acid isnt working then you can gently take a piece of sand paper and sand the coating a little. If you do it too much then it will look scratchy and not eaten. Basically dont be afraid to wash the acid off and let it work slowly. You can always take more off but you cant get it back! You will notice after the first time you wash it off what is going to happen. If it comes off in big reflective flakes when you put water on it but didnt seem to be doing anything until you rinsed it off BEWARE it will be gone extremely fast. If you can start to see it eating away at the coating before you rinse it but it hasnt made it through all of it let it sit a little longer and you will get a mirror with more color variation.
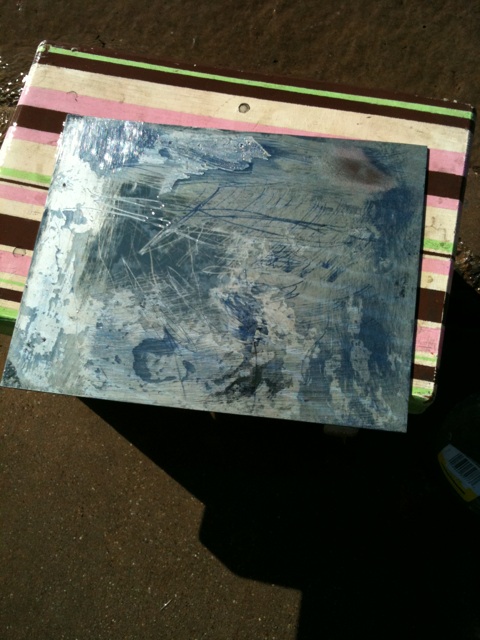
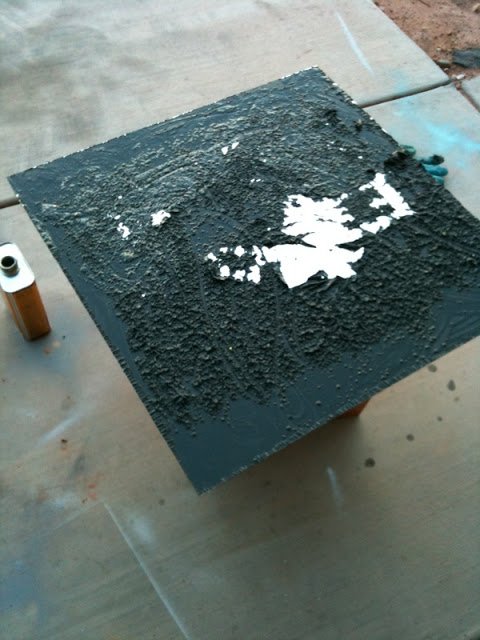
This is a mirror that the acid slowly ate away. You can see parts where the stripes from the stool are starting to show through.
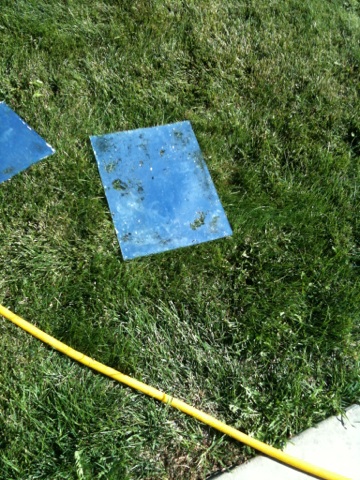
A great way to see what it looks like is to lay it on the grass. You can see the places that are gone really well.
Once you have done this the rest is CAKE!
Use your favorite spray adhesive on the back of the mirror and lay your fabric right side down on top of it. Cut it to shape and put it in your frame.
Hope this makes sense!
Feel free to leave a comment or email me with any questions!
UPDATE:
A reader just informed me that mirrors that are made before 1941 can have mercury in them. 90% of the mirrors that I do have to be cut for the frames, so I dont worry about it too much BUT if for any reason you think that your mirror might be close that that era. DO NOT RISK IT. Just have another piece cut. You and I will both sleep better at night!


I’m in love.
I have boxes of mirrors in my storage unit and when we buy a house, I’m gonna bust them out and do this.
I had a huge hall lined with them in my last house…
SOOOO loved these mirrors! I love how they are painted, how they are distressed, and how they are hung. Fab! Congrats on getting into round 3! I can’t wait to see what you do with fabric!
SO Cool! I have been wanting to do this forever. Thanks for the great post.
I HAVE to make some of these for my bedroom. Thanks for the AWESOME idea and tutorial! You’re a friggin genius! 😀
I love this. That’s great that you experimented and found out another solution. I have been dying to try this but haven’t had the chance yet!! Great job!!
What an amazing project. Beautifully done and explained. Thank you. I would be honored if you linked this post to the Boardwalk Bragfest link party occurring today. You have definitely inspired me to get off my butt (constantly growing, by the way) today!
oooh how i love all those colors! sweet!
OH MY GOSH!! I can not wait to try this! I have seriously never seen these! I love them! I am doing a linky party onFriday if you want to link up!
PS I totally voted for you guys!
lovely!
WOO HOO! Thanks Sista…You totally made my day. Can’t wait:)
Jen
wow I have never seen this done before! I love it! Tana
I love this! This is what I wanted to do for Round 1 Knockoffs:) Great minds!!
These look so great. You really worked hard to get the perfect technique, and it shows!
The mirrors look awesome. Thanks for sharing the technique~
This is so cool! Are you selling them? :)-
I want to try this! I love it.
Interesting! I would have never thought of that!
I’m both intrigued and freaked the heck out to try this! Argh! Acid!! 😉
Wow! That’s fantastic!! Love your tehnique!
You know I LOVE it. Thank you for linking to the Boardwalk Bragfest to share your technique.
My friend was telling me about this yesterday. I’m so glad that I found it! It’s very cool!
Hilarius aren’t we? First we beat on our furniture, and next we ruin our mirrors! That means I love this. 🙂 Very cool wall mural it makes!
Donna
After I saw this tutorial and your fabulous display of the mirrors I stayed and visited for a while… omg, you are so creative and hilarious!! I am your newest follower, and will be back soon! Theresa xoxo
This is EXCELLENT!!!
Honestly, I thought that your photo was the Anthro photo, so well, i think you’re doing a great job here…
So, OK: I would like to invite you to link up on our site so our readers can find you too: https://www.finecraftguild.com/diy-linky-party-19/ Open now. On Wednesdays new parties open, so you can add more great tutorials as time goes on. Looking forward to seeing all your wonderful works of art! Cheers, Rose
~**~Very cool!! Im a new follower~*~* Hugs~Rachel~*~*~*
Oh, I love this look and the grouping you’ve done is fantastic with the red and turquoise! Your tute is right spot on, so I have to try this. You are inspiring me!
I also love this! The fabric on the back is awesome.
Hugs, Sherry
Check out who our featured weekly blogger is…
oh my gosh, this is the second time I’m here at this page. I think I’m in love ha ha
rose
This is one thing I’ve always wanted to try! LOVE it! Great tutorial! Thanks so much for sharing!
Have a great week!
Roeshel
Hi Mandi. This project was one of the top five MOST POPULAR LINKS from last Tuesday’s Boardwalk Bragfest! Congratulations. Please stop by and take a look. Feel free to take the “Featured Boardwalker” button, as well; and thank you again for linking this great project!
As usual you keep outdoing yourself! great work!
Posted about it @
http://www.UglythenPretty.com
Yeah, this is pretty dang cool!
I love the look of your mirrors….I’ll be trying this one…soon!
Thank you for the tutorial! I love the way these turned out and I linked your post to my “mirror” post here: https://inspire-me-heather.blogspot.com/
“Squeel” You cannot believe how excited I am to try this technique. No mirrors will be for sale at MY garage sale this weekend. So much fun, thanks for a great website all around!
oh my goodness… have just stumbled on your blog today and have read and read and read. amazing work and love your techniques and inspiration 🙂 keep em coming… thanks for sharing.
TOTALLLLLLY inlove!!! I am forsure going to do this! Just found your blog and I promise I will be an addict! 🙂
I saw the Studio 5 segment and fell in LOVE with your mirrors. I can not wait to try this. One question – did you buy mirrors to fit your frames or were the frames and mirrors one piece to start with? If you bought the mirrors separately, were did you get them? Oops, that was two questions. I am your newest follower and would love for you to follow me back. I am so glad that I found your creative blog.
Wow, I’ve been using the oven cleaner technique to create similar mirrors, but your method makes a great looking aged mirror. I’ll have to give it a try this spring. Thanks for the excellent tutorial!
your picture looks better than anthro’s! wow i cant wait to try this!
I’ll have to try this method the next time I do this Anthro style mirror project. Yours look amazing!
Hi Mandi! I love your projects and have started making these mirrors….. when I went to Home Depot, They wanted to sell me TWO giant bottles of the acid and I was determined to not have to buy that much- i don’t know anyone with a pool I could donate it to afterward….
So I googled forever and just decided I would try different things. Turns out BLEACH works great! It depends on the mirror like you said, some work VERY fast but the majority have been slow. ( which is cool because you can control it) I would suggest doing it in the sun, it seems to work better.
So there you have it 🙂 I’m sure its not as great as the acid but it does work.
-Christina
From past experience I would just like to say that the acid should ALWAYS be used outside. Just the fumes could cause your metal appliances to rust! Not Good my friend not good!
O yes and my favorite part is when you called your hubby Macho. Im thinking that is probably not his name but would you mind if I used this lovely nick name for my hubby? It would make him happy. I thought I would ask since I don’t really want to steal! Stealing is bad and it goes on way to much in the bloggy world! A little random I know but thats how I roll!
Where did you get your amazing looking frames? My email is [email protected] if you get a chance to let me know. Thanks! Love your blog!
Thanks for the awesome tutorial! I did them and I’m totally in love. They’re exactly the answer I was looking for to a really horrid wall in my house. I linked your tutorial to my post. Thanks again! https://myfabulesslife.blogspot.com/2011/03/anthro-knock-off-knock-off.html
what an amazing collection! you did a phenomenal job on these! thanks for sharing such a wonderful tutorial. I’ve posted it on my facebook page for all my fans to drool over. xo ~ kristi
http://www.facebook.com/barnowlprimitives
I love this project. Where do you recommend do go to find someone that will cut mirrors to size?
Thanks!
I am also looking for suggestions on where to buy mirrors to fit frames I already have. Also, how did you connect all of your frames? Or did you just hang them individually?
Just to let everyone who’s asked about this know, I just called the local “glass and mirror” shop and they cut mirrors to fit frames. I am bringing all of my frames in tomorrow and he said they should be about $10 each for frames near 10X12. He also said they will cut them right there and should take no time at all. I live in DC, where everything is pricey, so I think $10 each is the most you should have to pay!
I am still wondering how to hang all of these on the wall without hanging them individually. If anyone has any suggestions, I’d love to hear them! Thanks!
In the guidelines for the mirrors, you specify Jasco remover. Our Home Depot does not carry that line any longer. Will any stripper work, or can you recommend another you have had good luck with?
This is incredible!!! Your work is so creative. Well Done, Miss America! 🙂
-Raymond Lee Jewelers in Boca Raton, FL
I loved this on Nate. Now I just have to find a great mirror to try it on. Another excuse to head to the flea market =)
MaryAnn
These are beautiful, but there has got to be an easier, cleaner way to do this. What about the chemicals you wash down the curb with the garden hose? Maybe some way to dab on classy silver paint on clear glass? It’s pretty, but I don’t like the technique, sorry..
…I am Blue Wolf…
Hi Mandi, I was in St. George a week ago and I stopped by the DI and thought of you. Never left a comment here before, but I have a question. Did you attach those mirrors before hanging them up? Or did you just hang them on the wall close to each other? I hope you are still looking at these comments, because I am trying to make my own version, but I am stumped on this. thanks!!!
I have searched the internet for just this information and can’t believe I’ve found a solution. I do mirror work for a hobby but need to remove a specific area from the mirror back. I hope this will help. Thanks for the help!!!
Gayle in Chicago
What are you using to paint the frames? I want to be just like you 🙂 I love that teal color what is it?
Shut.to.the.up! I love these! A touch of funk with the shabby!
I am all over this project- hopefully I don’t harm myself or others in the process!
Thanks for sharing!
Kerry at housetalkn.blogspot.com
Love the project and the cool frames – What is the name of the blue color – I ADORE it – Thank you soo much
Hey Mandy, I got a 42″ rOund mirror off craiglist for free, I want to do this but not sure how old the mirror is, is there anyway to tell, I know its older the edges are already peeling away. I really wanna acid wash an make it a huge clock
Thank u for any help
Angi
Ok, I too fell in love with this tutorial and tried them for myself. A warning to others though …I had put the Muriatic acid in a spray bottle I got from home depot. I was planning on doing it that day, but ran out of day light. The next day when I went to finish the mirrors the acid in my bottle turned yellow and my spray bottle didn’t seem to work. I finished the project and stored in my garage. Came home about 3 hours later to garage smelling like rotten eggs…the acid was burning through the squirt bottle and started eating away the cabinet. So DO NOT store acid in spray bottle!
What is the color of the turquoise frame? It’s beautiful!
I was disappointed in that I sprayed the muriatic acid on the mirror after I stripped the paint off and left it for less than ten seconds. Silvering was completely and totally gone. My next mirror, when I ripped the back off was stamped with a company and a date of July 1914! Now I have to find another mirror that I can use in this project! Sigh!
Fantastic! Thanks Mandi for the great instructions!!
Fantastic! Thanks Mandi for the great instructions!!