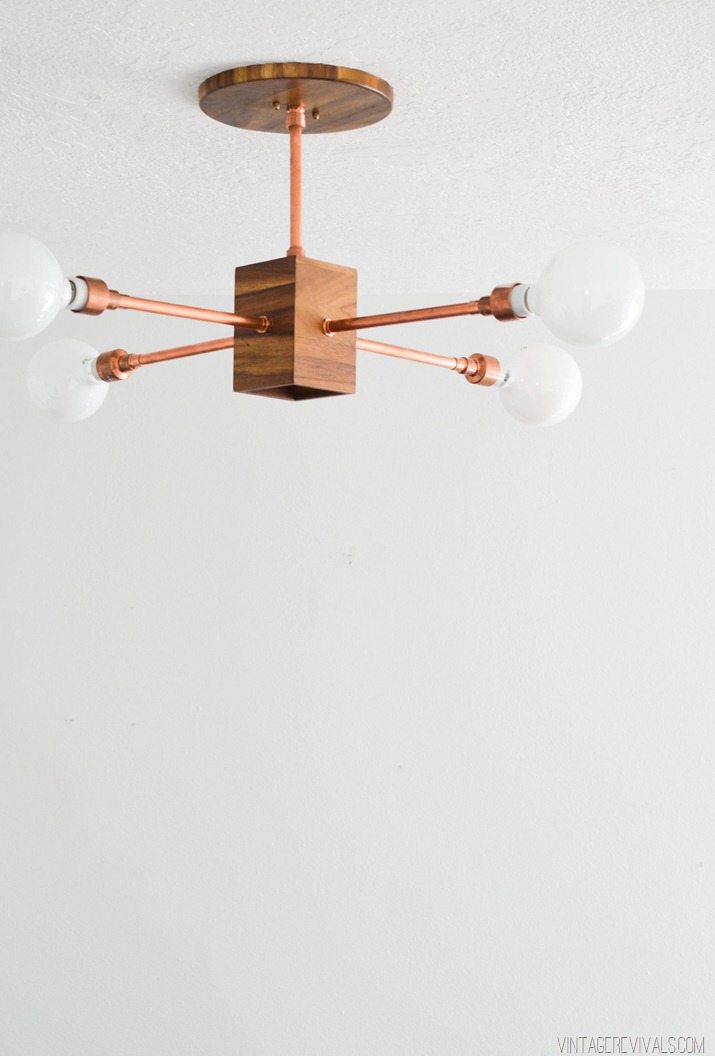
Do it yourself lighting is one of my favorite types of projects to tackle. Lighting (well beautiful lighting) can be seriously expensive. But guess what?! It doesn’t have to be! There are so many cool components that you can find around your local hardware store that can be put together to create a serious show stopper.
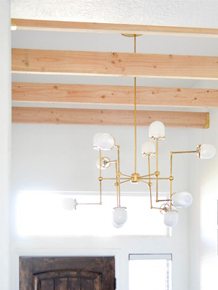
Originally the plan for the lighting in Ashy’s room was to hardwire this light. I mean, the design is perfect for the space, right? We got it installed and had a problem.
A one light bulb problem.
This room is so ginorm that having a light with just one bulb was not cutting it. As I was problem solving different solutions (where to put wall sconces, lamps etc.) I realized that we really just needed a different light.
Just a side note, if you are at your local hardware store and you see a crazy looking lady in paint clothes, sitting on the floor surrounded by pipe fittings with a wild look on her face, just keep your head down and don’t make eye contact.
The great thing is that after the wild look passes, she probably has a pretty great plan.
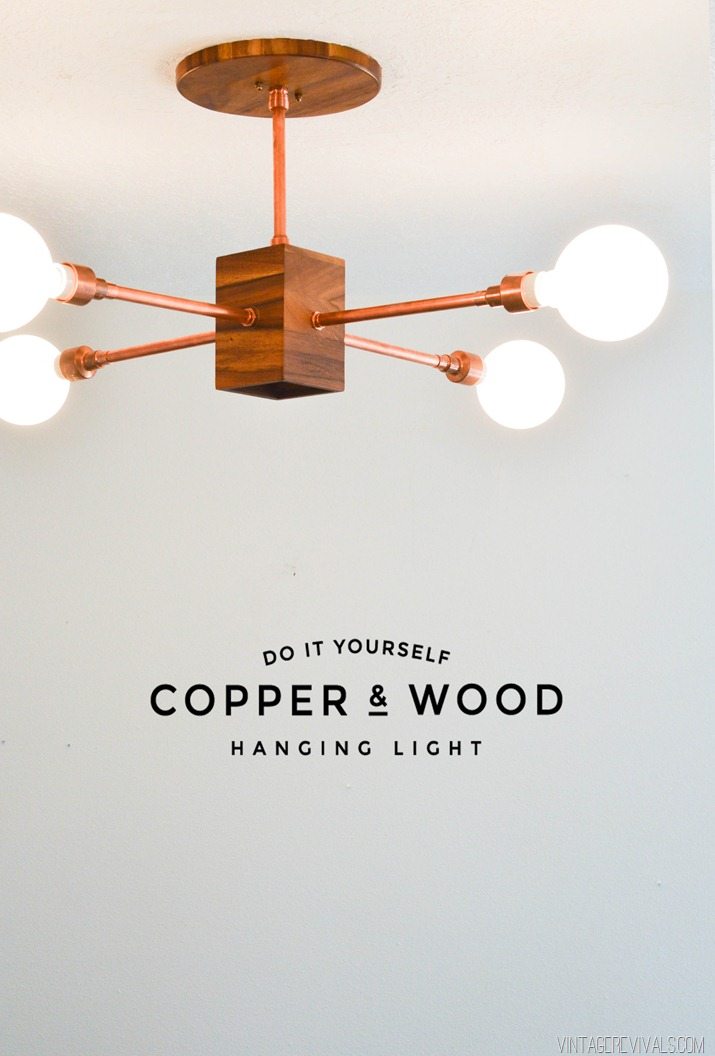
Here is what you need: (I bought the hardware supplies at Home Depot and Lowes. Locally, Lowes seems to have a bigger selection of copper fittings.)
(4) ceramic light sockets
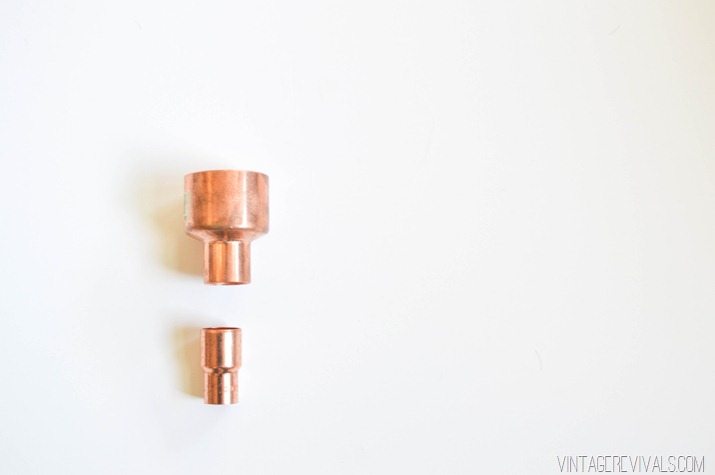
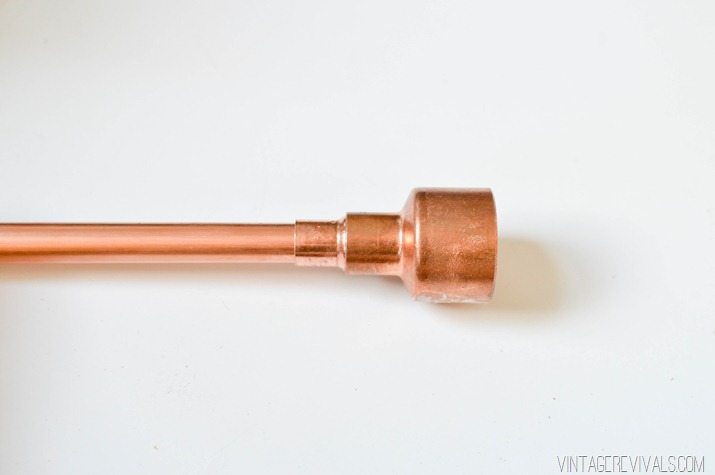
(4) 1 1/2” x 3/4” Reducing Coupling
(4) 3/4” x 1/2” Fitting Reducer
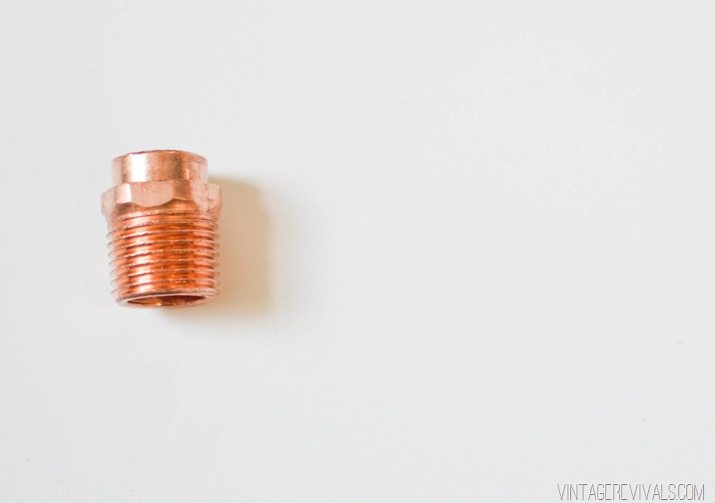
(4) 1/2” Threaded Adaptor Fitting (Male)
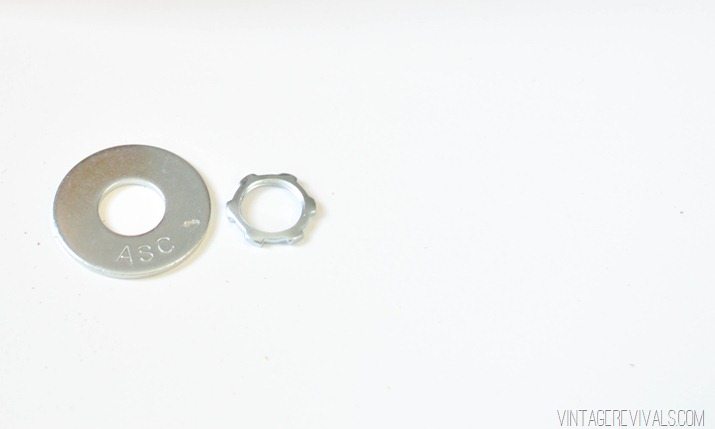
(5) Washers
(5) Pipe Nuts
(4) 10” pieces of 1/2” pipe
(1) 8” piece of 1/2” pipe (or measured to the length that you want your fixture to hang)
(2) 1/2” copper push-fit male adaptor pieces
(1) Threshold Utensil Caddy
(1) Threshold Bowl
12’ of lamp wire
Loctite 5 Minute Epoxy
Drill with 1/2” Drill Bit, and 3/4” spade bit
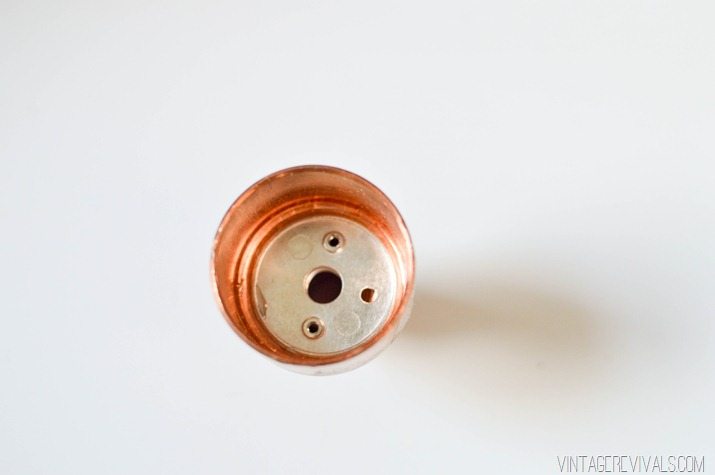
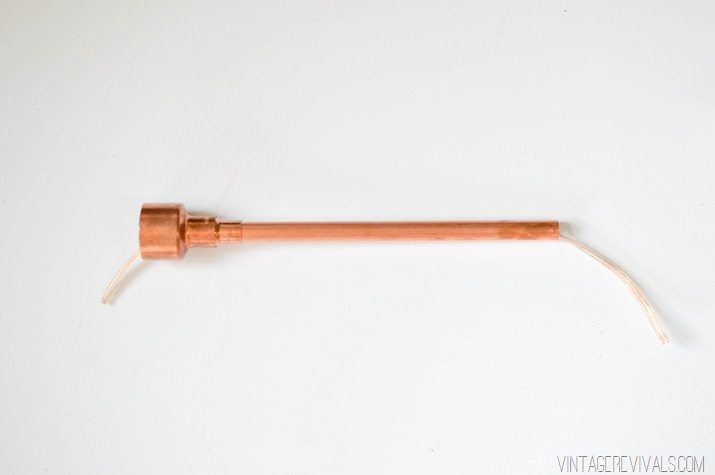
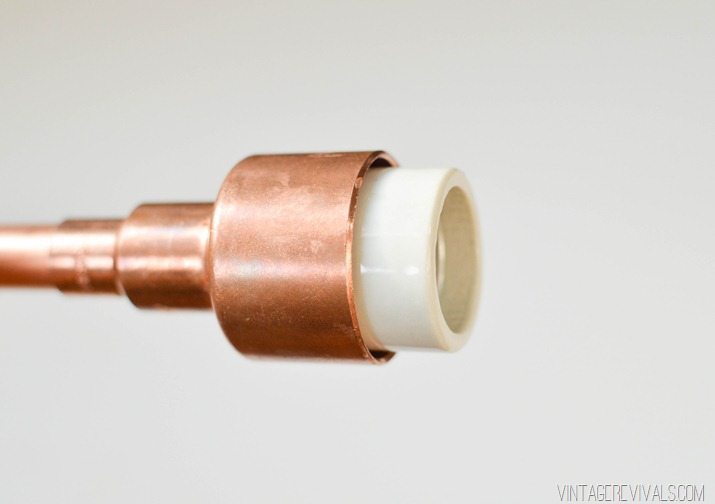
Start by taking apart the ceramic sockets. Right now, we just want the metal base.
Using your epoxy, glue it to the inside of the reducing coupling (make sure that it is straight!) Let it set for at least 5 minutes. (Be aware of any drips down the inside, they will cause problems when you attach your next piece)
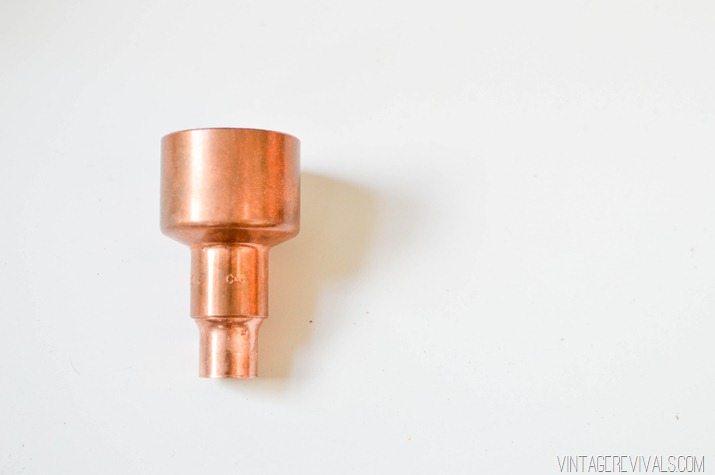
Add a small amount of glue to the inside of your Reducing Coupling, push the Fitting Reducer into the bottom of it.
Add a small amount of glue to the inside of your Fitting Reducer and attach 1 of the 10” pieces of pipe.
Repeat 3 times. These are your arms!
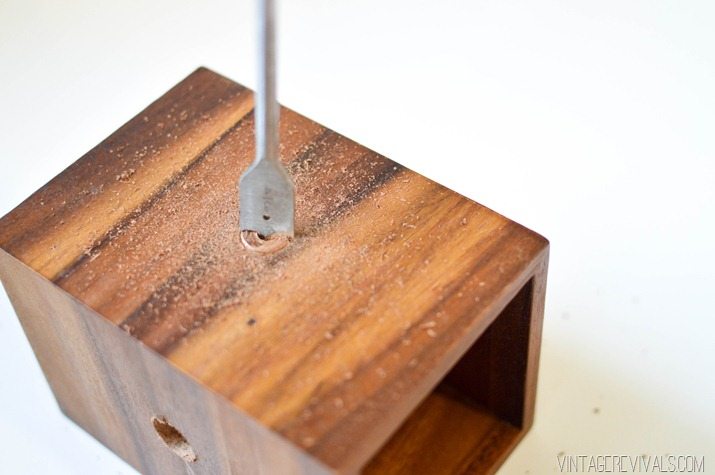
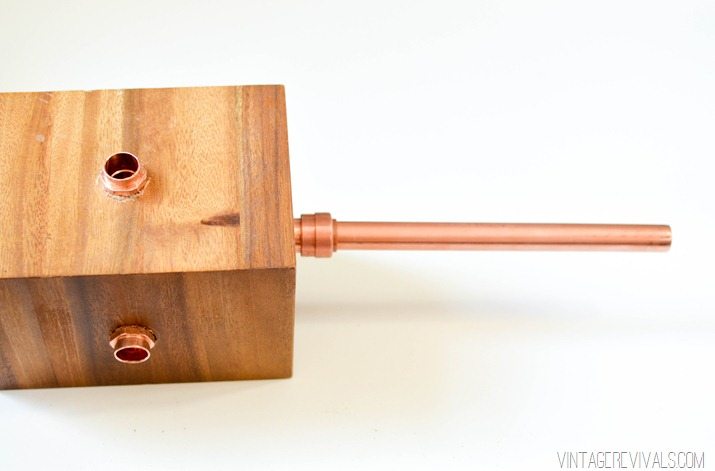
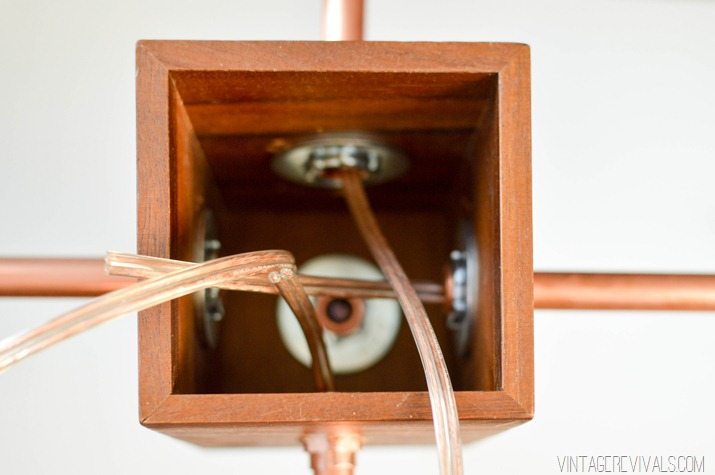
The heart of this light is a wooden utensil holder from Target (couldn’t find it online, but it is still in store). Originally I was picturing 2 wooden bowls sandwiched together, but I think this worked out to be significantly easier. Using a 3/4” spade bit, mark and drill a hole in the dead center of each side of your box. Even with a 3/4” hole, you will need to ream it out a little bit more so that the Male Fitting Adaptor will fit inside.
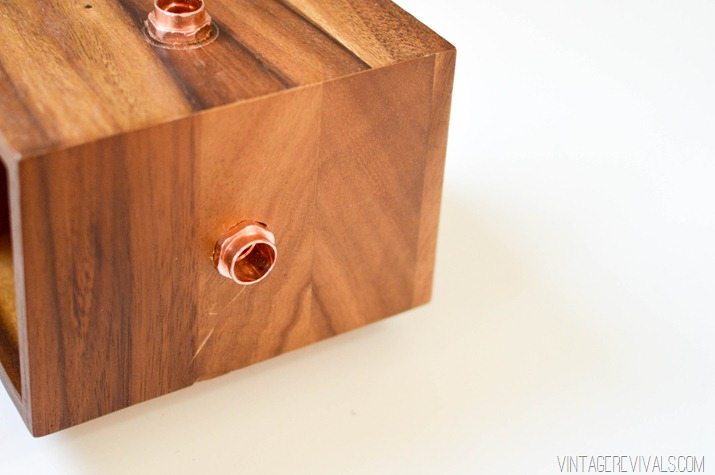
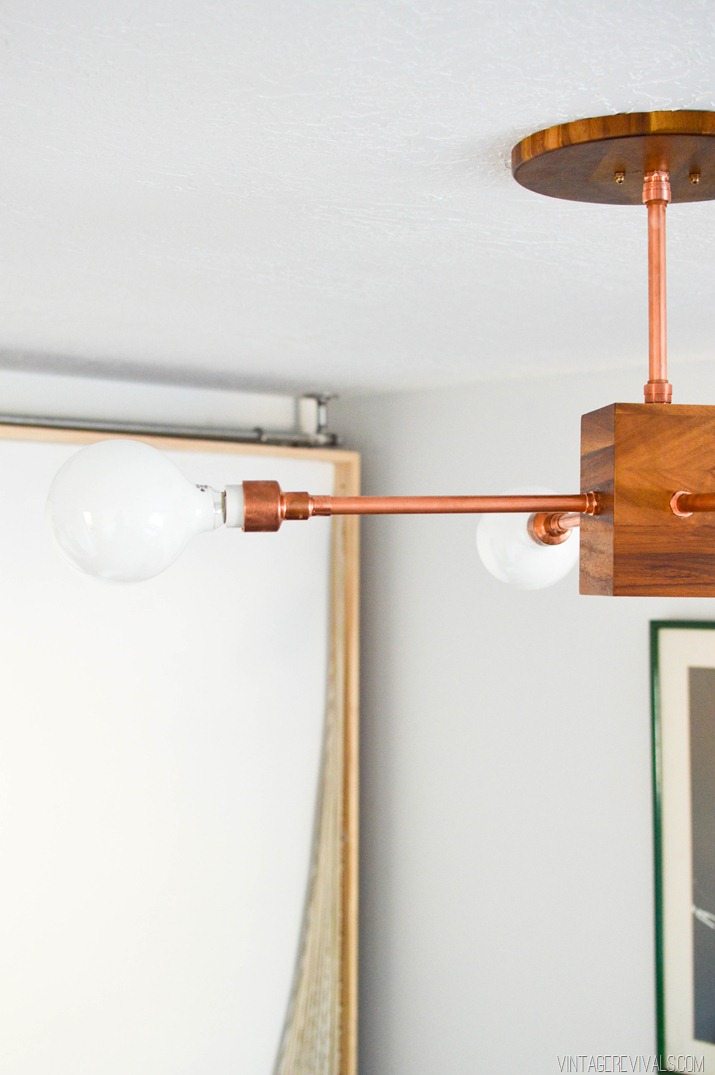
These were a little hard to hand screw in, so on some I used a socket wrench (you can see the mark that it left on the top of the box). Just be careful to not make your hole too big when you ream it, this adds a lot of stability to your arms. You are going to do this on all 4 sides, as well as the top. The only difference is that the top gets a Push-Fitting, instead of a simple adaptor.
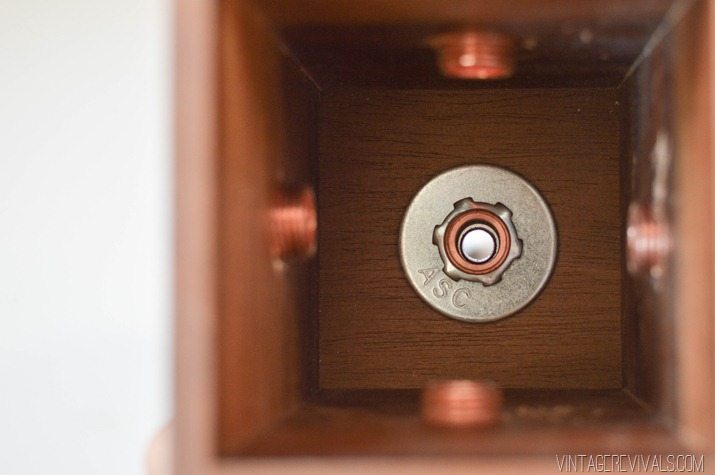
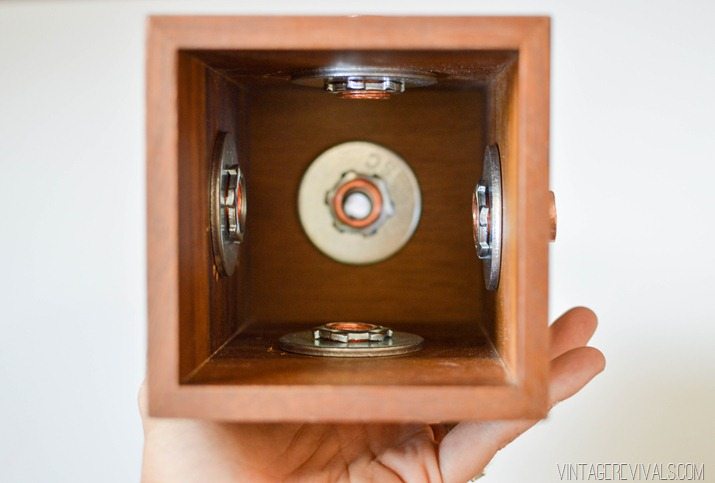
Next, put your washers and nuts on the threads inside the box.
Attach the top piece of copper (mine was 8” long) to your push fitting.
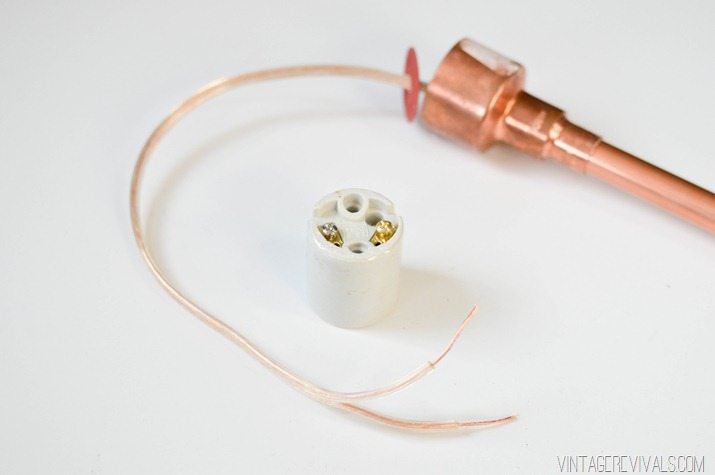
Cut 5 pieces of lamp wire so that they are 20” in length (this will give you some wiggle when you are wiring) and thread one through each of your lamp arms.
Wire your socket according to the instructions found on the packaging (don’t forget to put the red rubber piece on first!)
Because we are making a light with multiple sockets, be EXTRA sure that you are wiring the hot lines to the same colored screw in each socket (i.e. all of the hot lines go to the gold screw, and the neutral lines go to the silver one.) You will be able to tell which wire is hot because there is a small ridge on the edge of that wire to differentiate the hot from the neutral.
When all of your arms are wired, put a small amount of glue on the inside of your Male Adaptor Fitting and push them on, so that the wire is INSIDE your box.
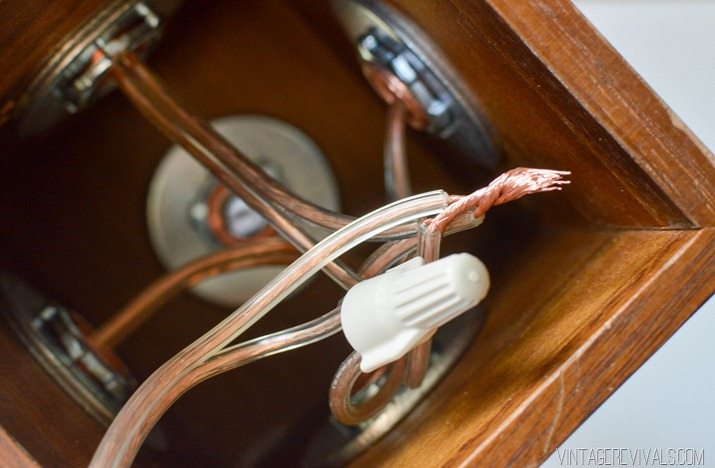
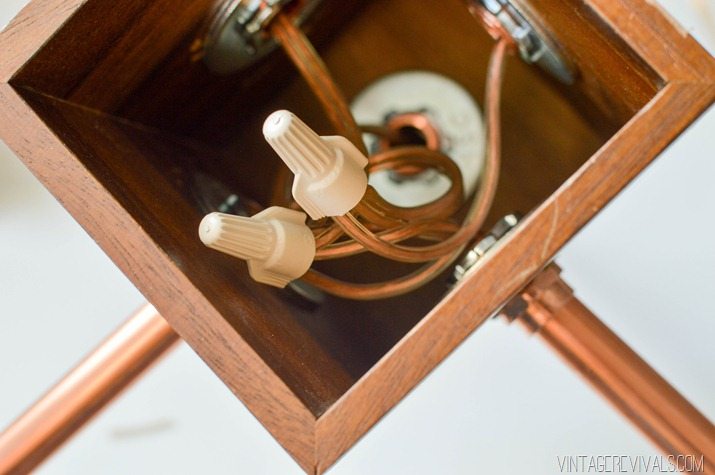
Using large wire nuts, join all 5 of the hot wires together (4 from the arms, 1 from the top) and all 5 of the neutral wires together.
Now its time to install!
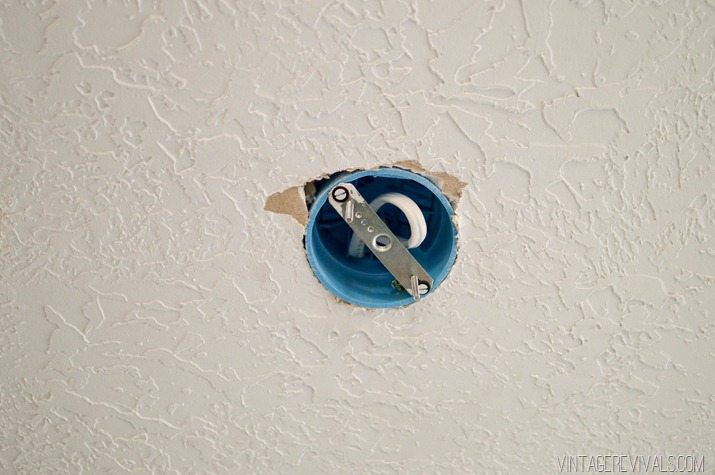
We had to move the junction box so that the light could hang in the right spot of the room. Please please please for the love of all that is good in this world, DO NOT do this if you don’t know what you are doing. Hire an electrician to spend 25 minutes at your house. Ok?! When we moved the junction box, we left the electrical inside the old one and piggy backed the new wire from there. It is illegal to permanently cover a hole that still has live wire inside it. To disguise it (without making the ceiling feel like a land mine) we used a simple cover and put putty on it to sort of match the ceiling pattern. If you look at it, it is very clearly there, but if you aren’t trying to notice it, it doesn’t jump out at you. The most important part is that it is a temporary solution and can be spotted and opened up easily.
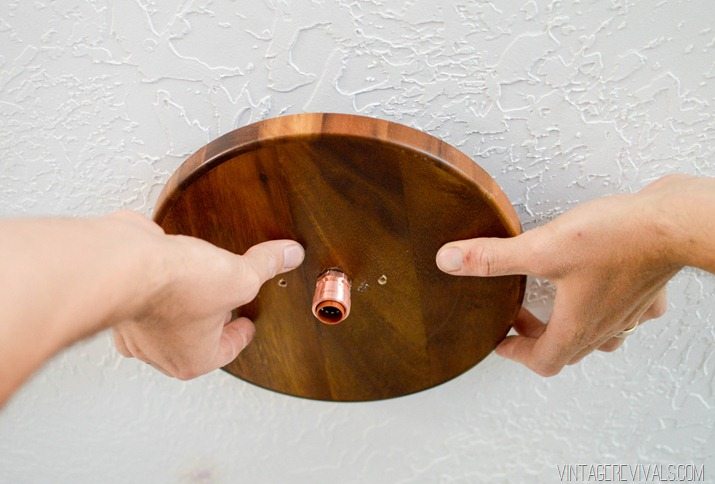
For our ceiling mount, I bought this bowl from Target, and used my table saw to cut most of the sides off. I left a small 1/2” lip. If you don’t have access to a table saw, you could use a wooden plate, or even a regular cover and spray paint it copper.
Drill a hole in the center of your mount, and attach the second Push Fitting as well as the washer and nut to the opposite side.
Measure on your junction box the distance between the screws, and drill into your mount. If you are using screw caps like we did, you will need to have them hanging down before you can mount your light (if you look closely in the picture below you can see the screws.
This is where you wire your light. No pictures, because I was the one holding it up, but don’t forget this minor step.
Put the mount on the ceiling with the screws coming through the holes, and attach screw caps. I was a little nervous about just having the screws holding the light up, but after talking with an employee at the hardware store and having him point out giant hanging lights that had the same style mount, I felt so much better about it.
(The pic below was of the dry run, you can see that there are no wires coming through. When you are installing it for real, the light will be hanging down.)
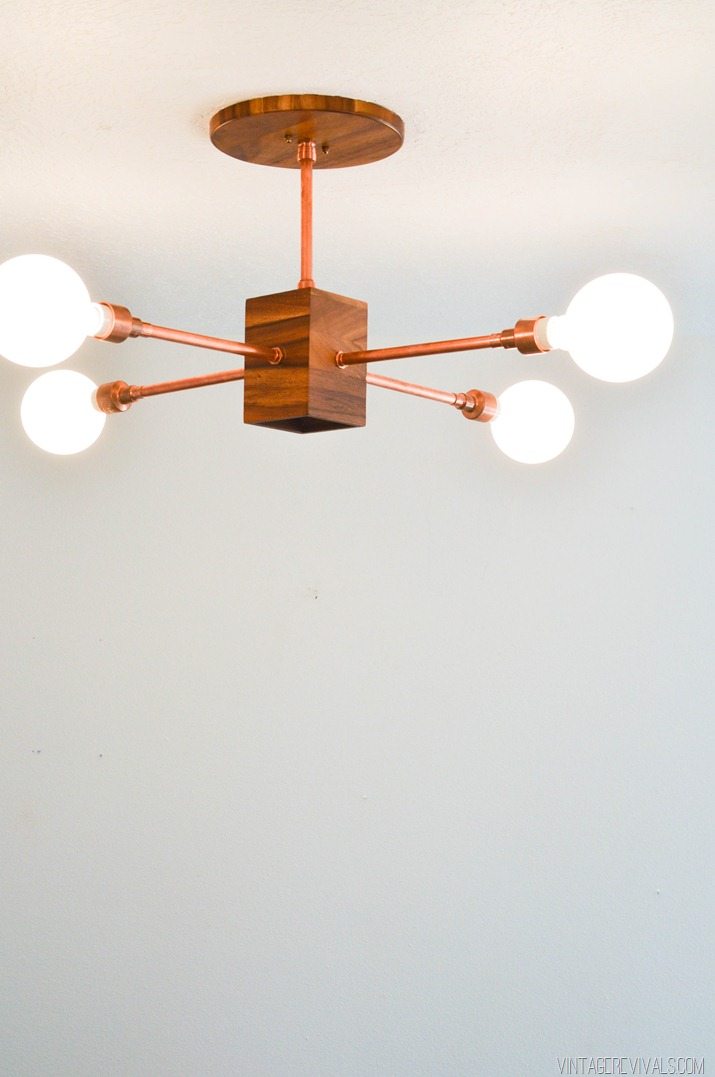
Once the ceiling mount is installed and wired, push the copper pipe into the Push Fitting and TA DA! your light is done!!
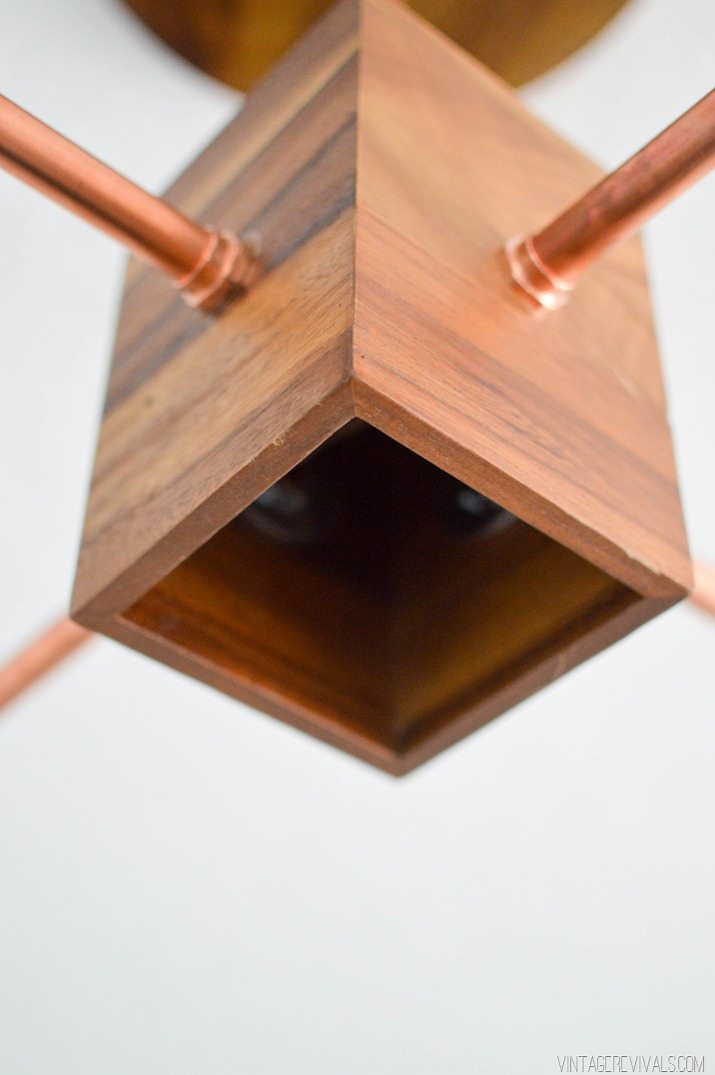
I didn’t cover the hole at the bottom because the wires are tucked up inside it so far, but it would be cute to put a piece of copper contact paper or something on the bottom if you feel like it needs it.
Questions? Leave them below!

In your previous post about the light, I totally called that you used a utensil caddy! Man, I’m good 🙂
You are, like, super hero awesome, genius! Love this!
Do you mind sharing how much the materials for this project cost, altogether? And how long it took you to make it? It’s gorgeous!
Hi Anna! I made this light a couple of months ago, and total cost was over $200, close to $250. The caddy and bowl together were about $60. The copper fittings were also expensive, particularly the ones that hold the light socket. No hardware store in my city had them in stock, so I had to special order them from Lowe’s to the tune of about $50. We also ended up spending another $30 for a dimmer, because even with 20 watt bulbs, this sucker is BRIGHT!
what does it look like when you look straight up – into the box? How did you hide the wiring inside? thanks! it’s very cool
Seriously girl, you are constantly blowing me away. This fixture is just too good. I’m so thankful for your blog because its so real and authentic. Unlike other blogs that are full of high end pieces by milo and eames, you pull off rooms that are just so much better. I’m dying to see this full room reveal.
P.S. I found your danish swag fixture on ebay, did you see the price? https://www.ebay.com/itm/281365104922
Mind = blown. You’ve totally opened my eyes. Now I need to apply this creative insight to lighting for my travel trailer. Can’t wait to see what lighting ideas you’ll have for the nugget!
I love seeing what you come up with, and this fixture is amazing!
BUT I’m actually commenting because it seems your RSS feed is busted. The last two posts never showed up in my Feedly reader, and when I clicked on your RSS link at the top of the site I got this error: “Error establishing a database connection.” Just thought you’d like to know… I was seriously missing updates from my favorite blog this past week! Hope it is an easy fix!
You are so freaking awesome, Mandi! Swooning over this light fixture; great job!
This is super awesome Mandi! I love seeing what you come up with and glad I’m not the only crazy creating on the floor in stores ;). You constantly remind me to look at everyday items in a new way, so thank you for that. Hope you are enjoying your weekend!
Super cool light! Just wondering why you decided to change out the light? The chandelier in the before post looked pretty groovy and totally your style. What made you not keep the original one?
LOVE this! How much did it cost you altogether? Also curious about what kind of bulbs you used. 🙂
I would like to know what bulbs were used as well!
Love, love, LOVE!
And the best use of a utensil caddy as anything BUT a utensil caddy goes to… Mandi! (Crowd goes wild)
Well done. Well done.
This is seriously awesome. I just tried to build a fixture this weekend using chicken wire but it majorly backfired. Currently trying to salvage the project, but if it doesn’t work I may try something like this! I bet the copper would patina nicely over time, too!
Absolutely stunning. You are a rock star, girl, a total rock star.
Amazed. Barking at my husband to make me one ASAP.
Truly, blown away. Thanks for always kicking out some killer unique content – you’re such a real and genuine blogger, in a blog wide web that’s not so full of them.
Love this lamp!!!
https://www.thespicywall.com/
What camera do you use? I am gong to be replacing my camera soon and your photos are so clear and bright. Thanks!!
Hi Mandi, excellent How-to post. I teach adult education carpentry class and my students are always looking for projects they can complete in the few hours during class. I will be keeping this in my stash of projects for students wanting to learn a bit more about doing electrical work. No wait, plumbing, er. woodworking. See, you have all the bases covered, plus it could be done with re purposed supplies too. You have all the bases covered.
I’m stuck!
I’ve been slowly collecting the supplies for this, and now I’m in the assembly phase. My issue is this: if the fitting reducer is 1/2″ wide as stated in the instructions, and the pipe is 1/2″ wide, how can the pipe fit inside the fitting reducer? Mine won’t because they’re the same diameter.
Is your fitting reducer actually larger than the 3/4″ x 1/2″ listed in the instructions? I tried flipping the fitting reducer around (putting the 1/2″ end in the reducer coupling), but that didn’t look right.
Please help!
Hey Hannah!
I don’t have the packaging anymore, so I can’t be sure, but I haven’t had anyone else have this question. Does it work with a reducing coupling?
I figured it out!
The pipe I purchased was 12″ x 1/2″ REPAIR COUPLING. This is different from the actual type M or type L copper tubing. The coupling was just as long as the standard pipe and stored right next to it. But because it is a repair coupling, it is designed to go on the OUTSIDE, hence it being to big to fit into the fitting reducer.
Problem solved! Maybe this will help someone else who just grabs the first shiny cylindrical thing that says 1/2″ on it!
Thanks for an awesome project!
YAY!! I’ve been thinking about you all day! I’m so glad that you figured it out! Will you send me pics when it’s done?
Mandi,
I’m redoing (ok just doing) my office tomorrow and tossing ideas around to my husband for some fun DIY lighting and he approved of your light right away– which is pretty unusual for him (not me though, I give a go for any project you inspire and take on! Our entry wainscoting was so inexpensive because you shared your diagonal wall materials! https://www.petitemodernlife.com/2014/08/19/easy-diy-wainscoting/ So thank you 🙂 I hope you enjoy a rejuvenating creative break, whatever that looks like for you. You have a captivated audience that loves what you do on YOUR own time, not theirs and we’re not going anywhere. So rock on girl.
Cheers,
Karisa
Freaking amazing!
Hi! Great project! You’ve inspired me to do something similar! However, I can’t seem to find the pipe nuts that you used to attach the copper fitting to the box. Do you remember where you got them/what their ‘official’ name is?
Chad Zentner,
Did you ever figure out what to use? I am also trying to build something similar and am stuck on locating nuts to attach to the copper fittings.
Thanks!
Omg. I have been searching for the last hour (probably more but that’s embarrassing to admit) for a wooden ceiling mount to try to make a sconce. YOU ARE SO BRILLIANT AND CREATIVE!
I bought porcelain sockets but they don’t appear to come apart or have the “red” part you mentioned. Where did you purchase your sockets?