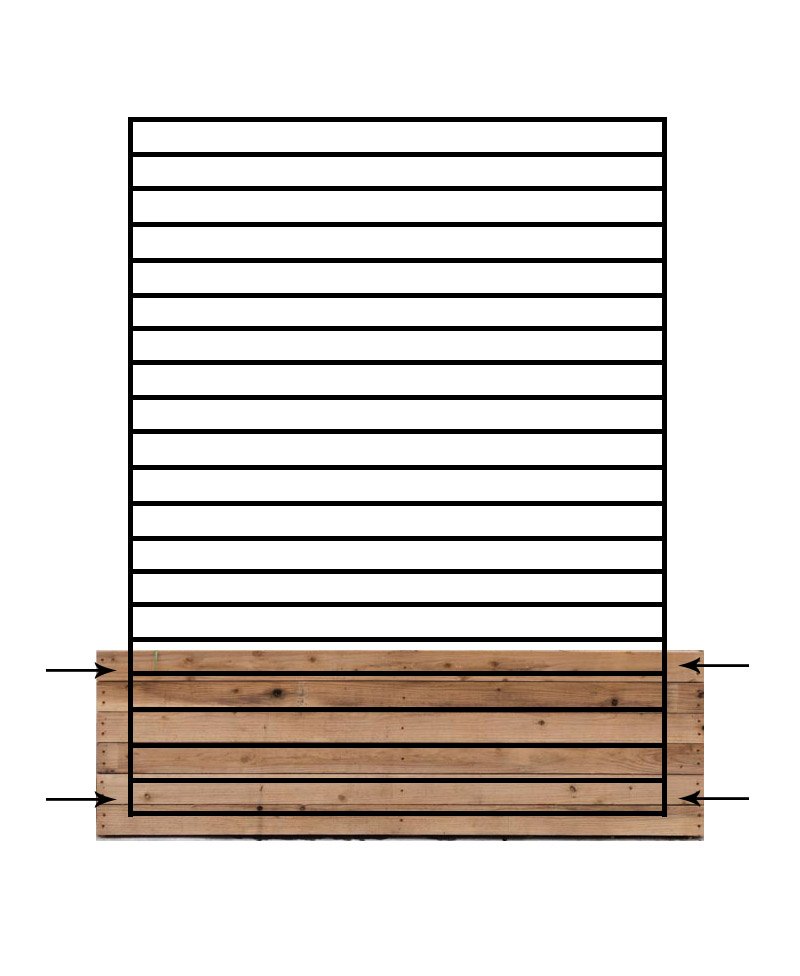
Oh man am I excited for this post!! I love nothing more than a good hack, and this trellis is everything. It’s unique and cool, easy to DIY, and available in store at your local Home Depot, you just need to venture into the fencing section to find it!
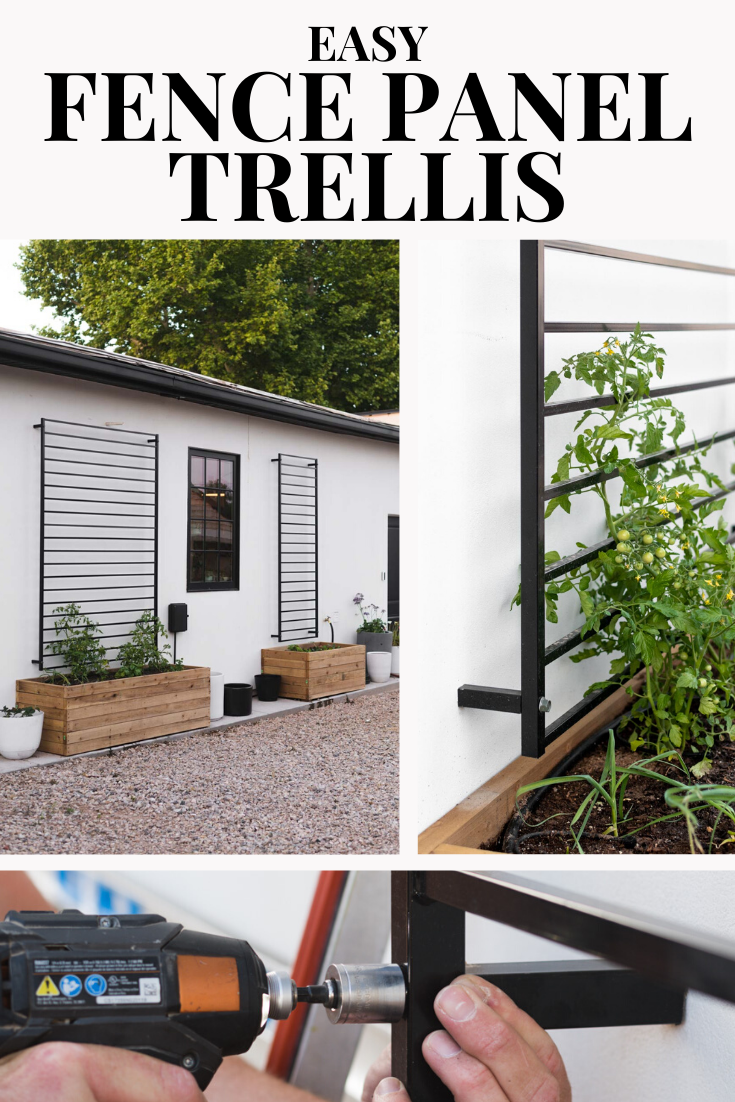
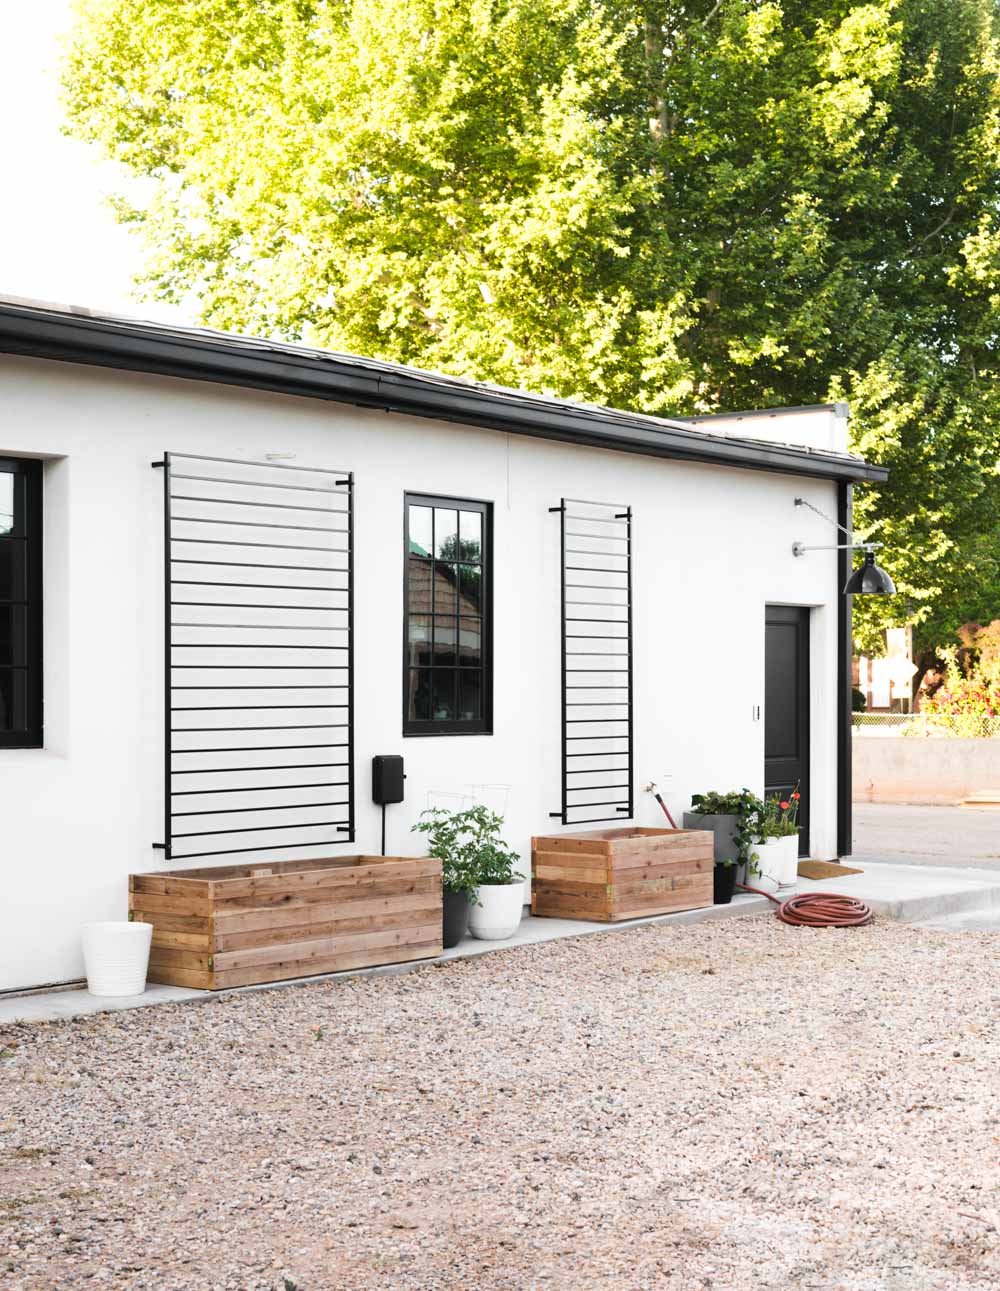
Until our renovation of the Merc is finished, my dreams of a yard full of planter boxes overflowing with veggies and flowers is on hold. This year the itch was really bad though, so we came up with this idea of putting the planter boxes right next to the Merc. That way they are out of the way, and I can still garden a little!
If you need to build raised planter boxes, this post is where you’ll want to start!
Now, let’s talk about the trellis!
We actually did this project before we even started on the renovation for the Merc. We had a couple of months between the time it was ours, and the time our plans were approved, which meant we needed a fun project and the detached garage was perfect!
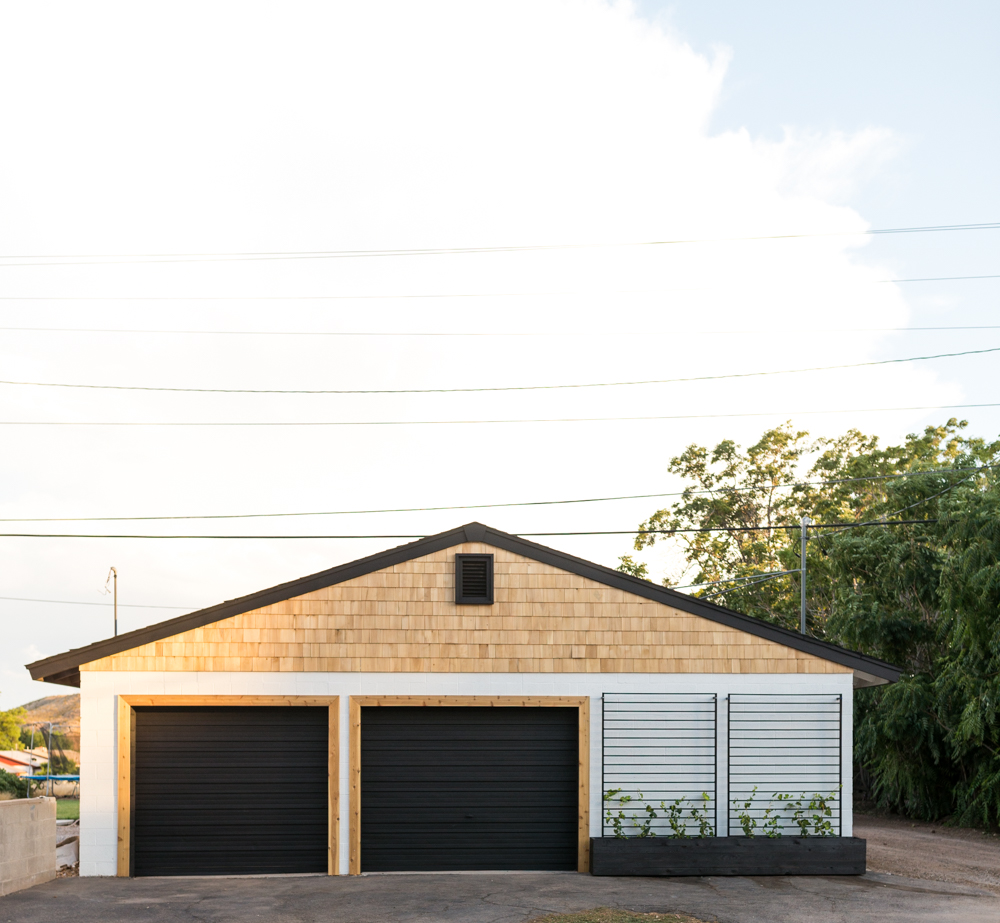
The thing is though, that I (shamelessly!) never posted a tutorial because by the time the garage makeover was done, we were rocking and rolling with the real renovation and this project got put into the land of lost tutorials.
When I decided to put the raised planter beds up, I knew that it was time to bring this project to light and give it the love it deserves!
Here’s why this project is magic.
- It looks super expensive and custom, like thousands of dollars to have it built to your exact specifications custom. But each panel will cost you less than $100!!
- It will work with a lot of different styles. Farmhouse, eclectic, modern.
- It uses in store products! Now, I dont know about you but I am ALL OVER projects that have supplies readily available.
So let’s get into it!
Supplies:
Fence Panel Trellis
7″ Bolts (4)
Silicone
Tools:
Saw with Metal Cutting Blade
Drill
Level
Step 1:
See that extra length of tube? That thing is going!
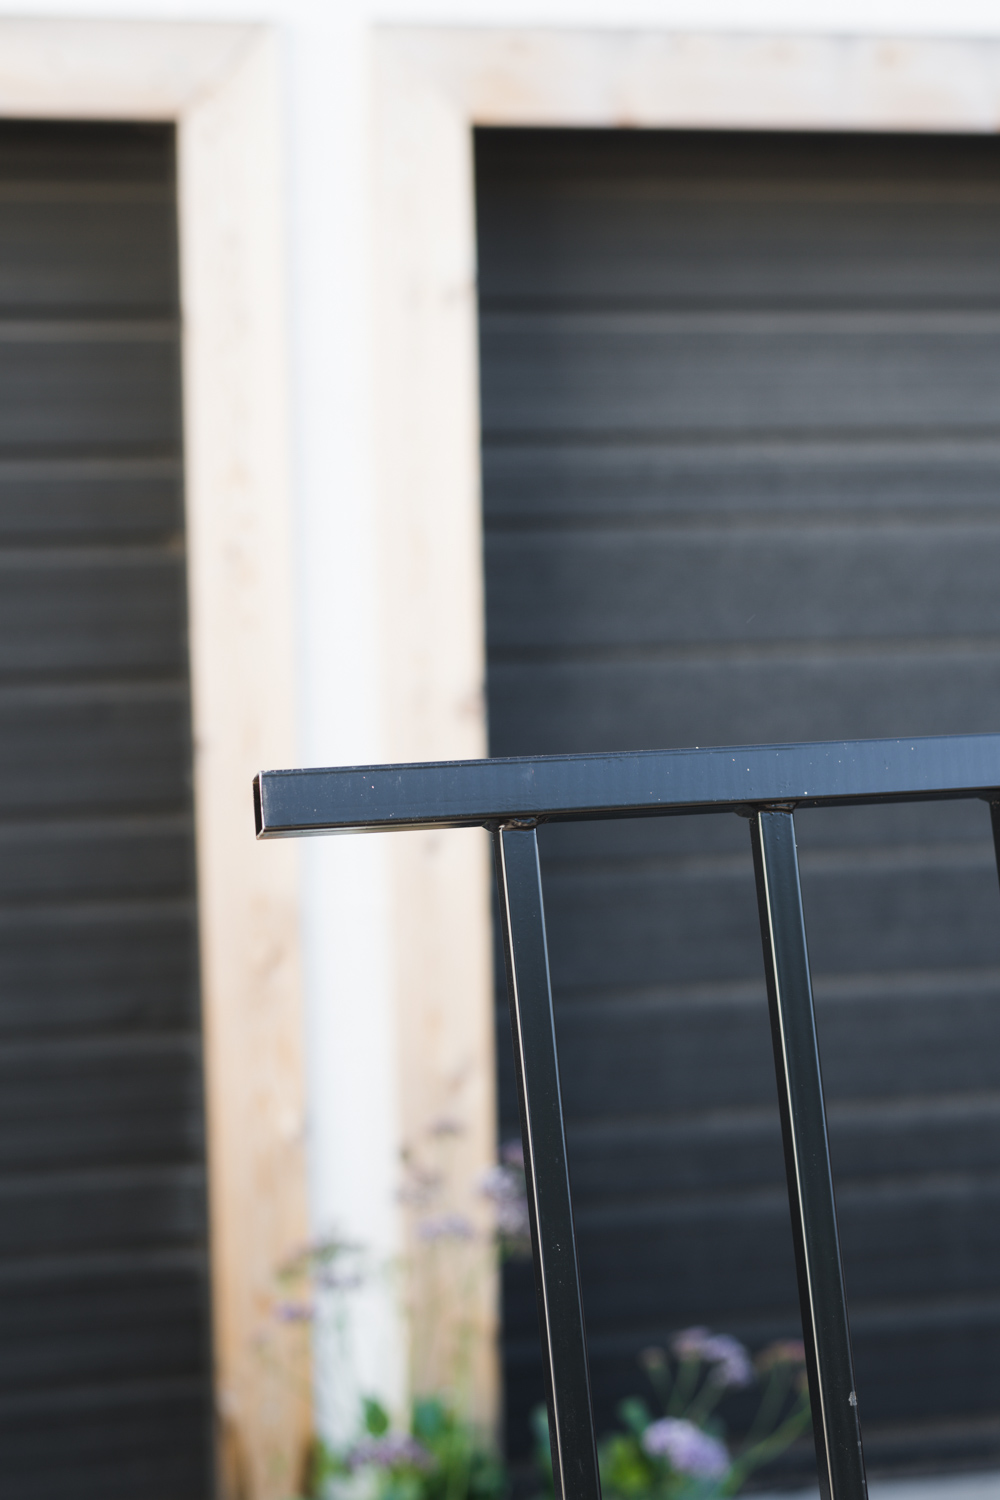
Using a saw with a metal blade, carefully cut right along the edge and remove that section.
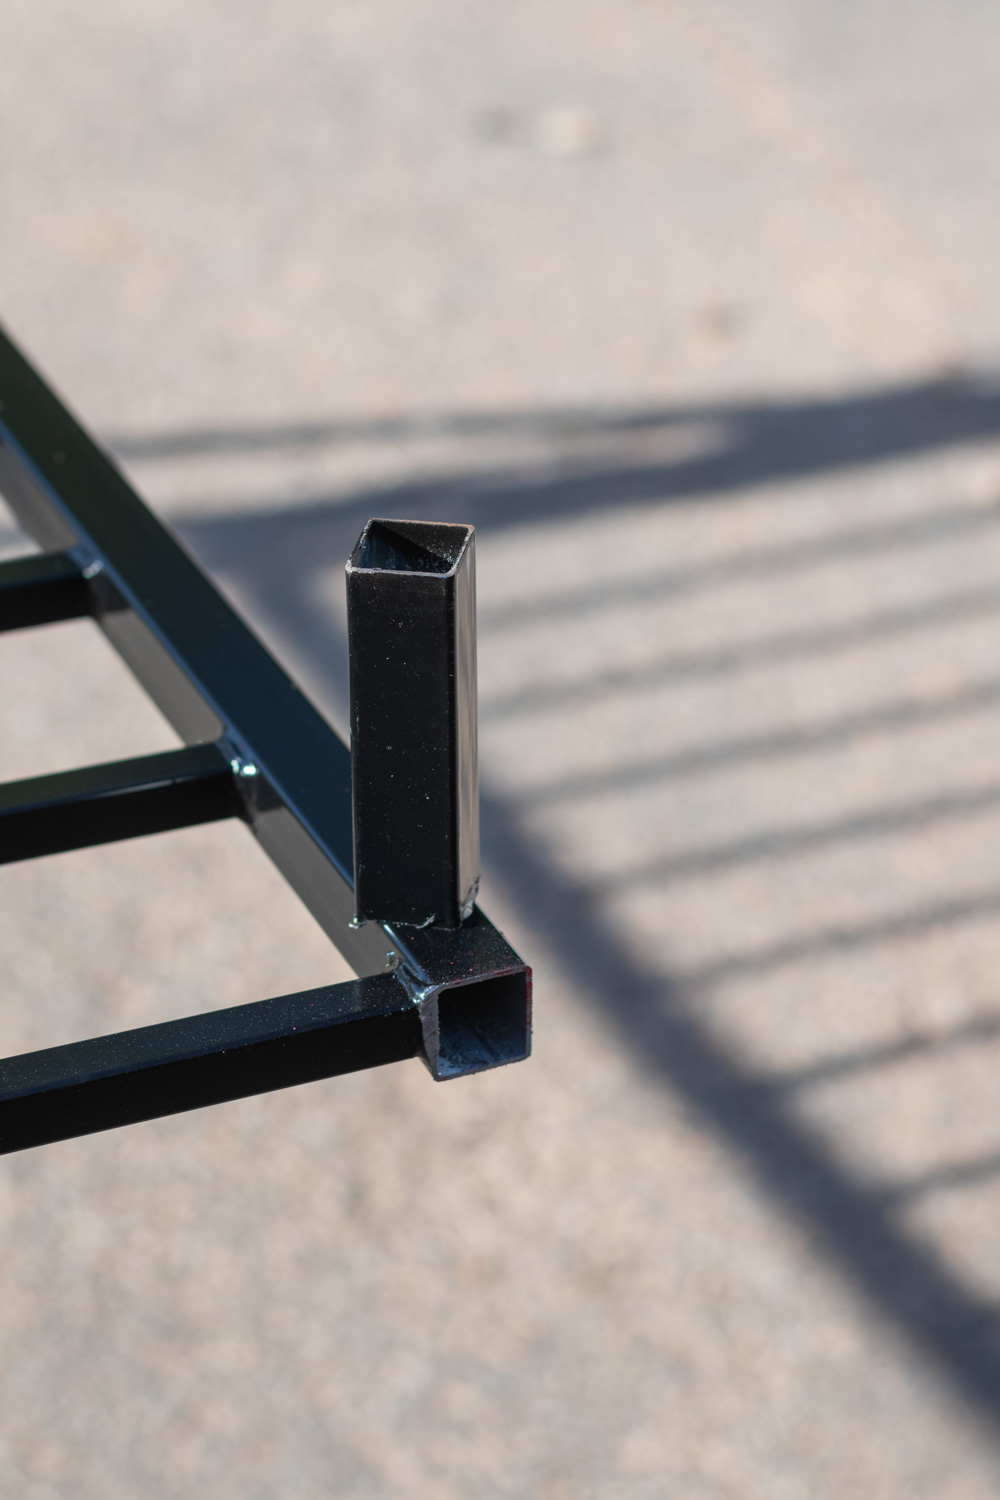
Dont lose it! We’re using it as a spacer to hold our trellis off of the wall!
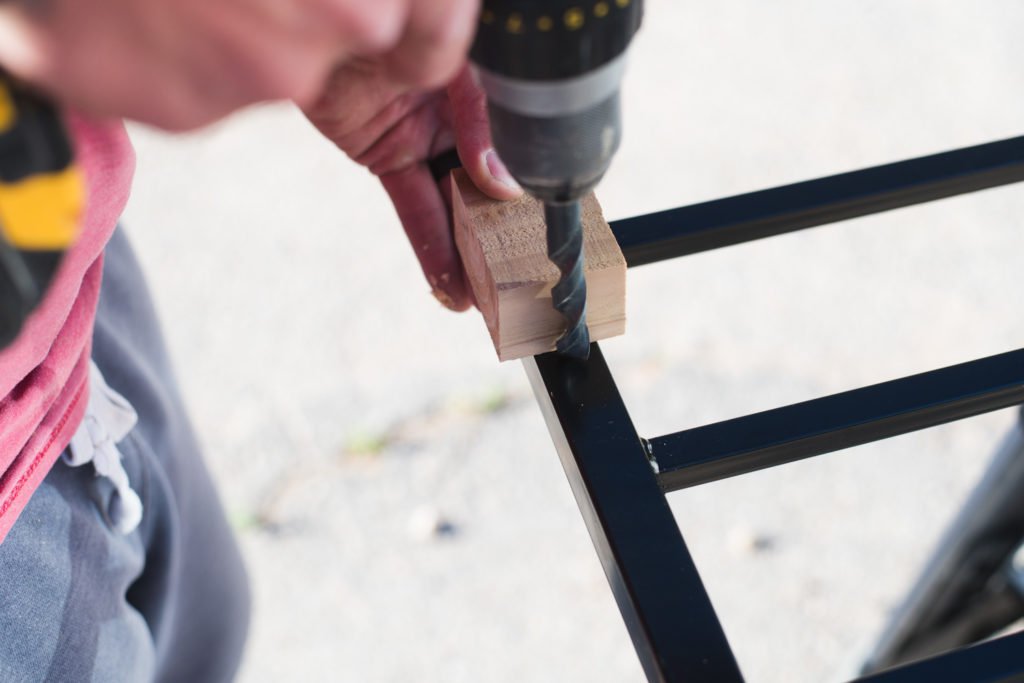
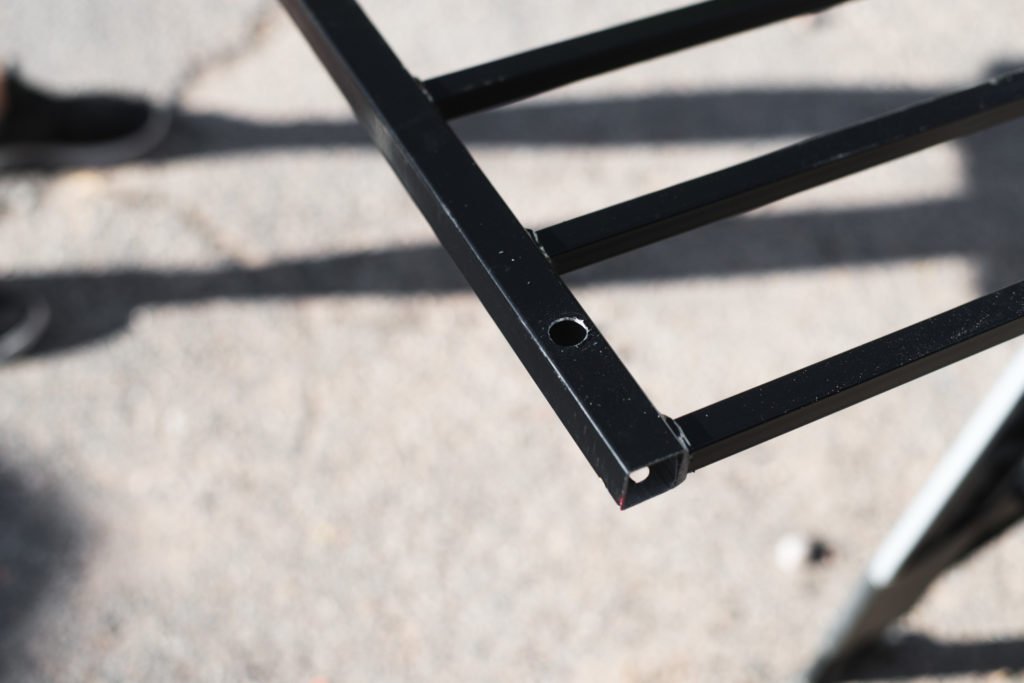
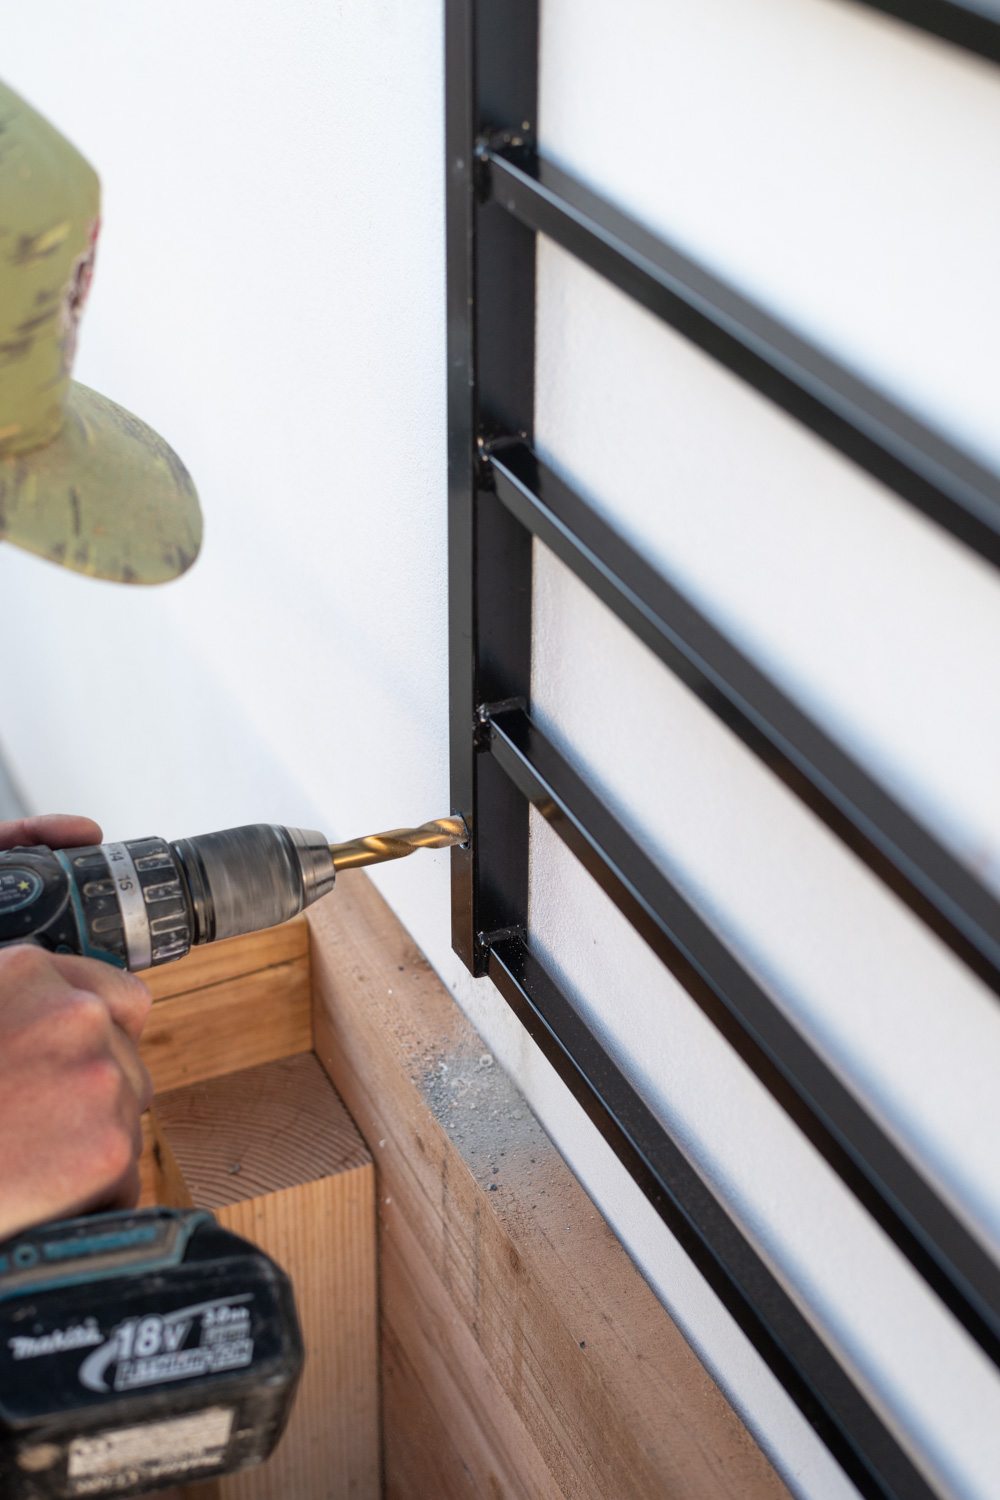
Step 2: Drill the Pilot Holes
The next step is to drill 1/2″ holes through all 4 corners of your panel. We used a piece of scrap wood to space it correctly. Make sure that you are using a drill bit that is made for metal, and wearing safety goggles.
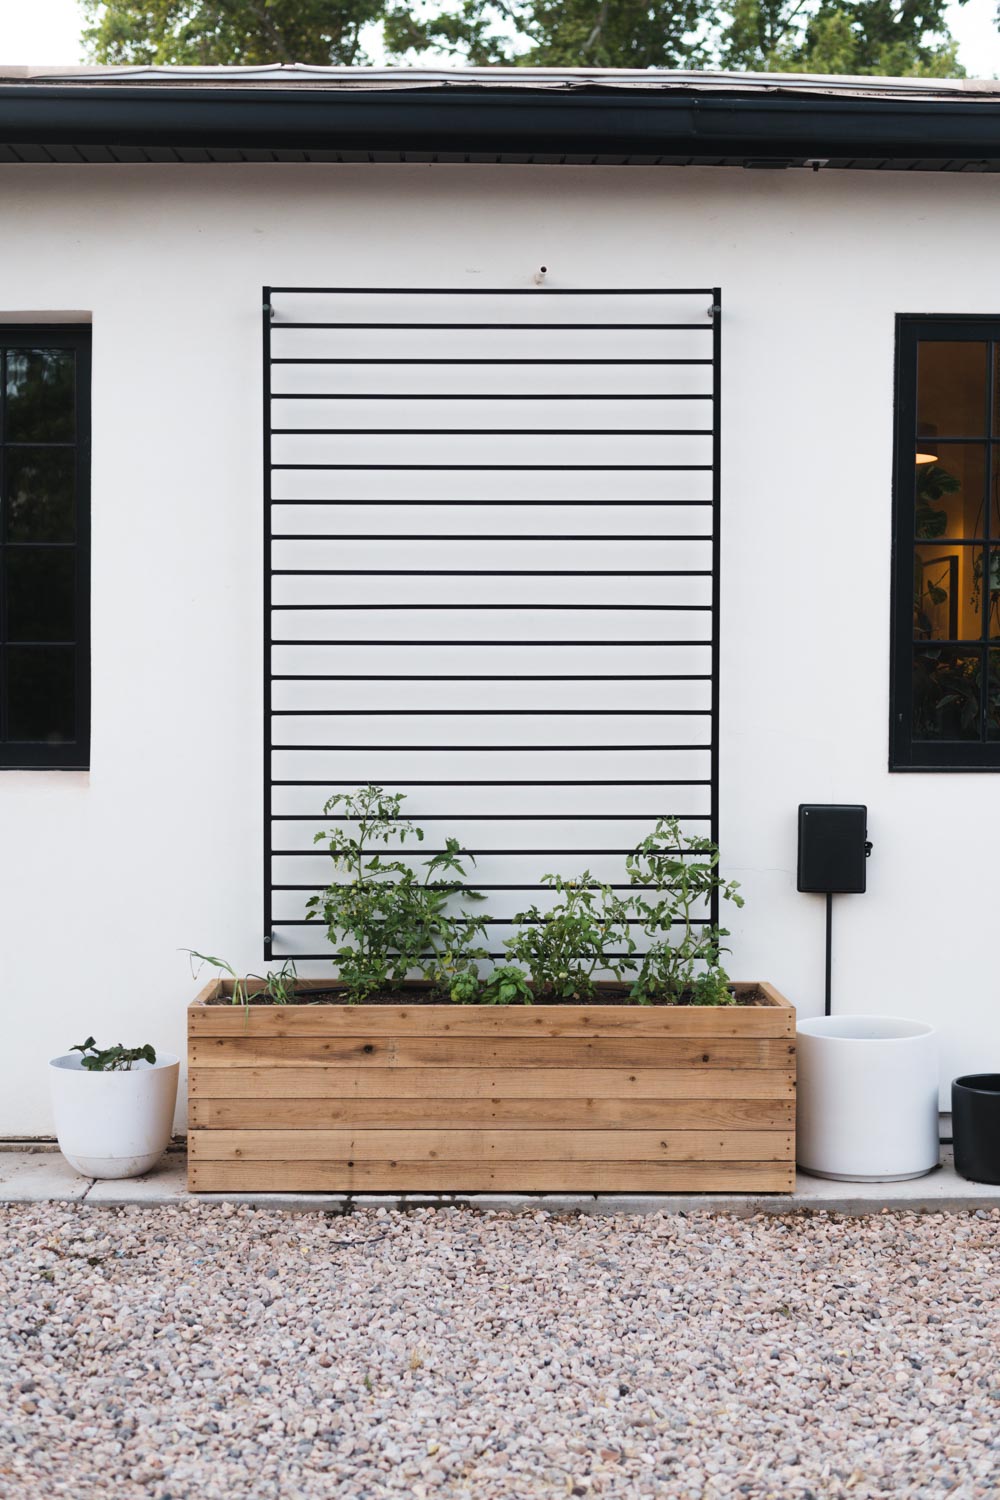
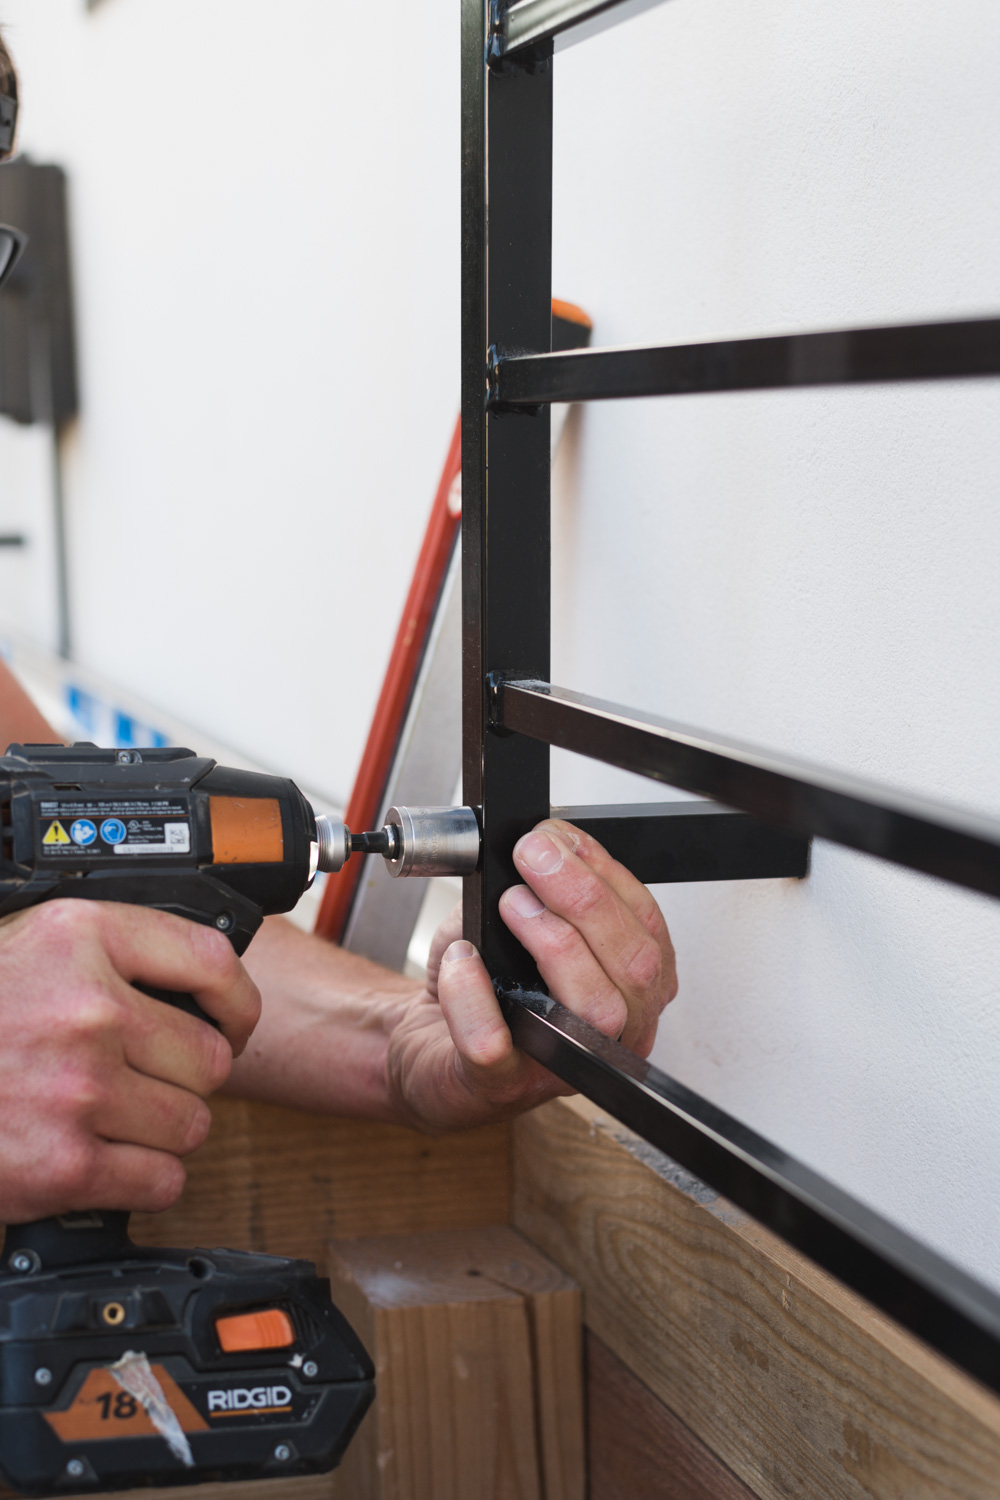
Step 3: Attaching it to the wall
The first thing that you need to know is that when you are attaching something to the outside of your house, you need to know where the critical stuff is. (Like your water main!) One of our panels was in the general area so we measured it carefully to make sure that we werent hitting it!
Something else to keep in mind is that if you are drilling holes into a building, they need to be weather proofed. I’ll show you how to do that in just a few!
Also, this is a 2 person job 😉
Hold your panel directly against the wall and level it. (We’re not worrying about the spacers yet!)
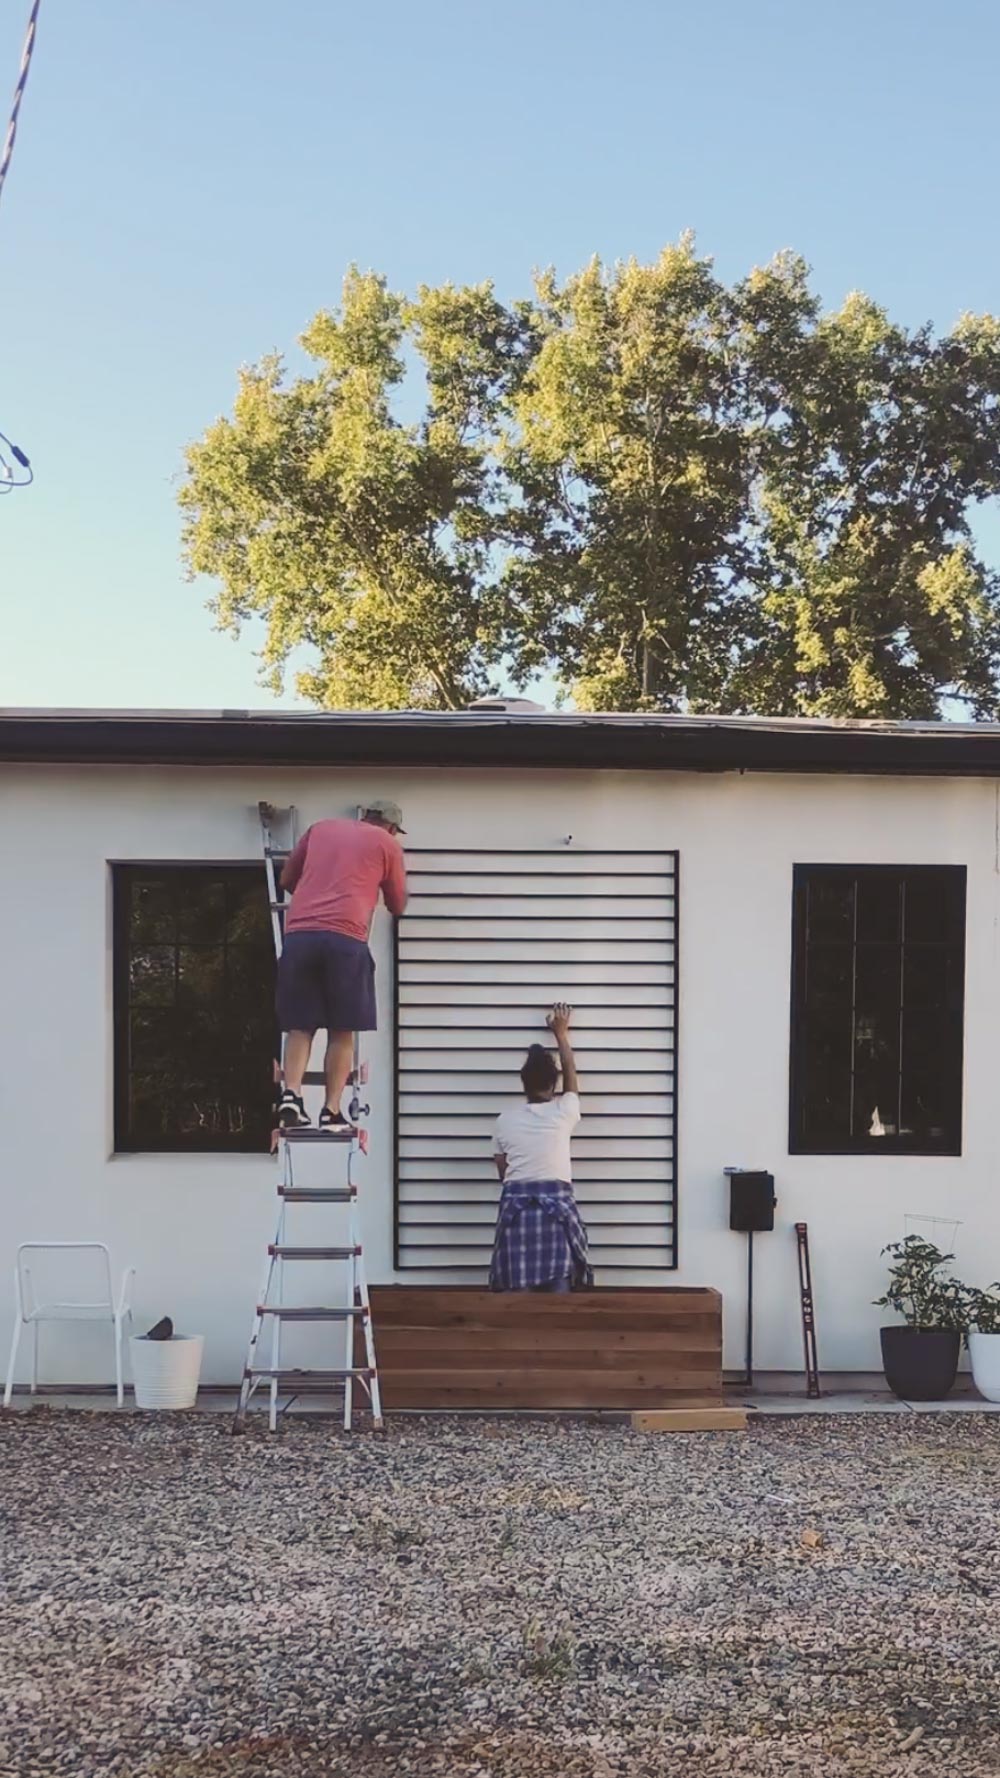
With the panel flush, drill through the holes in the trellis and into the wall.
Now it’s time to get hanging! Speaking of hanging, does anyone remember Hangin’ with Mr. Cooper? Weird that i just had that flash back, I wonder if it’s online!?
Update: it’s on Amazon!
Ok, back to our trellis.
Depending on the type of material you are drilling into you, we have different bolt options.
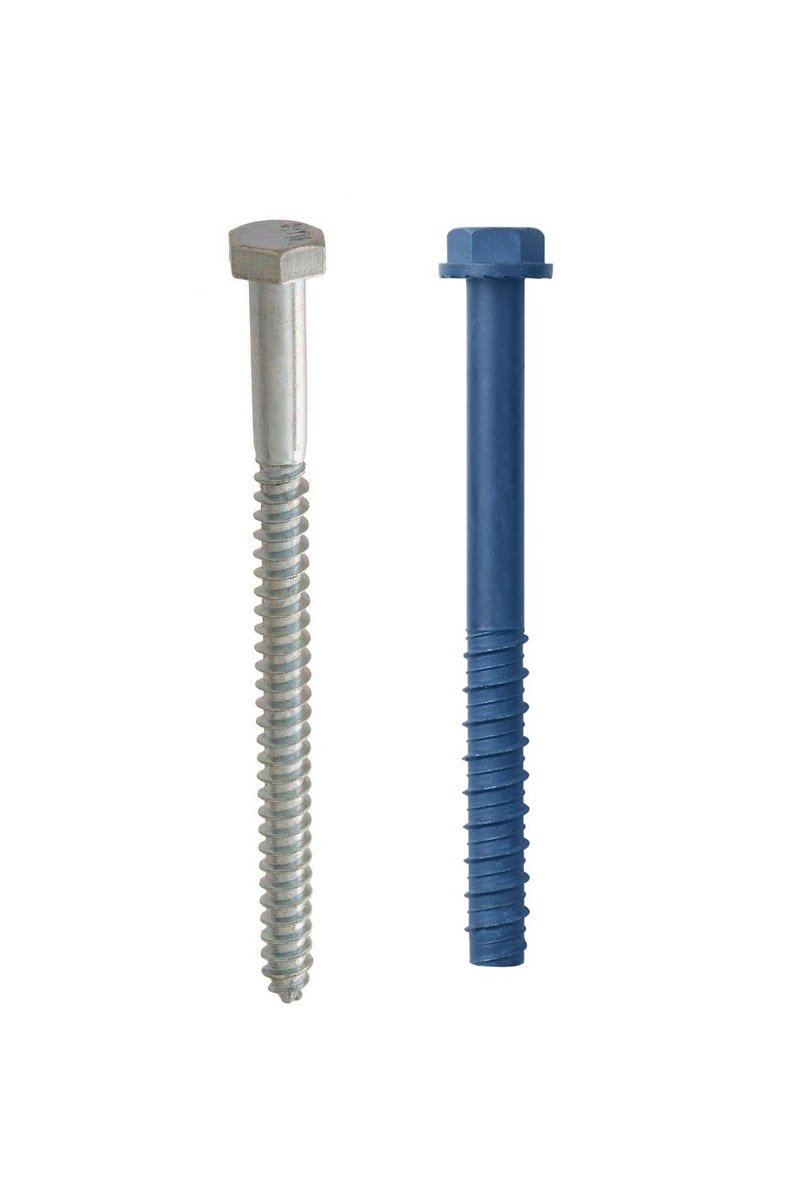
When we installed this into our detached garage made out of concrete block, we used 6″ TapCon concrete anchors. They worked amazing and are perfect if that is your material!
When we put them into the Merc, we used these lag bolts. Because we were going through multiple materials, and ultimately the screws are ending up in wood, we used a different type that could happily grab both wood, and the outer layer of stucco.
The 7″ screw length that we used is great for a standard wall.
Once your holes are drilled, pull the panel off the wall and fill the hole with 100% silicone.
This will weather-proof the hole.
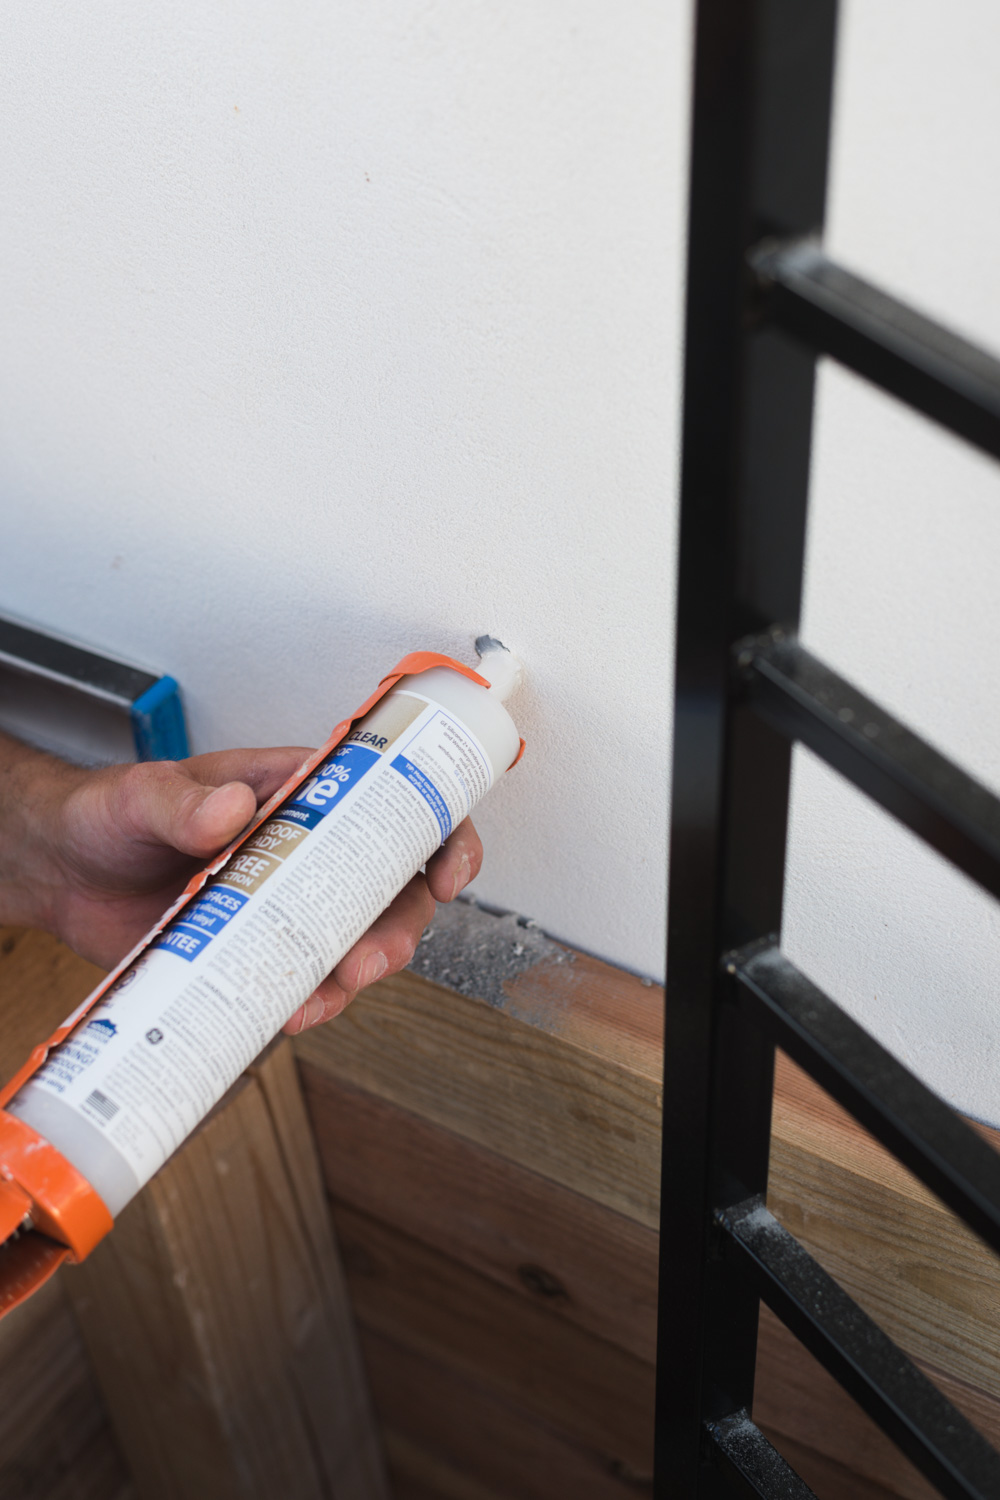
While the silicone is still wet, put the bolt through the holes in your trellis, and add the spacer (the piece you cut off!) to the other side.
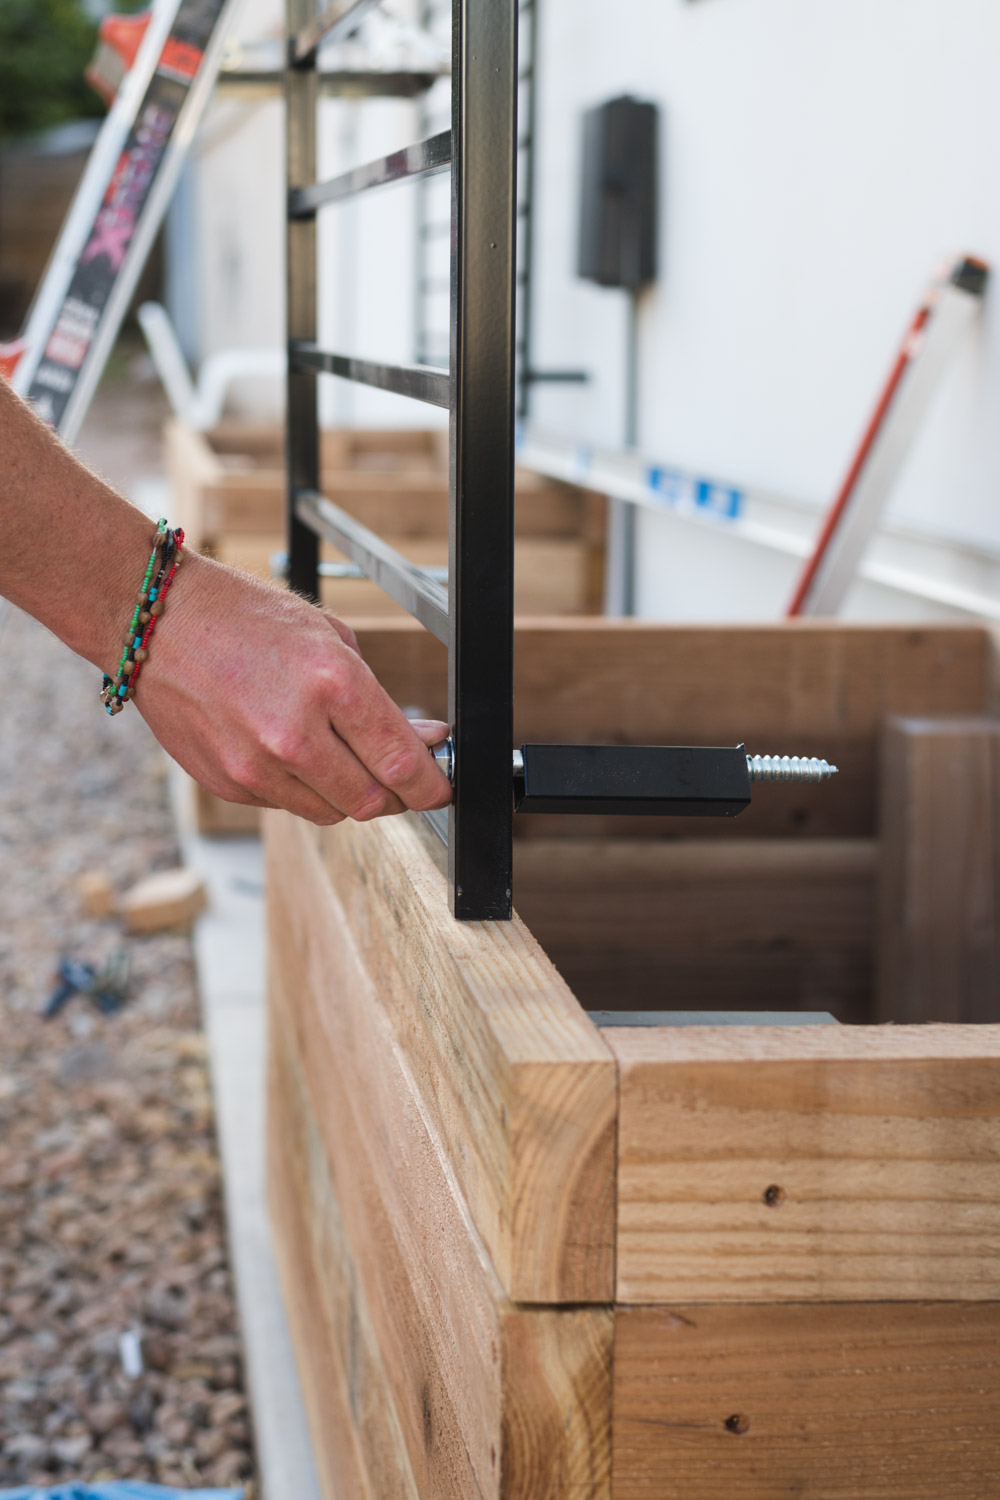
With one person holding the panel, and the second person attaching the screws, you should have it installed in no time! Just double check to make sure everything is level before you screw them in tight, and don’t forget to keep your spacers straight!
We started by attaching both of the top screws first, and then the bottom ones!
That’s it!
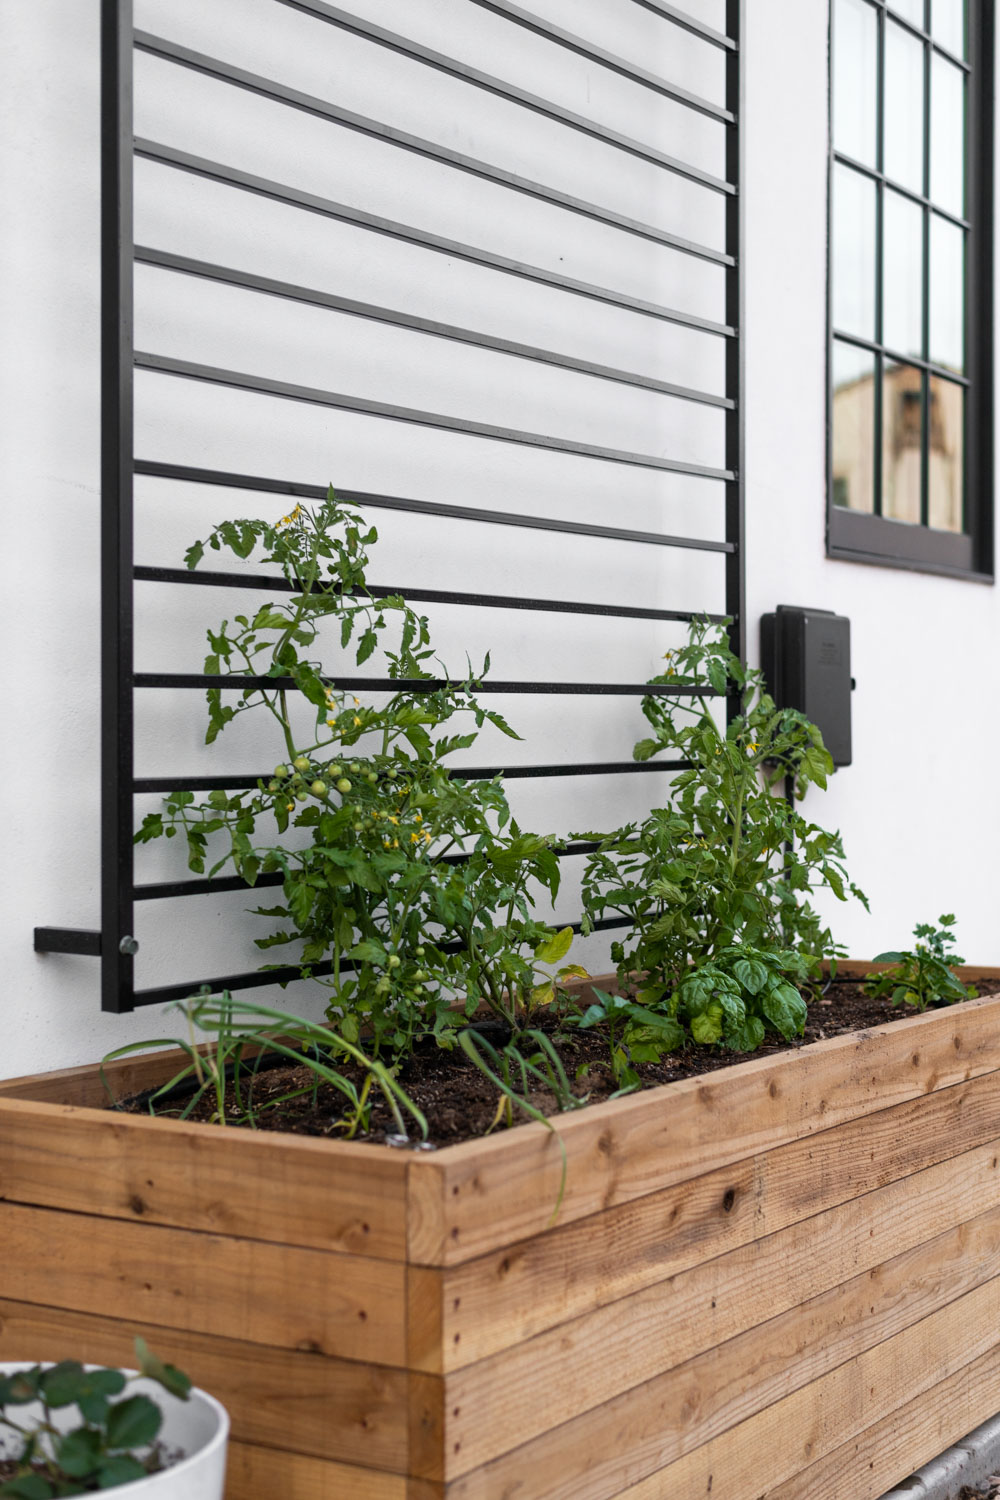
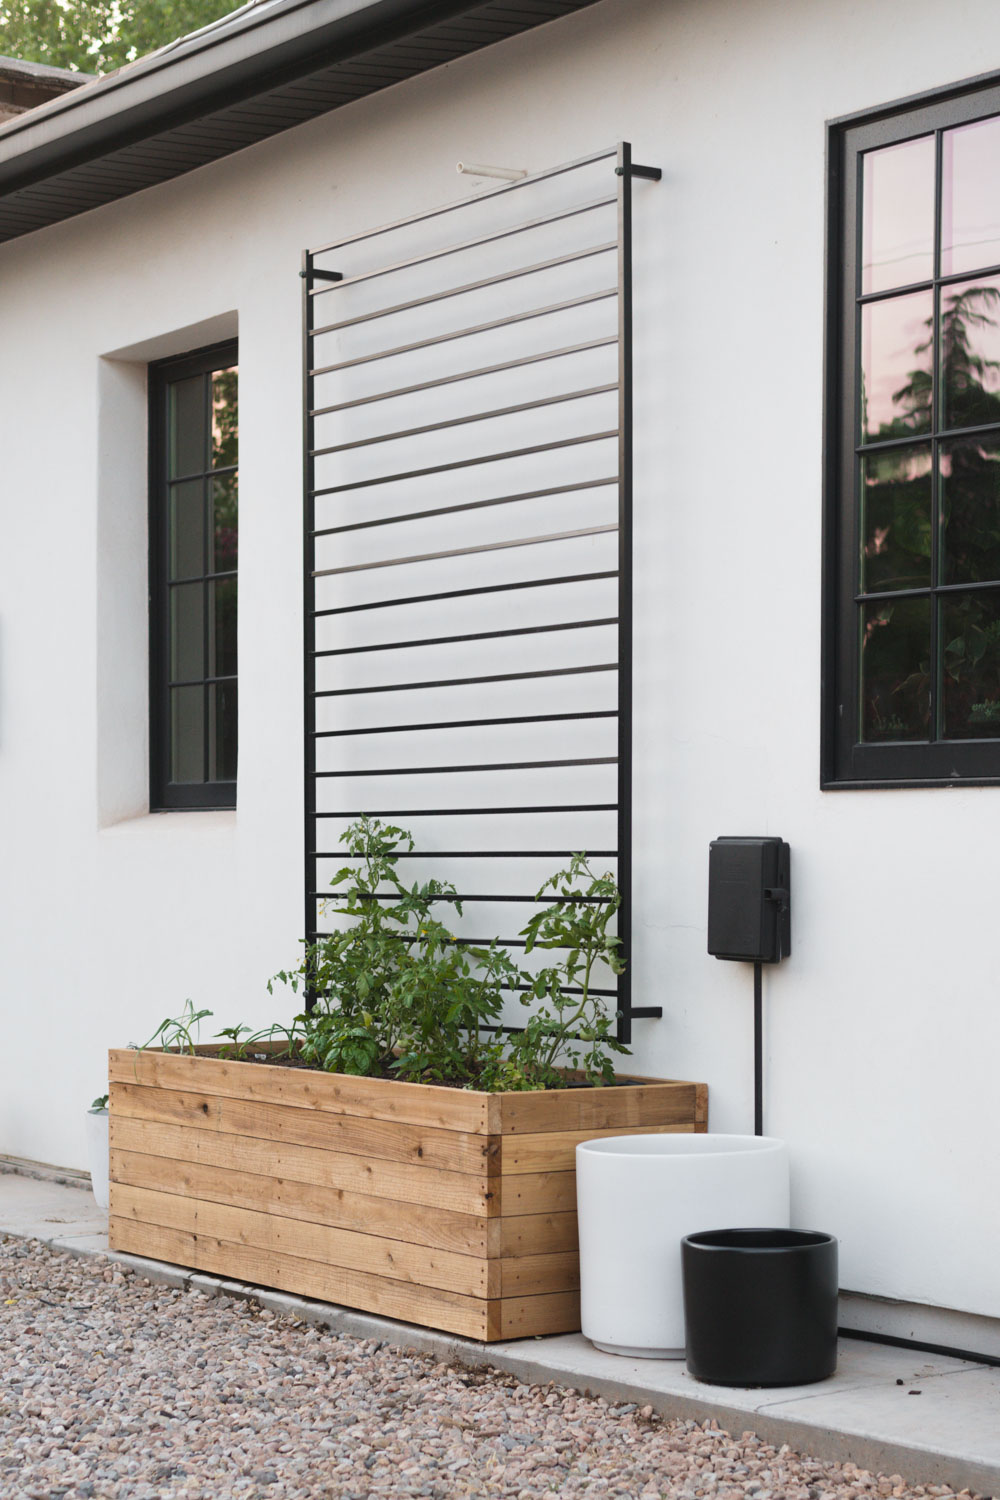
Your panel is hung and ready to be the perfect home for some lucky plants!
If you are feeling nervous about installing these onto your house, or have a spot for them that isn’t against the wall, you can absolutely install them on the backside of your planter!
I dont have pictures of this (because obviously we installed them on our walls) but this is how I would do it!
Measure the height of your planter box. Subtract 6″ from the height, this is the spacing you’ll use for your pilot holes on the panel.(It will give you a 3″ cushion on the top and bottom of your planter)
Measure 3″ from the bottom and drill a hole on both sides of trellis. Then measure the distance of your spacing and drill your second set of pilot holes.
Attach the panel to your planter box by drilling through the holes, into the wood of the planter box. Bolts that go through to the inside of the box with a nut on the end would be a great way to secure your panel.
Sort of makes sense? Hopefully!!
If you make this project I WANT TO SEE! Please tag me on Insta! @vintagerevivals!
Fall Update!
In the spring when we added the raised planter beds and fence panel trellis to the back side of the Merc. I had big big plans for those little gardens, and they did ok. The indeterminate tomatoes worked really well on the trellis! Well, until the watering drip line accidentally got turned off for an extended period of time…and they got powdery mildew…and we had a record setting heat wave. But other than that?! Things went great!!
I needed to replant them for the fall and get some greenery happening again. I got sick of feeling sad pangs every time I walked into my back door 😂. The first thing I did (per the usual) was head to Home Depot for inspiration! I needed a few more bags of potting soil (the Vigoro blue bag is ideal for raised planters!) and of course plants!
While I was there I couldnt scoop up enough gorgeous Vigoro plants. After looking at plants that were ⅞ of the way dead these looked like they came from the garden of Eden!! I got a bunch of neon green sweet potato vines (Ipomoea), an Aptenia (a succulent-like plant with dime size hot pink flowers that look like fireworks) and an Armeria that has grass-like leaves and round pom pom flowers! I also planted some cool weather veggies like lettuce, chard, and Kale. I’ve also been itching for a fig tree after visiting Russell the adobe mason’s house and couldnt resist grabbing one.
And now!? PURE HAPPINESS!! Everything is thriving and it brings me so much joy to see the little pink Aptenia flowers open and close every day!!
I love that Home Depot always has different varieties of plants depending on the season and what will thrive!!
[mv_create title=”DIY Fence Panel Trellis” key=”22″ thumbnail=”https://vintagerevivals.com/wp-content/uploads/2020/05/Modern-Black-Trellis-Planter-DIY-1.jpg” type=”diy”]
This looks SO amazing, my friend! Who knew you could do this so inexpensively? I love it and I’ll be sharing!
Mandi Gubler you’ve done it again! GENIUS! And OH SO gorgeous.
Love it! Totally gonna steal this idea for my commercial architecture clients. One question I have though is what do you plan to plant so that it crawls up and makes use of the entire trellis?
Yes! I’ve been waiting for this since your garage. I love it!