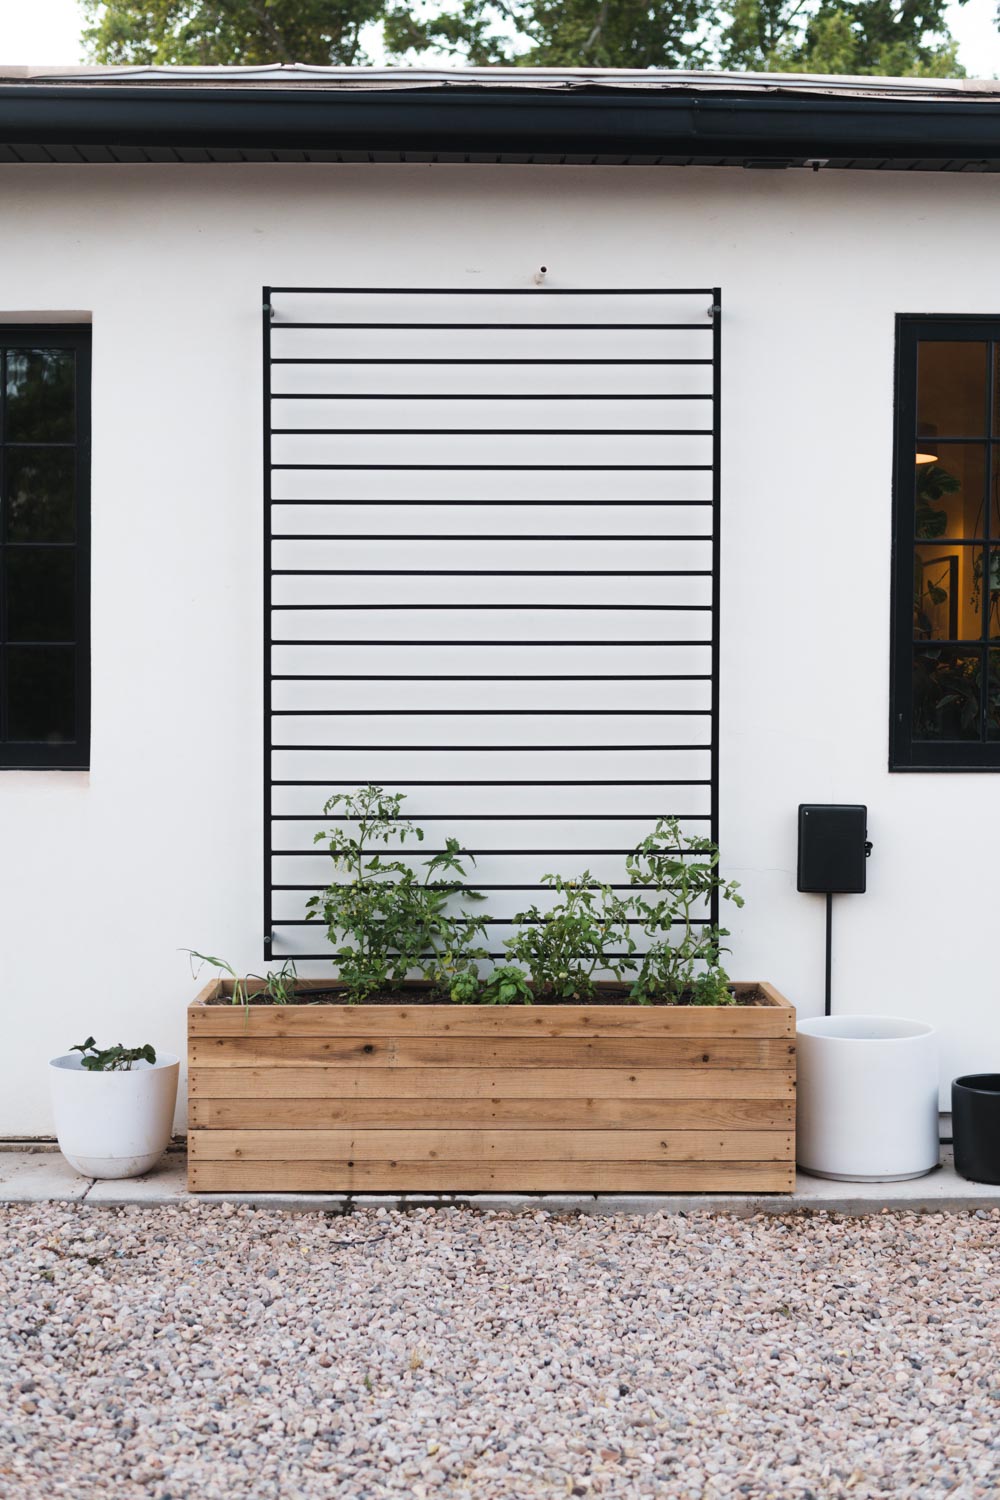
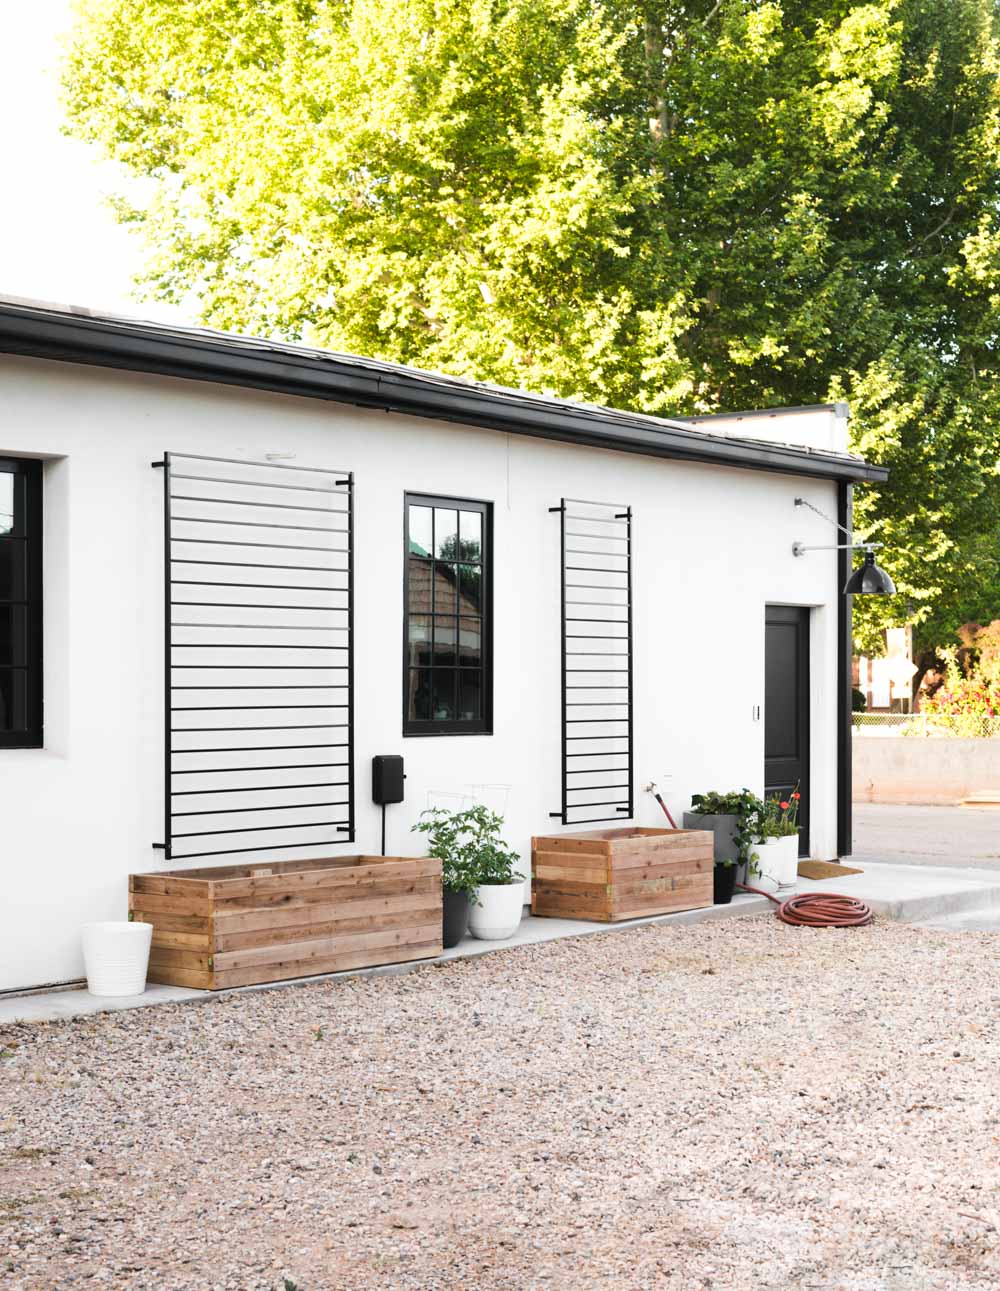
Every single human can use this tutorial, I dont care where you live, or how big of a yard you do (or dont!) have, this 3 step raised planter box can be made in any size. Perfect for a front porch, balcony, or backyard. Building this raised garden box is the perfect weekend project, and if you’re feeling extra stylish, add the accompanying DIY fence panel trellis!
These are the boxes we made for the Granary Patio (we just covered those in cement board!)
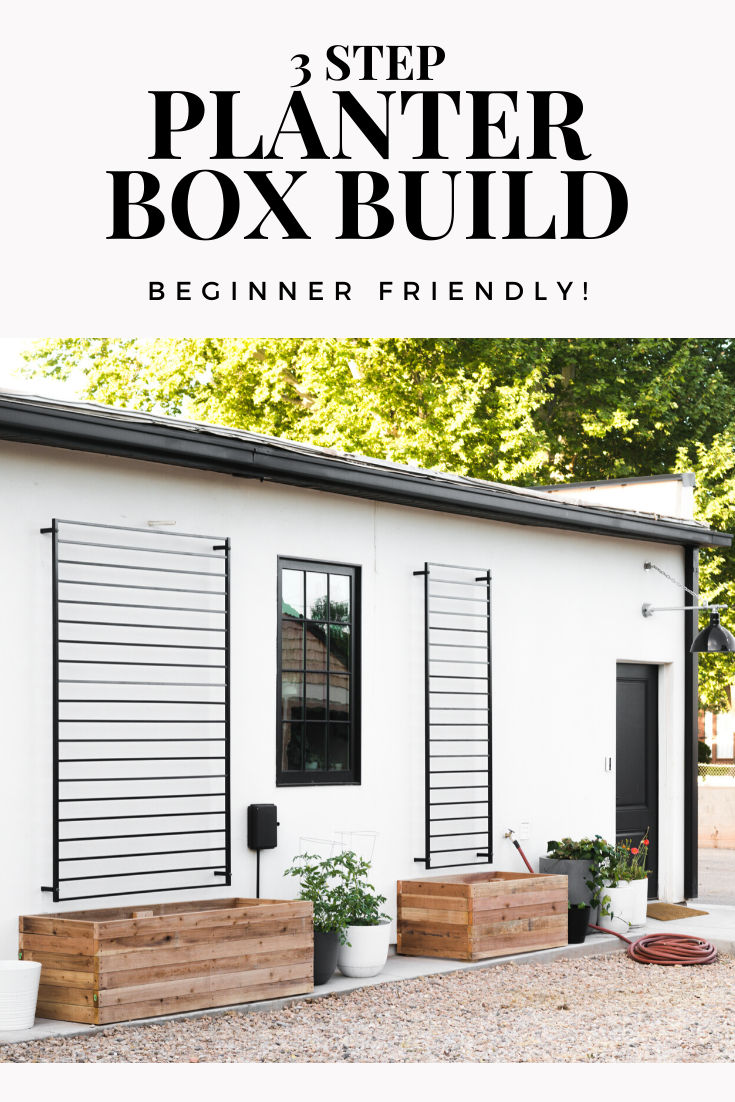
The best part of this project is how easy it is to build, even the most beginner DIYer can handle this, so grab your tools and let’s head to Home Depot!
Supplies:
2×4 Wood
4×4 Wood
2 1/2″ Self Drilling Wood Screws
Tools:
Miter Saw (or any saw you have available!)
Drill
Level
What kind of wood is best for raised garden beds?
There are a million types of wood in this world and they all react differently to outdoor conditions. The best wood to use on planter boxes is water and insect resistant. Cedar and Redwood are the two main types that are recommended for this type of outdoor use. You can also use Teak, but it’s more expensive.
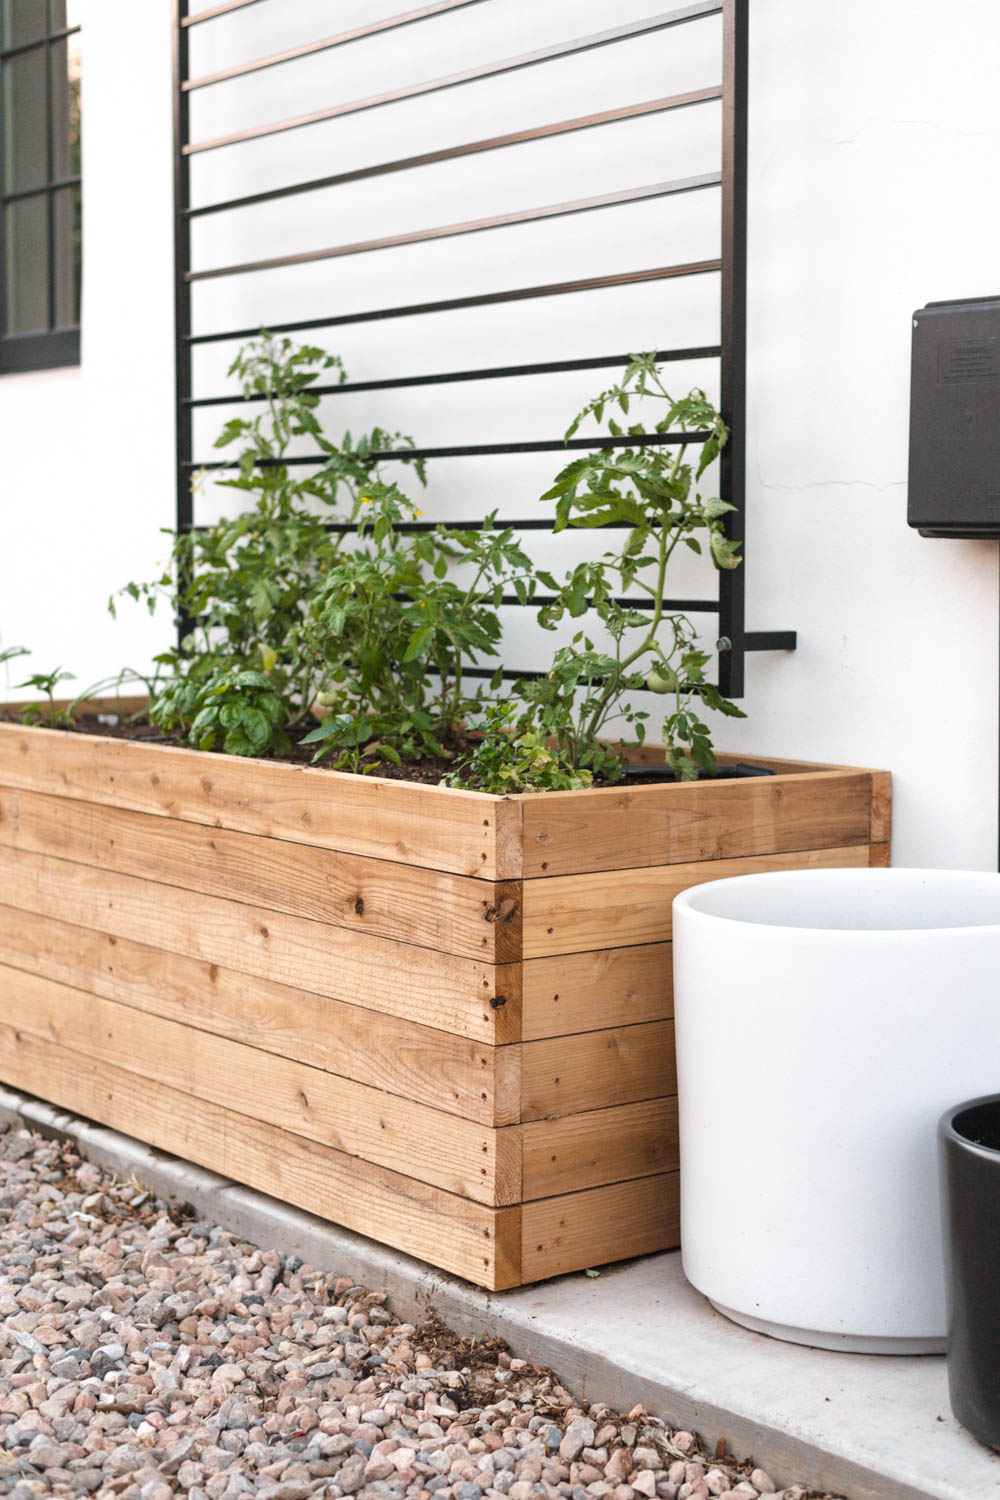
Cedar for President
Cedar is always going to be the star of the show when it comes to outdoor wood application. Though no wood is completely perfect, Cedar’s resistance to water damage, insects, and decay make it an easy choice. Cedar doesn’t have to be treated and over time will weather to a soft gray. If you love the look of fresh cedar, you can absolutely put a exterior clear coat on it and it will stay saturated.
Can you paint cedar?
I would recommend avoiding it if you can. One of the reasons that Cedar is so great is because it doesn’t need to be treated. That being said, the Tannin in cedar (which is the oil that keeps bugs and water from damaging it) will seep and discolor paint.
Cedar is easy to find in thinner sizes (picture cedar fence pickets) and some thicker sizes.
Redwood is also a great option
Redwood is great because it comes in thicker widths and has a larger variety of sizes. It has more variation in color than cedar ranging from light gold to deep purple red. Redwood also contains Tannin and will seep into and stain paint.
*I live in a hot dry area and most lumber yards don’t stock cedar or redwood. This is because freshly cut boards warp quickly in the blazing heat, especially if it’s an outdoor lumber yard. The only place to buy cedar is at a store like Home Depot, where it’s inside, in a temperature controlled environment. Interesting right?
What about Douglas Fir?
If you dont have access to cedar, or are on a tight budget, you can use Douglas Fir. Douglas Fir is the type of wood that run-of-the-mill 2×4’s are made out of. It’s not naturally water/rot resistant like cedar or redwood, but you’ll get a handful of good years out of it! We have a planter that we built 3 years ago out of Douglas Fir and it’s doing great still! Douglas Fir is also a great option if you are planning on painting your planter!
If you decide to go with Cedar, there are a few things to keep in mind!
Ideally you would use 2×4 cedar like ours. But in a pinch, you can use cedar fence posts. Keep in mind that the wood is thinner and more likely to bow, so you’ll probably want to put vertical supports in every 18″ or so.
Treated or Untreated?
There is quite the debate on using treated or untreated wood when it comes to planter beds, especially if you are growing food in them. My take is, if you can find and afford untreated wood that is always a good idea. If not, do the best you can!
How To Build A Raised Planter Box in 3 Steps!
Step 1: Cut Your Boards to Length
The first thing that you need to decided is the size and height of your planter! The planters that we built are different sizes, and honestly you can use any combo of width and height to fit your space.
Our box is 36″ wide, 24″ deep, and 30″ high.
How to measure your boards:
- Determine your height. This measurement is easy, just take the width of your lumber and figure out how many you need to stack. For our planters we stacked them 6 high. Cut your 4×4’s so that they are 2″ shorter than the total height of your planter
- Cut your boards to the exact length of the planter. This will be the long sides of the box. Our box is 36″ so our cut is at 36″. Cut this length for each front and back piece.
- Decide how wide you want your planter to be. This is the short side of the box. Because of the way we are assembling it, we have to do a little math.
Take the total measurement that you want and then subtract the thickness of both the front and back piece. Your next cut is the remaining difference. For example, our total width is 24″. Each of the 2 boards are 1.5″ thick, so that means I take 3″ total off of the width (24-3) and that leaves me with a board that needs to be cut at 21″.
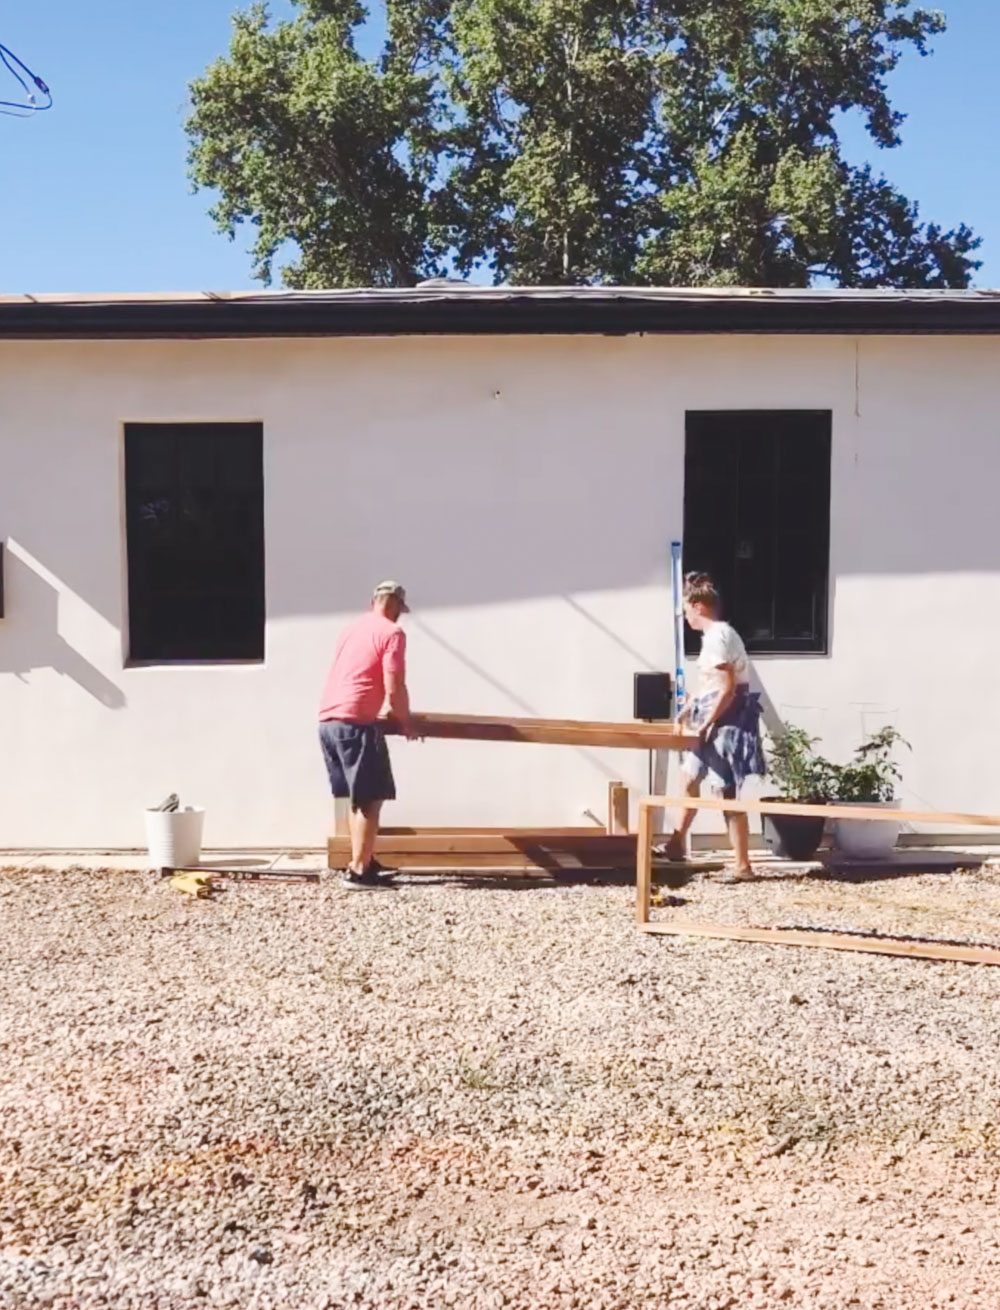
Step 2: Building Your Rows
Start by putting together each of the rows. Make sure that you are assembling them on a flat level surface so that they are straight. We used 2 1/2″ self drilling spax screws for this project. Cedar is a really soft wood, so you dont really need to predrill your holes before, especially if you are using self drilling screws.
Line up the boards and set the screws!
Tip:
Use 2 screws on each corner. This will keep the rectangle from twisting as you move it!
Once you are all done with your rows, it’s time to get this thing assembled!

Step 3: Assembling Your Planter
We’ve built a few of these guys, and let me tell you, there is an easy way to do it and a not easy way. Trust me when I say, this is the easiest way to build your raised planter bed and get perfect results!
One of the biggest mistakes that people make when they are building raised beds is that they dont level them! If you are building your planter box on a surface that can be leveled, you should totally do that! Dig out the grass, tamp the dirt, move the rock, make it nice and flat!
If like us, you are building your planter on a surface that cant be leveled (helloooo concrete!) then you have to level the box. This is why we built all of the row rectangles separately.
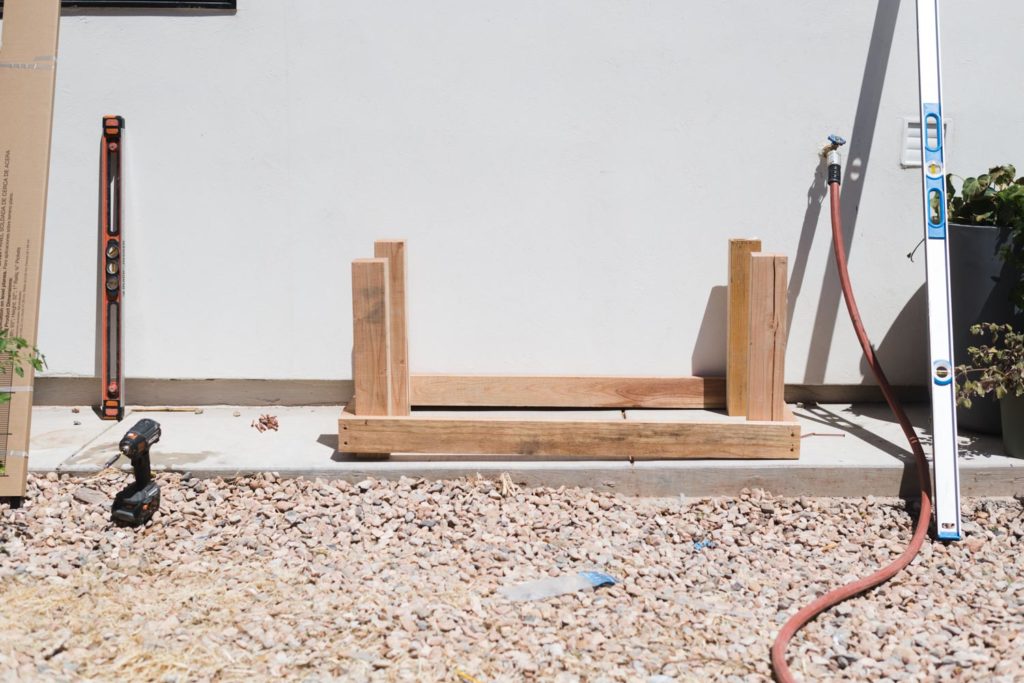
Set up the 4 corner posts. These are the 4×4’s that you cut first! You arent setting or screwing them to anything yet, right now you’re just balancing them.
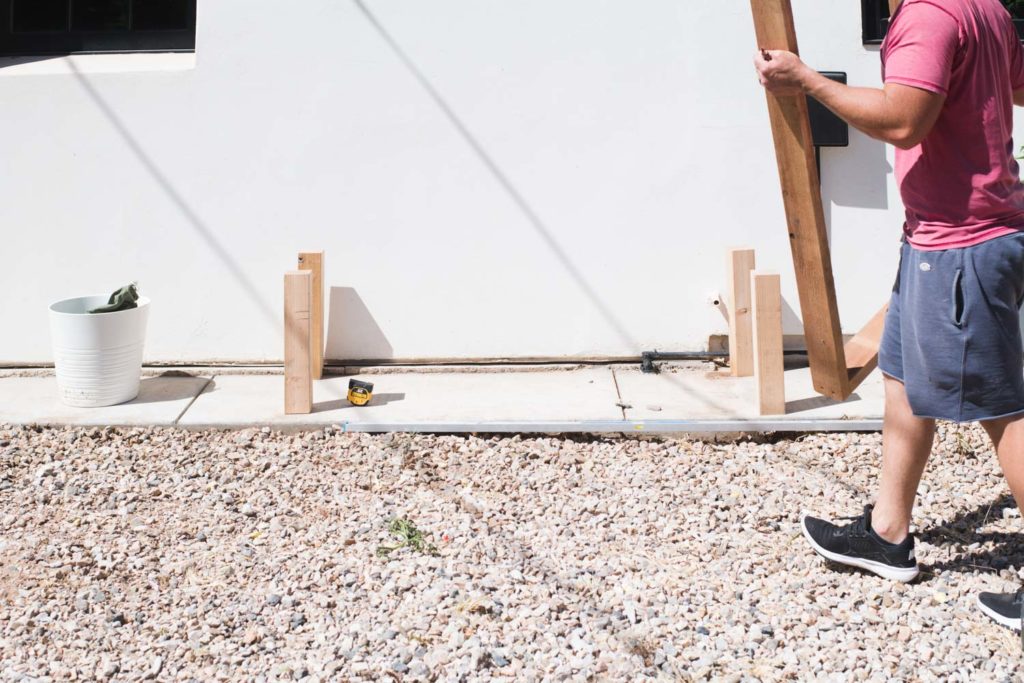
This is giving you the general idea for placement.
Take your first rectangle and fit it around the posts. Move the planter into the exact spot that you want it to live.
Using a level and spacers (we used rocks!) level each side of the rectangle. You’ll probably have to go around it a few times and make adjustments.
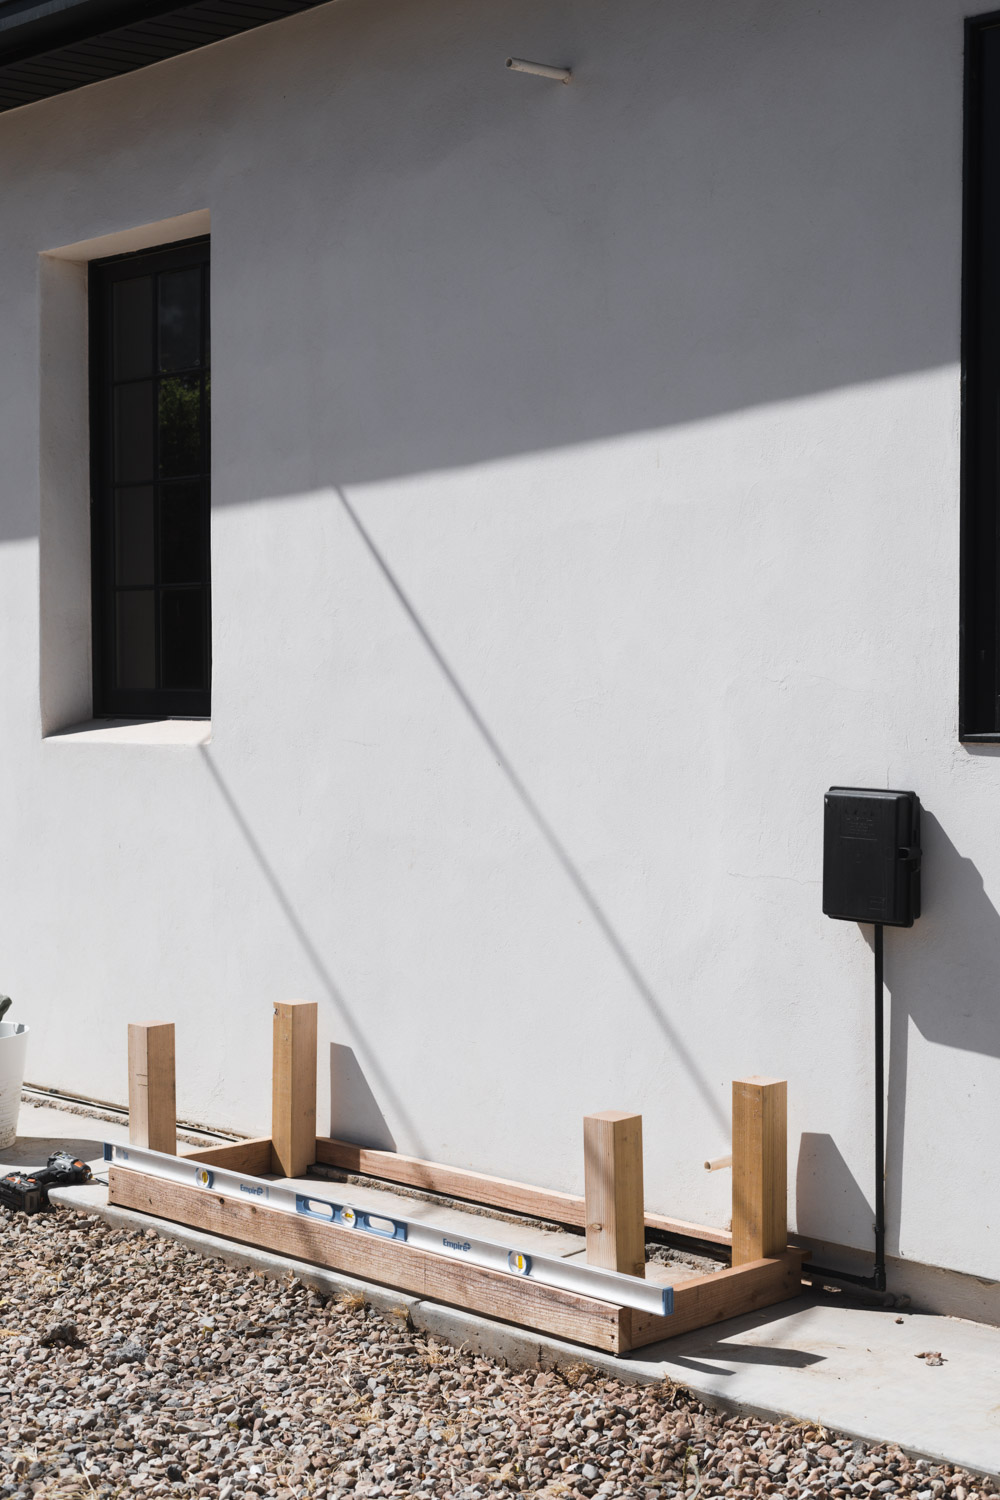
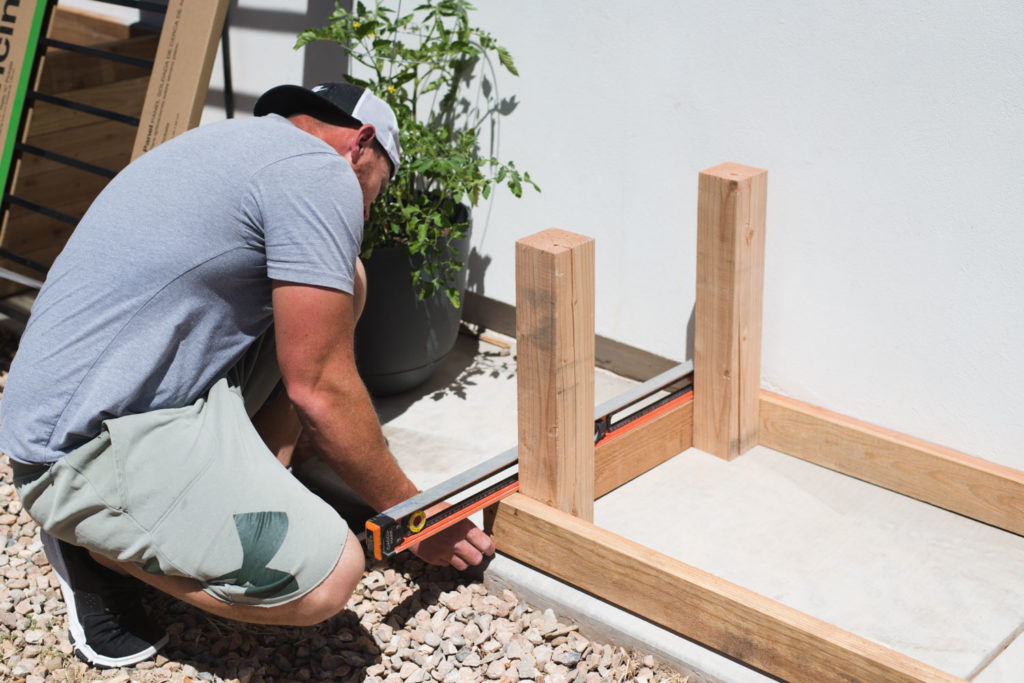
When all 4 sides are level it’s time to attach it to the corner posts.
MAKE SURE that they are against the ground when you screw through the row! If they arent, then your planter box will be wobbly and wont be level!
I promise it’s better to have a gap at the bottom of your planter than one that isnt level!
Our smaller planter was on a much steeper slope than the larger one and has about a 1.5″ gap on the left side. Keep an eye out for that gap when I show you the after pics a little later in the post, you wont even notice it!
Once your bottom row is level and secured, stack the remaining rows on top of it! Dont screw them in yet, just get them all stacked!
Once all of the rows are stacked, starting at the top, screw them into the corner posts!
For our longer planter, we added 2 vertical pieces in the center, and 1 horizontal piece that connected them. This is maybe a little bit of overkill, but I didnt want the planter to bow.
 And that’s it!!
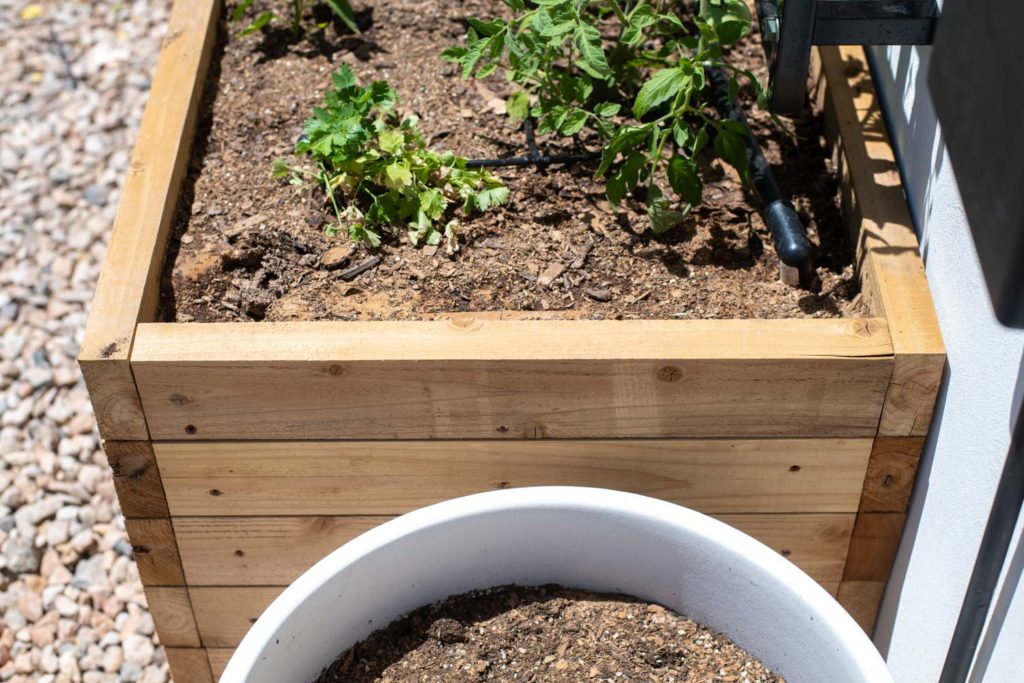
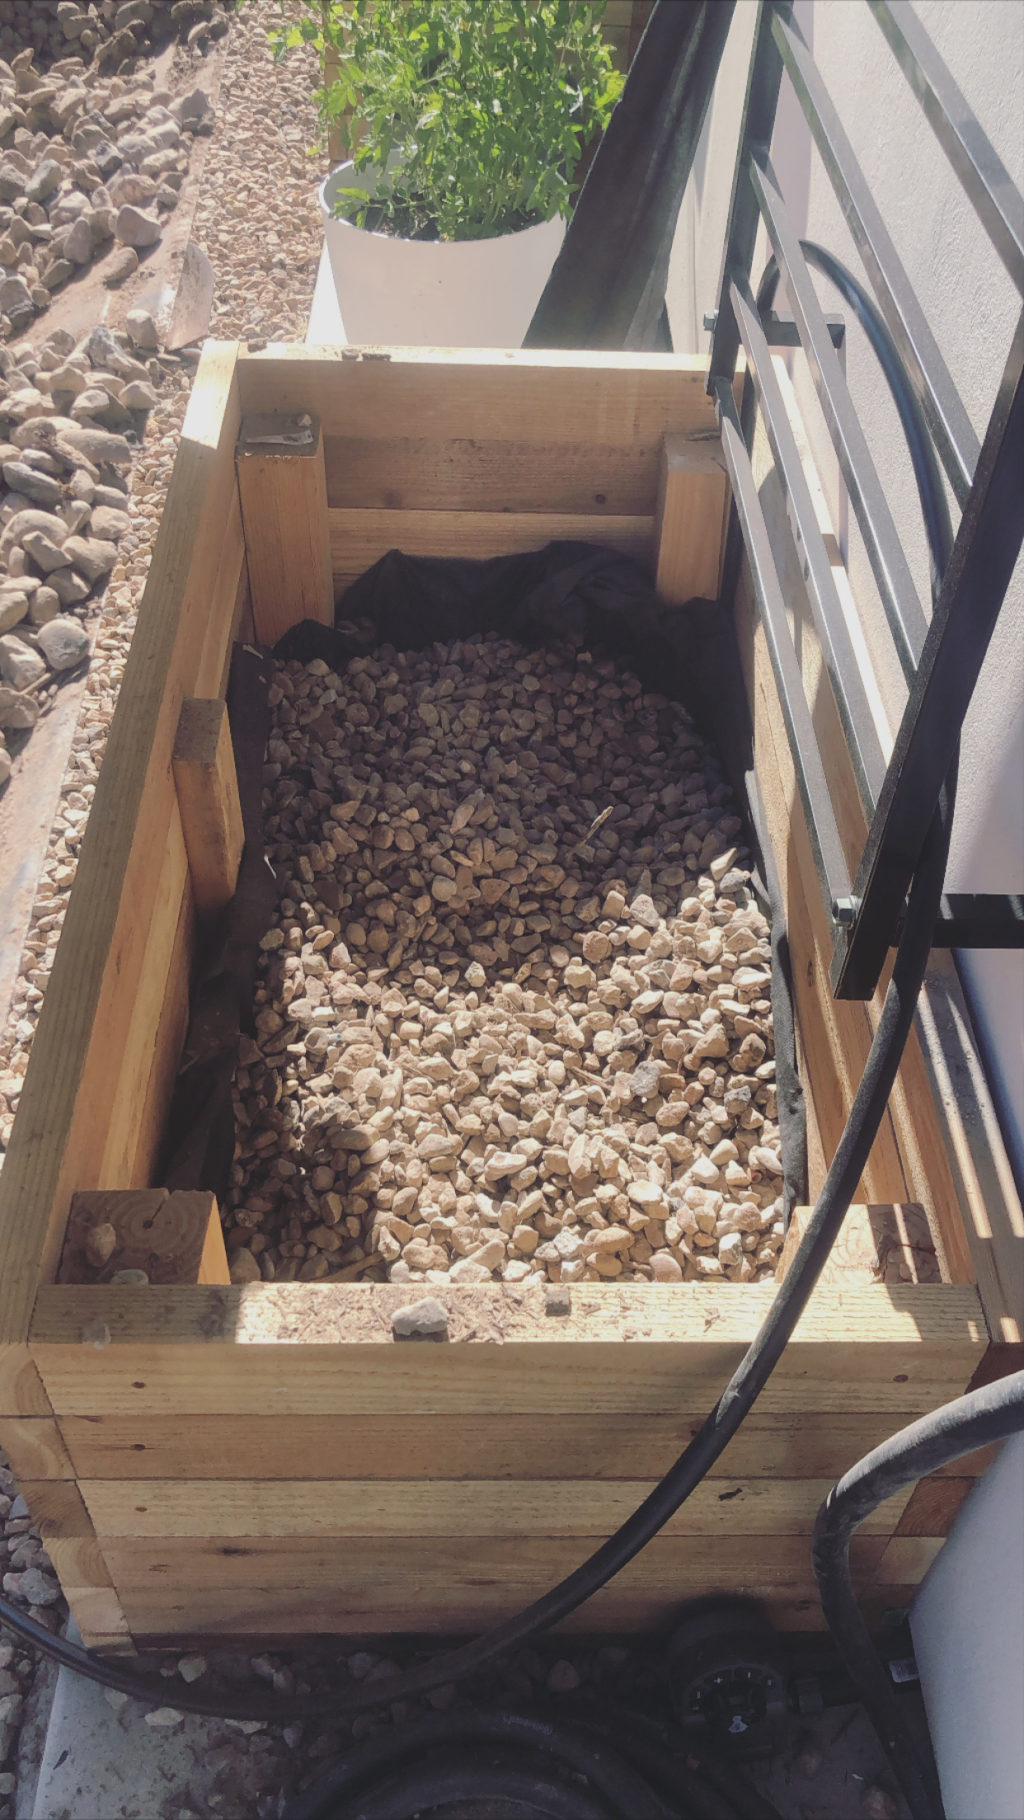
To fill the beds we lined them with Vigoro weed fabric that we got at Home Depot. Contrary to popular belief, lining planter beds isnt necessary, but because we had some gapping at the bottom (to make them level!) I decided that it was a must, otherwise we’d have soil all over the concrete!
Fabric week cloth is perfect for a job like this because it lets the water drain out while retaining all of the soil and organic matter inside!
We lined them and stapled the fabric in place and then put 6″ of rock on top of it. This will also help with drainage, and its a good filler so that you dont have to use so much soil!
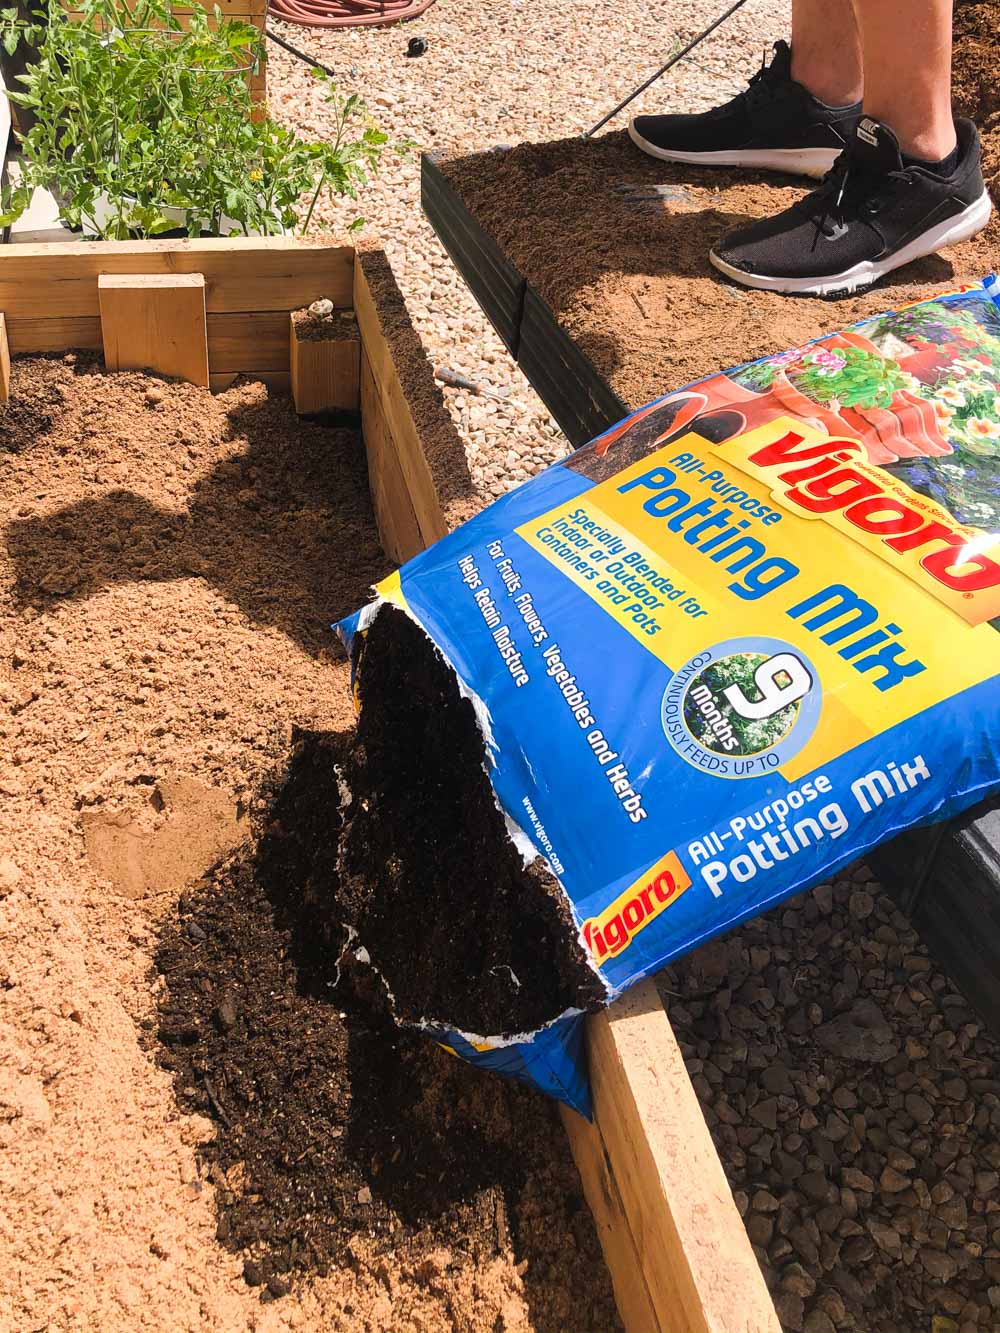
Speaking of soil, the soil we used to fill our beds was a mix of top soil from the nursery, and Vigoro potting soil. If you have any reservations about using this awesome potting mix, just read the reviews!!
I can’t wait to see how my veggies do!!
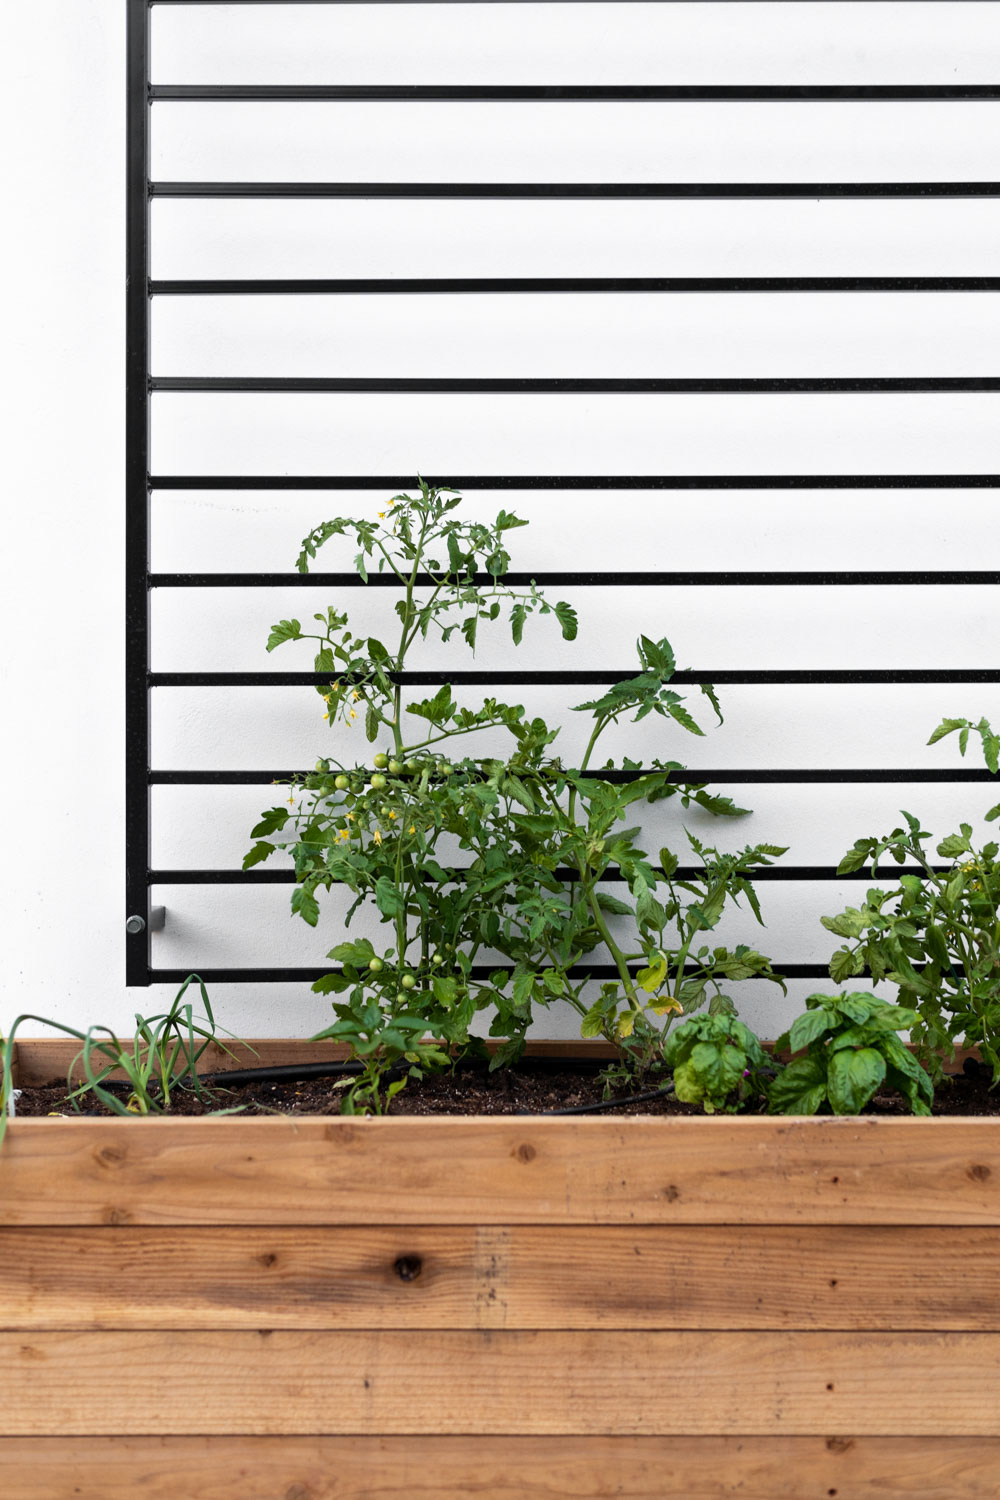
Read part 2 of this build, the fence panel trellis here!!
[mv_create title=”DIY Raised Planter Box (In Just 3 Steps!!)” key=”21″ thumbnail=”https://vintagerevivals.com/wp-content/uploads/2020/05/1.png” type=”diy”]
Where did the black trellis behind the planter come from? I really would like to find those! Looks beautiful, love your work.
Looks amazing. Do you have a link to those wall mounted trellises?
These are beautiful, what is above them? Is that black metal fencing?
Every single human can use this tutorial, I dont care where you live, or how big of a yard you do (or dont!) have, this 3 step raised planter box can be made in any size. Perfect for a front porch, balcony, or backyard.
I love your posts, but as someone who lives in a small apartment with no balcony, no yard, no porch, and an interior entrance… no. 😉
where can i find the info about the trellis/ fence panel situation?!
Yes, please, information regarding the trellis!
Love!
Also interested in the trellis.
Great instructions for the boxes! Thanks for sharing! Like others asking here, would also love to know more about your black metal trellis’ above. Their awesome! Custom made or are they available to buy?
Thanks so much!
Julie W.
Is that black fencing for the trellis?
Beautiful beds! Where did you find the black trellis above?
These look so good! Thanks for addressing the weed cloth, because I was wondering if you were just going to put the soil right on the concrete. I may have to make one of these for my patio! Thanks for the tutorial. You do make them seem pretty straightforward, even for my amateur construction skills! Love the trellis, too!!
Oh, my Lord you did this such a hard way!
I think they’re absolutely beautiful, but what a lot of unnecessary work.
As someone who has built three, 16′ x 50″w x 27″ tall, one 33′ x 50″ x 28″ tall, and a couple 10′ x 5 and 8′ wide, 20″ tall, raised beds? I’d still be working on them 2 years later.
That said, the way you know is the shortest, so more power to you. Your end result is lovely.