I’m back with another fun DIY or Buy project!! DIY or Buy is exactly how it sounds! I am sharing a step by step tutorial for how to DIY, and for those that would rather buy, we have them for sale in our shop! Cue Miley, this is literally the best of both worlds!
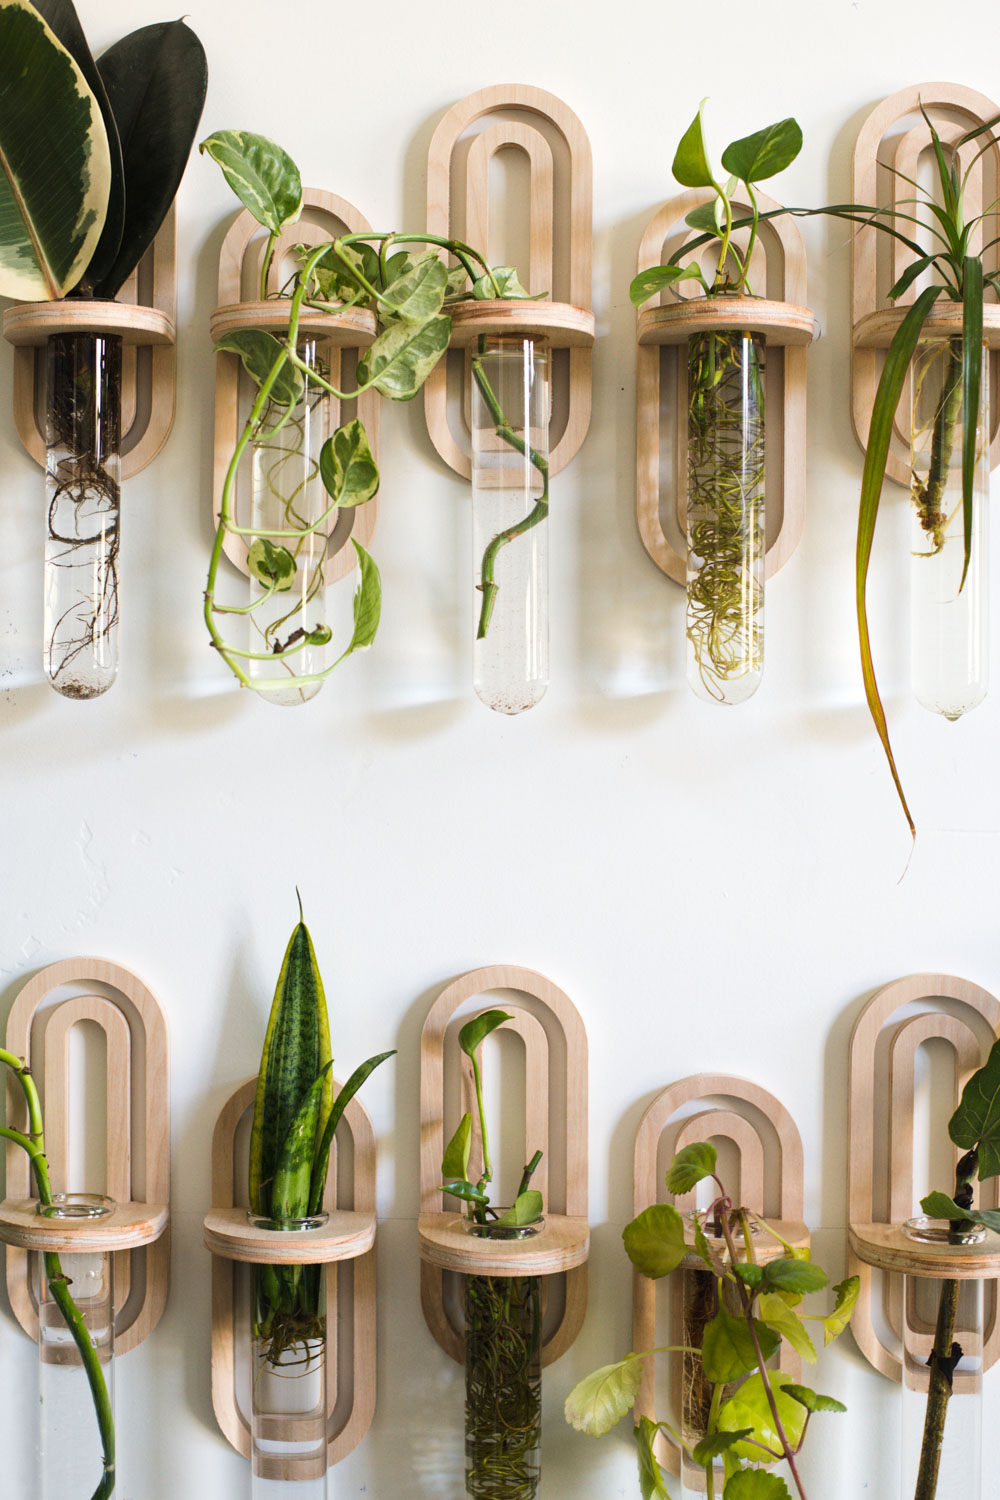
The obsession with plant propagating is hitting a fever pitch around here and over on Happy Happy Houseplant. It is such a fun (and free!) way to see your plants in a whole new way. Our last DIY or Buy was such a hit that we decided to design another one!
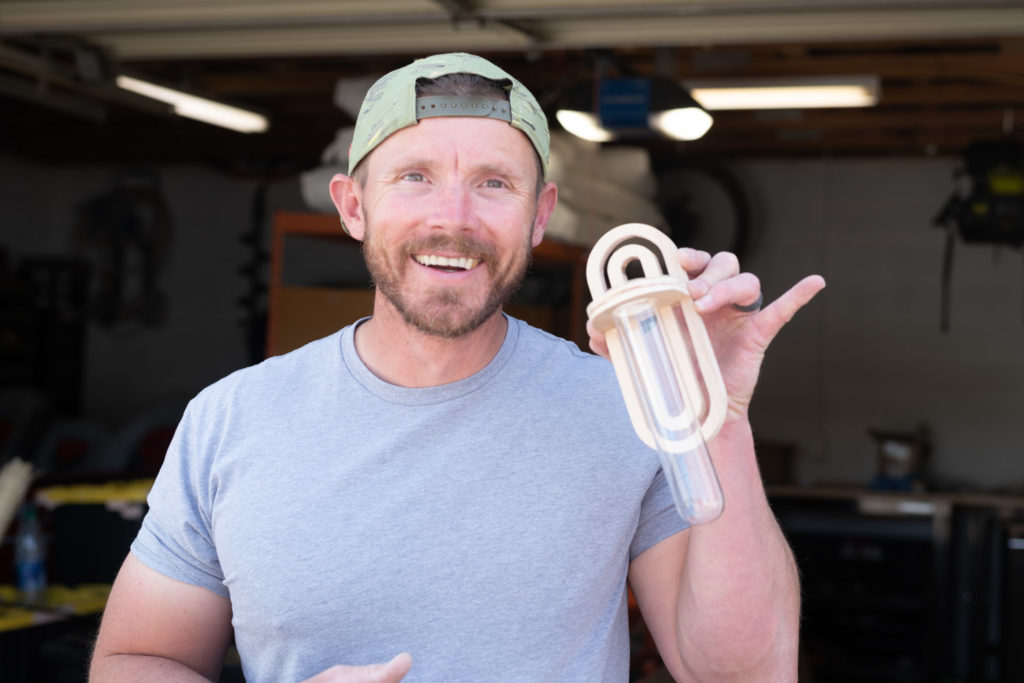
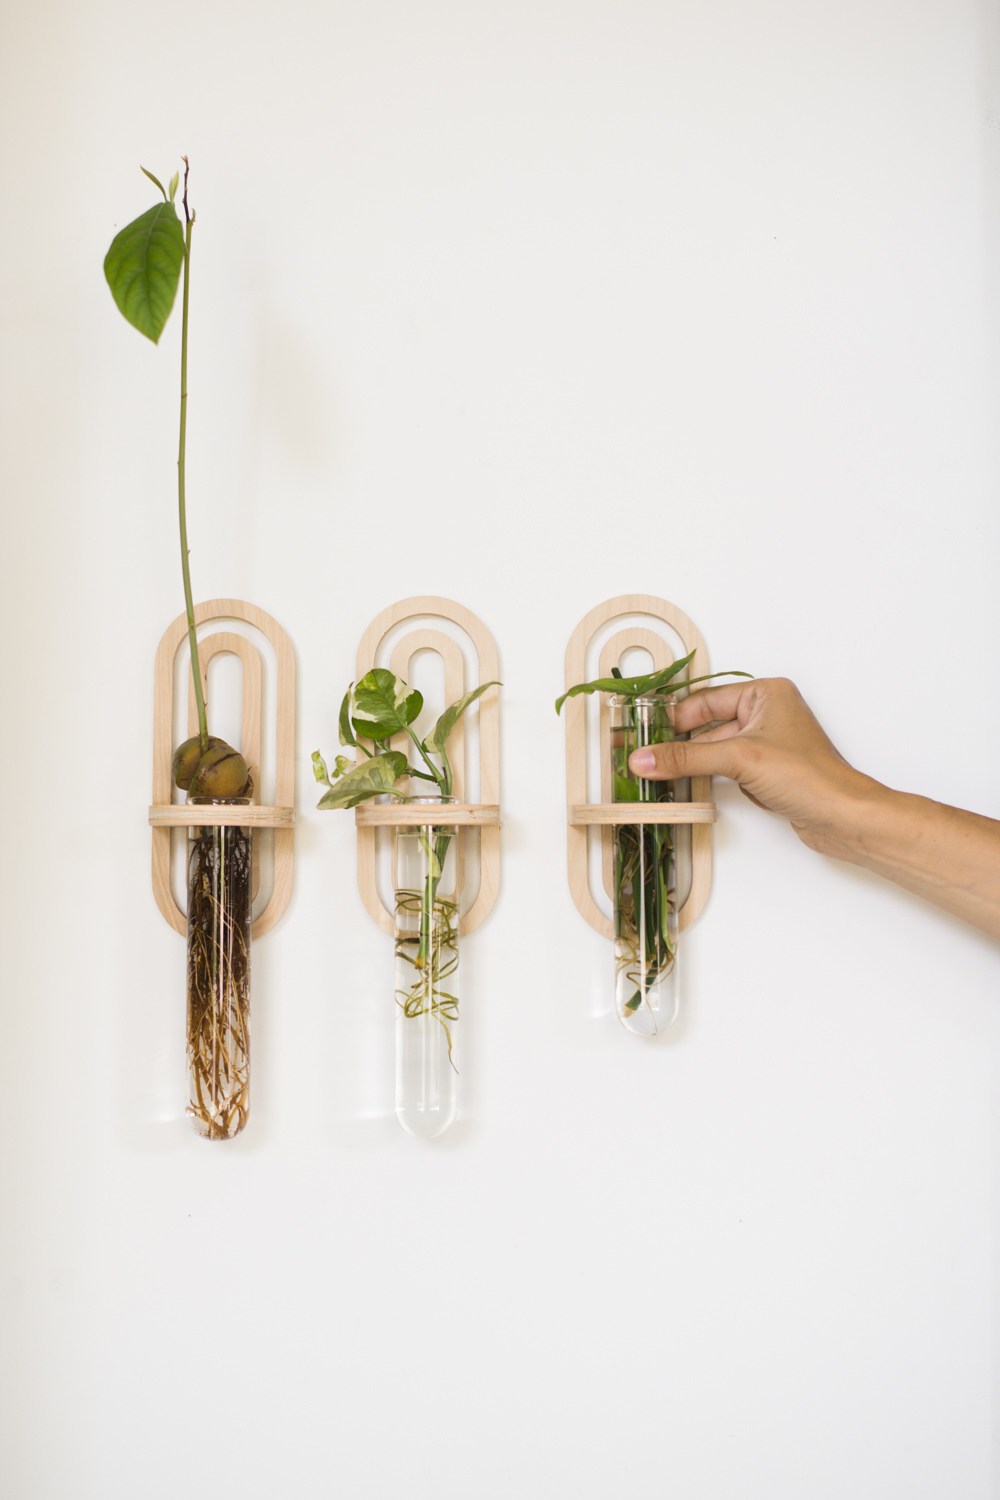
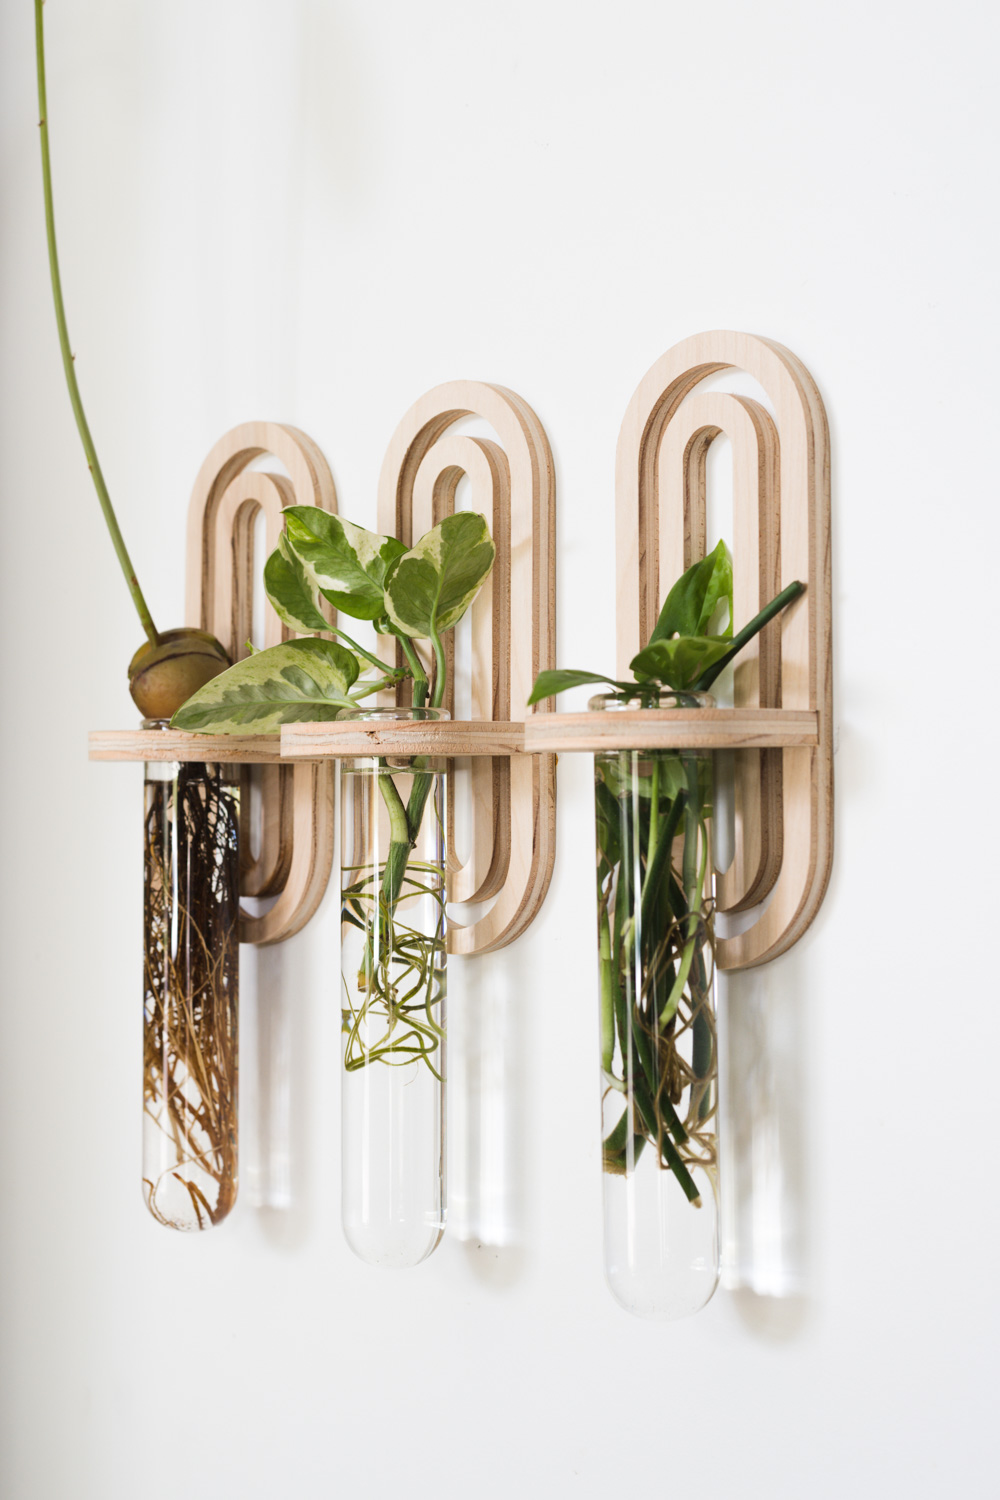
Friends meet the Modern Arch Propagation Planter
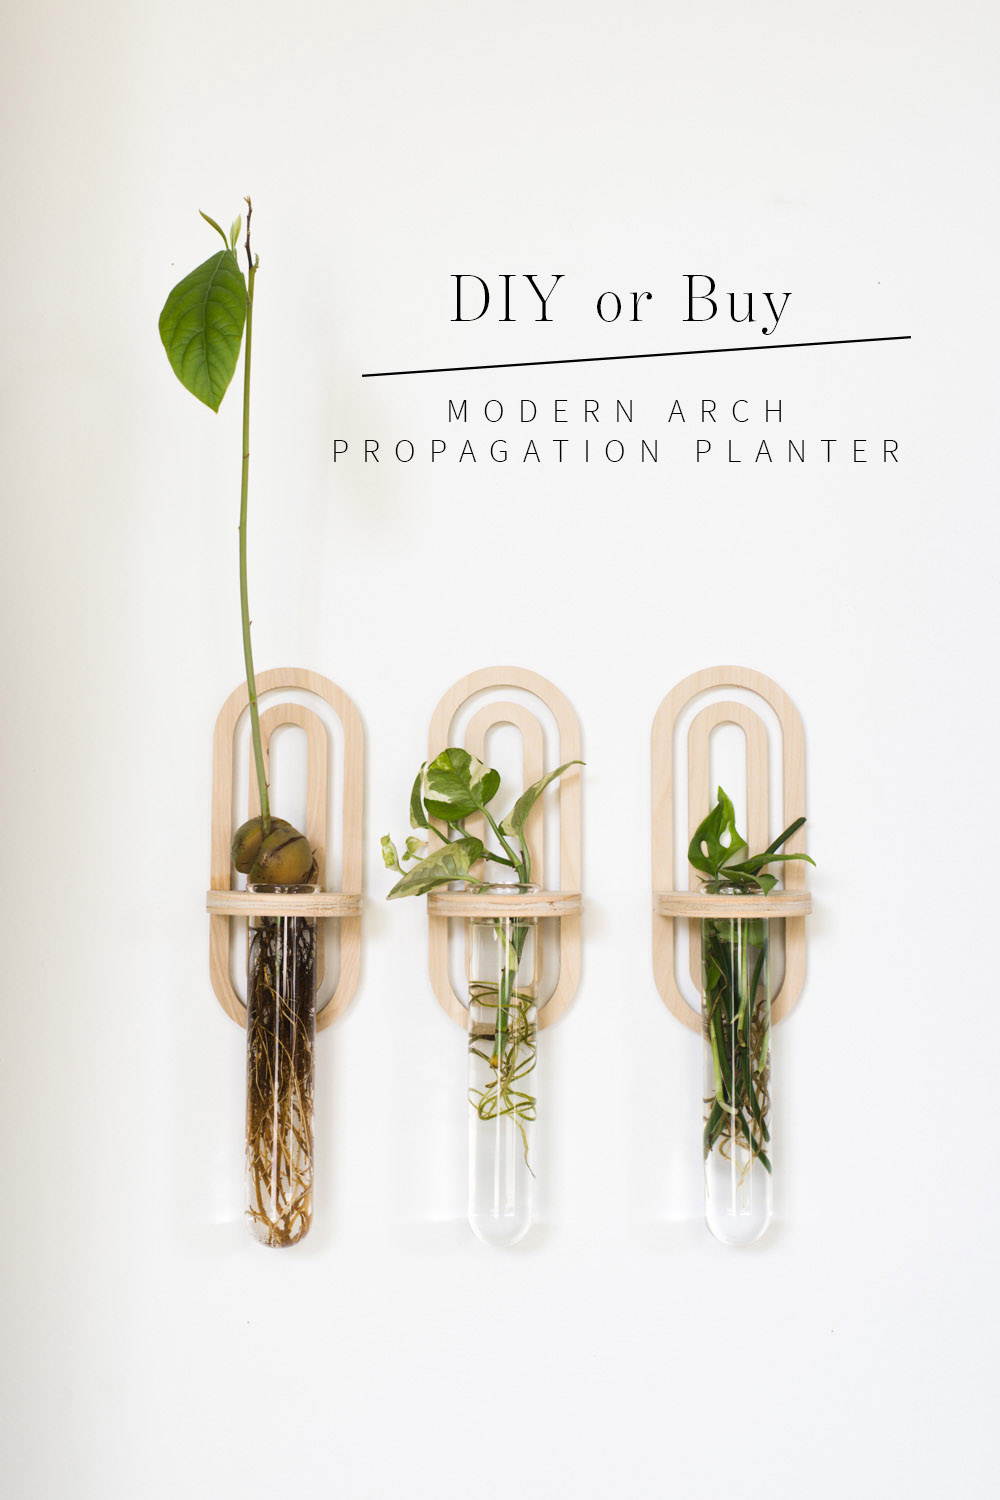
This thing has been 6 months in the making, and after a lot of trial and error, we are SO EXCITED to be launching it today!! It’s a little like giving birth when you put so much time and energy into developing a product!
If you prefer to purchase some propagation planters, you can do so here!
If you are here for the DIY tutorial keep reading! THIS TUTORIAL IS FOR PERSONAL USE ONLY
What is Propagating?
Propagating is the process of taking a cutting from a plant, putting it in water or soil and over time new roots grow, thus creating a new plant! Picture taking a finger, cutting it off, placing it in a cup of water and growing a new human. I was getting some high society status points by using the word thus, but then totally killed it by talking about human fingers. Plants are cool, I am not.
A lot of propagation starts out by rooting the cutting in water. When the roots have grown a couple of inches, then you transfer it to soil. So having a clear container to see the roots can be super important. There are all different types of propagation depending on the type of plant, if you want to know more about your favorite plants and how to propagate them you can check that out here!
Modern Arch Propagation Planter Tutorial
You’ll need:
Supplies:
1/2″ Plywood
Template
Test Tube (the hole in the pattern is for a 1 1/2″ test tube but can be easily adjusted to fit any size!)
Screws
Tools:
Jigsaw
Table Saw or Router
Drill
Level
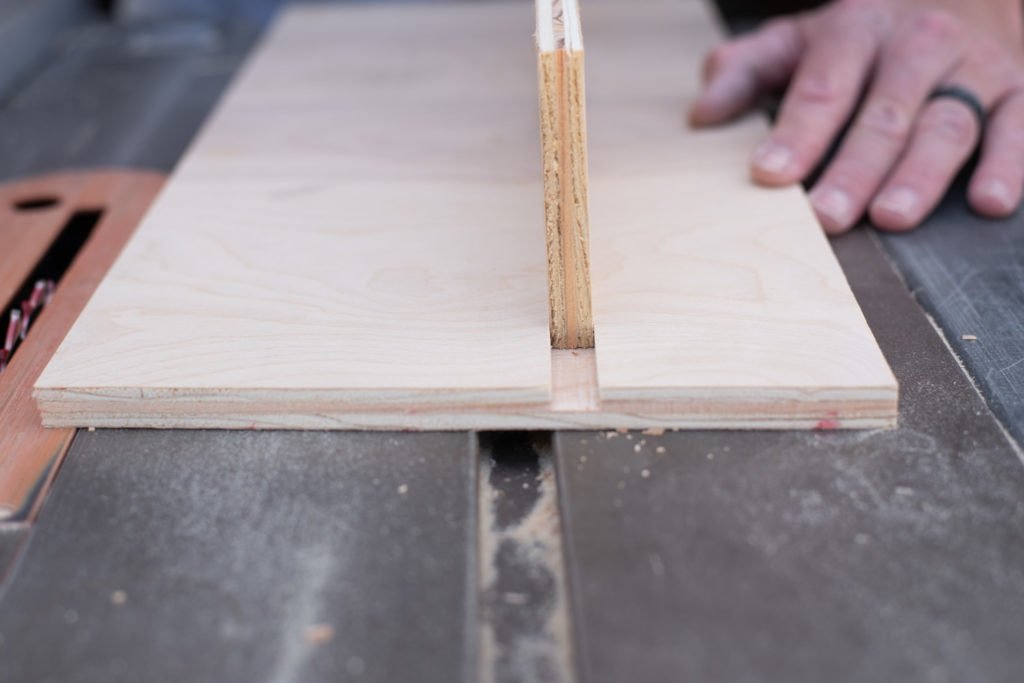
Step 1: Cut Your Channel
The first step for this project is to cut the channel that holds the “shelf” in place. This is really easy to do with a table saw, but can also be done with a router.
Measure the exact thickness of your plywood, and by exact I mean exact. The shelf is held in place by fitting tightly in this channel, so it needs to be the same thickness as the wood.
Plywood can vary slightly, that’s why you’ll want to measure what you’ve got.
Set your blade height so that it cuts through just over 1/2 of the plywood depth.
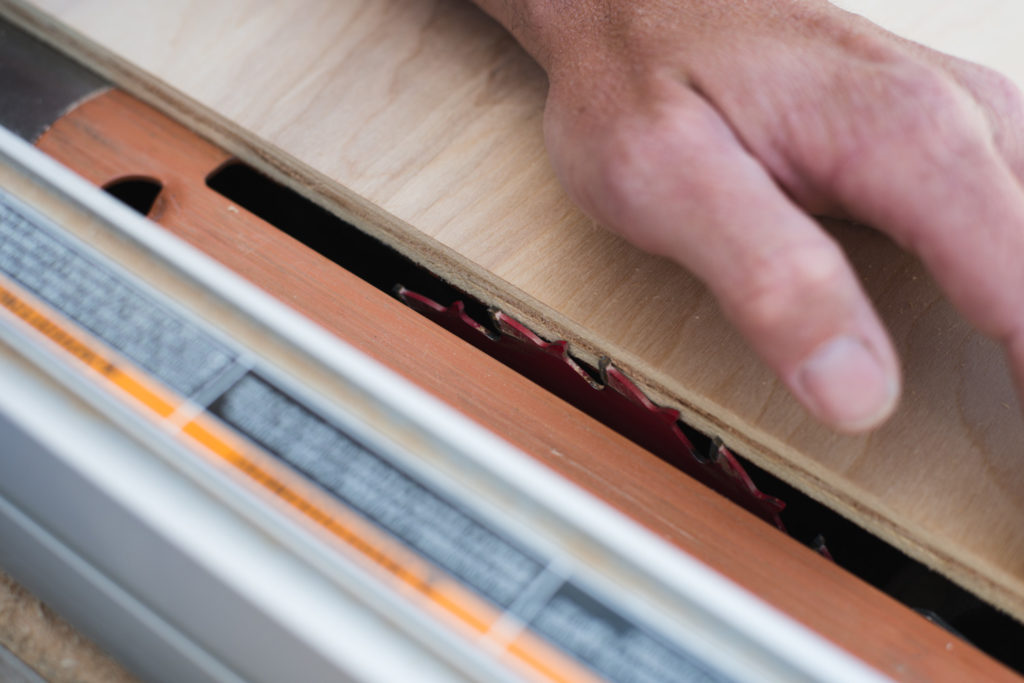
With the blade height set, start running your board through (make sure to set your fence far enough back that you have enough space on both sides of your channel for the design!)
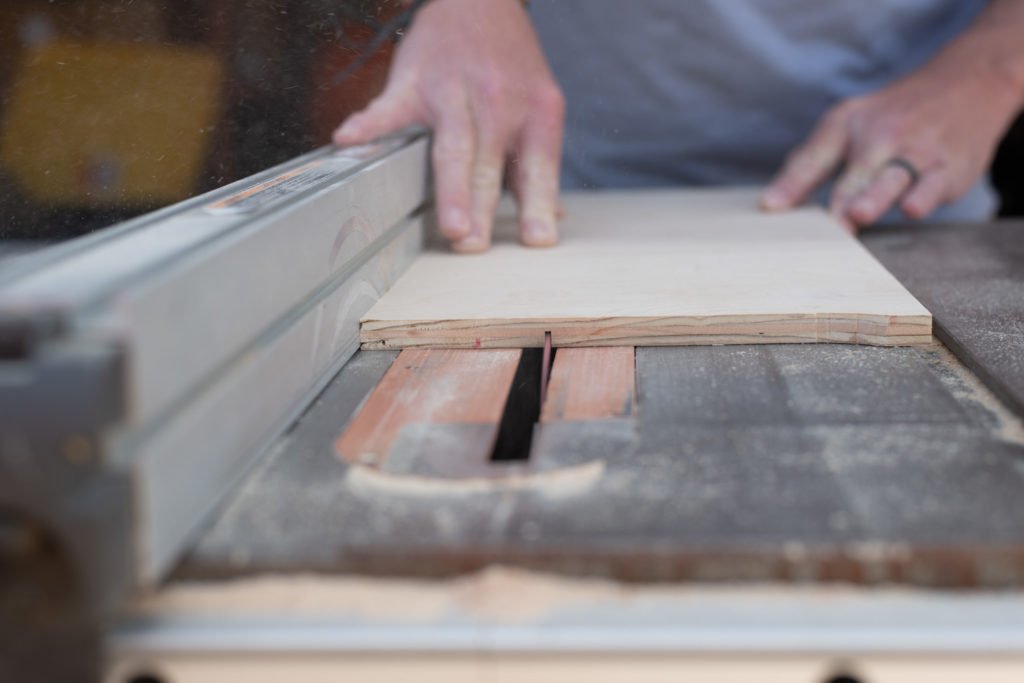
After each pass, move the fence a little further away and run it through again. Repeat this until you have the correct channel width cut.
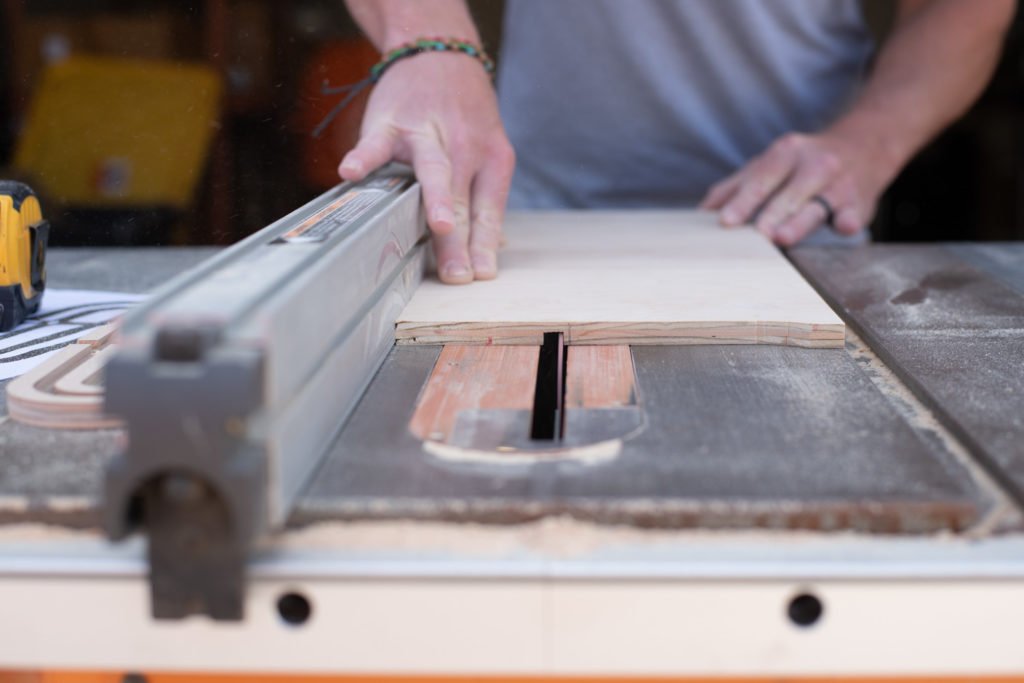
Check to make sure that the wood fits verrrrry snuggly in the channel.
Step 2: Trace The Pattern
First, you’ll need to print off the template. It’s sized for standard letter paper and doesnt need to be adjusted. Download the file here!
Cut it out with a razor blade.
Line the pattern up so that the solid horizontal line is laying over the channel that you cut and trace it.
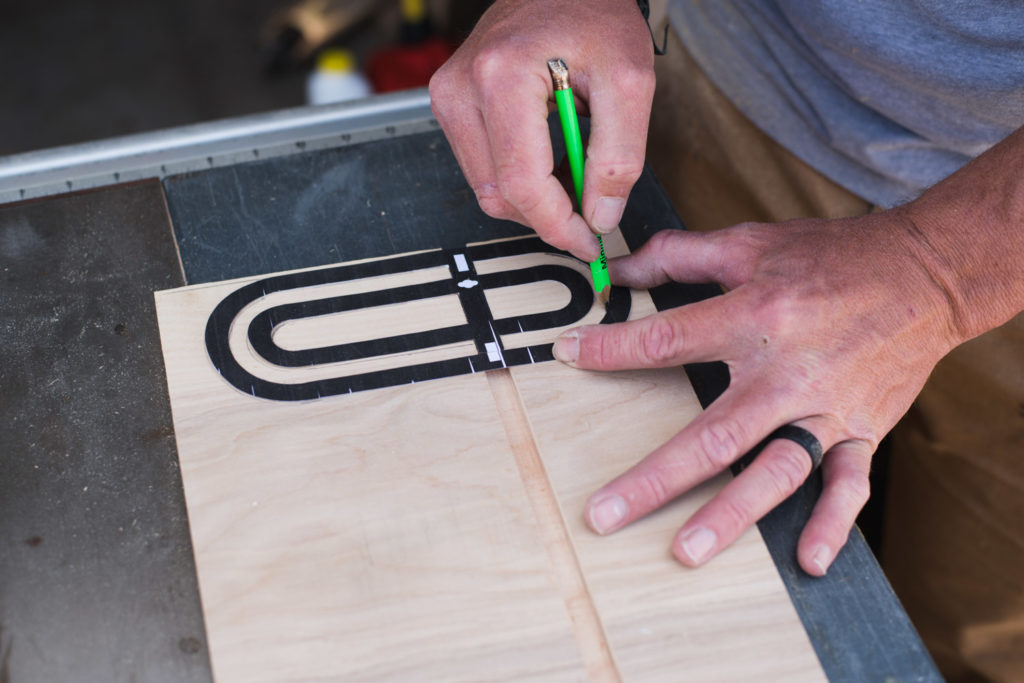
Clearly mark the spaces that are going to be removed, it’s easy to get confused when you are cutting!
Step 3: Cut the Pattern Out
Ready to get jiggy wit it? Pull our your jig saw and lets make this happen!
Start by drilling holes in the sections that are going to be removed. This gives your saw blade a starting point!
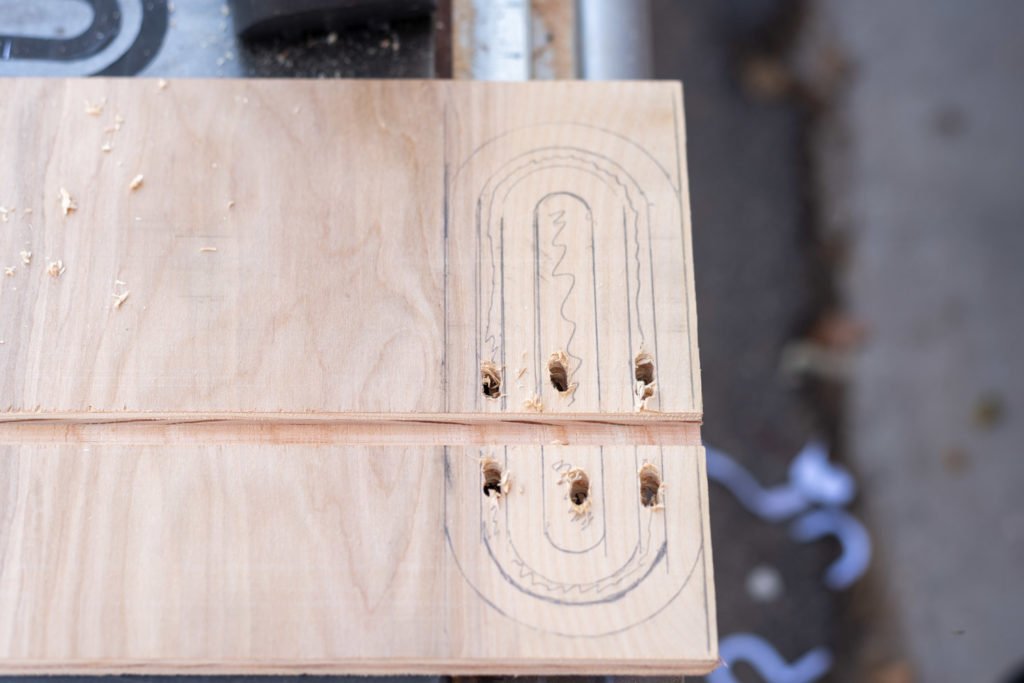
Starting at the center of your pattern (this is important!) Cut along the lines. DO NOT CUT THROUGH YOUR CHANNEL!
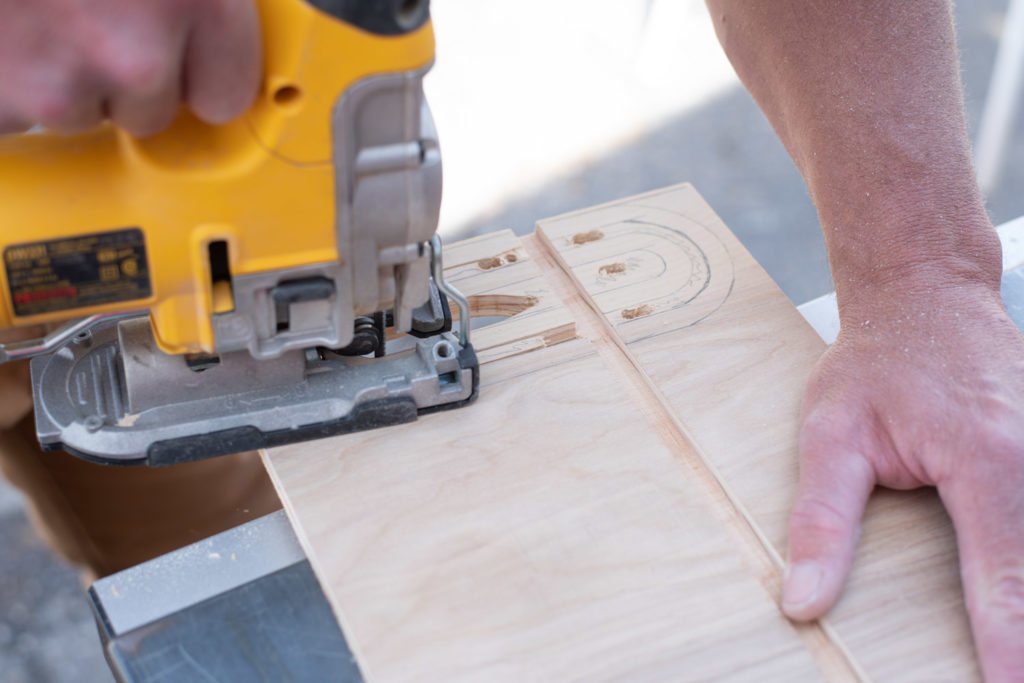
When all of the inner sections are removed, cut along the outer marks.
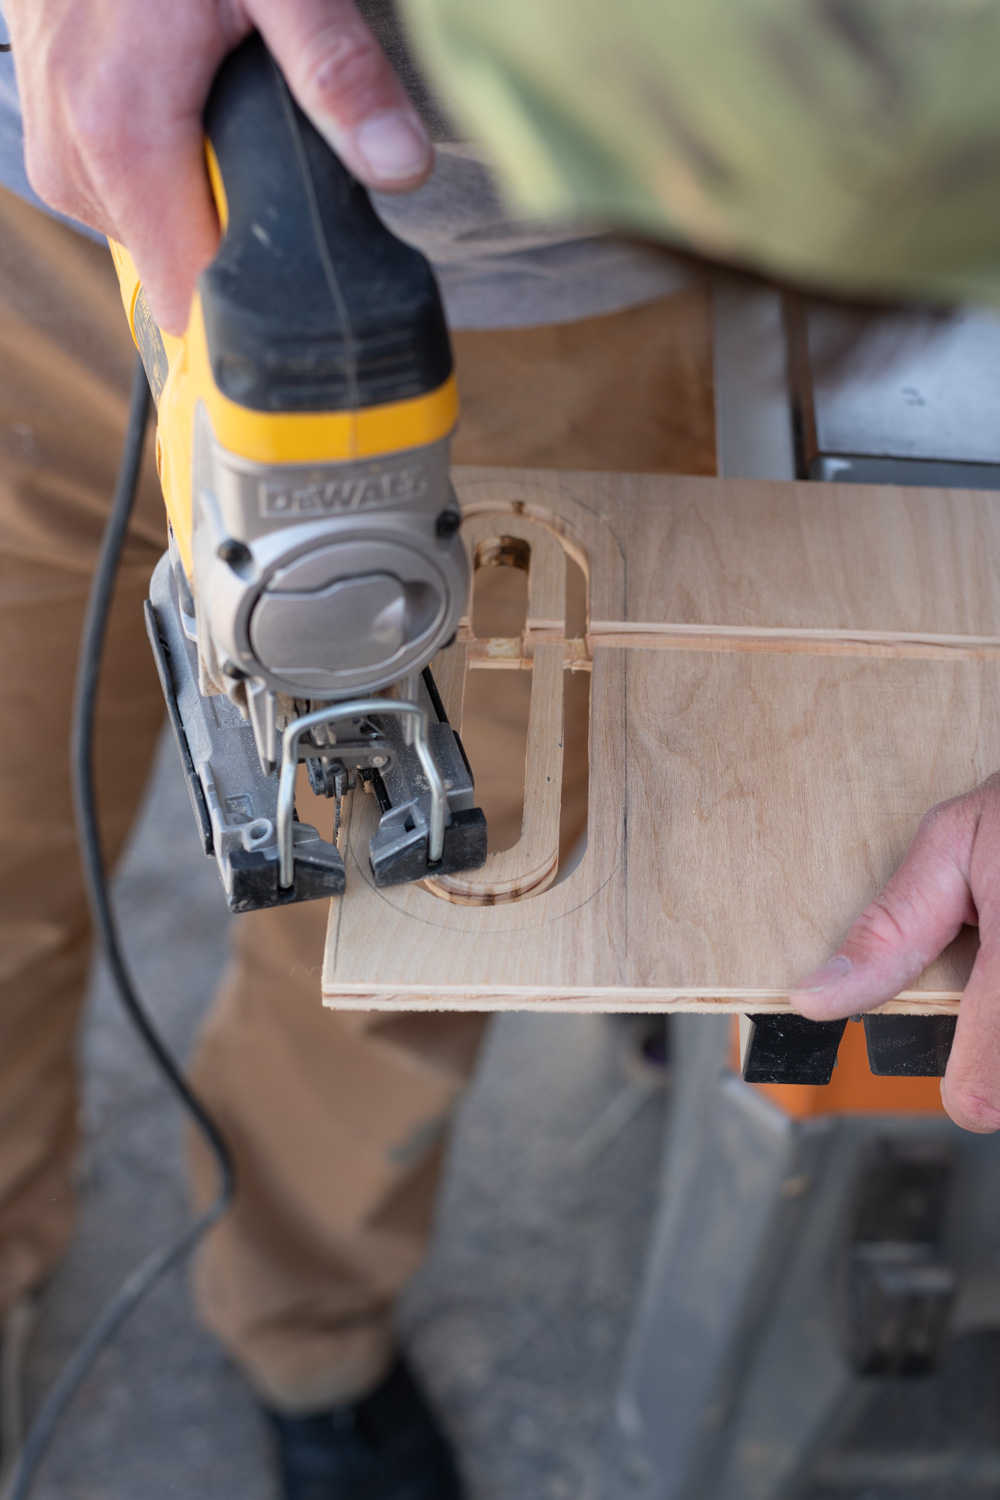
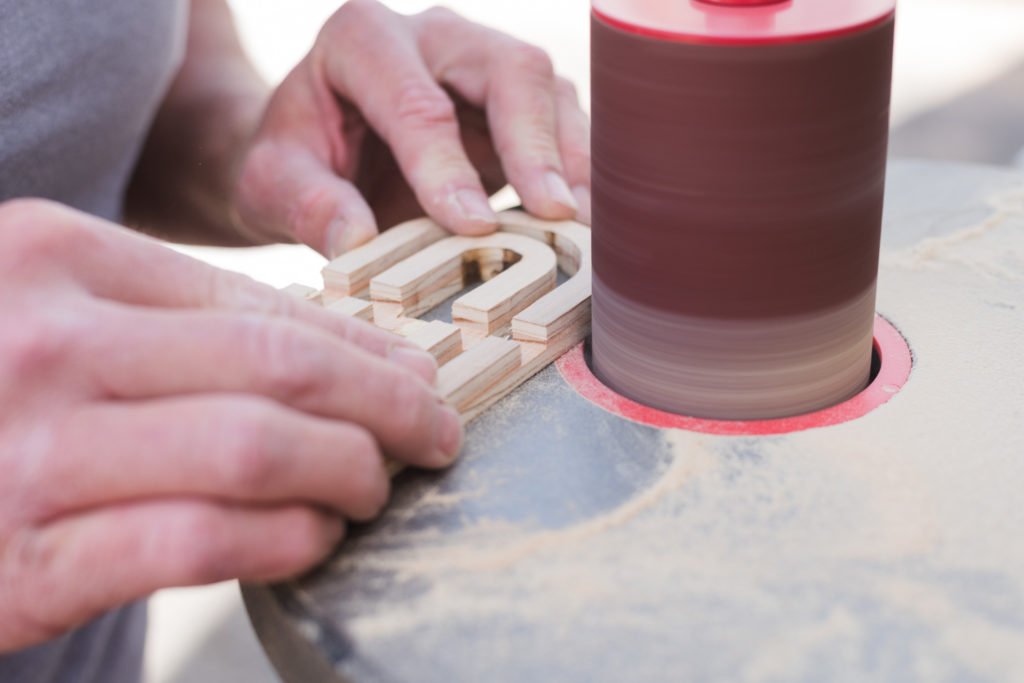
You’ll probably need to sand the edges to smooth out any unevenness. If the spaces inside the arch need to be smoothed, you can use a nail file or a loose piece of sandpaper.
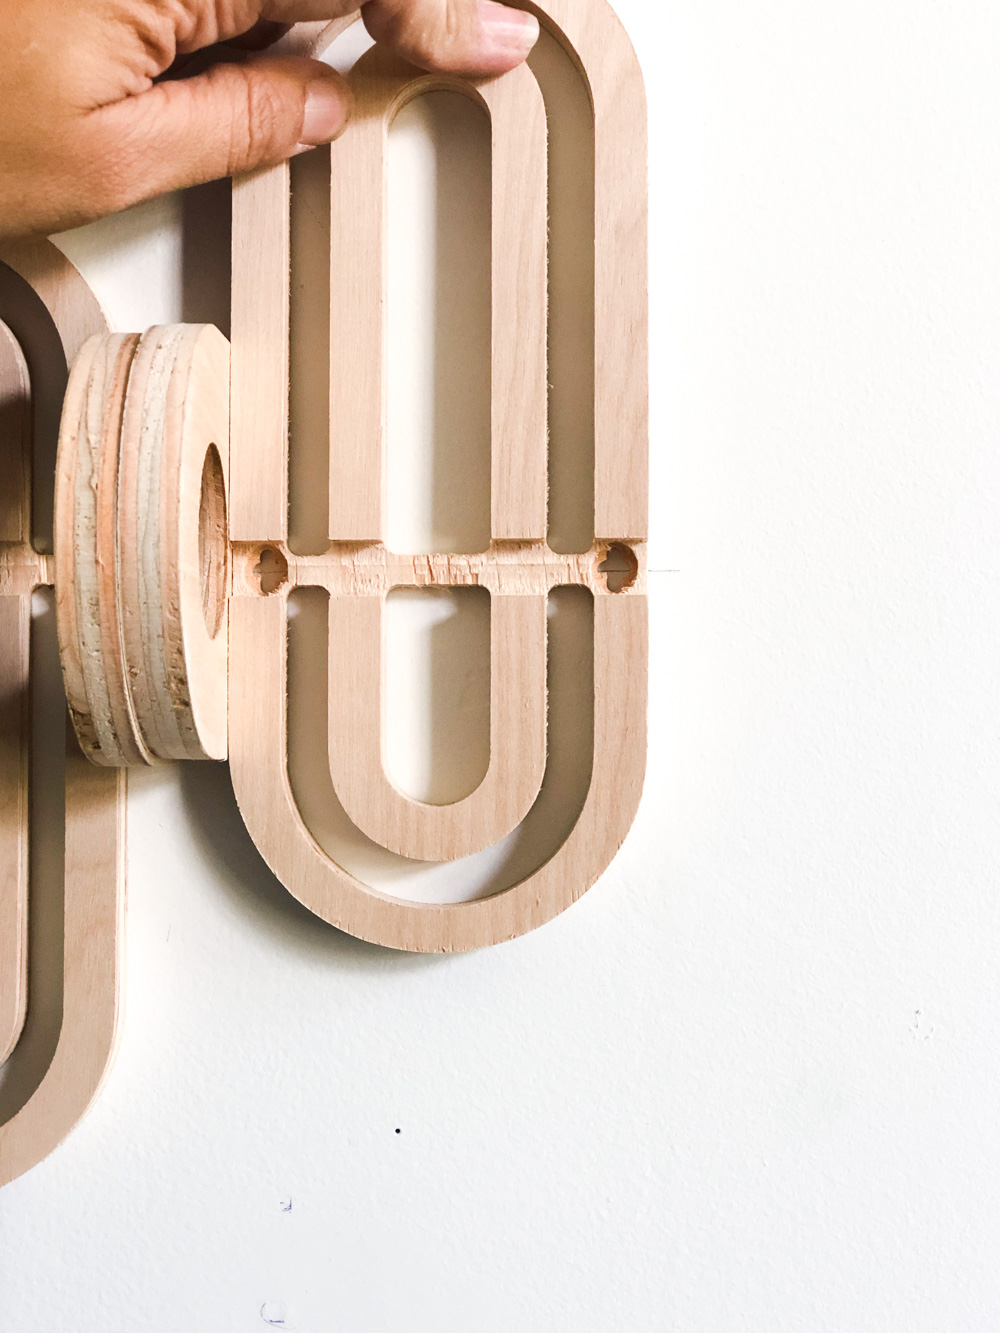
Step 4: Drill Screw Holes
Believe me when I say that we tried every.single.way.imaginable to hang these. After lots of trial and error we decided that the best and easiest way was to assemble them on the wall.
Drill 2 holes, on either side of your channel. Use a small 1/4″ bit to drill all the way through, and a larger 5/8″ bit to create a groove that the screw head will sit tucked into. This larger divot is super important because it makes it so that your shelf sits flush against the back of the channel.
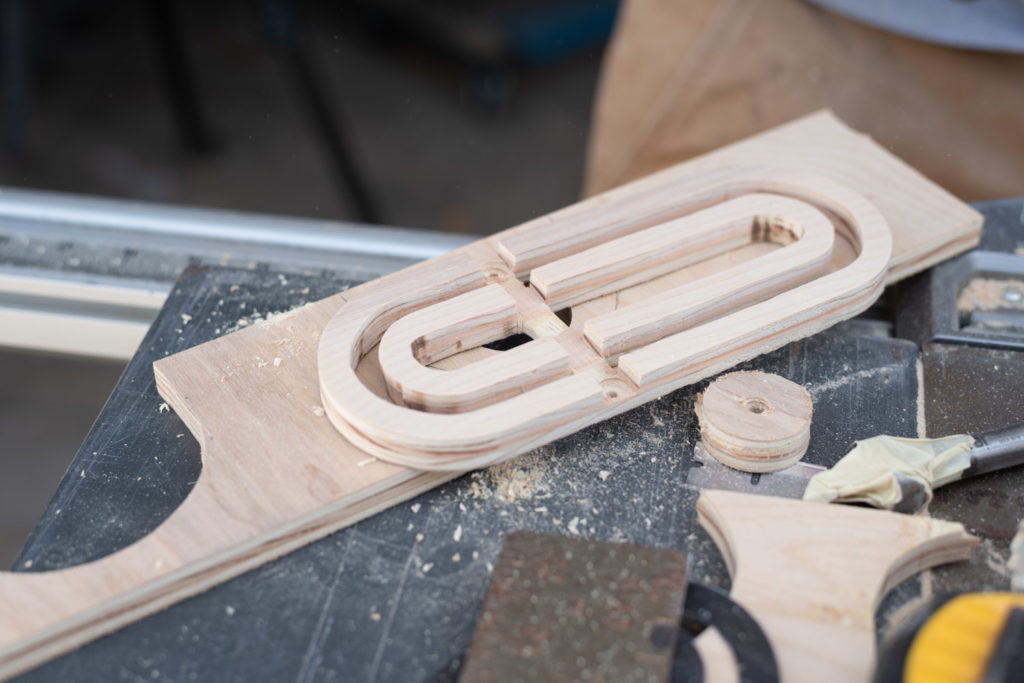
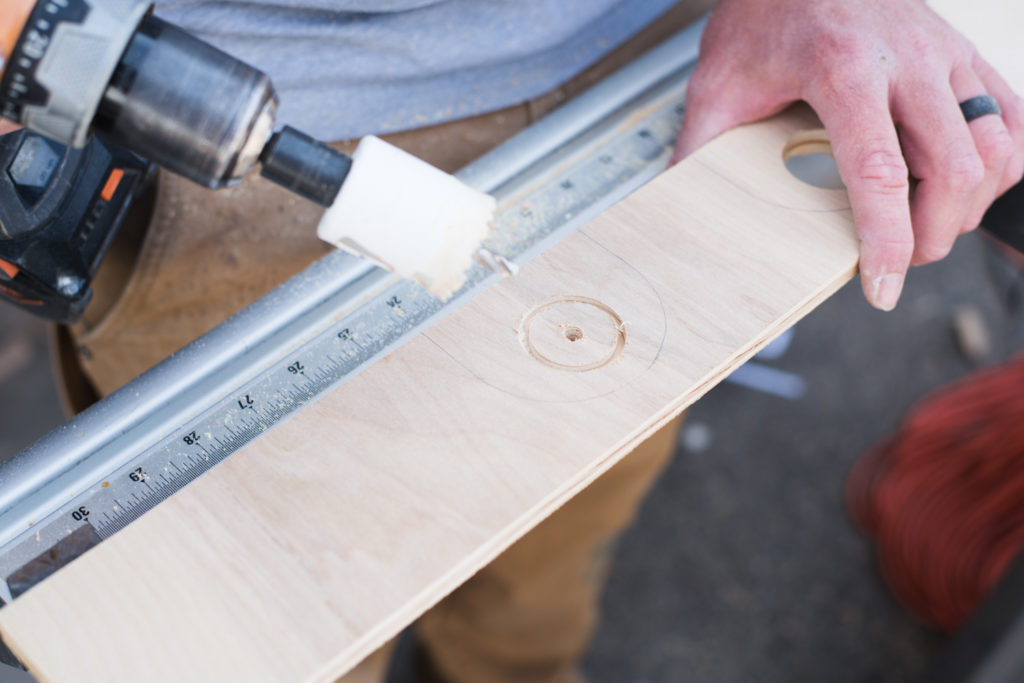
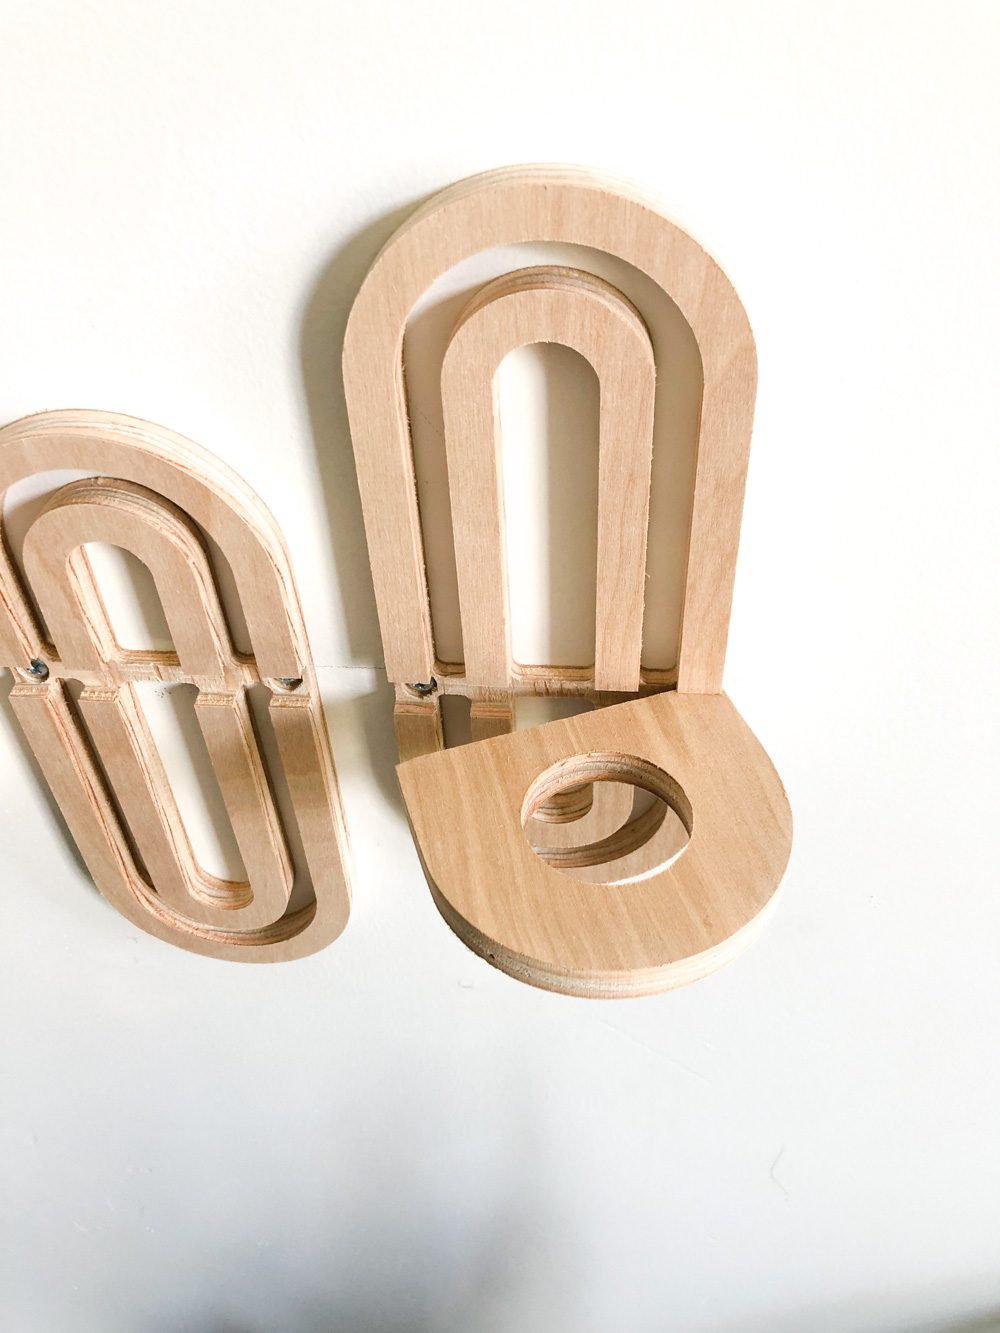
Step 5: Cut out the Shelf
The most important part of this step is two part. First, make sure that the hole you cut is slightly bigger than your test tube. Not a lot, but enough that there is some wiggle room. When the plywood gets wet, it will expand and be very hard to remove the tube. The extra space will fix that!
The next most important part is that you cut the hole in 2 directions.
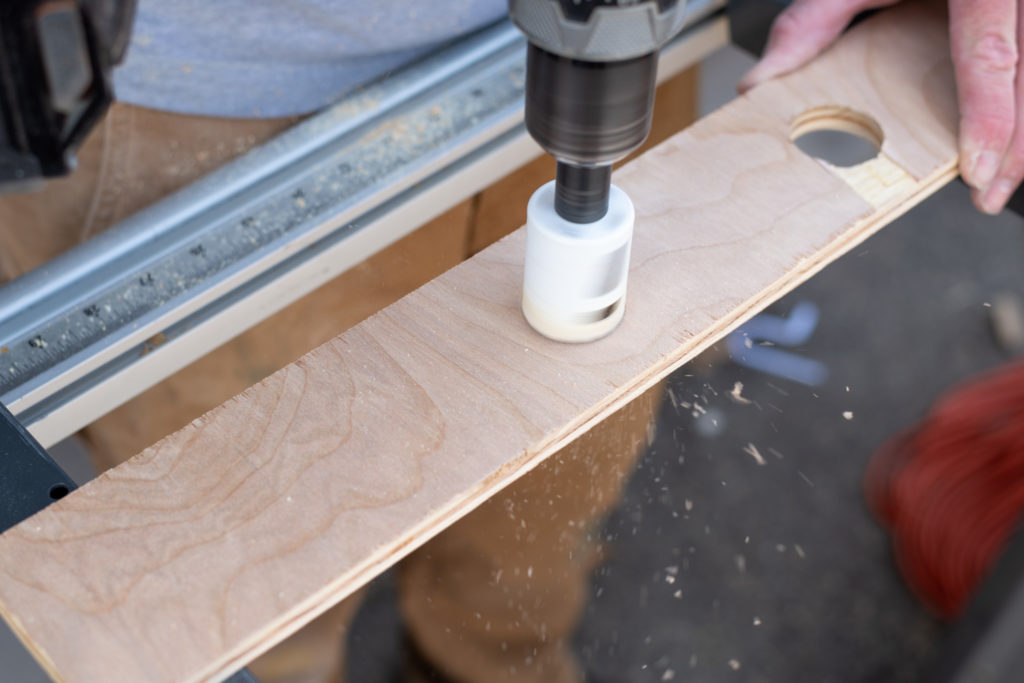
Line up your hole saw and drill halfway through the wood. Then take it out and flip the wood over.
Drill back through the other direction. This prevents the veneer of the plywood from blowing out. See the blow out on the right hole in the pic below? We dont want that to happen!
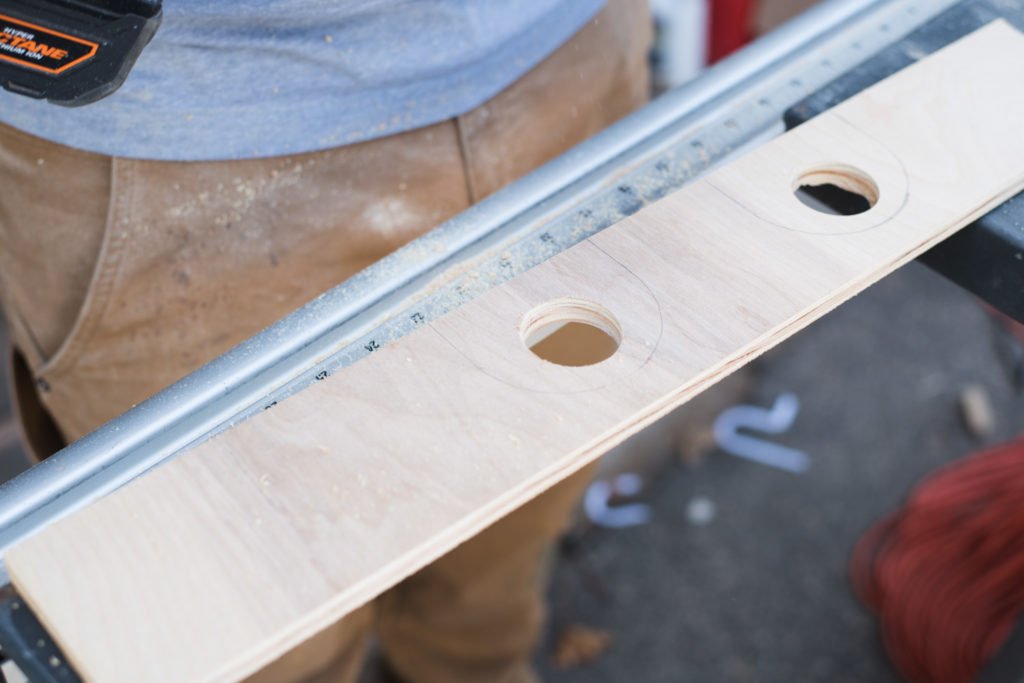
Cut out the perimeter and… ta da!
Here are a few things to note.
Like I mentioned above, hanging this in an easy, secure way was our biggest challenge.
Originally we cut keyholes in the back and glued the shelf in place but getting the screws spaced perfectly on the wall (there was literally no room for error) was an absolute nightmare. Like fill 20 holes and repaint because it was so unsalvageable.
I did not want to do that to you guys.
So back to the drawing board we went. The best way that we found to attach them was to screw the back into place first. If you are hanging more than one, I highly recommend drawing a level line on the wall first.
Step 7: Hanging Your Planters
Draw a light level line on the wall using pencil (or use a laser level if you have one!)
Line the holes up on the line so that you can see through them like a little window.
Check to make sure the side is level vertically and that the spacing between planters (if you are hanging more than one!) is right.
Then screw into the drywall.
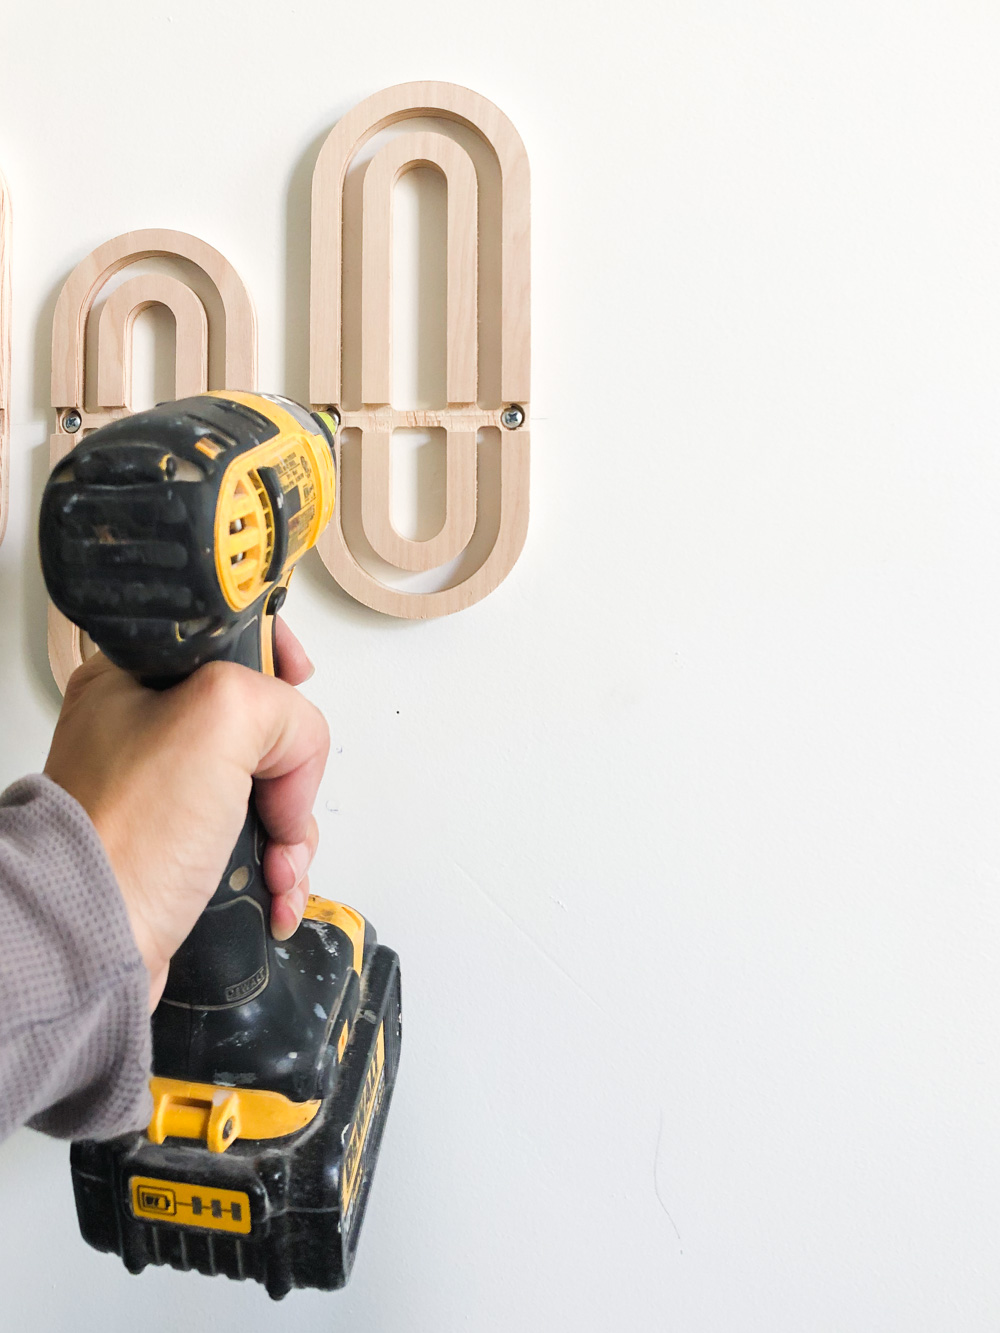
Add the shelf by pressing it firmly into place. It’s better if you start in on one side as opposed to putting it all in at the same time!
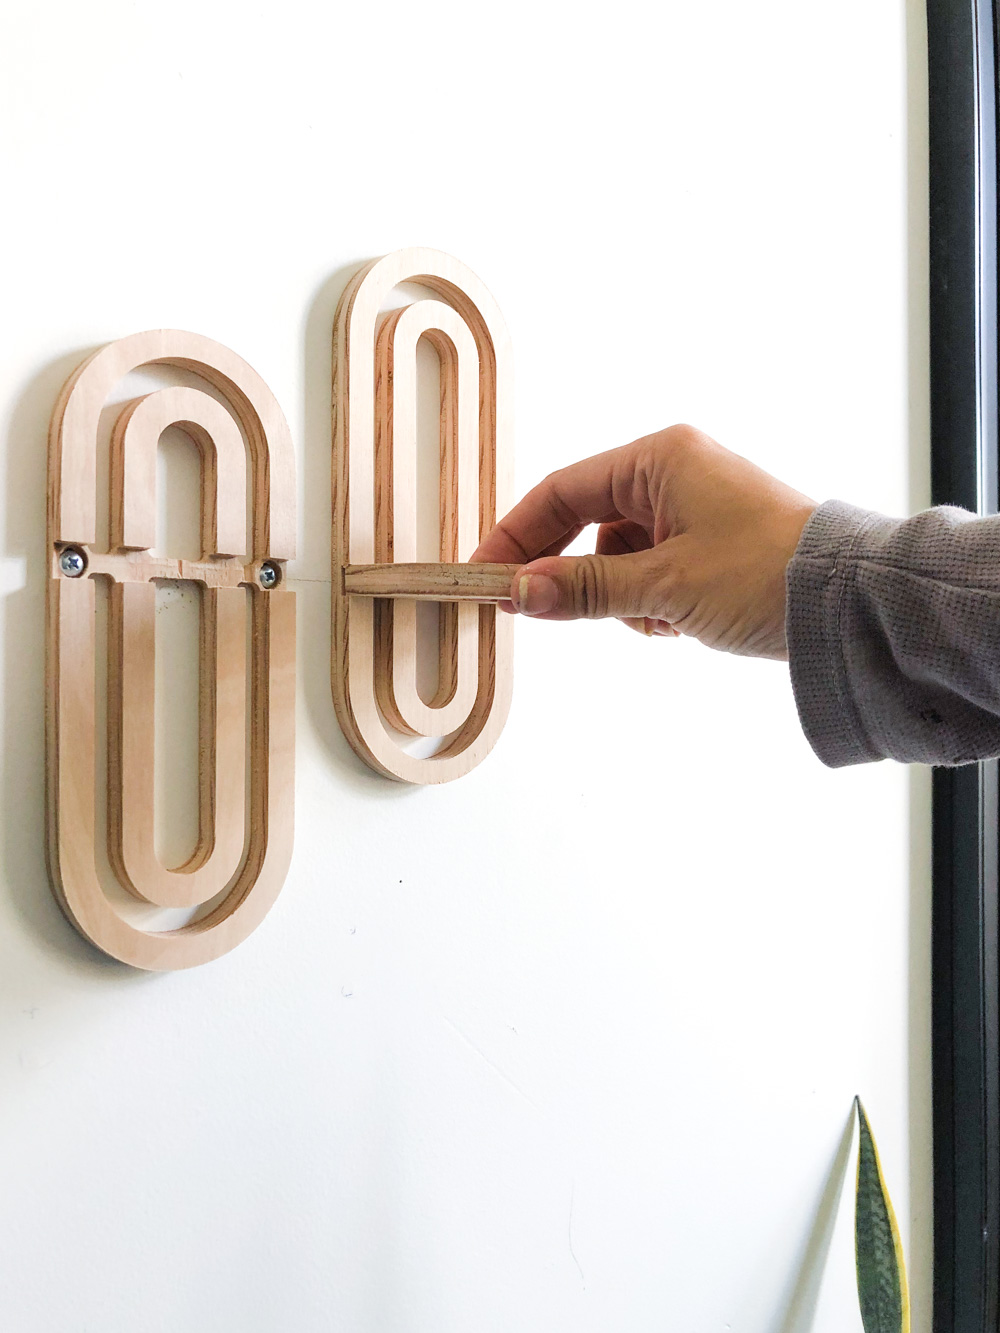
For the planters to be remove-able, the shelf needs to come off (so you can take the screws out) The channel if cut correctly, is tight enough to firmly hold it in place with a full test tube and cuttings. If you prefer to glue it, that is fine with me, just remember that you wont be able to move it once the glue dries!
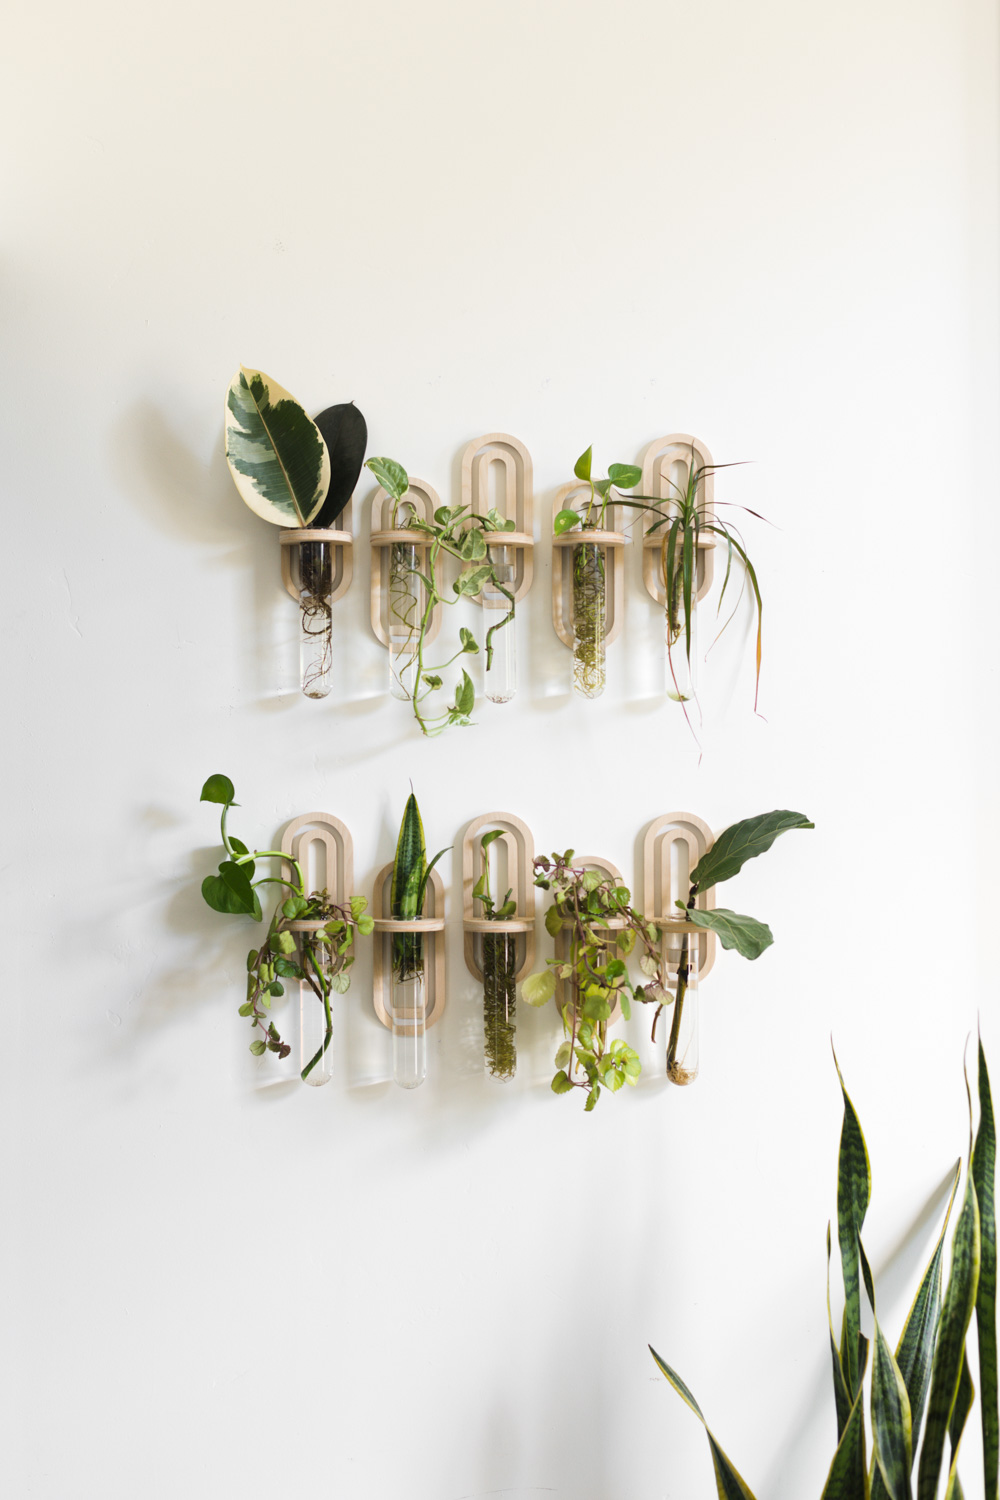
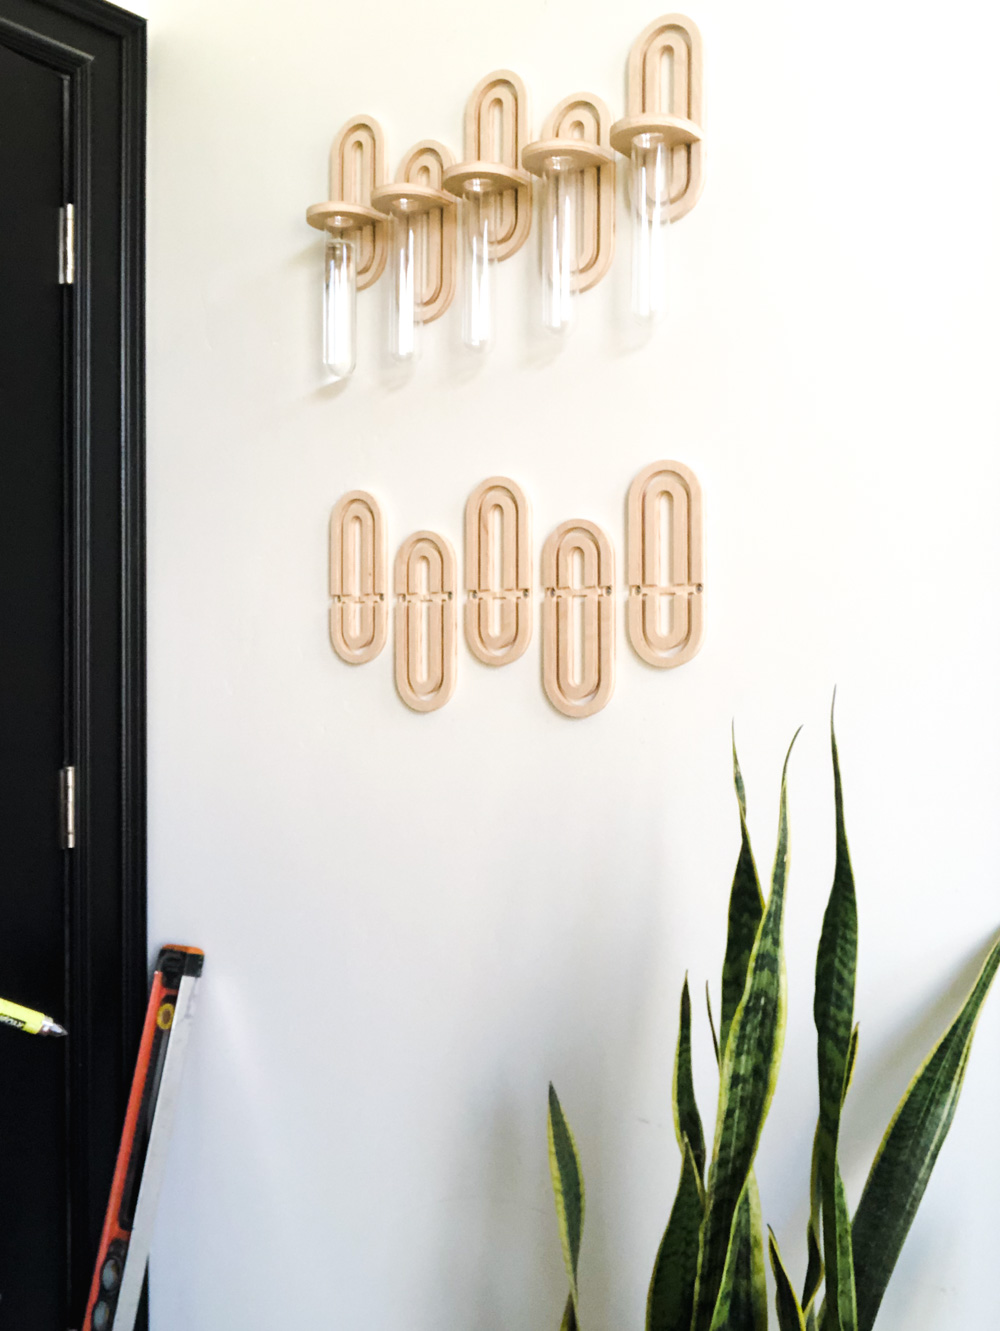
Oh, and did I mention that the planters are reversible!?
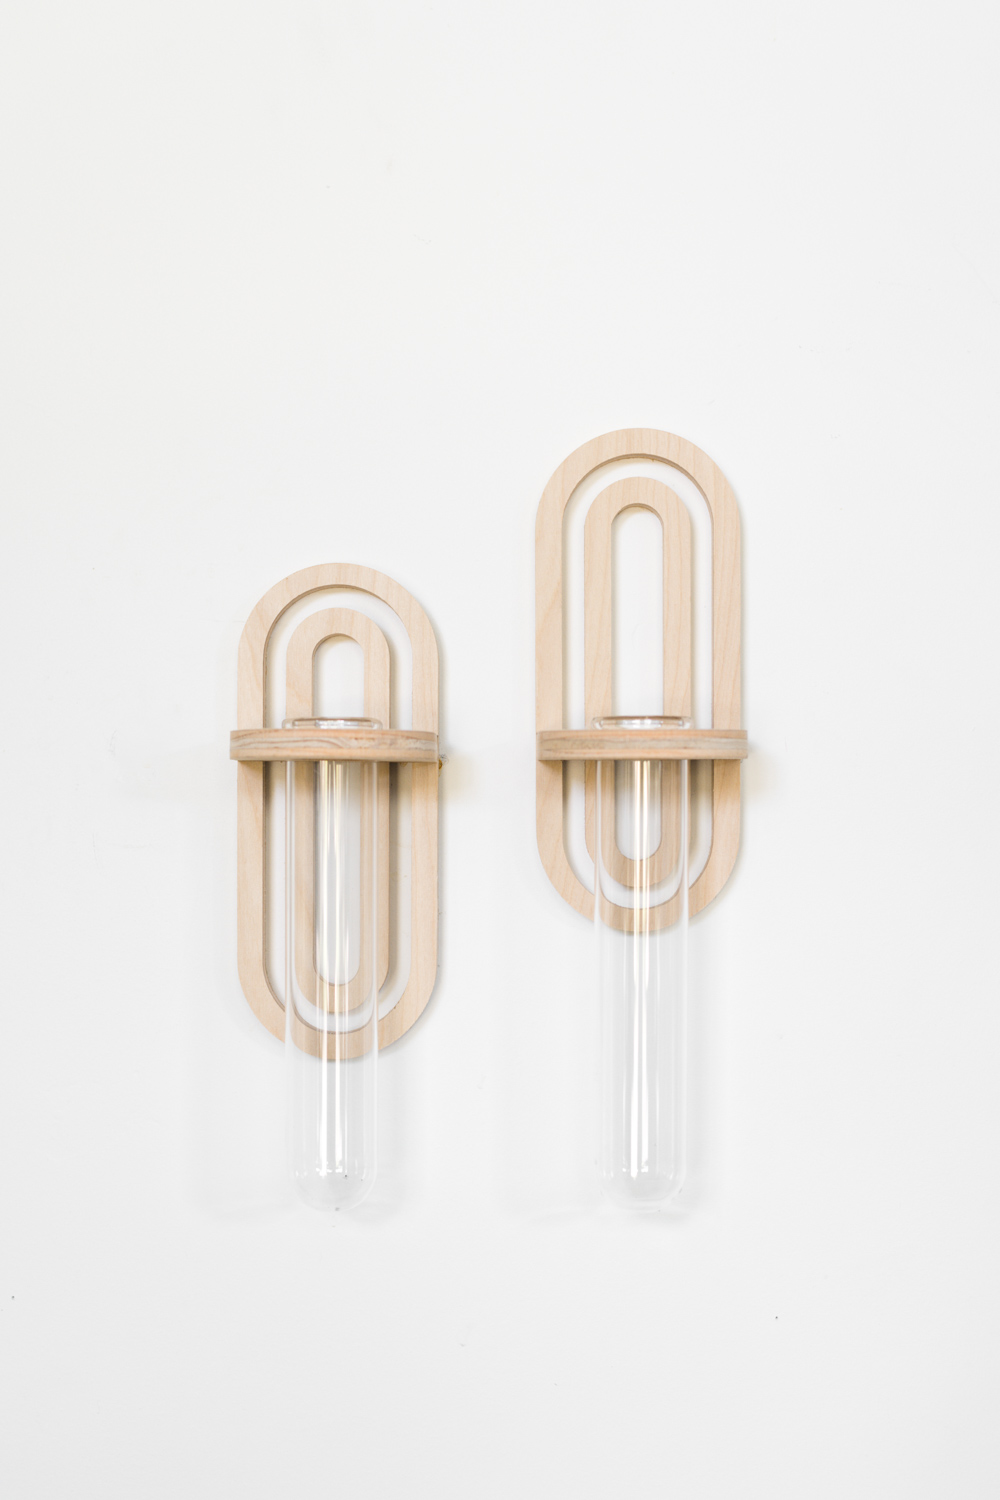
You can hang them either way, and even alternate directions like I did in my office!
I cant wait to see these in your house! If you are interested in buying some, head to the shop before they are gone!
What kind of jigsaw is that. Mine does not make curves like that..
Genius!
Any suggestions on where to buy the test tubes from?
They’re linked on amazon!
These are fantastic! And I cannot wait to see the rest of the Merc! I’ve followed for YEARS and am dying lol.
In this last photo, what is the first plant? The one with the large seed.
It’s an Avocado! I made guac and then rooted the pit!
These are gorgeous! But they also seem like a lot of work to make – definitely a buy, not a DIY!
This looks SOOOOOOOOO good. Omg what’s the word? Eyegasm?