Thrift Store Art Warms My Heart: Be My Groupie?

By Mandi | 02/01/2013 | 51 Comments

I am pretty sure that there are few in this world as addicted to Thrifting as I. And I am also pretty sure that those at that same level are reading this right now. THRIFTERS UNITE!

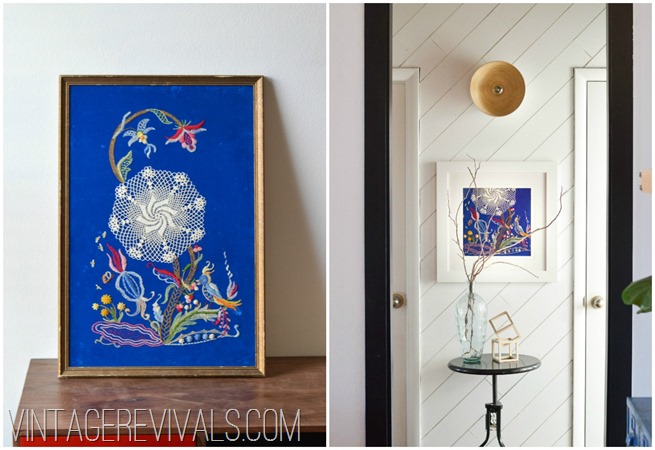
If you remember (or maybe you don’t because you are new and awesome) I scored 3 awesome pieces of art when someone donated their cute granny’s house to my local DI (Utah’s version of Goodwill)). Piece #1 was the hand embroidered Crewel Folk Art done by a Miss Doris Parker that I reframed and hung in my hallway.

Crewel Folk Art Update

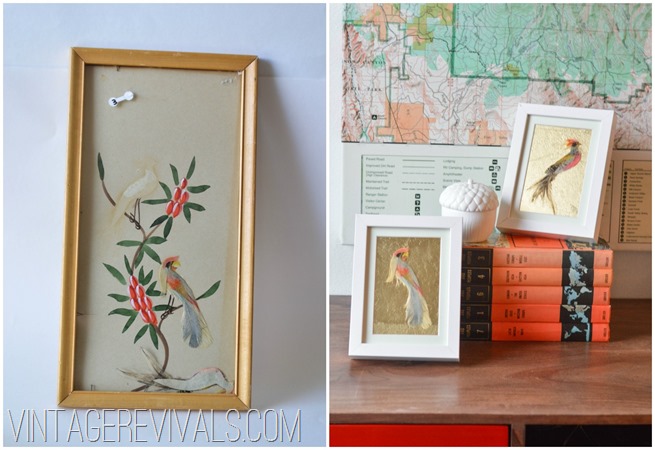
Piece #2 was the tropical birds made out of real feathers that I put on a gold leaf background and hung above my orange velvet couch.

Feathered Bird Art

Today my friend, you get to meet Piece #3…or should I say Pieces #3-9?

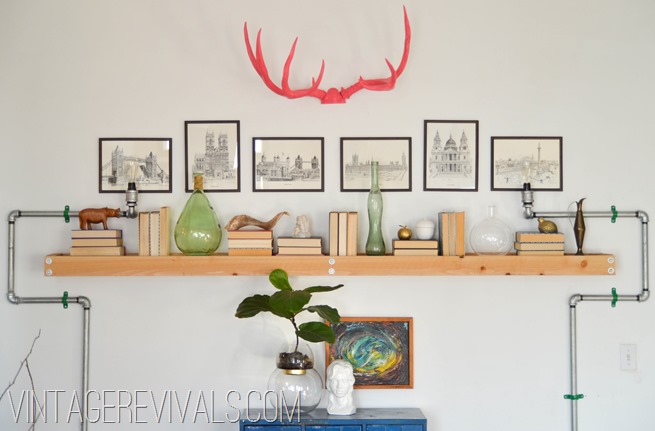
When I spotted these architectural sketches of English landmarks I may have gasped, bolted, and thrown a few elbows to get them…(don’t act like YOU have never done that.)  In all truthfulness they were just hanging out, overlooked and needing a savior. Luckily I was the woman for the job.

Ok so go with me on this one. You know how you find stuff and you are convinced that you HAVE to do something to it to make it your own? I have had my fair share of those experiences…take Vicki for example. She was amazing and I painted her, and then a year later saw the error of my ways. So I stripped her back to her original amazingness. For some reason I was compelled to change her. Well my friends, sometimes things are great just the way they are. They just need a perfect home.

(Enter perfect home stage left.)

Thrift Store Art @ Vintage Revivals-1-3

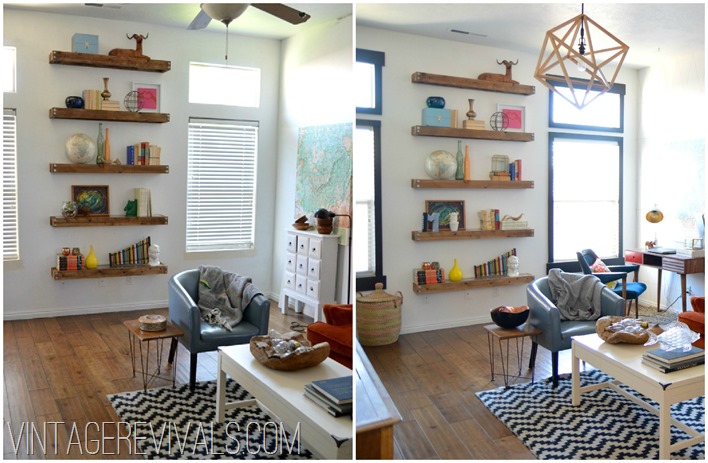
I haven’t really shared this part of my living room with you yet, granted you have seen bits here and there,  but never the whole enchilada. I build the giant shelf (literally, its a GIANT at 10 feet long) all because I wanted some sort of a mantle (It is the exact same plans as the industrial modern floating shelves on the opposite side of the room, just enlarged FYI).

It is so great,  I mean I had big plans for it when I built it. Visions of all of the crap I could stick up there kept me up at night. And then I woke up from perfectly staged fantasy land and ran face first into reality… the thing was so huge that it dwarfed everything I tried to put on it.

SUUUUCK.

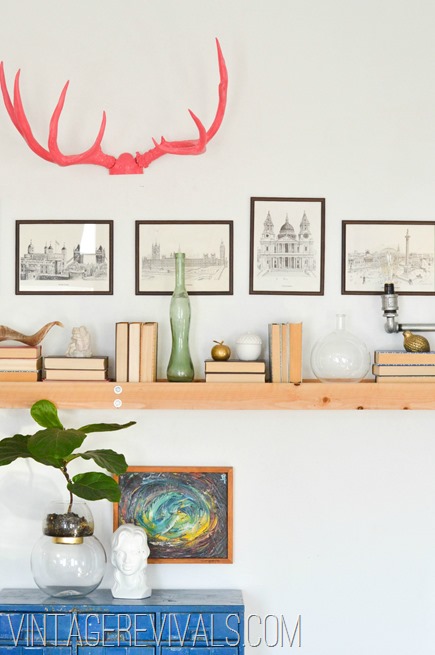
Until that lovely day at the DI that the clouds parted, angels sang Hallelujah and no one else in the store spotted the gold mine perched on the shelves. I found 6 pictures that perfectly stretched the width of said shelf.

Thrift Store Art @ Vintage Revivals

Repeating pieces of art can make such a huge impact, even if individually they are not stars. Power in numbers people. Just like you should always buy lamps in pairs, you should always buy any grouping of art (as long as it didn’t come out of The Comfort Inn originally decorated in 1989. Please pass on those, mmmmkay?)

One of these pictures is fantastic, but 6 is downright mind blowing.

So do you want to know how much I spent?…They were originally priced at $1.75 each but because I was buying so many the cashier gave them to me for $1.00 each. (Please don’t throw things!)  Where in this world, other than a thrift store can you find something so freaking fantastic for $6.00? No where. Which brings us full circle in my thrift store addiction.

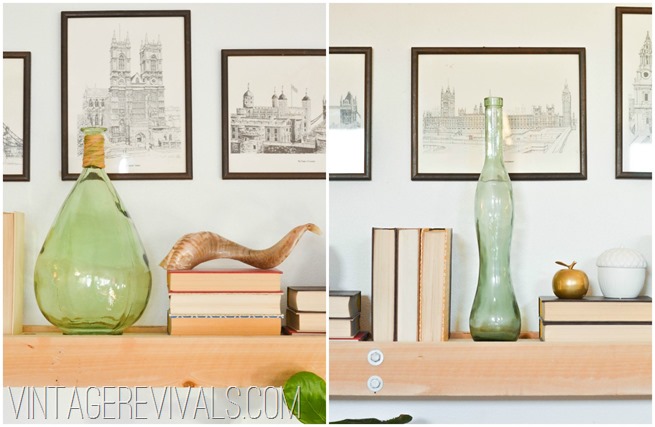
Thrift Store art, Books, Vases

Ok now I want to know, are you a thrift store addict? What is your most prized score? (If you have a blog post about it leave the link in the comments so we can all come over and drool hard core.)

And there is one item of business. You guys know that I never ask anything from you (except for your undying love and devotion) but I have something really important I want to chat about. Nominations have started for Apartment Therapy’s 2013 Homies (which is like the Oscars of blogland.)  Last year Vintage Revivals made it into the Top 6 Best DIY Blogs and I was SHOCKED. Well this year I would really love to win. So without begging or being annoying, if you have ever been inspired by a project here I would love it if you would click over really fast and vote for Vintage Revivals, I would LOVE it. (*you have to have an Apt. Therapy account to vote, they are the simple email address/password no verification  kind!)

image

And if I make it into the Top 6 then I promise I will post the most hilarious/embarrassing picture that you have ever in your life seen. And you’ve seen some pretty horrific ones.
Love Your Guts

It’s Like Mascara For Your Windows!

By Mandi | 01/31/2013 | 33 Comments

Yo yo! You guys, my living room is literally 98% done. I have one small project to finish and then dun dun dun dun DONE!

So all you ladies out there know what a huge difference mascara makes to your over all finished makeup routine right? (and even better than mascara are fake eyelashes)  This project is like that. You don’t know what you are missing until you look naked (or your room looks naked) without it.

Today we are talking window trim, and more specifically black window trim. I know it may seem a bit well, black, but it made the HUGEST difference in my living room. Here is the before and after:

Black Trim on Windows

Amazing right?!!

This project LITERALLY took me one morning to do (because that is all the time I had!)  Its actually a fun story. At 10:00 I got an email from Laura. She co-owns Southern Utah Bride magazine, check it out if you need any sort of inspiration, they are so fantastic. They were doing a mid century photo shoot the next day and their location had fallen through. So naturally with my famous orange couch she thought of me. There is nothing like a quick deadline to get me moving. I had been playing around with the idea of framing out the windows since we took out that awful beam and put black moulding up in our hallway. So my BFF Hailee came over and helped me get the job done. I have no idea what I would do without that girl. She is my Justin Beiber to a screaming teenager. You can check out the photo shoot here.

And because of the crazy rush I didn’t take any pictures. So if you are wanting a tutorial you will have to wait a bit (because I am doing it in my kitchen too!!)

Painting high contrast trim is such a great pick me up  if your room is feeling a little stagnant. Its like the best set of falsies you can buy.

Love Your Guts

The Blog Contest That Put Vintage Revivals On The Map Is BACK!!

By Mandi | 01/28/2013 | 19 Comments

Do you have an awesome blog that no one seems to know about? Do you love challenges? Do you want to be teamed up with a Blog Star and have them mentor you? Annnnnd lastly do you want to win a crapload of KILLER prizes?!

Good.

Because Crafting With The Stars is BACK and better than ever.

Time for a history lesson. When Vintage Revivals was just a few (maybe 3) months old I entered a brand new blog contest called Crafting With The Stars. I was SO excited to make it to the final 12 and be able to compete. My star was Becca from Blue Cricket (who is still one of my favorite people in the entire world) and to say we rocked it would be an understatement. I ended up winning that season but more than prizes, Crafting With the Stars gave me permission to do something TOTALLY different. We can all thank Crafting With The Stars for these amazing projects:

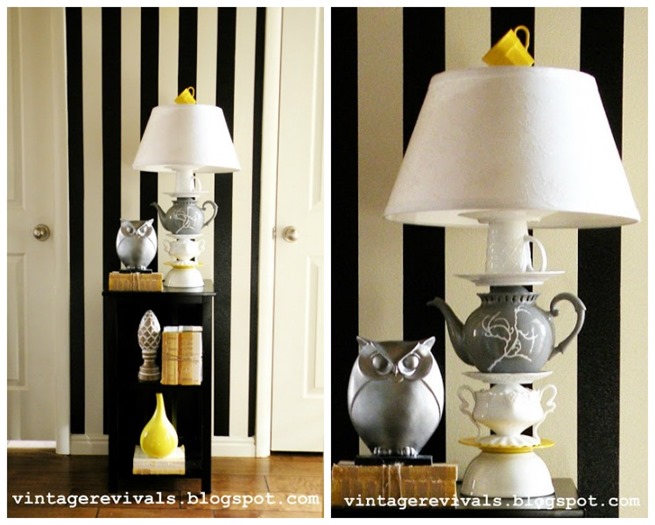
Anthro Teacup Lamp Knockoff

Teacup lamp

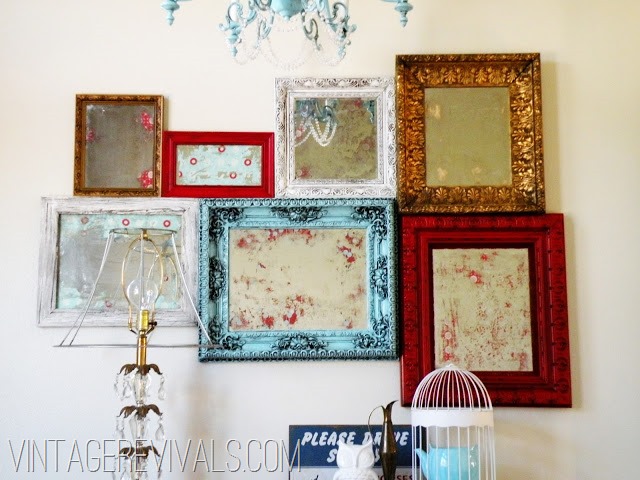
Anthro Acid Mirrors

mirror 3


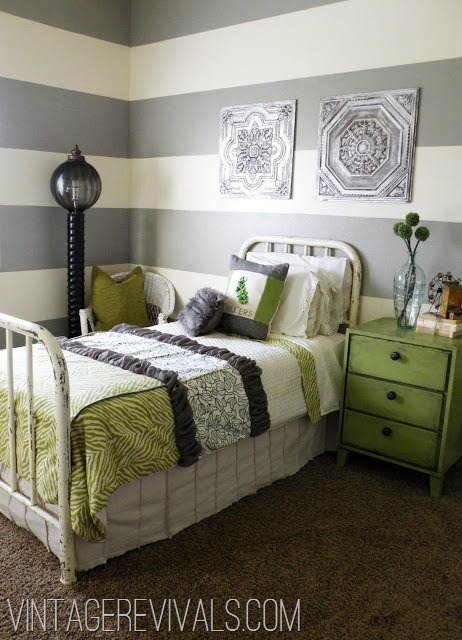
Sewing Room Scrap Bedding

bed full

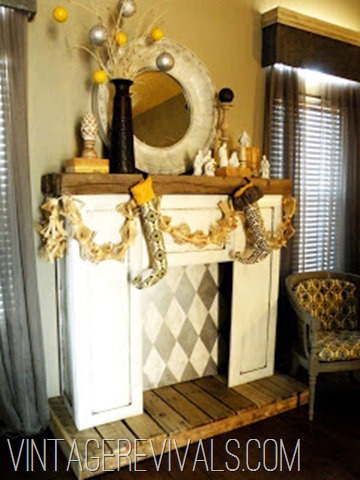
Faux FireplaceDSCN3869


Wow that was a fun trip down memory lane.

So here is what is going on. My girls Jess and Monica from East Coast Creative bought Crafting With The Stars and have made it 10000x better. Starting off with a name change. And prizes, lots of prizes.

Want to know who the stars are? You guys are going to DIE.


1- Sherry from Young House Love
2- Whitney & Ashley from Shanty 2 Chic
3- Brooke from All Things Thrifty
4- Jen from Tatertots and Jello
5- Sarah from Thrifty Decor Chick
6- Beckie from Infarrantly Creative
7- Mandi from Vintage Revivials
8- Jamielyn from I Heart Naptime
9- Shaunna from Perfectly Imperfect
10- Beth from Home Stories A to Z
11- Kari from U Create
12- Brittany from Pretty Handy Girl

I mean. Can I be a contestant and be paired up with any of these guys? Did you notice that cute picture #7 is a little familiar? I am SO excited to be a Star and get to work with one of YOU!

Here is how its going to work (as hijacked from EC2)

Submit one project that shows everyone your best stuff into the linky party here on East Coast Creative that will begin on February 5th. Projects must have been made October 1, 2011 or later and must be your own work. You have until February 21st to enter. From those entries, 12 of you will be chosen by the blog stars and us as contestants and will be randomly paired up to work one-on-one with a Blog Star, to duke it out in a four-week competition to see who’s the most creative. The Star will give suggestions, ideas, encouragement, and help so you can come up with the best project possible. Each round will have a theme and the bottom three will be eliminated based on reader votes. Once the contest is started, weekly projects are anonymous, so big blogger or rookie, everyone’s on the same, even playing field! Find your favorite project to link up and be prepared to put your best foot forward if you want to survive!

Head over to EC2 to get all the big bad info and details. I am happy dancing all over the place with the chance to share this experience with one of you!! If you guys have any questions I will do my best to answer them!


Love Your Guts

Speaking of Blog Puberty…You Do NOT Want To Miss This Post.d

By Mandi | 01/25/2013 | 13 Comments

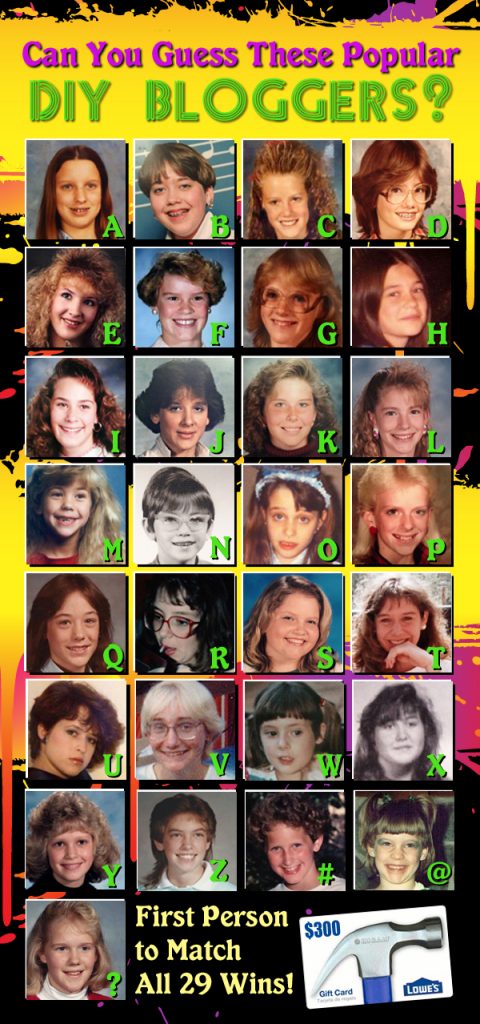
Let’s take a ride in that DeLorean parked outside and go back in time. Back to a time before there was Pinterest, Facebook and Twitter. Before chevrons, mercury glass and ombré were hot. And most importantly, before there were blogs! We’re going back to when these DIY gals were worrying about how high they could get their hair, was there food in their braces and oh no…not another zit! Talking on the phone for hours meant stretching that long spiral cord beyond its limits and tying up the only phone in the house. Common purchases for these DIY gals may have been the latest cassette tape, neon bracelets, a swatch watch and a tube of clearasil. You wouldn’t catch them dead in the hardware store, totally unheard of to the max! Are you there yet? Do you see leg warmers or jelly sandals? You’re getting closer…the time machine has stopped so step out of your DeLorean and behold…the time before blogs:  

Do you recognize any of these popular DIY bloggers? I don’t know how “popular” they were back then. Do you think you could recognize them in High School, Middle School or Elementary School? For sure! These awkward youngsters will one day be the brains behind your favorite DIY blogs. And they are giving a $300 Lowe’s Gift Card to the first person who can guess which faces match with which DIY blogs.

Here are the blogs to match:

Here are the details (you must be 18 yrs or older to win):

  • Visit the link below where you will be able to enter your guess for each blogger pictured above. (All information will be kept private.)
  • The first person to correctly match all the faces with their blog will win a $300 Lowe’s gift card!
  • If you win, you will be emailed to collect your mailing address. (Then your prize will be mailed to you.)
  • And of course, you will gain bragging rights for being the biggest DIY Blog Fan Ever! Totally RAD, right?!

Best of luck to you, should decide to take on the challenge.

Enter Your Answers

*Special thanks to Mandi of Vintage Revivals who bared her soul about blog puberty, (which seeded the idea to “share” all our awkward photos with you!)

DIY Sharpie Wallpaper Tutorial

By Mandi | 01/22/2013 | 168 Comments

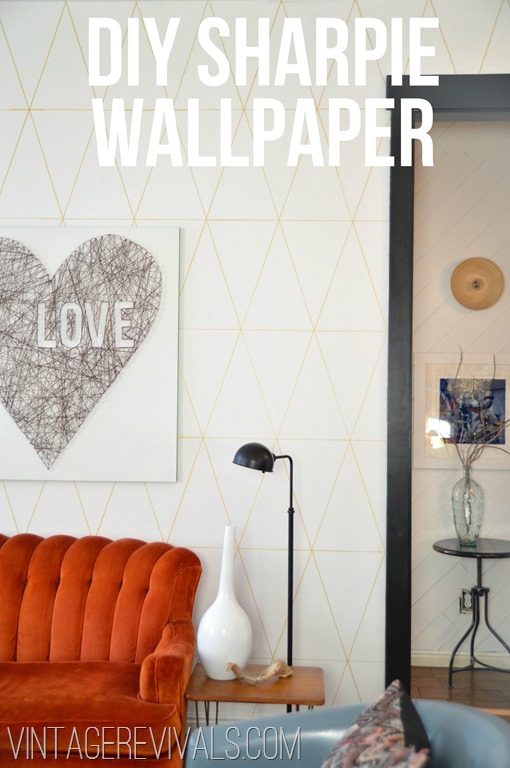
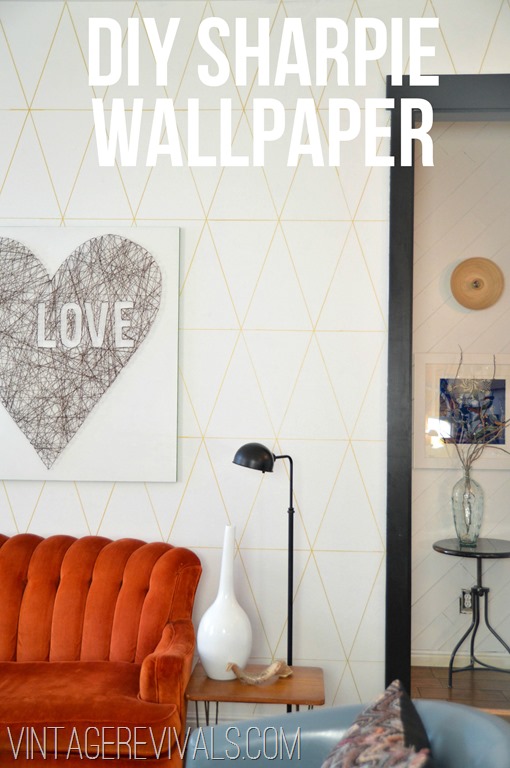
I am so IN LOVE with today’s project I want to lick my wall. Remember last week when we chatted about overcoming a major project/idea fail? This post is what I like to call redemption. Or DIY Custom Wallpaper…without the paper, or the cost, or the mess for that matter.

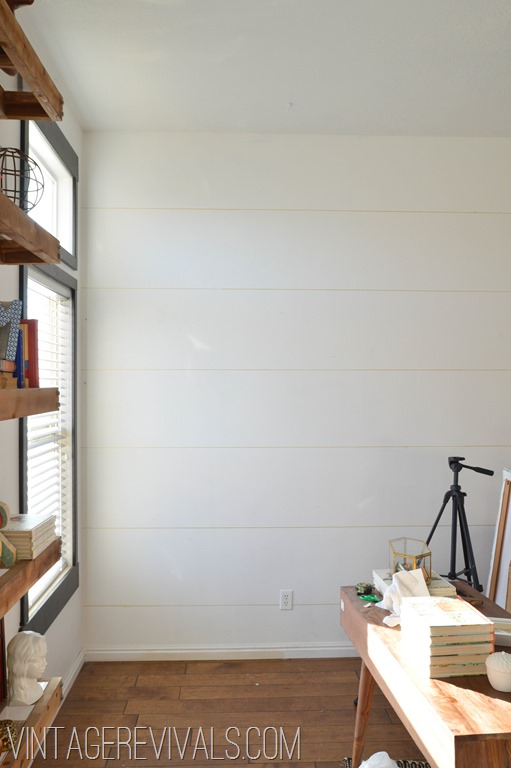
For those that are new here is a quick recap. In my living room I was itching for Southwest/Tribal inspiration. The original plan didnt work out the way I wanted so I left the walls white. There is nothing better to brighten a room than white walls. I had fallen in love with the white, I didnt want to give it up. Now I have the best of both worlds (sing that in your best Miley Cyrus voice for full effect…)

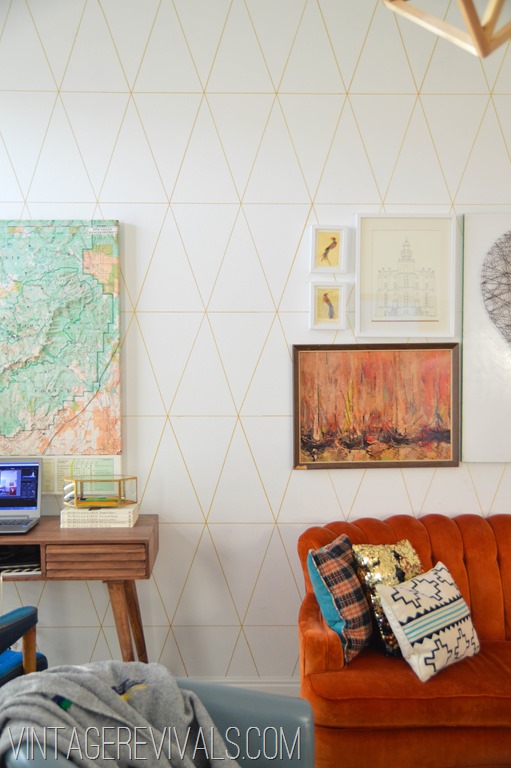
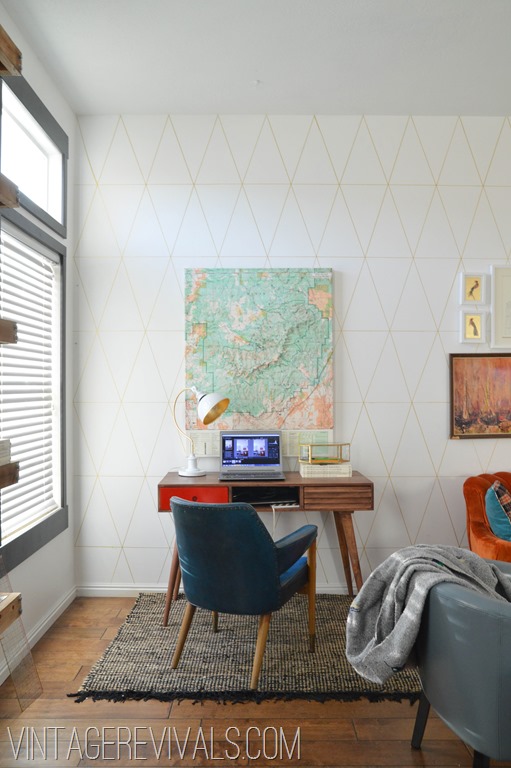
DIY Sharpie Wallpaper Tutorial @ Vintage Revivals


So great right?!! Here is the best part. The entire project cost $8.00! I mean that is like 2 happy meals!! If you are overwhelmed by stenciling,  wallpaper is too expensive  or want thinner lines that you can get with taping off stripes this project is PERFECT!

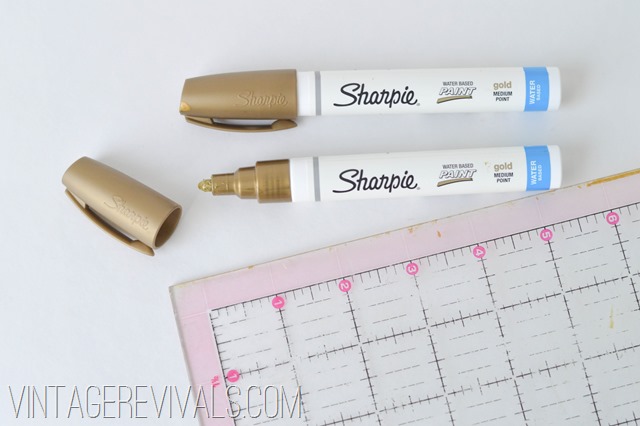
Here is what you need:

DIY Wallpaper Tutorial @ Vintage Revivals-1-2

Yep, that’s it. A Sharpie paint pen and a straight edge. Make sure that you are getting a PAINT pen and not just a regular sharpie, and make sure that they are water based. Did you know that you can paint oil paint over latex but you cant paint latex over oil? We are using a water based pen for that very reason,  in the future if you want to paint over it you will be able to without re-priming your walls.

You can find water based paint pens at any craft store (I got mine at Michaels on sale for $2.50)  I used 3 for my wall.

I was inspired by this amazing wall I saw on Apartment Therapy:

Gallery_wall_rect540

I love how this wallpaper looks hand drawn and I love the huge scale of it. So I took what I loved and gave it my own twist with triangles.

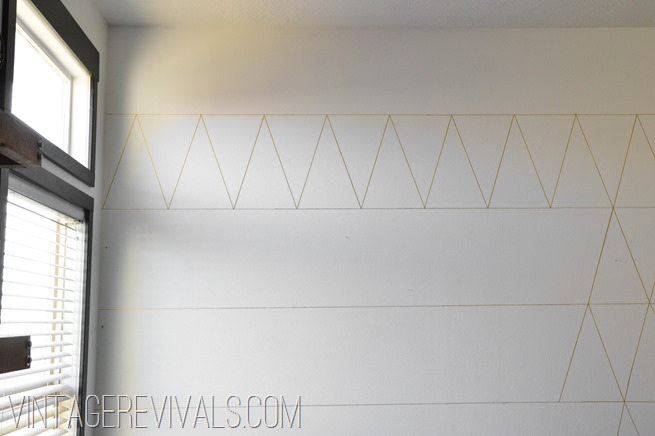
Start by drawing your horizontal lines. Dont forget to use a level folks. My lines are 18” apart. When you are doing a project like this start at the ceiling and work your way down, that way you will end up with a full design at the top and the broken design at the bottom.

DIY Wallpaper Tutorial @ Vintage Revivals-1-3

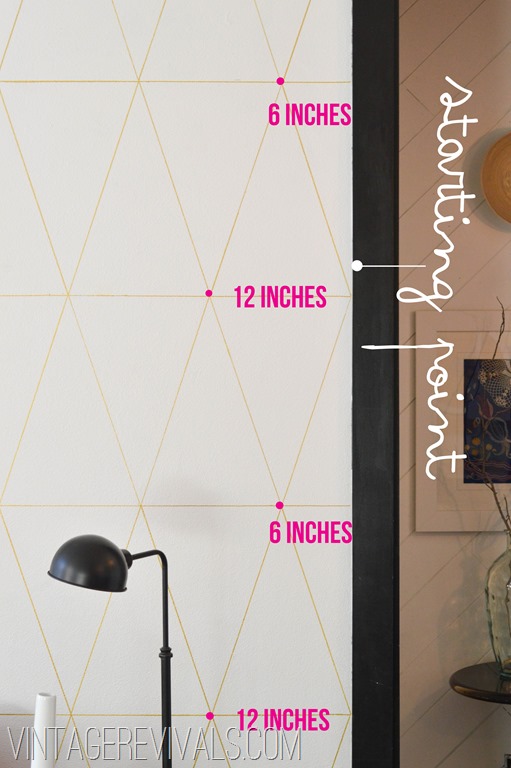
Now comes the fun part, the actual design. First you need to decide how large you want the base of your triangle to be. I wanted mine taller than wider so I decided on a 12” base. Find where your starting end is (against a wall or door frame) and alternate marking the full width of your base and 1/2 the width of your base on your horizontal lines.

How To Draw Wallpaper Tutorial @ Vintage Revivals-1-5

There are 2 reasons you are doing this. It is setting the pattern and the spacing (so that the point of the triangle is in the center of the base).

Once you have your starting marks just measure the width of your base from then on (12”)  Lets say you want your triangles to be 8” at the base, you would mark (going down your horizontal lines) at 4”, 8”, 4”, 8”. And then mark every 8” from those starting points. Got it?

Now channel your inner 1st grader and using your straight edge connect the dots!

DIY Wallpaper Tutorial @ Vintage Revivals-2-2

Here are a few tips for working with metallic paint pens.

1. You have to shake them constantly, what ever it is that makes it metallic looking seems to settle on the bottom.

2. If it seems like the pen is drying out depress it onto a piece of paper and that will fill the felt tip again.

3. The paint dries very quickly, but make sure that the line is dry before you cover it with your straight edge because if its not it can smear.

4. If you flub a line you will have to repaint it and then go again,  you cant wipe the paint pen off without getting a big yellowish smear.

DIY Wallpaper Tutorial @ Vintage Revivals-1

The best part is that you can do a million combinations of patterns and colors . What about a charcoal wall (like the one I did in the $150 room makeover) with white lines? Amazing.

To do the entire wall in my living room I spend 3 hours drawing, which is WAY less time than it takes to stencil, wallpaper, tape, or paint. This project is perfect if you just need a little spruce up in your house!

DIY Wallpaper Tutorial @ Vintage Revivals-4

DIY Sharpie Wallpaper Tutorial @ Vintage Revivals

Some of the other tutorials I spy in this picture are Love String Art, How To Make A Light From A Bowl, and the always incredible Thrift Store Crewel Art.  If you are wanting more hand drawn inspiration check out Wendy’s traditional wall and Elsie’s off the beaten path wall posts.

So what do you think? Is this a project you could handle?

Love Your Guts

SNAP! FREE Conference Pass Giveaway

By Mandi | 01/21/2013 | 164 Comments

Top o the mornin to ya today!! (Apparently I woke up as  a leprechaun, who knew?!)  I am clearly excited about today’s post because it means that I get to meet one of YOU in real life!!! (I just did a jig if you were wondering…) I am giving away a FULL CONFERENCE PASS to the sold out  SNAP! Conference. This.Is.Huge.Folks. SNAP! sold out in 30 minutes, its just that exciting.

SNAP Ticket Giveaway

For those that are new to this creative world, SNAP! is a creative blog conference being held April 19-21. It is full of inspiring speakers, hands on handmade classes, and super yummy food. It is held at Thanksgiving Point in American Fork, UT. I can pretty much guarantee that most of your favorite creative bloggers will be there and you do not want to miss out!! This giveaway is for one all inclusive conference pass, the hotel and travel is up to you. This ticket is non-transferrable folks.

To enter leave a comment telling me WHY going to SNAP! would make your life. (You must also enter through the Rafflecopter widget below! There are also a few other entry options for extra chances!)  AND because we REEEEEALLY love you Miss Shelley @ The House of Smiths is giving away a ticket too! Double chances holla!


The fine print:

    • Odds of winning are based on number of entries.
    • Winner chosen at random using Rafflecopter.
    • This giveaway begins 01/21/2013 and runs through 01/27/2013 at midnight MST


a Rafflecopter giveaway

Also I am teaming up with Studio 5 for a fun new segment called “What Would Mandi Do?”   Are you in the Salt Lake area and have a piece that you are puzzled with and want some Mandilicious love for?! Studio 5 is looking for a few viewers who have a piece of furniture that needs a new life and would be willing to take my advice and tackle the job. Send us a picture of the furniture piece and your brief story and I will pick my favorites to give a new life. Email us at [email protected] or post yours on their facebook page.

Love Your Guts