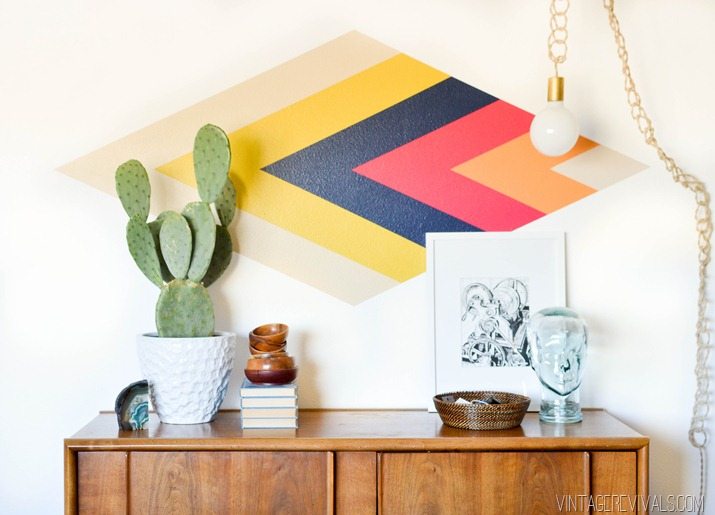
DIY Retro Diamond Focal Wall

By Mandi | 09/22/2014 | 39 Comments

You know the saying “Diamonds are a girls best friend”? Well. I (apparently) have taken that to heart because I want to put them everywhere!! Blush may be the new Black, but guys, Diamonds are the new Triangle.

Ashy’s room makeover is in full swing and I am loving it oh so much! One of the easiest ways to spruce up a space is with a painted focal wall. Today I am teaming up with ScotchBlue™ Painter’s Tape for this fun (and simple!) tutorial.

DIY Retro Diamond Focal Wall vintagerevivals.com


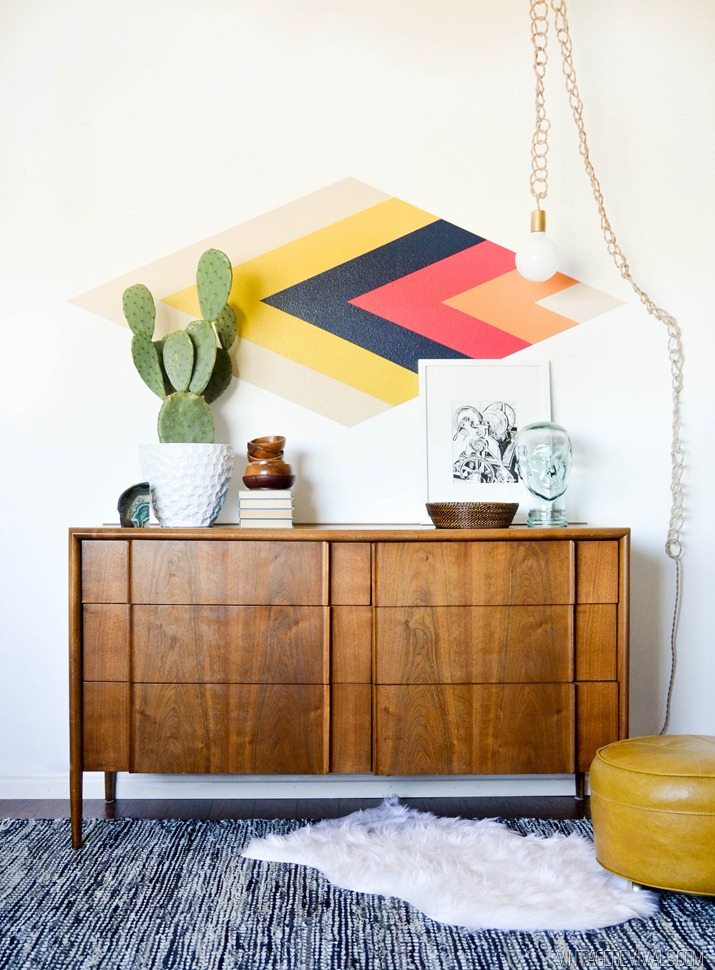
I found this retro painting by Kenneth Noland and fell in love with the colors and style of it. Ashy and I decided it would be a perfect accent for above the dresser.

Trans West, 1965 https://decdesignecasa.blogspot.it


Start by deciding on the size of your diamond. First things first, we moved the dresser into place so that we could make sure the scale was right.

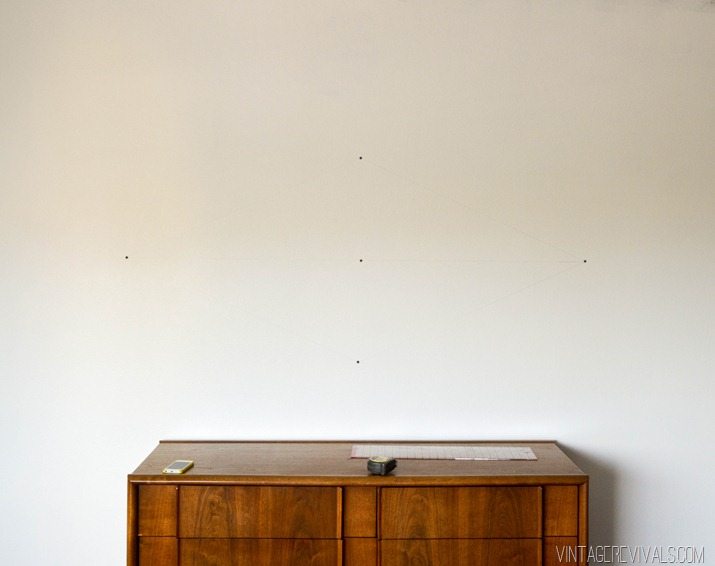
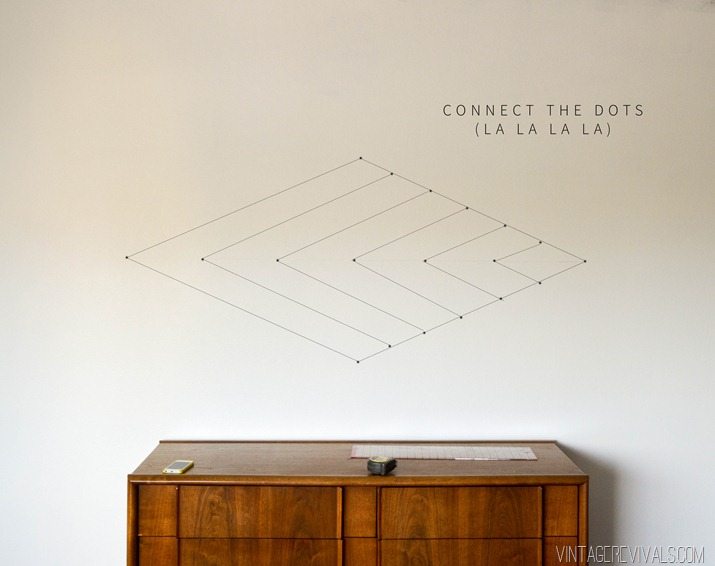
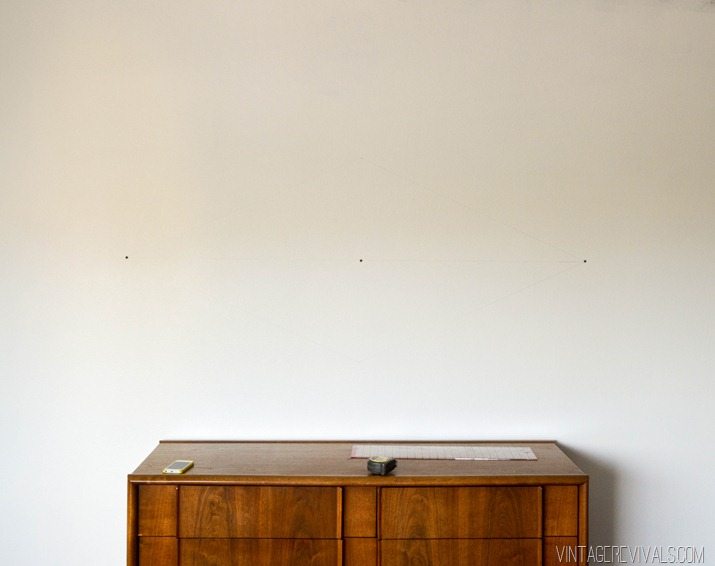
We started by using a pencil marking the center of the wall and the width of the diamond.

Retro Diamond Pattern 1


Then measure 1/4 of the total width up and down and mark.

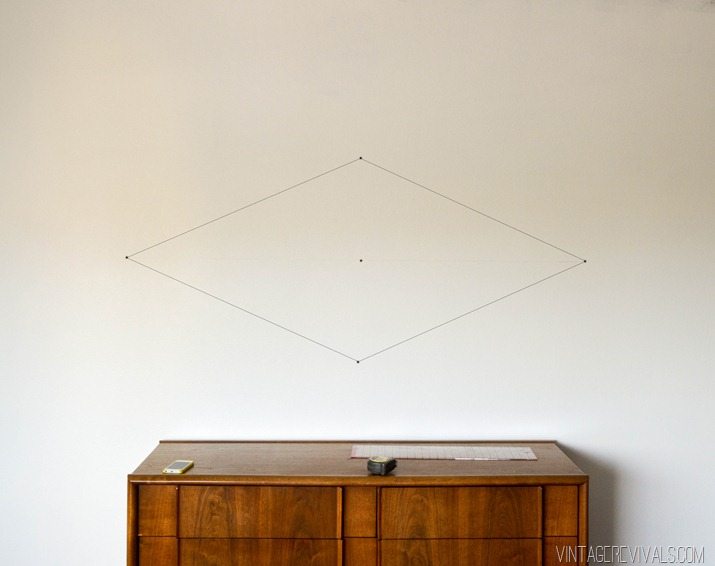
Retro Diamond Pattern 2


Connect the dots to make the outer edge of the diamond.

Retro Diamond Pattern 2 psd


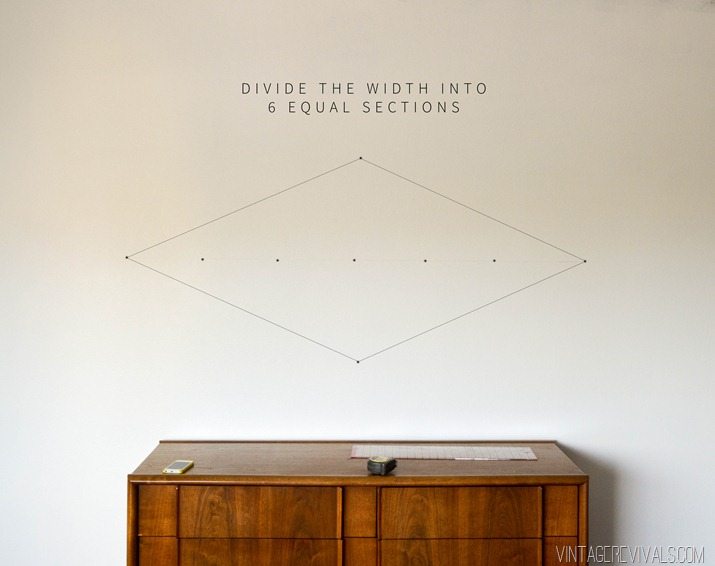
Take the total width of the diamond and divide it by 6. This number will tell you the distance between marks. (Please note that you are making 5 marks, but creating 6 sections)

Retro Diamond Pattern Tutorial


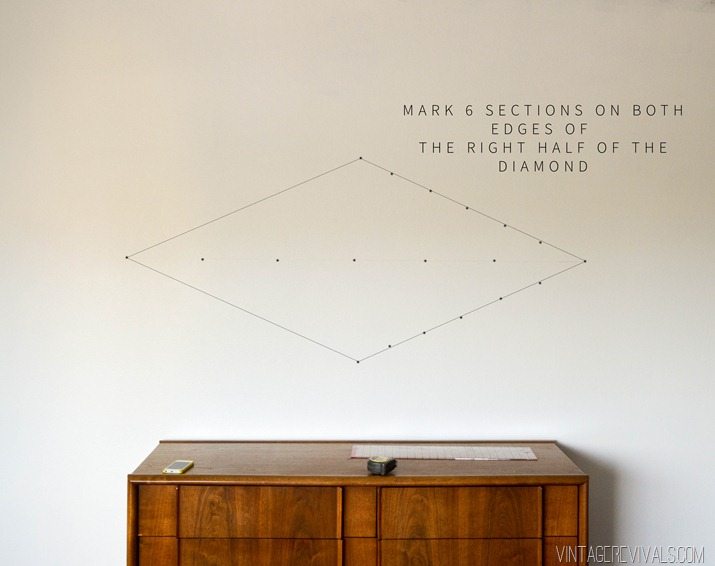
Now take the width of one edge of the diamond and divide it by 6. Mark the 6 sections down both sides of the diamond.

Retro Diamond Pattern 4

Connect your dots.

Retro Diamond Pattern 5


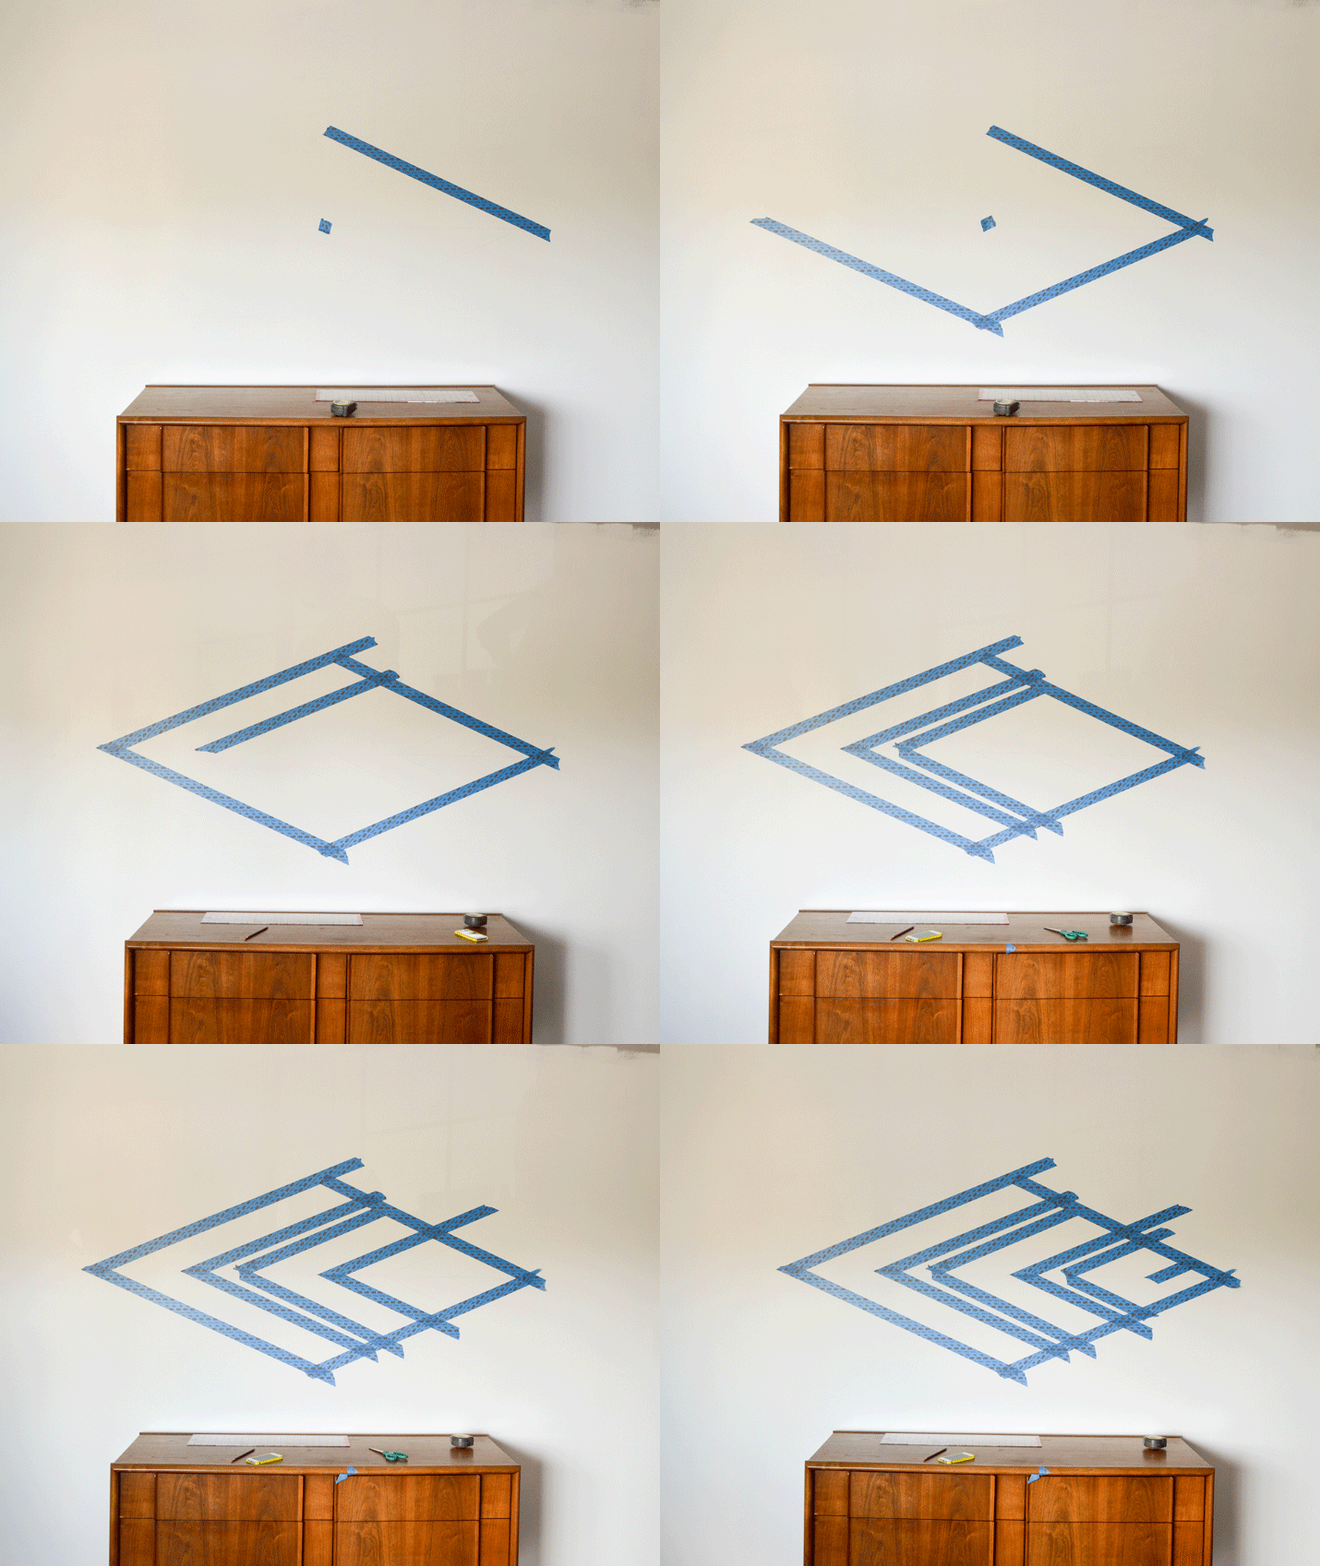
Now it is time to tape. Our wall was freshly painted (wait at least 24 hours) so we used ScotchBlue™ Painter’s Tape for Delicate Surfaces with Advanced Edge-Lock™ Paint Line Protector (2080EL) (the orange one).


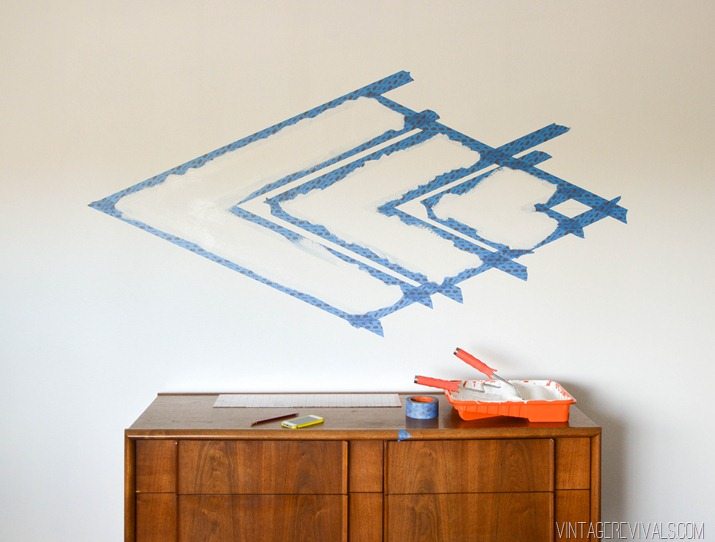
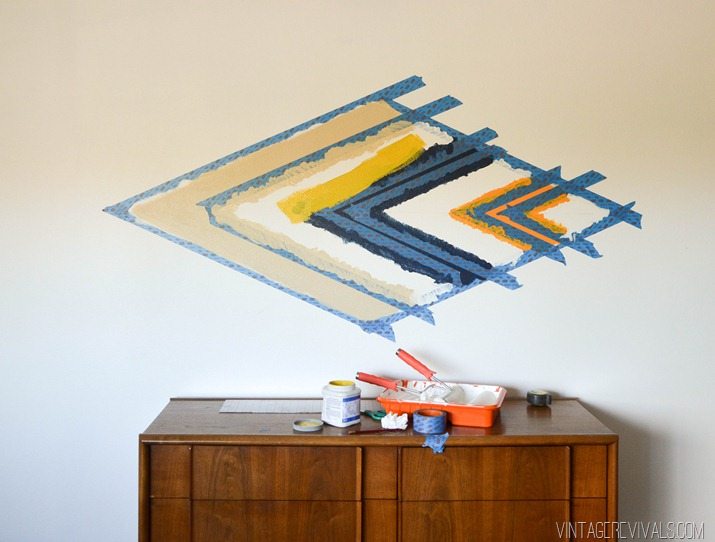
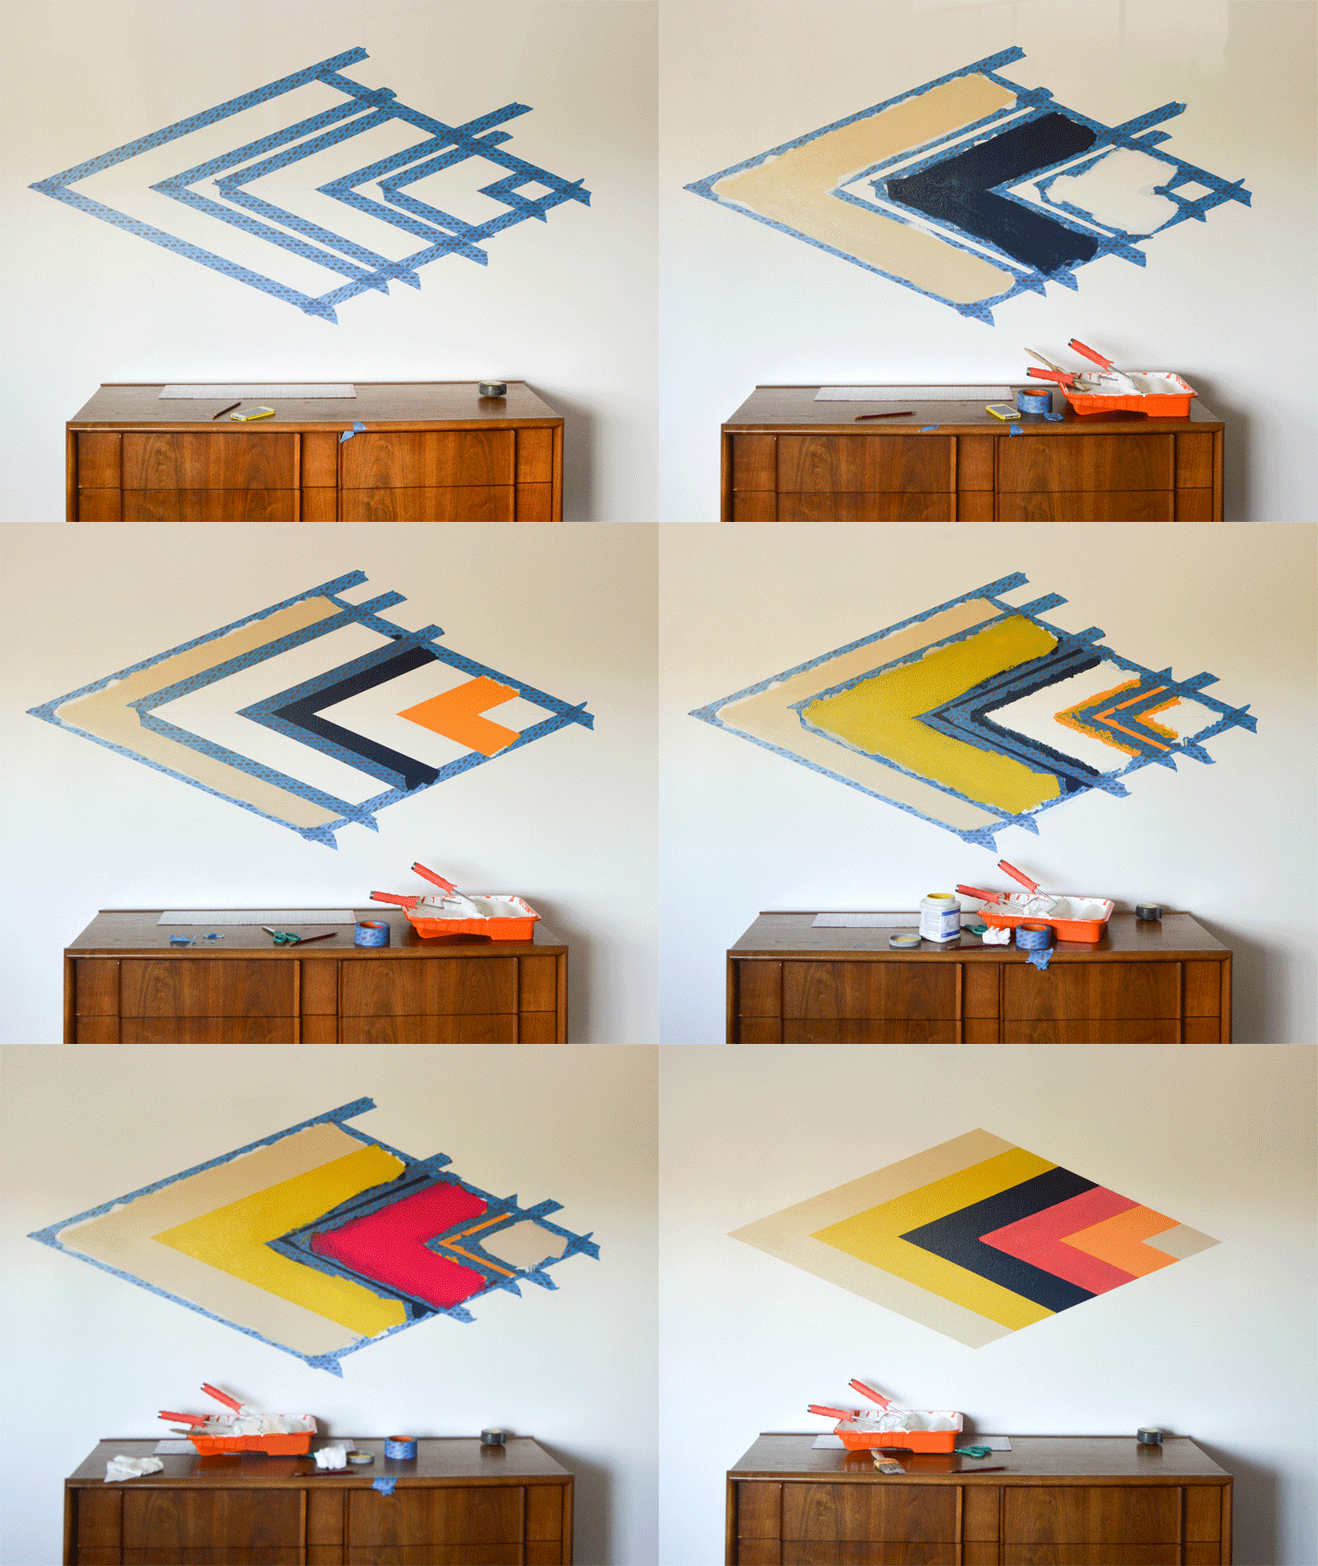
Tape along the outside of the diamond pencil marks. Because of the nature of the stripes (with no white space between colors, you have to break the taping up into 2 rounds. Tape along the outside of the 1st, 3rd, and 5th stripes.

DIY-Painted-Diamond-Focal-Wall-vintagerevivals.com-14


One of my favorite tricks for PERFECT paint lines is to paint the wall color onto the tape before you start painting with your new color. This will ensure that any bleeding is the color of the wall, not the new color that will be noticeable.

DIY Painted Diamond Focal Wall vintagerevivals.com-22


After your paint is done for those 3 sections, gently pull off the Scotchblue Painters Tape and let it dry.

DIY Painted Diamond Focal Wall vintagerevivals.com-26


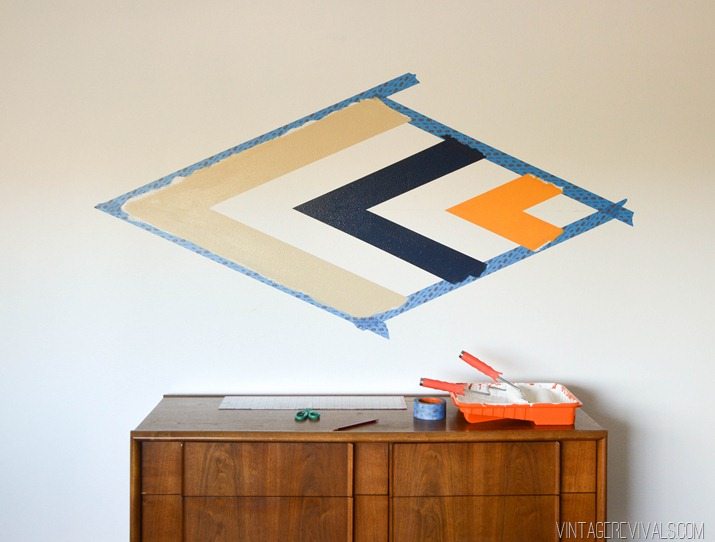
Once it is dry, you are going to line your tape up against the edge you just painted and tape along the edges of the 2nd, 4th,and 6th stripes.

Bleed your tape lines with the color that it is against. (For example before painting the yellow stripe we bled the taupe and the navy on the left and right, and white on the bottom and top.

DIY Painted Diamond Focal Wall vintagerevivals.com-30

diamond_painting


This technique, coupled with ScotchBlue™ Painter’s Tape will give you perfect paint lines every time.

DIY Painted Diamond Focal Wall vintagerevivals.com-11


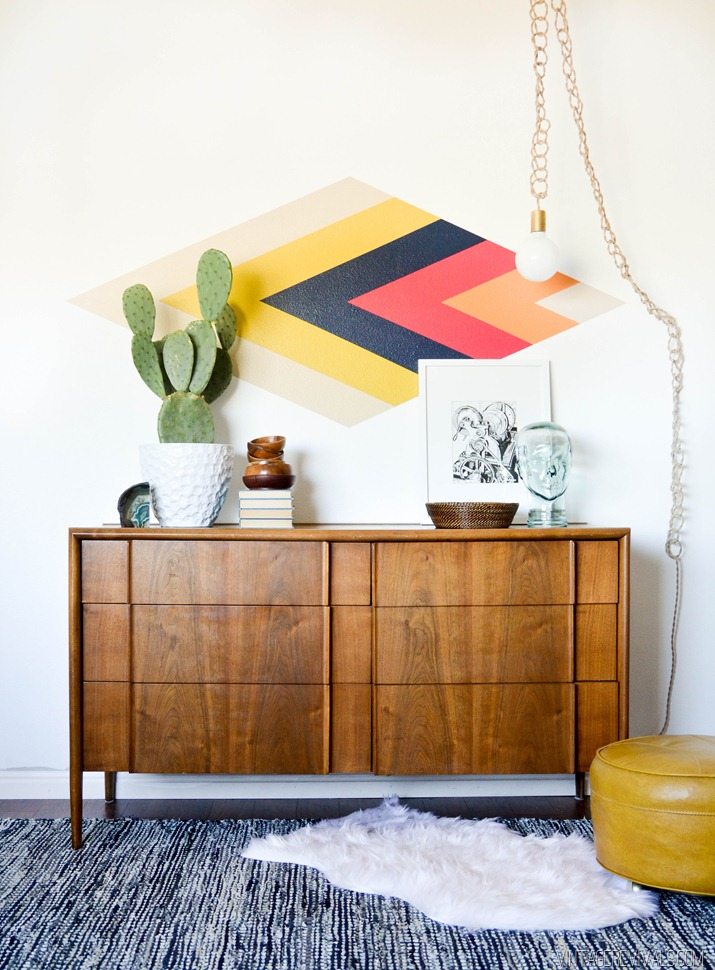
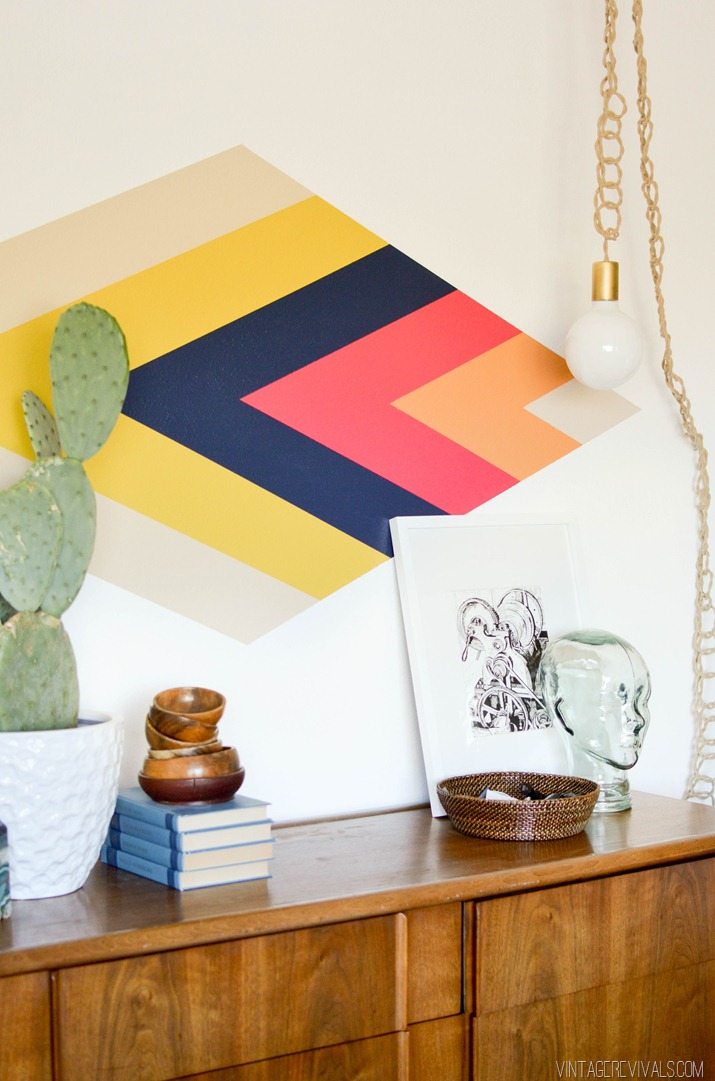
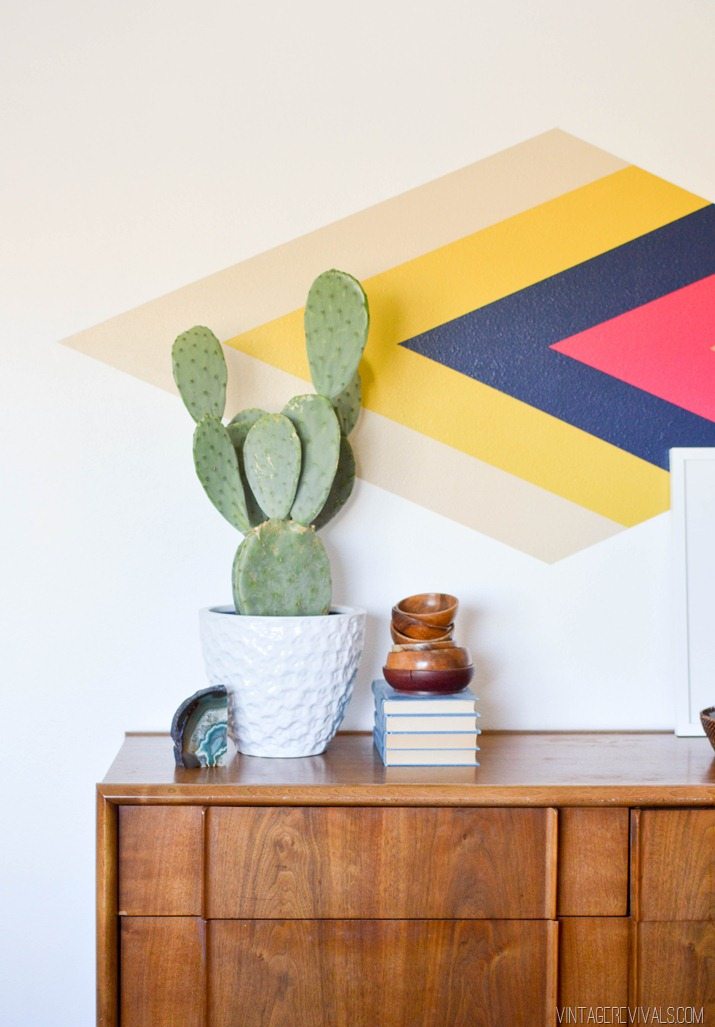
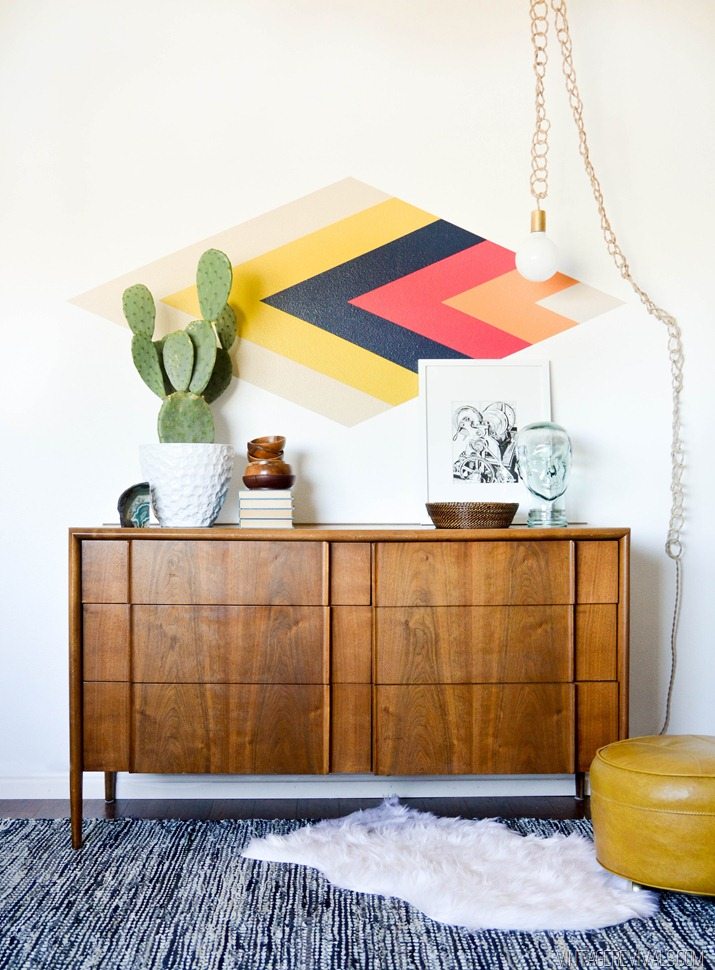
I am so in love with how it turned out. It is the perfect Desert Nomad vibe that we are itching for.

DIY Painted Diamond Focal Wall vintagerevivals.com

DIY Painted Diamond Focal Wall vintagerevivals.com-7

DIY Painted Diamond Focal Wall vintagerevivals.com-2

DIY Painted Diamond Focal Wall vintagerevivals.com-4

DIY Retro Diamond Focal Wall vintagerevivals.com


So now for the part that will really get you excited! Everyone loves winning money right!? Well you can enter the Home of ScotchBlue™ Painter’s Tape Contest at www.scotchblue.com/homecontest October 1, 2014 through November 15, 2014 and you could win $5,000 to put towards a home makeover! The first 500 to submit an eligible entry will receive one (1) roll of the new ScotchBlue™ Painter’s Tape with Advanced Edge-Lock™ Paint Line Protector!

Check out this project as a featured project example in the contest! There are also mounds of idea on HOSB’s social pages! ScotchBlue™ Facebook page ScotchBlue™ Twitter page ScotchBlue™ Pinterest page

And stay tuned, because this room makeover is on the fast track to amazing!

LoveYourGuts14


Contest open to legal residents of the U.S. and D.C. (excluding AZ, MD, NJ, ND, TN and VT),

who are 18+ (19+ in AL & NE and 21+ in MS) at the time of entry. Void where prohibited. Enter from October 1, 2014 at 12:00:01 a.m. CT through 11:59:59 p.m. CT on November 15, 2014. All contest communications, entry/judging criteria and details subject to the full Official Rules. To enter and for Official Rules, visit www.scotchblue.com/homecontest. Sponsor: 3M Construction and Home Improvement Markets Division, St. Paul, MN.

I am proud to be a 3M sponsored blogger, and, as part of my responsibilities, I get the
opportunity to evaluate products from ScotchBlue™ Painter’s Tape. Opinions are my own and
additional product used in the project were selected by me.
Saturday Snaps | 2

By Mandi | 09/20/2014 | 13 Comments

So many amazing things on the internet this week!!

saturday_snaps

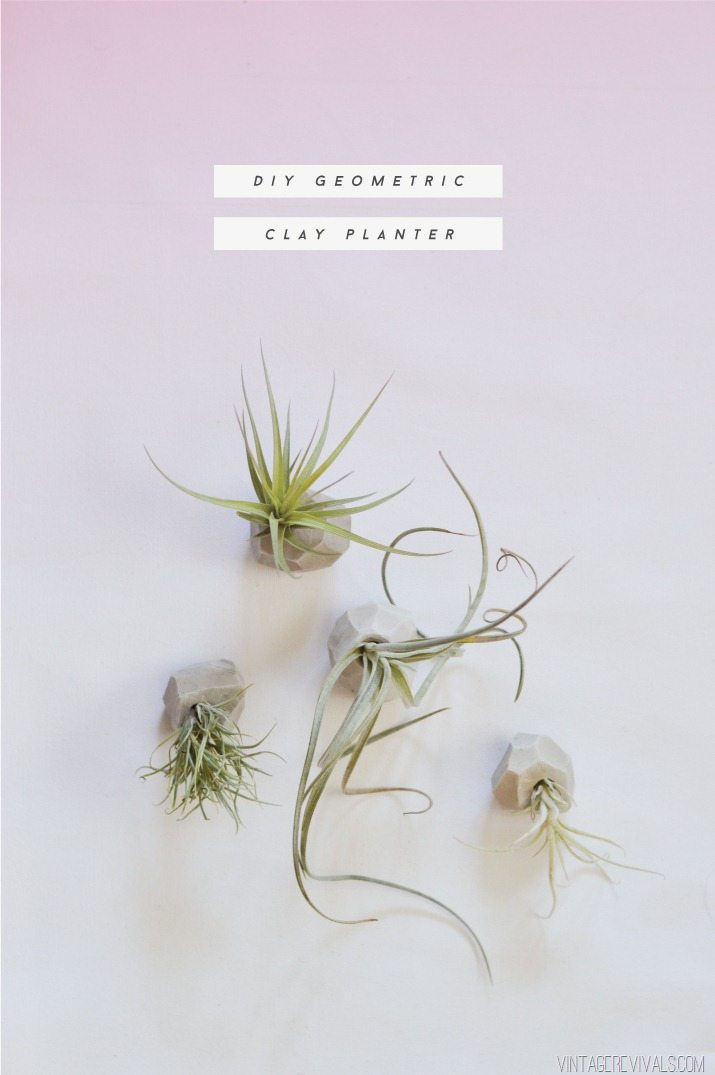
|| ONE ||  Jamie (my right hand gal) created a really fun tutorial for the secret project in this week’s newsletter. So. Here is the deal, I am going to give you the link, and if you love it, then you should wholeheartedly consider signing up because she brings this kind of magic into your life every Friday morning!

clay_planter


|| TWO ||  In the comments on yesterday’s bare all post, one reader (thanks Adriana!) recommended this TED talk by Eat Pray Love author Elizabeth Gilbert. It is wonderful listen for everyone who feels like they are creative and struggling, or creative and just had a massive success. Or you know, just creative.


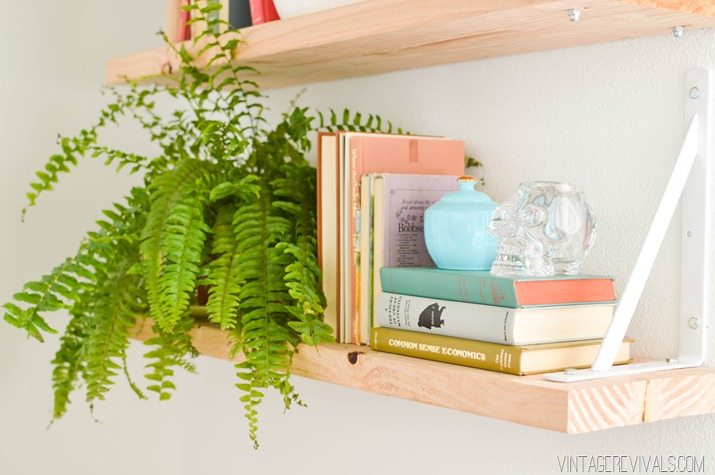
|| THREE ||  I get asked pretty frequently about the little crystal skull planter that is in Macie’s Bedroom. It is sort of one of those unicorn pieces that I found at Homegoods (strike one) during Halloween (strike two) on clearance (strike 3). So the chances of you guys finding one is slim. I saw these skull shot glasses on clearance at UO yesterday while rug shopping and thought I would share! (affiliate link)

Retro Bohemian Teen Bedroom Makeover vintagerevivals.com-27


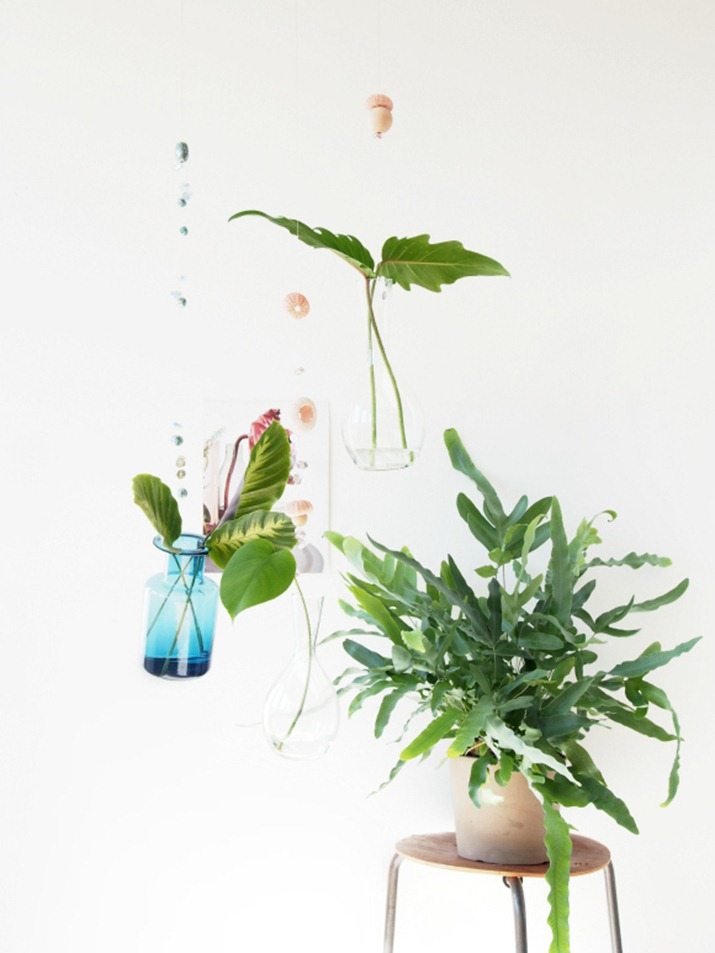
|| FOUR ||  Do you read Monsters Circus? It is FULL of inventive DIY’s and oh so inspiring. I could do an entire post just on her awesome ideas. This floating vase project is beautiful.

DIY-Floating-Vases-hanging-greenery


|| FIVE ||  These are on our to do list this weekend… Thanks Joy,  thanks a lot.

4654394200_32dc936bba


LoveYourGuts14

A Good Reality Check

By Mandi | 09/19/2014 | 136 Comments

You guys! Its Friday, and I’ve had a pretty massive breakthrough so its time to celebrate! The last couple weeks have been a little rough in my head. Join me for a peek inside?

As Vintage Revivals has grown, and cool things like winning The Homies or being BHG’s DIY Blogger of the Year have come along, I have found myself becoming what I thought those things should look like.

That, coupled with the “this is your job, act like it” tape that has been playing in my head for the last few weeks, was a recipe for disaster.

The straw that broke the camels back, was the feedback on the Nugget cabinets. All of the comments about the cabinets were right on. Let me make this CRYSTAL CLEAR. I loved the feedback. The comments didn’t hurt my feelings, or make me feel bad in anyway. Pinky promise. I’ve been stressed about it because I didn’t have the answer. I didn’t know what was wrong, just that it was. You guys are seeing what I see, your gut is feeling the same meh as mine. Finding a solution just proved more difficult than I wanted. I love when you guys think I’m up in the night crazy. Creating something new and getting the side eye is a place that I am comfortable. Only this I time didn’t have some quirky stunt move to pull myself out of the nose dive. Womp womp.

There are some changes ahead for the little guy (demo round 3 anyone? who wants to come and help!?) but the hold back that I have been having isn’t about making the changes or about the extra work to do so.

Its about how it looked to you.

I show you one thing, only to rip it out or paint over it in the next breath with every.single.element.in.this.freaking.trailer. To be completely -bare all- honest, its embarrassing. Here I am,  someone who is supposed to know things (what things I am not sure, just things) and I cant pull this trailer together to save my life. This is hands down the hardest project I have ever done. When I say that we are failing our way through, I am not exaggerating. The whole point of this blog is to inspire you to do something creative to make your space more you. I know its encouraging to see the fails, but at what point does it become discouraging? After how many projects gone awry do you not feel inspired anymore, and you’re left feeling like “Welp. I don’t even want to start because look at this freaky mess!”

It all came to a head yesterday when I was talking to Court. (pssst he is the best you guys)  Basically I was feeling beyond overwhelmed and hyper sensitive about a project that I was working on for Ashy’s Room. After finally talking though how I was feeling (sorry for myself, overwhelmed about the Nugget design, the whole embarrassment factor) he listened to me while I had a good cry, then he gave me some tough love. He said that I needed to get over myself (record screeeeeech). That being a blogger doesn’t automatically make me a Designer, especially one that only makes right choices. I am not exempt from the work that is mine to do, and sometimes that means failing on a massive scale. Then he said the part that I needed to hear the most. That while I may not know all of the things, or create a space that works out perfectly from the word go,  the one thing that I have going for me is that I’m not going to say “well, its good enough” or give up on a project until it feels right, even if that means redoing it completely…

…3 times.

So there you have it. I am feeling much better, and extremely grateful for a husband that keeps me in check. I know what I need to do to fix the trailer, and I just love you guys. Really. Thank you from the bottom of my heart for being wonderful.

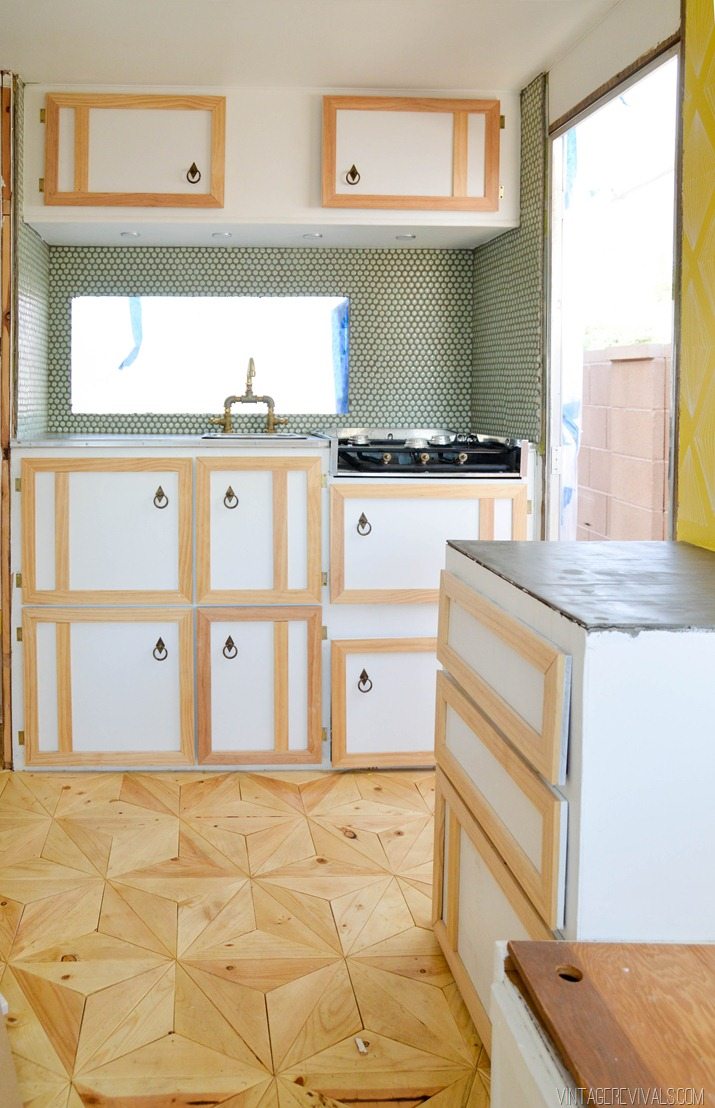
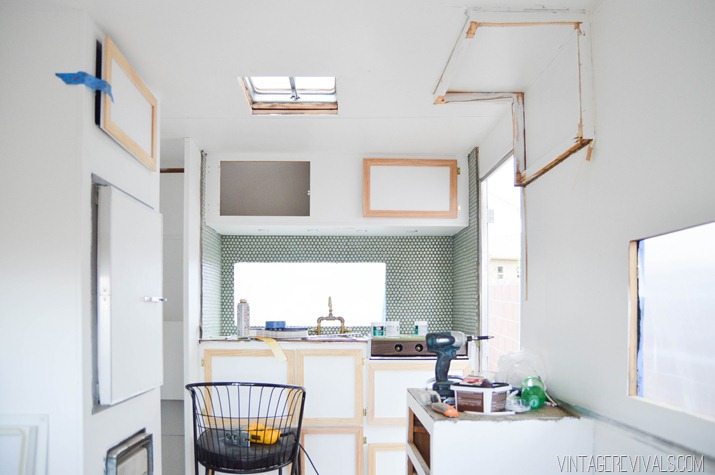
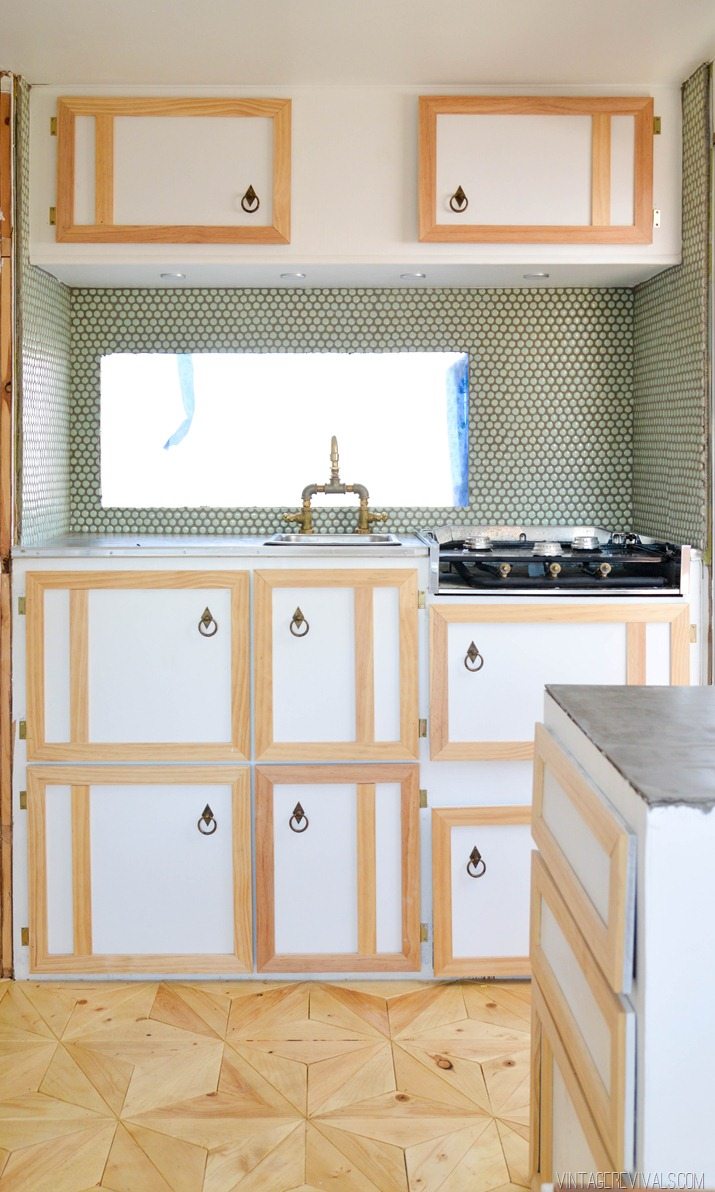
As far as the Nugget goes, there are a few things that I LOVE. The floors, the walls, the cabinet hardware, and the faucet all stay. Everything else is up for elimination. This thing is going to turn out beautiful, even if I am DIYing at the bottom of a 90 ft ravine. Also, I have decided that my plane hasn’t crashed yet, and the stunt move is coming, so be prepared.

Now, has anyone seen my sledgehammer?

Love Your Guts

About The Cabinets

By Mandi | 09/17/2014 | 29 Comments

Hey guys!! Holy cow, I can’t believe that it is Wed. already. This week is flying by!

I wasn’t planning on posting today, but I just wanted to pop in with a huge thank you! I loved getting feedback on the post yesterday about the cabinet doors in The Nugget.

Vintage Trailer Cabinet Refinishing-12


Here is the thing with the cabinets. I’m with you, they’re fine, but they aren’t amazing. I am a few steps ahead of what you guys are seeing on the blog and I have been feeling like something just isn’t right with the design. Like its just off. Yesterday’s post/comments were exactly what I needed to hear. So thanks for your feedback friends, it means the world! I hope that you guys are enjoying the real process, good, bad, and ugly. I know I am!

Love Your Guts

The Nugget: Refinishing Cabinetry

By Mandi | 09/16/2014 | 54 Comments

Dudes! We are overhauling a 1972 Bell Travel Trailer! Follow the entire series from the beginning here!   Huge thanks to 3M DIY for teaming up with us on this project!

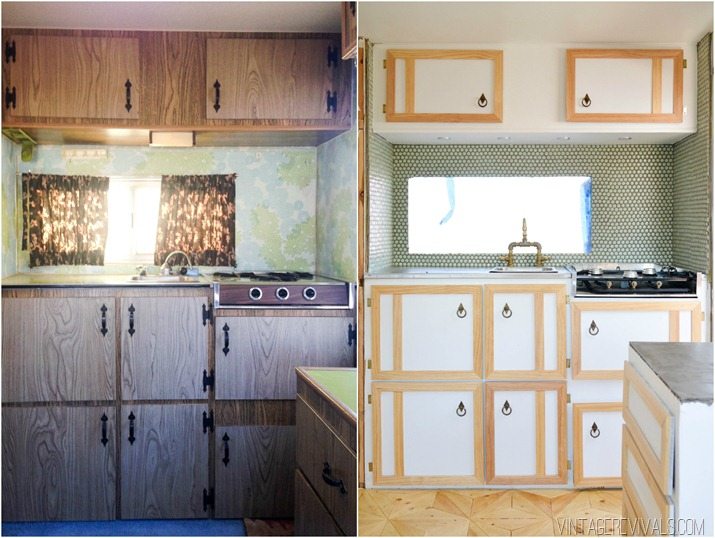
Oh cabinets. You tricky little suckers, you. The original cabinets in The Nugget were simple. Some sort of bullet proof laminated particle board (no joke, this stuff is tough!) with black hammered outside hinges and a black hammered handle.

Vintage Trailer Cabinet Refinishing-16

In order to keep costs down we decided that reusing them would be the best option.

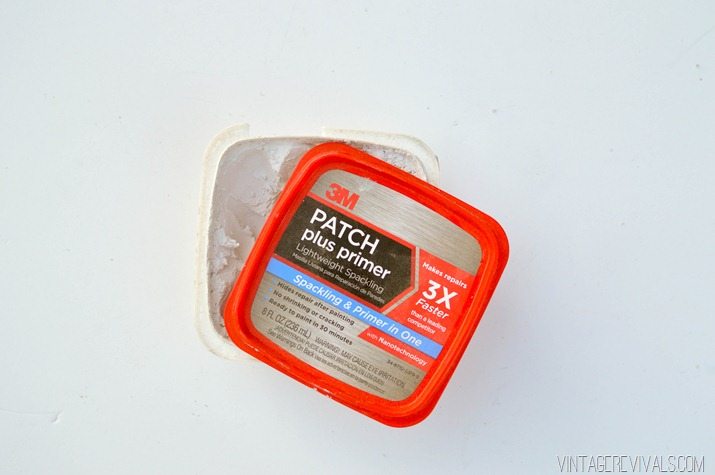
After removing them from the trailer and removing the hardware, I used 3M™ Patch plus primer to fill the holes. This stuff is my fave!

Vintage Trailer Cabinet Refinishing-2

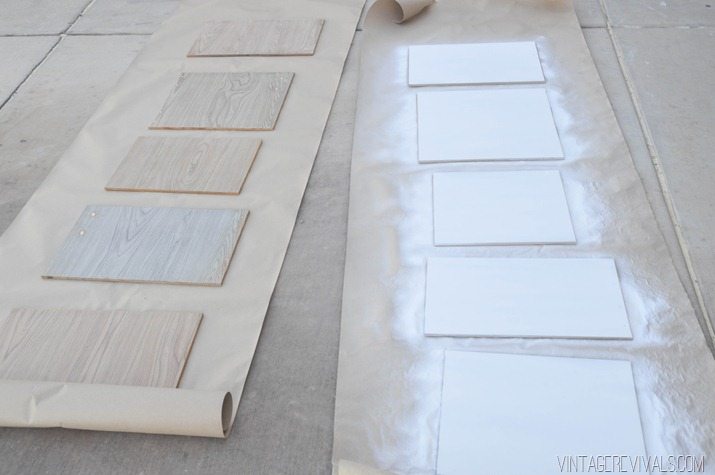
When it was completely dry I sanded the front and backs of the doors. When you are painting over laminate using a 150 grit sandpaper like 3M™ Advanced Abrasives is an absolute necessity. I needed to give the paint something to stick to.

So go with me on this, sometimes we like to overcomplicate things, right!? When I was trying to decide the best painting route I had all of these paint options and techniques and it was just turning into such a process. What it finally boiled down to was durability and the finish. Guess what? Spray paint is AWESOME for both. No paint lines, no major clean up, and when you let if cure for the proper time period it is totally durable. I used Rust-O-leum 2x in White Satin and it matched my wall paint perfectly. (When does that ever happen? It was meant to be!!)

Please note the color difference between the backs of the cabinets, and the front (the 4th one down on the left) There was some major sun fading happening.

Vintage Trailer Cabinet Refinishing-4 copy


Trimming out the doors with wood proved to be a little more complicated. Finding wood that is 1/2” thick at a low price is pretty impossible, so we bought 1×2”s and ripped them in half on the table saw.

Then we measured and mitered the corners. Just a tip, when you are measuring for a 45 degree angle remember that you are measuring for the longest edge!

We attached the wood to the cabinet fronts with a staple gun, and then patched and sanded the holes again. Instead of spray painting the entire back side,  I used a little spray paint touch up trick. Spray a good-ish amount of paint into a disposable container. Then use a synthetic brush to touch up your spots.

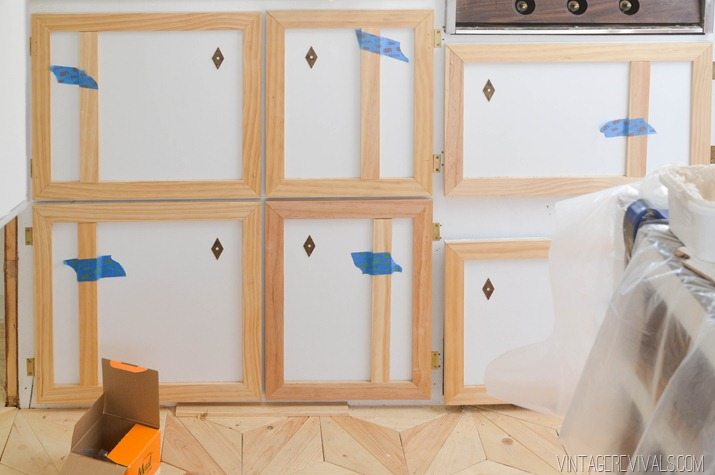
It was at this point that I was having stress that everything was so blah. After playing around with a few ideas we finally decided that an off set vertical piece was just the detail that the cabinets needed.

Vintage Trailer Cabinet Refinishing-6


I attached these pieces with glue and used ScotchBlue™ Painter’s Tape to hold it on for the recommended cure time.

Vintage Trailer Cabinet Refinishing-7


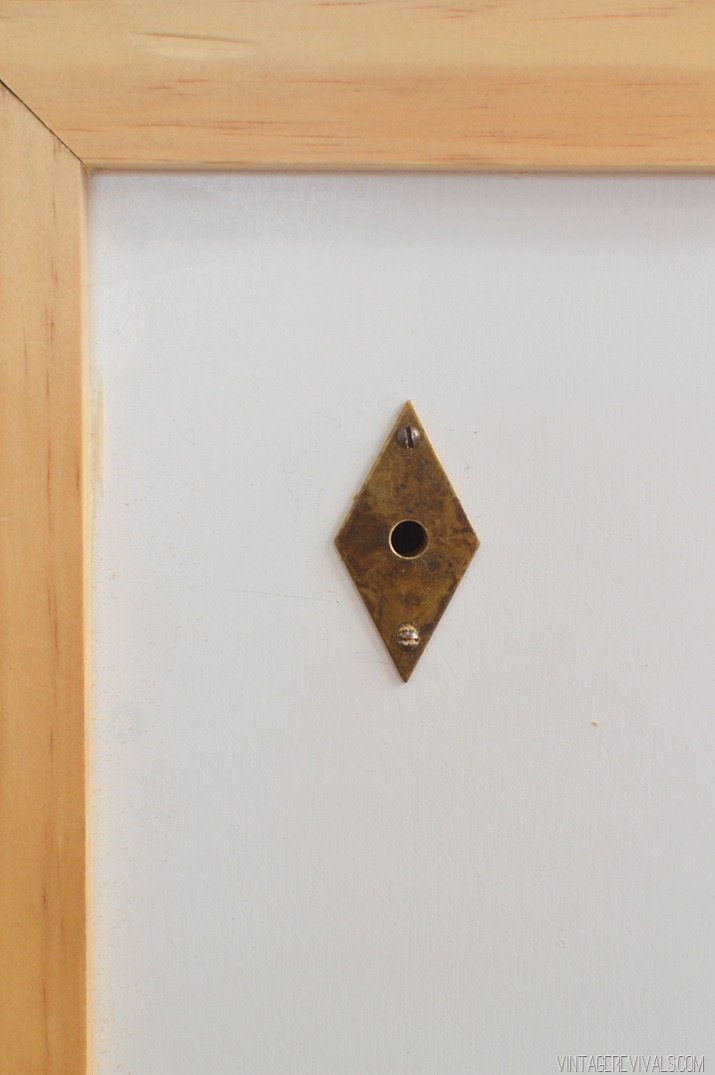
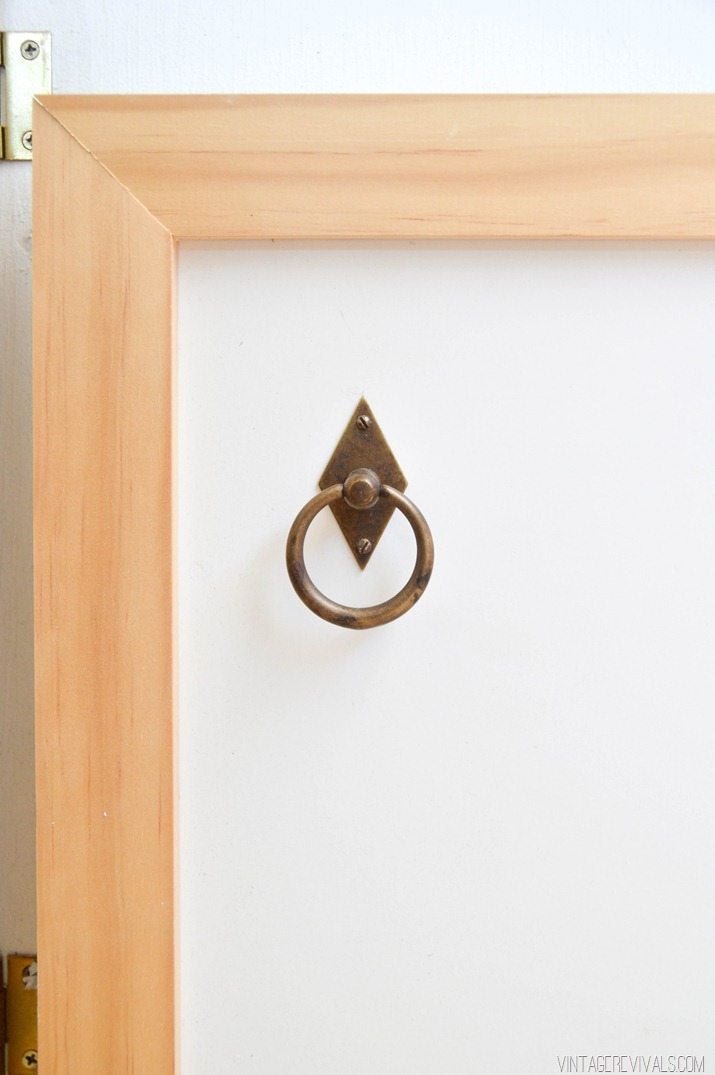
While they were curing I put on the freaking amazing hardware.

Vintage Trailer Cabinet Refinishing-10

Vintage Trailer Cabinet Refinishing-13

Vintage Trailer Cabinet Refinishing-14

Vintage Trailer Cabinet Makeover

LoveYourGuts14


I am proud to be a 3M- sponsored blogger, and, as part of my responsibilities, I get the opportunity to evaluate products from 3M DIY. Opinions are my own and additional product used in the project were selected by me.


dont miss any of this series


Ashy’s Room Makeover: Demo That Dang Bench!

By Mandi | 09/15/2014 | 15 Comments

There are some very happy feeling floating around the entire Gubler family right now. We just started working on Ashy’s bedroom makeover (you can see the befores and read the project plans here) but this room is not really just Ashy’s room.

At one point or another we have all lived in this bedroom. It was Court’s room when we started dating and after we were married we lived there for a little bit. So overhauling it is extra exciting.

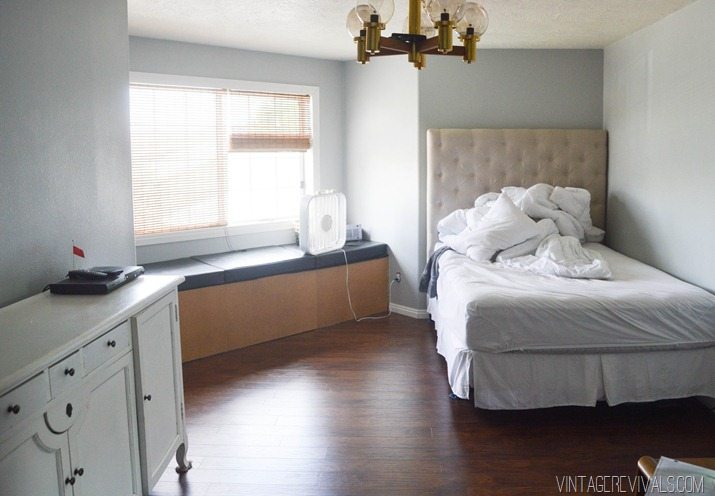
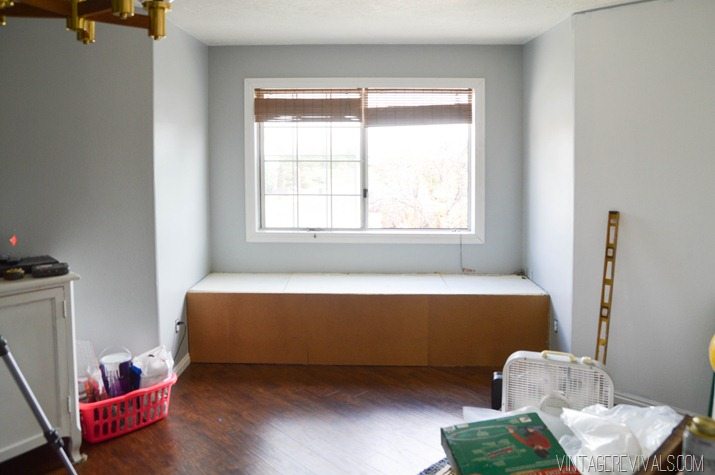
The first item of business was taking out the window bench. I am sure that the people that built the house originally had visions of their daughter curling up on it with a book in a comfy sweater and peacefully gazing out the window and dreaming of her one true love. Don’t lie, you’ve always wanted to feel like that on a window seat. But in reality it was a place of forgotten storage (hello Britney Spears poster) and a surface to pile stuff on. There was no window gazing happening. Plus I have a great idea for the space. So the window bench had to go.
Ashy Room Before


When we overhauled Alicia’s Kitchen and Living Room, we also replace the flooring on the top floor (where her office and Ashy’ bedroom are)  Taking out the bench meant that we also had to feather in new flooring (when the flooring was laid down they laid it around the bench, not underneath it.)

Demo a Window Bench


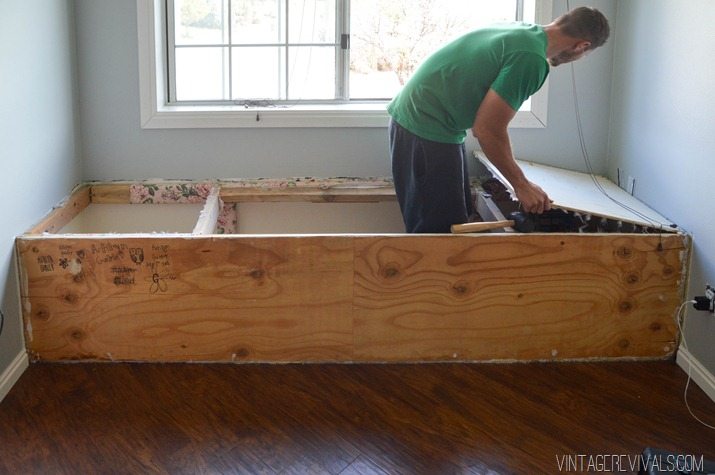
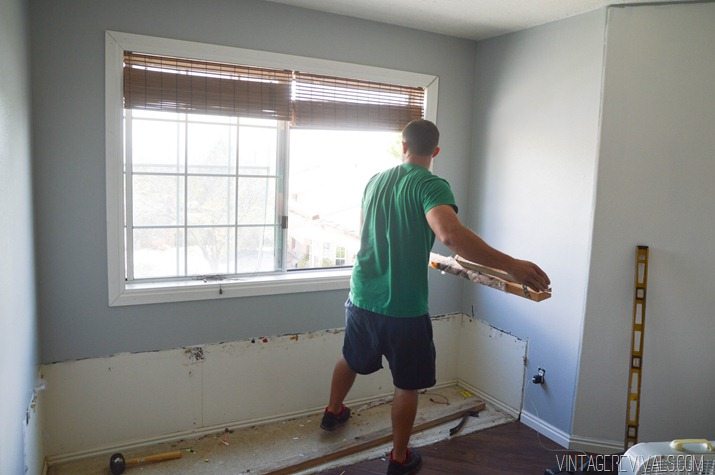
The demo was fast and easy and mostly consisted of Court throwing things out the window and me praying that he didn’t knock the gutter off of the roof.

Demo a Window Bench-2


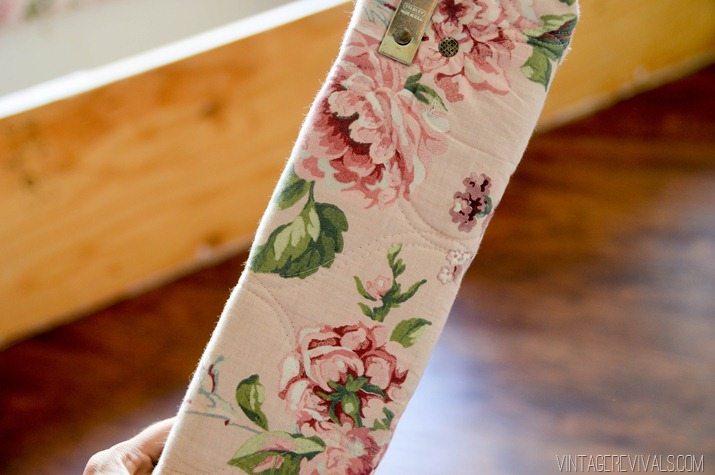
This fabric brought back memories. When Court and I lived in the room the ENTIRE bench was covered in it. My Grandma would have been sad to see it go. She loves pre-quilted florals.

Demo a Window Bench-3

Demo a Window Bench-4


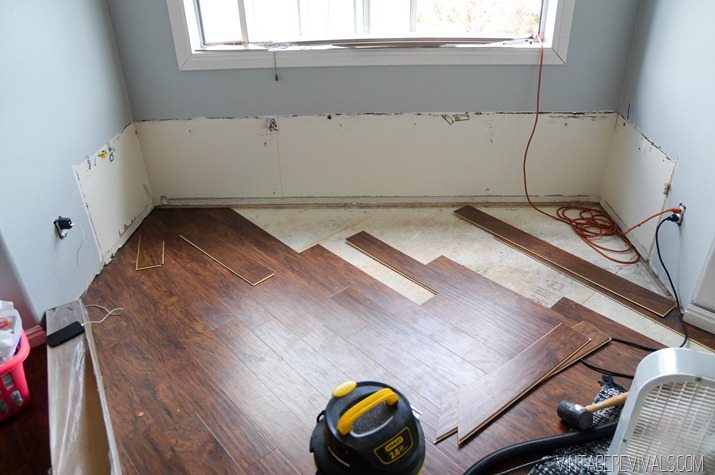
Once the bench and carpet (and all things carpet related) had disappeared it was time to tackle the floor.

The flooring that they installed was this. Thank goodness it was click because that made feathering it in really simple.

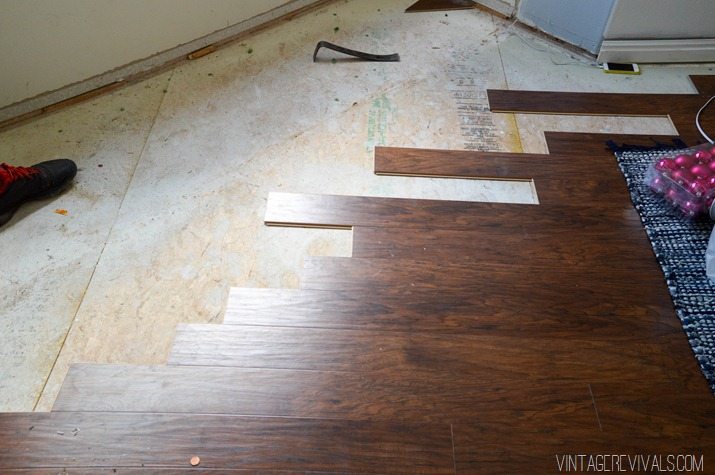
We took out all of the boards that had been cut to fit at the edge of the bench and were left with this staggery situation. You can see the line where the bench was to see how far back it was staggered. (Oh look! A penny!!)

Demo a Window Bench-6


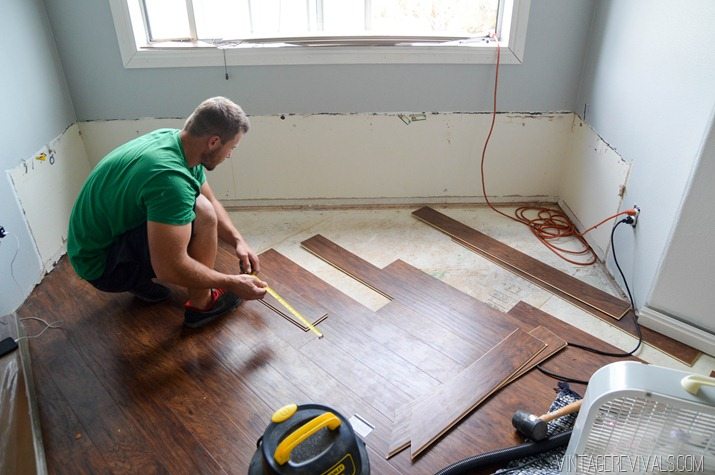
Then starting on the left side of the window we filled it in.

Demo a Window Bench-8


The hardest part were the pieces that had to be slid in a long ways to fit. I had to gently pull and lightly twist the preexisting floor while Court slid it down the groove. (Sorry no pictures because I was gently pulling and lightly twisting…)

Demo a Window Bench-9


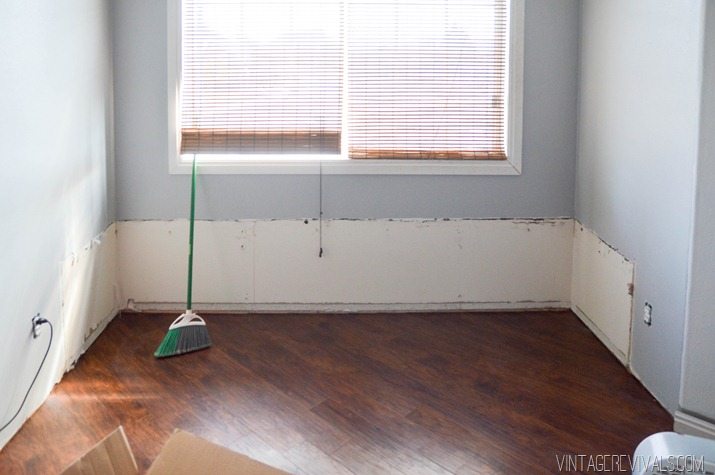
The floor took just less than 2 hours to finish and you guys, my MIL almost started crying when she saw the pile of bench remnants on the front lawn.

Demo a Window Bench-10


The room looks SO MUCH bigger. Not that it needed to, but we always had a hard time with furniture placement and now that problem has been thrown out the window with the floral fabric. So now the real fun can begin. Insert happy dance to Shake It Off because I have had that song stuck in my head for days.

LoveYourGuts14

Saturday Snaps | 1

By Mandi | 09/13/2014 | 19 Comments

What. Is. Going. On. A post on Saturday?! I know, I am just as shocked as you are.

There are so many amazing and inspiring things on the internet,  I thought it would be fun to share some of my favorites.

saturday_snaps

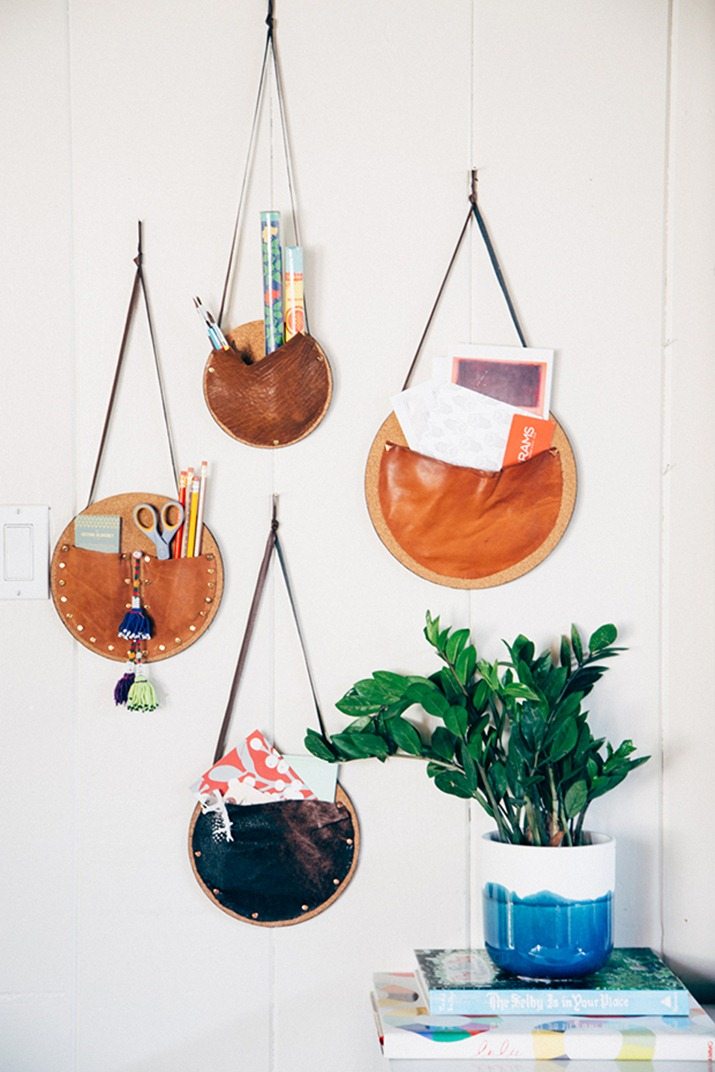
|| ONE ||  Pants need pockets, purses need pockets, even cheesy pepperoni pizza needs pockets. Do you know what else needs pockets? Your walls. Check out this DIY Wall Pocket tutorial by Justina Blakeney.

2-Wall-Pocket-11


|| TWO ||  This Make-A-Face printable from MrPrintables is just too cute.

changing-faces


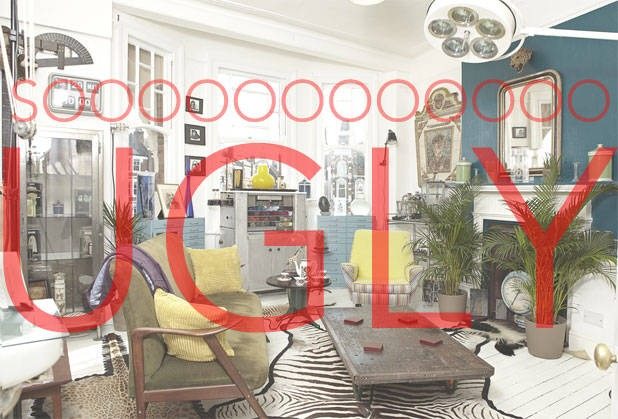
|| THREE ||  This post from Elle Decor about Beautiful Rooms and Ugly Comments was shared in a lot of my blogging FB groups. It is a really great read.

466170039

My favorite part is where the author says:

if you can’t say anything nice, say it in a smart, informed way

I know that I personally am grateful for opinions. I don’t know everything in the world when it comes to DIY and design. Feedback that informs or offers another option for myself and other readers is awesome and only adds value to the project. As long as its respectful.

So just for fun, do you guys want to hear the meanest comment that I have received as of late? (It was on this post)

You bought a beautiful “VINTAGE” leather sofa to “REVIVE” these hideous throw pillows.

In my opinion you should be tied by the hands to a pole with remnants of the PINK CLOTH then given lashes with a whip made from the very leather you desecrated!

Not going to lie, it made my face burn when I read it the first time, but after taking a step back and really looking at it for what it was. I mean, in reality it is a pretty creative albeit offensive solution.

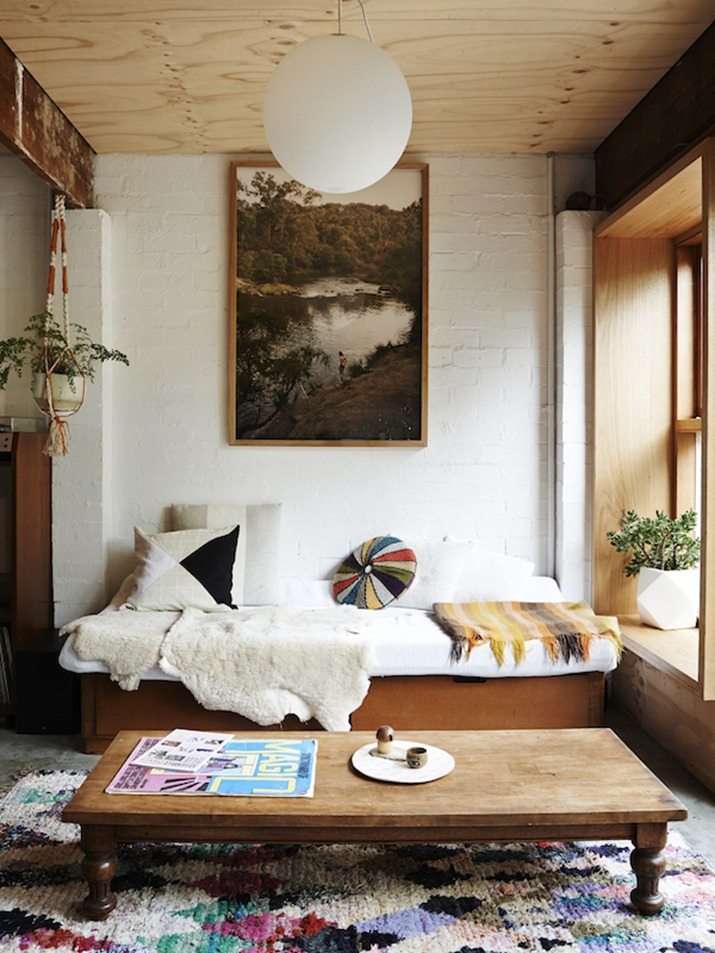
|| FOUR ||  Hello plywood ceiling. Lets get married.

TDF-carlton1023


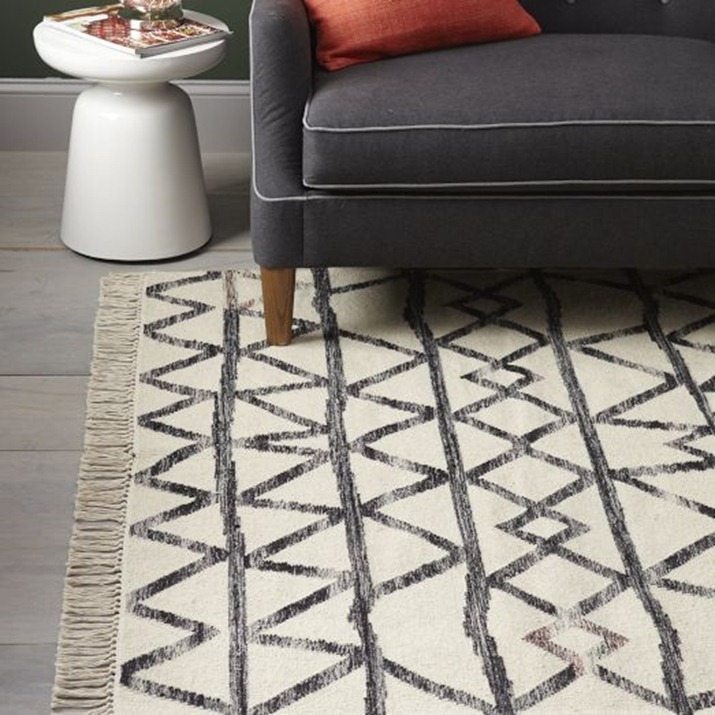
|| FIVE ||  20% off select rugs at West Elm (!!)  This one (<—affiliate link) ≥˚∆o9 is my fave and is only $244 for a 5×8 (down from $349).

img43c


|| SIX ||  Huge honor to be featured on Decor8 yesterday. Pop over and read the full article here.

Did you find anything interesting/amazing this week? Feel free to share it in the comments so we can all enjoy! I hope you have a wonderful weekend guys! See you on Monday for the first post in Ashy’s Real Time bedroom makeover! (See I can take feedback! 😉 )

LoveYourGuts14