Laundry Humor and $500 Home Depot Giveaway!

By Mandi | 08/08/2013 | 714 Comments

Remember that one time that I was planning a really awesome laundry room post and then went out of town for the entire summer and started 3 other rooms? Yeah, that was fun.

My laundry room is like the armpit of well, my entire city. It makes Court crazy. I have no problem washing and drying the clothes,  its the putting them away part that always gets my goat. Remember learning about the Water Cycle in the 2nd grade? That is precisely what happens to the laundry at my house. It is an ever present round of rewashing.

One of the problems? My laundry room is not super functional. The worst part? I don’t even have pictures to show you,  because then I would actually have to do laundry. (Court are you behind all of this?!)

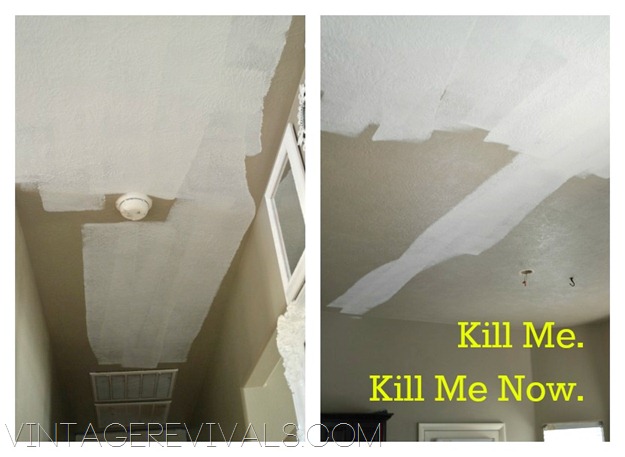
There is no counter,  small shallow cabinets,  bad linoleum,  beige paint,  and not a lot of room.

Do you know what I want? I want a laundry room that will hide all of my dirty laundry so it looks like I am on top of it.

THAT is a laundry room makeover I could get behind.

So. Instead of a mind blowing makeover (pop over and check out Brooke’s or Jenny’s if you need some of that kind of inspiration) I thought I would share with you some art that I feel would be super appropriate given the current state of affairs.

Laundry Room Art

Laundry Room Art Ideas

Funny Laundry Room Art


Since I am clearly not the expert in this situation and in all actuality need a laundry intervention of my own,  here are a few tips from Jenny Komenda about sprucing up your laundry room.


Brilliant Ideas by Jenny Komenda

Dealing with a dark, cave-like laundry room is a chore in and of itself!By taking off the doors on a few of your upper cabinets, you’ll open up the space and create a place to store baskets. In this laundry room, we assigned baskets for every member of the house, which makes sorting a breeze!

Why not decoupage or paint the insides of your cabinets for a fun pop of color? It’s a guaranteed smile each and every time you reach for your detergent. Also don’t ignore the door. Adhere some cork panels on the inside of the cabinet doors and create a space to pin all those stain removal tips.

Don’t like the cabinets, floors and countertops in your laundry room? Every surface can be painted or resurfaced! We updated this room with paint and a concrete overlay for less than $30 in materials. Say goodbye to the outdated linoleum, brick pavers and old, dark cabinets.

A rolling laundry butler can be your best friend, doing triple duty with a hanging bar, a rolling basket and a drying rack. It’s the perfect choice for smaller laundry rooms that haven’t been updated in a few decades.

Don’t neglect your laundry room walls! Hanging interesting art and mirrors will elevate your room and make it feel less utilitarian and a little homier. Suddenly those 400 loads of laundry most of us will do this year might actually be enjoyable!

A folding station makes all the difference. Use a slab of stone or a simple piece of painted MDF on top of washer/dryer units to create a folding station that also prevent socks from slipping in between the appliances!


And now for the REALLY good part.

Want to win $500 gift card to Home Depot? I mean, is that even a question? Of course you do.

Enter the Rafflecopter below,  there are a few extra options thrown in for those who are super committed to winning. For the rest of you fellow slackers (I say fellow because I am the President of the Slackers United Fellowship) feel free to enter as few or as many times as you can muster the motivation for.

a Rafflecopter giveaway


We bought our Maytag washer and dryer from The Home Depot 3 years ago and LOVE them. The only downside is that it doesn’t come with a Fold/Put Away option. Because goodness knows it comes with everything else.

Right now Maytag is running a great promo. To celebrate the #BrilliantHEClean campaign, they are offering a $100 gift card with the purchase of a Maytag Powerwash machine & 150 oz. Tide.

And here is the BEST part,  they are giving away a $5000 laundry room makeover!!

  Make sure you enter here!

This post was written in partnership with Tide,  Maytag and The Home Depot. All opinions and dirty underwear references are 100% mine.

The Suckiest Suck Job EVER. Revisited.

By Mandi | 08/08/2013 | 55 Comments

A year or so ago, I proclaimed with all my heart that the suckiest DIY job ever was painting ceilings. In fact it was what I told Court I wanted for my anniversary. He totally delivered,  such a good guy right?

Well I am here to go on record today saying that I lead you astray my friends.

Painting ceilings are not in fact the suckiest job ever.

Painting Ceilings Sucks.


Chiseling off thinset is the suckiest suck job ever.

I mean, have you ever done it?

WHY. IS. IT. SO. HARD?!?

The good news,  you guys get to see my awesome chisel boots.

IMG_2148


The bad news? We still have 1/2 our kitchen.

You also may be wondering why I am updating you on the kitchen. Why not the Master Bedroom, or Cara’s Office. The answer is simple. Court said if we were going to do it, we needed to do it now. I of course said “As you wish.”

I guess that is the beauty of a real time room makeover,  you guys get to see how things really work around these parts.

Hate the game, not the playa.

So tell me,  in your opinion, what is the suckiest DIY job you’ve encountered?

Concrete and Glass Succulent Planter Tutorial

By Mandi | 08/07/2013 | 26 Comments

Remember how I just took another week of? I get the blogger of the summer award. The good news? Summer is just about over,  and then I will be back and handing the award off to someone else.

I have a really simple project to share with you today. So simple in fact that your kids could help you do this! It is a concrete and glass succulent planter,  and it looks about 1000x more expensive than it really is.

Concrete and Glass Succulent Planter vintagerevivals

The best part is how unique each planter is. Start with varying glass containers. My fave place to buy them is Homegoods,  they always have lots of different options and most will be under $5.

Mix a batch of Quickcrete together. I like using the kind that comes in a bucket. Its a much more manageable amount and you have something to mix it in!

Concrete and Glass Succulent Planter vintagerevivals.com-4-2

Scoop concrete into your glass container.

With your planter on a towel, gently but firmly hit the bottom of the container against a flat surface. This will make your concrete settle.

Concrete and Glass Succulent Planter vintagerevivals.com-2-2


Wipe off all of the excess concrete with a wet sponge.

Concrete and Glass Succulent Planter vintagerevivals.com-3-2

If you are using a planter that you can fit your hand into you can make it so that the edges of your concrete are a little more jagged.

Concrete and Glass Succulent Planter vintagerevivals.com-6-2

I love when things are imperfect. It makes me feel not so left out.

Scoop out the center so you have a place to plant your succulent

Concrete and Glass Succulent Planter vintagerevivals.com-10-2 Concrete and Glass Succulent Planter vintagerevivals.com-11


Let your planters cure for at least 36 hours before you plant them.

Concrete and Glass Succulent Planter vintagerevivals.com-8-2

Concrete and Glass Succulent Planter vintagerevivals.com-2

Concrete and Glass Succulent Planter vintagerevivals.com-5

Concrete and Glass Succulent Planter vintagerevivals.com

Concrete and Glass Succulent Planter vintagerevivals.com-6


The fantastic thing about succulents is that they are really hard to kill. You know,  for those of us that are serial plant murderers.

Concrete and Glass Succulent Planter vintagerevivals

DIY Leather Pillow Tutorial & How To Sew A Zippered Pillow Cover (The EASY Way!)

By Mandi | 07/30/2013 | 63 Comments

These leather pillows are one of my favorite projects to date. There is just something so satisfying about taking an unwanted item that was destined for the thrift store and/or dump, and turning it into that perfect something that you were unable to find.

DIY Leather Pillow Tutorial vintagerevivals

If you remember a couple of weeks ago I shared this post (that has the best title of my life. I mean, I know I will never top So…I Skinned A Couch. It is one for the ages.)   For those unfamiliar with this tale,  I bought a couch off of Craigslist with the sole purpose of cutting it apart to make pillows. Strange? Yes. Welcome to Vintage Revivals.

Untitled-2

Did you know that if you make a pillow with leather on both sides it is the equivalent of laying down on a floatie? You know floaties like the orange things you put on kids arms while they are swimming? It will take an hour for all of the air to drain out of your pillow…and 2 days to fill back up.

I wanted my pillows to be really slouchy and a little saggy and really used looking. A floatation device was not a good look for this project.

This simple fact left me at a crossroads. I could try and match the fabric to the leather and fake it. Or I could embrace the change of plans… what do you think I did?

DIY Leather Pillow Tutorial vintagerevivals.com-8


This is so much more than embracing. This is a full contact body hug,  the kind that lasts 15 seconds too long… with a bit of uncomfortable breathing.

I was a little concerned with the whole sewing through leather thing. But with the right needles it was like buttah. They make needles just for this type of job. They are called Leather Needles. Mind Blown.

Start by literally skinning a couch. Leave the leather as intact as possible.

Cut roughly the size of your pillow out of the leather (you may have to piece it together, which makes it all the more awesome. FYI.

DIY Leather Pillow Tutorial vintagerevivals.com

Fine tune your cut so that it is a perfect square. My pillow insert is euro size (26×26) AND I wanted it to be shluppy so I made it 29” square and allowed for a 1/2” seam.

DIY Leather Pillow Tutorial vintagerevivals.com-4

Cut the contrasting fabric to the same dimensions. I LOVE using  Duck Cloth for throw pillows. It is a really thick canvas that comes in about a billion colors at Joann’s. It usually runs $10.99 /yd,  so use a 40% of coupon to save a bit of cash! You are also going to want to snag a coordinating zipper. Don’t be scared. Zippers are easy.

The easiest way to sew a zipper into a pillow!  No skills required!!

DIY Leather Pillow Tutorial vintagerevivals.com-10


Place right sides together.

DIY Leather Pillow Tutorial vintagerevivals.com-5


Turn your machine to the longest stitch length.

DIY Leather Pillow Tutorial vintagerevivals.com-7


Sew your 2 pieces together with 1/2” seam allowance.

DIY Leather Pillow Tutorial vintagerevivals.com-6


Press your seam open and for goodness sake, the leather has already been tanned,  take care to not tan it more.

DIY Leather Pillow Tutorial vintagerevivals.com-9


Pin your zipper facedown in place. Now, I am a rule breaker at heart and sometimes just cant bring myself to do things the right way. Feel free to pin your zipper the whole way down, or if you are a rebel looking for a cause you can pin it at the top like me.

DIY Leather Pillow Tutorial vintagerevivals.com-11


Sew and backstitch over the upper part of your zipper a few times to tack in in place.

DIY Leather Pillow Tutorial vintagerevivals.com-14


Now with your sides still separated sew down one side of the zipper and then the other. Make sure your zipper stays lined up with the center seam.

DIY Leather Pillow Tutorial vintagerevivals.com-15


When both sides of your zipper are sewn in sew a horizontal stitch at the bottom of your zipper,  just like you did at the top.

DIY Leather Pillow Tutorial vintagerevivals.com-16


Now unpick the stitch between the leather and the canvas and TADA! There is your zipper! This is the best kind of magical surprises.

DIY Leather Pillow Tutorial vintagerevivals.com-19


Line up the right sides together again, and stitch the remaining 3 sides. Unzip the zipper a little to get it started and the finish unzipping it when everything is in place.

For really sharp corners cut off the excess before you turn it right sides out.

How To Sew a Pillow


Turn it right side out,  clip your threads,  stuff,  and enjoy!

DIY Leather Pillow Tutorial vintagerevivals.com-22

Leather Pillow Tutorial vintagerevivals.com

DIY Leather Pillow Tutorial www.vintagerevivals    Pillow from Homegoods,  Antique Kilim Rug

I actually made 3 of these cute guys for my bed,  but couldn’t wait until my wicker headboard was done to show you how great they turned out.

So what do you think? Was it worth a couch dying?

Love It For Now

By Mandi | 07/29/2013 | 36 Comments

Holy cow, you guys. I just took a week off the blog. I dont think that has happened since…well ever. I love coming back with fresh perspective!

How many of us spend our days thinking and planning out our dream home? Saving all of our good ideas for it? Hoping that one day it will become a reality. Meanwhile reality is that we live in a place that we will be in for the next while and we look around and don’t love it, and possibly don’t even like it because of A) B) and C).

I do this, and mind you, it is my job to redecorate my house.

I get it. You don’t want to invest time and money into something because it is a starter home, not a forever home. But what is wrong with a starter home? Do you remember how excited you were to finally find it? I distinctly remember promising Court that I would keep our house clean all the time. (Something that he never fails to remind me about)

Have you noticed that you haven’t really seen my kitchen? Its because its not my favorite. How about my bathrooms? Again. Not my fave. This pic is from the MLS listing, it doesn’t look this bad anymore. But it still isn’t great.

20081017024019644881000000-o

In Southern Utah, builder basic consist of beige walls and red tile and oak. Such a happy little combination. But renovating is a little different than decorating. It can be expensive. It can take a long time. It can suck.

Its like the Serenity Prayer,  God grant me the serenity to accept the things I cannot change,  the courage to change the things I can, and the wisdom to know the difference. Sometimes we cant drop 20k into a kitchen overhaul where we move walls and get all new goods. Sometimes we cant change a thing.

But sometimes we can.

Rewind back to when we moved into our house 4 years ago. All I wanted was hardwood floors. That was it. I didn’t care if we had a fridge, a toilet, or an A/C until. I needed hardwood.

We found our floors on clearance and they had almost to the box the perfect amount for our living room/hallways/master. Also please remember that this was a full year before Vintage Revivals, before I started decorating, before I knew anything about design.

Since that order, the floor has been discontinued. Until 2 days ago. When I found it again.

I have made our kitchen as bearable as I can. But bearable is not my favorite. So I have set a really small budget for updating our kitchen. I am thinking along the lines of $2500. So there you go. Is it doable? Am I going to be eating my words?

We will see how that turns out.

So if you are in the same boat as yours truly,  enduring things because you don’t know if it will be worth it to change, I want to hear about it,  what is holding you back?

For everyone waiting on the Master Bedroom Makeover,  its coming along and I have the leather pillow tutorial coming up tomorrow!!

Conversation Spying

By Mandi | 07/18/2013 | 35 Comments

Hey friends! I am back in Vegas this weekend working on Cara’s Office and having a blast (of course!). Here is the thing, I wish you all were here with us,  because this whole thing, its pretty entertaining.

Just because you cant be here, I came up with the idea of telling you what we are talking about, and then you can chime in on the comments and we will feel like you are here too!

Up first on the conversation agenda? Thigh Gap.

Now. Mind you. I am not a fashionista AT. ALL. In fact, unless you consider my husbands old clothes (that are even too big for HIM, splattered in paint, with 4 day old knee sag) fashion,  I am grossly underdressed 97% of my life.

But Cara. She brings out my inner supermodel. I have to ask her every question about beauty and fashion I can think of before she realizes that I am a freakazoid and doesn’t want to be my BFF anymore.

So we are chatting blogs and stuff and we start pulling up different Fashion blogs. These girls are gorgeous. SUPER gorgeous. But the first thing that have to say is “Oh my. Their legs.”

images

They are seriously a good 4 inches from touching each other. I think girls of all sizes are gorgeous,  and inner beauty outweighs a thigh gap any day of the week. But I guess this is like an aspirational thing? The bigger the thigh gap the better. Sort of like boobs…but the opposite. Don’t genetics play a huge part in this? Seems sort of a bummer if your hips are all wrong for it.

This is the only way I am getting a thigh gap. Whose with me?

Thigh Gap

(This pictures was an outtake from my makeover photo shoot. The awkward pictures from that deserve their own post. Like I’ve said before 19 cycles of America’s Next Top Model have done NOTHING for me.)


We actually talk about you guys a lot. And how fun it is to get emails and stuff showing off your hard work. Like the one I got this week from 17 year old Kae. I feel like I need to steal a bunch of her ideas. Oh and renovating a bathroom as a teenager and keeping the total under $500? This girl is like a prodigy.


As most of you know I have been working on my site redesign for the past little bit and it is almost done!! I pulled it up to show Cara and she thought you all would appreciate how I label things.

image

Ads are not cute. I get it. But they pay for my thrifting habit, so they stay.


And I saved the best for last.

I am such a sucker for personality tests. I LOVE every single thing about them. Cara has a favorite that I had never heard of called an Ennegram. Holy dead on.

I am a raging 7. Court is a 3. Together we are described as Sparkly.

Here are a few of my favorite highlights:

Sevens are energetic, lively, and optimistic. They want to contribute to the world

How to Get Along with Me

Give me companionship, affection, and freedom.
Engage with me in stimulating conversation and laughter.
Appreciate my grand visions and listen to my stories. (WHAT!?! This is SO right!)
Don’t try to change my style. Accept me the way I am.
Be responsible for yourself. I dislike clingy or needy people.
Don’t tell me what to do.

What I Like About Being a Seven

being optimistic and not letting life’s troubles get me down
being spontaneous and free-spirited
being outspoken and outrageous. It’s part of the fun.
being generous and trying to make the world a better place
having the guts to take risks and to try exciting adventures (They used the word guts. Its like they know me!)
having such varied interests and abilities

What’s Hard About Being a Seven

not having enough time to do all the things I want (….!!)
not completing things I start
not being able to profit from the benefits that come from specializing; not making a commitment to a career
having a tendency to be ungrounded; getting lost in plans or fantasies

Sevens as Children Often

are action oriented and adventuresome
drum up excitement
prefer being with other children to being alone
finesse their way around adults
dream of the freedom they’ll have when they grow up

Sevens as Parents

are often enthusiastic and generous
want their children to be exposed to many adventures in life
may be too busy with their own activities to be attentive (Ok,  I think they are looking in my windows.)

Crazy right?! You know you have to go over and take the test. Let me know how it turns out, I am super interested in getting to know you guys better!

Test HERE

Here are awesome links once you’ve discovered which one you (or your friends and family) are:
Made Easy (you need to click on your number up at the top center of the page)
Relationship Compatibility
Overview

So do you feel like you are here with us? Chime in because we want you to be!!

Love Your Guts

The Joy of Why Not.

By Mandi | 07/16/2013 | 41 Comments

I really want to kick this Basic DIY series off with a little happy motivation. Happy motivation is the motive behind everything that I do (am I allowed to use motive and motivation in the same sentence? Hmmm. Lets just go with it.)

There are 3 sure things in life. Death, Taxes, and the simple fact that when I announce I am changing a room up, I always get a “WHAT!? Didn’t you just do that room?”

Basic DIY- The Joy of Why Not   vintagerevivals

The most basically basic DIY I want EVERY SINGLE PERSON that reads Vintage Revivals to click away knowing. Is that it.is.your.choice.

I feel like every single room in your house should make you feel like it is the most perfect place in the world for you. There is nothing better in the world than walking into a space that you LOVE.   Do you feel like that when you walk into your house? If you said yes,  you get 1000 Vintage Revivals points that will be redeemable when I am rich and famous. If you answered with no, I have one question for you.

Why not?

Is it because you rent?

Is it because you don’t have any money?

Is it because you aren’t creative?

Is it because you don’t have any ideas?

Is it because you cant make a decision?

Is it because you are worried it wont be perfect?

Is it because you feel like you just cant do it?


Here is what I say to each and every one of those rebuttals.

I know it may seem a little Pee Wee Herman “I know you are but what am I”

But.

Just because you rent doesn’t mean you cannot make a space your own. (This is one of the biggest reasons that I am so excited for Cara’s office makeover!)

Just because you don’t have any money, does not mean that you cant repurpose things you already have, or score a road kill rescue here or there.

Just because you feel like you are not creative is not a good reason. Creativity is a skill that is developed by (you guessed it) being creative. A few years ago I would have considered myself the least creative person on the planet. For reals.

Just because you feel like you don’t have any ideas is the lamest reason of them all. Have you ever heard of this little teeny site called Pinterest? It is FULL of ideas, some good, some not so good. But that is up to you to choose which of them work the best for YOU.

Just because you feel like you cant make a decision does not mean that you shouldn’t. Start with something small. Paint a wall. Find a dresser at the Goodwill and give it a coat of spray paint.

Which brings me to my next point.

Perfection is NOT REALITY. You are not a machine. You don’t have your own personal Ty Pennington in the garage waiting for you to bring out furniture building plans (but that would be nice, if you know what I am sayin…)  There is not one.single. project that I have done that is perfect. Not one. They all have flaws. But if I obsessed over it where would that get me? Embrace that the flaws tell a story. Because it is a good story.

If you feel like you just cant do it, lets do a little visual learning lesson. Go stand in front of the mirror. Grab your cheeks Home Alone style. Squeeze them together and say YES. YOU. CAN. Because that is EXACTLY what I would do if you were sitting in front of me.

I know that you have a project that you have been thinking about doing. Do it and send me pictures, and I will be all the cheerleader you need. Just don’t expect me to be good.

Love Your Guts