Drywall is one of those things that every renovation has. It is a huge expense, and when you’re looking to cut costs, it can be a very tempting DIY. This post covers everything Drywall during our renovation at the Merc. From hiring drywall installation out, to tips and tricks, finish levels, and texture, even prepping for paint, this post covers it all!
Drywall Installation: To Hire or To DIY
Is it worth hiring out drywall work?
In a word?
Yes.
Hiring out our sheetrock was something that Court was on the fence about. It definitely would have saved us some cash (our bid came in at $16,000 for installation and texture). And when you’re faced with that large of an expense (hello 10x what my first car cost) its definitely something you want to pause and think about.
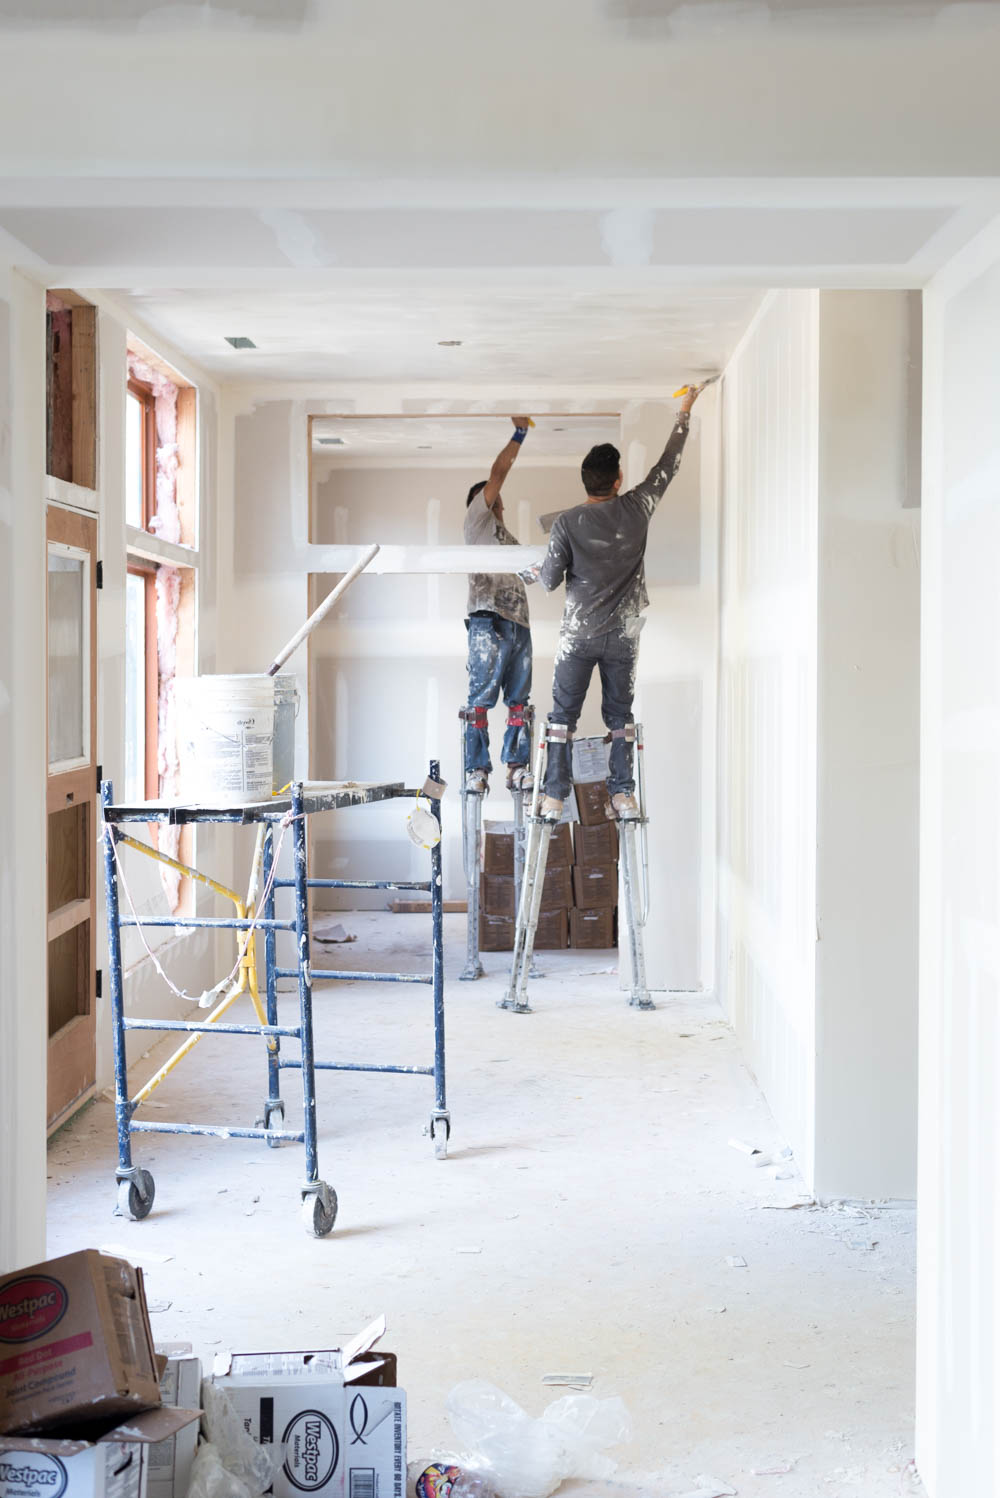
Ultimately though, we decided that we’d rather do other work ourselves, like painting and tile work, and not get burnt out just trying to install the sheetrock, so we hired it out.

It took 5 days for the drywall to be installed, if we had done it ourselves I’d estimate it would take about 2 weeks to install it, and 29 trips to Home Depot.
Drywall Tips and Tools
If you are installing your own drywall, here are some tips and tool info I picked up watching the installers. This list a just a brief overview, you can read the full post in all it’s detail here!
- Use nails in the 4 corners to hold the drywall sheet in place then screw it in everywhere else. One of the most frustrating things that happens with old drywall, or drywall that isn’t installed correctly is that the nails or screws that hold it in place, pop over time. Using screws is a must, because they’ll hold much longer than nails.
- Use a Drywall Screw Gun, not a normal drill
- Drywall T Square + Box Cutter is all you need to make cuts
- A Drywall Foot Lift holds the sheet in place while you install it.
- Invest in a taping gun
- Master the stilts
- Wear the same clothes, especially when you’re finishing

Drywall Finish Levels
When you hire out drywall, the contractor will ask you what finish level you want it done to. FYI the correct answer is not yes. There are 5 levels of drywall finish. You can dive into more details in this blog post about the finish levels.
Level 0 | Unfinished:
Drywall Finishing Level 0 is when the drywall is hung with no finish work at all.

Level 1 | Unfinished
Drywall Finishing Level 1 is when you put the drywall tape in the joint compound along the seams. Its ok to have it be rough and have tool marks.
Level 2 | Unfinished
Drywall Finishing Level 2 is when you skim a thin coat of joint compound over the tape and screws. This just has a thin coat of compound over the tape and screws. There is usually no sanding at this point and tool marks are still ok. FYI you can stop at this level if you plan on covering it with tile.

Level 3 | For Medium to Heavy Paint Texture
Drywall Finishing Level 3 is when you apply a coat of joint compound to the tape and screws. . This level is smooth and doesn’t show tool marks. Walls that are going to be receiving a heavy texture (usually a spray texture) can end at Level 3
This is where things get a little murky.
Level 4 | For flat paint, a light final paint texture:
Drywall Finish Level 4 has two additional coats of joint compound over the screws and tape joints (this means that there are actually 3 coats because of the light skim coat in Level 2) The compound has to be smoothed, and there cannot be any tool marks or ridges.
This is where those of you who are in the midwest/east coast with smooth walls seem to be on the scale, the seams and screws have had a few layers of compound on them and have been sanded smooth. My house growing up had this level of finish with no texture on it.
Level 5 | Completely Smooth for high gloss paint or harsh lighting conditions
To get a Drywall Finish Level 5 you add a thin skim coat over the entire surface. The skim coat is of joint compound or of a material manufactured specifically for this purpose. Walls are sanded and there are no tool marks. The walls are usually checked with a halogen light to ensure that they are nice and smooth. Often times a Level 5 gets a colored final skim coat over the first one so that the contractors can see where has been done and what still needs to be finished.
Wall Texture Types
There are a lot of different types of drywall textures, and as I learned in the comments on this blog post, they are very regional. Keep in mind that they can range from very understated to severe, but the general idea for each doesn’t vary.
Here are the most common:
- Orange Peel
- Knockdown
- Smooth
- Swirl
- Old World
In my research I found a great alternative to smooth walls in a texture finish called Old World. that made me a believer that we could have the best of both worlds. You can see my post about wall texture here!

I asked my contractor about texture and why it seems to be so prevalent here on the west coast and he said it was just the way they’d always done it. I’ve never seen a house in So. UT without wall texture. Everything from budget builder grade up to million dollar parade houses have wall texture. My sister’s new house in Vegas has a texture that I’ve never seen before that looks similar to alligator skin. (You can see her full room makeover here)
Our old house had orange peel, so those that commented about never getting a straight paint line because of the texture, I HEAR YOU. That is why I always talk about bleeding the original wall color first because you will NEVER get a straight line if you don’t. It doesn’t matter what kind of tape you use.
Those that have texture, do you hate it? Do you wish you had it? I’m LOVING the insight into this part of peoples homes that totally gets overlooked, keep chiming in!
Trick for a Smoother Appearing Drywall Texture
Another key factor in the visibility of wall texture is the sheen of paint that you are using. The higher the sheen, the sharper the shadows are, which makes the texture more visible. Interesting right?
We are using MY FAVORITE Sherwin-Williams Emerald Matte for all of the walls so the visible texture is significantly minimized. The important thing when using a low sheen paint is to make sure that its high quality, often times the lower the sheen, the less scrubbable, but Emerald is the best of both worlds. Finding the right paint for the job is SO important! Check out my guide here!!
If you are prepping your drywall for paint you need to remove all dust before you can start or else the paint doesnt stick. We found the craziest hack that we used and it worked wonders!! We used our paint sprayer to spray the walls down with water first. See the full tutorial on how to easily remove drywall dust here!
After searching for ways to find the correct level of drywall finish im wanting to use on our bathroom I came upon this article. Drywall is not the most exciting topic to talk about, but you made it sound easy. thanks so much.