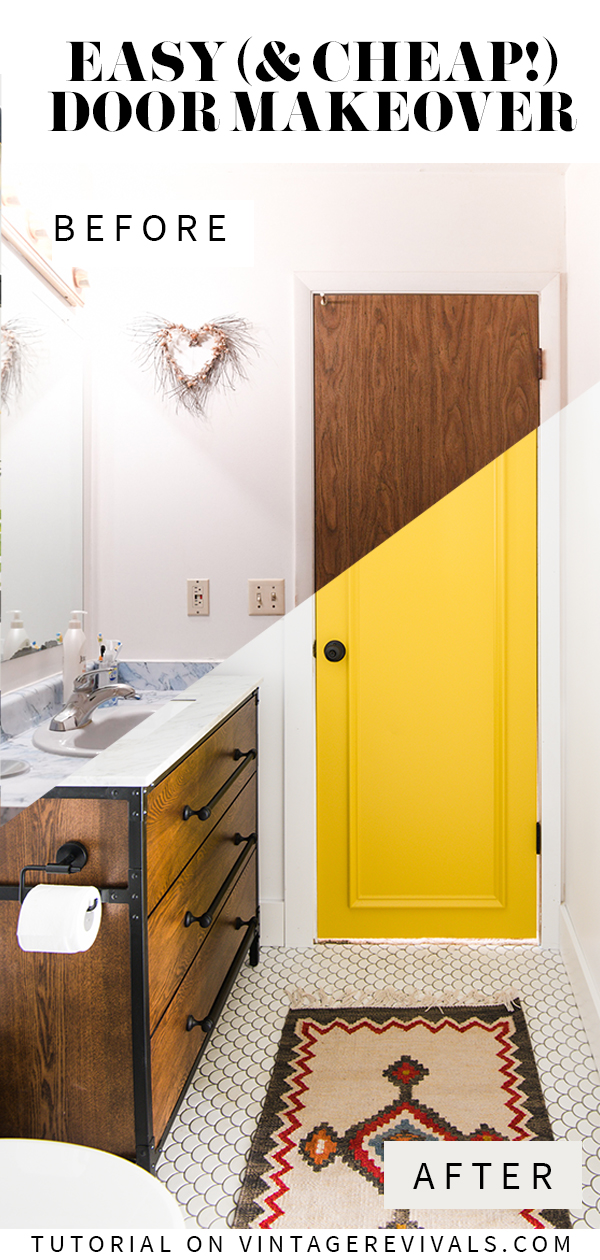
We’ve talked long and hard about doors. The doors in your house set the tone and style, but they are so often overlooked unless you’re doing a complete gut job. They aren’t easy to replace, and you usually need lots of them. Today’s post is all about giving outdated doors a budget friendly upgrade and a HUGE level up in the style department.
One of the immediate hurdles that we came to when we were updating my parents bathroom was the question of what to do with the doors. They are basic faux wood hollow core flat panel doors that are in most houses built in the early eighties. Of course we would love to swap them all out with something new and fresh but that just wasn’t in our budget. That being said we couldn’t just leave them as is. It would be like getting a full face Kardashian style makeover and leaving your hair in a mullet with side hair combs.
It’s just not going to work.
We came to the conclusion that we were going to embrace the situation and change the interiors of the doors while leaving the outside the same. So I guess we ARE embracing the mullet style! THIS HAS NEVER HAPPENED IN MY LIFE!!
Interior Door Makeover
Sand The Doors
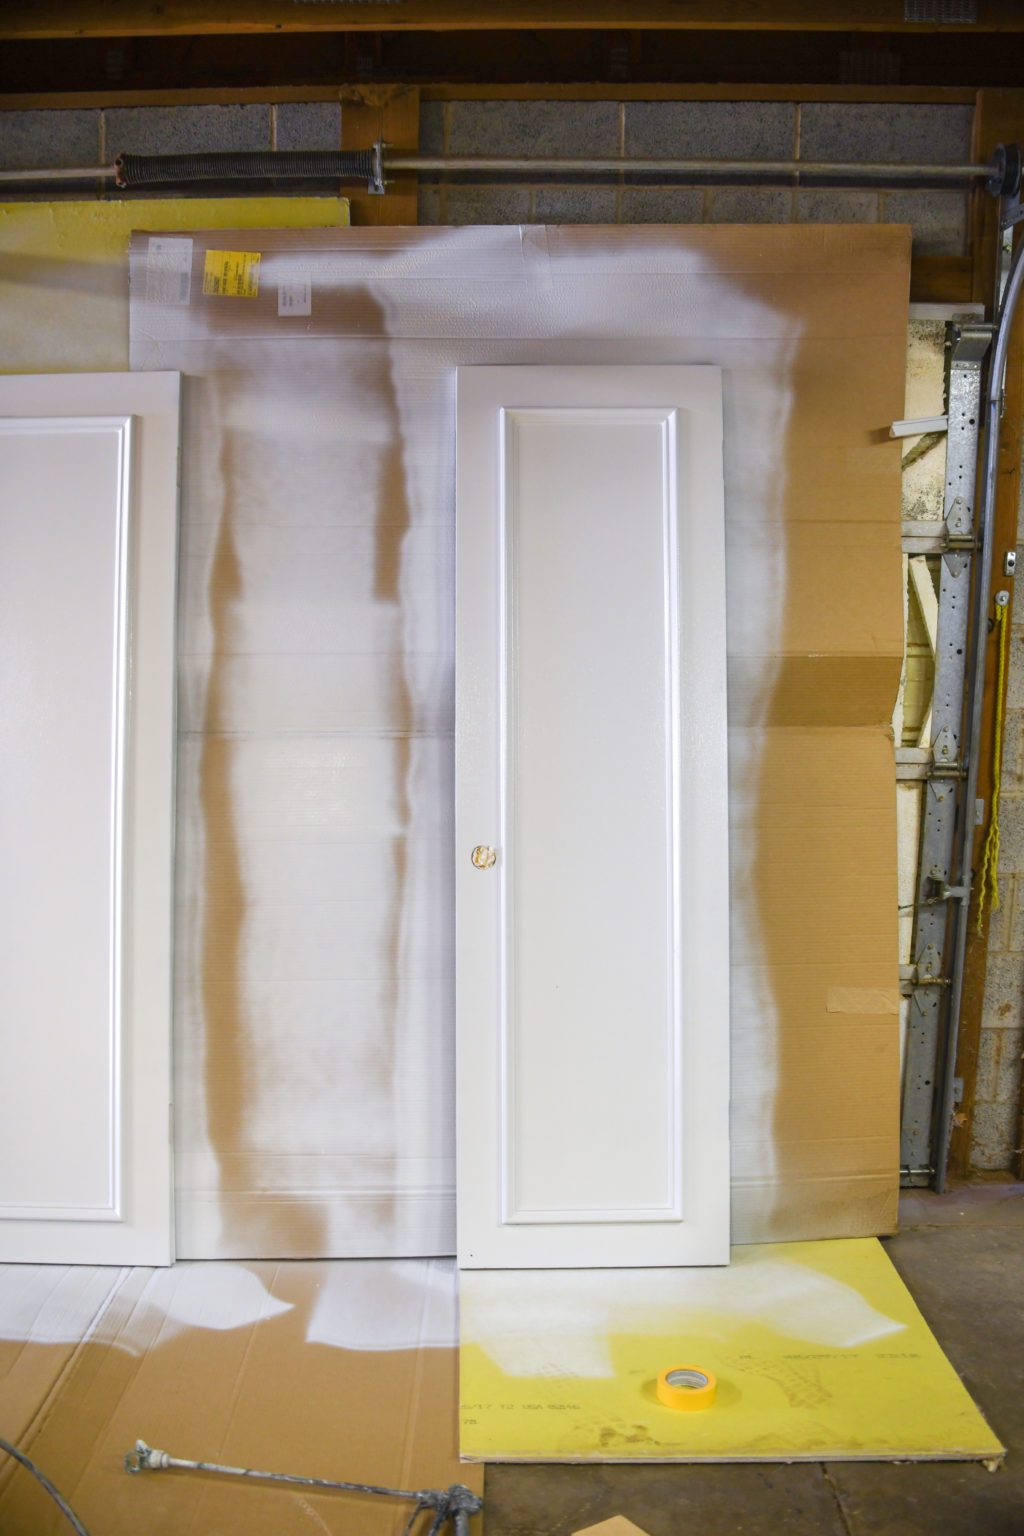
The first thing that we did was haul the doors down to our house and gave them a light sanding. One thing to keep in mind when you are sanding something like this is that you just want to really lightly remove the surface. If you dig too deep you’ll break through the surface of it and expose the grainy particle board underneath. This will give you spots of texture and a sheen difference on your finish. If you happen to sand it a little too deep (don’t worry, we did it in some spots too! just use a little bit of wall putty and cover it. It will even it out and look like it never happened!
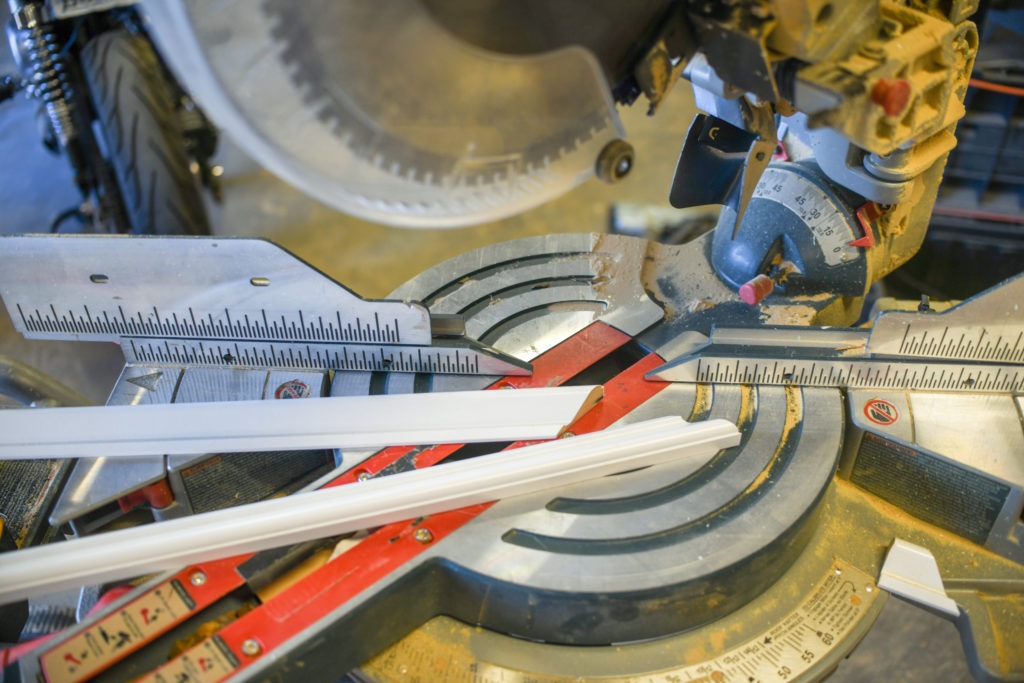
Cut Your Molding
The molding that we used is basic in stock Base Cap molding from Home Depot. When you are cutting molding you want to cut it at a 45 degree angle. This will ensure that the edges fit nice and tight and make a perfect 90 degree angle.
Our doors were different sizes, so to make sure that everything was uniform Court used a piece of scrap wood that was 4″ wide. He lined the scrap piece up with the edge of the door and clamped it in place. This made it so that he could attach the base cap as it was sitting on the inside of it. This isn’t a necessary step (you could mark a pencil line with a measuring tape and level if you want) but it made the attaching quick and pretty perfect.
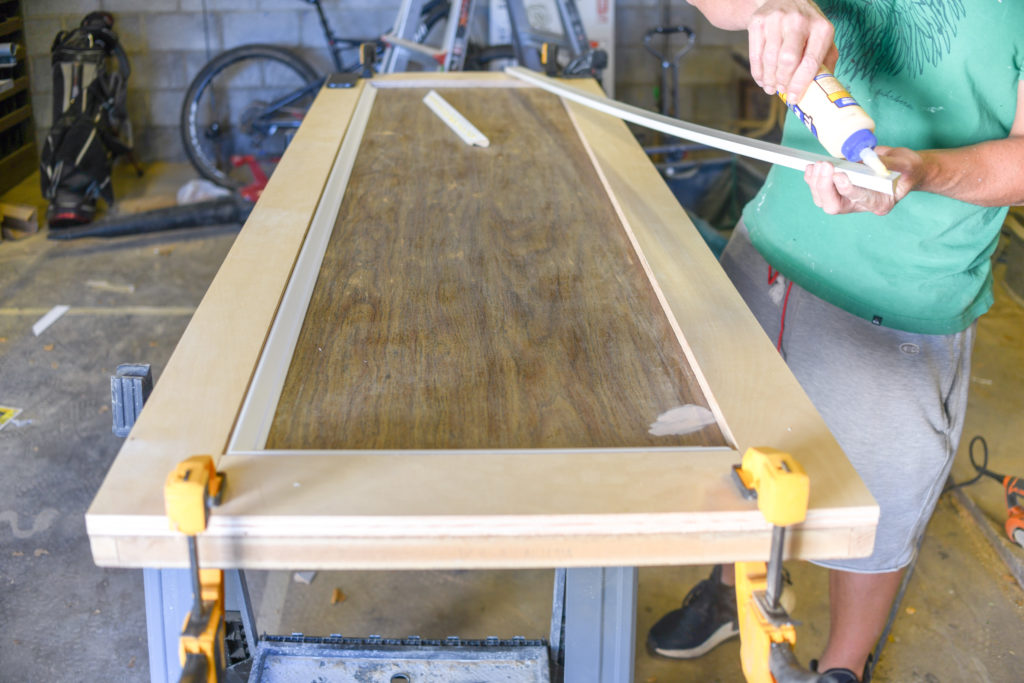
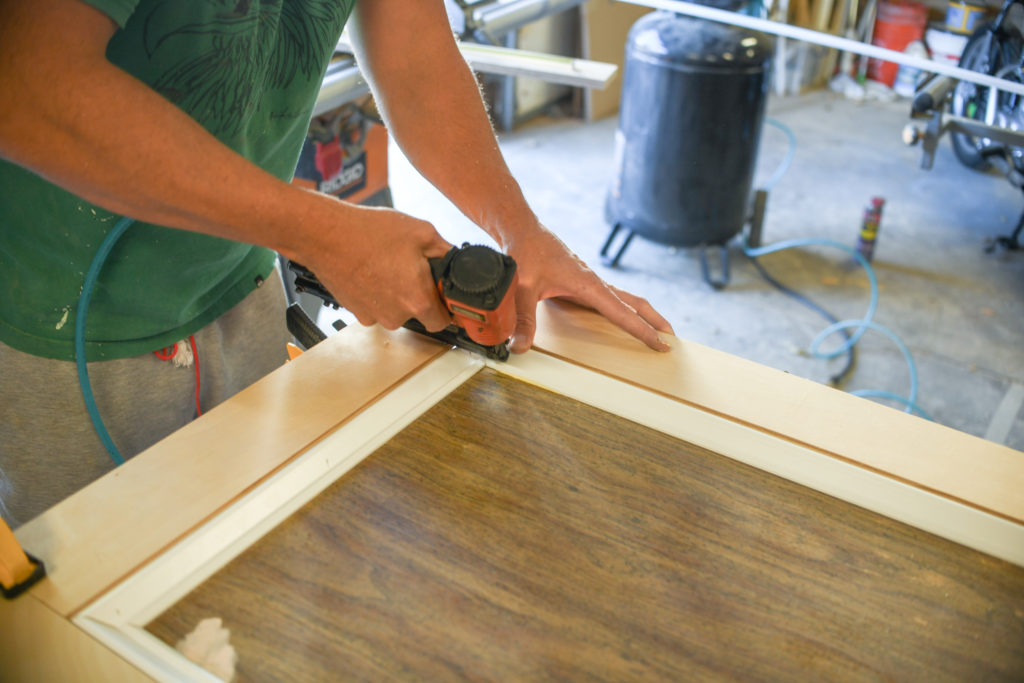
Glue and Nail Your Molding
We used wood glue and our finish nailer to attach the molding to the doors. Make sure to wipe off any excess glue that may have seeped out from underneath.
Caulk Your Molding
Don’t skip this step!! There is nothing like weird gaps along the seams to expose your DIY secret. It’s like wearing spanx underneath a sheer dress. Like…just don’t do it. Fill in your nail holes with putty and sand them smooth.
Use this tip when you are caulking your molding and you’ll get a perfect finish every time!!
Prime!
If you’re painting older doors, especially ones that arent white, give them a coat of primer. This will help with your paint coverage and prevent any discoloration from previous finishes. You spray or roll primer on just like regular paint. Make sure that you get nice even coverage with your primer coat. One of the reasons that primer is so important is because it creates this situation where you dont have to use as much paint. Paint is usually significantly more expensive than primer, so you’ll save money and get a better finish.
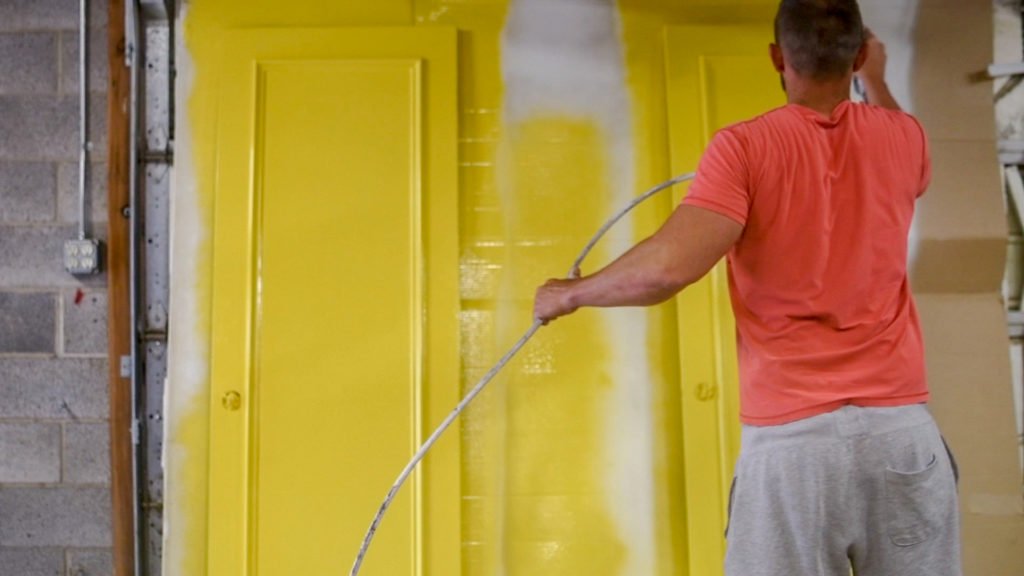
Paint
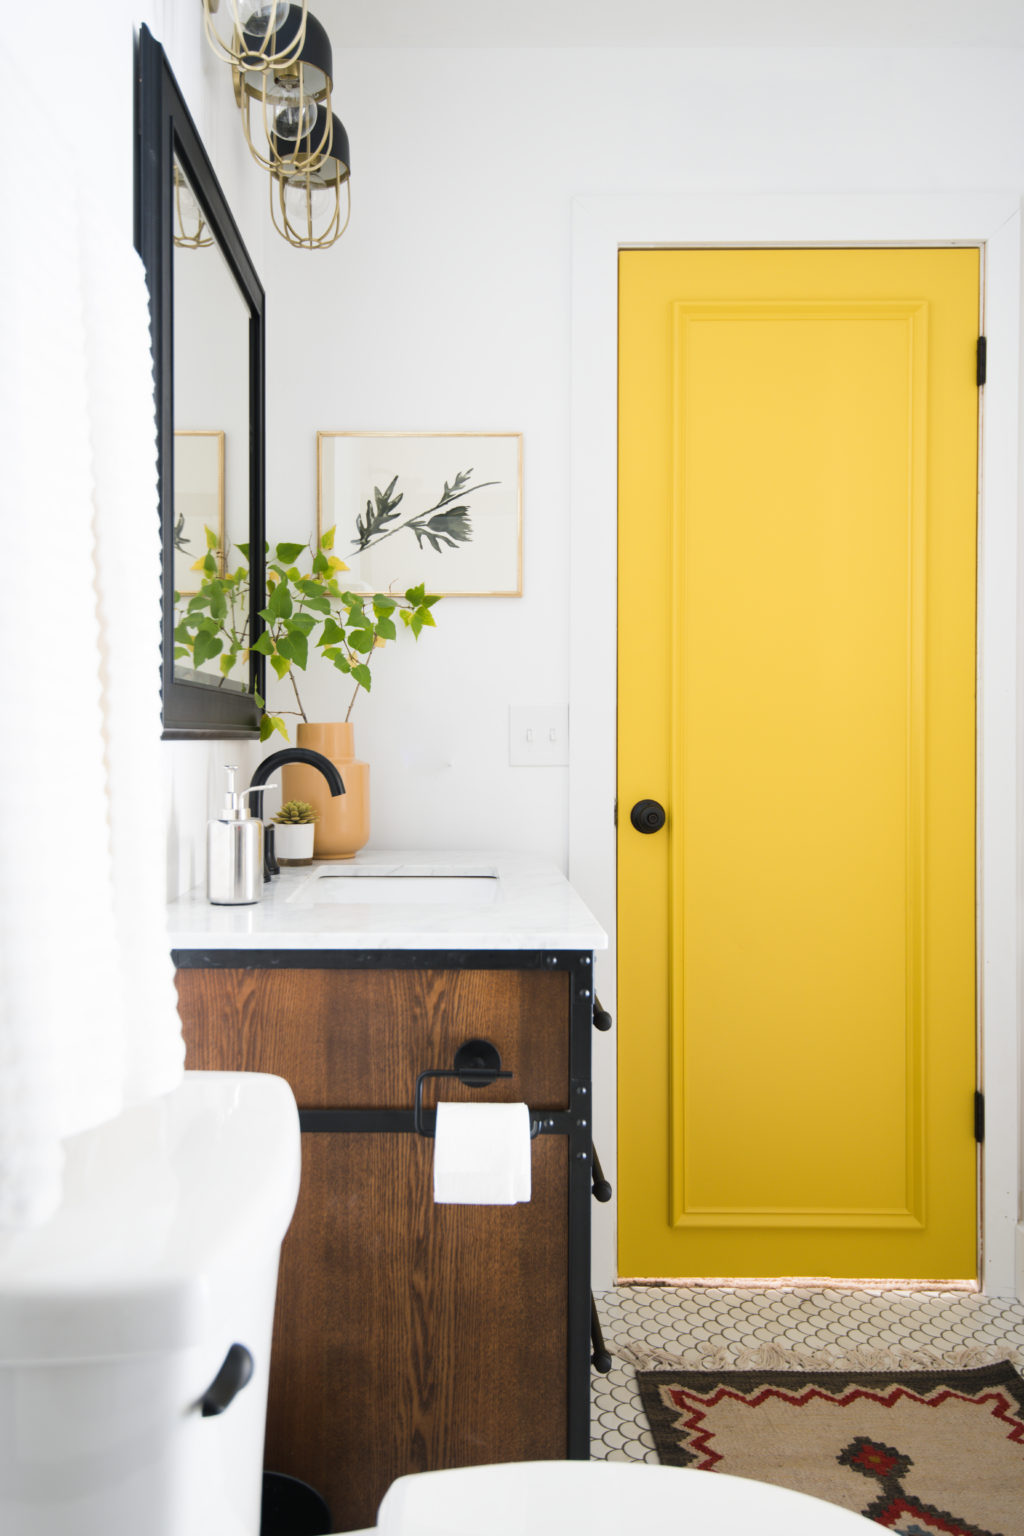
We’ve talk A LOT about using the right kind of paint for interior doors. Read all about it here: The color of paint that I used is Sherwin-Williams Gambol Gold. Court sprayed it with our Graco x7. It leaves a perfect finish. If you dont have access to a sprayer, you can use this tutorial for painting furniture. Everything in it is exactly what you need to do step by step!!
We swapped out the old hardware for this simple and inexpensive set from Schlage and holy cow it looks better right?! Check out the full reveal of the bathroom here!

I can’t tell, did you change the door hinges as well?
Yes! We swapped them out for matte black ones!
This looks amazing! Because you painted just the interior side, what did you decide to do with the side edge of the door? Did you choose to paint it yellow, or tape it off so to leave it as untreated wood? Thanks!
We left it unpainted!
Hi!!
Are these hollow doors? I’m confused what it’s nailing into if it’s hollow??? Yep… I’m a rookie.
These look amazing. I really hate those old hollow doors. Would have never thought of doing this.
I just LOVE those light fixtures. I didn’t see a source on that, unless I missed it?
Where did you get the sconces, or did you make them? I looked at the full bathroom reveal and didn’t see them listed. I’ve been waiting for the perfect thing to replace my lovely brass 80’s fixture & this is it! I can DIY 🙂 Please help!
And the rug too? Your rooms always are the perfect touch of color and blank space.