You guys know I love a good wall treatment, but I dont know if I have ever loved a wall treatment as much as I love this Fluted wall. It is an absolute labor of love, so settle in because if you are going to DIY this fluted wall treatment you’ve got to have stamina.
Fluting is a type of molding finish where half round, or rounded pieces of molding are repeated over and over. We’ve seen slat walls take the DIY world by storm over the last few years, this is the more refined version of that. Fluted walls/furniture/etc. can pull either very boho and a little 80’s or more traditional like ours. It all depends on how it’s styled and the color of the wall!
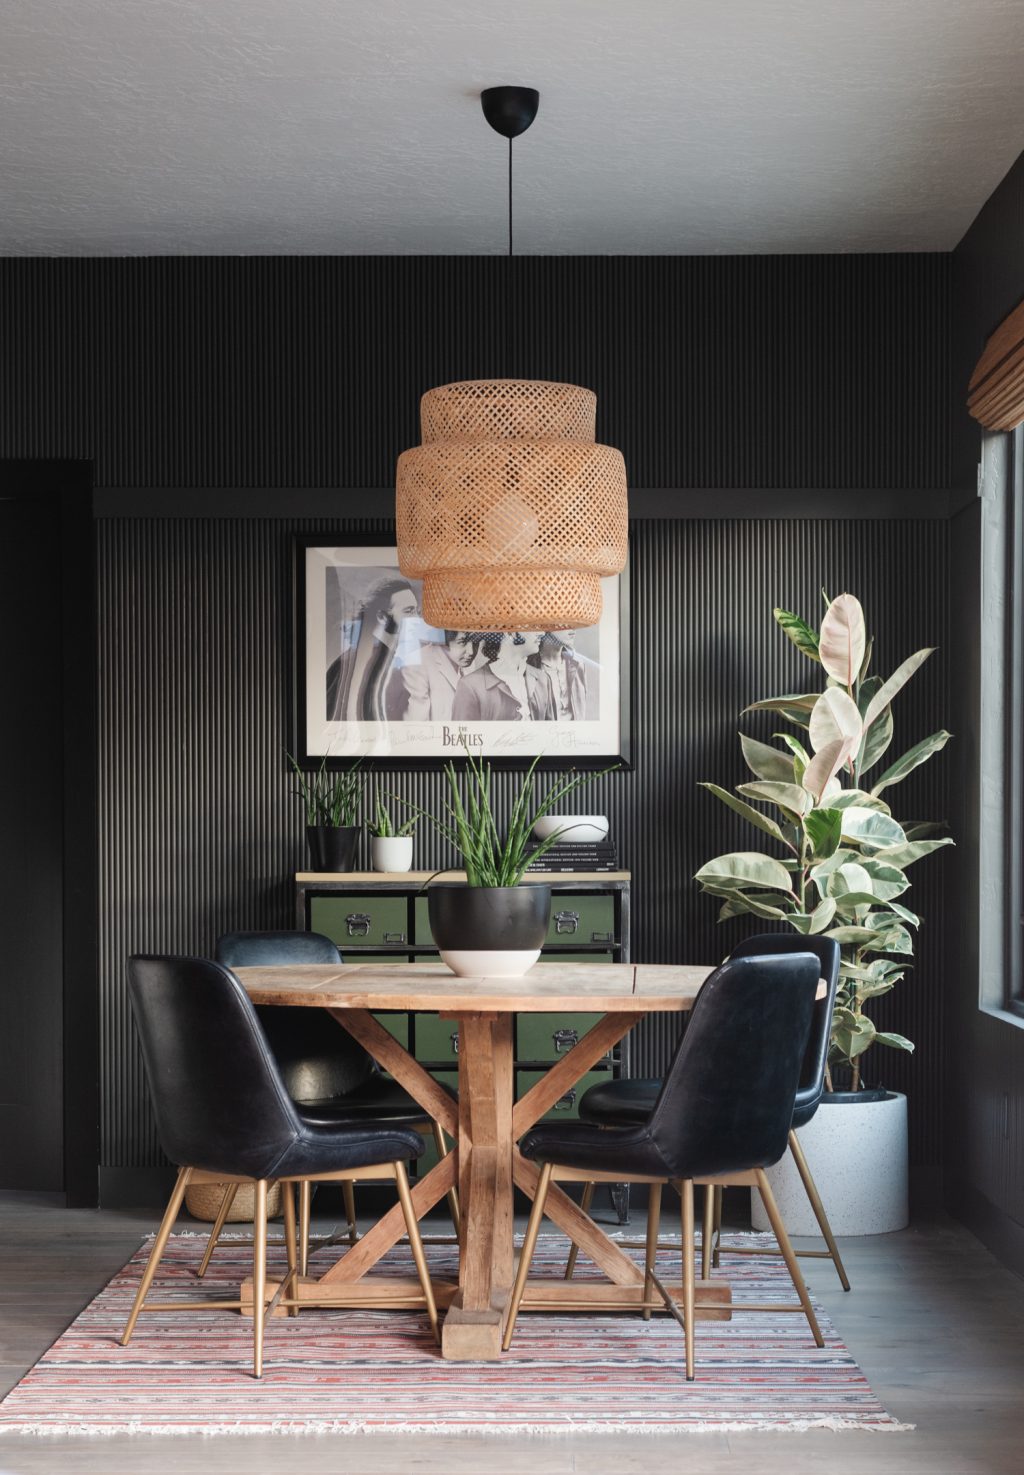
It’s a texture that you are magnetically pulled to, you cant help but run your hand along it.
Like I mentioned before, it’s not a hard process, it’s just really tedious-but SUPER worth it!!
How to DIY a Fluted Wall Treatment
You’ll need:
Half Round molding
Pin Nailer
Pin Nails
Measuring Tape
Miter Saw
Level
Pull Saw (if you have windows!)
Where to buy half round molding
Tracking down half round molding is probably going to be the hardest part of this project. Not because it’s hard to find, but because it seems to be sold out everywhere! Home Depot only sells half round trim online, they dont have it in stock (at least not in Utah/Nevada) Ordering online is obviously super easy because it’s shipped directly to your door.
Lowes only has half round trim in store. They dont have an option to purchase it online. You might be able to order mass quantities from the pro desk, I would check!
You guys know I am a Home Depot girl through and through, but we had a quick turnaround on our project, so I drove to Vegas and singlehandedly cleared out 7 stores. Pick your poison depending on your bandwith and project turnaround time.
How much half round trim will I need to flute a wall?
This my friends is the million dollar question. Well, not million, but definitely a couple thousand. One great thing about buying molding from a large retailer like Home Depot or Lowes is that you can return the left overs. If you want to figure out how much you’ll need, start by taking the total wall width and times it by the width of your molding (ours was 11/16″) Where things can get hairy is adding extra footage to compensate for the ceiling height (our ceiling was 11″ longer than the 8′ trim piece) and subracting the spacing for windows and doors.

Give me all the geometry type math, but this kind? Nope. So like I said earlier, I cleared out 7 stores. Some had 30 pieces, some had 100. Total I ended up buying 442 pieces, and we used about 400 of them and returned the rest. At $3.92/piece this wall treatment was around $1700.
You guys know I am ALL ABOUT doing things as inexpensively as possible and I ran through a few different scenarios. Buying full round pieces and ripping them in half, running cut pieces through the router, I even toyed with the idea of reaching out to the company that made our custom molding for our front doors at the Merc. But ultimately, buying precut half rounds was the most inexpensive strategy to get the look I wanted. If you come up with a better option please let me know and I will update this post!!
How to install a fluted wall treatment
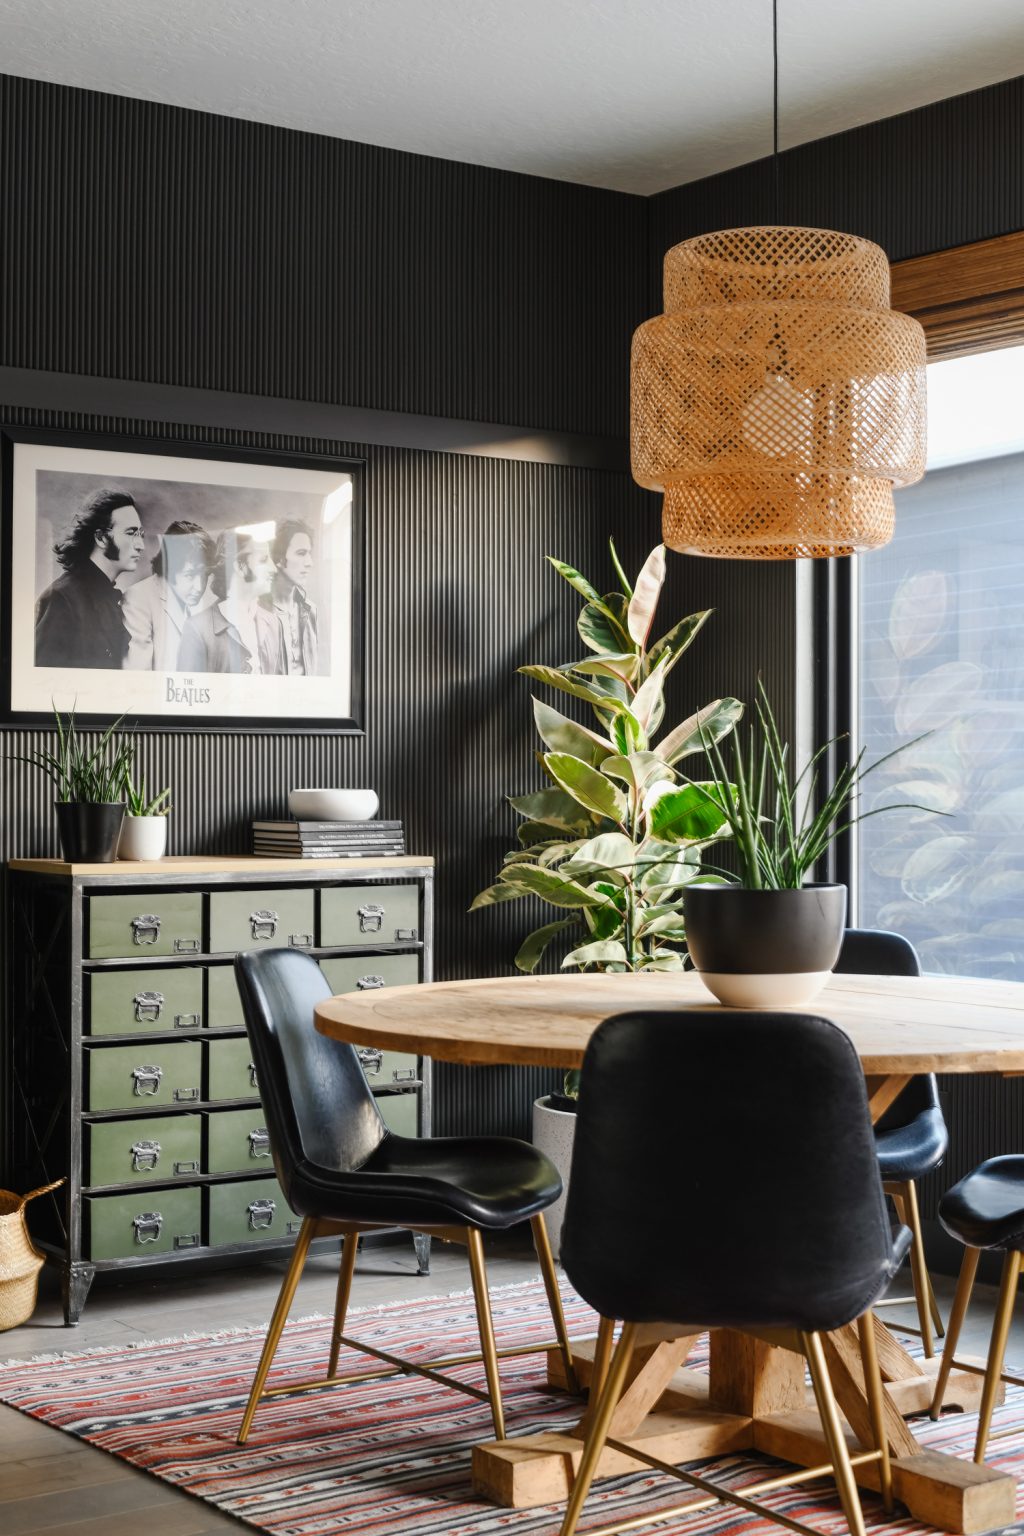
One of the hurdles we faced with our walls ended up making the treatment 500% better! The pieces of molding were 8 feet long. Our ceiling height was just over 9′. In order to mask a seam, and not have to putty+sand+curse every single one of the dowels, we added a 4″ horizontal piece that went all the way around the room. This gave our molding something to die into and we were able to mask the seam situation.

And honestly, it makes the space dont you think?!
Because we were making this up as we went, we learned some great lessons along the way! So forgive me if my pictures arent as chronological as my instructions.
Step 1: Set the horizontal trim piece height
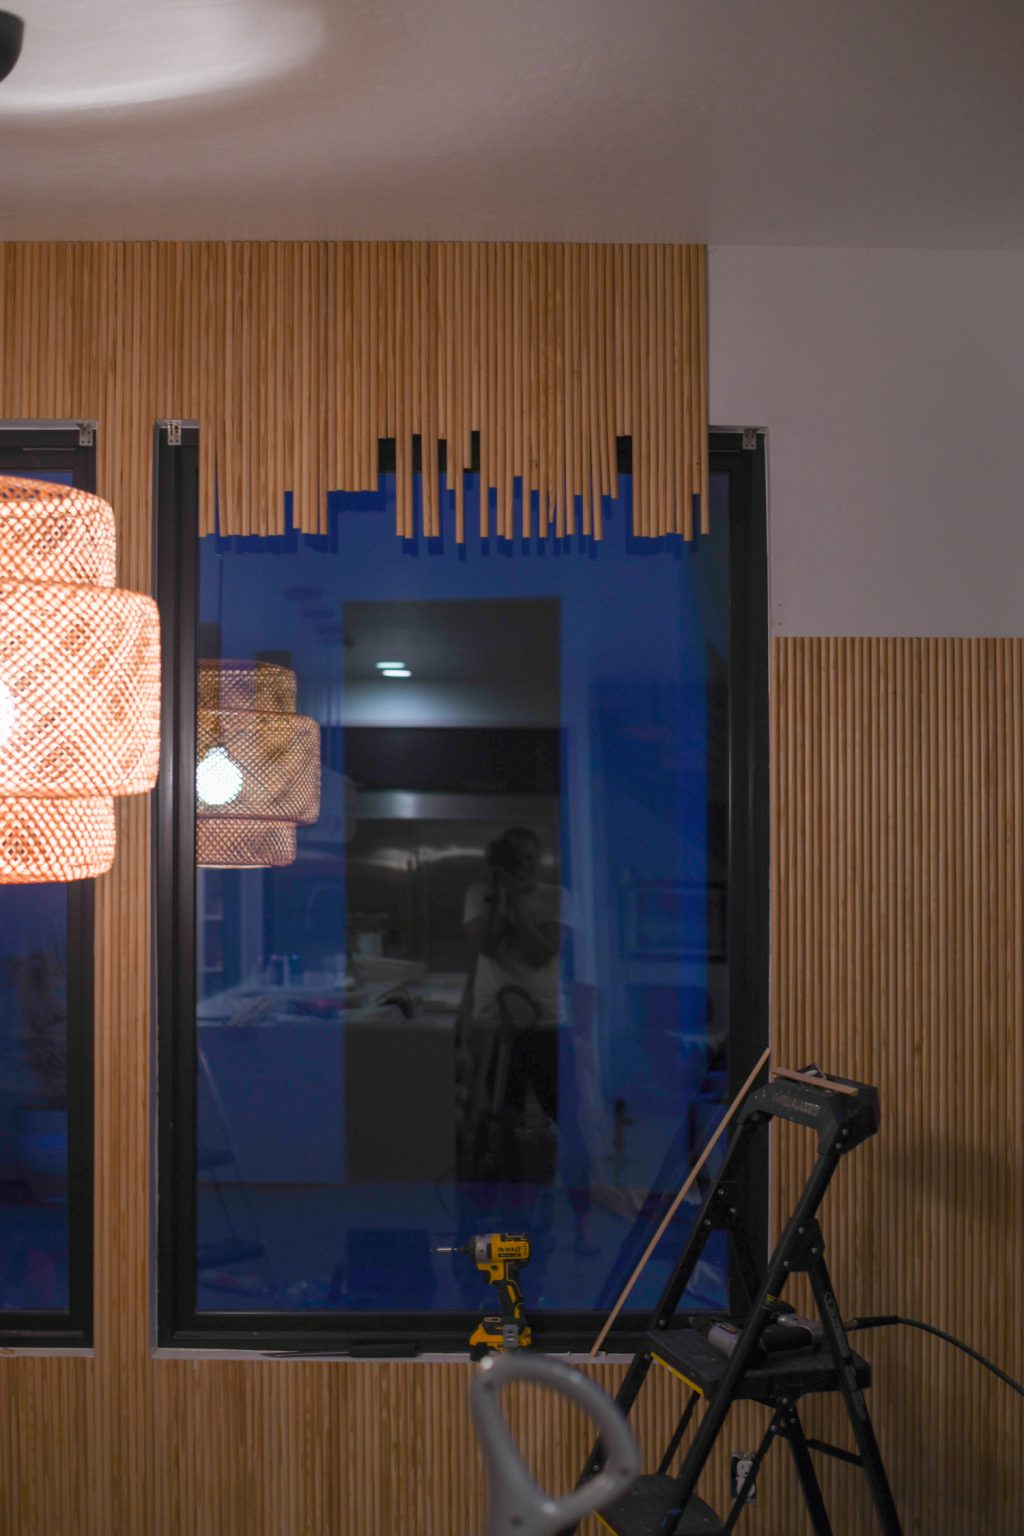
First thing we did was set our 4″ horizontal piece. I set it at a height where the off cuts from the molding could be used in a different section of the room (underneath the windows!) With molding that expensive, I was not about to waste it because of a dumb measurement mistake. Of course everyone’s house is different, but my tip for this is to measure down at least 4″ from the top of the door casing.

After we installed the entire lower portion of moulding on the walls and were frustrated and overwhelmed at the thought of custom cutting the entire upper section, Court came up with a genius idea. On this horizontal trim piece, we cut out a corner that the dowels can sit behind so we didnt have to measure them all perfectly! I didnt get a great shot of it, but this screenshot from our Instagram Stories gives you an idea! So if you are doing an upper section, I would HIGHLY recommend doing this, and doing it before you install it on the wall!
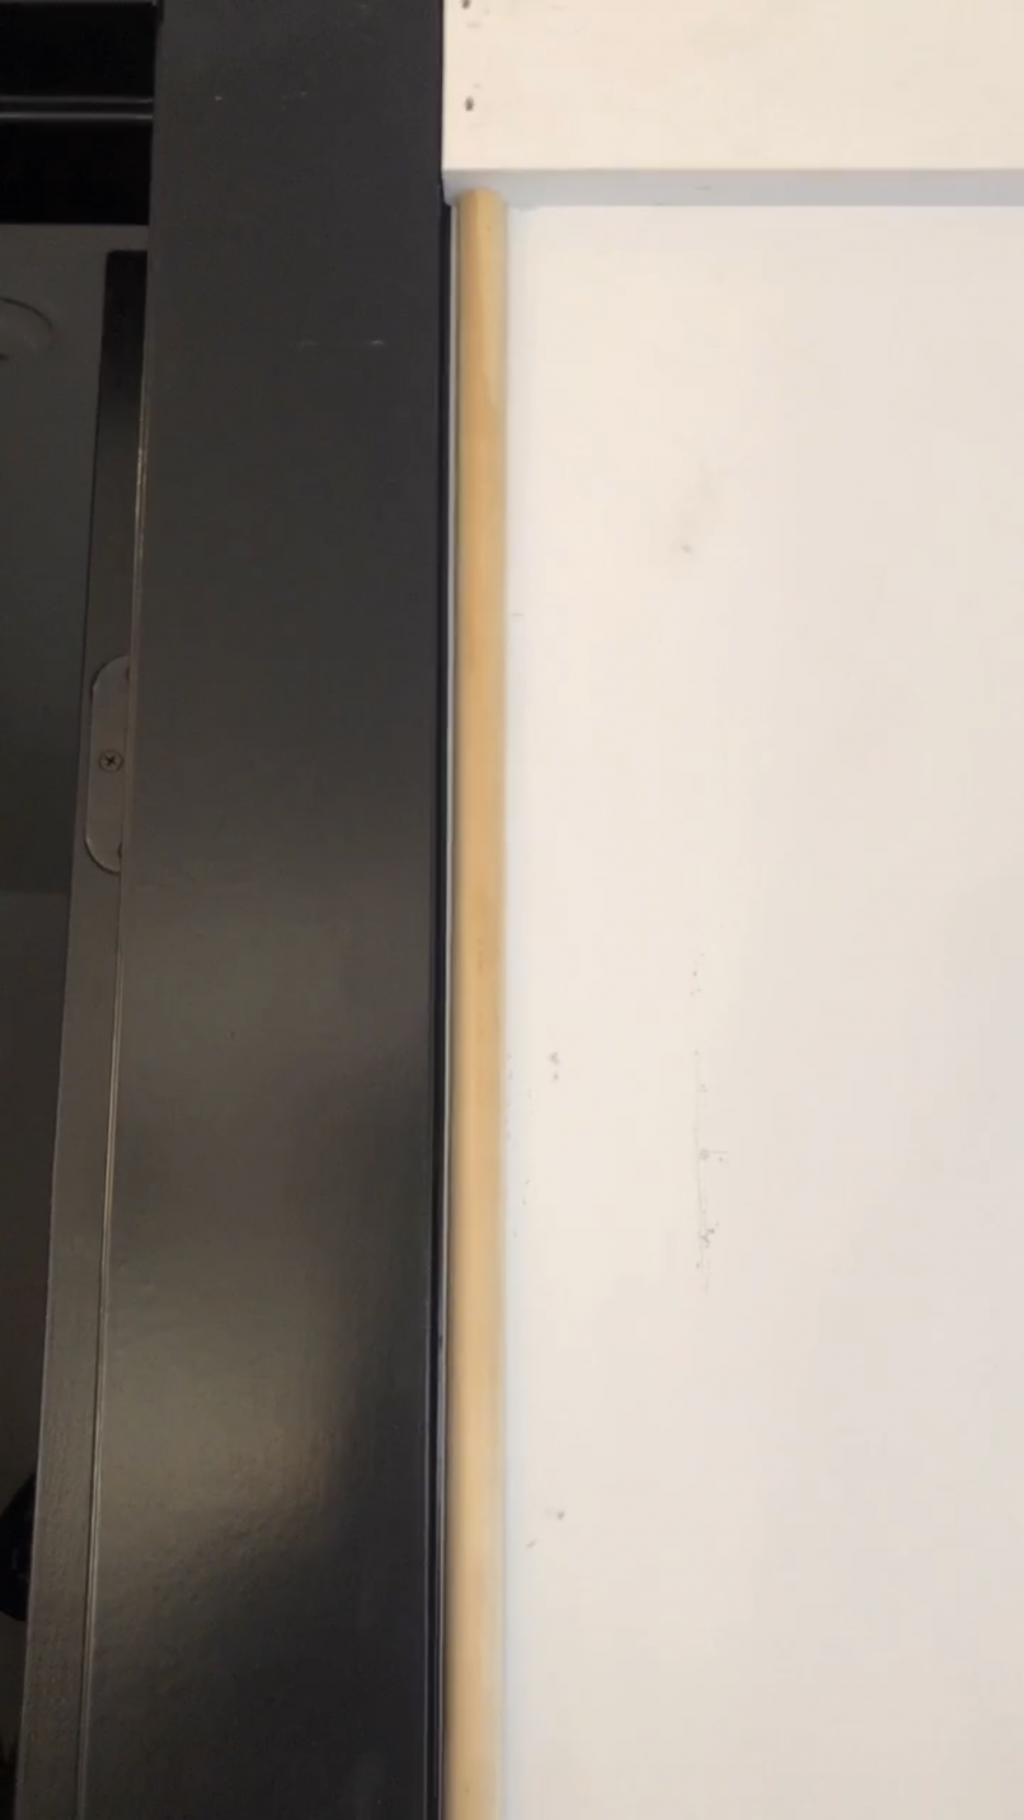
Step 2: Level and install the first piece of half round molding
Once your horizontal piece is installed it’s time to set the first piece of half round. This is SUPER IMPORTANT SO LISTEN UP!! Do not install the molding directly against your door casing/wall unless it is perfectly level. In our case, the casings were not (this will probably be the case in your house too!) So we pulled the first piece off the casing just a little and leveled the half round. If you skip this step, your ENTIRE wall treatment will be crooked. If you have a gap between the molding and the casing/wall I would love to be the first to welcome you into the “no one is going to notice but you” club. And even then, when you paint the wall you wont notice. Trust me on this. Scroll down to the picture below this one, I bet you didnt even notice the gap.
Step 3: Install half round for the next 37 days
Ok not really 37 days, but you are going to be in it for a while. The floors at my MIL’s arent level, so I cut and installed pieces in groups of 10, that way I could adjust as I needed to. I set up a stop on the saw to make them the same and adjusted that as needed. I will say, we had a learning curve trying to figure out the best way to cut the molding.

Here’s why.
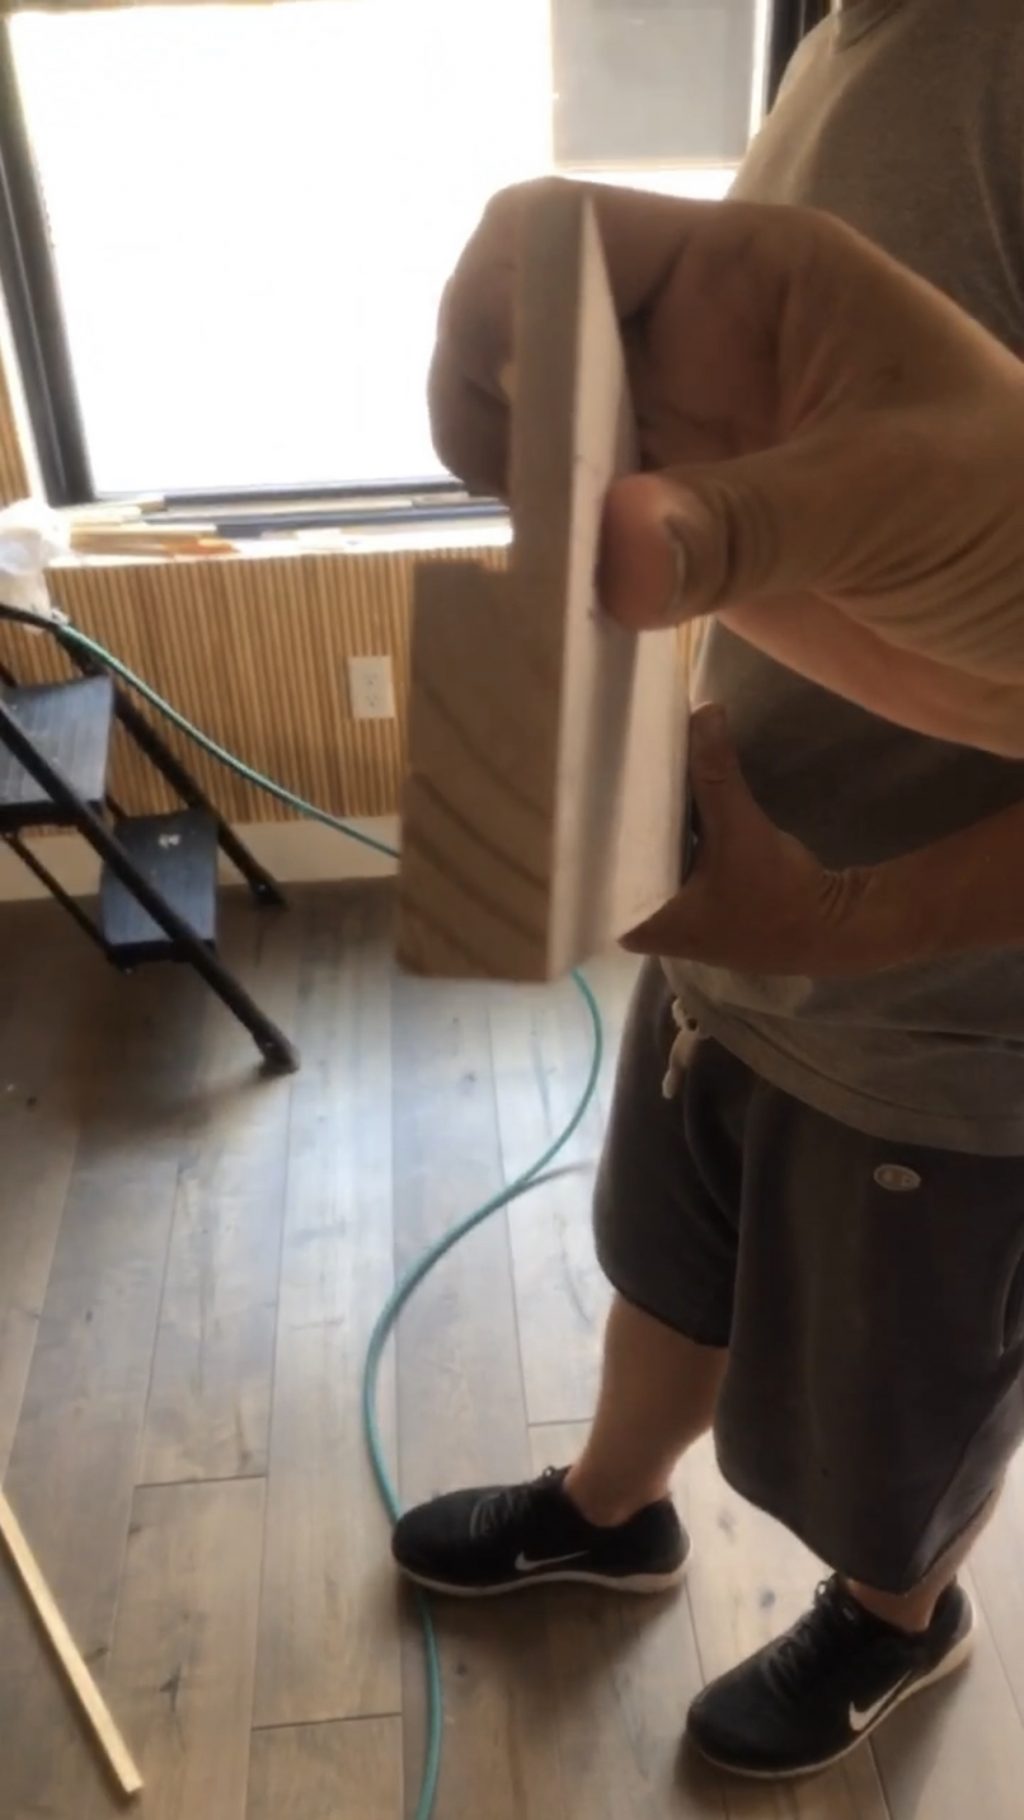
The pieces themselves are super long and floppy, and a lot aren’t straight (which doesnt really matter because they are so thin you can straighten them as you are attaching them to the wall). Even using a stop, we had to adjust them manually.
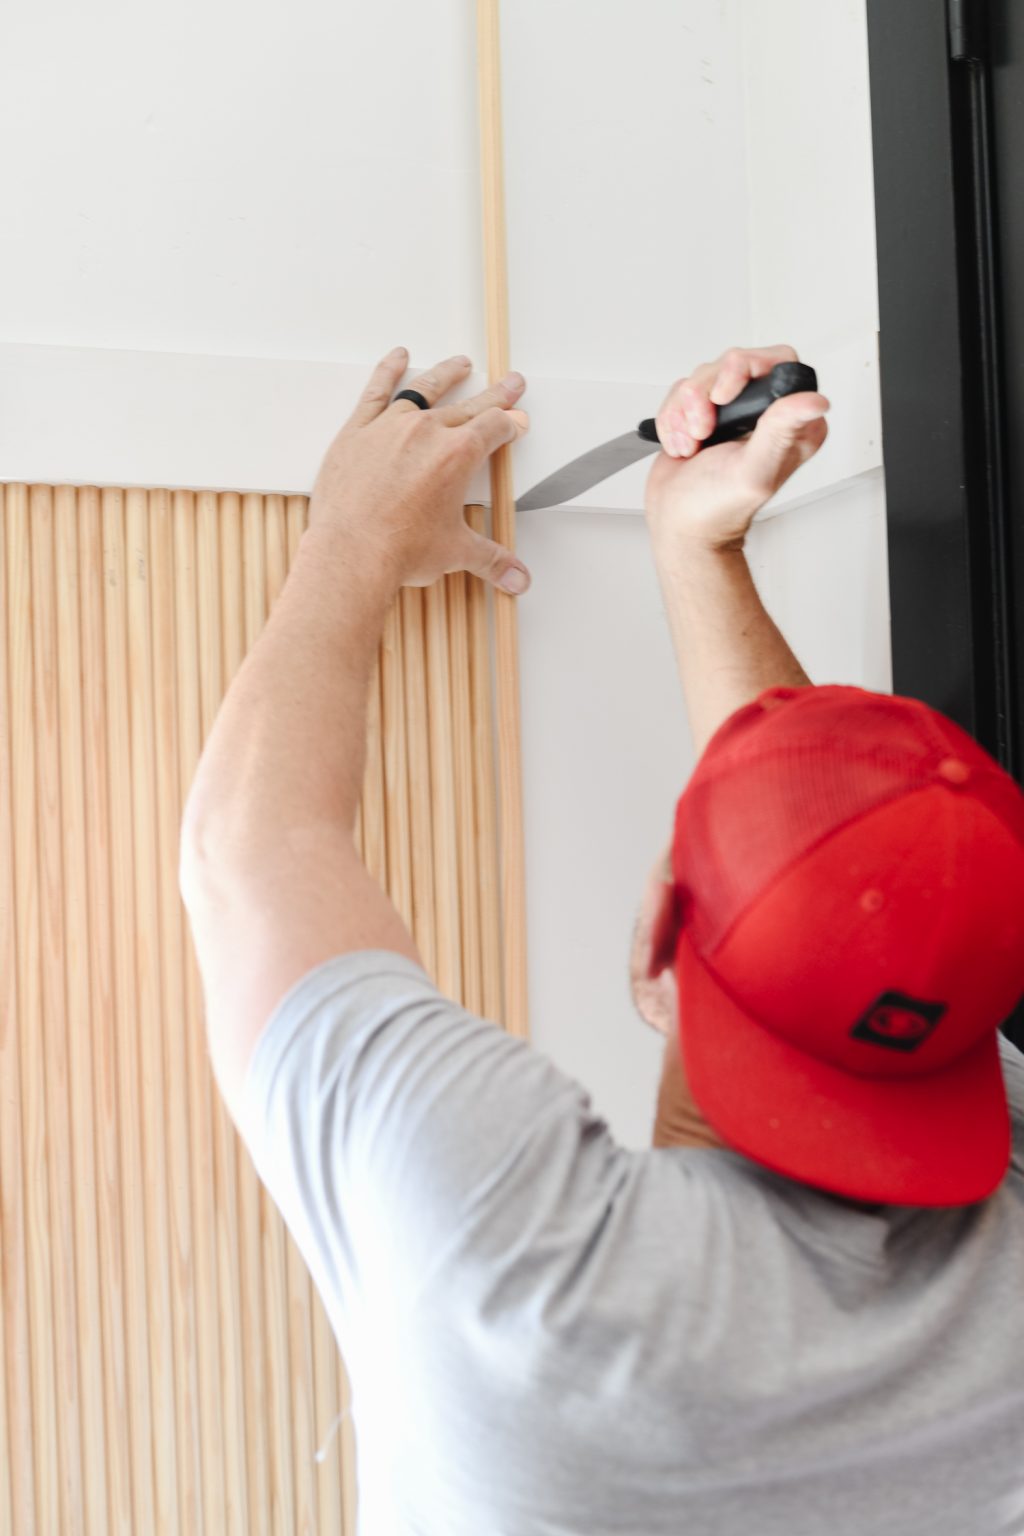
We also tried marking them with a pencil, which was great but because they had to fit perfectly, Court couldnt cut the ones I marked (I always mark a little short and cut at the end of the mark leaving it on the wood and Court marks it long, removing the mark completely when he cuts). In the end after the first full wall was done Court ended up using a knife to mark and cut the rest of the tall pieces while I installed the pieces around the windows. Is a knife the best technique? Probably not, but you’ll figure out the way that is best for you, I’m sure of it!
To nail the pieces in we used a pin nailer. Pin nailers are different than finish nailers and are an absolute necessity when doing a project like this. The nails that they use look just like a headless pin. They are TINY and leave extremely small holes. We used these for a few reasons, the biggest being that we didnt want to have to fill all of the nail holes. If we used a finish nailer we 100% would’ve had to do that. You can see the pin holes if you look close, but they are not something you’d notice. If you choose, you can absolutely fill them, but we just felt like the time commitment didnt impact the finished product that much.
Step 4: Installing molding around windows
Like I mentioned earlier, I did some math to make sure that our off cuts werent wasted. They fit with room to spare around the windows. We tried a few ways of installing the molding above and below the windows (dumb stuff like measuring and cutting each one by hand) and ultimately found that installing them long and then trimming them off with a flush cut hand saw was miles faster and looked better.

Step 5: Clean up!
Before it’s time to paint there are a few clean up things that need to happen. In doubtedly if you are putting in 5000 nails, one or two will have misfired. Pull those out. We also filled the nail holes in the horizontal pieces and moved all of the electrical outlets to the face of the molding.
Step 6: Prep for paint
A project like this is the exact type of project that you want to spray instead of roll or brush. The last thing you want is uneven or goopy paint in between the half rounds. The downside with spraying is that there is a huge amount of prep involved, especially in a house that is finished. But like everything else in this project, it is so worth the effort. Our go to gear when we have to tape something off are these pre-taped plastic painter rolls. They are a lot easier to manage than the paper + masking tape situation. We taped off the ceiling, floors, windows, doors, and light fixture. We also used a lot of regular masking tape. It holds stronger than painters tape and makes it easier to tent an entire room. The downside is that it can leave residue and pull up paint if it’s left on for too long. So keep that in mind!

Step 7: Spray Spray Spray
We LOVE our sprayer (it’s this one from Graco!) and use it all the time, you can read about how we use it to paint walls here! Spraying paint has got to be one of the most satisfying DIY projects on the planet. The crazy thing is that it goes super fast, each coat of paint took about 4 minutes to apply! Nuts right? A few hours to prep, and less than 10 to actually paint!

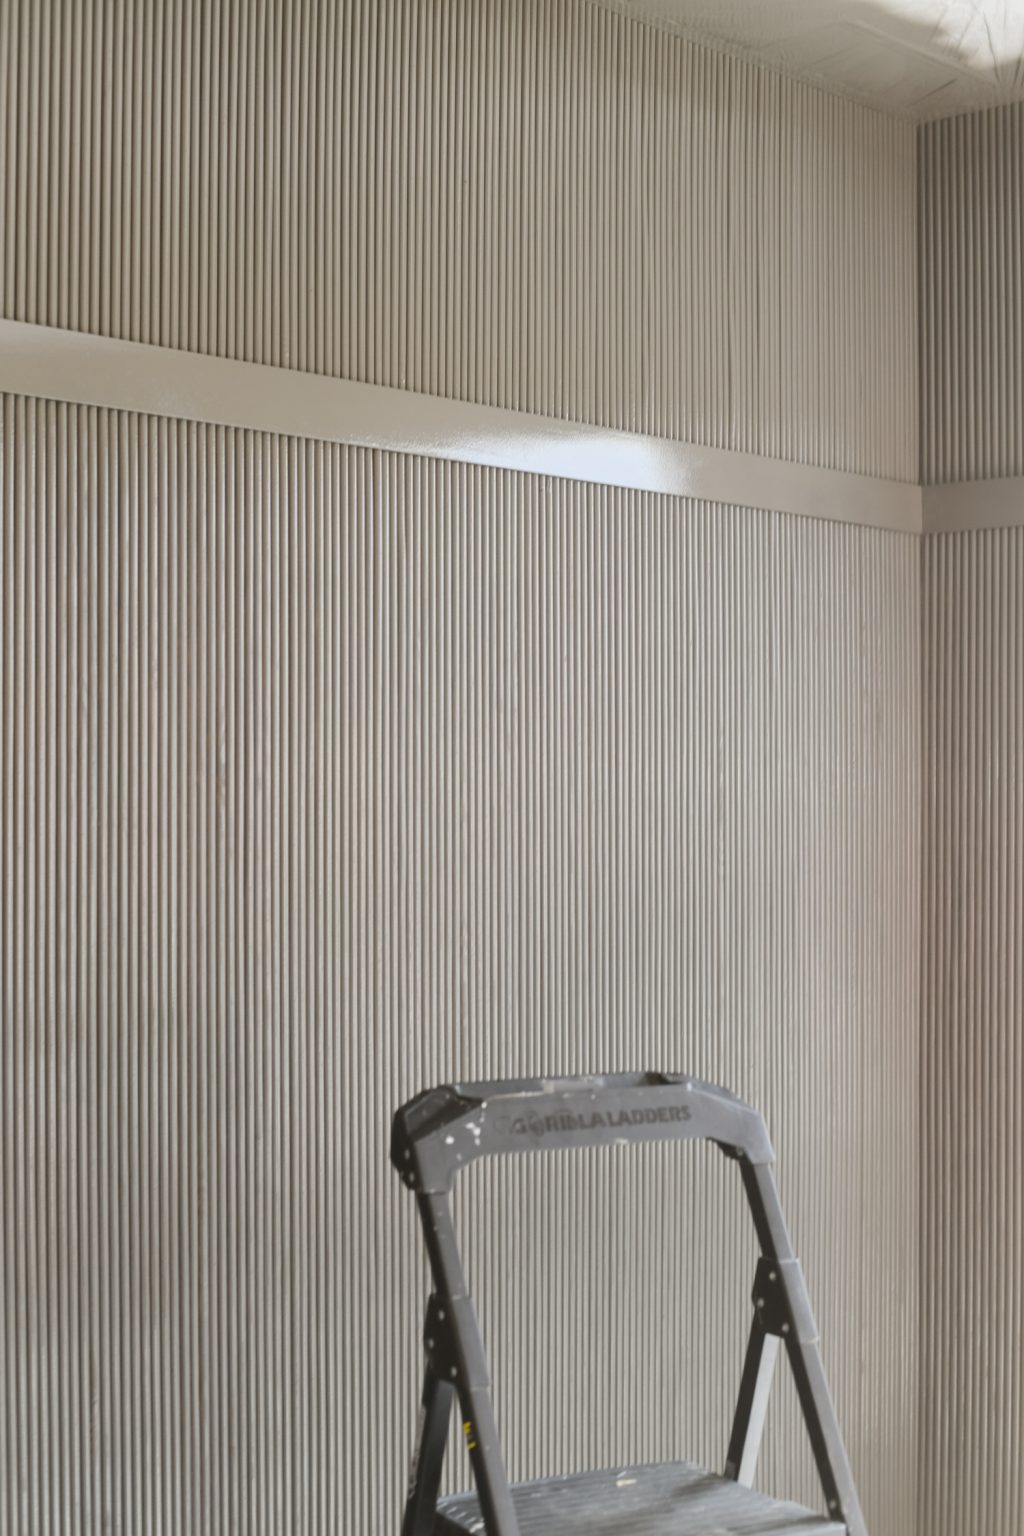
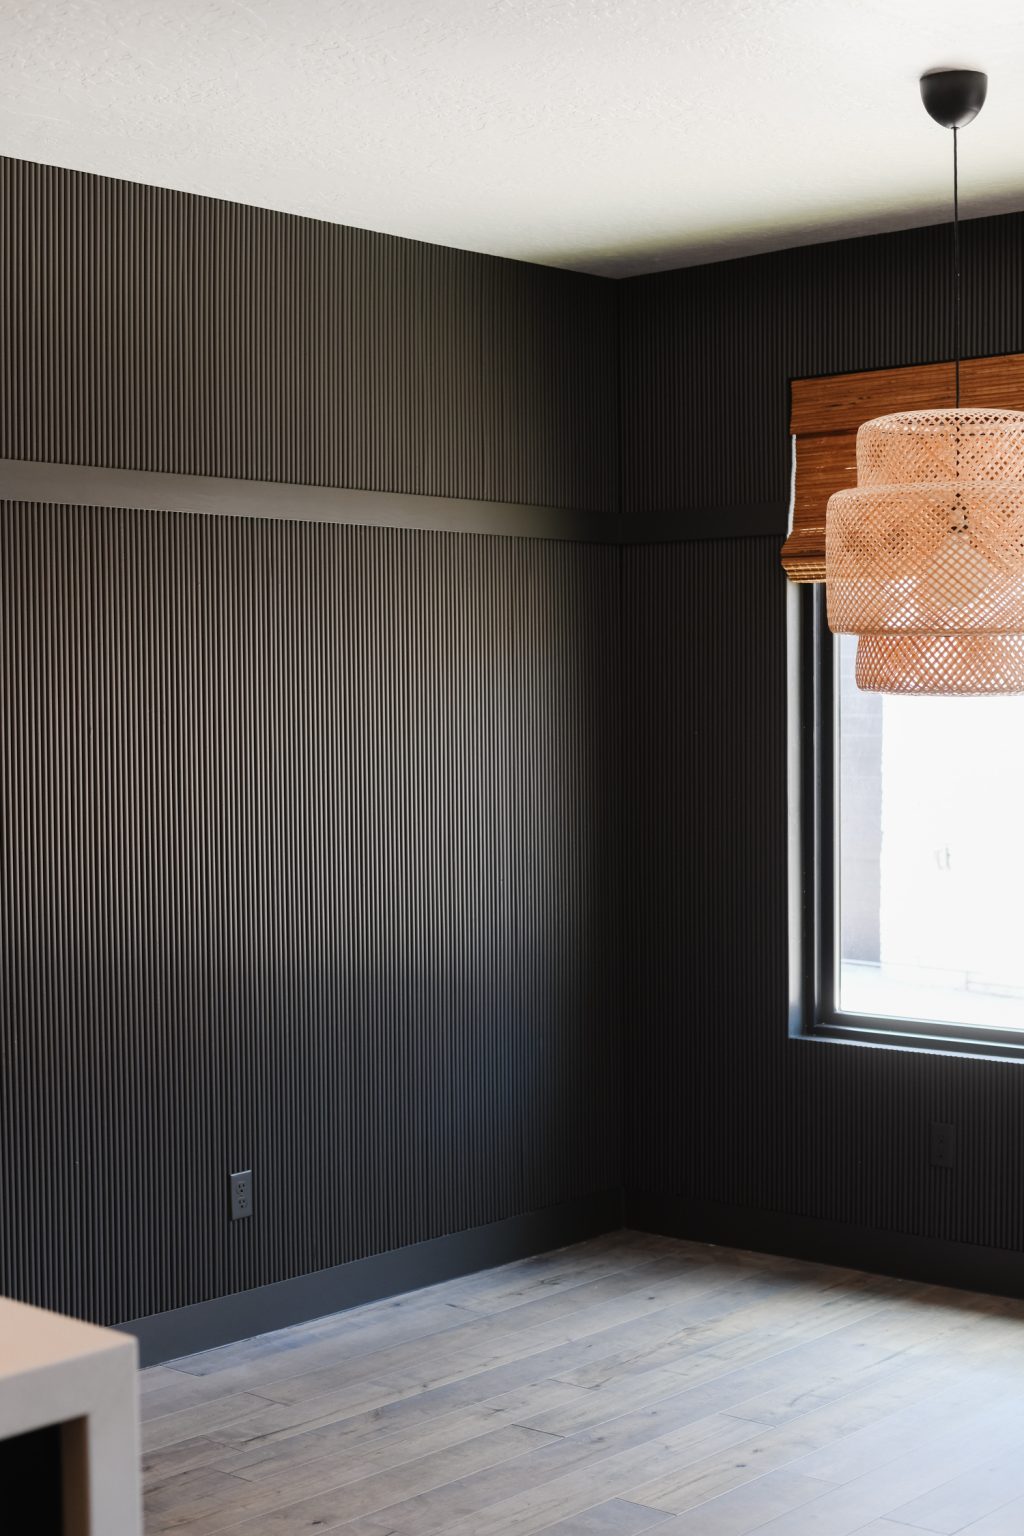
Using the right kind of paint is a big deal, because we were spraying wood and not a drywall surface, we used Sherwin-Williams Emerald Urethane Trim Enamel. You can read why I love it so much here! It’s the ideal paint formula for molding, doors, cabinets, and furniture. The finish I chose is Satin and the color is Sherwin-Williams 2021 Color of the Year Urbane Bronze.
I hope that I havent scared you away with all of the usage of the word tedious in this tutorial, I promise it’s doable and just look at the space! TOTALLY WORTH IT!!

its gorgeous! Dark and moody and texture — sums up this year!
This is beyond beautiful. I won’t be attempting it but I’m glad you did!
Blown away and so worth the money!
Just Stunning as always but this one is over the top!!!
What a sensorial space. Way to exercise your endurance. Mad props.
It looks gorgeous.
One idea I had while reading about the tedious cutting process: why not use Court’s trick of routering the back of the horizontal trim on both sides of the board, to get wiggle room with the lenghts for the longer parts as well? Or would tha be to visible?
WOW!! That’s kewel. 🙂
Just over the top FAB-U-LOUS. You always do incredible work but this is my favorite yet.
Holy cow. I love this!
It’s weird, but the thing that intimidates me the most is dealing with a paint sprayer!
I cannot BELIEVE you did this all by hand. I watched your IG stories and was ripping my hair out vicariously. I have 0 patience and was trying to think of how this could be done without nailing each piece. Anyway, it looks gorgeous! And the styling is to die for as usual. Genius!
AMAZING. Now I’m going to build a bookcase with a similar technique on the side… so inspiring!! It looks so high-end (and I guess for the price, it is, lol)!
Totally stunning and totally gorgeous.
my baby enjoys playing on the baby swing, baby swings can really make your baby happy**
Spot up for this write-up, I really think this fabulous website needs considerably more consideration. I’ll apt to be once more to read a great deal more, thank you for that info.
hey there and thank you for your information – I’ve definitely picked up something new from right here. I did however expertise a few technical issues using this website, since I experienced to reload the web site lots of times previous to I could get it to load properly. I had been wondering if your web hosting is OK? Not that I’m complaining, but sluggish loading instances times will often affect your placement in google and could damage your high-quality score if advertising and marketing with Adwords. Well I’m adding this RSS to my email and could look out for a lot more of your respective fascinating content. Ensure that you update this again very soon..
Your article was indeed entertaining. I look forward to further agreeable contributions from you. However, how can we communicate with you?
Appreciate it for this post, I am a big fan of this internet site would like to keep updated.