Update A Dresser In 2 Hours!

By Mandi | 11/13/2012 | Leave a Comment

Sometimes projects are HUGE. They take a crapload of time and effort. And while they are usually worth it, sometimes you just want something simple. Did you know that you can literally update a dresser during naptime?!

Colorful Woven Rug vintagerevivals.com

Here is the skinny.

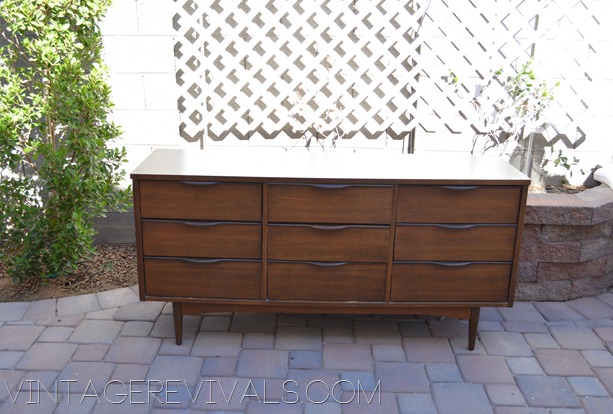
I found this dresser on AZ Craigslist. After a late night trip to a sketchy part of town (that may or may not have involved  Jilly having a heart attack while almost witnessing a stray cat being hit, which in turn gave the rest of us a heat attack thinking she was being carried away by drug lords or possibly someone cutting off her favorite finger. That girl can scream)

Anyway back to the dresser. It was $75 and in GREAT condition.

042

The one downside was that the outer shell of it was laminate. Now, normally I am not a huge fan but it was fairly realistic looking laminate and (like I mentioned before) it was in great condition. So we went with it.

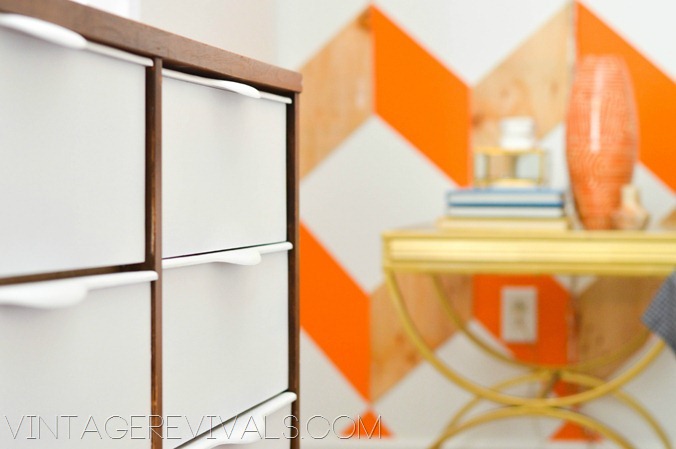
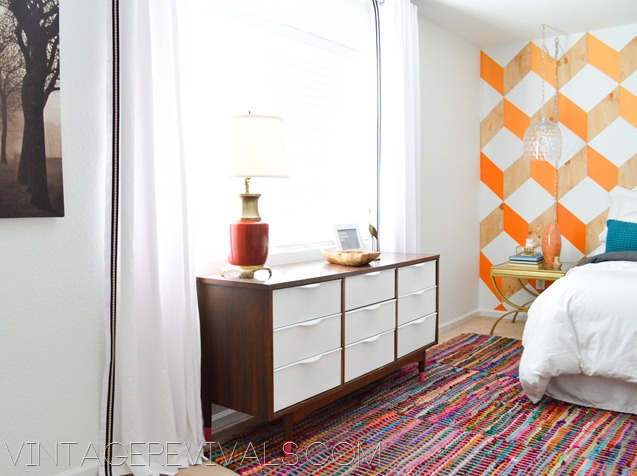
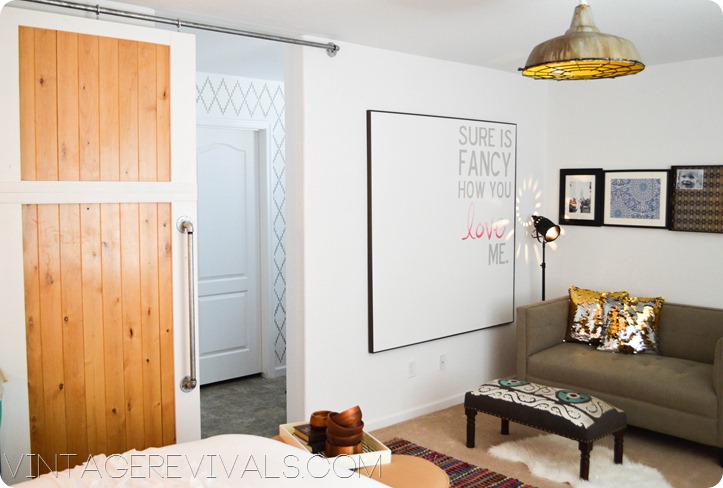
Because we already had a lot of wood in Kelsey’s room (on the wall and on the sliding barn door) this happy little dresser got a quick update  just by painting the drawer fronts!

The first step is to make sure the piece is clean. Depending on the level of grime you might need to use a strong cleaner like TSP.

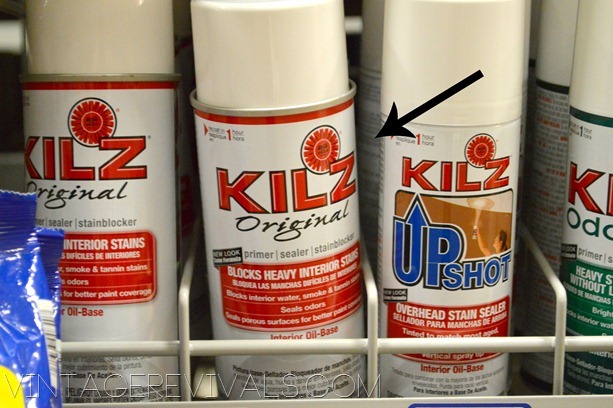
When its clean and dry you are ready to start! Meet your best friend. This is Kilz. It is hands down THE BEST primer on the market, especially when it comes to laminate pieces. The key to using Kilz is to shake shake shake (for a good 2 minutes) before you spray. If you don’t it will come out sandpapery and you will have to sand it smooth.

How To Paint Laminate Furniture

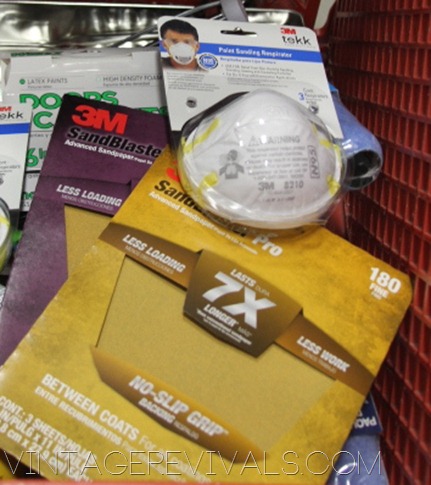
Once your primer is dry (usually between 30 minutes to 1 hour depending on the temperatures outside) give it a quick once over with 220 grit sand paper. This will make it silky smooth and make it look uber professional.

IMG_2685

Wipe your piece down with a slightly damp rag or tack cloth to get all of the sanding dust off (if you skip this step you will have an epic spray paint fail FYI. So don’t forget!!)

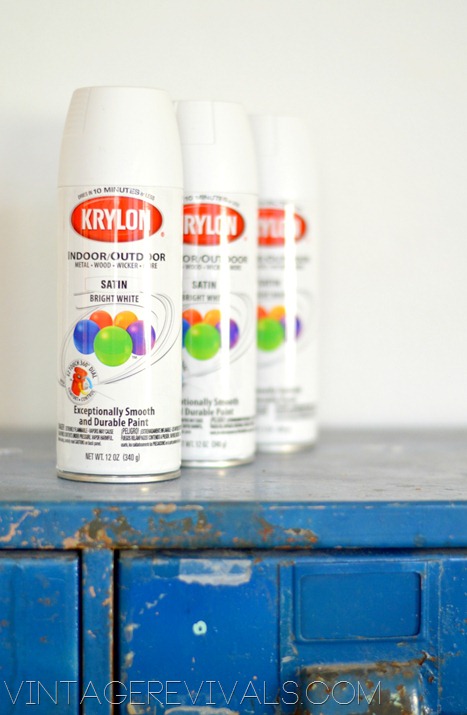
Give your drawer fronts 2-3 good coats of spray paint. If you have read any of my posts about spray paint you know that I am a Krylon fan until I die. I have a few reasons I love it, let me share them with you.

How To Spray Paint Furniture with Krylon

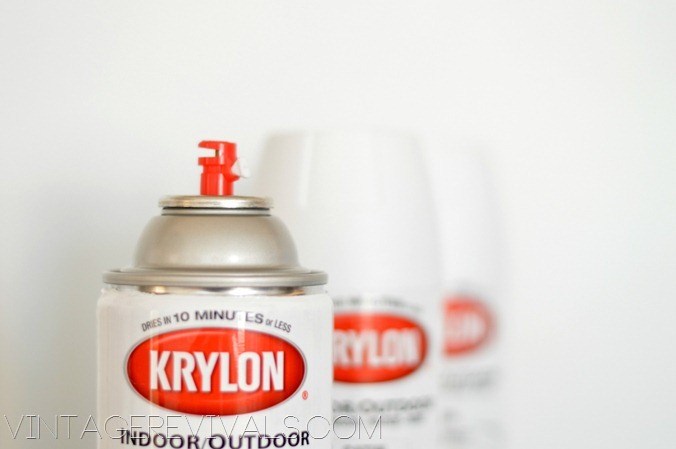
1. The nozzle. Its life changing folks. Instead of spraying in a circle like most brands it sprays in a line AND it rotates. So if you are moving your can horizontally across your piece you want to make sure that your nozzle is turned to spray in a vertical line. That way it is covering a much larger area. I feel like I have WAY more control with a can of Krylon.

Krylon Nozzle

2. Krylon cures very quickly. If you are spray painting a piece of furniture chances are you like things done fast. There are some lines that take HOURS to cure. It is SO frustrating when you have given it adequate time and in all of your excitement pick it up and its still tacky (the one bonus to that is,  if you ever go missing and the cops need your fingerprints you can bet your hoard its perfectly impressed into that lamp.)

3. The color selection! Krylon has SO many on trend colors to choose from AND if there is one that you cant find check out this post I wrote a while ago on how to get the top secret colors you cant find anywhere else for FREE!

As much as I loved the white and wood,  this thing needed a little bit more flair. And tell me my friends, what can add more flair than bright pink?

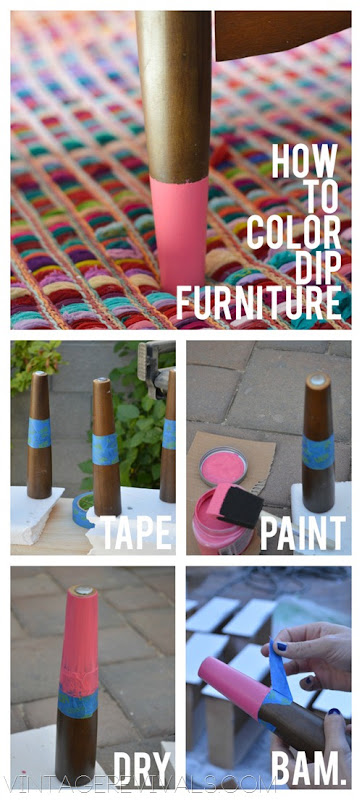
To “color dip” a piece like this all you need is a roll of ScotchBlue and some paint (we used a sample pot from Lowes, just like I used on the Leather Belt Dresser Pulls)

Start by removing the legs if you can (it just makes it a little easier to work with). Hailee being the genius she is found a piece of Styrofoam to hold our legs

How To Color Dip Furniture

Simple and impactful my lovies.

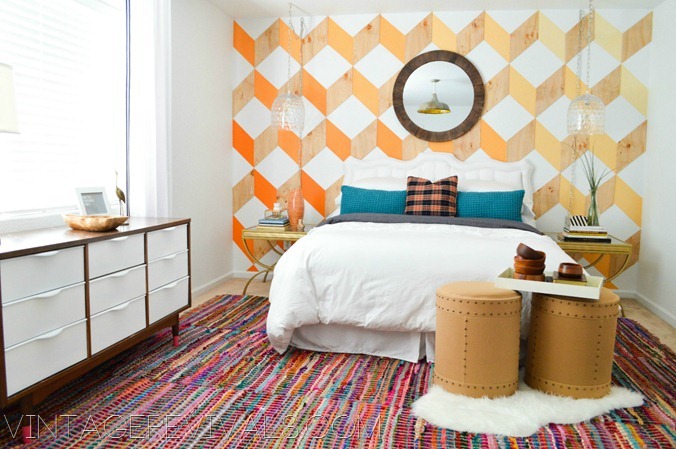
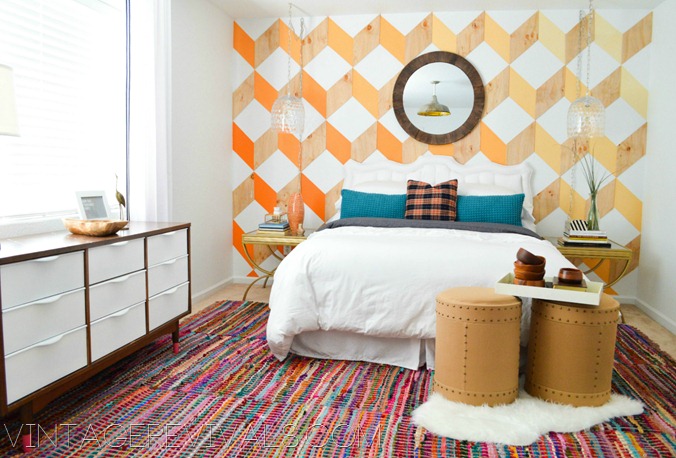
I wanted the dresser to be super complimentary to the rest of the room without trying to steal the show. Sometimes that is what you need out of a piece of furniture.

Colorful Woven Rug vintagerevivals.com

Everything in the room cant be the star, but just because something isn’t the star doesn’t mean it needs to be generic or dull.

Mid Century Dresser Graphic Wall - Vintagerevivals.com DIY Home Decorating Blog

Mid Century Dresser Graphic Wall vintagerevivals.com

Did you notice the red lamp that we got for $5 from Serg?

I LOVE how this dresser turned out,  and can you believe it was such a simple project!? Do you have something that could use a 2 hour update? I want to hear all about it!

krylon_logo

Make sure you check out the other posts in the Epic Room Makeover 2012 Giveaway:

Make sure to check out the other posts in the Epic Room Makeover 2012 Series:

Epic Room Makeover Reveal

Epic-Room-Makeover-Giveaway-2012-Vin

Source List

Chindi-Rug-Flokati-Rug-vintagereviva[1]

How To Build A Simple Sliding Barn Door

How-To-Construct-a-Pipe-Handle-for-a

How To Play “Lets Make A Deal!”

Negotiating--Vintage-Revivals3

How To Drill Through Glass (Video Tutorial!)How-To-Drill-Through-Glass-Tutorial-[1]


Love Your Guts, Mandi


Follow Vintage Revivals on Pinterest! Lets Be Friends!!  Vintage Revivals on Facebook! Tweet Me!!  Vintage Revivals on Twitter! Image Map


How To Drill Through Glass (Video Tutorial!!)

By Mandi | 11/06/2012 | Leave a Comment

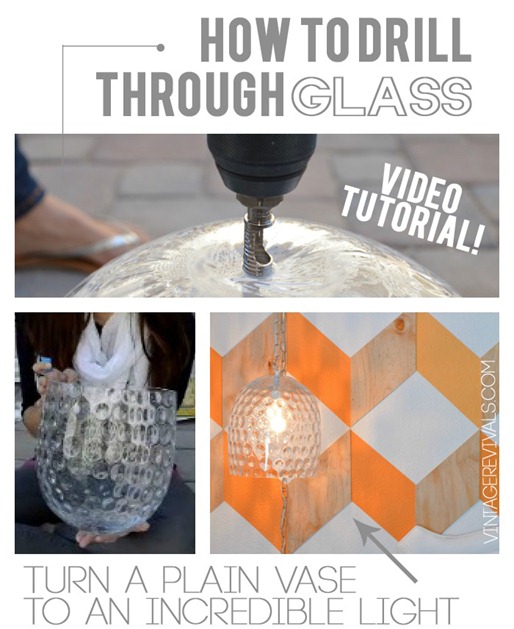
Making lighting is one of my FAVORITE DIYs ever. Especially when it involves making something amazing out of something totally unexpected. The one project Kelsey requested in her Epic Room Makeover was hanging bedside lights. Aaaaaand because those are one design choice that I think everyone should make in their Master Bedroom I happily obliged.

Using vases and drilling though glass is nothing new to me (my first project was my Anthro Inspired Teacup Lamp 2 years ago) and I have gotten more questions about the specifics of that tutorial than anything else on my site. (People are scared to drill through glass!)  So guess what?! I made a video and show you EXACTLY how to do it without breaking your glass.

How To Drill Through Glass Tutorial @ Vintage Revivals

I found my vases for $16.99 at Homegoods. If you are looking for glass to drill Homegoods is such a great place to find it! Glass elsewhere can be super pricey (even at places like Target) the glass from Homegoods is WAY cheaper and much more unique. homegoods

Make sure to check out the other posts in the Epic Room Makeover 2012 Series:

Epic Room Makeover Reveal

Epic Room Makeover Giveaway 2012 Vintage Revivals Blog

Source List

Chindi Rug Flokati Rug vintagerevivals.com

How To Build A Simple Sliding Barn Door

How To Construct a Pipe Handle for a Sliding Barn Door

How To Play “Lets Make A Deal!”

Negotiating @ Vintage Revivals

Love Your Guts, Mandi


Follow Vintage Revivals on Pinterest! Lets Be Friends!!  Vintage Revivals on Facebook! Tweet Me!!  Vintage Revivals on Twitter! Image Map


Gift Guide- 25 Bloggers Give Away Their Fave Things!

By Mandi | 11/05/2012 | 6 Comments

Its almost Christmas!!!!!! (Those that hate rushing past Thanksgiving I am SO with you,  but please hold while I finish this thought.)  The reason I am so excited this year is because last year I was in full on Nate mode. We were in NYC for a week before Christmas and couldn’t put our tree up until we were home (incase we needed to reshoot anything) so I have vowed to enjoy every.second. of this holiday season.

To help you enjoy your season more a group of creative bloggers have decided to team up and do a fun blog hop with a gift guides of their favorite things!

favorite-things-gift-guide

As much as I would love to channel my inner Oprah and say “Your getting a vintage tufted sofa, and YOUR getting a vintage tufted sofa, and YOUR getting a vintage tufted sofa!” Its just not possible. Maybe one day. So without further adieu here are my favorite things under $25 that you can enter to win!

Favorite Things Giveaway Vintage Revivals copy

Lets begin shall we?

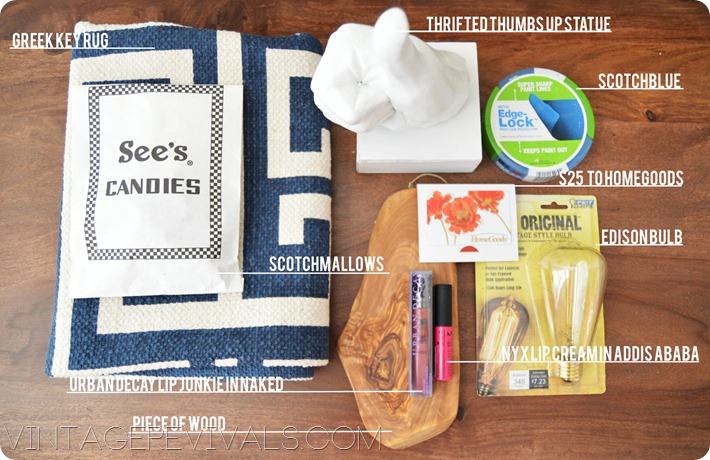
First things first. I am obsessed with these simple printed rugs from Homegoods. They are a great size, super durable, and easy to wash! I have one similar on my front porch. ($12.99)

I found this thumbs up statue at a Goodwill in AZ while I was working on Kelsey’s Bedroom. After a coat of white gloss spray paint it is the perfect amount of randomness for your house! ($3.99)

What favorite things list would be complete without a roll of ScotchBlue? We go through this stuff faster than we go through underwear. The good news? My hubs can make clothes out of it, so we are golden. Also how is that for a visual? ($5-7 per roll at Lowes)

Its no secret that if Homegoods was a person I would totally marry them, so I have included $25 so you can start your own lovefest if you havent already.

I SUPER love Vintage Style light bulbs. The just make your lights so much funner. ($9.00 from Lowes)

NYX Lip Cream in Addis Ababa is my favorite fun lip color. It’s a great Barbie pink that doesn’t wash you out! You can find it at Ulta ($6.00)

Urban Decay Lip Junkie in Naked. BEST NUDE COLOR EVER. That is all there is to say. I didn’t think I would love it at first but I am now a complete junkie. You can also find this at Ulta or here. ($19.00)
Piece of Olive Wood. I am OBSESSED with Olive Wood. It has the most beautiful grain and color variation. You can use this piece for a million things from Décor to serving food. ($7.99 at Homegoods)
Scotchmallows from See’s Candy. Hands down my favorite chocolates. There is a yummy layer of their perfect caramel and a disk of handmade marshmallow smothered in dark chocolate. And lets be honest. I bought these a week ago for pictures and I need to go buy more for the winner…because I ate them. Don’t be so disappointed, they are irresistible!

So there you go! Things that I cant live without. Do you want to win them all?! All you have to do is enter below!

a Rafflecopter giveaway >

Now, make sure you check out the other bloggers gift guides especially my BFF’s Brooke @ All Things Thrifty (she has some of my other favorite things in hers!) and the wonderfully creative Amy @ The Idea Room!!

1. All Things Thrifty

2. Capturing Joy with Kristen Duke

3. Chef in Training

4. Click it Up a Notch

5. Eighteen25

6. I Heart Nap Time

7. kojodesigns

8. Landee See, Landee Do

9. Lil’ Luna

10. Lolly Jane

11. Love the Day

12. My Sister’s Suitcase

13. Or So She Says

14. sew.craft.create.

15. Six Sisters’ Stuff

16. Tatertots and Jello

17.The Dating Divas

18.The Diary of DavesWife

19. The Girl Who Ate Everything

20. The Idea Room

21. The Pleated Poppy

22. The Savvy Photographer

23. TidyMom

24. Vintage Revivals

25.Your Homebased Mom

Love Your Guts, Mandi

Follow Vintage Revivals on Pinterest! Lets Be Friends!!  Vintage Revivals on Facebook! Tweet Me!!  Vintage Revivals on Twitter! Image Map


How To Play “Lets Make A Deal”

By Mandi | 11/02/2012 | 5 Comments

Negotiating when thrifting is an art. Depending on the store’s policy you can score some pretty fab pieces at a nice discount. But it can be sort of scary right? Like, what if they say NO! I will be referring to this game A LOT in the Epic Room Makeover posts so I thought I would kick the tutorials off with the most important/awkward one first.

How to play Lets Make A Deal.

Now don’t get me wrong, I can hold my own when it comes to wheelin and dealin but when there is a little something called peer pressure it takes it to a WHOLE NEW LEVEL. My partners in crime are my girls Mia and Jilly

How To Negotiate Thrift Store Purchases

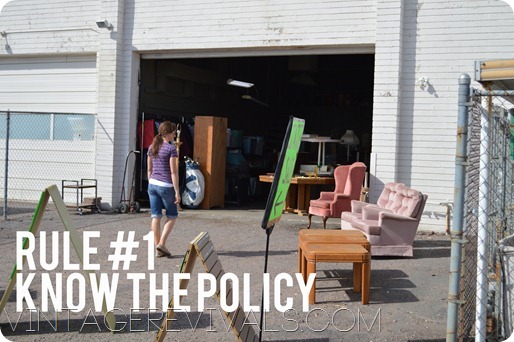
Rule 1. Know their policy. If you are going into a store that you know will not negotiate its sort of a waste of time to try. If you are going into an Estate/Yard Sale or a store that will negotiate then go in ready!


Rules for negotiations

Rule 2. Don’t discredit their price offensively. No one wants to hear that what they are selling is a piece of crap and that you would never be caught dead paying that much (even if that is how you feel).


Negotiating @ Vintage Revivals

Rule 3. If they even entertain the lower the price a little then you know that negotiations have begun. Had Randy said “The door is $75, I cant go down at all, its our policy.” Then it would have been much harder. The Restore in St. George doesn’t negotiate AT. ALL. Buuuut because Randy went down on the price and didn’t say anything about a policy it was ON.

Poor guy, he had no idea what he was up against.

Negotiating Tips @ Vintage Revivals

Rule 4. The key to Let’s Make a Deal is bundling. It works for your phone/internet/cable and it is CRUCIAL to getting Randy/Todd/Helen to drop the price.

How To Negotiate At Garage Sales

Rule 5. Have FUN! People are WAY more likely to give you a deal if they like you! Use their name, find out a little bit about them,  make friends!

This is a real life situation that we recorded so you guys could see how it went down.

Meet poor unsuspecting Randy the employee at Restore who had the privilege of helping us lock down the price for our sliding barn door.

There was a sign posted that said “Solid Core Doors $35.00”. Well this door was solid core, so in our minds it was priced at $35.00. Randy was not amused. He said that the price of the door was between $75-$100. We explained to him that the door was with the sign that said “Solid Core Doors $35.00”. He then explained to us that that sign was for doors that were normal height and that our door was 8ft tall. He said he would go down to $65.

In Randy’s case,  we bundled the door with a canvas that we really liked that Randy wanted to get rid of. The total offer was $60 and he was getting us out of his store. I mean how could he say no?


Up next is Serg. He owns a small Estate Sale in a storage unit in downtown Phoenix. In this video we took 2 end tables from $100 to $15 each. Bam. You may need to turn your volume up for this video.

So do you have any tips to add to the Lets Make A Deal rules?

Check out the other posts in the Epic Room Makeover 2012 Series:

Epic Room Makeover Reveal

Source List

How To Build A Simple Sliding Barn Door

DIY_STARTS_HERE_FINAL94222

HG_Logo_no_tag_193_LRG642222

Lowes-logo642222

krylon_logo542222

Royal-Design-Studio-Logo542222

Love Your Guts, Mandi

Follow Vintage Revivals on Pinterest! Lets Be Friends!!  Vintage Revivals on Facebook! Tweet Me!!  Vintage Revivals on Twitter! Image Map


How To Build A SIMPLE Sliding Barn Door

By Mandi | 10/31/2012 | 52 Comments

** Check out THIS POST for an updated (and more detailed) lightweight version of this tutorial! Including how to make your own door!

How to make a Sliding Barn door was hands down the most requested tutorial from The Epic Room Makeover 2012, which I was SUPER excited about, cause it is one of my favorite projects too….

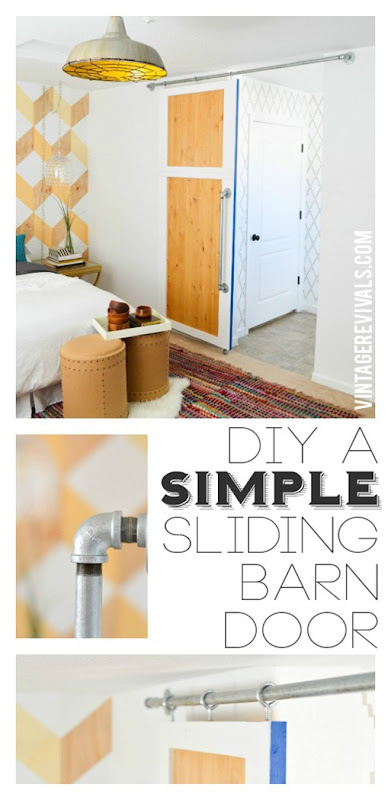
DIY Sliding Doors are fantastic. They can also be very not thrifty depending on the hardware that you use to hang them. But guess what? They don’t need to be expensive. Kelsey’s was done for under $75 my friends. How do you feel about that?

DIY Simple Sliding Barn Door @ Vintage Revivals

There are a few measurements you need to get right off the bat. You need the length of the pipe for the door to slide on (make sure you give it enough room to open!) and you need the width of your door opening.

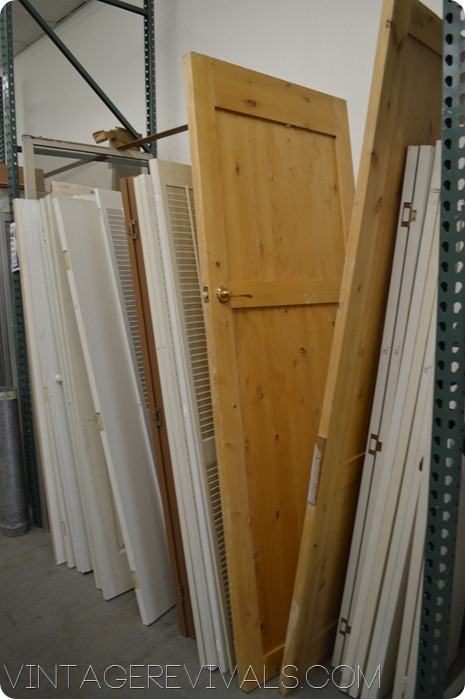
Now that you have your measurements, you need a door. Measure the space you need to fill and add at least a 2” overhang to each side. We ended up at Restore and played Let’s Make A Deal with Randy, the Restore employee. I wish I could say he loved us like everyone else we had video taped that weekend, but notsomuch. Which is weird. Cause we are PRETTY dang loveable.

100

This is the door I fell in love with. It was solid wood and it may or may not have been covered in bird poop and feathers. We got it for $40.

Here is the problem. Though we THOUROUGHLY measured the door opening when we found this great door we were so excited that we accidentally forgot to measure the door. Whoopsie. But we totally fixed it, so its fine. (I know I had you worried for a second.)

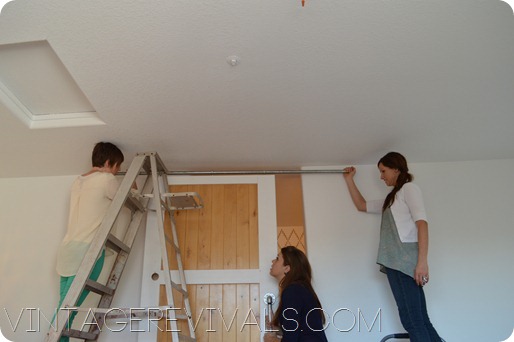
The first item of business was to cut the length of the door down 6”. (The door was 8’ and so was the opening, we needed to make room for the casters and eyehooks.)  You can determine the amount you may or may not need to cut the door down by adding the height of the casters, eyehooks, and where on the wall it will be mounted.

Did you know that if you have something huge like this door to cut  that you can take it over to Lowes and they will cut it for you? Even if you didn’t buy it from them! Originally I was all for jigging it out, but to get a perfect line in about 2 minutes is a MUCH better option.

Once the door arrived back at Kelsey’s we needed to expand the width (remember the whole not measuring at the store thing? We used 2×2 premium pine slats to do this. (Premium means that they are not as warped. They are a little bit more expensive than the cheap pine but totally necessary in this type of project.)

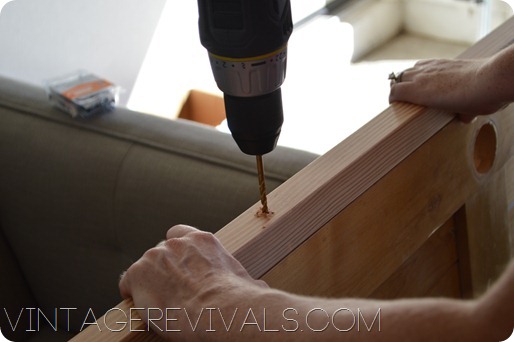
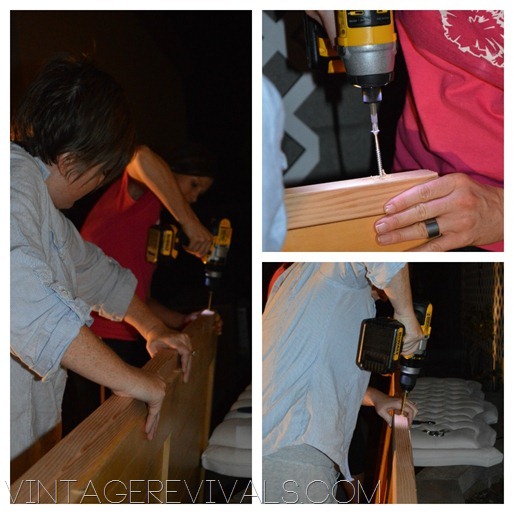
Start by drilling your pilot holes through the 2x2s and into the door. If you don’t there is a great chance that the solid door will stop your screw in its tracks, and/or strip it. Strip it good. You will need screws that are long enough to get a good grip in your door. We used 2 1/2” wood screws.

085

Hanging Barn Door Collage

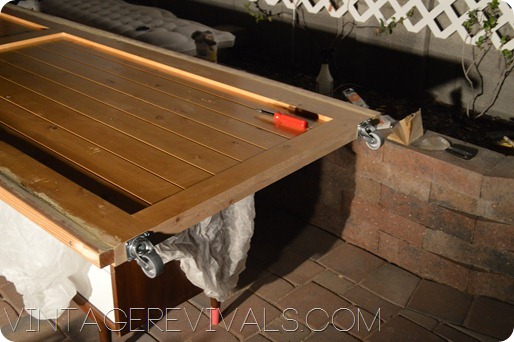
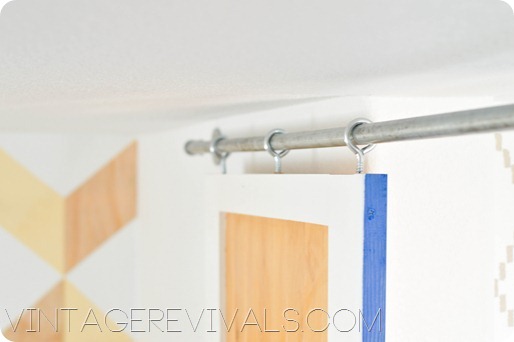
When its time to attach your casters and eyehooks the biggest thing that you need to remember is that they need to be PERFECTLY centered/even especially the eyehooks.

I would recommend getting stationary casters that don’t swivel, we did not get them and its fine but when I do this project in Ivie’s room I will for sure be doing that. You will pre-drill  your pilot holes and screw them on! We used metal casters from Lowes. If I remember right they were around $4 each.

110

We used the largest eyehook that Lowes had for the guides on the top of the door. If I were to do it over again, I would use larger hooks (you can probably find them at a specialty store) or a thinner piece of pipe. Though it will slide there is room for play, so if you eye hooks arent perfectly centered on each other then it will rub.

This is where we took a sleeping break.

And now its morning! Oh the power of the internet.

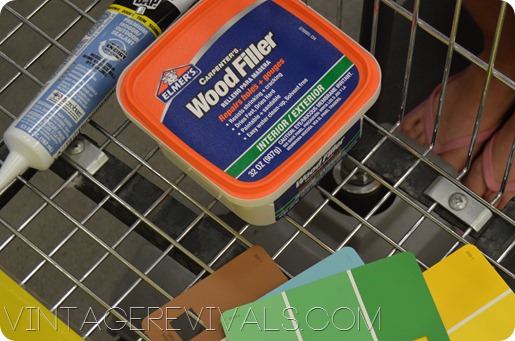
Use wood filler to fill your gaps. I would not use regular wall spackle especially if your door has a clear coat on it. It wont adhere the way that it needs to and will probably crack. So wood filler. Got it?

019

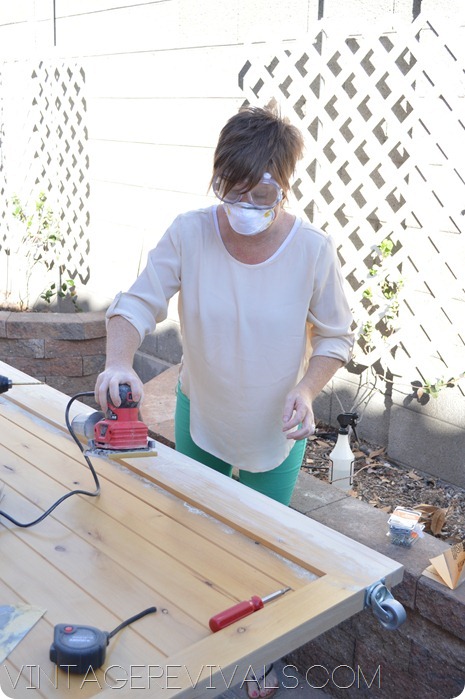
When its completely dry its time to sand.

Make sure that you are wearing a mask when you are sanding wood putty,  because it is a lot harder than spackle you will be sanding a lot longer. Therefore breathing it in longer. And no one wants a black lung from wood putty. Just to be safe, next time you are at Lowes grab a pack of 3M masks for $5. They are SO important to have on hand.


150

Isnt Jilly cute?

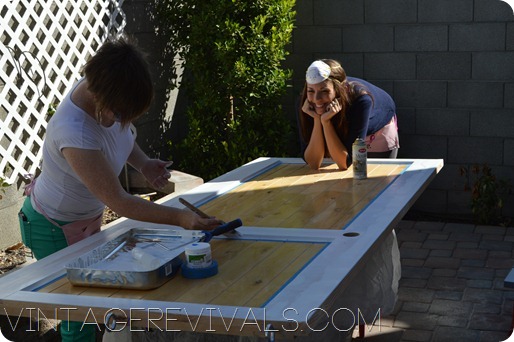
Once your surface is smooth and gap free (hooray!!) its time to paint! Don’t forget to put your ScotchBlue down to get perfect edges and protect the parts you don’t want painted!

192

To get our bright blue edge I bought a sample pot from Lowes in a great cobalt color and used this technique.

Now lets get into the pipe aspect of the door. There are 2 types of conduit pipe that they sell at Lowes. They have electrical conduit and pluming conduit. You want the electrical. Its cheaper. Go into the store with the measurements that you need for the handle and for the length of the sliding rod. They will cut and thread the pipe for you for free, then all you have to do is screw it together!

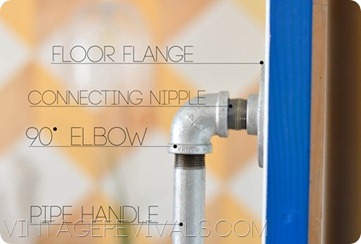
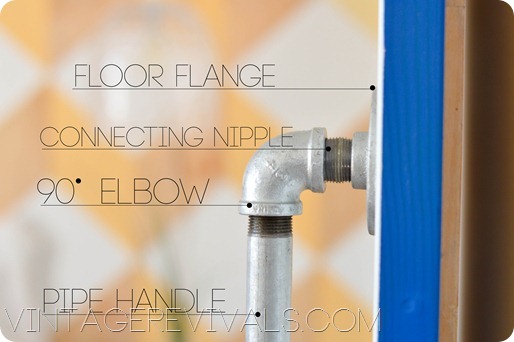
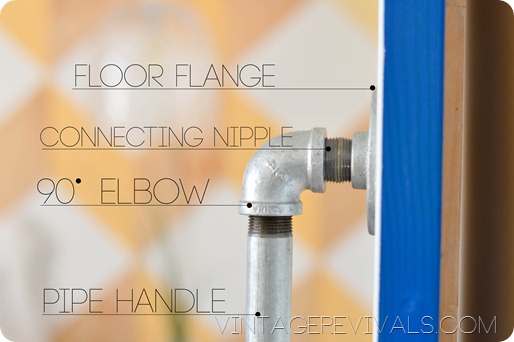
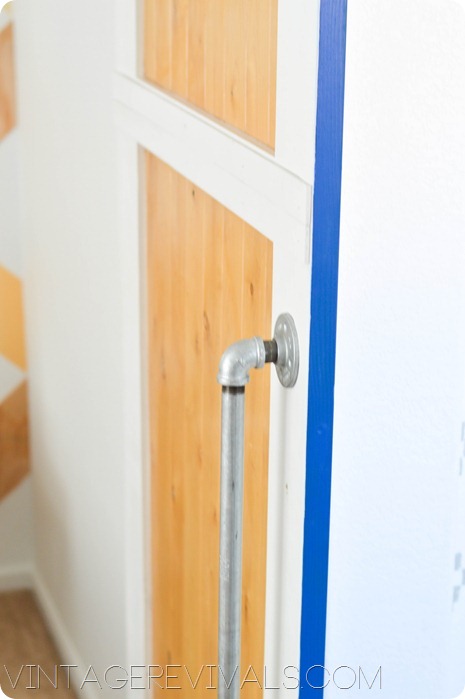
To make your handle and your sliding rod you will need (4) floor flanges, (2) Connecting Nipples, (2) 1” Connecting Nipples, (4) 90 degree elbows, and the pieces of electrical conduit pipe in your preferred length. The pipe we used was 3/4”.

How To Construct a Pipe Handle for a Sliding Barn Door

To make the rod that the door slides on you use the exact same set up and the handle pictured above. The only difference is that you use a 1” connector nipple between the flange and the elbow (it will give you a little more length from the wall.)

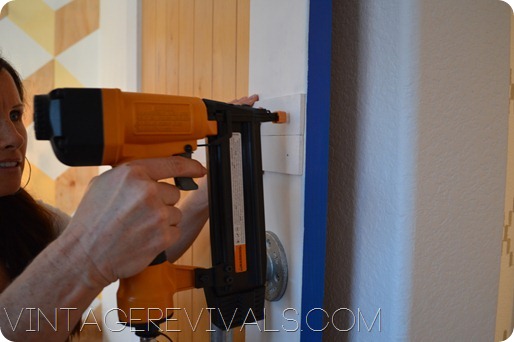
When you are mounting your flanges to the wall, do everything you can to get it into a stud. It will make it MUCH more secure. This door is heavy and you need to be safe.

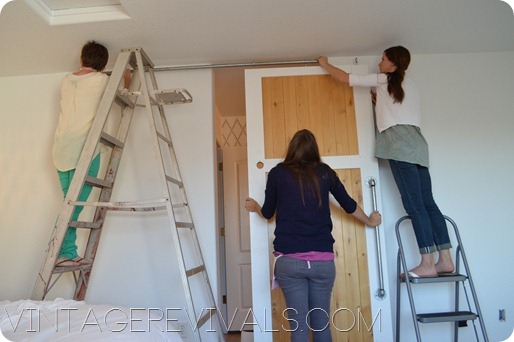
Put the door on the pipe and determine where it needs to attach to the wall. (You obviously determined this before you had the door cut down but do a dry run before you start screwing things to the wall.)

005

Attach your first flange to your studs with the pipe on it. The put your door on.

014

Screw your other elbow flange combo on and mount it to the studs on the  other end. You need to remember that the door is not hanging from the rod/eyehooks. They are simply a guide. All of the weight of the door should be on the casters at the bottom. If you have hardwood/tile it will glide MUCH easier than if you have carpet like Kels.

Pretty simple right?!

You may notice in the picture above the gaping hole in the door from its previous function as an actual door. Stupid previous function. When we were attaching the handle we had one of those “Shoot me now. No really, just do it.” moments. The plan was to cover the hole that was made for the door knob with our handle (the floor flange fits perfectly!) so that’s just what we did. Then we realized because we used the best side of the door for the front, we made it so that the handle was on the wrong side. Balls. This is where ingenuity and the DIY spirit comes in. We moved the handle to the other side and covered that entire center piece with a few scrap pieces of wood. Bam. Problem solved, character added, happy Mandi.

018

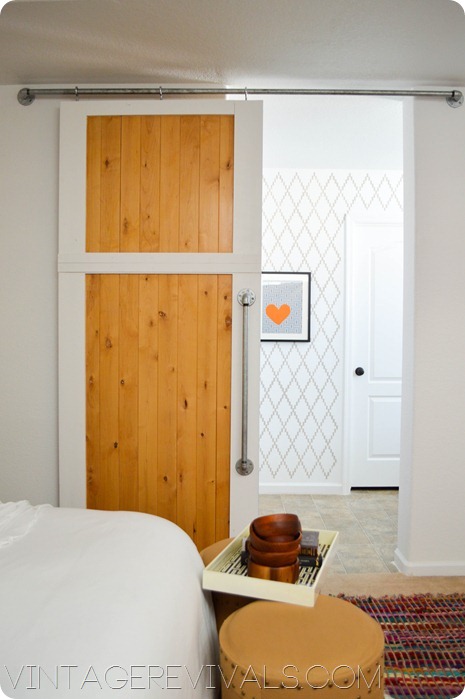
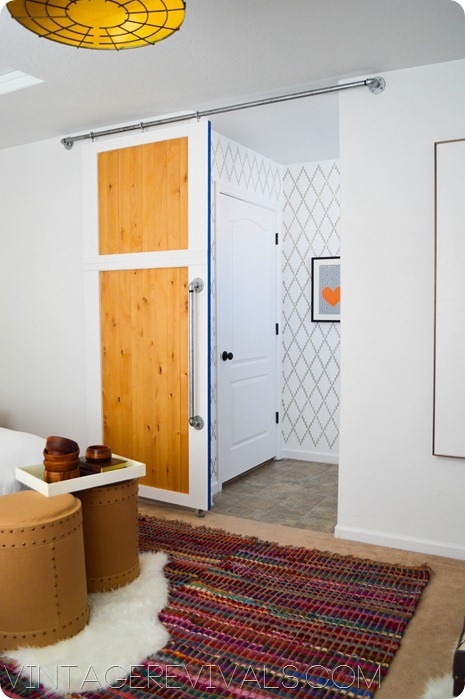
Color Blocked Sliding Door vintagerevivals.com

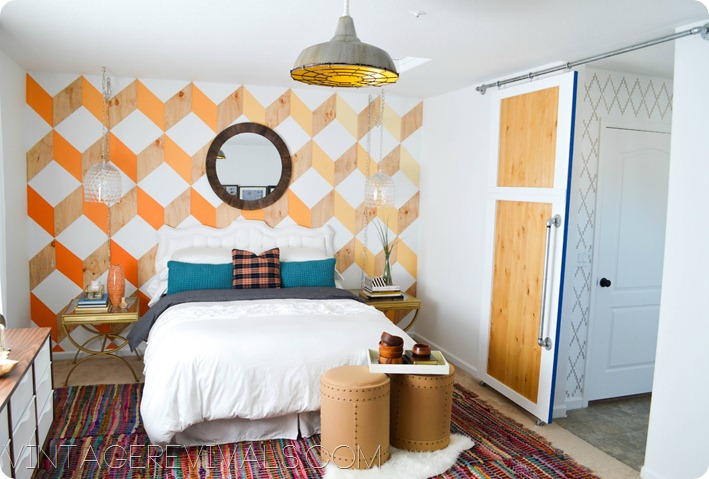
Bedroom Makeover @ Vintage Revivals

Industrial Modern Global Master Bedroom vintagerevivals.com

Sliding Barn Door DIY Pipe

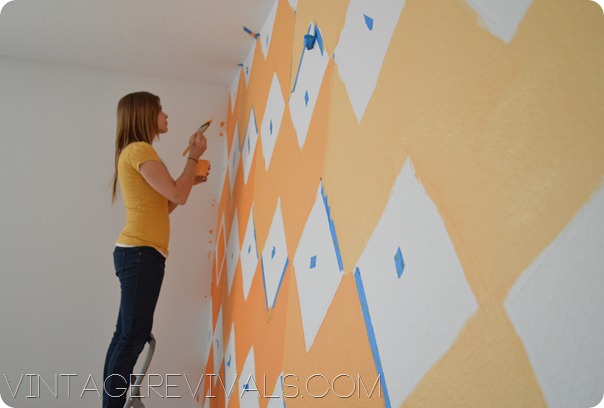
Sliding Door Graphic Wall Stencil Wallpaper vintagerevivals.com

Sliding Door How To Stencil Wall vintagerevivals.com

Can you believe what an easy project this is?

HUGE thank you to Lowes for sponsoring this project!

IMG_2633

Make sure you check out the other posts in the Epic Room Makeover Giveaway 2012 series:

Epic Room Makeover Reveal

Source List

Love Your Guts, Mandi

Issues!

By Mandi | 10/29/2012 | 16 Comments

I have started each of the tutorial posts for the Epic Room Makeover a thousand times and for some reason the words just arent coming out right. I am hoping that by sharing this post with you guys first, it will clear my head and I will be able to write.

The problem that I am having is that I miss these girls. To be completely honest, I was worried going into this contest a second time. The first time was hard. It was really really hard. When Kelsey won I was excited, she seemed normal enough,  she seemed like she wanted this really bad and that she was onboard for just about anything. You guys, Kelsey was a dream. Like if I could have dreamed up the perfect person to win this contest it would be her to a T.

278

The reason I am having such a hard time writing the tutorials is because it was never just a project. There are all these hilarious stories involved with every element of the room and I am having a hard time separating the 2 enough to get a clear tutorial! Is that crazy or what? Its true.

026

So I am still working out in my mind exactly HOW to share the tutorials and the stories without finishing each post with “Well, I guess you had to be there.”

So PLEASE bear with me. Do you guys have any suggestions for me? I am all ears!

Love Your Guts, Mandi

Epic Room Makeover Giveaway 2012 Source List

By Mandi | 10/25/2012 | 9 Comments

Happy Thursday!!! As you may know the Epic Room Makeover 2012 was a HUGE success. The winner Kelsey was adorable, and we had a BLAST living in AZ for a week (I super miss my girls!) and we DIYed our hearts out.

Vintage Revivals-Epic-Room-Makeover-Horizontal

Today I am going to share with you the source list for the room, so if you were itching for something you can get going on your journey!!!

Bedroom Makeover @ Vintage Revivals

Paint Color:  Ultra White and Navel by Sherwin Williams. We custom mixed the ombre ourselves (tutorial to come.)

Hanging Pendant Lights:  Vases from HomeGoods, light kit from Lowe’s (tutorial and video to come.)

Round Mirror:  $40 HomeGoods.

End Tables:  Estate Sale updated with Krylon Brass Metallic Spray Paint (video to come).

Dresser:  $75 Craigslist (updated with Krylon White Gloss Spray Paint.)

Headboard:  Craigslist $120 (tutorial to follow)

Duvet:  Homegoods

Pillows:  Target

Rug DIYed from World Market (tutorial to come).

Stools:  Currently on clearance at Target for $50.

Wooden Bowls: Thrifted.

Tray:  Clearance from Homegoods.

Flokati Rug:  $10 Ikea.

Sliding Barn Door:  Restore (tutorial to follow.)

Stencil:  Royal Design Studios Nova Trellis Wall Stencil (use code VINTAGE10 for a 10% discount on any order!)

038


Large Canvas:  Restore (tutorial to follow)

Lamp:  Target

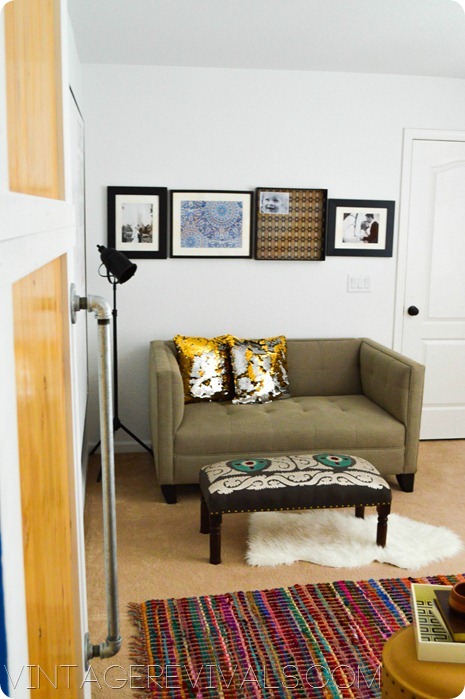
Couch: $350 HomeGoods

Sequined Pillows:  Homegoods $24.99 each

Bench:  Homegoods: $79.00.

Flokati Rug:  $10 Ikea

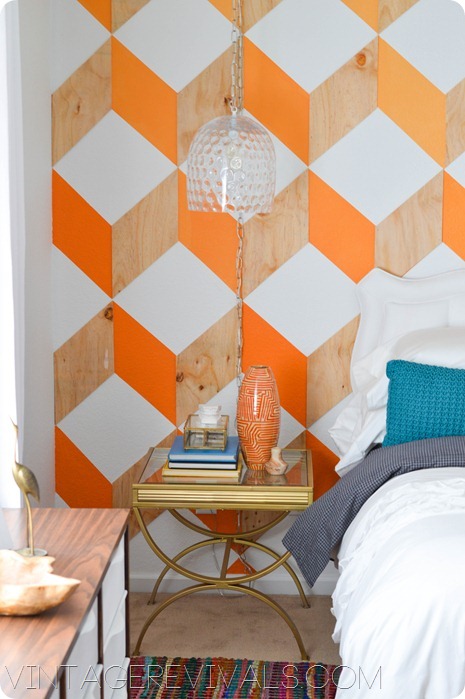
Geometric Wall vintagerevivals.com


Wooden Bowl:  Homegoods $19.99

Brass Crane:  thrifted

Books:  thrifted

Glass Jewlery Box:  Homegoods $16.99

Dental Impressions:  Kelsey’s storage room (yes, they are real!)

Tall Orange Vase:  Homegoods $18.99

Small Vase:  thrifted

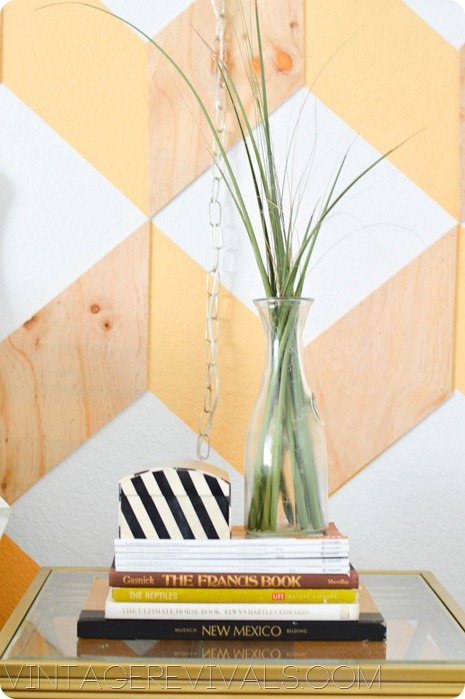
Cut Grasses Black and White Box vintagerevivals.com

Striped Box:  Homegoods

Vase: Kelsey

Cut Grasses: Kelsey’s Front Yard

Books:  Thrifted


Ok friends, the tutorials start Monday so gear up for TONS of fun projects!!


DIY_STARTS_HERE_FINAL9422

HG_Logo_no_tag_193_LRG64222

Lowes-logo64222

krylon_logo54222

Royal-Design-Studio-Logo54222


Love Your Guts, Mandi


Follow Vintage Revivals on Pinterest! Lets Be Friends!!  Vintage Revivals on Facebook! Tweet Me!!  Vintage Revivals on Twitter! Image Map